1
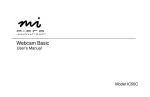
Face Recogniser
User Manual
Product Description
Gain access to your computer using your FACE! Snappy Face Recogniser is a face detection and recognition system
that protects your computer and important information from unwanted access.
Offering a TRUE 1.3 Megapixels, Snappy Face Recogniser webcam provides superior quality images and video
performance.
Parts Description
2
1. Installing Snappy FR Driver
a. Insert Face Recogniser CD into your computer’s CD Rom drive. The following screen will appear. Click
Install.
b.
On the next screen, click Continue Anyway to continue with the installation.
c.
On the screen below, click Finish to complete the installation of FR Driver.
2. Installing Snappy FR Software
a.
Immediately after the installation of FR Driver, the following screen will appear to install the FR Software.
b. Select your preferred language and click Next.
3
c. Follow the installation wizard to complete the installation.
d. After completing the installation, Display Properties box will appear. Set the screen saver to Snappy Screen
Saver. Set the Wait time to your preference and click Apply, OK.
3. Installing Snappy FR Webcam
a.
Connect Snappy FR webcam to your computer via USB.
b.
A pop up screen Found New Hardware will appear. Choose Install the Software Automatically and click
Next.
c.
Follow the wizard to complete the installation. Click Finish to complete.
4
4. Enrolling New User
a.
Connect Snappy FR webcam to your computer. First find the optimal clarity point. Rotate the camera lens back
to its original position clockwise all the way till the end. Now, rotate the camera lens anti-clockwise 2 rounds
till the red and black lines are in line with each other.
b.
From the windows task bar, right click on the Snappy icon
c.
Select Configure Screen Saver to configure your user profile.
d.
From the Snappy Screen Saver screen below, under User tab, user can add, edit or delete user images. Users
are allowed to set up to 5 users per computer.
e.
Click Add button to add User Images. Before adding user images, the system will prompt user to set the user
name and password prior to adding images.
f.
After setting the User name and Password, click Add Images button.
g.
To have your image captured, look at the Snappy FR webcam. 5 images will continuously be detected.
5
.
h.
Click OK to close. Or add additional users if desired.
i.
Under the Video tab, user is able to change the Video Settings according to individual’s preference.
j.
Click on the Video tab and click Edit Settings button. Adjust the settings to individual’s preference and click
OK.
6
k.
Under the Animation tab, user can select from the 3 available live animated screen savers (Living Room,
Video Cube and Video Plane).
l.
To test the screen saver animation, click Test Animation button. Click OK to close.
5. Running the Screen Saver
a.
Right click on the desktop and select Properties from the menu. In the Screen Saver tab, check that the
Snappy Screen Saver is selected and the Wait time is set.
b.
When the specified amount of time has passed with no computer activity, Snappy FR ‘live video’ Screen Saver
will activate.
c.
To bypass the Screen Saver, type any key (except the ESC key) or move the mouse.
d.
Stay within the Snappy FR webcam’s field of view, Snappy FR will find your face, verify your identity and
unlocks the computer.
7
e.
During the face recognition process, you might see visual cues such as red and green boxes and a voice that
prompt if the access was granted or denied.
6. Overriding Face Recognition
a.
Your Snappy FR Screen Saver password can be used to override face recognition and gain access to your
computer if the video capture system fails.
b.
Your Snappy FR Screen Saver password would have already been set when you first add the user.
c.
To override the face recognition, press the ESC key and type in the Snappy FR Screen Saver password. Please
note the password is not your Windows logon password.
7. Changing the Current User
a.
The current user is the person the screen is locked for. That user’s face is the ‘key’ face to unlock the screen. If
there are multiple Screen Saver user profiles on a computer, you can change the current user.
b.
From the Windows taskbar, right click on the Snappy icon and click Configure Screen Saver.
c.
From the User tab, select a new user and click OK to close.
8. Running FR Screen Saver from System Tray
from the Windows task bar. Select Launch
a.
To quickly lock your computer, right click the Snappy icon
Screen Saver.
b.
Or double click on the Snappy icon to activate Snappy FR Screen Saver.
8
9. Using Snappy as a Webcam
a.
Connect Snappy webcam to the PC via USB.
b.
To use Snappy as a webcam, first find the optimal clarity point. Rotate the camera lens back to its original position
clockwise all the way till the end. Now, rotate the camera lens anti-clockwise 2 rounds till the red and black lines are
in line with each other.
c.
Adjust the camera lens casing to a suitable position. It can be adjusted from 90 to a maximum of 145 degree angle.
d.
Click Start menu on the Windows Taskbar, select All Program, select Snappy, launch AMcap.
e.
A screen with the image captured will be shown.
10. Adding Special Effects
a.
At the bottom right of the Taskbar, right click on the Snappy icon.
b.
Select Special Effects. A selection of special effects are available for your selection if your resolutions are set at
640x480 or lower.
9
c.
If the resolutions are set at 640x480 and above, the selection of special effects are as below:
d.
Some examples of special effects:
Flower
Merry Christmas
FBI Wanted
Jungle
11. Using Snappy to snapshot photograph
a.
To do a snapshot using Snappy, right click on Snappy icon, select Snap Shot and click on the desire resolution.
10
12. Using Snappy to record Video
a.
On the AMcap screen, click File and select Set Capture File.
b. Name the file and save in AVI format.
c. On the same screen, click Options and select Video Capture Pin.
d.
Adjust the desired frame rate and output size. For Video Capturing purposes, it is recommended to set the
output size at 640 x 480.
e.
You can also set the desired brightness and contrast under Video Capture Filter.
f.
On the following screen, click on Capture and select Start Capture.
g.
Click OK to start recording.
11
h.
On the following screen, click Stop Capture to stop recording.
i.
Retrieve the saved file, open it with Window Media Player.
Note:
1. Please note that Snappy is designed for USB 2.0 hi speed connection, for USB 1.1 users, the maximum resolution
achievable is 640 x 480. To view at a higher resolution of 1280 x 1024, USB 1.1 users are advised to upgrade to
USB 2.0 using a PCI card.
2.
For technical support, please email to [email protected]
12
www.snappy.com.sg
Innovative Products By
www.thakral-dit.com
13