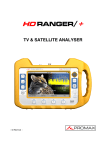
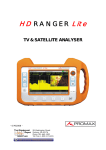
Download HD RANGER / HD RANGER+ signal coverage option
Transcript
OP-001-GPS
SIGNAL COVERAGE OPTION
TABLE OF CONTENTS
1 GENERAL .................................................................................................... 1
1.1 Description ........................................................................................... 1
2 SPECIFICATIONS ......................................................................................... 2
2.1 GPS receiver......................................................................................... 2
3 SIGNAL COVERAGE ANALYSIS ....................................................................... 3
3.1 Operation ............................................................................................. 3
3.2 Settings ............................................................................................... 4
3.3 Description of signal coverage screen ....................................................... 5
3.4 Menu Options........................................................................................ 6
4 DATA FILE PROCESSING ............................................................................... 7
4.1 Description ........................................................................................... 7
4.2 Obtaining an excel file............................................................................ 7
4.3 Presenting measurements in Google Earth ...............................................10
August 2013
SIGNAL COVERAGE OPTION
OP-001-GPS
1 GENERAL
1.1
Description
This annex contains operating instructions for the next option:
OP-001-GPS: Signal coverage analysis with GPS for HD RANGER/+
This option allows the user to check signal coverage by measuring its power,
MER and C/N. The position where all these measurements are taken is
determined by a GPS receiver. All this data, measurements and GPS position can
be downloaded to a PC and exported to a file for later analysis.
Please, read the user's manual of the equipment for detailed information about
general operation, specifications and other data.
August 2013
1
2 SPECIFICATIONS
2.1
GPS receiver
Chipset
GSP3F
SIRF Start III technology
General
Frequency
L1, 1575.42 MHz
C/A code
1.023 MHz chip rate
Channels
20
Accuracy
Position
10 meters, 2D RMS
5 meters 2D RMS, WAAS corrected
<5 meters (50%), DGPS corrected
Velocity
0.1 meters/second
Time
1 microsecond synchronized to GPS time
Datum
Default
WGS-84
Other
Selectable for other Datum
Acquisition Rate (Open Sky & Stationary Requirements)
Reacquisition
0.1 sec., average
Snap start
1 sec., average
Hot start
8 sec., average
Warm start
38 sec., average
Cold start
42 sec., average
Dynamic Conditions
Altitude
18.000 meters max
Velocity
515 meters/second max
Acceleration
4g, max
Jerk
20 meters/second, max
Power
Main power input
5V DC input
Power consumption
0.15 W (continuous mode)
Supply Current
45 mA
Backup power
3V Lithium-Ion rechargeable battery
Mechanical features
Dimensions
45.75 (L) x 39.90 (W) x 14.15 (H) mm
Weight
13 g
2
August 2013
3 SIGNAL COVERAGE ANALYSIS
3.1
Operation
The Signal Coverage tool is available for all DIGITAL TERRESTRIAL signals.
Connect the GPS receiver to the equipment.
In Settings menu
select the terrestrial band.
Access the SPECTRUM mode and tune the signal for coverage study.
In case of tuning a DVB-T2 signal, in the Signal Parameters menu
select the Profile (Base or Lite) and the PLP identifier. User has to choose
one profile and one PLP identifier per each signal coverage analysis.
Press the Tools key
.
Select the Signal Coverage option.
The Signal Coverage function appears on screen.
Before starting the signal coverage analysis, access the Configuration
option in the Advanced menu
section).
for settings (more details in next
After settings, access the Advanced menu
start the signal coverage analysis.
and press on Start to
In Automatic mode, the equipment takes samples automatically. In
Manual mode each time the user presses the joystick the equipment
takes a sample. Measurement are linked to the GPS reference.
Access the Advanced menu
coverage analysis.
and press on Stop to finish the signal
Press the Installations management key
coverage data.
August 2013
to access the signal
3
3.2
Settings
User can adjust some parameters on the Signal Coverage analysis:
Figure 1.
► File name:
User can give a name to the file where data is saved. All measurement that
can be seen in the MEASUREMENT 1/3 screen (frequency, power/level, C/N,
PLP identifier, MER, CBER, LBER and LM) will be stored on the data file. Be
sure to change the file name when starting a new Signal coverage analysis. If
not, new data file will be saved on the last one.
► Comment:
User can write some comments about the study.
► Mode:
There are two options: Continuous or Manual. In continuous mode a
sample is taken automatically every sample time. In manual mode a sample is
taken every time that user presses the joystick.
► Sample Time:
Time between acquisitions. Only when working in continuous mode. Minimum
time is 1 second.
► Span time:
It is the width, in time, shown on screen for the X axis.
► Save to:
There are two options: Internal or USB. For Internal option it saves the file
with all data in the internal memory of the equipment. For USB option it saves
the file with all data in a USB flashdrive connected to the micro-USB port of
the equipment.
4
August 2013
3.3
Description of signal coverage screen
The following describes the Signal Coverage screen:
Figure 2.
Selected installation; date and time.
Spectrum.
Power measurement over time (shows span time).
MER and C/N measurement over time (shows span time).
Signal coverage started.
LNB, Selected band; battery level.
Signal information window 1:
Frecuency: frequency at which signal is locked; Profile (only for
DVB-T2 signals): Base or Lite; PLP identifier (only for DVB-T2 signals):
identifier of the layer being measured.
Signal information window 2:
Power, C/N, MER measurements of the signal over time. It shows on
screen only the span time selected in settings.
August 2013
5
Signal information window 3:
Elapsed: Time elapsed since the beginning of the coverage study.
Samples: Samples taken since the beginning of the coverage study.
Space left: Space left in the memory to save data.
GPS status: It shows if the GPS receiver is locked or unlocked.
Latitude, Longitude: It shows the latitude and longitude at the current
position, if GPS is locked. Measurement are linked to the GPS position.
3.4
Menu Options
At the bottom of the screen there are four menus available via the function keys.
It displays the channel/frequency where is pointing
the cursor and access the tuning menu.
It displays the selected transmission standard menu
and accesses the signal parameters.
It displays the Tools menu.
It displays the Advanced menu.
In the Advanced menu there are some options for the Signal Coverage. They
are:
► Start: It starts the signal coverage study.
► Stop: It stops the signal coverage study.
► Configuration: It shows the settings window with some parameters.
6
August 2013
4 DATA FILE PROCESSING
4.1
Description
This document is an explanation about the process that is needed to be done in
order to obtain a more comfortable view of the XML data obtained with
HD RANGER family equipment, with GPS option, when doing a Signal Coverage
analysis.
Once you got the coverage data, copy the XML data file from the equipment to a
USB memory using the Installation Manager. See the equipment’s documentation
in how to get files from an Installation.
4.2
Obtaining an excel file
For this section, you must have at least Excel 2003 or newer version. Excel 2007
(or later) is highly recommended to avoid macro problems.
First of all we need to locate the XML data file in the folder from which we
want to work. There are no requirements needed to be satisfied. A file
named COVERAGE.XSL must be placed in the same data file folder. That
second file allows proper data formatting when processed by Excel.
Select the XML data file and then right click with the mouse button on the
file name.
August 2013
7
Choose the option “Open with” and then select Excel 2007 (or the
available version)
Figure 3.
When Excel tries to open the file it will ask you the import method to
open the XML data file by this way:
Figure 4.
8
August 2013
You must choose the option in which a stylesheet is asked. It will appear
as an option the “COVERAGE.xsl” file.
Figure 5.
Now Excel is opening the XML data file using the format that the XSL file
is providing. This step could take few seconds depending on the size of
the XML data file.
At this point, you should have an excel file with three different sheets.
Each sheet corresponds to a different view of the same data:
3
The first one will show you the generic signal information and the
different coverage measures for each point acquired.
3
In the second one, you will find the same data but presented in a
table format, more user friendly for working with graphs based on
each measured parameter.
3
The third one provides data in a format adapted for geolocation.
Information is shown in terms of parameters required for presenting
the measured data as a map layer (latitude, longitude, id, description
and an icon identifier number) as required for GIS and Google Earth
technologies. This third sheet is formatted mainly to be compatible
with main Google Earth format converters available in Internet.
Now save the data as a true excel file. No specific name or path is
required, but you must remember the path.
August 2013
9
4.3
Presenting measurements in Google Earth
For this process Google Earth must be installed on the computer and internet
connection will be needed.
Open a web browser and then search for a converter from Excel file to
KML file, for instance, googling “excel to kml” (a kind of XML file used by
Google Earth) We propose this one (and this is the one we will explain in
detail in the following example explanation).
Navigate to: http://www.earthpoint.us/ExcelToKml.aspx
Figure 6.
10
August 2013
Click on the BROWSE icon:
Figure 7.
A new window will appear in which you will be able to search the Excel
file you saved in the step number 9 of the previous section of this
document.
Figure 8.
After doing the file selection click on the option VIEW ON GOOGLE
EARTH:
Figure 9.
August 2013
11
The web page will perform the file conversion and then will ask if you
want to save the resulting file or just open it using Google Earth
software. Select OPEN WITH Google Earth.
Figure 10.
Google Earth will try to open the three different excel sheet explained
before in this document (see step 8 from Excel opening process for XML
data file in the previous section of this document). The first one is not
using the format that the converter is expecting and will generate an
error. The second and the third one will represent the coverage
measurement points, but only the third one will be with the really suitable
format.
Figure 11.
12
August 2013
Disable the first and the second sheets for a more comfortable view, and
click over the third one.
Figure 12.
The yellow flag symbol mark the first and the last coverage measure
point. The other measurement points will be presented as a C symbol.
Figure 13.
Every point will show the POWER and MER measurements, when
selected.
Figure 14.
Finally, the KML file generated with the procedure described here can be
used directly with most of the GIS tools, to import such data into a layer
over a GIS map.
August 2013
13


