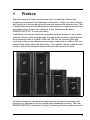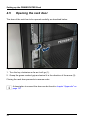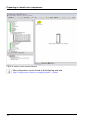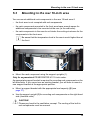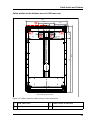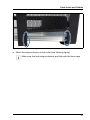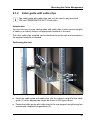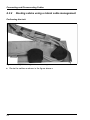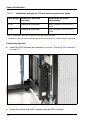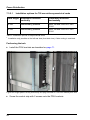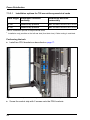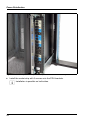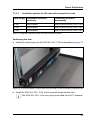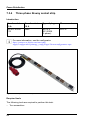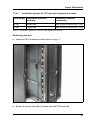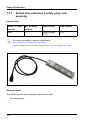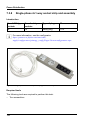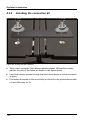
1
User Manual - English
PRIMECENTER M1 19-inch Rack
Rack System for PRIMERGY, PRIMEQUEST, BS2000, STORAGE
March 2014
Comments… Suggestions… Corrections…
The User Documentation Department would like to
know your opinion of this manual. Your feedback helps
us optimize our documentation to suit your individual
needs.
Feel free to send us your comments by e-mail to
email: [email protected].
Certified documentation
according to DIN EN ISO 9001:2008
To ensure a consistently high quality standard and
user-friendliness, this documentation was created to
meet the regulations of a quality management system
which complies with the requirements of the standard
DIN EN ISO 9001:2008.
cognitas. Gesellschaft für Technik-Dokumentation mbH
www.cognitas.de
Copyright and Trademarks
Copyright © 2014 Fujitsu Technology Solutions GmbH.
All rights reserved.
Delivery subject to availability; right of technical modifications reserved.
All hardware and software names used are trademarks of their respective manufacturers.
–
The contents of this manual may be revised without prior notice.
–
Fujitsu assumes no liability for damages to third party copyrights or other rights arising from
the use of any information in this manual.
–
No part of this manual may be reproduced in any form without the prior written permission
of Fujitsu.
Microsoft, Windows, Windows Server, and Hyper V are trademarks or registered trademarks of
Microsoft Corporation in the USA and other countries.
Intel and Xeon are trademarks or registered trademarks of Intel Corporation or its subsidiaries
in the USA and other countries.
Before reading this manual
For your safety
This manual contains important information for safely and correctly using this
product.
Carefully read the manual before using this product. Pay particular attention to
the accompanying manual "Safety notes and other important information" and
ensure these safety notes are understood before using the product.
Keep this manual and the manual "Safety notes and other important
information" in a safe place for easy reference while using this product.
Radio interference
This product is a "Class A" ITE (Information Technology Equipment) as defined
by the Voluntary Control Council for Interference by Information Technology
Equipment (VCCI-A) of Japan. In a domestic environment this product may
cause radio interference, in which case the user may be required to take
appropriate measures.
High safety use
This product has been designed and manufactured for general uses such as
general office use, personal use, domestic use and normal industrial use. It has
not been designed or manufactured for uses which demand an extremely high
level of safety and carry a direct and serious risk to life or body if such safety
cannot be ensured.
These uses include control of nuclear reactions in nuclear power plants,
automatic airplane flight control, air traffic control, traffic control in mass
transport systems, medical devices for life support, and missile guidance control
in weapons systems (hereafter, "high safety use"). Customers should not use
this product for high safety use unless measures are in place for ensuring the
level of safety demanded of such use. Please consult the sales staff of Fujitsu if
intending to use this product for high safety use.
Technology controlled by the Foreign Exchange and Foreign Trade
Control Law of Japan
Documents produced by FUJITSU may contain technology controlled by the
Foreign Exchange and Foreign Trade Control Law of Japan. Documents which
contain such technology should not be exported from Japan or transferred to
non-residents of Japan without first obtaining authorization in accordance with
the above law.
Harmonic Current Standards
This product conforms to harmonic current standard JIS C 61000-3-2.
Contents
1
Preface . . . . . . . . . . . . . . . . . . . . . . . . . . . . . . 9
1.1
Features . . . . . . . . . . . . . . . . . . . . . . . . . . . . . 11
1.2
Target Group . . . . . . . . . . . . . . . . . . . . . . . . . . 13
1.3
Where to find which information . . . . . . . . . . . . . . . 13
1.4
Structure of the manual . . . . . . . . . . . . . . . . . . . . 14
1.5
Notational Conventions . . . . . . . . . . . . . . . . . . . . 15
2
Important Information . . . . . . . . . . . . . . . . . . . . . 17
2.1
Safety Instructions
2.2
Notes on mounting the rack components . . . . . . . . . . 19
2.3
Environmental Protection . . . . . . . . . . . . . . . . . . . 20
3
Overview . . . . . . . . . . . . . . . . . . . . . . . . . . . . 21
4
Preparations . . . . . . . . . . . . . . . . . . . . . . . . . . 25
4.1
Unpacking the delivery unit . . . . . . . . . . . . . . . . . . 27
4.2
Rolling off the PRIMECENTER M1 19-inch rack from the
transport palette . . . . . . . . . . . . . . . . . . . . . . . . 27
4.3
Setting up the PRIMECENTER M1 19-inch rack . . . . . . . 27
4.4
Installing the tilting protection
4.5
Opening the rack door . . . . . . . . . . . . . . . . . . . . . 30
4.6
4.6.1
4.6.2
Inserting mounting elements . . . . . . . . . . . . . . . . . 31
Inserting Cage Nuts . . . . . . . . . . . . . . . . . . . . . . . 31
Inserting Spring Nuts . . . . . . . . . . . . . . . . . . . . . . 32
5
Preparing to install rack components . . . . . . . . . . . . . 33
. . . . . . . . . . . . . . . . . . . . . . 17
. . . . . . . . . . . . . . . . 29
Contents
5.1
Support Systems . . . . . . . . . . . . . . . . . . . . . . . . 36
5.2
5.2.1
Mounting in the front 19-inch area . . . . . . . . . . . . . . . 36
Mounting support brackets . . . . . . . . . . . . . . . . . . . . 37
5.3
Mounting in the rear 19-inch area . . . . . . . . . . . . . . . 39
5.4
5.4.1
Mounting in the expansion area . . . . . . . . . . . . . . . . 40
Mounting Rack Components . . . . . . . . . . . . . . . . . . . 41
5.5
5.5.1
5.5.2
Rack cable routing with external cabling . . . . . . . . . . . 42
Cable routing in the lower area . . . . . . . . . . . . . . . . . . 42
Cable routing through the top cover . . . . . . . . . . . . . . . 51
6
Cable Management . . . . . . . . . . . . . . . . . . . . . . . 55
6.1
6.1.1
6.1.2
Mounting components of the cable management . . . . . . 55
Lateral cable management . . . . . . . . . . . . . . . . . . . . 55
Cable guide with cable clips . . . . . . . . . . . . . . . . . . . 57
6.2
6.2.1
6.2.2
Connecting and disconnecting cables . . . . . . . . . . . . . 58
Connecting Cables . . . . . . . . . . . . . . . . . . . . . . . . 58
Disconnecting Cables . . . . . . . . . . . . . . . . . . . . . . . 59
6.3
6.3.1
6.3.2
6.3.3
6.3.4
6.3.5
Routing Cables . . . . . . . . . . . . . . . . . . . . . . . . .
Routing cables in the rack . . . . . . . . . . . . . . . . . . . .
Routing cables using a lateral cable management . . . . . . . .
Cable routing and strain relief for the built-in rack components in
asymmetrical racks . . . . . . . . . . . . . . . . . . . . . . . .
Cable Guide with Cable Clips . . . . . . . . . . . . . . . . . . .
Direct Connection . . . . . . . . . . . . . . . . . . . . . . . . .
7
Power Distribution . . . . . . . . . . . . . . . . . . . . . . . . 69
7.1
Installing PDU brackets . . . . . . . . . . . . . . . . . . . . . 71
7.2
Mounting socket strips onto PDU kit 2 HU / 3 HU . . . . . . . 73
7.3
7.3.1
7.3.2
7.3.3
7.3.4
7.3.5
7.3.6
Installing the socket strips . . . . . . . . . .
32 A single-phase 5-way socket strip . . . . .
Single-phase 10-way socket strip w/o plug . . .
32 A three-phase 15-way socket strip . . . . .
Three-phase 24-way socket strip . . . . . . . .
Single-phase 8-way socket strip and assembly .
Single-phase 10-way socket strip and assembly
.
.
.
.
.
.
.
.
.
.
.
.
.
.
.
.
.
.
.
.
.
.
.
.
.
.
.
.
.
.
.
.
.
.
.
.
.
.
.
.
.
.
.
.
.
.
.
.
.
.
.
.
.
.
.
.
.
.
.
.
.
.
.
60
61
62
63
66
67
75
75
79
83
88
93
97
Contents
7.3.7
7.3.8
Socket strip extension 3 safety plugs and assembly . . . . . . . 102
Single-phase 4+1-way socket strip and assembly . . . . . . . . 106
7.4
Connecting to the potential compensating system . . . . . 110
7.5
Power Supply via UPS . . . . . . . . . . . . . . . . . . . . . 111
8
Optional accessories . . . . . . . . . . . . . . . . . . . . . . 113
8.1
8.1.1
8.1.2
8.1.3
Earthing kit . . . . . . . . .
Preparing the earthing cable .
Configuring the earthing cable
Installing the earthing kit . . .
8.2
8.2.1
8.2.2
Connection Kit . . . . . . . . . . . . . . . . . . . . . . . . . 122
Preparing the connection kit . . . . . . . . . . . . . . . . . . . 122
Installing the connection kit . . . . . . . . . . . . . . . . . . . 124
9
Appendix . . . . . . . . . . . . . . . . . . . . . . . . . . . . 127
9.1
Door conversion . . . . . . . . . . . . . . . . . . . . . . . . 127
.
.
.
.
.
.
.
.
.
.
.
.
.
.
.
.
.
.
.
.
.
.
.
.
.
.
.
.
.
.
.
.
.
.
.
.
.
.
.
.
.
.
.
.
.
.
.
.
.
.
.
.
.
.
.
.
.
.
.
.
.
.
.
.
.
.
.
.
.
.
.
.
114
115
115
116
Contents
1
Preface
The data centers of today and tomorrow have to meet the continuously
increasing requirements and demands of operators. Fujitsu has been offering
well thought-out and permanently evolved rack systems for decades now. This
in-depth experience with the development and operation of data centers and the
associated close contact with operators is also reflected in the latest
PRIMECENTER M1 19-inch rack family.
In addition to the proven racks with asymmetrical base frames for the unique,
optimized Fujitsu cable management, the rack family has been supplemented
by symmetrical racks in widths of 600 und 700 mm. By removing the side
mounting locations the additional symmetrical version with a width of 600 mm
requires less space within the data center. This makes it ideally suited for data
centers, where minimal space requirements for the rack are an issue.
Figure 1: Different variants of the PRIMECENTER M1 19-inch rack
Constant changes in infrastructure requirements as well as increasing cost
pressures on companies call for flexible and expandable solutions. The new
PRIMECENTER M1 rack family of Fujitsu Technology Solutions offers precisely
9
Preface
the flexibility you need to cover your current requirements. Consequently,
PRIMECENTER M1 racks can also be integrated in future concepts and thus
offer long-term investment protection.
The rack technology combines an entire IT infrastructure with rack servers,
storage systems, power supply components as well as controls, such as
consoles and switches, within the smallest data center footprint. The
PRIMECENTER M1 racks can be expanded horizontally and blend into existing
IT scenarios. They are based on the industry standards EIA-310-D, DIN41494
and IEC60297. The new PRIMECENTER M1 racks are available as
asymmetrical and symmetrical versions.
As a special feature the symmetrical version also has up to 4 vertical slots of 1
height unit for the installation of additional devices, e.g. switches. Asymmetrical
PRIMECENTER M1 racks are equipped with up to 6 vertical slots to the left of
the 19-inch area. Proven Fujitsu cable management with its arrangement on the
side enables optimal ventilation with high heat throughput even in fully equipped
and cabled racks with a low rack depth of 1050 mm. The design ensures
serviceability and ease of maintenance through a one-piece front door and split
rear doors.
The PRIMECENTER M1 rack systems with their lockable doors offer access
protection for servers, backup media and optical drives. They also offer
protection against electromagnetic influences, up to protection of cabling.
PRIMECENTER M1 racks with 16 and 24 height units are ideally suited to
provide secure and space-saving IT solutions not only, but particularly for office
environments. Fujitsu Technology Solutions has therefore had optimal rack
systems in its product portfolio for decades now, and in addition to servers has
also had the associated storage subsystems, uninterruptible power supplies
and other accessories such as rack management components, console
switches and systems for mounting tape drives.
PRIMECENTER M1 Racks ensure optimal and reliable installation of 19" rack
components and high passive throughput in ventilation thanks to optimized
cable routing and a new door design.
10
Preface
1.1
Features
The new PRIMECENTER M1 rack family offers in an attractive new design a
large selection of rack heights and widths for the various requirements in data
centers or IT rooms.
The optimized cable management patented by Fujitsu Technology Solutions is
a major highlight in the asymmetrical PRIMECENTER M1 rack system. The
asymmetrical rack structure with a section for side cable routing reduces the
impairment to the air flow behind the rack devices. Guiding of the cables via
swivel arms on the systems and within the cable conduit permits perfect routing
of the cables, prevents their being stressed below the minimum bending radius,
secures cables against dropping or twisting, and thus permits clean and clear
cabling in the entire rack. This means of cabling, particularly in fully equipped
racks, increases system availability and reduces maintenance and upgrade
times. The offer is supplemented by new symmetrical racks in widths of 600 mm
and 700 mm. The symmetrical 700 mm racks also offer as a special feature up
to 4 slots on the front for the installation of switches or the switch cabling in the
rack.
New rack doors in an attractive design with honeycomb-shaped perforations
also offer (approx. 80% holes) optimal prerequisites for the cooling of highperformance systems.
Design:
24U and 42U 700 mm x 1050 mm asymmetrical
24U and 42U 700 mm x 1050 mm symmetrical
16U, 24U and 42U 600 mm x 1050 mm symmetrical
Rack height:
Max. rack height approx. 2000 mm (without pallet)
Capacity:
16 to 42 height units plus up to 6 vertical height units (depth of
up to 300 mm incl. cable space)
Additional load of 20 kg per horizontal height unit, 3.5 kg per
vertical height unit, maximum weight up to 1000 kg.
Design doors: One-piece front door and two-piece rear door with high
percentage of holes (approx. 80%) for improved server
cooling. Ergonomic door handles.
Security:
Lockable doors and side panels with a standard key, up to 200
different locking cylinders, electronic access protection
optional.
11
Preface
Optional, telescopic anti-tilt protection. Earthquake security on
request.
Cable
Optimized cable routing solutions for all symmetrical and
management: asymmetrical rack types. Asymmetrical racks prepared for the
patented lateral cable management. Cabling openings in the
roof of the rack, in the floor group and in the rear door.
Service:
Doors can be optionally mounted to the left or right, and can be
unhinged easily by a single person.
Split rear doors to reduce the required service space.
Increased space for cabling at the front (80-100 mm) and rear
(180 mm).
19" rack profiles with 740 mm depth distance.
Numbering of the height units can be seen from the front and rear.
Complete extraction thanks to telescopic rails available for
servers with hot-replace components.
Shipment:
Optional ex works, fully mounted and tested including cabling.
Shipment including 4 heavy-duty castors and 4 adjusting feet
on a shock-absorbing pallet.
Other
features:
Extension: can be placed horizontally in a row (provided
identical variants are used).
Operation in normally air-conditioned rooms up to 35°C.
Optional anti-tilt protection solution; can be mounted under the
rack, telescopic.
Large portfolio of rack infrastructure components that can be
configured using the rack configuration tool SystemArchitect®
with a cabling assistant for automatic console and power
cabling as well as power value calculation (Power-Calculator).
PRIMECENTER M1 Racks meet national and international
standards:
– EIA-310-D
– DIN 41494
– IEC 60297
12
Preface
1.2
Target Group
This manual is intended for those responsible for installing and maintaining the
PRIMECENTER M1 19-inch rack (service personnel, technicians and technical
specialists).
The manual is organized in a way that you can commission the rack without
prior special knowledge. Knowledge of the hardware to be integrated is helpful
for understanding the various connection options. The 3-phase power
connection is an exception and must only be installed by an authorized
electrician approved by the local utility company.
The manual does not include technical descriptions of services that only the
service department of Fujitsu Technology Solutions GmbH or appropriately
trained specialist staff are allowed to carry out.
1.3
Where to find which information
On the customer documentation CD, which is part of the rack delivery, you will
find the "PRIMECENTER M1 19-inch Rack User Manual" in pdf format.In
addition, the delivery package comprises a printed version of the Safety Notes.
All information can also be found at the web:
http://manuals.ts.fujitsu.com/index.php?id=5406-5605-5606
Document
Description
User manual
This manual provides information on
features and technical data of the rack.
The manual explains how to install, set
up, and operate the rack.
Format
Table 1: Overview of the PRIMECENTER M1 19-inch Rack documentation
13
Preface
Document
Description
Quick Start
Guides
In these guides you will find precautions
and information about unpacking,
checking and installing the rack and its
components.
Format
Safety Notes
The safety instructions listed in this
and regulations leaflet will help you to avoid making
serious errors that could impair your
health or damage the devices.
Table 1: Overview of the PRIMECENTER M1 19-inch Rack documentation
1.4
Structure of the manual
This manual describes how to set up the PRIMECENTER M1 19-inch rack, how
to install accessories and how to route the cables.
The installation of the current components, such as servers and storage
expansion units, for example, is described in the respective manuals for these
devices.
You will find additional information:
– in the “Safety Notes and Regulations” manual
– in the documentation for the individual components installed in the rack
14
Preface
1.5
Notational Conventions
bold type
Used for emphasis in the body of the text
“quotation marks”
Used for references to other chapters, sections or
manuals
Ê
Identifies an action that you need to take
I
V CAUTION!
Alerts you to important information, notes and tips
Warning sign indicating that your health, the correct
functioning of your system or the security of your data
may be at risk if you ignore the information given at this
point
15
Preface
16
2
Important Information
2.1
Safety Instructions
I The following safety instructions are also provided in the manual "Safety
Notes and Regulations".
V CAUTION!
Observe the safety instructions in the documentation for the individual
components mounted in the rack and the following notes on safety.
●
The activities described in this manual may only be performed by
technical specialists. Ignoring the instructions in this manual can result
in personal injury or damage to equipment (risk of tipping over, etc.).
●
When the unit is transported, it is only allowed to have a lean angle of
max. 10°.
●
The unit must remain in the original package until its installation
location.
●
Make sure the floor at the final place of installation has sufficient loadbearing capacity.
●
Always ensure that the anti-tilt plate is mounted when you set up the
PRIMECENTER M1 19-inch rack and teleskopic rails are used (risk
of tipping over).
●
When connecting or disconnecting cables, refer to the relevant notes
in the section "Connecting and disconnecting cables" on page 58.
●
Route the cables in such a way that they do not form a potential
hazard (make sure no one can trip over them) and that they cannot
be damaged.
●
When mounting a server, pull the telescopic rails out all the way until
they click into position.
●
Notice that a 42HU rack must weight at least 114 kg and a 24 HU rack
must weight at least 75 kg to fulfill the safety regulations. There is no
minimum weight for a 16HU rack.
17
Important Information
V CAUTION!
●
The maximum transport weight may not exceed a specific maximum
(see table "Summary of all rack types" on page 24).
●
For safety reasons, no more than one unit must be pulled out of
the rack at a time, otherwise the rack may tip over.
This is illustrated by the following pictograms:
18
●
Before mounting a server in the PRIMECENTER M1 19-inch rack,
remove all heavy and easily removable server components such as
hot-plug disks and power supply modules since this makes the server
lighter and easier to mount. Follow the instructions in the user manual
of the server.
●
If necessary, have other people help you mount the individual
components in the rack because of the weight involved.
●
Before pushing extended telescopic rails back into the rack, pull the
ball cage of the telescopic rail forward as far as it will go.
●
Install only system expansions that satisfy the requirements and rules
governing safety. If you install other expansions, you may damage the
system or violate these safety regulations. Information can be
obtained from customer service or your local sales office.
●
If you cause a defect on the device by installing or exchanging system
expansions due to wrong handling, the warranty is invalidated.
●
The configurations available in the PRIMECENTER M1 19-inch rack
can carry a leakage current >3.5 mA. Therefore, a ground connection
must be established before connecting to the mains (see chapter
"Power Distribution" on page 69).
Important Information
V CAUTION!
The AC main power connection for the PRIMECENTER M1 19-inch rack
must be installed by an authorized electrician approved by the local utility
company.
2.2
Notes on mounting the rack components
Before you start mounting components in the rack, please identify the positions
of the individual components in the PRIMECENTER M1 19-inch rack according
to the configuration generated using the "SystemArchitect" (see page 33). You
should then mark the positions using the relevant assembly aid, if one was
supplied with the rack component.
Marking and numbering the height units simplifies the assembly when installing
and adding on components.
The maximum mounting height for the PRIMECENTER M1 19-inch rack is
16/24/42 height units (HU). One height unit corresponds to 44.45 mm (see
page 35).
Observe the following rules when mounting the components:
●
Mount the components in the rack from bottom to top.
●
Mount heavy parts at the bottom, e.g. the uninterruptible power supply.
●
Mount the keyboard or rack console at a height that makes it easy to operate
(HU 17 - 21).
●
Position the dummy covers so that later planned extensions can be installed
without having to rearrange components.
●
To accommodate the ventilation concept and ensure proper ventilation of all
the components in the rack, any unused areas must be closed using dummy
covers.
●
Mount the unit in accordance with the technical manual and assembly aid
supplied.
19
Important Information
2.3
Environmental Protection
Environmentally Friendly Product Design and Development
This product has been designed in accordance with the Fujitsu standard for
"environmentally friendly product design and development". This means that
key factors such as durability, selection and labeling of materials, emissions,
packaging, ease of dismantling and recycling have been taken into account.
This saves resources and thus reduces the harm done to the environment.
Further information can be found at:
http://www.fujitsu-general.com/global/corporate/eco/products/products.html
Energy-saving information
Devices that do not need to be constantly switched on should be switched off
until they are needed as well as during long breaks and after completion of work.
Notes on Saving Energy
Devices that do not have to be on permanently should not be switched on until they
are needed and should be switched off during long breaks and when work is finished.
Notes on Packaging
We recommend that you do not throw away the original packaging in case you
need it later for transportation. If possible, devices should be transported in their
original packaging.
Notes on Labeling Plastic Housing Parts
Please avoid attaching your own labels to plastic housing parts wherever
possible, since this makes it difficult to recycle them.
Take-back, Recycling and Disposal
For details on take-back and reuse of devices and consumables within Europe,
contact your Fujitsu Technology Solutions branch office/subsidiary or our
recycling center in Paderborn:
Fujitsu Technology Solutions GmbH
Recycling Center
D-33106 Paderborn
Tel.: ++49 5251 525 - 1410
Fax: ++49 5251 525 - 321410
20
3
Overview
The PRIMECENTER M1 19-inch Rack is a universal rack system for the
creation of integrated data center infrastructure solutions from server, storage,
network, management and UPS components.
In addition to Fujitsu servers, storage subsystems, UPSs, modems, etc. are also
available for installation. Additional options especially developed for rack
installation include a console drawer (1U) with foldaway TFT monitor, touchpad
and keyboard as well as diverse analog and digital console switches and
various rack accessories. Competitors' products or products from third-party
vendors, such as electric door locks, rack management and power supply
components can also be installed.
Thanks to new cable conduits and an expanded cable management concept all
cables are routed in an orderly and service-friendly manner. This in conjunction
with the telescopic rails means that all servers can be removed from the rack
during operation. This permits maintenance and repair to be carried out as part
of the high-availability functions of the servers (e.g. hot-plug hard disks, hot-plug
fans).
The rack anti-tilt protection required in case of maintenance must be mounted
under the rack and pulled out in case of service. Several rack servers can be
operated simultaneously via an electronic switch (console switch) using just one
monitor and one keyboard. Improved access control based on lockable doors or
optional electronic security ensures complete protection of the installed
modules against tampering.
Expansion concept
The PRIMECENTER M1 racks are available in the gradations 16, 24 and 42
height units with a rack depth of 1050 mm and can be placed horizontally in a
row. The side panels remain on the rack to permit uniform ventilation, and
internal cabling of the cabinets with each other is ensured. The side panels are
lockable and remain accessible even when the racks are fully equipped.
PRIMERGY/ SPARC Enterprise rack server slide-in modules
Many of the proven Fujitsu PRIMERGY and SPARC Enterprise servers are
available as rack versions. These rack servers combine high computing power
with minimal space requirements, since larger memory capacities can be
addressed by using additional storage devices.
21
Overview
Rack system with horizontal ventilation
The PRIMECENTER M1 rack is ventilated from the front to the rear. A fully
configured rack in normal air-conditioned rooms can be operated at
temperatures up to 35°C. The volume of air required to cool the rack modules
is supplied via the integral horizontal ventilation system. The rack conforms to
protection class IP20 (i.e. protection against solid foreign bodies/without any
special protection against water; IP = International Protection). Honeycombshaped holes in the doors (up to 80% holes) enable uniform, passive ventilation.
Hard disk expansion / Extension for tape drives
Fujitsu offers a large portfolio of storage subsystems to expand the hard disk
capacity as well as for data backup.
Automatic console switching
The administration of several servers can be performed as an option via the rack
console by means of console switches. Console switches are offered with 4, 8,
16 and 32 channels. Switching over is carried out by means of hotkeys or the
OSD (on screen display) function. Digital KVM (Keyboard-/Video-/Mouse-)
switches can be used to integrate rack systems in a LAN and administered
worldwide.
UPS systems
The availability of the systems can be increased through the use of optional
UPS (interruptible power supply) modules. These provide the systems with
adequate protection against power outages and fluctuations in the line voltage.
Depending on configuration within the rack, a number of systems can be
protected by a single UPS. APC modules rated at 1,500 VA, 3,000 VA and 5,000
VA, and online UPS rated 3 / 5 KVA and 8 / 10 / 20 KVA are currently available.
All UPS modules are equipped with an SNMP interface (signal line). All the
parameters and statuses of the installed UPSs can thus be set and monitored
with the server management. A power failure can be automatically reported to
every connected server by means of traps.
Ease of serviceability and maintenance
The rack servers and expansion modules, which are mounted on telescopic or
sliding rails, can be installed in a rack without the need for any tools. If telescopic
rails are used, systems can be withdrawn toward the front. This facilitates
maintenance and upgrade operations by allowing technicians access to all the
22
Overview
installed components upon removal of the upper/side covers. Optimized cable
management solutions for the various rack types also play their part in this by
allowing reliable and orderly routing of cables. Hot-plug hard disks and hot-plug
power supply modules can be exchanged online even more easily. The rack
doors can be easily unhinged and replaced again by a single person without any
tools. An HU scale, which is visible both from the front and the rear and on which
the heights units are numbered and marked, facilitates the installation and
retrofitting of components.
Fujitsu Technology Solutions configuration tool "SystemArchitect"
The SystemArchitect, a configuration tool with a graphical user interface, can be
used to obtain an early overview of the desired configuration at the planning
stage. The tool runs a simultaneous consistency check to ensure the
completeness and functionality of the desired system.
Once the required configuration has been created, the SystemArchitect also
provides further information concerning the appropriate installation
requirements (power connection, heat dissipation, weight and the requisite
footprint as well as the maximum floor loading at the installation site). A conflict
is created when the weight of a configuration exceeds 1,000 kg and a warning
is given (as of SystemArchitect V 6.6) when the weight exceeds 250 kg.
Enterprise ServerView Suite
The Fujitsu Technology Solutions administration tool "Enterprise ServerView
Suite" is also used to display the position of the server or disk node in the rack.
This provides a greatly improved overview for administration and diagnostic
tasks.
Transport
Racks with installed servers may not be tilted. All racks are supplied on shockabsorbing pallets and can be rolled short distances to the installation site in the
data center on heavy-duty castors (note the condition and load-bearing capacity
of the floor). Please check requirements regarding transport to end users for
42U racks and delivery weight (rack and installed servers) in excess of 250 kg.
23
Overview
Security
The rack is suitable for installation and operation of rack management systems.
If rack devices with telescopic rails are used, it is necessary for security reasons
to ensure that racks are protected against tilting by means of suitable anti-tilt
protection. Optional available for Fujitsu Racks is an anti-tilt protection that can
be pulled out in case of service.
Standards
Each rack has power connections complying with European and international
standards. There are at least two multiple socket outlet distributions and two
power connections for configuration.
Due to the high leakage current of a fully fitted rack, CEE (IEC60309)
connectors are used. Connection kits for single-phase and three-phase supply
are available, as is a three-phase non-detachable connection. Reliable
grounding in the rack is ensured by the use of IEC60309 connectors.
The power supply components are ideal for these applications and the design
of the power supply ensures reliable and permanent grounding. IEC 60320
connectors are used inside the rack. If grounding in a power supply cable is
interrupted, the leakage current remains limited to < 3,5mA.
Summary of all rack types
Base
unit
Type
Dimensions
(W/D/H)
Max. pay load /
Net
max. dynamic load weight
16 HU symmetrical
600x1050x847 mm
320 kg / 380 kg
60 kg
24 HU symmetrical
600x1050x1203 mm
480 kg / 565 kg
85 kg
42 HU symmetrical
600x1050x2003 mm
840 kg / 960 kg
120 kg
24 HU symmetrical
700x1050x1203 mm
480 kg / 590 kg
85 kg
42 HU symmetrical
700x1050x2003 mm
840 kg / 975 kg
120 kg
24 HU asymmetrical
700x1050x1203 mm
480 kg / 590 kg
85 kg
42 HU asymmetrical
700x1050x2003 mm
840 kg / 995 kg
120 kg
V CAUTION!
The maximum transport weight may not exceed 1000 kg.
24
4
Preparations
This chapter describes the preparations for installation and all the tasks involved
in setting up and operating the PRIMECENTER M1 19-inch rack.
The service areas
I Cable outlet dimensions for the raised floor can be found on page 43.
Figure 2: Service areas for 700 mm racks
25
Preparations
Figure 3: Service areas for 600 mm racks
The figures above show the specific service areas for 700 mm (see figure 2 on
page 25) and 600 mm (see figure 3) racks.
26
Unpacking and checking the delivery unit
4.1
Unpacking the delivery unit
I For a description to unpack the PRIMECENTER M1 19-inch rack please
refer to the info-sheet delivered with the rack.
4.2
Rolling off the PRIMECENTER M1 19-inch
rack from the transport palette
I For a description to roll off the rack from the transport palette please refer
to the info-sheet delivered with the rack (also available on the web:
http://manuals.ts.fujitsu.com/file/10279/pcrm1-qsg-unpack-muli.pdf).
4.3
Setting up the PRIMECENTER M1 19-inch
rack
I For a description to set up the rack from the transport palette please refer
to the info-sheet delivered with the rack (also available on the web:
http://manuals.ts.fujitsu.com/file/10279/pcrm1-qsg-unpack-muli.pdf).
Introduction
To ensure that the rack has a firm foothold, it is necessary to align it in all 3 axis
exactly horizontal.
Required tools
The following tools are required to perform this task:
– Hexagon key 6 mm
– Spirit level
27
Setting up the PRIMECENTER Rack
Performing the task
Figure 4: Screwing down the leveling feet
Ê Screw down the four leveling feet using a 6 mm hexagon key.
I The leveling feet are easier to adjust if not carrying the full weight of
the rack. If necessary, please ask another person to tilt the rack
slightly in order to relieve the leveling foot in question.
28
Setting up the PRIMECENTER Rack
Figure 5: Adjusting the PRIMECENTER M1 19-inch rack
Ê Adjust the rack on all three axes (X,Y,Z) with the leveling feet. Use a spirit
level to make sure the rack is exactly level!
I The horizontal orientation of the rack is required to ensure the pull-out
functions of the components mounted to the rack. The rack is set up
properly, as a rule, when the front panels of the mounted components
add up to form a continuous vertical line!
4.4
Installing the tilting protection
V CAUTION!
●
A tilting protection is mandatory as soon as one component is
installed that can be pulled out via teleskopic rails (e. g. for
maintenance reasons). The tilting protection prevents the rack from
tipping over.
●
The tilting protection must make firm contact with the ground at the
front.
●
Make sure that no cables were cut off when installing and moving the
tilting protection.
I For a description to install the tilting protection for the PRIMECENTER
M1 19-inch rack please refer to the Quick Start Guide (QSG) delivered
with the rack (Web:
http://manuals.ts.fujitsu.com/file/10281/pcrm1-qsg-mounting-muli.pdf).
29
Setting up the PRIMECENTER Rack
4.5
Opening the rack door
The door of the rack has to be opened carefully as described below:
0
/
Figure 6: Opening the rack door
1. Turn the key clockwise as far as it will go (1).
2. Grasp the green marked grip and swivel it in the direction of the arrow (2).
Closing the rack door proceeds in reverse order.
I A description to convert the door can be found in chapter "Appendix" on
page 127
30
Inserting mounting elements
4.6
Inserting mounting elements
4.6.1
Inserting Cage Nuts
Introduction
Cage nuts are placed into the support uprights. A special tool helps you to
mount it (see figure 7).
Performing the task
Figure 7: Inserting cage nuts
Ê Insert the cage nut as shown in the figure with the bottom part of the cage
in the appropriate mounting hole of the support upright (1).
Ê Use the tool supplied to lever the upper part of the cage nut into the
mounting hole as shown (2).
The cage nut should lock into the mounting hole as shown (3).
31
Inserting mounting elements
4.6.2
Inserting Spring Nuts
Introduction
You need spring nuts for mounting socket strips for the power supply of the rack
components.
Performing the task
Ê Mark the position of the components to be fitted on the four support uprights.
I In order to facilitate the positioning, assembly aids are shipped with
the rack components.
2
ca. 45°
5
3
1
4
5
Figure 8: Inserting spring nuts
Ê Insert the spring nut into the appropriate groove on the support upright at the
marked location (1) - (4).
Ê If necessary, slide the spring nut within the groove until it locks in the correct
position (5).
32
5
Preparing to install rack
components
This chapter describes how to prepare the PRIMECENTER M1 19-inch rack to
install rack components. Refer to the appropriate delivery documentation (i.e.
Quick Start Guide) for information on how to mount the components
themselves.
The rack comes with three areas in which components can be mounted:
– the 19-inch area with 16/24/42 HU, which is accessible from the front and is
used for mounting the rack components horizontally.
– only for 700 mm racks:
the optional expansion area with 1 x 2 HU, 2 x 2 HU and 3 x 2 HU, which is
accessible from the front and is used for mounting the rack components
vertically.
– the 19-inch area, which is accessible from the rear and is used for mounting
the rack components horizontally if not already occupied by other
components.
Before preparing the PRIMECENTER M1 19-inch rack and starting mounting
components, you should use the SystemArchitect (see next paragraph). Also
observe the information in section "Notes on mounting the rack components" on
page 19.
V CAUTION!
Make sure the floor at the final place of installation has sufficient loadbearing capacity!
The configuration tool "SystemArchitect"
The SystemArchitect is used as an aid for configuring the PRIMECENTER M1
19-inch rack.
Before you start mounting components in the PRIMECENTER M1 19-inch rack,
you should identify the positions for mounting the individual components in the
rack according to the configuration generated using the SystemArchitect and, if
available, the assembly aid supplied with the component.
33
Preparing to install rack components
Figure 9: Screen of the SystemArchitect
I More information can be found at the following web site:
http://configurator.ts.fujitsu.com/public/public_en.html
34
Preparing to install rack components
The Height Unit (HU)
The unit of measurement used in the PRIMECENTER M1 19-inch rack is the
height unit (HU). One height unit comprises a 3-hole section in the front area
and mounting area (starts and ends with a narrow metal bar) and corresponds
to 44.45 mm or 1 ¾ inches.
The height units are numbered consecutively in ascending order from 1
upwards on each vertical support upright.
1 HE
1 HE
1 HU
Figure 10: Height unit (HU)
35
Support systems
5.1
Support Systems
Support systems are needed in order to be able to integrate system
components effortlessly into the rack. The PRIMECENTER M1 19-inch rack
supports all support systems with a depth of 740 mm that correspond to
industry standards EIA-310-D, DIN41494 and IEC60297 (see the configurator
at: http://configurator.ts.fujitsu.com/public/public_en.html)
I The mounting description of the specific support system is part of the
delivery of the specific Rack Mount Kit. Please refer to this description.
You can also find this description on the Web:
http://manuals.ts.fujitsu.com/index.php?id=5406-5605-5606
5.2
Mounting in the front 19-inch area
Introduction
Components are mounted in the front 19-inch area of the PRIMECENTER M1
19-inch rack using either telescopic rails or rails with L-brackets. Light weight
components can also be mounted via the front panel (e.g. switches, which can
be installed with screws on the front support uprights).
If components are mounted using telescopic rails, all the cables leading to the
components are routed to the component's rear side via a cable management
for 19-inch DC-PC-racks. If service work needs to be performed, the cables can
remain connected when the components are removed from the
PRIMECENTER M1 19-inch rack. This makes servicing much easier and also
allows device components in hot-plug slots to be replaced during operation.
If components are mounted using rails with L-brackets, all the cables are routed
directly to the components and are connected without any special aids, i.e.
without using a cable management for 19-inch DC-PC-racks. If service work
needs to be performed, all connected cables must be disconnected before the
components can be removed from the PRIMECENTER M1 19-inch rack.
36
Mounting in the front 19-inch area
5.2.1
Mounting support brackets
I Support brackets are required only for asymmetrical PRIMECENTER M1
19-inch racks.
A support bracket is required for mounting components regardless of whether
telescopic rails or sliding rails are used.
Figure 11: Support brackets for 1 HU (left), 2 HU (middle) and 3 HU (right)
Support brackets with a load capacity of 15 kg (1 HU), of 35 kg (2 HU), of 50 kg
(3 HU) and of 200 kg (10 HU) are available. A cable clip can be mounted on
each support bracket for vertical cabling.
The support bracket is mounted at the appropriate height on the rear left
support upright and is used to fasten the left sliding or telescopic rail at the rear.
Required tools
The following tools are required to perform this task:
– Torx screwdriver
37
Mounting in the front 19-inch area
Performing the task
2x
Figure 12: Sample of mounting a 2 HU support bracket
Ê Mount the support bracket as shown and screw it to the rear left support
upright at the appropriate height using the delivered screws.
Ê If necessary, you can mount one additional cable clip to each support
bracket for vertical cabling.
38
Mounting in the rear 19-inch area
5.3
Mounting in the rear 19-inch area
You can mount additional rack components in the rear 19-inch area if:
– the front area is not occupied with rack components
– the rack components mounted in the front area leave enough space for
additional components to be mounted at the rear (in the rear area)
– the rack components in the rear do not hinder the cooling air stream for the
components in the front area.
I Be aware that the temperature level in the rear is much higher than at
the front.
Figure 13: Example of how to mount a rack component in the 19-inch area at the rear side
Ê Mount the rack component using the support uprights (1).
Only for asymmetrical PRIMECENTER M1 19-inch racks:
An appropriate support bracket is required for mounting rack components on the
left-hand side. If you cannot use an existing bracket, you will have to mount a
new support bracket at the appropriate position.
Ê Mount a support bracket with the appropriate load capacity (2) (see
page 37).
Ê Use the support upright (1) for mounting rack components on the right-hand
side (frontside view).
V CAUTION!
Please pay heed to the ventilation concept. The cooling of the built-in
rack components must be ensured.
39
Mounting in the expansion area
5.4
Mounting in the expansion area
19-inch rack components can be mounted vertically in the optional expansion
area to the left of the 19-inch area.
I The expansion area is only available in 700 mm racks.
The following applies to symmetrical 700 mm racks:
Only 19-inch rack components with a height of 1 HU can be mounted.
The following applies to asymmetrical 700 mm racks:
Only 19-inch rack components with a height of 2 HU can be mounted.
The cable management (only possible in 700 mm asymmetrical racks) restricts
the depth of the components to 290 mm. Gaps that occur when you mount 1 HU
components must be covered.
40
Mounting in the expansion area
5.4.1
Mounting Rack Components
Figure 14: Mounting a rack component in the expansion area
Ê Remove the cover (3) from the appropriate slot.
Ê Insert the cage nuts as required for the component to be installed (1).
Ê Install the rack component (2) and cover any resulting gap with an
appropriate cover.
41
Cable Inlets and Outlets
5.5
Rack cable routing with external cabling
5.5.1
Cable routing in the lower area
Cables can be routed in the lower area:
●
within asymmetrical racks: only on the left (frontside view)
●
within symmetrical 700 mm racks: on the right and on the left (frontside view)
as well as in the back of the 19-inch server area.
Cable routing through the raised floor
Cable outlets (see graphics on the next pages):
1. Rear rack floor I Cable routing through the rack floor at the rear side is only possible,
if no integrated cable management (CMA) is configured in HU1 and
HU2 (depending on the thickness of the cable bundle).
2. Lateral cable channels 3. Cable outlet at cat door 4. Cable outlet on top cover The graphics on the next pages show the cable outlets in the bottom area in the
different types of racks:
42
Cable Inlets and Outlets
Cable outlets in the bottom area of a 600 mm rack
600
240
(180)
(95)
98
71
105
71
R20 4
849
1049
x
PCR-M1 642S / 624S / 616S
Figure 15: Cable outlets for cable routing in the bottom area
Rear rack floor
Cable outlet at cat door
n/a
Cable outlet on top cover
43
Cable Inlets and Outlets
Cable outlets in the bottom area of a symmetrical 700 mm rack
700
340
98
(121)
(121)
105
(95)
(180)
849
1049
R20 4x
PCR M1 742S / 724S
Figure 16: Cable outlets for cable routing in the bottom area
Rear rack floor
Cable outlet at cat door
Lateral cable channels
Cable outlet on top cover
44
Cable Inlets and Outlets
Cable outlets in the bottom area of an asymmetrical 700 mm rack
700
340
98
121
121
849
1049
R20 4x
105
(95)
(180)
PCR-M1 742A / 724A
Figure 17: Cable outlets for cable routing in the bottom area
Rear rack floor
Cable outlet at cat door
Lateral cable channel
Cable outlet on top cover
45
Cable Inlets and Outlets
Cable outlet at the lower rear door
A cable outlet ( so-called "cat door") can be found at the lower end of the right
rear door (see figure below). To install the cat door proceed as follows:
Figure 18: Cover for the cable outlet at the lower rear door
Ê Unscrew the 5 screws that fix the cover for the cat door.
/
0
Figure 19: Edge protectors are to be confected
Ê Confect two edge protectors (length: 70 mm (2)) from the edge protector
oval (1).
46
Cable Inlets and Outlets
Figure 20: Cable outlet with edge protectors
Ê Mount the edge protectors to the outlet (see following figure).
I Make sure that both edge protectors are flush with the door edge.
47
Cable Inlets and Outlets
Option: Brush for the cat door
A plastic brush can be mounted optionally to the opening (see following figure).
Figure 21: Fastening points for the brush
Ê Screw the brush with two screws onto the rear door.
I Take care that the brush is installed horizontal and fasten the screws
with a torque value of 2.5 Nm.
48
Cable Inlets and Outlets
Cable holder at the cat door
Figure 22: Cable holder at the cat door
Figure 23: Cable routing through the raised floor using cable holders
I The plugs of the socket strips have to be routed through the false floor.
Otherwise the plugs have to be removed and reinstalled (the connection
may only be performed by an authorized electrician).
49
Cable Inlets and Outlets
Figure 24: Cables leaving the rack through the cat door
Ê Lead the cables through the cat door as shown in the figure above.
I Route the cables with a sufficiently large bending radius in order not
to limit the swing area of the door.
50
Cable Inlets and Outlets
5.5.2
Cable routing through the top cover
The 42 HU racks offer the possibility to route cables through the top cover by
means of the brush panel kit. Two special outlets have been foreseen which can
be opened by cutting through the micro-joints of the cover sheet.
I Cable routing via the outlet without the brush panel kit is not allowed,
because cables may be damaged by sharp edges.
The following parts are delivered with the brush panel kit:
/
0
Figure 25: Delivered parts of the brush panel kit
1
Edge protector
2
Top cover brush (2x)
51
Cable Inlets and Outlets
Figure 26: Cutting through the micro-joints
Ê Cut through the micro-joints of the top cover cable outlet.
52
Cable Inlets and Outlets
Figure 27: Mounting the edge protector
Ê Mount the edge protector around the top cover outlet to prevend cable
damaging by sharp edges (see arrows).
/
0
Figure 28: Cable outlet on top with brush panel kit
Ê Mount the two brushes at both sides of the top cover outlet.
53
Cable Inlets and Outlets
54
6
Cable Management
The cable management comprises the following parts:
– lateral cable management (only for asymmetrical 700 mm PRIMECENTER
M1 19-inch racks)
– cable guides with cable clips
– cable management arms (see description provided)
6.1
Mounting components of the cable
management
6.1.1
Lateral cable management
I The lateral cable management can only be used in asymmetrical
700 mm PRIMECENTER M1 19-inch racks.
Introduction
The lateral cable management for 19-inch DC-PC-racks is used for rack
components that are mounted in the rack using telescopic rails.
The mounting height of the lateral cable management depends on the rack
component to be installed and must not interfere with the telescopic rails.
Several cable managements can be stacked depending on the type of server
they are used for.
55
Mounting the Cable Management
Performing the task
1
2
Figure 29: Mounting a lateral cable management for 19-inch DC-PC-racks
Ê Insert the lateral cable management into the openings in the special upright
(see circle) at the appropriate height as shown.
Ê Fasten the lateral cable management to the rear support upright using two
centering screws (see arrows).
The lateral cable managements for some rack components can be installed
completely in the free height units. A distance should be left to the next lateral
cable management to facilitate cable upgrades.
56
Mounting the Cable Management
6.1.2
Cable guide with cable clips
I The cable guide with cable clips can only be used in asymmetrical
700 mm PRIMECENTER M1 19-inch racks.
Introduction
You can use one or more cable guides with cable clips to store excess lengths
of cable in an orderly fashion at appropriate locations in the rack.
The other cable clips supplied can be distributed over the rack and mounted on
the support brackets as needed.
Performing the task
Figure 30: Mounting cable guides with cable clips
Ê Insert the cable guide with cable clips into the support upright for the cable
guide (1) at the appropriate height as shown in the figure above.
Ê Fasten the cable guide with cable clips to the rear support upright using two
screws with integrated plugwashers (2).
57
Connecting and Disconnecting Cables
6.2
Connecting and disconnecting cables
Introduction
The following advices have to be observed when connecting cables to the rack.
V CAUTION!
6.2.1
●
The power plug(s) must be pulled out!
●
Read the documentation for the device before you connect it.
●
Make sure that all signal cables are free of electrostatic charge before
they are plugged.
●
Never connect or disconnect cables during thunderstorms.
●
When disconnecting a cable, always grasp the plug. Never pull on the
cable.
●
Connect or disconnect cables in the sequence shown below.
Connecting Cables
I Observe the safety notes in chapter "Important Information" on page 17.
Performing the task
Ê Switch off all affected devices.
Ê The power plugs of all affected devices must be pulled out of the sockets on
the socket strip in the PRIMECENTER M1 19-inch rack.
Ê Attach all cables to the devices. Mark the cables and note what function
each cable serves.
Ê Plug all data transmission cables into the sockets provided for the data
transmission or telephone networks.
Ê Plug the mains power plugs of all devices into the sockets on the socket
strip(s) in the rack.
I In case of a 3-phase connection:
Make sure that the power cables of the devices are plugged in so that
there is an even distribution of power to the three phases (L1, L2, L3)
(see chapter "Power Distribution" on page 69).
58
Connecting and Disconnecting Cables
Make sure that the cabling of devices with a "dual power feed" fulfils
the conditions of the high availability requirements of the system.
6.2.2
Disconnecting Cables
Performing the task
Ê Switch off all affected devices.
Ê Pull the power plugs of all affected devices out of the sockets on the socket
strip in the PRIMECENTER M1 19-inch rack.
Ê Pull all data transmission cables out of the sockets provided for the data
transmission or telephone networks.
Ê Disconnect all cables on the devices.
59
Connecting and Disconnecting Cables
6.3
Routing Cables
This section contains several examples of how to route cables in the
PRIMECENTER M1 19-inch rack.
Introduction
Only internal cables are routed at the factory before delivery. All other cables
must be routed during rack installation at customer site.
If one or more lateral cable managements are mounted with an installed device,
all external cables must be routed in these guides. If the installed lateral cable
managements are not sufficient for the number of cables, you must install
additional ones.
The lateral cable managements must be installed 1 HU apart. If this is not
possible, the cables must be routed in the rack before installing the device.
For easier access to the lateral cable managements you can pull out the
systems above and below the guides toward the front.
Using cable ties
Figure 31: PDU bracket with cable tie
Ê Thread a cable tie through the two openings (see circles in figure above) in
the PDU bracket
Ê Mount the PDU brackets into the groove of the rear pillars using two spring
nuts M5 and two screws M5x10 mm.
60
Connecting and Disconnecting Cables
6.3.1
Routing cables in the rack
The following photo shows as a sample how to route cables in the rack:
Figure 32: Sample of cable routing within a 600 mm rack
The following aids are useful to route the cables within the rack:
(1) Cable management arm
(2) Cable ties
(3) Cable arm
(4) Hook-and-loop tape
61
Connecting and Disconnecting Cables
6.3.2
Routing cables using a lateral cable management
Performing the task
Figure 33: Routing cables using a lateral cable management for 19-inch DC-PC-racks
Ê Route the cables as shown in the figure above.n
62
Connecting and Disconnecting Cables
6.3.3
Cable routing and strain relief for the built-in rack
components in asymmetrical racks
The rack component is inserted in the PRIMECENTER M1 19-inch rack and
secured. The cables are attached to the relevant plug connectors and should be
routed in the lateral cable management system with a reserve length by making
a loop over the center axis of the rack component (see figure 34).
lateral cable
management
Figure 34: Rack top view: rack component inserted and secured
63
Connecting and Disconnecting Cables
connectors
lateral cable
management
loom of cables
Figure 35: Rack top view: rack component pulled out half way
64
front of the Rack
When the rack components are extracted, the cables fixed in the lateral cable
management are also pulled out. The lateral cable management stabilizes the
cables at the appropriate rack component height and thus ensure a trouble-free
insertion and removal (see figure 35 below and figure 36 on page 65). The
mechanical attachment is performed using the strain relief fitting on the
connectors.
50 %
loom of cables
lateral cable
management
connectors
front of the Rack
105 %
Connecting and Disconnecting Cables
Figure 36: Rack top view: rack component pulled out fully
65
Connecting and Disconnecting Cables
6.3.4
Cable Guide with Cable Clips
The example below shows you how to route excess lengths of cable in the
PRIMECENTER M1 19-inch rack using a cable guide with cable clips.
V Caution!
In the case of fiber-optic cables, a minimum bending radius must be
adhered to.
I The cable guide with cable clips can only be used in asymmetrical
700 mm PRIMECENTER M1 19-inch racks.
Figure 37: Routing cables using a cable guide with cable clips
Ê Route the cables as shown in the figure above.
66
Connecting and Disconnecting Cables
6.3.5
Direct Connection
The example below shows how to connect cables directly to a rack component
installed on sliding rails.
Figure 38: Routing cables of a rack component with direct connection
Ê Route the cables in the side area of the rack as shown in the figure above.
V CAUTION!
The ventilation slots of the devices installed underneath must not be
covered by the cables.
67
Connecting and Disconnecting Cables
68
7
Power Distribution
The PRIMECENTER M1 19-inch rack offers various possibilities for distributing
power to the integrated rack components. Therefore only a few selected
proposals are described here. For more information, please refer to the web:
http://manuals.ts.fujitsu.com/index.php?id=5406-5605-5606
The following socket strips are currently available:
Total no. of
sockets
Name of socket strip
Remarks
5 sockets
Socket strip
3x 16 A + 2x 10 A
IEC 60320
Single-phase "Blade"-PDU
10 sockets
(6x16 A +
4x10 A)
PDU 50A 2U, 6x16A +
4x10A IEC 60320
Single-phase "Blade"-PDU w/o
plug
15 sockets
(9x 16 A + 6x
10 A)
Socket strip 3x3 16A +
3x2 10A IEC322
Blade-PDU with CEE plug
(3-ph./32 A red) and Fuses
24 sockets
Socket strip 3-phase 3x8 with CEE plug 3x16 A (red)
sockets
8 sockets
Socket strip 8x 10A
IEC60320 + 32A
IEC60309 plug
10 sockets
Socket strip 1x 10 outlets Single-phase with CEE plug
+ ass.
(16 A)
ditto
Socket strip 1x 10 outlets Single-phase with USA/CAN
for USA/CAN
plug (208 V AC)
ditto
Powersocket outlet 10x
IEC6 0320 C13 for UPS
3 safety sockets
Socket strip exp. 3 safety Single-phase PDU
plugs + ass.
4x socket 10 A + Socket strip
1x safety socket
Single-phase with CEE plug
(32 A) and Fuses
Single-phase for UPS units
can not be mounted on PDU kit
2 HU / 3 HU
69
Power Distribution
The connection conditions described in the relevant manuals for the integrated
rack components should be complied with in all cases.
Redundancy concept
The power supply to the PRIMECENTER M1 19-inch rack can be included
optionally as part of a redundancy concept. In the simplest scenario,
redundancy is achieved with the 3-phase mains connection by distributing
redundant power supplies to the phases.
Ever higher redundancy is achieved by duplicating the current distribution
components so that the PRIMECENTER M1 19-inch rack can be connected to
two independent inhouse power distribution networks via a dual power feed.
This option is offered both in 1-phase and 3-phase socket strips.
V CAUTION!
Remember in configurations with several mains supply cables that all
cables must be disconnected before working with the cabling so that
there is no current flowing to the rack!
The power supply complies with the requirements of the EN60950 regulations.
This allows a PRIMECENTER M1 19-inch rack to be connected with flexible 3
or 5-wire cables to a rated current of up to 16 A/32 A/50 A per phase. The
respective line cross-sections should be noted.
Because of the high number of power supply units within the PRIMECENTER
M1 19-inch rack , the configuration can carry leakage currents > 3.5 mA. For
this reason, the PRIMECENTER M1 19-inch rack may generally only be
connected to internal power distribution networks via rigid connections or via
industrial connections in accordance with IEC309.
I Note the requirements outlined in the data sheets when installing the
power distribution unit.
70
Power Distribution
7.1
Installing PDU brackets
Introduction
All PDUs have to be mounted using versatile mounting brackets (PDU
brackets). These PDU brackets (see following figure) can be mounted in various
heights on both sides of the rack’s rear side.
Figure 39: Samples of the short (left side) and the long PDU bracket (right side)
Required tools
The following tools are required to perform this task:
– Torx screwdriver
71
Power Distribution
Performing the task
Figure 40: Two installed spring nuts
Ê Install the spring nuts M5 into the groove of the rear pillars (see circles) as
described in section "Inserting Spring Nuts" on page 32.
Figure 41: Installed PDU bracket
Ê Mount the PDU brackets into the groove of the rear pillars using two spring
nuts M5 and two screws M5x10 mm (see circles).
72
Power Distribution
7.2
Mounting socket strips onto PDU kit 2 HU /
3 HU
I Horizontal mounting is the only way to mount socket strips into a 600 mm
rack.
Figure 42: PDU kit 2 HU / 3 HU mounted in the rack
Required tools
The following tools are required to perform this task:
– Torx screwdriver
73
Power Distribution
Performing the task
I The PDU kit 2 HU / 3 HU may only be mounted from HU 7 upwards.
Figure 43: Mounting socket strips onto the PDU kit 2 HU / 3 HU
Ê First of all screw the desired socket strip(s) onto each holder extension lead
of the PDU kit 2 HU / 3 HU as shown in figure above (see circles).
I A detailed installation instruction for different types of socket strips
can be found on the web at:
http://manuals.ts.fujitsu.com/file/11010/pdu-3u-kit-ig-muli.pdf.
Ê Install the PDU kit 2 HU / 3 HU into the rack as described in the provided
installation sheet (see link above).
74
Power Distribution
7.3
Installing the socket strips
7.3.1
32 A single-phase 5-way socket strip
Introduction
No. of sockets
10 A
No. of sockets
16 A
Type of plug
Max. current
2x IEC 60320
C13
3x IEC 60320
C19
blue 32 A
IEC 60309
(1-phase)
32 A
I For more information, see the configurator:
https://partners.ts.fujitsu.com/com/ordersupply/configurators/primergy_config/Pages/Currentconfigurators.aspx
Figure 44: 32 A single-phase 5-way socket strip
Required tools
The following tools are required to perform this task:
– Torx screwdriver
75
Power Distribution
7.3.1.1
Installation options for 700 mm wide asymmetrical racks
Rack height Installation direction
vertically
Installation direction
horizontally
42 HU
conditionally possible1
Max. 4x with PDU kit 2 HU /
3 HU
24 HU
conditionally possible1
Max. 4x with PDU kit 2 HU /
3 HU
Table 2: Installation options for 700 mm wide asymmetrical racks
1
Installation only possible on the left rear side (front side view). Cable routing is restricted.
Performing the task
Ê Install the PDU brackets as described in section "Installing PDU brackets"
on page 71.
Figure 45: 5-way socket strip mounted vertically in a 700 mm wide asymmetrical rack
Ê Screw the socket strip with 2 screws onto the PDU brackets.
76
Power Distribution
7.3.1.2
Installation options for 700 mm wide symmetrical racks
Rack height Installation direction
vertically
Installation direction
horizontally
42 HU
conditionally possible1
Max. 4x with PDU kit 2 HU /
3 HU
24 HU
conditionally possible1
Max. 4x with PDU kit 2 HU /
3 HU
Table 3: Installation options for 700 mm wide symmetrical racks
1
Installation is only possible on the rear side. Cable routing is restricted. Installation of cable
arms at the same height is not possible.
Performing the task
Ê Install the PDU brackets as described on page 71.
Figure 46: 5-way socket strip mounted horizontally in a 700 mm wide symmetrical rack
Ê Screw the socket strips with 2 screws each onto the PDU brackets.
I Installation is possible on both sides.
77
Power Distribution
7.3.1.3
Installation options for 600 mm wide symmetrical racks
Rack height
Installation direction
vertically
Installation direction
horizontally
42 HU
Not possible
Max. 4x with PDU kit 2 HU /
3 HU
24 HU
Not possible
Max. 4x with PDU kit 2 HU /
3 HU
16 HU
Not possible
Max. 4x with PDU kit 2 HU /
3 HU
Table 4: Installation options for 600 mm wide symmetrical racks
Performing the task
Ê Install the socket strips onto the PDU kit 2 HU / 3 HU as described on
page 73.
Figure 47: 5-way socket strip mounted horizontally in a 600 mm wide symmetrical rack
Ê Install the PDU kit 2 HU / 3 HU in the required height into the rack.
I The PDU kit 2 HU / 3 HU may only be mounted from HU 7 upwards.
78
Power Distribution
7.3.2
Single-phase 10-way socket strip w/o plug
Introduction
No. of sockets
10 A
No. of sockets
16 A
Type of plug
Max. current
4x IEC 60320
C13
6x IEC 60320
C19
none
50 A
I For more information, see the configurator:
https://partners.ts.fujitsu.com/com/ordersupply/configurators/primergy_config/Pages/Currentconfigurators.aspx
Figure 48: Single-phase 10-way socket strip without plug
Required tools
The following tools are required to perform this task:
– Torx screwdriver
79
Power Distribution
7.3.2.1
Installation options for 700 mm wide asymmetrical racks
Rack height
Installation direction
vertically
Installation direction
horizontally
42 HU
conditionally possible1
Max. 2x with PDU kit 2 HU /
3 HU
24 HU
conditionally possible1
Max. 2x with PDU kit 2 HU /
3 HU
Table 5: Installation options for asymmetrical racks
1
Installation only possible on the left rear side (front side view). Cable routing is restricted.
Performing the task
Ê Install the PDU brackets as described on page 71.
Figure 49: Single-phase 10-way socket strip w/o plug mounted in a 700 mm wide asymm. rack
Ê Screw the socket strip with 2 screws onto the PDU brackets.
80
Power Distribution
7.3.2.2
Installation options for 700 mm wide symmetrical racks
Rack height
Installation direction
vertically
Installation direction
horizontally
42 HU
conditionally possible1
Max. 2x with PDU kit 2 HU / 3 HU
24 HU
1
Max. 2x with PDU kit 2 HU / 3 HU
conditionally possible
Table 6: Installation options for asymmetrical racks
1
Installation is only possible on the rear side. Cable routing is restricted. Installation of cable
arms at the same height is not possible.
Performing the task
Ê Install the PDU brackets as described on page 71.
Figure 50: 10-way socket strip "Blade PDU" mounted in a 700 mm wide symmetrical rack
Ê Screw the socket strip with 2 screws onto the PDU brackets.
I Installation is possible on both sides.
81
Power Distribution
7.3.2.3
Installation options for 600 mm wide symmetrical racks
Rack height
Installation direction
vertically
Installation direction
horizontally
42 HU
Not possible
Max. 2x with PDU kit 2 HU / 3 HU
24 HU
Not possible
Max. 2x with PDU kit 2 HU / 3 HU
16 HU
Not possible
Max. 2x with PDU kit 2 HU / 3 HU
Table 7: Installation options for 600 mm wide symmetrical racks
Performing the task
Ê Install the socket strips onto the PDU kit 2 HU / 3 HU as described on page 73.
Figure 51: 10-way socket strip "Blade PDU" mounted in a 600 mm wide symmetrical rack
Ê Install the PDU kit 2 HU / 3 HU in the required height into the rack.
I The PDU kit 2 HU / 3 HU may only be mounted from HU 7 upwards.
82
Power Distribution
7.3.3
32 A three-phase 15-way socket strip
Introduction
No. of sockets
10 A
No. of sockets
16 A
Type of plug
Max. current
6x IEC 60320
C13
9x IEC 60320
C19
red 32 A
IEC 60309
(3-phase)
3x 32 A
I For more information, see the configurator:
https://partners.ts.fujitsu.com/com/ordersupply/configurators/primergy_config/Pages/Currentconfigurators.aspx
Figure 52: 32 A three-phase socket strip
Required tools
The following tools are required to perform this task:
– Torx screwdriver
83
Power Distribution
7.3.3.1
Installation options for 700 mm wide asymmetrical racks
Rack height
Installation direction
vertically
Installation direction
horizontally
42 HU
conditionally possible1
Max. 2x with PDU kit 2 HU / 3 HU
24 HU
1
Max. 2x with PDU kit 2 HU / 3 HU
conditionally possible
Table 8: Installation options for asymmetrical racks
1
Installation only possible on the left rear side (front side view). Cable routing is restricted.
Performing the task
Ê Install two PDU brackets as described on page 71.
Figure 53: 32 A three-phase socket strip mounted in a 700 mm wide asymmetrical rack
Ê Screw the socket strip with 2 screws onto the PDU brackets.
84
Power Distribution
7.3.3.2
Installation options for 700 mm wide symmetrical racks
Rack height
Installation direction
vertically
Installation direction
horizontally
42 HU
conditionally possible1
Max. 2x with PDU kit 2 HU / 3 HU
24 HU
1
Max. 2x with PDU kit 2 HU / 3 HU
conditionally possible
Table 9: Installation options for asymmetrical racks
1
Installation is only possible on the rear side. Cable routing is restricted. Installation of cable
arms at the same height is not possible.
Performing the task
Ê Install two PDU brackets as described on page 71.
85
Power Distribution
Figure 54: 32 A three-phase 15-way socket strip mounted in a 700 mm wide symmetrical rack
Ê Install the socket strip with 2 screws onto the PDU brackets.
I Installation is possible on both sides.
86
Power Distribution
7.3.3.3
Installation options for 600 mm wide symmetrical racks
Rack height
Installation direction
vertically
Installation direction
horizontally
42 HU
Not possible
Max. 2x with PDU kit 2 HU / 3 HU
24 HU
Not possible
Max. 2x with PDU kit 2 HU / 3 HU
16 HU
Not possible
Max. 2x with PDU kit 2 HU / 3 HU
Table 10: Installation options for 600 mm wide symmetrical racks
Performing the task
Ê Install the socket strips onto the PDU kit 2 HU / 3 HU as described on page 73.
Figure 55: 32 A three-phase 15-way socket strip mounted in a 600 mm wide symmetrical rack
Ê Install the PDU kit 2 HU / 3 HU in the required height into the rack.
I The PDU kit 2 HU / 3 HU may only be mounted from HU 7 upwards.
87
Power Distribution
7.3.4
Three-phase 24-way socket strip
Introduction
No. of sockets
10 A
No. of sockets
16 A
Type of plug
Max. current
24x IEC 60320
C13
none
red 16 A
IEC 60309
(3-phase)
3x16 A
I For more information, see the configurator:
https://partners.ts.fujitsu.com/com/ordersupply/configurators/primergy_config/Pages/Currentconfigurators.aspx
Figure 56: Three-phase socket strip with 3x8 sockets
Required tools
The following tools are required to perform this task:
– Torx screwdriver
88
Power Distribution
7.3.4.1
Installation options for 700 mm wide asymmetrical racks
Rack height Installation direction
vertically
Installation direction
horizontally
42 HU
2x per side
Max. 2x with PDU kit 2 HU / 3 HU
24 HU
1x per side
Max. 2x with PDU kit 2 HU / 3 HU
Table 11: Installation options for 700 mm wide asymmetrical racks
Performing the task
Ê Install two PDU brackets as described on page 71.
Figure 57: 3-phase socket strip w/ 3x8 sockets mounted 2x in a 700 mm wide asymmetrical rack
Ê Screw the socket strip with 2 screws onto the PDU brackets.
89
Power Distribution
7.3.4.2
Installation options for 700 mm wide symmetrical racks
Rack height Installation direction
vertically
Installation direction
horizontally
42 HU
2x per side
Max. 2x with PDU kit 2 HU / 3 HU
24 HU
1x per side
Max. 2x with PDU kit 2 HU / 3 HU
Table 12: Installation options for 700 mm wide asymmetrical racks
Performing the task
Ê Install two PDU brackets as described on page 71.
90
Power Distribution
Figure 58: 3-phase socket strip w/ 3x8 sockets mounted 2x in a 700 mm wide symmetrical rack
Ê Screw the socket strip with 2 screws each onto the PDU brackets.
I Installation is possible on both sides.
91
Power Distribution
7.3.4.3
Installation options for 600 mm wide symmetrical racks
Rack height
Installation direction
vertically
Installation direction
horizontally
42 HU
Not possible
Max. 2x with PDU kit 2 HU / 3 HU
24 HU
Not possible
Max. 2x with PDU kit 2 HU / 3 HU
16 HU
Not possible
Max. 2x with PDU kit 2 HU / 3 HU
Table 13: Installation options for 600 mm wide symmetrical racks
Performing the task
Ê Install the socket strips onto the PDU kit 2 HU / 3 HU as described on page 73.
Figure 59: 3-phase socket strip w/ 3x8 sockets mounted on the left side of the PDU kit 2 HU /
3 HU
Ê Install the PDU kit 2 HU / 3 HU into the rack at the desired height.
I The PDU kit 2 HU/3 HU has to be installed from HU 7 upwards.
92
Power Distribution
7.3.5
Single-phase 8-way socket strip and assembly
Introduction
No. of sockets
10 A
No. of sockets
16 A
Type of plug
Max. current
8x IEC 60320
C13
none
blue 32 A
IEC 60309
32 A
I For more information, see the configurator:
https://partners.ts.fujitsu.com/com/ordersupply/configurators/primergy_config/Pages/Currentconfigurators.aspx
Figure 60: Single-phase 8-way socket strip with 32 A IEC 60309 plug
Required tools
The following tools are required to perform this task:
– Torx screwdriver
93
Power Distribution
7.3.5.1
Installation options for 700 mm wide asymmetrical racks
Rack height
Installation direction
vertically
Installation direction
horizontally
42 HU
4x
Max. 4x with PDU kit 2 HU / 3 HU
24 HU
4x
Max. 4x with PDU kit 2 HU / 3 HU
Table 14: Installation options for 700 mm wide asymmetrical racks
Performing the task
Ê Install two PDU brackets as described on page 71.
Figure 61: Single-phase 8-way 10 A socket strip mounted in a 700 mm wide asymmetrical rack
Ê Screw the socket strip with 2 screws onto the PDU brackets.
94
Power Distribution
7.3.5.2
Installation options for 700 mm wide symmetrical racks
Rack height
Installation direction
vertically
Installation direction
horizontally
42 HU
4x
Max. 4x with PDU kit 2 HU / 3 HU
24 HU
4x
Max. 4x with PDU kit 2 HU / 3 HU
Table 15: Installation options for 700 mm wide asymmetrical racks
Performing the task
Ê Install two PDU brackets as described on page 71.
Figure 62: Single-phase 8-way socket strip mounted 2x in a 700 mm wide symmetrical rack
Ê Screw the socket strip with 2 screws onto the PDU brackets.
I Installation is possible on both sides.
95
Power Distribution
7.3.5.3
Installation options for 600 mm wide symmetrical racks
Rack height
Installation direction
vertically
Installation direction
horizontally
42 HU
Not possible
Max. 4x with PDU kit 2 HU / 3 HU
24 HU
Not possible
Max. 4x with PDU kit 2 HU / 3 HU
16 HU
Not possible
Max. 4x with PDU kit 2 HU / 3 HU
Table 16: Installation options for 600 mm wide symmetrical racks
Performing the task
Ê Install the socket strips onto the PDU kit 2 HU / 3 HU as described on page 73.
Figure 63: Single-phase 8-way 10 A socket strip mounted in a 600 mm wide symmetrical rack
Ê Install the PDU kit 2 HU / 3 HU into the rack at the desired height.
I The PDU kit 2 HU / 3 HU has to be installed from HU 7 upwards.
96
Power Distribution
7.3.6
Single-phase 10-way socket strip and assembly
Introduction
No. of sockets
10 A
No. of sockets
16 A
Type of plug
Max. current
10x IEC 60320
C13
none
blue 16 A
IEC 60309
16 A
10x IEC 60320
C13
none
16 A NEMA L 6-30
16 A
10x IEC 60320
C13
none
16 A IEC 60320
C20 for UPS units
16 A
I For more information, see the configurator:
https://partners.ts.fujitsu.com/com/ordersupply/configurators/primergy_config/Pages/Currentconfigurators.aspx
Figure 64: Single-phase 10-way socket strip with IEC 60309 plug
97
Power Distribution
Figure 65: Single-phase 10-way socket strip with NEMA L6-30 plug
Figure 66: Single-phase 10-way socket strip with C20 plug for UPS units
98
Power Distribution
7.3.6.1
Installation options for 700 mm wide asymmetrical racks
Rack height
Installation direction
vertically
Installation direction
horizontally
42 HU
ok
ok
24 HU
ok
ok
Table 17: Installation options for 700 mm wide asymmetrical racks
Performing the task
Ê Install the PDU brackets as described on page 71.
Figure 67: Single-phase 10-way socket strip mounted in a 700 mm wide asymmetrical rack
Ê Screw each socket strip with 2 screws onto the PDU brackets.
99
Power Distribution
7.3.6.2
Installation options for 700 mm wide symmetrical racks
Rack height Installation direction
vertically
Installation direction
horizontally
42 HU
2x
ok
24 HU
ok
ok
Table 18: Installation options for 700 mm wide symmetrical racks
Performing the task
Ê Install the PDU brackets as described on page 71.
Figure 68: Single-phase 10-way socket strip mounted in a 700 mm wide symmetrical rack
Ê Screw each socket strip with 2 screws onto the PDU brackets.
I Installation is possible on both sides.
100
Power Distribution
7.3.6.3
Installation options for 600 mm wide symmetrical racks
Rack height
Installation direction
vertically
Installation direction
horizontally
42 HU
Not possible
Max. 4x with PDU kit 2 HU / 3 HU
24 HU
Not possible
Max. 4x with PDU kit 2 HU / 3 HU
16 HU
Not possible
Max. 4x with PDU kit 2 HU / 3 HU
Table 19: Installation options for 600 mm wide symmetrical racks
Performing the task
Ê Install the socket strips onto the PDU kit 2 HU / 3 HU as described on page 73.
Figure 69: Single-phase 10-way socket strip mounted in a 600 mm wide symmetrical rack
Ê Install the PDU kit 2 HU / 3 HU into the rack on the desired height.
I The PDU kit 2 HU / 3 HU has to be installed from HU 7 upwards.
101
Power Distribution
7.3.7
Socket strip extension 3 safety plugs and
assembly
Introduction
No. of C13-type
sockets
No. of safety
sockets
Type of plug
Max. current
None
3
Safety socket
(C13)
10 A
I For more information, see the configurator:
https://partners.ts.fujitsu.com/com/ordersupply/configurators/primergy_config/Pages/Currentconfigurators.aspx
Figure 70: Socket strip extension 3 safety plugs and assembly
Required tools
The following tools are required to perform this task:
– Torx screwdriver
102
Power Distribution
7.3.7.1
Installation options for 700 mm wide asymmetrical racks
Rack height Installation direction
vertically
Installation direction
horizontally
42 HU
ok
Max. 4x with PDU kit 2 HU / 3 HU
24 HU
ok
Max. 4x with PDU kit 2 HU / 3 HU
Table 20: Installation options for 700 mm wide asymmetrical racks
Performing the task
Ê Install the PDU brackets as described on page 71.
Figure 71: Socket strip extension 3 safety plugs and assembly mounted 2x in a 700 mm wide
asymmetrical rack
Ê Screw the socket strips with 2 screws each onto the PDU brackets.
103
Power Distribution
7.3.7.2
Installation options for 700 mm wide symmetrical racks
Rack height Installation direction
vertically
Installation direction
horizontally
42 HU
ok
Max. 4x with PDU kit 2 HU / 3 HU
24 HU
ok
Max. 4x with PDU kit 2 HU / 3 HU
Table 21: Installation options for 700 mm wide symmetrical racks
Performing the task
Ê Install the PDU brackets as described on page 71.
Figure 72: Socket strip extension 3 safety plugs and assembly mounted in a 700 mm wide
symmetrical rack
Ê Screw the socket strips with 2 screws each onto the PDU brackets.
104
Power Distribution
7.3.7.3
Installation options for 600 mm wide symmetrical racks
Rack height Installation direction
vertically
Installation direction
horizontally
42 HU
Not possible
Max. 4x with PDU kit 2 HU / 3 HU
24 HU
Not possible
Max. 4x with PDU kit 2 HU / 3 HU
16 HU
Not possible
Max. 4x with PDU kit 2 HU / 3 HU
Table 22: Installation options for 600 mm wide symmetrical racks
Performing the task
Ê Install the socket strips onto the PDU kit 2 HU / 3 HU as described on
page 73.
Figure 73: Socket strip extension 3 safety plugs and assembly mounted in a 600 mm wide
symmetrical rack
Ê Install the PDU kit 2 HU / 3 HU into the rack on the desired height.
I The PDU kit 2 HU / 3 HU has to be installed from HU 7 upwards.
105
Power Distribution
7.3.8
Single-phase 4+1-way socket strip and assembly
Introduction
No. of C13-type
sockets
No. of safety
sockets
Type of plug
Max. current
4x
1x
safety plug
10 A
I For more information, see the configurator:
https://partners.ts.fujitsu.com/com/ordersupply/configurators/primergy_config/Pages/Currentconfigurators.aspx
Figure 74: Single-phase socket strip with 5 plugs and assembly
Required tools
The following tools are required to perform this task:
– Torx screwdriver
106
Power Distribution
7.3.8.1
Installation options for 700 mm wide asymmetrical racks
Rack height Installation direction
vertically
Installation direction
horizontally
42 HU
ok
Not mountable with PDU kit 2 HU /
3 HU
24 HU
ok
Not mountable with PDU kit 2 HU /
3 HU
Table 23: Installation options for 700 mm wide asymmetrical racks
Performing the task
Ê Install the PDU brackets as described on page 71.
Figure 75: Single-phase socket strip with 4+1plugs and assembly mounted in a 700 mm wide
asymmetrical rack
Ê Screw the socket strip with 2 screws onto the PDU brackets.
107
Power Distribution
7.3.8.2
Installation options for 700 mm wide symmetrical racks
Rack height Installation direction
vertically
Installation direction
horizontally
42 HU
ok
Not mountable with PDU kit 2 HU /
3 HU
24 HU
ok
Not mountable with PDU kit 2 HU /
3 HU
Table 24: Installation options for 700 mm wide asymmetrical racks
Performing the task
Ê Install the PDU brackets as described on page 71.
Figure 76: Socket strip with 4+1plugs and assembly mounted 2x in a 700 mm wide symm. rack
Ê Screw the socket strip with 2 screws onto the PDU brackets.
108
Power Distribution
7.3.8.3
Installation options for 600 mm wide symmetrical racks
I The installation of this socket strip is not possible within this type of rack.
109
Power Distribution
7.4
Connecting to the potential compensating
system
If required by local regulations, the PRIMECENTER M1 19-inch rack can be
connected to the indoor potential-compensating system via the grounding
screw located at the lower left side of the rack chassis (see photo below). This
grounding only protects from external parasitic voltages and does not replace
the protective conductor in the mains feeders.
Figure 77: Grounding screw
110
Power Distribution
7.5
Power Supply via UPS
If uninterruptible power supply (UPS) units are involved in supplying energy to
the rack and its components, the connection conditions described in the
relevant manuals for the integrated rack components should be complied with
in all cases. There are many possible combinations:
●
The rack is supplied completely via the UPS:
In this case the UPS should be connected directly to the mains. In the rack
the rack components are connected directly or optionally via a socket strip
to the UPS.
●
The rack is partly supplied via a UPS:
This gives a choice of connecting the UPS via the socket strip in the rack or
directly to the power supply network. This process also applies if a number
of UPSs are used in the rack.
●
High-power UPSs above 3000 VA:
UPSs above 3000 VA need their own mains connection because of the large
amount of current that they draw. Both fixed connections and connections
using IEC 309-complaint connectors can be used here. The technical
requirements can be taken from EN60950 and from the specifications of the
local utility company.
Online UPSs and line-interactive UPSs are available in different performance
classes. Different UPS types are used preferentially by the various server lines
for the PRIMECENTER M1 19-inch rack. Please refer to the configuration
information for the individual severs.
The power supply can be configured freely depending on the UPSs used. The
input power connector of the respective UPS can be connected either directly
to the mains or to the protective contact socket of the main socket strip in the
rack by using the connection cable supplied with the respective UPS. The rack
components or additional socket strips should be connected to the power
outlets of the respective UPS.
I Note that the increased leakage currents >3.5mA can also flow over UPS
connection cables. The connection cables therefore have to be assigned
uniquely to the device and the strain on the UPS relieved, either using
appropriate strain relief facilities or by routing with suitable cabling, which
requires the assistance of tools to change the cabling.
111
Power Distribution
112
8
Optional accessories
Various accessories are optionally available with the PRIMECENTER M1 19inch rack, including:
– Cable holders
– Cable management systems
– Console switches
– Dummy panels
– Earthing Kit (see page 114)
– Earthquake protection kits (on request)
– Installation flooring
– Connection kit (see page 122)
– Rack installation kits
– Rack console (monitor, keyboard and mouse)
– Uninterruptable power supply
I More information can be found at:
– http://partners.ts.fujitsu.com/primergy (PRIMERGY information on the
Extranet)
– http://www.primergy.com (PRIMERGY information on the Internet)
– For further questions use the following e-mail address:
[email protected]
113
Optional accessories
8.1
Earthing kit
S26361-F4530-L6
Earthing kit for PCR M1 Rack
The earthing kit is used to earth the sidewalls, the cover and the doors
according to VDE 0100 part 540. Cabels to connect all conductive parts to the
designated points are included (see figure below).
Figure 78: Earthing kit as delivered
114
Optional accessories
8.1.1
Preparing the earthing cable
Figure 79: Different parts of the earthing kit
1
Spring Nut
2
Washer
3
Cable eye of the earthing cable
4
Fan-shaped Washer
5
Mounting Screw
6
Cable Clip of the Earthing Cable
8.1.2
Configuring the earthing cable
Take the mounting screw (5) and put the fan-shaped washer (4), the cable eye
of the earthing cable (3) and the washer (2) on it. This "configuration" has to be
screwed into the spring nuts at the designated earthing points on the front door,
the side walls and the top cover.
115
Optional accessories
8.1.3
Installing the earthing kit
The earthing kit has to be installed on the following parts of the rack:
–
–
–
–
at both back doors
at the front door
at the side walls
at the top cover
Installing an earthing cable at the back doors
The installation order is as follows:
Figure 80: Earthing cable mounted at one of the back doors
Ê Install the spring nut (see descripton on page 32) next to the earthing
symbol at the rack frame (see right close-up).
Ê Screw the "earthing cable configuration" (see page 115) onto the spring nut
(see right close-up).
Ê Plug the other end of the earthing cable onto the designated connector on
the door (see left close-up in figure 80 on page 116).
116
Optional accessories
I To remove the earthing cable from the connector you can press on
the plug’s spring.
Proceed in the same way to install the earthing cable at the other back door.
Installing an earthing cable at the front door
The installation order is as follows:
Figure 81: Earthing cable connectors at the front door
Ê Install the spring nut (see descripton on page 32) next to the earthing
symbol at the rack frame (1).
Ê Screw the "earthing cable configuration" (see page 115) onto the spring nut
(1).
Ê Plug the other end of the earthing cable onto the designated connector on
the door (2).
117
Optional accessories
Installing an earthing cable at the side walls
I Remove the side wall at the right side of the 600mm rack as well as of
asymmetrical racks before assembling the earthing cables.
The installation order is as follows:
Figure 82: Opening the side panel lock
Ê Open the side wall lock with the door key1
Ê Open all quarter-turn locks by using the key head or a coin1
Ê Remove the side wall by lifting it up1
1
This step not necessary for the left side wall.
118
Optional accessories
Figure 83: Location of the earth symbol
Ê Identify the earth connection marked with the earth symbol on the right front
profile (see figure above).
Ê Install a spring nut (see description on page 32) near the earth symbol on
the vertical cabinet profile.
Ê Screw the "earthing cable configuration" (see page 115) onto the just
installed spring nut.
Ê If required, reinstall the side wall.
119
Optional accessories
Figure 84: Earthing cable connector at the side walls
Ê Plug the other end of the earthing cable onto the designated connector on
the sidewall (see circle in figure above).
Proceed in the same way with the other side wall.
120
Optional accessories
Installing an earthing cable at the top cover
The installation order is as follows:
Figure 85: Earthing cable connectors at the top cover
Ê Install a spring nut (see descripton on page 32) at the designated point of
the rack frame where the earthing symbol is located (1).
Ê Screw the "earthing cable configuration" (see page 115) onto the spring nut
(see also figure 80 on page 116).
Ê Plug the other end of the earthing cable onto the designated connector on
the top cover (2).
121
Optional accessories
8.2
Connection Kit
S26361-F4530-L225
Rack Connector Kit for PCR M1 Racks
The connection kit allows you to connect rack cabinets together safely and
securely. It contains metal tabs (so-called rack connectors) (1), which are
screwed onto the roof panels to join two rack cabinets together.
8.2.1
Preparing the connection kit
Figure 86: Contents of the connector kit
1
Rack connector (2x)
2
Metal washer (4x)
3
Hex key screw (4x)
4
Plastic washer (4x)
122
Optional accessories
I Before the racks are joined, each rack cabinet should already be set up
according to the instructions and aligned at the same height (see also
"Setting up the PRIMECENTER M1 19-inch rack" on page 27).
Figure 87: Roof screws to be removed
Ê As shown in the figure above, remove the four roof screws (1 - 4) with a 6 mm
Allen key no.10 (included in the rack accessory pack).
123
Optional accessories
8.2.2
Installing the connection kit
Figure 88: Joining the rack cabinets
Ê Take a rack connector, then place a plastic washer, followed by a metal
washer on each of the holes, as shown in the figure above.
Ê Insert the hex key screws through the holes from above to fix the connector
in place.
Ê First fasten the screw in the round hole (on the left in the picture above) with
a 6 mm Allen key no.10.
124
Optional accessories
Figure 89: Fastening the screw in the long hole
Ê Now fasten the screw in the long hole (on the right in the picture above).
I Whilst tightening the screws the two racks may need to be pressed
together by a second person.
Ê Repeat the procedure to attach the second rack connector.
125
Optional accessories
126
9
Appendix
In this chapter you can find additional information on special tasks:
– Door conversion
9.1
Door conversion
On the following pages you will find the description for door conversion.
127
Appendix
128