1
Option Suffix Code
/RET
/RS
/HBA
/ALM2
/ALM3
/ALM4
Thank you for purchasing Samwontech production. Please use after read instruction manual
for safety. Free to contact to our sales Div. for Production Inquiry and After Service.
FAX : +82-32-326-9119
Tel : +82-32-326-9120
E-mail : [email protected]
http://www.samwontech.com
Ex) Order Suffix Code : ST340
- Used in switching
between parameters or
registering parameter
settings.
- Pressing SET/ENT Key
at least 3 sec. switches
between an operating
display and an operating
parameter setting display
+ Option
- Used to change the value of
parameters.
- Used to move between GROUP
3
J
-199.9∼999.9
-300∼2300
TC.J
1
4
E
-199.9∼999.9
-300∼1800
TC.E
2
5
T
-199.9∼400.0
-300∼750
TC.T
-199.9∼999.9
0∼2300
0∼1700
R
TC.K2
No.
K2
TC.R
32∼3100
T/C
TC.B
7
B
0∼1800
32∼3300
8
S
0∼1700
32∼3100
TC.S
9
L
-199.9∼900.0
-300∼1600
TC.L
Type
Absolute-Value
Upper-Limit Alarm
Absolute-Value
Lower-Limit Alarm
Upper-Limit Alarm
of Deviation
Lower-Limit Alarm
of Deviation
Upper-Limit Alarm
of Deviation
Lower-Limit Alarm
of Deviation
3
4
5
6
Upper-and-LowerLimit alarm of
Deviation
7
○
○
AH.F
11
○
○
AL.F
12
○
○
DH.F
13
○
○
DL.F
14
-300∼2400
TC.N
10
11
U
-199.9∼400.0
-300∼750
TC.U
21
Soak
12
W
0∼2300
32∼4200
TC.W
* In case of HBA Option
8
13
Platinel Ⅱ
0∼1390
32∼2500
TC.PL
14
PtA
-199.9∼850.0
-300∼1560
PTA
15
PtB
-199.9∼500.0
-199.9∼999.9
PTB
16
PtC
-150.0∼150.0
-199.9∼300.0
17
JPtA
-199.9∼500.0
-199.9∼999.9
JPTA
18
JPtB
-150.0∼150.0
-199.9∼300.0
JPTB
19
0.4∼2.0V
0.400∼2.000V
20
1∼5V
1∼5V
0∼10V
RTD
D.DV, D.PV
OFF, ON
0.1 ~ 10.0
0.0 ~ 999.9%
OFF, 1 ~ 6000 sec
OFF, 1 ~ 6000 sec
-5.0 ~ 105.0%
2V
5V
22
-10∼20mV
-10∼20mV
23
0∼100mV
0∼100mV
20M
Base Suffix Code
Model
Base Suffix Code
ST320 / 340 / 360 / 370 / 380 / 390
Description
Digital Controller
S
A
R
Control Output
SSR
AOUT(SCR)
RELAY
100 ~ 240V AC
24V DC(preparing)
0
1
Power
15
DL.R
16
○
DO.F
17
○
DI.F
18
○
○
AH.R
19
○
○
AL.R
20
Soak
22
○
○
Absolute-Value
Upper-Limit Alarm
Absolute-Value
Lower-Limit Alarm
Upper-Limit Alarm
of Deviation
Lower-Limit Alarm
of Deviation
Upper-Limit Alarm
of Deviation
Lower-Limit Alarm
of Deviation
Upper-and-LowerLimit alarm of
Deviation
Upper-and-LowerLimit Range of
Deviation
Absolute-Value
Upper-Limit Alarm
Absolute-Value
Lower-Limit Alarm
Lower-Limit Alarm
of HBA *
Off
On
Display
Data
○
○
AH.FS
○
○
AL.FS
○
○
DH.FS
○
○
DL.FS
○
○
DH.RS
○
○
DL.RS
○
DO.FS
○
AbsoluteValue
LowerLimit Alarm
Upper-andLowerLimit
Range of
Deviation
PV
▲
ALM
◀OFF
◀ON
DB
PV
▲
ALM
OFF▶
LowerLimit Alarm
of
Deviation
DEV
-
HBA
DB
+
▲
ALM.H
+
OFF▶
+
OFF▶
◀OFF
NSP
D.SLP Operation
SKDV
TSP
TSP
NSP
Operation
Display-1 : Initial
display after
power on
Operation
Display-2 :
Output Control
Display
G.AT
G.SUB
ENT
AT
AT.BS
When User
Screen is
registered
ENT
A/M
US1
US2
U.SLP
D.SLP
SKDV
SPRH
SPRL
▲▼
G.PID
ENT
ARW
C.MOD
FUZY
AT-G
P
I
D
MR
*
ENT
When User
Screen is
registered
ENT 3 sec or NO KEY 60 sec
: OPTION
*
: I=0
**
: ON/OFF operation
※ Operation in Power ON
- Start in Operation MODE
before Power OFF
※ AUTO Operation MODE
- Start Control from PO
※ ST320 : ALM2 OPTION
PWD
G.CTL
ENT
LOCK
DSP.H
DSP.L
U.PWD
ONOF
INIT
▲▼
G.IN
ENT
IN-T
IN-U
IN.RH
IN.RL
IN.DP
IN.SH
IN.SL
IN.FL
BSL
BS
RSL
▲▼
G.OUT
ENT
O.ACT
CT
OH
OL
HYS.H **
HYS.L **
PO
▲▼
G.ALM
ENT
ALT1
AL-1
AL1.H
AL1.L
A1DB
A1DY
ALT2
AL-2
AL2.H
AL2.L
A2DB
A2DY
ALT3
AL-3
AL3.H
AL3.L
A3DB
A3DY
ALT4
AL-4
AL4.H
AL4.L
A4DB
A4DY
▲▼
G.HBA
ENT
HBCS
HBCD
HBDB
▲▼
G.RET
ENT
RET
RETH
RETL
Always
Initial
TC.K1
℃
Remark
Always
T/C, RTD
Setting Range
Unit
refer to “Type of Input Sensor ” ABS
℃, ℉
ABS
refer to “Type of Input Sensor”
However, INRH > INRL
EU
EU(100%)
Always
EU
EU(0.0%)
Always
0~3
ABS
1
mV, V
100.0
mV, V
Within -1999∼9999
however, INSH > INSL
The Decimal Point Position is relay on
the value of IN.DP
OFF, 1 ~ 120
ABS
0.0
mV, V
OFF
UP
ABS (DCV=OFF)
0
ABS
TC.RJ
ABS
Always
Remark
sec
Always
Always
T/C
Always
sec
2 sec
Output=
SSR,RLY
OH
High-Limit value
of Output
Low-Limit value
of Output
OL + 1Digit ~ 105.0%
(However, OH>OL)
-5.0% ~ OH - 1Digit
(However, OH>OL)
%
100.0%
%
0.0%
HYSTERISYS
HIGH
HYSTERISYS
LOW
Preset Output
Symbol
ALT1
Parameter
Alarm Type 1
Set value of
AL-1
ALT1
Upper-Limit Set
AL1.H
value of ALT1
Low-Limit Set
AL1.L
value of ALT1
A1DB
Alarm 1 Hys
Alarm 1 Operation
Delay Time
Alarm 2 Operation
Delay Time
Alarm 3 Operation
Delay Time
Alarm Type 4
Set value of
AL-4
ALT4
Upper-Limit Set
AL4.H
value of ALT4
Low-Limit Set
AL4.L
value of ALT4
A4DB
Alarm 4 Hys
MENU Display
▲▼
OFF
1 ~ 300 sec
ALT4
Power ON
▲▼
ABS
Cycle Time
A3DY
OFF▶
ON state : ALM OFF in case of change SP.
Operation
Display
Always
Always
CT
Alarm Type 3
Set value of
AL-3
ALT3
Upper-Limit Set
AL3.H
value of ALT3
Low-Limit Set
AL3.L
value of ALT3
A3DB
Alarm 3 Hys
▲
OFF▶
ALM(HBCS)
PV
0
OFF
REV
ALT3
HBCD
SKDV
Always
ABS
ABS
Initial
Alarm Type 2
Set value of
AL-2
ALT2
Upper-Limit Set
AL2.H
value of ALT2
Low-Limit Set
AL2.L
value of ALT2
A2DB
Alarm 2 Hys
DB
SOAK
Max. Value of
Measurement Range
Min. Value of
Measurement Range
ALT2
+
DB
◀ON
PV
EU(-5.0%)
Unit
A2DY
ON▶
Always
EU
ABS
A1DY
▲
ALM.H
▲
ALM.H
OFF, ON
EU EU(105.0%)
Remark
Always
Always(ON/OFF
Mode: SKIP)
Always(ON/OFF
Mode: SKIP)
EUS(0.0 ~ 10.0%)
EUS EUS(0.5%) ON/OFF Mode
EUS(0.0 ~ 10.0%)
EUS EUS(0.5%) ON/OFF Mode
-5.0 ~ 105.0%
%
0.0%
Always
Setting Range
refer to “Type of Alarm”
Unit
ABS
Initial
AH.F
Remark
Always
Not Deviation
Alarm
Deviation
Operation
Deviation
Operation
Always
ALARM GROUP
DB
△
Initial
OFF
REV, FWD
PO
◀ON
U.SLP Operation
Parameter
Key Lock
Display High
Limit
Display Low
Limit
User Password
ON/OFF MODE
Parameter
Initialization
Setting Range
AL.RS
◀ON
▲
ALM.L
◀OFF
Unit
ABS
Always
Always
Always
I=0
Parameter
Reverse and
Forward
○
DEV
▲
- △
SP ALM.L
DEV=0
Setting Range
OFF, ON(No Editing)
EU(-5.0 ~ 105.0%) :
However, DSP.L<DSP.H
EU(-5.0 ~ 105.0%) :
However, DSP.L<DSP.H
0 ~ 9999
OFF, ON
AUTO Operation
OUT GROUP
Symbol
○
DB
ON▶
DB
DEV
-
Always
Always
OFF, UP, DOWN
OL
◀OFF
D.PV
ON
1.0
10.0%
120 sec
30 sec
50.0%
EUS(-100.0 ~ 100.0%)
TC, TC.RJ, RJC
AH.RS
◀ON
△
OFF▶
Always
ABS
ABS
ABS
%
sec
sec
%
Bias Value
RJC SEL
○
ON▶
DEV=0
▲
ALM.L
Remark
100.0%
BOUT SEL
○
ON▶
DB
Initial
%
BS
RSL
O.ACT
○
DEV
- △
SP ◀OFF
Unit
BSL
IN.SL
DI.FS
◀ON
LowerLimit
Alarm of
HBA
Parameter Map
UpperLimit Alarm
of
Deviation
DB
Always
IN.FL
IN.SH
○
○
EU(0.0%)
Decimal Point
Position
Max Value
of Input Scale
Min Value
of Input Scale
PV Filter
IN.DP
HYS.L
ON▶
mV
100M
DH.R
○
Type
Standby
Alarm Operation
Upper-andLowerLimit alarm
of
Deviation
10V
0∼10V
○
○
Output
Direct
For Rev
HYS.H
AbsoluteValue
UpperLimit Alarm
PTC
DCV
9
On
Display
No.
Data
○
○
-200∼1300
US.2
Auto(0.0) ~ 200.0%
Symbol
Parameter
IN-T
Input Type
IN-U Display Range
Off
N
US.1
Setting Range
ARW
IN.RL
10
ENT
Symbol
IN.RH
Upper-and-LowerLimit Range of
Deviation
Absolute-Value
Upper-Limit Alarm
Absolute-Value
Lower-Limit Alarm
PV Value
OUT Value
Always
EU
Set Point
Range High
Set Point
Range Low
IN GROUP
Type of Alarm
Standby
Always
EU EU(100.0%)
INIT
Output
Direct
For Rev
Always
OFF(0)
EU(0.0 ~ 100.0%)
U.PWD
ONOF
● Safety : EN61010-1, UL61010C-1, CAN/CSA·C22.2 No.10101-92, Category Ⅱ
TC.K1
-300∼2500
OFF(0)
OFF, D-Register Number(1~1299)
EU(0.0 ~ 100.0%)
DSP.H
● CT Spec : use CTL-6-S or 800:1 CT
Safety & EMC
DISP
OFF(0),
EUS(0.0%+1digit ~ 100.0%)/min EUS
OFF(0),
EUS(0.0%+1digit ~ 100.0%)/min EUS
OFF, D-Register Number(1~1299)
CTL GROUP
105%
Group
Temp.Range(°F)
Remark
Always
Always
Always
When select
ALM=SOAK
Symbol
LOCK
● EMC : EMI(Emission) - EN61326, ClassA
EMS(Immunity) - EN61326
Temp.Range(℃)
Initial
AUTO
OFF
OFF
◎ P.I.D GROUP is skipped in ON/OFF MODE operation.
*note5 : ST320 - STD 1 Point / ST320, 340, 360, 380 - Max 2 Points
*note6 : In case of HBA Option - 22 Types
Used when
shifting position
to modify value
Unit
ABS
ABS
ABS
EUS EUS(0.0%)
Parameter
Anti-Reset
Wind-Up Select
C.MOD Control Mode
FUZY
Fuzzy
AT-G
AT Gain
Proportional Band
P
I
Integral Time
D
Derivative Time
MR
Manual Reset
● Alarm Capacity : STD 2 Points, Max 4 Points *note5
● Alarm Type : 21 types(High/Low Temp Limit, Deviation Limit etc) *note6
Alarm
Down Slop
Setting Range
AUTO, MAN
P.I.D GROUP
● Type of Input
T/C : K, J, E, T, R, B, S, L, N, U, W, Platinel Ⅱ
RTD : Pt100, JPt100
DCV : -10 ~ 20mV, 0 ~ 100mV, 0.4 ~ 2.0VDC, 1 ~ 5VDC, 0 ~ 10VDC
(4 ~ 20mA, 0 ~ 20mA, with external 250Ω, 500Ω)
● Control Output : 1 Point
● Time-proportional PID : Relay, SSR(V-Pulse)
Continuous PID : SCR(4 ~ 20mADC)
Output
Unit
Initial
Remark
AUTO Operation
ABS
OFF
EUS EUS(0.0%)
Always
EUS(0.0 ~ 10.0%)
SPRL
● PV/SP Data Dispaly : each 4 digits
● Sampling Time : 250ms
● Indication Acuracy : ±0.2% of FS
● Running Mode : AUTO / MAN
● Control Loops and Mode : Single-Loop Control
● Number of Setpoint(SP) : 1SP(1 Zone PID)
● Retransmission Output : 4 ~ 20mADC ( PV, SP, MV ) or Loop power supply
● Communication Protocols : PC-Link, MODBUS(ASCII, RTU), SYNC Master, Slave
● Power Supply and Consumption : 100 ~ 240VAC, 50 ~ 60Hz / Max 6W below
Sensor ● PV Input : Universal Input(1 Point)
2
ENT
Up Slop
DSP.L
-200∼1370
PV Value
SP Value
U.SLP
SPRH
HBA
display range : -5%
K1
Parameter
AUTO, MAN
User Screen
User Screen
SKDV Soak Deviation
Specification
Type of Input Sensor
TYPE
Symbol
A/M
US1
US2
D.SLP
S0 / RS
Base
AT GROUP
Setting Range
Symbol
Parameter
OFF, ON
AT
Auto Tuning
EUS(-10.0 ~ 10.0%)
AT.BS Auto Tuning Bias
◎ AT GROUP is skipped in ON/OFF MODE operation.
SUB GROUP
*note1
*note4 : It’s standard function except ST320
Lights on
during
EVENT
occurs
(fixed ALM)
Lights on when
Control Output occur
21
Remark
*note1
*note1
*note1, *note3
*note2, *note4
*note3 : It can’t install with AOUT
Control Keys and Display
Lights on when
Manual Mode
operates. or, LED
blinking during
AUTO-TUNING
process.
6
Available Model
ALL
ALL
Except ST320
Only ST320
ST390 / ST370
ST390 / ST370
*note2 : RET, ALM2 to be purchased separately
Safety Guide
1
Description
Retransmission
RS 485
Heater Break Alarm
RELAY Output 1 Point
RELAY Output 1 Point
RELAY Output 1 Point
*note1 : RET, RS, HBA, ALM4 to be purchased separately
The following safety symblos are used in this manual.
If this symbol is marked on the product, the operator must investigate the
!
CAUTION explanation given in this manual to protect injury or death to personnel or
damage to instrument.
1. Be sure to operate the controller installed on a panel to prevent electric shock.
!
2. Keep the input circuit wiring as far as possible away from power and ground
CAUTION
circuit.
3. Do not mount front panel facing downward.
4. To prevent electric shock, be sure to turn off and the source circuit breaker
before wiring.
5. The power consumptions are 100-240VAC, 50/60Hz, 10VAmax and operate
without power switching in advance.
6. No work in wet hands( it caused electric shock )
7. Refer the way of grounding connection, however, keep away for grounding to
Gas pipe, water pipe, lightening rod etc.
8. No magnetic disturbances are caused.
No.
PARAMETER Table
Option Suffix Code
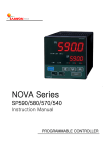
NOVA 300 SERIES
DIGITAL CONTROLLER
ST390/380/370/360/340/320
Instruction Manual
G.COM
ENT
COM.P
BAUD
PRTY
SBIT
DLEN
ADDR
RP.TM
RBS
SPSL
EU(-100.0 ~ 100.0%)
EU EU(100.0%)
EUS(-100.0 ~ 100.0%)
EUS EUS(0.0%)
EUS(-100.0 ~ 100.0%)
EUS EUS(0.0%)
EUS(0.0 ~ 100.0%)
0.00~99.59(MM.SS)
ALT1-HH:MM in case of Soak
refer to “Type of Alarm”
EU(-100.0 ~ 100.0%)
EUS(-100.0 ~ 100.0%)
EUS(-100.0 ~ 100.0%)
EUS(0.0 ~ 100.0%)
0.00~99.59(MM.SS)
ALT2-HH:MM in case of Soak
refer to “Type of Alarm”
EUS EUS(0.5%)
TIME
0.00
ABS
AH.F
Always
Always
Not Deviation
Alarm
Deviation
EUS EUS(0.0%)
Operation
Deviation
EUS EUS(0.0%)
Operation
EUS EUS(0.5%)
Always
EU EU(100.0%)
TIME
0.00
Always
ABS
AH.F
Option
EU(-100.0 ~ 100.0%)
EU EU(100.0%)
Option
EUS(-100.0 ~ 100.0%)
EUS EUS(0.0%)
Option
EUS(-100.0 ~ 100.0%)
EUS EUS(0.0%)
Option
EUS(0.0 ~ 100.0%)
0.00~99.59(MM.SS)
ALT3-HH:MM in case of Soak
refer to “Type of Alarm”
EUS EUS(0.5%)
Option
TIME
0.00
Option
ABS
AH.F
Option
EU(-100.0 ~ 100.0%)
EU EU(100.0%)
Option
EUS(-100.0 ~ 100.0%)
EUS EUS(0.0%)
Option
EUS(-100.0 ~ 100.0%)
EUS EUS(0.0%)
Option
EUS EUS(0.5%)
Option
TIME
0.00
Option
EUS(0.0 ~ 100.0%)
Alarm 4 Operation
0.00~99.59(MM.SS)
A4DY
Delay Time
ALT4-HH:MM in case of Soak
◎ ALM3,4=ST320, 340, 360, 380 : can’t use.
HBA GROUP
Symbol
Setting Range
Unit
Initial
Remark
HBCS
OFF, 1 ~ 50A
ABS
OFF
Option
DISPLAY ONLY
ABS
INRH
Option
0 ~ 10A
ABS
1
Option
Remark
Option
Parameter
Heater Break
Current Set
Heater Break
HBCD
Current Display
Heater Break
HBDB
Current DB
TRANS GROUP
Symbol
RET
Parameter
Select RET
Setting Range
LPS, PV, SP, MV
Unit
ABS
Initial
PV
RETH
High-Limited Value of
Retransmission
INRH
Low-Limited Value of
Retransmission
T/C, RTD : INRH ~ INRL
mV, V : INSH ~ INSL
However, RETH > RETL
EU
RETL
EU
INRL
When select
RET=PV, SP
Unit
Initial
Remark
ABS
PCC0
Option
COMM GROUP
Symbol
COM.P
BAUD
PRTY
SBIT
DLEN
ADDR
RP.TM
RBS
SPSL
Parameter
Communication
Protocol
Baud Rate
Parity
Stop Bit
Data Length
Address
Response Time
Remote Bias
SP SELECT
Setting Range
PCC0, PCC1, MBSA
MBSR, Sync.M, Sync.S
600, 1200, 2400. 4800, 9600, 19.2K
None, Even, Odd
1, 2
7,8(SKIP in MODBUS)
1 ∼ 99(Max 31 can connect)
0 ~ 10(x10ms)
EUS(-100.0~100.0%)
LSP, RSP
9600
ABS
ABS
None
1
ABS
8
ABS
1
ABS
0
ABS
EUS EUS(0.0%)
ABS
LSP
Option
Option
Option
Option
Option
Option
Sync.S
Option
Power Cable Connection
■ Use Vinyl insulation wire 0.9~2.0㎟ (Allowed Rating Voltage
300V max) or higher leveled cable for power cable connection.
L
RLY_NO
Be sure to keep L(Hot) and N(neutral) status connection.
Otherwise, it may result for operation default and defect.
!
CAUTION
Φ5.8㎜ or less
N
Terminal Specification
Use M3.5 screw-compatible crimp-on terminals with insulating
sleeve as shown below.
CAUTION
2. DC VOLTAGE INPUT
SHIELD
SHIELD
b
RTD
■ Recommended CR FILTER
▶ Seong Hoo Electronics
▶ HANA PARTS CO.
▶ Songmi Electric Co.,Ltd.
▶ Jiwol Electric Co.,Ltd.
▶ Shinyoug Communications Co.,Ltd.
-
-
R
NOVA300
NOVA300
NOVA300
Class 3 Ground
Class 3 Ground
+
DCmA
R
Class 3 Ground
2. RET
Actuator
+
OUT1+
-
OUT1-
CAUTION
SHIELD
Receiver
(Recorder
etc)
NOVA300
Class 3 Ground
SCR : 4∼20mADC, 600Ω max
SSR : 12VDC min, 600Ω min
+
RET+
-
RET-
R
DIODE
CR FILTER
Display Error and Correction
NOVA300
Class 3 Ground
To prevent electric shock, be sure to turn off the NOVA300 controller and the source circuit
breaker before connection/disconnection of the actuator, receiver as well as wiring.
!
Display
ERROR
ERROR Contents
Correction
E.SYS
EEPROM, DATA Loss
Ask repair
E.RJC
RJC SENSOR Failure
Ask repair
Communication Failure
Comm Cable
CHECK
S.OPN
SENSOR Open
SENSOR CHECK
E.AT
AT Time Out (27h over)
PROCESS
CHECK
Flash Decimal
point of SP
CAUTION
Terminal Arrangement and External wiring
ST390
HBA
RET
12
ALM2
13
RS485
HBA
RET
ALARM
RS485
HBA
21
ALM3
RTX+ 15
15
+ 15
15
ALM3
RTX+ 11
11
+ 11
- 22
22
COM
RTX- 16
16
- 16
16
COM
RTX- 12
12
- 12
4~20mA DC * Contact Rating
250V AC 1A
/30V DC 1A
MAX: 19.2Kbps
TC INPUT
1
2
3
4
5
21
22
23
24
mV/V INPUT
2 +
2 +
3 -
3 -
RTD INPUT
ALARM
1 A
8
ALM1
2 b+
9
ALM2
3 B-
10
4~20mA DC * Contact Rating
250V AC 1A
/30V DC 1A
8
9
10
11
12
COM
TC INPUT
1
2
3
4
5
15
16
17
18
MAX: 19.2Kbps
mV/V INPUT
RTD INPUT
ALARM
2 +
2 +
1 A
6
ALM1
2 b+
7
ALM2
3 -
3 -
3 B-
8
* Contact Rating
250V AC 1A
/30V DC 1A
N
L
100~240V AC
(50/60Hz)
HBA
ALARM
23
23
ALM3
ALM4
24
24
COM
* Contact Rating
250V AC 1A
/30V DC 1A
POWER
RELAY
+ 4
4
NO
- 5
- 5
5
COM
11
12
SSR
N
L
100~240V AC
(50/60Hz)
4~20mA DC * Contact Rating
250V AC 1A
/30V DC 1A
HBA
ALARM
17
17
ALM3
ALM4
18
18
COM
* Contact Rating
250V AC 1A
/30V DC 1A
※ HBA, RET to be purchased separately
ST380
mV/V INPUT
2 +
2 +
3 -
3 -
RTD INPUT
SSR
1 A
2 b+
6
7
8
9
10
COM
RTX+ 21
21
+ 21
22
RTX- 22
MAX: 19.2Kbps
ALARM
RET
- 22
11
ALM1
ALM2
13
COM
14
15
* Contact Rating
250V AC 1A
/30V DC 1A
4~20mA DC
+ 4
+ 4
4
NO
- 5
- 5
5
COM
ST380
ST370
3 -
3 -
RTD INPUT
1 A
2 b+
N
9
3 B-
L
10
100~240V AC
(50/60Hz)
4~20mA DC * Contact Rating
250V AC 1A
/30V DC 1A
SCR
RELAY
HBA
+ 4
+ 4
4
NO
13
- 5
- 5
5
COM
14
Voltage
Pulse
※ HBA, RET to be purchased separately
4~20mA DC * Contact Rating
250V AC 1A
/30V DC 1A
※ HBA, RET to be purchased separately
ST320
SCR
RELAY
RS485
+ 4
+ 4
4
NO
RTX+ 9
- 5
- 5
5
COM
RTX- 10
Voltage
Pulse
mV/V INPUT
RTD INPUT
12 +
TC INPUT
12 +
7 8 9 10
ALARM
11
1213
11 A
13 -
13 -
+ 7
7
ALM2
- 8
8
COM
OUT1
HBA
N
1
23
2
L
4~20mA DC * Contact Rating
250V AC 1A
/30V DC 1A
N
L
24
SSR
※ HBA, RET to be purchased separately
+ 3
RELAY
+ 3
3
- 4
Voltage
Pulse
※ ALM2, RET to be purchased separately
ALARM
SCR
- 4
100~240V AC
(50/60Hz)
100~240V AC
(50/60Hz)
13 B-
1 2 3 4 5 6
MAX: 19.2Kbps
4~20mA DC * Contact Rating
250V AC 1A
/30V DC 1A
Dimension and Panel Cutout
ST390
2 +
OUT1
RET
POWER
12
mV/V INPUT
2 +
SSR
POWER
HBA
TC INPUT
1
2
3
4
5
POWER
RELAY
21 22 23 24
1112 13 14 15
RS485
11
12
13
14
12 b+
1 2 3 4 5
3 B-
SCR
Voltage
Pulse
OUT1
TC INPUT
4~20mA DC
OUT1
SCR
+ 4
Voltage
Pulse
D-egister
0604
0605
0606
0607
0608
0609
0610
0611
0612
0613
0614
0615
0616
0617
0618
0651
0652
0653
0661
0662
0663
0664
0665
0666
0667
0668
0669
* Contact Rating
250V AC 1A
/30V DC 1A
OUT1
SSR
Parameter
IN.RL
IN.DP
BIAS
IN.SH
IN.SL
IN.FL
BSL
O.ACT
CT
OH
OL
HYS.H
HYS.L
PO
RSL
RET
RETH
RETL
COM.P
BAUD
PRTY
SBIT
DLEN
ADDR
RP.TM
RBS
SPSL
RET
+ 21
COM
ST360
D-egister
0407
0408
0409
0411
0412
0413
0414
0416
0417
0418
0419
0421
0422
0423
0424
0426
0427
0428
0429
0501
0502
0503
0504
0505
0506
0507
0601
0602
0603
21
POWER
15
Parameter
AL-2
AL-3
AL-4
AL1.H
AL2.H
AL3.H
AL4.H
AL1.L
AL2.L
AL3.L
AL4.L
A1DB
A2DB
A3DB
A4DB
A1DY
A2DY
A3DY
A4DY
ARW
FUZZY
P
I
D
MR
C.MOD
IN-T
IN-U
IN.RH
ST340
ALARM
* Contact Rating
250V AC 1A
/30V DC 1A
14
D-egister
0001
0002
0006
0014
0105
0121
0122
0135
0136
0201
0203
0204
0205
0206
0207
0208
0211
0212
0216
0217
0218
0301
0302
0303
0401
0402
0403
0404
0406
22
11
12
13
14
15
Terminating
Resistor
Class 3 Ground
RTX- 22
ALARM
ALM1
RTX-
RTX+ 21
MAX: 19.2Kbps
11
RTX-
* Thick Line : READ ONLY
ST370
RS485
RTX-
Parameter
NPV
NSP
MVOUT
ALSTS
A/M
AT
AT-G
US1
US2
SP
LOCK
DSP.H
DSP.L
U.PWD
ONOF
INIT
SPRH
SPRL
U.SLP
D.SLP
SKDV
HBCS
HBCD
HBDB
ALT1
ALT2
ALT3
ALT4
AL-1
External AC
Power
Master
▪ DIODE, CR FILTER
Need to connect direct to RELAY COIL Terminal (SOCKET)
▪ R : RELAY
Rating Specification of RELAY COIL should be used lower than the Contact
Rating of Controller
!
4∼20mADC,
600Ω max
SHIELD
RTX+
D-Registers
2. In case of AC RELAY
ANALOG OUTPUT Connection
1. SSR / SCR
RTX+
■ Up to 31 slave controllers(NOVA300 series instruments equipped with communication
option) can be multidrop-connected.
■ Be sure to connect terminating resistors(220Ω, 1/4W) to slave and master controllers
at communication-channel ends as shown above.
To prevent electric shock, be sure to turn off the NOVA300 controller
!
and source circuit breaker before wiring.
CAUTION
: BSE104R120 25V (0.1μ+120Ω)
: HN2EAC
: CR UNIT 953, 955 etc
: SKV, SKVB etc
: CR-CFS, CR-U etc
1. In case of DC RELAY
External AC
Power
Master
INPUT
SHIELD
+
mV,V
B
INPUT
RTX+
Class 3 Ground
INPUT
A
NOVA300
Controller
SHIELD
■ When using an auxiliary relay or inductance load (L) such as solenoid, be sure to insert
a CR filter(for AC) or diode (for DC) in parallel as a surge-suppressor circuit to reject
sparks, preventing malfunction or damage.
3. DC CURRENT INPUT
NOVA300
Controller
Terminating
Resistor
Use an Auxiliary RELAY
ANALOG INPUT Connection
1. RTD INPUT
CAUTION
NOVA300
Φ3.0㎜ or over
Master Station
To protect electric shock, be sure to turn
off the NOVA300 controller and the
source circuit breaker before wiring.
!
COM
Never touch the terminal in the rear panel to prevent electric shock when
power is supplied to the controller, and Be sure to turn off the electric
power before wiring.
Bind the wires connected to the controller terminals neatly together in
order to prevent electromagnetic wave radiation.
!
Communication Wiring (RS485)
RELAY Connection
4
5
ALM1
6
COM
NO
COM
* Contact Rating
250V AC 1A
/30V DC 1A
4~20mA DC * Contact Rating
250V AC 1A
/30V DC 1A
How to install Mount
ST360
ST340
ST320
ST390
ST370
A
ST360
D
C
F
B
E
MOUNT BLOCK
MOUNT BLOCK
H +0.6
0
Panel Thickness
ST340
ST380
G +0.6
0
1mm~10mm : 390,380,370,360
1mm~ 5mm : 340,320
PANEL
PANEL
PANEL
K +0.6
0
ST320
I*N-J
+2
0
N:the Number of unit
MODEL
A
B
C
D
E
F
G
H
I
J
K
ST390
96
96
11.4
99.6
120
120
92
92
96
4
92
ST380
48
96
11.4
99.6
70
120
45
92
48
3
92
ST370
72
72
11.4
99.6
90
90
68
68
71
3
68
ST360
96
48
11.4
99.6
120
70
92
45
-
-
-
ST340
48
48
11.0
99.6
70
70
45
45
48
3
45
ST320
48
24
3.3
96.7
70
60
45
22.2
48
3
22.2
LATCH
PANEL
MOUNT BLOCK
LATCH
PANEL
1) Cut the mounting panel. (Refer to Dimension and Panel Cutout)
2) Insert the controller into the panel cutout with the rear terminal board facing ahead.
3) Attach the right and left mount and fix it to the panel.(Use driver)