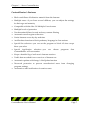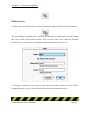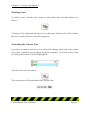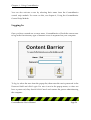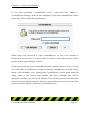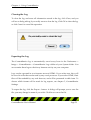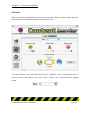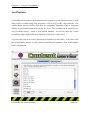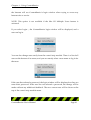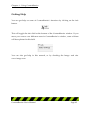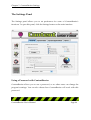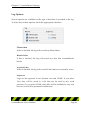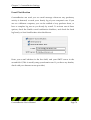
1
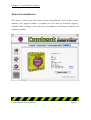
ContentBarrier
User's Manual
ContentBarrier User's Manual
Page 1
ContentBarrier for Macintosh
©2001 - 2002 Intego, Inc. All Rights Reserved
Intego, Inc.
www.intego.com
This manual was written for use with ContentBarrier software for Macintosh. This
manual and the ContentBarrier software described in it are copyrighted, with all
rights reserved. This manual and the ContentBarrier software may not be copied,
except as otherwise provided in your software license or as expressly permitted in
writing by Intego, Inc.
The Software is owned by Intego and its suppliers, and its structure, organization
and code are the valuable trade secrets of Intego and its suppliers. The Software is
protected by United States Copyright Law and International Treaty provisions.
ContentBarrier User's Manual
Page 2
Contents
1- About ContentBarrier .....................................................................................................5
What is ContentBarrier? .............................................................................................................6
ContentBarrier's Features .......................................................................................................................7
2 - Filtering Internet Content .............................................................................................8
A Brave New World.....................................................................................................................9
Types of Internet Content.....................................................................................................................10
Filtering Content....................................................................................................................................10
How You can Help your Children Surf Responsibly.......................................................................11
Filtering Content in Businesses ..............................................................................................12
Optimizing Productivity ......................................................................................................................12
Optimizing Bandwidth.........................................................................................................................12
Protecting Your Company....................................................................................................................13
3 - Installation ...................................................................................................................14
System Requirements ...............................................................................................................15
Installing ContentBarrier .........................................................................................................15
Custom Installation ...................................................................................................................16
Registering ContentBarrier ......................................................................................................17
Uninstalling ContentBarrier ....................................................................................................18
Uninstalling NetUpdate .......................................................................................................................18
4 - Using ContentBarrier...................................................................................................19
Using ContentBarrier ................................................................................................................20
Opening ContentBarrier .......................................................................................................................20
Managing Users..........................................................................................................................22
Mac OS Multiple Users .........................................................................................................................22
Creating New Users ..............................................................................................................................23
Editing Users ..........................................................................................................................................24
Deleting Users ........................................................................................................................................25
Activating the Current User.................................................................................................................25
Logging In ...................................................................................................................................26
Setting User Restrictions ..........................................................................................................28
Filtering Method ....................................................................................................................................28
Using Selected Filters ............................................................................................................................28
Predefined Settings................................................................................................................................29
Saving Filter Sets....................................................................................................................................29
Editing Filter Sets...................................................................................................................................31
Adding Custom Filters..............................................................................................................32
Editing Custom Filters ..........................................................................................................................35
Deleting Custom Filters ........................................................................................................................36
ContentBarrier User's Manual
Page 3
Using Special Sites ....................................................................................................................36
Selecting Special Sites............................................................................................................................ 37
Adding Special Sites..............................................................................................................................38
Removing Special Sites .........................................................................................................................39
Using Special Applications......................................................................................................40
Adding Special Applications ...............................................................................................................41
Removing Special Applications...........................................................................................................41
Internet Access............................................................................................................................42
Setting Time Restrictions ......................................................................................................................43
Redirecting Searches .............................................................................................................................45
Adding Redirection Sites......................................................................................................................46
Removing Redirection Sites .................................................................................................................47
Locking Internet Access........................................................................................................................48
Using the Log..............................................................................................................................49
How the Log works...............................................................................................................................49
Understanding the Log.........................................................................................................................50
Accessing Sites in the Log ....................................................................................................................52
Sorting the Log.......................................................................................................................................52
Clearing the Log.....................................................................................................................................53
Exporting the Log ..................................................................................................................................53
Statistics...................................................................................................................................................54
Clearing Statistics ..................................................................................................................................55
AntiPredator................................................................................................................................56
Adding Filters ........................................................................................................................................57
Editing Filters .........................................................................................................................................58
Deleting Filters .......................................................................................................................................59
Using the ContentBarrier Control Strip Module.................................................................60
Getting Help ...............................................................................................................................62
5 - ContentBarrier Settings...............................................................................................63
The Settings Panel .....................................................................................................................64
Using a Password with ContentBarrier..............................................................................................64
Creating a Password .............................................................................................................................65
Password Options.................................................................................................................................. 66
Log Options ............................................................................................................................................69
E-mail Notification ................................................................................................................................70
Choosing a Startup User.......................................................................................................................71
NetUpdate ..............................................................................................................................................72
Special Sites ................................................................................................................................73
Special Applications..................................................................................................................73
About ContentBarrier................................................................................................................74
6 - Technical Support.........................................................................................................75
7 - Glossary.........................................................................................................................77
ContentBarrier User's Manual
Page 4
Chapter 1 – About ContentBarrier
1- About ContentBarrier
ContentBarrier User's Manual
Page 5
Chapter 1 – About ContentBarrier
What is ContentBarrier?
ContentBarrier is a content control program for the Macintosh, providing functions
for parents and businesses. It is designed to filter and block certain Internet content
according to the settings you choose. ContentBarrier blocks adult web sites, sites
with subjects not fit for children, and even blocks chats when predatory language
is used. It blocks all offensive content coming from the Internet.
ContentBarrier works with multiple users; if you have several children, you can set
different criteria corresponding to their age or maturity. You can choose whether
they have access to newsgroups, e-mail, or whether they can download files. You
can set the program to let them only use the Internet at certain times, and on
certain days. The program can even send you e-mail, automatically, when certain
events occur.
You don’t let your children read just anything, do you? Well, without
ContentBarrier, they can see whatever they want on the Internet, unless you’re
there to watch over their shoulders. With ContentBarrier, the Internet is a safer
place for your children.
ContentBarrier sets up a protective wall around your computer. Its pre-defined
filters let you choose what you don’t want your children to see, and you can create
your own custom filters as well. Inappropriate web sites are blocked, shielding
your children from content they are too young for. You can also choose to allow
access only to sites you select.
ContentBarrier keeps a complete log of all web sites visited, whether blocked or
not. This gives you a full record of your children’s activities on the Internet.
ContentBarrier makes the Internet a safer place for your children.
ContentBarrier User's Manual
Page 6
Chapter 1 – About ContentBarrier
ContentBarrier's Features
•
Blocks and filters all offensive material from the Internet
•
Multiple users—if you have several children, you can adjust the settings
for their age and maturity
•
Compatible with the Mac OS Multiple Users feature
•
Multiple levels of protection
•
Pre-determined filters for safe and easy content filtering
•
Automatic search engine redirection
•
Limits Internet access by day and time
•
AntiPredator function to block predatory language in chat sessions
•
Special Site selection—you can set the program to block all sites except
those you select
•
Special
Application
selection—you
can
choose
programs
that
ContentBarrier will not monitor
•
Keeps a detailed log of each user's Internet sessions
•
Traffic data recorded for an overview of Internet use
•
Automatic updates with Intego's NetUpdate function
•
Password protection to prevent unauthorized users from changing
program settings
•
Automatic e-mail notification of certain events
ContentBarrier User's Manual
Page 7
Chapter 2 – Filtering Internet Content
2 - Filtering Internet
Content
ContentBarrier User's Manual
Page 8
Chapter 2 – Filtering Internet Content
A Brave New World
It’s a brave new world out there on the Internet. A world of information,
entertainment and fun. You can surf the web for hours, going from news sites to
sports sites, from movies to music, but, sooner or later, whether you like it or not,
you will come across the dark underbelly of the Internet. For not all is as it seems.
Sometimes you'll look for something in a search engine and come up with a list of
links that seem to correspond to your search, when, in reality, some of them are
pornography sites, others are hate sites, and some are propaganda for cults.
You may be convinced that the Internet is the library of the future, and you may
want you children to use it for their homework and entertainment, but do you
really want them to see everything that's out there? You don’t let them read just
anything, do you? Well, without ContentBarrier, they can see whatever they want,
unless you’re there to watch over their shoulders. ContentBarrier makes the
Internet a safer place for your children.
The Internet is still young, and, from its earliest days, when it expanded beyond
research laboratories and universities, it has been a kind of frontier land where
anything goes. While this freedom is what gives the Internet its strength, it is also
what makes it dangerous for children.
Some people see the Internet as a huge library, newsstand and bookstore all in one.
This is actually a good metaphor. But when you think about it, you don't give your
children free rein in the library, nor do you let them look at every magazine you
find on your local newsstand. The problem with the Internet is that its very nature,
that of hypertext links from one site to another, means that content inappropriate
for children is often just a mouse click away.
ContentBarrier User's Manual
Page 9
Chapter 2 – Filtering Internet Content
Types of Internet Content
Children use the Internet for many purposes today: to do their homework, to
present creative writing, artwork or photos, to do research for school, to find out
more about their favorite singers or movies, and to communicate with other
children, whether they be next door or in other countries. Many children have their
own home pages, telling their interests and hobbies, and others participate in chats
with their peers around the world.
In most cases, there is nothing dangerous about what they do, but many parents
are concerned about the variety of subject matter that is seen on the Internet.
Content presenting sexually explicit images, violence, gambling, alcohol
advertising, ideological extremism, etc., is easily found, whether accidentally or on
purpose. While parents consider it normal to protect their children from this
content in books and magazines, and count on their local public libraries and
schools to do so, there is no such protection on the Internet.
Add to that the complication of the various national laws in the many countries
accessible via the Internet—while national or local standards may exist in some
areas, controlling such content, other areas may have no legislation at all.
Gambling is legal in many countries, as is pornography in many countries; and, on
the Internet, as we all know, there are no borders.
Filtering Content
While adults have the right to free speech, many parents feel that their children
should have the right to be protected from content that conflicts with their moral
values. While freedom of expression does and should exist, there must be a way to
protect children from content that is inappropriate for their age or maturity.
ContentBarrier User's Manual
Page 10
Chapter 2 – Filtering Internet Content
This inappropriate content can include web sites, chat rooms, newsgroups and
even e-mail. It should be up to parents to decide which of the many Internet
resources their children can access.
The only solution to this problem is to filter Internet content with a program such
as ContentBarrier. This program allows you to choose the specific filters you wish
to filter and the level of filtering applied. You can also choose to allow your
children to access only those trusted sites you enter into the program, for the
highest level of security.
How You can Help your Children Surf Responsibly
The best way to ensure that your children surf responsibly is to stand by their sides
and help them choose what is right for them. But not all parents have the time for
this, and it is essential to allow children to have a certain amount of freedom.
ContentBarrier helps by offering the possibility of filtering the filters you want, or
by allowing access only to trusted sites. But ContentBarrier also keeps a full log of
your children's Internet sessions, so, if you want to give them freedom, you can
check up on them afterwards.
ContentBarrier User's Manual
Page 11
Chapter 2 – Filtering Internet Content
Filtering Content in Businesses
While parents may want to protect their children by filtering Internet content,
business managers may do the same thing to protect their bottom line. The Internet
certainly gives their employees access to an endless source of information, but it
also gives them plenty of chances to waste time. How many employees do their
shopping on the Internet, play network games, send and receive personal e-mail or
download MP3 files, reducing productivity and using valuable network
bandwidth?
ContentBarrier can solve this problem by blocking access to many different types
of sites, and contains specific filters of web sites designed for business use.
Optimizing Productivity
The Internet can help improve employee productivity, by providing the latest
information, but this productivity can drop sharply if employees spend their time
playing games on the Net, checking sports scores or managing their investment
portfolios. Also, your employees might be spending your time looking for a new
job, consulting on-line job sites and sending résumés by e-mail. ContentBarrier
helps you optimize productivity by blocking the sites you choose, such as
shopping, financial or job sites.
Optimizing Bandwidth
Your network bandwidth is valuable. Not only is it expensive, but when you need
to send or receive large files, you need that bandwidth to be free. If your
employees are wasting your bandwidth, by downloading MP3 files, software or
ContentBarrier User's Manual
Page 12
Chapter 2 – Filtering Internet Content
movies, you may find your network clogged. ContentBarrier lets you block access
to FTP servers, and you can also block the download of movies and MP3 files.
Protecting Your Company
If your employees spend their working time surfing sexually explicit sites, this not
only reduces productivity, but it may even expose you to liability for sexual
harassment. Sending private e-mail over your mail server can also expose you to
liability, and even prosecution, since your business is responsible for what
circulates on its network. ContentBarrier lets you selectively block access to
different filters of web sites, so your employees get down to business, all the time.
ContentBarrier User's Manual
Page 13
Chapter 3 – Installation
3 - Installation
ContentBarrier User's Manual
Page 14
Chapter 3 – Installation
System Requirements
•
Any MacOS compatible computer with a PowerPC processor
•
OpenTransport
•
Mac OS 8.6 or higher
•
32 MB RAM
•
5 MB free hard disk space
•
Minimum Screen resolution 800 x 600
Installing ContentBarrier
Installing ContentBarrier is very simple. Insert the ContentBarrier CD-ROM in
your computer's CD-ROM drive. A window will open, containing the
ContentBarrier installer, the Read me file, the ContentBarrier manual (this file) and
an Acrobat Reader installer.
First, read the Read me file, for any late-breaking changes.
Then, double-click on the ContentBarrier installer.
You will see a window displayed containing the ContentBarrier license. Read this
license carefully, and, if you accept it, click Accept.
ContentBarrier User's Manual
Page 15
Chapter 3 – Installation
The following window will be displayed:
Click on Install to install ContentBarrier and NetUpdate. ContentBarrier will be
installed, and a dialog will instruct you to Restart your computer.
Custom Installation
You can perform a custom installation, and have the choice between installing only
ContentBarrier, or only NetUpdate. To do this, select Custom Install from the
installer popup menu, check the appropriate checkbox on the installer screen, then
click Install.
ContentBarrier User's Manual
Page 16
Chapter 3 – Installation
Registering ContentBarrier
When you restart your computer, ContentBarrier displays its Registration window:
You must enter your name, company, if any, and then your serial number. The
serial number is found on a sticker on the ContentBarrier CD; it is made up of four
groups of four characters, and is not case-sensitive.
When registration is completed, ContentBarrier opens its control panel and you
can configure the program.
ContentBarrier User's Manual
Page 17
Chapter 3 – Installation
Uninstalling ContentBarrier
To uninstall ContentBarrier, you cannot merely remove the ContentBarrier control
panel from the Control Panels folder. Open ContentBarrier, then select Uninstall
ContentBarrier... from the File menu. A dialog will be displayed asking you to
confirm that you wish to uninstall the program.
Click OK to uninstall ContentBarrier, or click Cancel to leave it on your computer.
Uninstalling NetUpdate
You can uninstall NetUpdate using the ContentBarrier installer. To do this, launch
the installer, then choose Uninstall from the installer's popup menu. Click
Uninstall, and NetUpdate will be removed from your computer.
ContentBarrier User's Manual
Page 18
Chapter 4 – Using ContentBarrier
4 - Using ContentBarrier
ContentBarrier User's Manual
Page 19
Chapter 4 – Using ContentBarrier
Using ContentBarrier
After you install ContentBarrier, and restart your Macintosh, you will have to
assign one or several users, so it can automatically filter and monitor your
computer's activity. ContentBarrier is designed for multiple users: you can add just
one user, if only one person will be using the computer it is installed on, or as
many users as you want, if the computer will be shared. Bear in mind that each
user's settings are different; you will have to set ContentBarrier to a new user each
time a different person begins using the computer.
However, you can also add a dummy user, which you can leave as a default, if you
want to prevent anyone from accessing the Internet without your permission. You
just need to create a user who has no access to the Internet authorized, and leave
this user active whenever you are not able to come to the computer to change to a
specific user.
Opening ContentBarrier
To add users, change preferences, or carry out any other actions with
ContentBarrier, you need to open the ContentBarrier control panel.
There are three ways to do this. You can select ContentBarrier from the Intego
menu, in the menubar.
ContentBarrier User's Manual
Page 20
Chapter 4 – Using ContentBarrier
Or, you can select Open ContentBarrier from the ContentBarrier Control Strip
Module.
Finally, you can also select the Apple Menu > Control Panels > ContentBarrier.
ContentBarrier will open, and the main screen will be displayed.
ContentBarrier User's Manual
Page 21
Chapter 4 – Using ContentBarrier
Managing Users
Mac OS Multiple Users
IMPORTANT NOTE: if you are using the Mac OS Multiple Users function on
your computer, ContentBarrier integrates seamlessly with this function. If you
wish to create, edit or delete users with ContentBarrier, the Multiple Users control
panel will open, and all your user management will be made there. If you are not
using Multiple Users, user management will be carried out as described in the
following section.
If Multiple Users is activated when you install ContentBarrier, all the user accounts
you have created will automatically be added to ContentBarrier. You can then go
on and choose their settings.
However, if you create users with ContentBarrier, and then activate the Multiple
Users function, you will have to recreate the user accounts in the Multiple Users
control panel. Users cannot be transferred from ContentBarrier to the Multiple
Users control panel; they can only be transferred in the other direction.
Due to a limitation in the Mac OS Multiple Users function, new users must log in
at least once after their creation in order for ContentBarrier to recognize them.
When you create a new user, you should log the user out, then log in again. After
this first login, ContentBarrier will correctly recognize the user.
When deleting users, the Mac OS will ask you if you wish to keep the user's folder.
You must delete this folder, or ContentBarrier will continue to see these users and
maintain accounts for them.
ContentBarrier User's Manual
Page 22
Chapter 4 – Using ContentBarrier
Creating New Users
When you open ContentBarrier for the first time, the New User dialog is displayed.
ContentBarrier needs to have at least one user created in order to function.
To create a new user, enter the user's name in the Name field. (User names can be
up to 31 characters.) If you wish to use a password, check Password Needed and
enter the password in the first Password field, then enter it again in the second
field to confirm it. If you leave these fields blank, there will be no password
protection, and anyone can log in as this user. Click OK, and the user will be
added.
Note: your password must be at least 4 characters and is case-sensitive. This means
that Mypassword and myPassword are not the same.
You can create additional users at any time in the same way. Just click the Add
User button, and the New User dialog will be displayed.
ContentBarrier User's Manual
Page 23
Chapter 4 – Using ContentBarrier
Editing Users
To edit a user, click the user's name to select them, then click the Edit User button.
The User dialog, with the user’s name in the title bar, is displayed: you can change
the user's name and password here. You can also check the Password Needed
check box if you have not yet assigned a password and want to do so.
To change a password, just enter a new password and confirm it. Click OK to
change the password, or click Cancel to leave the old password active.
ContentBarrier User's Manual
Page 24
Chapter 4 – Using ContentBarrier
Deleting Users
To delete a user, click the user's name to select them, then click the Delete User
button.
A dialog will be displayed asking you to confirm this deletion. Click OK to delete
the user, or click Cancel to cancel the operation.
Activating the Current User
If you have created several users, you will need to change which user is the current
user when a different person begins using the computer. To do this, select a user
by clicking their name. It will be highlighted.
Click the Activate User button.
The current user will be specified below the user list.
ContentBarrier User's Manual
Page 25
Chapter 4 – Using ContentBarrier
You can also activate a user by selecting their name from the ContentBarrier
control strip module. For more on this, see chapter 4, Using the ContentBarrier
Control Strip Module.
Logging In
Once you have created one or more users, ContentBarrier will ask the current user
to log in the first time any type of Internet access is requested on your computer.
To log in, select the user from the popup list, then enter the user's password in the
Password field and click Login. If a user is not in the popup menu, or does not
have a password, they should click Cancel and contact the person administering
the computer.
ContentBarrier User's Manual
Page 26
Chapter 4 – Using ContentBarrier
If you have protected ContentBarrier with a password (see chapter 5,
ContentBarrier Settings), and any user attempts to open the ContentBarrier control
panel, they will see the following dialogue:
Either enter your password to open ContentBarrier, or click Lock Internet to
deselect the current user. If a user wishes to connect to the Internet, they will be
greeted with a login dialogue as above.
Using a password to protect ContentBarrier adds a useful function—users can "log
out" when they are finished, by simply choosing ContentBarrier from the Intego
menu in the menubar, or by opening the ContentBarrier control panel from the
Apple menu or the control strip module. The above dialogue box will be
displayed, and they can click Lock Internet. This not only prevents unauthorized
users from accessing the Internet, but also requires that the next user enter their
password when trying to connect to any Internet service.
ContentBarrier User's Manual
Page 27
Chapter 4 – Using ContentBarrier
Setting User Restrictions
Each user can have several types of restrictions, and you can choose exactly which
restrictions you wish to apply. To set user restrictions, first choose which user the
restrictions will apply to by clicking their name.
Filtering Method
ContentBarrier allows you to choose from two filtering methods: you can either
use the filters selected in the filter list, or restrict access only to special sites that
you select. To choose a filtering method, click the appropriate filtering method
checkbox.
Using Selected Filters
To block the current user's access to any of ContentBarrier's predefined filters,
merely click the name of the filter you wish to block. The checkbox will be checked,
indicating that this filter is active for the current user.
ContentBarrier User's Manual
Page 28
Chapter 4 – Using ContentBarrier
Predefined Settings
Several predefined settings are available: All allowed, All forbidden, Default and
Child. If you wish to choose one of these settings, click the Set pop-up menu and
select the setting you want. The Custom setting will be displayed if you have
chosen your own set of filters.
Saving Filter Sets
You can save filter sets, giving a name to a group of selected filters, so you can
easily change from one group of filters to another.
To do this, select a set of filters in the Filter List, then select Save Set from the Set
popup menu.
ContentBarrier User's Manual
Page 29
Chapter 4 – Using ContentBarrier
A dialog is displayed, asking you to enter a name for your Filter Set. Enter the
name you want for this set; it must be at least 4 characters. Click Save to save the
set, or click Cancel if you wish to cancel the operation.
You can now choose this filter set easily, for any user, by selecting it from the popup menu over the filter list.
ContentBarrier User's Manual
Page 30
Chapter 4 – Using ContentBarrier
Editing Filter Sets
If you wish to rename or delete any of your filter sets, select Edit sets from the Set
popup menu.
The Edit sets... window is displayed listing your filter sets.
If you wish to rename or delete one of your filter sets, select the set by clicking it
once, then click the Rename button, to change its name, or the Delete button, to
delete it. Click the Close button when you have finished, to confirm these changes
and close this window.
ContentBarrier User's Manual
Page 31
Chapter 4 – Using ContentBarrier
Adding Custom Filters
ContentBarrier allows you to create your own custom filters. To do this, click the
Edit Custom Filters... button.
The Custom Filter Editor window will be displayed.
ContentBarrier User's Manual
Page 32
Chapter 4 – Using ContentBarrier
To add a new custom filter, click the Add... button. A New Filter window is
displayed.
This window has two sections. The top section, the text field marked Name, is
where you can enter a name for your Custom Filter, which must be at least 4
characters. The bottom section, which contains two headers, String and Action, is
where you can enter your own custom text strings that the program is to look for.
ContentBarrier User's Manual
Page 33
Chapter 4 – Using ContentBarrier
To add a new text string, click the Add button. A new string will be added to the
Strings field.
Enter the text you wish to block or filter in the field at the left, then select Block or
Filter from the pop-up menu at the right. You can add as many strings to your
filter as you wish. When you have finished, click OK. You will see a list of your
filters now in the Custom Filter Editor window.
ContentBarrier User's Manual
Page 34
Chapter 4 – Using ContentBarrier
Click Done to close this window. Your custom filters will appear at the end of the
filter list; scroll to the bottom of the list to see them. They are shown in bold italic
type.
You can activate or deactivate any of your custom filters by clicking their
checkbox.
Editing Custom Filters
To edit any of your custom filters, click the Edit Custom Filters… button.
The Custom Filter Editor window will appear. Click the filter you want to edit,
then click Edit…; the filter window will open. Make any changes you wish, as
described above, then click OK to save the changes, or click Cancel to leave the
filter as it was.
ContentBarrier User's Manual
Page 35
Chapter 4 – Using ContentBarrier
Deleting Custom Filters
To delete any of your custom filters, click the Edit Custom Filters… button.
The Custom Filter Editor window will appear. Click the filter you want to delete
then click Remove; the filter will be deleted. Click Done to close the Custom Filter
Editor window.
Using Special Sites
If you wish to limit access to special sites that you have selected, first choose which
user the restrictions will apply to. Then check the Restrict to special sites checkbox.
Note: If you check Restrict to Special Sites, all sites not in the Special Sites list will
be blocked.
ContentBarrier User's Manual
Page 36
Chapter 4 – Using ContentBarrier
Selecting Special Sites
ContentBarrier allows you to establish your own list of special sites. You can then
restrict user access to these sites, and only these sites, or you can block any specific
sites that you don’t want users to access. To do this, click the Settings button on the
main interface, then the Special Sites tab.
ContentBarrier User's Manual
Page 37
Chapter 4 – Using ContentBarrier
Adding Special Sites
To add a special site, click the Add button. A new line will appear in the Special
Site list.
Enter the URL, or web address, of the special site in the text field.
Next, select the action for this site from the popup menu at the right. You can
choose Always accept or Always reject.
If you choose Always accept, this site will never be blocked. If you choose Always
reject, this site will always be blocked. Note: if Restrict to Special Sites is checked
for the current user, special sites that are set to Always Reject are always blocked,
regardless of the user options selected.
ContentBarrier User's Manual
Page 38
Chapter 4 – Using ContentBarrier
Removing Special Sites
To remove a special site, select it in the Special Site list by clicking its name. The
site will be highlighted.
Click the Remove button. The special site will be removed.
ContentBarrier User's Manual
Page 39
Chapter 4 – Using ContentBarrier
Using Special Applications
You can choose to not monitor certain applications, if you are sure that you can
trust their use. Any applications you add to ContentBarrier’s Special Applications
section will not be monitored, and users will be able to access any content they
wish with these applications. This only affects applications that access the Internet;
you may want to add an e-mail application so ContentBarrier allows users to
access their e-mail while blocking all other Internet access, for example.
ContentBarrier User's Manual
Page 40
Chapter 4 – Using ContentBarrier
Adding Special Applications
To add a special application to ContentBarrier, click the Add… button on the
Special Applications pane. A standard Mac OS open dialog will appear. Navigate
until you find the application you want to add, then click Open. ContentBarrier
will add this application to the Special Applications list.
Removing Special Applications
To remove a special application, click the application’s name in the Special
Applications list, then click Remove. The application will be removed immediately.
ContentBarrier User's Manual
Page 41
Chapter 4 – Using ContentBarrier
Internet Access
The Internet Access tab allows you to choose several settings regarding your users’
Internet access. Click the Internet Access tab on the Users screen of the
ContentBarrier control panel.
ContentBarrier User's Manual
Page 42
Chapter 4 – Using ContentBarrier
Setting Time Restrictions
To set time restrictions for a given user, select the user, then, click the Use Time
Table checkbox.
You will see a timetable that you can use to limit Internet access to given days and
times.
To allow Internet access at given times, click the time cells in the timetable—each
cell represents one hour. You can click individual cells, or you can click the mouse
button and drag it to cover longer periods.
A red cell means that access is forbidden; a green cell means that access is allowed.
When you click the mouse on any cell, a small tag will pop up showing the time.
You can change any cell's color by clicking it. You can also click and drag in any
ContentBarrier User's Manual
Page 43
Chapter 4 – Using ContentBarrier
direction to change cells. If, for example, you start clicking on the red cell at the top
left, and drag all the way to the bottom right, all the red cells will become green.
If, at the current time, the currently active user has Internet access privileges, there
will be a green check next to their name in the user list. If not, there will be a red
"forbidden" symbol next to their name. In the first example below, Alice can
currently access the Internet, because there are no time restrictions for her. In the
second example, Bob cannot access the Internet, because the current time and day
correspond to a period when he does not have access.
ContentBarrier User's Manual
Page 44
Chapter 4 – Using ContentBarrier
Redirecting Searches
ContentBarrier allows you to redirect Internet searches to the search engine of your
choice. If a user enters the name of a search engine, such as Yahoo!, AltaVista,
Excite, etc. in their web browser, and you have activated this function, their search
will be redirected to the search engine you have chosen.
If you leave the default setting, No Redirection, searches will go to the search
engine selected by the user.
ContentBarrier includes menu items for family-friendly search engines. If you wish
to use one of these as the redirected search engine, just select it from the popup
menu.
ContentBarrier User's Manual
Page 45
Chapter 4 – Using ContentBarrier
Adding Redirection Sites
You can also add your own search engines to the Redirection menu. To do this,
select Edit... from the popup menu. The Redirection Site Editor will be displayed.
To add a redirection site, click the Add... button. A new line will appear in the
Redirection site list.
Enter the URL, or web address, of the redirection site after www. in the text field.
ContentBarrier User's Manual
Page 46
Chapter 4 – Using ContentBarrier
You can add as many redirection sites as you wish. When you have finished, click
Done to close the Redirection Site Editor window.
Removing Redirection Sites
To remove a redirection site, select it in the redirection site list by clicking its name.
Click the Remove button. The redirection site will be removed.
Changing the Redirect Search Engine
If you wish to change the search engine used as a redirection site, click the Redirect
Search menu and select the site you wish to use.
ContentBarrier User's Manual
Page 47
Chapter 4 – Using ContentBarrier
Locking Internet Access
ContentBarrier allows you to lock Internet access after a certain amount of idle
time has passed. After Internet access is locked, users will need to log in the next
time they wish to use any Internet services.
To use this function, check the Lock Internet after idling for check box, and enter
the idle time you wish to use. In the example below, Internet access will be blocked
after 1 hour of idle time, that is, 1 hour after the last time the current user accesses
the Internet.
You can adjust this time entering the number of hours and minutes you wish to
use for this setting in the H and M fields.
NOTE: This option is not available if the Mac OS Multiple Users feature is
activated.
ContentBarrier User's Manual
Page 48
Chapter 4 – Using ContentBarrier
Using the Log
ContentBarrier provides a complete log of all Internet activity for each user, as well
as general statistics concerning their Internet use. To view the log, click the Log
button on the main interface.
How the Log works
The Log shows a record of Internet activity for all the users of your computer. The
activity displayed in the log depends on the log options selected in the Settings
panel. For more on selecting log options, see chapter 5, ContentBarrier Settings.
ContentBarrier User's Manual
Page 49
Chapter 4 – Using ContentBarrier
You can choose to display all users, or just a specific user, by selecting a choice in
the Show popup menu.
Understanding the Log
Each Log entry contains 4 different items of information: the User, the Date and
Time, the URL and the Status.
User
This is the name of the user who accessed, or who tried to access the URL.
Date & Time
This is the date and time that the user accessed or tried to access the URL.
URL
This is the web site address, or the e-mail server or other server the user
accessed or tried to access.
Status
This shows whether the user accessed the URL, or whether it was blocked or
filtered.
ContentBarrier User's Manual
Page 50
Chapter 4 – Using ContentBarrier
Status icons
Three icons may appear in the status field.
Granted
The first icon indicates a site for which access has been granted.
Filtered
The second icon indicates a site for which access has been filtered. When
access is filtered, a link on the page is blocked. The page requested will be
displayed, but if the user clicks on the link, that page will be blocked.
Blocked
The third icon indicates a site for which access has been blocked. The user
will see a message in their browser window explaining that the site has been
blocked by ContentBarrier.
ContentBarrier User's Manual
Page 51
Chapter 4 – Using ContentBarrier
Accessing Sites in the Log
If you want to check any of the sites listed in the log, you can access them by
simply double-clicking one of the log entries. This will cause the appropriate
program to open (if your Internet settings are correctly set) and connect to the site.
Sometimes, however, you will find a page that displays nothing, or displays an
error message. This is because many of the URLs in the log may be links to
advertisements or other elements on web pages.
Sorting the Log
The log can be sorted by any of its fields by clicking on the header just above the
field.
It can also be sorted in ascending or descending direction by clicking on the sort
button, the small triangle in the selected sort column header.
ContentBarrier User's Manual
Page 52
Chapter 4 – Using ContentBarrier
Clearing the Log
To clear the log, and erase all information stored in the log, click Clear, and you
will see a dialog asking if you really want to clear the log. Click OK to clear the log,
or click Cancel to cancel the operation.
Exporting the Log
The ContentBarrier log is automatically saved every hour in the Preferences >
Intego > ContentBarrier > ContentBarrier Log ∫ folder of your System folder. You
can examine these logs to check any Internet activity on your computer.
Logs can be exported in two formats: text and HTML. If you select text, they will
be saved in a file that can be read by any word processor. If you select HTML, their
files will be readable by any web browser, and will be presented in table form. To
choose which format will be used for log exports, see chapter 5, ContentBarrier
Settings.
To export the log, click the Export... button. A dialog will prompt you to save the
file; you may change its name if you wish. Click Save to save the file.
ContentBarrier User's Manual
Page 53
Chapter 4 – Using ContentBarrier
Statistics
This panel shows information about sites accessed, filtered and blocked, and the
total amount of data that has been received and sent.
You can choose to view this data for all users, together, or for individual users. To
choose a user whose data you wish to view, select a user from the Show popup
menu.
ContentBarrier User's Manual
Page 54
Chapter 4 – Using ContentBarrier
The following information is presented:
Accessed sites
The number of sites that have been accessed.
Filtered data
The total number of words that have been filtered. ContentBarrier filters
individual words in some web pages, corresponding to specific filters that
the user selects.
Blocked sites
The number of sites that have been fully blocked. This means that a user has
attempted to access a site that is forbidden.
Internet traffic
This is the amount of data entering your computer (on top) and leaving
your computer (on the bottom) for all types of Internet applications: web, email, FTP, etc.
Clearing Statistics
If you wish to clear the statistics, to reset them to zero, for any user, select the user
from the Show popup menu, then click the Clear... button.
You will see a dialog asking if you really want to clear the statistics. Click OK to
clear the statistics, or click Cancel to cancel the operation.
ContentBarrier User's Manual
Page 55
Chapter 4 – Using ContentBarrier
AntiPredator
ContentBarrier includes a powerful function to protect your children when in web
chat rooms or when using chat programs, such as ICQ or IRC chat software. The
AntiPredator function filters chat texts for predatory language, that is, language
asking for personal information about the user. This includes such questions as,
"are you home alone", "what is your phone number", as well as other key words
and phrases that might indicate predatory behavior by other users.
You can add your own words, phrases and sentences to this filter. To do this, click
the AntiPredator button on the main ContentBarrier interface. The AntiPredator
panel is displayed.
ContentBarrier User's Manual
Page 56
Chapter 4 – Using ContentBarrier
This panel contains two tabs: Incoming data and Outgoing data. While
ContentBarrier has an extensive list of text strings to be filtered, each of these tabs
provides an area where you can add your own texts to be filtered. You could add,
for example, your address or phone number, as well as any other personal
information you feel should be protected.
Adding Filters
To add a filter for either Incoming or Outgoing data, click the tab to display the
appropriate panel. Click the Add... button. The AntiPredator filter window will be
displayed.
Enter the word, phrase or sentence you wish to filter, which must be at least 3
characters. To add just this entry, click OK. To add this entry then add another,
click Save & New.
ContentBarrier User's Manual
Page 57
Chapter 4 – Using ContentBarrier
When you have finished adding filters, your texts will be displayed in the filter list.
NOTE: it is best to filter the smallest amounts of text possible. ContentBarrier will
look for the exact text you have entered in the filter, and, if the user types it
differently, it will not be blocked. For example, rather than enter "my phone
number is 555-1234", it is best to enter just the phone number.
Editing Filters
To change the text of any of your filters, click one of them in the filter list to select
it, then click the Edit... button. You can also edit a filter by double-clicking it.
The AntiPredator Editor will open.
ContentBarrier User's Manual
Page 58
Chapter 4 – Using ContentBarrier
You can make any changes you wish to the filter text. To save your changes click
OK, or click Cancel to leave your text as it was.
You can easily navigate from one filter to another using the arrow buttons in this
window.
Deleting Filters
To delete any of your filters, click one of them in the filter list to select it, then click
the Remove button. The filter will be deleted and no confirmation will be
requested. Note: you cannot delete the texts that are included by default.
ContentBarrier User's Manual
Page 59
Chapter 4 – Using ContentBarrier
Using the ContentBarrier Control Strip Module
ContentBarrier installs a practical control strip module that gives you quick access
to the program and several of its functions.
The top section of the control strip module menu shows the current user.
Below that, you can select Open ContentBarrier to open the ContentBarrier control
panel.
The Lock Internet Access function allows you to block Internet access by logging
out all users. This means that if, at any time, you wish to leave your computer
unattended, you can choose Lock Internet Access, and any user who wishes to use
ContentBarrier User's Manual
Page 60
Chapter 4 – Using ContentBarrier
the Internet will see ContentBarrier’s login window when trying to access any
Internet site or service.
NOTE: This option is not available if the Mac OS Multiple Users feature is
activated.
If you select Login..., the ContentBarrier login window will be displayed, and a
user can log in.
You can also change users easily from the control strip module. There is a list of all
users at the bottom of its menu, and you can merely select a user name to log in for
that user.
If the user has selected a password, the login window will be displayed so they can
enter their password. If the user has not selected a password, the change will be
made without any additional feedback. The new current user will be shown at the
top of the control strip module menu.
ContentBarrier User's Manual
Page 61
Chapter 4 – Using ContentBarrier
Getting Help
You can get help on some of ContentBarrier’s functions by clicking on the info
button:
This will toggle the info field at the bottom of the ContentBarrier window. If you
move your cursor over different areas in ContentBarrier’s window, some of them
will be explained in this field.
You can also get help in this manual, or by checking the Intego web site:
www.intego.com.
ContentBarrier User's Manual
Page 62
Chapter 5 –ContentBarrier Settings
5 - ContentBarrier
Settings
ContentBarrier User's Manual
Page 63
Chapter 5 –ContentBarrier Settings
The Settings Panel
The Settings panel allows you to set preferences for some of ContentBarrier's
functions. To open this panel, click the Settings button on the main interface.
Using a Password with ContentBarrier
ContentBarrier allows you to use a password, so no other users can change the
program's settings. You can also choose how ContentBarrier will work with this
password.
ContentBarrier User's Manual
Page 64
Chapter 5 –ContentBarrier Settings
Creating a Password
Note: if you protect ContentBarrier with a password, make sure you note your
password in a safe place.
To create a password, click Create... A dialog will be displayed, asking you to enter
a password. Type your password in the first field, then type it again in the second
field for confirmation. The password will be hidden. If you want the password to
be added to the Keychain, click the Add to Keychain checkbox. (The Keychain
function is available only in Mac OS 9 or later. For more on the Keychain, see your
Mac OS documentation or on-line help.)
If you wish to validate this password, click OK; if not, click Cancel.
Note: your password must be a minimum of 4 characters and is case-sensitive.
ContentBarrier User's Manual
Page 65
Chapter 5 –ContentBarrier Settings
Password Options
ContentBarrier offers two ways to work with your password.
No Password
If you check this option, ContentBarrier will not ask you to enter your
password. This is useful if you have set a password, but want to
deactivate the password protection temporarily. Your password will
still be saved, but you will only be asked to enter it if you check Ask
each time.
Ask each time
If you check this option, ContentBarrier will ask you to enter your
password each time it is opened.
ContentBarrier User's Manual
Page 66
Chapter 5 –ContentBarrier Settings
Changing your Password
If you have entered a password in ContentBarrier, there will now be a
Change... button on this panel. To change your password, click this button,
and enter your old password in the dialog that is displayed.
If this is the correct password, a second dialog will be displayed where you
can enter and confirm your new password. If you wish to validate this new
password, click OK; if not, click Cancel.
ContentBarrier User's Manual
Page 67
Chapter 5 –ContentBarrier Settings
Erasing your Password
To erase your password, click the Change... button, and, in the dialog that is
displayed, enter your password. Then, in the Password dialog, leave both
fields blank. Click OK If you wish to validate this change; if not, click Cancel,
and your original password will be unchanged.
ContentBarrier User's Manual
Page 68
Chapter 5 –ContentBarrier Settings
Log Options
Several options are available for the type of data that is recorded in the log.
To select any of these options, check the appropriate checkbox.
Filtered data
If this is checked, the log will record any filtered data.
Blocked sites
If this is checked, the log will record any sites that ContentBarrier
blocks.
Accessed sites
If this is checked, the log will record all sites that are accessed by users.
Export as:
Logs can be exported in two formats: text and HTML. If you select
Text, they will be saved in a file that can be read by any word
processor. If you select HTML, their files will be readable by any web
browser, and will be presented in table form.
ContentBarrier User's Manual
Page 69
Chapter 5 –ContentBarrier Settings
E-mail Notification
ContentBarrier can send you an e-mail message whenever any predatory
activity is detected, or send you a hourly log of your computer's use. If you
are on a different computer, you can be notified of any predator alerts, or
have a complete log sent to you hourly by e-mail. To activate one of these
options, check the Enable e-mail notification checkbox, and check the Send
log hourly or Send AntiPredator alert checkboxes.
Enter your e-mail address in the first field, and your SMTP server in the
second field. (This is usually smtp.yourdomain.com. If you have any doubts,
check with your Internet access provider.)
ContentBarrier User's Manual
Page 70
Chapter 5 –ContentBarrier Settings
Choosing a Startup User
You can choose which user’s name will appear in the login dialogue by
default. To do this, select a user from the Startup user popup menu, or select
None to have the menu displayed in its default manner, in alphabetical order.
This user’s name will then be displayed in the popup menu of the login
dialogue whenever a login is required. If another user wants to log in, they
will need to select their name from the popup menu.
ContentBarrier User's Manual
Page 71
Chapter 5 –ContentBarrier Settings
NetUpdate
NetUpdate is an application that Intego's programs can use to check if the program
has been updated. This application, in the form of a control panel, is installed at the
same time as Intego's NetBarrier, VirusBarrier or ContentBarrier. It checks updates
for all of these programs at the same time, and downloads and installs those for the
programs installed on your computer.
For more on using NetUpdate, see the NetUpdate User's Manual.
ContentBarrier User's Manual
Page 72
Chapter 5 –ContentBarrier Settings
Special Sites
The Special sites tab allows you to make a list of sites that you trust, that you
want your users to access, or, on the other hand, sites that you definitely don't
want your users to access. These could be sites that you want to block, but
that do not fit into a specific filter.
For more on Special Sites, and how to add them, see the Using Special Sites
section in chapter 4, Using ContentBarrier.
Special Applications
The Special applications tab allows you to choose to not monitor certain
programs.
For more on Special Applications, and how to add them, see the Using
Special Applications section in chapter 4, Using ContentBarrier.
ContentBarrier User's Manual
Page 73
Chapter 5 –ContentBarrier Settings
About ContentBarrier
The About... panel gives information about ContentBarrier, such as the version
number, your support number (a number you will need for technical support),
clickable links to Intego’s web site and e-mail address, and Intego’s address and
telephone number.
ContentBarrier User's Manual
Page 74
Chapter 6 – Technical Support
6 - Technical Support
ContentBarrier User's Manual
Page 75
Chapter 6 – Technical Support
Technical support is available for registered purchasers of ContentBarrier.
By e-mail
[email protected]
From the Intego web site
www.intego.com
ContentBarrier User's Manual
Page 76
Chapter 7 - Glossary
7 - Glossary
ContentBarrier User's Manual
Page 77
Chapter 7 - Glossary
Chat: A system that allows two or more logged-in users to set up a typed, realtime, on-line conversation across a network.
DNS: Domain Name System. Used by routers on the Internet to translate
addresses from their named forms, such as www.intego.com, to their IP numbers.
FTP: File Transfer Protocol. A protocol used for transferring files from one server
to another. Files are transferred using a special program designed for this protocol,
or a web browser.
HTTP: HyperText Transfer Protocol, the protocol used to send and receive
information across the World Wide Web.
ICQ: A popular program used for on-line chats.
IP: The network layer for the TCP/IP protocol suite widely used on Ethernet
networks and on the Internet.
IP address: An address for a computer using the Internet Protocol.
Irc: Internet Relay Chat. A medium for worldwide "party line" networks that
allows people to converse with others in real time.
Local network: A network of computers linked together in a local area. This may
be a single building, site or campus.
Network: A group of interconnected computers that can all access each other, or
certain computers. This may be a local network, or a very large network, such as
the Internet.
Newsgroup: A type of discussion group that uses a special protocol (NNTP) and
special software. There are several tens of thousands of newsgroups each dealing
with very specific subjects. To access this kind of content, you need special
software, but most web browsers include a newsgroup reader.
NNTP: Network News Transfer Protocol. A protocol for the distribution, inquiry,
retrieval and posting of Usenet news articles over the Internet.
Protocol: The set of rules that govern exchanges between computers over a
network. There are many protocols, such as IP, HTTP, FTP, NNTP, etc.
Server: A computer connected to a network that is serving, or providing data or
files to other computers called clients.
ContentBarrier User's Manual
Page 78
Chapter 7 - Glossary
TCP: Transmission Control Protocol. The most common data transfer protocol
used on Ethernet and the Internet
TCP/IP: The Internet version of TCP; TCP over IP.
ContentBarrier User's Manual
Page 79