1
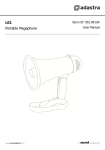
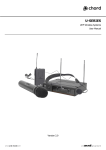
H25 Handheld Wireless PA (952.410) User Manual Features: Rechargeable battery operation VHF neckband microphone system Built-in USB media player Integral handle and shoulder strap Introduction: Thank you for choosing the Adastra H25 portable PA system. This all-in-one unit is designed to offer convenient and reliable portable amplification for a wide range of small public address applications. Please read this manual before using this equipment in order to avoid damage through incorrect operation and to get the best performance from your purchase. Contents: Please take care when unpacking this product. Inspect for any damage and ensure you have the following components… H25 Handheld PA speaker unit VHF beltpack transmitter Neckband microphone Shoulder strap Warning: To prevent the risk of fire or electric shock, do not expose any of the components to rain or moisture. If liquids are spilled on any component, stop using immediately, allow unit to dry out and have checked by qualified personnel before further use. Avoid impact or heavy vibration to any of the components, dropping the microphone can cause capsule failure. No user serviceable parts inside transmitter or receiver except for battery/charging access - refer servicing to qualified service personnel. Safety Ensure that mains supply voltage is correct for charging via the integral lead Avoid ingress of water or particles into the unit or beltpack transmitter Use alkaline or NiMH batteries in the transmitter and remove if unused for long periods. Observe the correct polarity when replacing batteries Do not attempt to charge USB devices from the type „A‟ connector Placement Keep all components out of direct sunlight and away from heat sources. Avoid impact or crushing of components Keep all components away from damp or dusty environments. Cleaning Use a soft cloth with a neutral detergent to clean the outside of each component Lightly damp sterile wipes may be used on the microphone head for hygiene purposes To avoid damage, do not use solvents to clean the components Handheld PA Unit 1. 2. 3. 4. Shoulder strap Mains recharging lead Sealed rechargeable battery Rear compartment cover 5. 6. 7. 8. 9. 10. 11. 12. 13. USB player transport controls VHF microphone On/Off/VOLUME control VHF microphone carrier signal indicator VHF microphone TONE control POWER/CHARGING indicator AUDIO OUTPUT 3.5mm jack ON/OFF power button USB connector MIC IN 6.3mm jack Beltpack Transmitter and Neckband Microphone 14. 15. 16. 17. 18. Transmitter LEVEL control Slide switch – OFF/MUTE/ON Microphone input 3.5mm jack Neckband Condenser microphone Operation The H25 portable PA unit is switched on using the ON/OFF rocker switch (11) at the bottom of the control panel The rear compartment of the H25 houses the mains charging lead (2). When this is connected to the mains (ensuring correct voltage), the H25 operates from mains when switched on and charges the battery when switched off. Full charging from empty takes approximately 4½ hours. An indicator LED (9) shows when power is on or charging the battery (if the H25 is switched off). Switching on the H25 with no mains plugged in operates from the internal battery and should offer up to 8 hours operation from a full charge, depending upon the usage and output volume. There is a USB type A socket on the control panel (12). Plugging in a USB pen drive containing compressed digital audio files enables them to be played through the unit. Play/Pause functions and moving through different tracks on the memory device are controlled by 3 transport buttons (5) above the USB connector. A 3.5mm jack (10) carries audio output at line level which can be connected to further amplifiers or active speakers if required. For the wireless system, sliding down the back half of the beltpack housing reveals the battery compartment. Place an alkaline or NiMH PP3 battery inside (ensure + and - are the correct way round) and then slide the housing back together. Plug in the supplied neckband microphone, slide the OFF/MUTE/ON switch (15) to the ON position and turn up the LEVEL rotary control (14) approximately half way. Sliding the OFF/MUTE/ON switch mid-way maintains the VHF carrier signal but mutes the audio from the microphone. The built-in receiver in the H25 unit is controlled by 2 rotary controls on the control panel. When the OFF/ON/VOLUME control (6) is turned fully off, the VHF receiver is powered down. Turning this control up gradually activates the receiver and increases the level. When the receiver detects the beltpack transmitter (switched on), the RF indicator (7) will illuminate. Adjust the OFF/ON/VOLUME level to the required output and increase or decrease the output level on the beltpack if necessary. Below the OFF/ON/VOLUME control is a TONE (8) control for the wireless microphone. Turning the tone down can help avoid “squealing” feedback from excessive treble content or turning up will add more treble for clearer speech. Also, a wired microphone or wireless receiver may be connected to the MIC IN 6.3mm jack socket (13) to be used instead of or in addition to the built-in wireless set. Care should be taken to avoid “line-of-sight” positioning of the H25 speaker and any microphones being used, which can cause feedback (howling or squealing caused by the microphone „hearing‟ its own output through the speaker). Furthermore, the H25 should not be positioned too close to the microphone(s) being used for this reason. After use, turn down the OFF/ON/VOLUME control fully down to power down the VHF receiver, switch off the beltpack transmitter and switch off the power switch on the H25 unit. If mains is connected, stow the lead carefully inside the rear compartment and store the unit upright in a dry place away from excessive heat or sunlight. SPECIFICATIONS Mains or internal rechargeable battery 9Vdc PP3 battery 25W 100Hz - 12kHz >60dB 35.0m 0.005% quartz crystal locked 205 x 68 x 25mm (ex. antenna) 76g (no battery) 155 x 183 x 285mm 2.74kg Power supply: main unit Power supply: VHF beltpack Output power: max Frequency response S/N ratio VHF operating distance VHF tuning stability Dimensions: VHF beltpack Weight: VHF beltpack Dimensions: main unit Weight: main unit Troubleshooting “POWER/CHARGING” LED not lit when using mains power “POWER/CHARGING” LED not lit when using battery power “POWER/CHARGING” LED is on but “RF” LED is not lit “POWER/CHARGING” and “RF” LEDs are lit but no mic output Microphone output is very loud or distorted Microphone output is very low USB player will not play audio files USB player output very low USB player output very high or distorted Check for correct voltage and that outlets are switched on Check if mains fuse has blown Check POWER switch is switched on Battery may be fully discharged, connect to mains if available Ensure transmitter is switched to ON or MUTE with a good battery installed Check that beltpack transmitter is not out of reception range Check that VHF OFF/ON/LEVEL control is not switched off Check if beltpack transmitter switch is in “MUTE” position Check if neckband microphone is properly connected to beltpack Ensure transmitter has good / charged batteries Check if there is another nearby transmitter with the same frequency Turn down LEVEL control on beltpack transmitter Turn down OFF/ON/LEVEL control on the H25 to a reduced level Turn up LEVEL control on beltpack transmitter Turn up OFF/ON/LEVEL control on the H25 Check transmitter batteries Check that file type is standard and 44.1KHz 16-bit format Check USB memory device on different equipment to ensure working properly Press PLAY button or jump to other tracks to make sure file is not corrupt Remove and replace USB device to check if connected properly Press and hold the VOL + button to increase volume level Check that audio file is not recorded at very low gain level - if so, correct this on a PC/Mac Press and hold the VOL – button to decrease volume level Check that audio file is not recorded at very low gain level - if so, correct this on a PC/Mac Note: for further troubleshooting, refer equipment to qualified service personnel for testing © Adastra 2011