Download THE ATLAS
Transcript
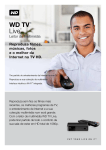
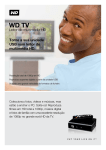
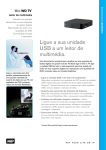
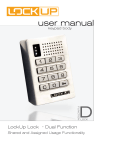
THE ATLAS INSTRUCTIONS FOR USE On the top left locker door you will find ONE BLACK BYPASS KEY and Keys to open the back of the unit. The black Digilock key shipped with your unit can be used to open or close any locker. Inside the unit you will find a plastic bag with: a) 1 REMOTE for your WD LIVE player b) 1 REMOTE for the LCD DISPLAY c) Instructions for the LCD DISPLAY To utilize the lockers: Press the “C” button, followed by a 4 digit code, then press the “” button. To open, the same operation is required. If the user has forgotten his/her code, management can open the door placing the black BYPASS KEY into the gold receivers on the lock. Leave the door open for the next user. The code is now reset. Installing the LCD DISPLAY: 1. 2. 3. 4. Remove the LCD DISPLAY from the box The LCD DISPLAY has mounting screws already attached to the back. The bracket on the top of the unit has openings that allows for quick mounting. Align the screws with the mounting holes and slide it down on the slots. For a more secure attachment, tight the screws firmly. Connect the power cable. Connect the HDMI cable to the HDMI 2 SLOT on the right side of the screen. WD LIVE PLAYER Before installing a new USB drive, format the new drive to NTFS FILE FORMAT File Formats Supported Video - AVI (Xvid, AVC, MPEG1/2/4), MPG/MPEG, VOB, MKV (h.264, x.264, AVC, MPEG1/2/4, VC-1), TS/TP/M2T (MPEG1/2/4, AVC, VC-1), MP4/MOV (MPEG4, h.264), M2TS, WMV9, FLV (h.264) Photo - JPEG, GIF, TIF/TIFF, BMP, PNG Audio - MP3, WAV/PCM/LPCM, WMA, AAC, FLAC, MKA, AIF/AIFF, OGG, Dolby Digital, DTS Playlist - PLS, M3U, WPL Subtitle - SRT, ASS, SSA, SUB, SMI Note: • • • • • • • • • • MPEG2 MP@HL up to 1920x1080p24, 1920x1080i30 or 1280x720p60 resolution. MPEG4.2 ASP@L5 up to 1280x720p30 resolution and no support for global motion compensation. WMV9/VC-1 MP@HL up to 1280x720p60 or 1920x1080p24 resolution. VC-1 AP@L3 up to 1920x1080i30, 1920x1080p24 or 1280x720p60 resolution. H.264 BP@L3 up to 720x480p30 or 720x576p25 resolution. H.264 [email protected] and [email protected] up to 1920x1080p24, 1920x1080i30, or 1280x720p60 resolution. An audio receiver is required for multi-channel surround sound digital output. Compressed RGB JPEG formats only and progressive JPEG up to 2048x2048. Single layer TIFF files only. Uncompressed BMP only. For details, please refer to the user manual. File Formats Not Supported Does not support protected premium content such as movies or music from the iTunes Store, Movielink, Amazon Unbox, and Vongo NEW FILE INSTALLATION: With the back door open, locate the video player. It is located on the top left corner, inside the unit. You can remover the player out of the unit in order to facilitate the programming. The player is secured to the unit using industrial strength Velcro. Carefully remove the player with the cables still attached. Set the player on the top of the machine, running the cables underneath the Screen. Position yourself in front of the unit so you can see the screen while programming the video player. 1. With the player turned OFF, remove the USB DRIVE located at the front of the Video Player. Connect the USB DRIVE to a computer or laptop that contains the files intended to play. 2. Remove all video / photo files on the USB, install new files. LEAVE WD FOLDER in the USB. Install USB DRIVE on the FRONT PORT on the player. 3. Make sure the HDMI cable is connected to the HDMI 2 port on the TV SCREEN (UPPERMOST PORT) Turn the unit ON, wait for the player to start. It may take up to two minutes for the player to boot. Once on the Home Screen, you must reprogram the player to play the files. Using the remote to configure the player: VIDEO: 1- On the home screen, use the arrows to navigate to SETUP, press OK button on remote. 2- Select APPEARANCE, click OK button, scroll down and select SCREENSAVER DELAY, press OK button, select NEVER, click OK button. Confirm screensaver option is marked OFF on setup screen, click BACK button on remote. 3- Navigate to VIDEO SETTINGS option, click OK on remote. Select VIDEO PLAYBACK option, click OK on remote. Scroll down, select REPEAT ALL, click OK button. Confirm on the VIDEO SETTINGS screen that VIDEO PLAYBACK SEQUENCE is set for REPEAT ALL. Scroll down to DVD Menu option, click OK, select OFF, click OK, confirm on the screen the option is OFF. Click BACK button on remote. 4- Navigate to OPERATION tab, click OK. Select AUTO PLAY, click OK. Select AUTO PLAY VIDEO, click OK. The screen will display the USB drive, click OK 4 times consecutively. The system will take you back to the AUTO PLAY screen. Click BACK button. 5- Navigate to SYSTEM, select MEDIA LIBRARY, click OK button on remote, select OFF, click OK button. Confirm the option MEDIA LIBRARY is off. 6- Scroll down to SYSTEM RESTART; select OK, press OK button. The player should restart and play the files automatically. PICTURES: 1- On the home screen, use the arrows to navigate to SETUP, press OK button on remote. 2- Select APPEARANCE, click OK button, scroll down and select SCREENSAVER DELAY, press OK button, select NEVER, click OK button. Confirm screensaver option is marked OFF on setup screen, click BACK button on remote. 3- Navigate to PHOTO SETTINGS option, click OK on remote. Select SLIDESHOW SEQUENCE option, click OK on remote. Scroll down, select REPEAT ALL, click OK button. Confirm on the PHOTO SETTINGS screen that SLIDESHOW SEQUENCECE is set for REPEAT ALL. Scroll down to DVD Menu option, click OK, select OFF, click OK, confirm on the screen the option is OFF. Click BACK button on remote. 4- Navigate to OPERATION tab, click OK. Select AUTO PLAY, click OK. Select AUTO PLAY PHOTO SLIDESHOW, click OK. The screen will display the USB drive, click OK 4 times consecutively. The system will take you back to the AUTO PLAY screen. Click BACK button. 5- Navigate to SYSTEM, select MEDIA LIBRARY, click OK button on remote, select OFF, click OK button. Confirm the option MEDIA LIBRARY is off. 6- Scroll down to SYSTEM RESTART; select OK, press OK button. The player should restart and play the files automatically. Troubleshooting Lockers No audible feedback when pressing “c” button: 1- The batteries have failed. Replace both 9v batteries located behind the keypad; 2- Poor connection on the door. Remove the lock from door and reinstall. 3- The lock is on sleep mode. Wait for a minute and try again. Lock does not unlock: 1- Listen for additional audible feedback from the lock. 2- Open using management (black) key. If the locker does not open immediately, leave the black key inserted for up to 3 minutes in the locker. That will charge the locker’s battery enough to open it. Replace the 2 batteries on the locker (9V alkaline battery). Lock emits 2 sets of 3 beeps during operation: 1- Binding indicator. The lock is binding against the unit plate. Press firmly against the door while inserting the code. If the binding is constant the strike plate and / or door hinges needs adjustment. For locker issues call DIGILOCK 800.989.0201 product ID STS-619-01-01 Maximum Power requirements: LCD screen: 0.3A – 120 V – 40 W Media Player 1.5A – 12 V – 18 W 10 Chargers 2.1A – 5 V – 11 W (each) 10 Chargers 1A – 5 V – 5 W (each)


