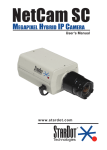
1
5.0 Comprehensive Administrator Guide Video Insight 3 Riverway, Ste 700 Houston, TX 77056 713.621.9779 www.video-insight.com 07/30/2012 Video Insight Administrator Guide IP Enterprise Version 5.0 Table of Contents TABLE OF CONTENTS ..................................................................................................................................... 2 CHAPTER 1: INTRODUCTION ........................................................................................................................ 6 A. B. INTRODUCTION ......................................................................................................................................... 6 PRE-REQUISITES ....................................................................................................................................... 6 a. Servers .................................................................................................................................................. 6 b. Desktop Clients...................................................................................................................................... 7 c. Web Client ............................................................................................................................................. 7 C. CAMERAS .................................................................................................................................................. 7 a. Licensing .............................................................................................................................................. 8 D. NETWORK ................................................................................................................................................. 8 Router Configuration ................................................................................................................................... 10 E. STORAGE CONSIDERATION ..................................................................................................................... 11 F. SQL CONSIDERATION ............................................................................................................................. 12 CHAPTER 2: GETTING STARTED ................................................................................................................ 13 A. B. INSTALLATION ........................................................................................................................................ 13 SERVER INSTALL ..................................................................................................................................... 13 IP Enterprise Server install (Includes SQL) ................................................................................................ 14 IP Server Installation with an existing SQL ................................................................................................ 19 Initialization................................................................................................................................................ 23 Activate by Phone ........................................................................................................................................ 28 Activate Using Demo Mode ......................................................................................................................... 29 Configuring a Failover Server .................................................................................................................... 31 C. SERVER CUSTOMIZATION ....................................................................................................................... 33 Setup and Configuration Tab ...................................................................................................................... 34 Cameras Tab ............................................................................................................................................... 36 Advanced Tab.............................................................................................................................................. 38 Health Monitor Tab .................................................................................................................................... 40 Client Tab ................................................................................................................................................... 42 Access Configuration Tab ........................................................................................................................... 44 Contact Information Tab............................................................................................................................. 45 D. IP SERVER M ANAGER ............................................................................................................................. 46 Accessing the IPSM .................................................................................................................................... 47 IPSM Configuration ................................................................................................................................... 48 IPSM: Options ............................................................................................................................................ 49 IPSM: System Log ...................................................................................................................................... 52 IPSM: Network Options .............................................................................................................................. 53 IPSM: Diagnostics ...................................................................................................................................... 54 IPSM: No Cameras ..................................................................................................................................... 59 IPSM: Update Activation ............................................................................................................................ 60 E. MONITOR STATION CLIENT INSTALL ...................................................................................................... 61 Add Servers Manually ................................................................................................................................. 65 Add Servers Automatically .......................................................................................................................... 66 F. MONITOR STATION CUSTOMIZATION ..................................................................................................... 68 a. Main Dashboard ................................................................................................................................. 68 b. Main Menu Toolbar............................................................................................................................ 69 2 Video Insight Administrator Guide IP Enterprise Version 5.0 c. d. e. f. g. h. i. j. k. l. m. n. Facility Maps .................................................................................................................................... 111 Layouts ............................................................................................................................................. 118 Rules Manager.................................................................................................................................. 128 TV Decoders ..................................................................................................................................... 132 Live View Monitor ............................................................................................................................ 134 Left Navigation Tree ......................................................................................................................... 136 PTZ Controls pane ............................................................................................................................ 153 Search Pane ...................................................................................................................................... 154 Live Audio Controls pane.................................................................................................................. 156 Layouts Toolbar ................................................................................................................................ 157 Camera’s Quick Access toolbar......................................................................................................... 157 Server Statistics................................................................................................................................. 157 G. WEB CLIENT ......................................................................................................................................... 164 a. Configuring IIS ................................................................................................................................ 164 b. Accessing the Web Client .................................................................................................................. 166 c. Using the Web Client ........................................................................................................................ 167 d. Layouts Tool Bar .............................................................................................................................. 171 e. High Speed Mode.............................................................................................................................. 173 f. Configuration Menu ......................................................................................................................... 174 g. Viewing Recordings (Playback) ........................................................................................................ 177 h. Camera Toolbar ................................................................................................................................ 178 i. Creating a Clip.................................................................................................................................. 179 CHAPTER 3: SECURITY ............................................................................................................................... 180 A. USER M ANAGER .................................................................................................................................... 180 Adding Users ............................................................................................................................................. 181 Deleting Users ........................................................................................................................................... 182 Modifying Users......................................................................................................................................... 183 Importing Users ......................................................................................................................................... 188 Adding Groups........................................................................................................................................... 189 Deleting Groups......................................................................................................................................... 191 Modifying Groups ...................................................................................................................................... 192 B. LOGIN ................................................................................................................................................... 197 C. ACTIVE DIRECTORY .............................................................................................................................. 201 Pre-requisites ............................................................................................................................................ 201 Configuring Active Directory ..................................................................................................................... 202 Adding Users or Groups............................................................................................................................. 207 Removing Users or Groups ........................................................................................................................ 211 Viewing Users Permissions ........................................................................................................................ 213 D. LDAP ................................................................................................................................................... 217 E. CHECKSUM ........................................................................................................................................... 218 Enabling Checksum Watermark.................................................................................................................. 218 Verifying a Checksum Watermark .............................................................................................................. 219 F. SYSTEM LOG ......................................................................................................................................... 221 G. ALARM LOG .......................................................................................................................................... 225 CHAPTER 4: CAMERAS................................................................................................................................ 227 A. ADDING CAMERAS ................................................................................................................................ 227 3 Video Insight Administrator Guide IP Enterprise Version 5.0 Automatically ............................................................................................................................................ 228 Manually ................................................................................................................................................... 229 Importing from 3.x Version ....................................................................................................................... 231 B. REMOVING CAMERAS ........................................................................................................................... 232 C. MODIFYING CAMERA DETAILS ............................................................................................................. 232 General Tab .............................................................................................................................................. 233 Record Tab................................................................................................................................................ 235 Advanced Tab............................................................................................................................................ 241 Motion Settings Tab .................................................................................................................................. 243 Video Settings Tab .................................................................................................................................... 246 Optional Controls Tab ............................................................................................................................... 248 Privacy Zone Tab ...................................................................................................................................... 249 Contact Information Tab........................................................................................................................... 251 Maintenance View Tab.............................................................................................................................. 252 D. DUAL STREAMING CAPABILITY ............................................................................................................ 253 CHAPTER 5: ACCESS CONTROL CONFIGURATION.............................................................................. 254 A. B. C. D. E. F. G. A. B. S2 .......................................................................................................................................................... 254 RS2 ....................................................................................................................................................... 254 DSX ...................................................................................................................................................... 256 ISONAS .................................................................................................................................................. 256 PAXTON ................................................................................................................................................ 256 MONITORCAST ..................................................................................................................................... 257 BLACKBOARD ....................................................................................................................................... 260 LANE VIEWER ........................................................................................................................................ 264 ACCESS VIEW......................................................................................................................................... 267 CHAPTER 6: HEALTH MONITOR............................................................................................................... 267 A. PRE-REQUISITES ................................................................................................................................... 268 INSTALLATION ...................................................................................................................................... 269 CONFIGURATION ................................................................................................................................... 271 SERVER CONFIGURATION ..................................................................................................................... 273 B. C. D. CHAPTER 7: MEDIA PLAYER ..................................................................................................................... 277 A. LEFT NAVIGATION TREE ...................................................................................................................... 277 TOOLBAR .............................................................................................................................................. 283 B. CHAPTER 8: SYNCHRONIZED PLAYER ................................................................................................... 285 A. SYNCHRONIZED PLAYER CLIP OPTION..................................................................................................... 288 CHAPTER 9: TROUBLESHOOTING............................................................................................................ 290 A. a. b. c. d. e. f. g. FREQUENTLY ASKED Q UESTIONS ......................................................................................................... 290 What types of cameras are supported? .............................................................................................. 290 Why am I seeing skipping in live view? ............................................................................................. 290 I’m having trouble installing the IP server on my machine, what should I do? ................................. 290 I can’t get the Health Monitor and my Server to connect .................................................................. 291 I just added my servers, why does it keep asking me to reenter them? Not saving added servers....... 291 Full list of all ports used by our application and their purpose? ........................................................ 292 What does ‘There was a database error, or this version of the database…’ mean? ........................... 293 4 Video Insight Administrator Guide h. i. j. k. l. m. n. o. p. B. C. D. IP Enterprise Version 5.0 What is Active Directory anyway? ..................................................................................................... 294 How do I set the IP Service to restart in the event of a crash? ........................................................... 295 How do I backup and restore my Video Insight database? ................................................................ 297 I’d like to migrate all of my servers to one centralized database, how should I do that? .................... 298 How to remove Microsoft SQL without having to reformat ............................................................... 298 Getting errors when playing recordings in Windows Media Player and VI’s Media Player............... 300 How do I add a VP1, VP16, VP8 Encoder or an Arecont type camera with multi channels? ............ 301 How do I disable Map Labels for the Web Client? ............................................................................ 301 My C Drive is filling up due to Temp Cache, how do I delete it? ....................................................... 302 ONLINE RESOURCES ............................................................................................................................. 304 REMOTE SUPPORT ................................................................................................................................ 304 CONTACT US ......................................................................................................................................... 305 APPENDICES .................................................................................................................................................. 306 APPENDIX A – LICENSE AGREEMENT ..................................................................................................... 307 APPENDIX B – SYSTEM OVERVIEW ......................................................................................................... 310 APPENDIX C - CURRENT CUSTOMERS EXAMPLES .............................................................................. 314 APPENDIX D - ACRONYMS.......................................................................................................................... 316 APPENDIX E – COMMONLY USED CAMERA CREDENTIALS .............................................................. 317 APPENDIX G – CONFIGURING A CNB CAMERA..................................................................................... 319 APPENDIX H – CONFIGURING A SENTRY FS1000 AND FS2000 CAMERAS ........................................ 321 APPENDIX I – CONFIGURING AN IQEYE CAMERA USING OPTIONAL CONTROLS ....................... 322 INDEX .............................................................................................................................................................. 324 5 Video Insight Administrator Guide IP Enterprise Version 5.0 Chapter 1: Introduction A. Introduction Video Insight’s suite of products was created to protect the next generation of Americans by providing intelligent, easy to use IP Security Solutions. Our software boasts the largest camera integrations available on the market to date; reliability, usability, and performance are our main focus because they are important to us and mainly - you. This comprehensive Administrator Guide was created to encompass everything you’ll need to install and configure our software with plenty of tips and recommendations to customize it for your organization. B. Pre-Requisites Due to the nature of this software and the peripheral equipment such as cameras and their specific settings, creating an optimum environment is a must to achieve the best performance. Pre- requisites for each application are detailed below. a. Servers Each server’s role will need to be identified prior to selecting the right configuration. For the IP server installation the following are required: Operating Systems: o 2008 Server R2 o 2008 Server Web Edition Online Configuration Tool: o 2008 Server Standard or Enterprise http://www.videoo 2003 Server Web Edition insight.com/Support/Tools/Configurati o 2003 Server Standard or Enterprise on-Calculator.aspx o Windows 7 o Windows Vista o Windows XP Professional All Windows updates must be current .Net 3.5 2GB of RAM Internet Information Services (IIS) with "static content" enabled User account with full administrative permissions to the local system Minimum of Dual core 2.4GHz Run Monitor Station on a separate machine The hardware required for an installation of the Video Insight IP software is determined by a variety of factors including the number of cameras, the resolution of those cameras, the number of frames per second, as well as the number of days of required video storage. 6 Video Insight Administrator Guide IP Enterprise Version 5.0 b. Desktop Clients Monitor Station, the Video Insight thick client, allows users full access to all cameras and provides centralized administration for the system. The Monitor Station requests video from the server in the cameras native format and therefore does not use additional CPU bandwidth. It is used daily to monitor live video as well as recorded video and performance of this machine is just as important; the following are recommended: You can expect HIGHER CPU usage Operating Systems: All Windows Operating Systems without Direct Show All Windows updates must be current; specifically Direct Show 9 Support or higher, will be used to display full resolution images Minimum 2GB of RAM 256MB Graphics card with Direct Show support The total memory required for the Monitor Station is dependent on several factors, most notably the number of cameras to be viewed as well as the method of compression. If H.264 or MPEG4 compressions are used, the memory requirements for the Monitor Station increase because CPU is required to decompress the images. Granted, if additional compressed images are viewed at once, additional CPU is required. c. Web Client This client utilizes Microsoft’s IIS server and is usually installed on the server. In order to support cross platform compatibility, the server will send MJPEG images to the clients that are unable to decompress MPEG4 or H.264 streams. These images are normally provided as a dual stream from the camera, however the server can create a MJPEG but it will utilize CPU resources. The Web Client connects directly to the cameras, not the IP server as the Monitor Station does. Browsers Supported: o Internet Explorer (IE) 7 and higher o Firefox 7 and higher o Chrome 15 o Safari IIS 5.1 or higher Must install and Configure IIS prior to the installation of the software C. Cameras Video Insight supports over 1000 models of cameras from 60 manufacturers around the world and that number is increasing rapidly with each release. Furthermore, we support ONVIF version 7 Video Insight Administrator Guide IP Enterprise Version 5.0 1.03, a universal protocol, if your camera supports it; it should work with our software as well. Camera image will display in our software most of the time right out of the box, however in some cases a camera may default with security on and those credentials will need to be entered. For a complete description of how to add cameras and customize them refer to the Adding Cameras section on page 227. a. Licensing Our licensing structure is simple and easy to use, each camera requires one license. Our licenses are floating instead of seat licenses which means there is no need to ever tie in a MAC address to a particular camera, If the need to replace a camera arrives, remove the bad one from the software and simply add the other. A few of the camera models we currently offer, such as Arecont for example, will give you the benefit of four camera views: 180 or 360 and only one license is required. We also offer encoders, such as the VP16, that will allow up to 16 analog cameras using 1 license. Contact our Sales Department for your specific licensing requirements: (713) 621-9779. D. Network The network configuration is extremely important when considering IP Video installation at your organization. IP Cameras use bandwidth as the currency to stream and deliver information between the cameras and the server as well as other media used to access those streams; outlets such as a Web Browser, Monitor Station, iPad and or a Smart Phone. The illustration below is an example of a very basic, isolated network comprising of one switch, one camera and one router to assist in explaining the intricacy of a network even at its simplest form and what affects each part may have on performance. 8 Video Insight Administrator Guide Wireless connectivity of cameras is possible, but when considering dead zones, providers, data delivery speed and weather conditions you can expect subpar performance and dropped cameras. There are a slew of Cameras on the marketplace, each provides different capability, and quality as well as a different set of manufacturer provided default settings. A few of these general settings should be examined and possibly changed to suit your environment and provide the best image quality. IP Enterprise Version 5.0 The following Network issues may cause cameras to drop: Camera is using a dynamic IP address instead of a Static one Another service/device is running with the same IP address thus causing a conflict when both are on. Multiple applications pulling a stream from one camera (some cameras limit the number of streams) Power output of a switch is less than required by the cameras. The power outage of a switch has to be greater than the total sum of camera(s) power requirements. Refer to the camera’s manual for that information. The type of Ethernet Switch used may attribute to slow frames per second delivery from the camera to the server. A 1 GB/s port shows a much better performance than a 10 Mbit/s, or 100 Mbit/s port thus avoiding a bottleneck scenario. 9 Internet providers differ both in capability, plans availability and the type of cable going into your organization. For example: Video Stream, much like surfing the web, is drastically different when using Dial up (phone cable) as compared to a DSL or Cable (Fiber Optic or Coax) so it will affect your video stream immensely. Router Configuration We recommend using some type of router if your computer is connected to the internet. Routers (SOHO routers) from manufactures like Linksys, provide a simple firewall that protects your server. They connect to your DSL or cable modem, and then connect your server to them. The router prevents all inbound traffic from accessing your network/computers except for the traffic that you specifically allow through. Recommended Setup for your Server and Router: 1. Configure a Static IP address for your Server. Most SOHO routers provide DHCP to dynamically assign IP’s to devices connected to the router. The normal range is 192.168.1.100 – 192.168.1.200. You will want to choose an IP outside of this range. For example 192.168.1.50. (Note: If you have an IT support person or Network Administrator onsite that supports your network check with them for an available IP Address). 2. Configure your router to forward ports 80 and 4011 to your server a. Check your router manual on how to do this. b. www.portfoward.com provides information on how to configure most SOHO routers. c. Save the settings once done and restart the router. 3. Test your configuration by trying to access the Web Client externally. a. Open Internet Explorer and type: http://<external IP>/videoinsight4 b. Keep in mind many routers will not allow you to connect to the external IP when sitting behind the firewall. You will need to be outside your network. c. You can use websites such as http://canyouseeme.org to get your External IP and to verify if your ports are open. 4. If you are still having trouble configuring you router we recommend you call the manufacture for help. We are happy to help, but due to the large number of different routers, many times we are not as knowledgeable as the manufacturer. Video Insight Administrator Guide IP Enterprise Version 5.0 E. Storage Consideration The amount of storage required for recordings depends on the number of cameras, the FPS for these cameras, the size (resolution) of the images and the percentage of motion (assumes motion only recording) and if choosing Record Always the amount of recorded video is exponentially larger. Type of Storage a. RAID A RAID is a group of three or more hard drives linked together to form one array of disks. The software uses a RAID 5 (striped disks with parity). This combines three or more disks in a way that protects data against loss of any one drive. b. OS drives The software uses a separate drive for the OS. c. Backup of OS Drive The software includes a partition with a backup image of the Operating System Drive as it was at the time of shipping. The image is created using Acronis True Image. d. COLDSTORE COLDSTORE is a Network Attached Storage system (NAS) designed specifically for modern video surveillance systems which need very high capacity for mega-pixel IP cameras and/or long archive periods. Keeping with cutting edge technology we implemented the ability to copy, move and view videos directly from the COLDSTORE storage. e. Long Term Storage Application The LTS is a standalone application that helps you manage your recorded video. The easy to use application connects to the video data directory allowing you to Move, Recompress or Trim the original AVI files. The LTS can also recompress the original AVI file using Microsoft’s WMV format and is able to double the available storage space. You can specify which cameras to copy, how many days to keep before the copying and what time of the day to execute the copy. The new copied files can be viewed Video Insight software or any Windows Media Player. f. File Manipulation Rule A new feature that allows users to backup their files to other locations such as NAS, SAN, or Network File Servers using the Rules manager; this feature takes the daunting task of remembering to back up important video recordings on the current server and automates it. File Manipulation also offers the ability to Move or Delete videos as well. 11 Video Insight Administrator Guide IP Enterprise Version 5.0 F. SQL Consideration Video Insight saves configuration settings, usernames, camera information and event logs in the database. When the IP Server starts, it reads its settings directly from the assigned database, while Monitor Station connects to the IP Server instead and saves all recordings to the local hard drive so in the event the DB crashed recordings are still accessible. Do I want a single local database or a shared one? Local Small centralized organization with 1-3 servers Use Monitor Station built in User Manager Number of users is manageable Disaster recovery and back up will need to be done for each server’s DB No Failover Server is NOT desired Servers are not located on LAN or the communication link between the server the database is on a low speed connection No need to move cameras from one server to another Security: don’t want to expose SQL to the network 12 Shared Large regional organizational with many servers Use AD/LDAP Number of users is large Disaster recovery will need to be done for one DB Failover server functionality is desired Servers are on the same LAN Can move cameras from one server to another quickly Security: Will need to expose SQL to the network Video Insight Administrator Guide IP Enterprise Version 5.0 Chapter 2: Getting Started A. Installation Video Insight supports both 32 bit and 64 bit Operating systems, choose the correct executable to begin the installation process. Prior to beginning the installation process we recommend the following check list is reviewed: 1. Begin the installation with a clean version of Windows. It is not sufficient to remove existing applications in some cases. Refer to FAQs on page 290. 2. Storage Considerations 3. SQL Considerations 4. Network Considerations 5. Online Calculator: http://video-insight.com/Support/Tools/Configuration-Calculator.aspx 6. Administrator Level access on server is required B. Server Install If SQL Server is not already used at your organization you may decide to install the IP Enterprise Server install package which includes SQL Server 2005 when installed on 32bit OSs. SQL 2008 will be used when installing on 64bit OSs. Conversely, if your organization already has a SQL Server 2005 or 2008 installed and only the Video Insight database needs to be installed you will require the IP Server Installation with an existing SQL. 13 Video Insight Administrator Guide IP Enterprise Version 5.0 IP Enterprise Server install (Includes SQL) To install Video Insight Software for the first time with SQL (this option will also install Monitor Station and the Web Client): 1. Double click the Setup.exe applicable to your system type: 32 or 64 bit OS, the following will appear: 2. Click the Agree button to accept the terms and continue the installation; otherwise choose Cancel to terminate the installation. The following will appear: 14 Video Insight Administrator Guide IP Enterprise Version 5.0 3. The first option: IP Enterprise Server install should be selected. 4. Click Next, following will appear: 15 Video Insight Administrator Guide IP Enterprise Version 5.0 5. Enter the destination folder if different than the default by selecting Browse; most customers using a server with multiple drives may choose to install Programs in the D:\ location rather than the OS drive. 6. Click Install, following will appear after a few seconds: SQL Server 2005 is being downloaded from Microsoft’s site 7. If you are using a Windows 7, XP or Server 2003 OS the following informational message may appear, click Run Program to bypass and continue the installation. 16 Video Insight Administrator Guide IP Enterprise Version 5.0 8. SQL will continue installing: 9. Upon SQL installation and configuration conclusion, the video Insight software will be installed and the Desktop icons, as well as the IIS Configuration instructions will be placed on the Desktop. 17 Video Insight Administrator Guide IP Enterprise Version 5.0 10. Click Next 11. Click Finish 12. At this point the Software is installed and ready to be initialized and configured, refer to the Initialization section on page 23 for details. 18 Video Insight Administrator Guide IP Enterprise Version 5.0 IP Server Installation with an existing SQL To install Video Insight software for the first time with an existing SQL (this option will also install Monitor Station and the Web Client): 1. Double click the Setup.exe applicable to your system type: 32 or 64 bit OS, the following will appear: 2. Click the Agree button to accept the terms and continue the installation; otherwise choose Cancel to terminate the installation. The following will appear: 19 Video Insight Administrator Guide IP Enterprise Version 5.0 3. The third option: IP Server install with existing SQL should be selected. 4. Click Next, following will appear: Test the SQL connection here If a Video Insight DB already exists and is used by other servers, deleting it will delete ALL data by removing the DB and creating a new copy. 20 Video Insight Administrator Guide IP Enterprise Version 5.0 SQL Server: This field will default ‘localhost’; however, the name (i.e. sql2) or the IP Address of the actual database server you’d like Video Insight to install our database into should be used, if you’re unsure of your company’s Database server name or IP address, contact your System Administrator. SQL Username: The SQL Server username with root level access should be entered here. SQL Password: The SQL Server password for the username used above should be entered here. 5. Once SQL information has been entered and the Test results were successful the Next button will be enabled. 6. Press Next 7. Enter the destination folder if different than the default by selecting Browse; most customers using a server with multiple drives may choose to install Programs in the D:\ location rather than the OS drive. 8. Click Install, following will appear: 21 Video Insight Administrator Guide IP Enterprise Version 5.0 9. Click Next 10. Click Finish 11. At this point the Software is installed and ready to be initialized and configured, refer to the Initialization section on page 23 for details. 22 Video Insight Administrator Guide IP Enterprise Version 5.0 Initialization 1. The following Initialization splash screen will appear: Please Note: Choosing Cancel will abort initialization and the server will not start automatically. 2. Click Next, following will appear: 23 Video Insight Administrator Guide IP Enterprise Version 5.0 3. Enter the Serial number (5 character alpha numeric code) provided to you at the time of your purchase and click Next. If Activating by Phone refer to page 28. If Activating a Demo version refer to page 29. 4. Click Next, following will appear: Having problems activating with the provided serial number? Choose ‘by phone’ and call: 713.621.9779 or choose Demo to start recording immediately. 5. Enter your Registration information if you’d like to be notified of updates and releases. Otherwise, bypass by choosing Register Later and click Next 24 Video Insight Administrator Guide IP Enterprise Version 5.0 6. This screen is the Server Configuration screen; the software auto detects most settings for you, but should be confirmed; incorrect information may cause issues. Each field is explained in detail below: Server Name: The default is “IP Server –“and the detected IP address of this server. You may change this to a more meaningful name such as Hendrickson High School while avoiding special characters. IP Address: This will default the current server’s IP address and should not be changed. Version: The current version of the software. Advanced Button: Once clicked two ports will appear, these values should not be changed unless ports listed are already in use by another program. Default Port of 4010 Command Port of 4011 SQL Server Location: This is the location or IP address of the server where the database server is located. Localhost value means the DB and SQL server are local to this machine, while having a specific IP address in this field indicates the SQL is located on another machine, also called Remote SQL install. Testing the connection can also be done by 25 Video Insight Administrator Guide IP Enterprise Version 5.0 pressing the Test DB button. The Advanced button is used to modify the database connection string values: Database Name, IP Address, SQL Server User ID and Password. Video Data Storage Path: This is the location where all of the recorded video should be saved to for later retrieval. The local OS drive, C, is the default, the video folder is created automatically once the server configuration is completed. You may choose to store all saved video to several different locations: Local Server Drive: an example would be C:\video Local additional Drive: an example would be D:\video A Share Location: an example would be \\v5\vshare\HHSvideo Be sure that when saving to a shared location a user with rights to write to that share is used or no recordings will be saved. 7. Click Next 8. On the following screen you will be asked to add cameras, there are three options for adding cameras, these are discussed in great detail in Chapter 4.a: Adding Cameras on page 227. 9. Click finish 10. The following congratulatory message will appear: 26 Video Insight Administrator Guide IP Enterprise Version 5.0 11. Click OK 12. Choose Yes to the Reboot prompt. 27 Video Insight Administrator Guide IP Enterprise Version 5.0 Activate by Phone From the IP Server Enterprise Activation screen: 1. Select the Activate by phone radio button as shown below 2. The representative will ask you for a serial number when available; otherwise the representative will ask you for a hardware code and once the account is confirmed in good standing a 16 digit Activation code will be provided. 3. Continue to follow installation step 4 on page 24 28 Video Insight Administrator Guide IP Enterprise Version 5.0 Activate Using Demo Mode Demo mode activation will allow for a normal operation of the software for up to 30 days using up to 99 cameras. Once the 30 day period has expired the software will no longer record or display live mages. The IP server will fail to start until initialization is configured and a valid serial number is used; no reinstallation is required. From the IP Server Enterprise Activation screen: 1. Select the Demo mode radio button as shown below 29 Video Insight Administrator Guide IP Enterprise Version 5.0 2. Select the demo option of your choice and click OK. 3. Continue to follow installation step 4 on page 24 30 Video Insight Administrator Guide IP Enterprise Version 5.0 Configuring a Failover Server When multiple servers are used to manage cameras it is unfortunately a possibility one of them may become unresponsive due to a network outage or a hardware failure. To offer some degree of disaster recovery protection the Failover feature will enable one server to take over recording capabilities of the failed server. This minimizes loss of video and will enable continuous live streaming video. Pre-requisites A minimum of two servers are required Installation type should be a Shared Database, those steps are detailed in Chapter 2.B: IP Server Installation with an existing SQL Failover Server must not manage its own cameras A serial number or activation key is needed for the Failover server with at least 1 license. You may also access Server Properties by simply right clicking the server name in the left navigation and choosing Properties>Advanced tab To designate a server as a failover server do the following: 1. Access Administration>Setup and Configuration 2. Select your server from the left navigation 3. Select the Advanced tab 4. Check the “Designate Server as Failover Server” checkbox as shown below: If a server with existing cameras is selected as a failover server the following warning will appear: 31 Video Insight Administrator Guide IP Enterprise Version 5.0 Once a failure occurs the transfer of the cameras takes approximately 5-10 minutes. During that time you will notice the Monitor Station on the Failover server will show all cameras and their images from the failed server and all recorded video will be recorded to the Failover server or an existing shared location as configured previously. 32 Video Insight Administrator Guide IP Enterprise Version 5.0 C. Server Customization Once a server is installed and configured, you may use both the Monitor Station client to configure Server settings and the IP Server Manager Utility found on page 54. Below, configuration changes of the servers using the Monitor Station client are explained; Administrative level access is required to perform the following functions. 1. Launch Monitor Station 2. Right click the server name in the left navigation and choose Properties 3. The following screen will appear 33 You may also access Server Properties by navigating to Administration>Set up and Configuration and selecting your server Video Insight Administrator Guide IP Enterprise Version 5.0 Setup and Configuration Tab This screen may seem familiar if you had to install the IP Server previousely as this is the same configuration screen that appears during initalization; its fields are explained in detail below: Server Name: The default is “IP Server –“and the detected IP address of this server. You may change this to a more meaningful name such as Hendrickson High School while avoiding special characters. IP Address: This will show the current server’s IP address and should not be changed. Version: The current version of the software. 34 Video Insight Administrator Guide IP Enterprise Version 5.0 SQL Server Location: This is the location or IP address of the server where the database server is located. Localhost value means the DB and SQL server are local to this machine, while having a specific IP address in this field indicates the SQL is located on another machine, also called Remote SQL install. The Advanced button is used to modify the database connection string values: Database Name, IP Address, SQL Server User ID and Password Be sure that when and cannot be done using this screen. To change saving to a shared location advanced SQL settings access IP Server Manager Utility a user with rights to write to found on page 48. that share is used or no recordings will be saved. Video Data Storage Path: This is the location where all of the recorded video should be saved to for later retrieval. The local OS drive, C, is the default, the video folder is created automatically once the server configuration is completed. You may choose to store all saved video to several different locations: Local Server Drive: an example would be C:\video Local additional Drive: an example would be D:\video A Share Location: an example would be \\v5\vshare\HHSvideo 35 Video Insight Administrator Guide IP Enterprise Version 5.0 Cameras Tab The Cameras tab allows for easy and centerlized location to manage the cameras on the server, as cameras are added and removed to the server, the licensing counts will adjust automatically. This License Supports: Will show the maximum number of IP cameras allocated to the serial number assigned to this server. In some cases, for example when using a Video Insight encoder such as VP16 you will see 0 here, but all 16 channels of the encoder may be added. You Selected: The total number of cameras in the Cameras to be Monitored pane. There are three options available to add cameras: Auto Discovery, Manually, and Import from 3.x. Each option is described in greater details in Chapter 4.a Adding Cameras found on page 227. Unassigned Cameras: This pane will show all cameras that are no longer assigned to the selected server; these unassigned cameras are not using a license. The cameras were previously added and removed and will remain in the database for later retrieval. If sharing a database with multiple servers you may quickly un-assign cameras from the old server and re-add them to the new server via this screen. Use Load button to load the cameras from the database, Clear List to permanently delete all of the unassigned cameras and Delete to permanently delete the selected camera. 36 Video Insight Administrator Guide IP Enterprise Version 5.0 Cameras to be Monitored: This pane will show all cameras assigned to the selected server, each camera in this pane is using a license. You may reorder their position in the Main dashboard using the up/down arrows or choose to sort them alphabetically. 37 Video Insight Administrator Guide IP Enterprise Version 5.0 Advanced Tab Enable Motion Log: This field will default to 30 days, the maximum number of days saved is 1000 as shown above. In order for the server to save Motion log at least one camera should be using a Motion Only Recording Format OR a Record Always with the ‘Calculate Motion Detection’ checkbox found on each Camera’s Record tab. All generated Motion Log may be viewed from either the System Log> Alarm Log on page 225 or Media Player>Motion Events. Enable System Log: This field will default to 30 days, the maximum number of days saved is 1000 as shown above. The System Log is a great way to track user actions, server and camera changes as well as troubleshoot any issues; it is explained in greater details in System Log found on page 221. Enable Security: Security is off by default; at this state any user may modify both Client and Server settings at their will. To turn Security on simply check the box and both Admin and non-admin users will need to have valid credentials to login; Security is discussed in greater detail in Chapter 3 found on page 180. Designate Server as Failover Server: Checking this box will assign the role of a Failover to this Server. A Failover server is used to assume responsibilities of recording and monitoring in the event that a Production server fails. This feature is explained in further detail on page 31. Server Timeout: This option provides the ability to set a timeout period at which point the Monitor Station will no longer be receiving video streams and will pause. The Server timeout is set at the server level. However, it is the individual Monitor Stations and Web Clients that are checking for activity. Activity is defined as mouse movement. For example, we will describe a situation where there are two 38 Video Insight Administrator Guide IP Enterprise Version 5.0 monitor stations running against a server, and the server timeout is set to 5 minutes. Monitor Station 1 has an active user who is viewing several cameras while actively moving the mouse from pane to pane. Monitor Station 2 has a passive user that just has the Monitor Station open on his machine. In this situation, Monitor Station 1 will remain active while Monitor Station 2 will be set to Pause. When live video is paused, the software stops the streams and thus reduces bandwidth requirements. Allow Only One Login Per User: This option provides the ability to restrict the number of concurrent logins permitted per non-admin users from different IP addresses. Non admin users can still login multiple times from the same computer. Administrators may login in multiple times; this option does not restrict Admin users. Reserve Space for Other Applications: This is an important option as this determines how much available space the Video Insight server will use for video recordings and how much space will be left for other applications. The default, regardless of the save location, is 5 GB will not be used for recording video. Since recording is a continuous process the server will determine when the drive space is becoming limited and approaching that Reserve Space at which point the Server Deletion Routine will initialize to delete older video first and make more room for newer video. The deletion process only deletes as many files as necessary to make room, so one file at a time is deleted, not whole folders at once. The Server checks free disk space every 5 minutes, once it is smaller than reserved disk space, then the The Reserve Disk Space is not an exact number; a percentage of the server Total Disk space is also taken into account: Reserved DiskSpace = Max(8%*Total DiskSpace, [Reserve Disk Space]) For Example: 2T Disk, Reserve Disk Space Set to 10G, we will use 160G as Reserve. 50G disk, Reserve Disk Space Set to 10G, we will use 10G as Reserve. deletion routine will kick in. If disk is large enough, we will delete one oldest day folder. If the Server’s disk size is extremely small or the Reserved Disk Space is set at a high number the deletion routine will have to delete today's video, which is at least one hour old starting with the oldest. Low CPU\High Bandwidth: There is always a tradeoff between bandwidth utilization and CPU utilization. You can either optimize for a low bandwidth or a high bandwidth. When selecting the Low CPU\High Bandwidth option you rely heavily on the Network performance at your organization to sends uncompressed images directly to the Monitor Station and so depending on the resolution size, bit rate and FPS and the number of cameras you consider your Network setup and capabilities. High CPU\Low Bandwidth: When you optimize for a low bandwidth situation, the compression occurs at the server level. The server sends a compressed MPEG4 image to the Monitor Station or Web Client. This compresses the image, sends them and then decompresses them. It allows the system to get a much higher frame rate over slower networks. 39 Video Insight Administrator Guide IP Enterprise Version 5.0 Health Monitor Tab The Health Monitor (HM) is a separate application also included in the suite of Video Insight’s products aimed at monitoring the health of your servers; only one Health Monitor is needed per farm of servers. For instructions on installing and configuring the Health Monitor refer to Chapter 6 on page 267. Once the Health Monitor is installed and its service running configure this tab as explained below. Enable Health Monitor: Once enabled here, the server will send a message to the HM in preparation for configuration in HM, the HM will not be aware of this server’s existence until the server HM properties are added. Version Number: The version of the IP server will be sent to the HM Lost Signal: Should a camera lose signal or a server stops responding (time intervals are set in the HM) the server will notify the HM. Camera Information: The server will include the camera information when sending camera issues to the HM. Server Name: The IP Server’s name will default here, however it is an editable field and can be changed here as well. Health Monitor IP Address: Enter the IP Address of the Health Monitor Server here 40 Video Insight Administrator Guide IP Enterprise Version 5.0 Health Monitor Server Port: The HM server port will automatically default to 11000, if this port is already in use, arrange for another port to be opened and enter it here. Health Monitor Send Frequency: the default is to email every 1 minute; however, you may select any one of the following intervals: 1min, 5min, 15min, 30min, 1hour, 4hour, 12hour, and 24hour. 41 Video Insight Administrator Guide IP Enterprise Version 5.0 Client Tab Use Data Port: The IP Server sends live video to the Monitor Station via this port. Command Port: This port is used by the Monitor Station to get and set system information. Maximum Connections: This will limit the number of Monitor Stations that can be connected to the server at one time. The more remote clients the more processing power required. Group Policy Editor: This is a very specific feature created for administrators where the organizational security policy for their video monitoring personnel is extremely limited. In some cases System Administrators will need to completely lockdown individuals’ desktops to prevent internet browsing, control panel changes and the like. In this case having an administrator with admin credentials to the Monitor Station they can launch the Windows built in Group Policy from this tab. To learn more about this Windows Group Policy Editor feature refer to this: 1. Click the Group Policy Editor Button, once it launches 2. Choose Help>Help Topics SMTP Server: In order to have the server send email in some instances, such as when a new user is added, enter the SMTP server’s IP Address or its name as in the example above. Other SMTP servers that are free for use are Gmail and Yahoo, Gmail for example is smtp.gmail.com. 42 Video Insight Administrator Guide IP Enterprise Version 5.0 SMTP Port: The standard SMTP port is the default, 25. However, should your organization use a different one enter it here. SMTP Logon Information: Valid SMTP credentials should be entered here, without them the emails will not be sent properly to the intended recipients. SMTP Server Requires Authentication: Check this box when entering credentials above and when credentials are required. SMTP Server Requires Encryption: Check this box when the SMTP server is using encryptions for outgoing and incoming messages. Send Test Email To: Enter a valid email address the test email should be sent to. Email From: The default is [email protected] however; this field is editable and could be changed to something more descriptive such as [email protected] to indicate Hendrickson High School server for example. Once Send is pressed to send a test email the following will appear: Some spam filters may prevent the email from going through. Specifying the From email address will reduce this possibility. Following this action two entries will be logged in the System Log and an email will be sent to the user, sample shown below: In some organizations it may take a few minutes for the full routing of the email from the Monitor Station to the IP Server for routing to the SMTP server and then to the intended user’s Inbox. 43 Video Insight Administrator Guide IP Enterprise Version 5.0 Access Configuration Tab The Access Configuration tab is used to configure various Access Configuration systems; for details regarding Access Control refer to Chapter 5: Access Control Configuration found on page 254. Blackboard configuration is found on page 260 and MonitorCast configuration is page 257. 44 Video Insight Administrator Guide IP Enterprise Version 5.0 Contact Information Tab The Contact Information tab is an excellent way to identify the Server in more detail. The Server Name is the only defaulted field on this tab, the rest will be entered by the server administrator with the specific server information. Once completed, save the information by clicking Apply and OK. 45 Video Insight Administrator Guide IP Enterprise Version 5.0 D. IP Server Manager The IP Server Manger (IPSM) application is used to manage the server at an advanced level as well as troubleshoot or configure any specific server settings for your organization and your environment. Monitors the IP Server and gives a visual status on a per server basis Allows for network connection administration Provides a Diagnostics version for troubleshooting and system optimization Manages licensing and registration Manages LDAP and Active Directory configuration Regardless of the installation type chosen in Chapter 2, section B discussed on page 13 the following options may be used unless otherwise specified. 46 Video Insight Administrator Guide IP Enterprise Version 5.0 Accessing the IPSM 1. Right click the IPSM icon in System Tray, following will appear: 2. The following options are available: a. Server Configuration: offers a slew of server configuration options discussed below. b. Restart IP Server: a shortcut to restart the service upon demand c. Start IP Server: will be enabled when server is stopped; allows for a shortcut to start service d. Stop IP Server: will be disabled when service is stopped; allows for a shortcut to stop service e. Exit IP Server Manager: once clicked will exit the IPSM application and the IPSM icon will be removed from System Tray (doing so prevents remote restarts from Clients) f. About Video Insight: will display information regarding version, Tech Support information and legal verbiage Hovering 3. The IPSM icon has two possible states indicated by colored dots discussed over the IPSM icon below: in System tray using mouse will display = Server is functioning properly; streaming video to clients, the Server’s status recording video and reporting to HM, if applicable and IP address = Server is stopped and is NOT recording or streaming video; refer to possible reasons and solutions on page 276 47 Video Insight Administrator Guide IP Enterprise Version 5.0 IPSM Configuration 1. Right click the IPSM icon in System Tray 2. Click ‘Server Configuration’ , following will appear: The ability to Stop, Start and Restart the service from this screen is also available in the Service Controls panel at the top. The Configuration pane options are explained in detail in the following sections, and lastly, the ability to Close the pop-up or completely exit the IPSM application are available. Options System Log Network Options Diagnostics No Cameras Update Activation Choosing to exit the IPSM application will remove thr IPSM icon from System Tray and will prevent Clients from remotely restarting the service 48 Video Insight Administrator Guide IP Enterprise Version 5.0 IPSM: Options The Options screen has several settings aimed at mitigating some organizational and server environment settings that could interfere with the IP Service; choose each applicable option below. Auto Restart From the Server Configuration pop-up select Options, the following will appear: You may elect to Auto Restart the service on a specific day and time. Restarting the service can aid in refreshing streaming, bandwidth and CPU by releasing the currently used resources and relaunching the service thus improving performance. The flexibility to choose a time enables off hours auto-restarts as to not interfere with normal business hours. 49 Video Insight Administrator Guide IP Enterprise Version 5.0 Delay Service From the Server Configuration: Options menu select the Delay Service tab Delaying the IP service start time is a good option to consider if the server has many services that have to start in addition to the IP Service. Services such as the MSSQL service used for database services and Network connectivity may take a bit longer to launch. Should the IP service begin without those services already running it may have trouble initializing. 50 Video Insight Administrator Guide IP Enterprise Version 5.0 Options From the Server Configuration: Options menu select the Options tab For those customers with a hybrid installation of both an Analog and an IP server installed on the same machine where bandwidth resources will likely be maxed an option was added to restrict the analog server’s bandwidth consumption. Checking this option will terminate communication between the Analog and the IP server and no live streaming or recording will be done by the IP server, once the timeout session has been reached. For example, let’s assume this option is selected and the session timeout is set to 30 seconds. While in MS viewing a layout comprised of both analog and IP camera images for 30 seconds, both streaming and recording is managed by the IP Server. Once 31 seconds have passed the analog cameras will cease to stream and record due to this feature. Changing the layout will start the session timeout again. 51 Video Insight Administrator Guide IP Enterprise Version 5.0 IPSM: System Log The System Log will document warnings, errors, security and informational messages related to various system functions. Each message may or may not appear depending on configuration and whether security is enabled on the server. For a complete list of possible system log entries refer to Chapter 3 found on page 221. 52 Video Insight Administrator Guide IP Enterprise Version 5.0 IPSM: Network Options The Network Options screen is used for selecting the network schemewhen a server has dual NIC cards, or when the communication port of the server needs to be changed, you may change it here. Moreover, adding Active Directory or LDAP configuration can be done from this screen as well. For complete details on how to configure AD and LDAP refer to Chapter 3 found on page 201. If changing the Communication Port in this screen, the command port in Server Properties discussed on pg. 42 should also be changed to retain client/server communication 53 Video Insight Administrator Guide IP Enterprise Version 5.0 IPSM: Diagnostics The Diagnostiics utility is used for troubleshooting any service related issues; the service is stopped when Diagnostics is launched, however, recording and live streaming will continue as usual. The only difference is Diagnostics offers a User Interface (UI) and the IP Service is a background process without a UI. Once Diagnostics is launched the following will appear: Server Name: This field will display the Server name previously entered and from this screen it is an uneditable field. To change the name of the server access the Setup and Configuration tab by clicking the node on the left or from Server Properties discussed on page 34. IP Address: This will show the current server’s IP address and should not be changed. Version: The current version of the software. Port: This port is used by the Monitor Station to get and set system information; also referred to as the Command channel port. For a list of ports used by the software refer to page 292. Max Cameras: Will show the maximum number of cameras allocated to the serial number assigned to this server. In some cases, for example when using a Video Insight encoder such as VP16 you will see 0 here, but all 16 channels of the encoder may be added. Available: The total number of licenses available to add to this server. The grid area of the Diagnostics screen is read only and will show all of the cameras, the last write time of the video, if recording and the last image received time, or the last time a live image was received from the camera. 54 Video Insight Administrator Guide IP Enterprise Version 5.0 Time of Last Write: This column will show the last time this camera’s images recorded to a file. In some cases when 12:00:00 AM is shown it is indicative of a camera that is not recording due to a Motion Only recording type or is set to Recording Off. Last Image Received: This column will show the last time this camera’s live images streamed. In some cases when 12:00:00 AM is shown it is indicative of a camera that is not up and could be down due to several reasons: incorrect credentials, Network, bandwidth, IP Service not running. Refer to the FAQ section on page 290 for more details. To view the Setup and Configuration section of Diagnostics click that node from the left navigation tree, the following screen will appear: With the exception of the Access Configuration tab available in server properties the tabs on this screen are exactly the same as Server Properties accessed from Monitor Station, those tabs are discussed in detail on page 34. Also, the cameras listed in the left navigation tree can be managed from this screen, simply click the camera on the left and the Camera’s Properties will appear as shown below: 55 Remember to start the service when exiting the Diagnostics application Video Insight Administrator Guide IP Enterprise Version 5.0 Camera property tabs are discussed in detail in Chapter 4 on page 232. Two additional features are available from these screens that are not available in Monitor Station for troubleshooting: Test DB and Advanced (highlight the Server node on the left) The Test DB button is used to test connectivity to the database; there are two possible states: Success: The database test will pass once the server can make a successful connection to the database. Failure: The test will display the following message: “Error: Database version is not correct. Either the database did not respond, or has an outdated version.” There are several reasons why the database test failed. For possible reasons and solutions refer to FAQs on page 293. Another reason for a failure maybe the SQL DB information entered previously; to update or confirm the information click the Advanced button. 56 Video Insight Administrator Guide IP Enterprise Version 5.0 Database: Enter the database name; the default database name installed is InsightEnt IP Address: Enter either the IP Address or the hostname of the database server as in this example. User ID/Password: Default credentials are: sa/vinsight for the InsightEnt database The Diagnostics utility also offers a Live View feature; once pressed a separate screen will appear with all of the cameras added to the server. Click the Live View node from the Video Server Diagnostics screen as shown below: 57 Video Insight Administrator Guide IP Enterprise Version 5.0 And finally, the System Log is also available; click the System Log node on the left as shown below. For details regarding the System Log and common messages refer to System Log on page 221. 58 Video Insight Administrator Guide IP Enterprise Version 5.0 IPSM: No Cameras To offer another level of troubleshooting whether an issue is with the camera or not we offer a diagnostics version that will run the application without any bandwidth use by not starting the cameras, only the application. In this case the exact same screens will be shown as in the Diagnostics section on page 54, however any related camera capabilities such as the Live View or last image received and last write time will not show up to the minute information, since the cameras are not being communicated with and to while this option is selected. 59 Video Insight Administrator Guide IP Enterprise Version 5.0 IPSM: Update Activation The Update Activation option is used to update the Activation type (e.g. transitioning from Demo to purchased licensing scheme) or when the serial number used has been upgraded with additional licenses. When Update Activation is clicked the following screen will appear: This screen and the different activation methods are explained in detail in Chapter 2 on page 23 if you are considering changing the activation type. Otherwise you may click Close to close the screen or OK to confirm the number of licenses currently available. 60 Video Insight Administrator Guide IP Enterprise Version 5.0 E. Monitor Station Client Install The Monitor Station client will be installed automatically with either the IP Enterprise Server Install OR IP Server install with Existing SQL so a client is easily accessible from the server as well. In some cases a Client only install is needed for Video Monitor personnel; if so, follow these installation procedures: 1. Double click the Setup.exe applicable to your system type: 32 or 64 bit OS, the following will appear: 2. Click the Agree button to accept the terms and continue the installation; otherwise choose Cancel to terminate the installation. The following will appear: 61 Video Insight Administrator Guide IP Enterprise Version 5.0 3. The second option: Monitor Station install should be selected. 4. Click Next, following will appear: 62 Video Insight Administrator Guide IP Enterprise Version 5.0 5. Enter the destination folder if different than the default by selecting Browse; most customers using a server with multiple drives may choose to install Programs in the D:\ location rather than the OS drive. 6. Click Install, following will appear: 7. 8. 9. 10. 11. 12. 13. Click Next Click Finish Click Yes to the Reboot prompt Monitor Station is now installed and ready to be initialized and configured. Double click the Monitor Station icon on your desktop Click OK to bypass the Login prompt At minimum one server should be entered before the Client can be used, the following Server Setup pop-up will appear: 63 Video Insight Administrator Guide IP Enterprise Version 5.0 There are several ways to enter servers, you may enter one server at a time, or import a list of servers used throughout your organization; we’ll cover both options below. 64 Video Insight Administrator Guide IP Enterprise Version 5.0 Add Servers Manually 1. In the Server Setup pop-up above click the Add New button 2. Enter the IP Address or name of the server to connect to; change the port if different than default. 3. Click the Test button to initiate a connection, the attempt to connect may result in one of three possible states: Login Error: The server is found but security is on and the server attempted to authenticate with the credentials we used when login in to MS initially (Administrator/blank). The server can still be added and once added log out and back into Monitor Station with the right credentials. No Server Found: Either the IP Address, Name, Port number or a combination is incorrect. Change the values and attempt to Test again. Server Found: The server is found, connection was made successfully using current credentials (Administrator/blank) since security is off. The Server’s name will appear in the Status field. 4. Click Add 5. Repeat steps 1-5 for any additional servers 6. Click Apply and OK 65 Video Insight Administrator Guide IP Enterprise Version 5.0 Add Servers Automatically When the Video Insight software is used in a large organization or School Districts it is possible to have upwards of 20 or more Video Surveillance servers across multiple locations. To easily add a long list of servers at once use the import feature as shown below. An already exported list of servers is needed; the file format should be an ‘lsl’ file. For instructions on how to create this file refer to the Login section on page on 200. 1. In the Server Setup pop-up click the Import List button 2. Browse to the location of the saved ‘lsl’ file as shown below: 3. Click OK 4. If the file is unreadable, or not found an error will appear. Otherwise the full list of servers will now appear in the Known Video Servers grid. A prompt asking to restart Monitor Station will also appear: 66 Video Insight Administrator Guide IP Enterprise Version 5.0 5. Click OK to acknowledge 6. Click Apply and OK 7. Restart Monitor Station by clicking the Lock icon on the upper left of the main dashboard as shown here: Why does it keep asking me to Reenter my Servers? 8. At the Login prompt enter the credentials to login to the desired server(s) or Click OK to bypass the Login screen without any credentials. Click link or refer to page 291 67 Video Insight Administrator Guide IP Enterprise Version 5.0 F. Monitor Station Customization The Monitor Station is the primary user interface in the product suite and can be considered the hub from which all configurations and monitoring is done from. Any Monitor Station configuration will affect the current client where that Monitor Station is installed, changes will not affect the server or any other Clients, unless Administrator Level access changes are made in Setup and Configuration notated below. a. Main Dashboard The main dashboard is full of functions to make daily monitoring easy and manageable. Upon launching the Monitor Station the following will appear. Each section is discussed in greater detail in the following sections. Click the Lock to log out and back in when restarting the MS for changes to take affect Main menu toolbar with a slew of options (pg 69) View options) Layout toolbar (pg 75) Left Navigation tree of servers, cameras, layouts, facility maps, Action buttons and HM access (pg 70) PTZ Controls pane (pg 78) Quick launch Media Player Cameras live view (pg 157) Camera’s name Camera’s quick Access toolbar (pg 157) Search Pane (pg 154) Live Audio Controls Pane (pg 156) Number of connected Servers; Click View>Status>Server Status to hide this information bar 68 Video Insight Administrator Guide IP Enterprise Version 5.0 b. Main Menu Toolbar The Monitor Station’s main toolbar encompasses the following options: File, View, Tools, Administration and Help; each is explained in detail below. The File menu has two selections: Media fixer used to fix corrupted video files and Exit. File>Media Fixer 1. Click Media Fixer 2. Click Next 69 Video Insight Administrator Guide IP Enterprise Version 5.0 3. Choose to add single multiple files or complete folders of videos to be fixed, once added a full list of each video’s path will appear as shown below: 4. Click Next 70 Video Insight Administrator Guide IP Enterprise Version 5.0 5. Leave the first option selected and click Fix Files to begin the process. If choosing the second option: Specify File Information it is recommended to provide the correct file header information as fixing it with incorrect information may render the file unusable. 6. The pop-up will appear on the screen until all files are fixed, once complete it will include the path of the fixed file as shown below: 71 Video Insight Administrator Guide IP Enterprise Version 5.0 7. The word ‘fixed’ will be appended to the file name, the original file will still be available. 8. Click Finish to exit this utility File>Exit Once clicked, Monitor Station will prompt for a confirmation to exit the application. This function is exactly as if pressing the Lock Icon. It is possible to exit the application without having to confirm by unchecking the Exit confirmation checkbox in Tools>Options>General tab. 72 Video Insight Administrator Guide IP Enterprise Version 5.0 The View menu has six selections: Archive Tree, Full Screen, Layout, Mini Toolbars, Status and Toolbars. View>Archive Tree The Archive Tree option is elected by default, when unchecking it the left tree navigation will be hidden. This option is useful when wanting to view more of the monitor’s real estate for the Live view streaming. Default view with Archive Tree selected: View with Archive Tree deselected: 73 Video Insight Administrator Guide IP Enterprise Version 5.0 View>Full Screen This option, also available by pressing the F11 key on your keyboard, will expand the main dashboard view to span the full size of your monitor. View>Layout The view Layout option will show a full list of the predefined layouts and it will change the number of cameras visible in the main dashboard view. Use the shortcut keys on your keyboard to change the layout 74 Video Insight Administrator Guide IP Enterprise Version 5.0 View>Mini Toolbars The Mini Toolbars option includes Cycle Layouts and Ptz Controls standalone pop-ups that can be repositioned anywhere on your dashboard for easy access to those functions. Cycle Layouts Video monitors and Police Officers may be assigned to a particular area and as such may need to review only certain locations which are usually grouped by server. For example, one Monitor Station may have multiple Servers, one per campus so when doing your usual virtual walkthrough of the campus you may need to review only one server and cycling Layouts is one way to accomplish that quickly and easily. There are two ways a user may cycle Layouts: manually or automatically. Manual Layouts cycling is done by pressing any of the predefined Layout buttons shown below: To configure the one server cycling for manual selection: 1. Access Tools>Options 2. On the General tab check the “Use tree navigation server selection for default layout buttons” checkbox as shown on the next page. 75 Video Insight Administrator Guide IP Enterprise Version 5.0 3. Log out and back into the Monitor Station to refresh the settings. 4. Select a server (it will appear highlighted) from the left navigation 5. Click any of the Layout buttons and notice only that server’s cameras will be selected for the layout view. To configure the one server cycling for automatic selection: 1. Access Tools>Options 2. On the Tools Configuration tab check the “Layouts cycle through current server” checkbox as shown on the next page. Checked is the default value for this checkbox. 76 Video Insight Administrator Guide IP Enterprise Version 5.0 3. Log out and back into the Monitor Station to refresh the settings. 4. Click View>Mini Toolbars>Cycle Layouts 5. Click the Layout scheme of your choice and press the Play button 77 Video Insight Administrator Guide IP Enterprise Version 5.0 PTZ Controls The ability to control PTZ operations for a PTZ capable camera is accessible from multiple locations in the application while offering a slight variation in capability from each location. The View>Mini Toolbars>PTZ Controls pop-up is as follows: Camera name Will select the next PTZ capable camera on the server to mange Use arrows to pan left right, up or down Once clicked will move the camera to the next saved preset location Close or Open shutter if exists on camera Focus near or far The Left Navigation Tree PTZ Controls pane is as follows: PTZ sensitivity slider; higher the setting the longer distance one mouse click will move. Setting it to lowest position will require multiple mouse clicks to move the camera further. Also called Home button, once pressed will return the camera to the home position if camera supports this feature. This icon will not appear if camera does not support this feature. Joystick capability Digital Zoom 78 Video Insight Administrator Guide IP Enterprise Version 5.0 The Left Navigation Tree PTZ Controls pane pop-up (click the arrow) is as follows: PTZ Operations can also be launched using Tools>PTZ Operations List of camera’s presets Select the server name from the dropdown Zoom in or out Select the PTZ camera to move. Only PTZ capable cameras will appear in this dropdown The Live Window button will launch a Live window of the selected camera, this window can be used to manipulate the live view using the PTZ controls. 79 Video Insight Administrator Guide IP Enterprise Version 5.0 Using the PTZ Operations pop-up with its expanded features you can create and manage PTZ presets. PTZ presets are predefined views that can be used to for cycling or manually going to with a click of a button during live view from the main dashboard. Creating a preset 1. 2. 3. 4. 5. Launch the PTZ Operations pop-up Select the Server and Camera from the dropdown Click the Live View button to view the camera as it is being moved In the Live Window move the camera to the desired preset location Click the Add button 6. Enter a Descriptive name for the preset, e.g. Northwest Entrance 7. Click Add 8. The Newly added Preset will now appear in the Presets pane as shown below: 9. Continue moving the camera to the second position and repeat steps 4-7 to add as many presets as required; a maximum of 32 presets is supported depending on the camera. To remove a Preset simply select it from the Presets pane and click the Delete button, the following confirmation will appear: 80 Video Insight Administrator Guide IP Enterprise Version 5.0 Click Yes to permanently remove it or No to cancel the operation and return to the PTZ Operations screen. You may also cycle automatically through the recently added presets by navigating to the Cycle Presets tab and clicking the Start button. Once added Presets can also be selected from the Live view camera toolbar in the Main Dashboard as shown below: View> Toolbars The View>Toolbars option is available to further hide additional options displayed by default in the main dashboard. Hiding them will add additional space to view the live view of the cameras. 1. Navigate to View>Toolbars 2. Notice the following three sub options are checked 3. Unchecking all three will hide the following Main Dashboard items: 81 Video Insight Administrator Guide Login IP Enterprise Version 5.0 Layouts Widescreen Layouts Tools>System Log The System Log is accessible from several different areas of Monitor Station and Diagnostics and is discussed in great detail in Chapter 3, section E found on page 221. Tools>Axis Joystick Control This option was added specifically for use with an Axis Joystick, it replaces the need to use mouse clicks. Once the USB joystick is connected and the option is selected from Tools the following will appear: All of the Axis PTZ cameras added to any of the servers in this Monitor Station will populate above for a maximum of 10 cameras; both the IP address and port will populate. To further customize the Joystick’s sensitivity click the Settings button where Pan, Tilt and Zoom sensitivities can be set: 82 Video Insight Administrator Guide IP Enterprise Version 5.0 Enter credentials if the Joysticks has authentication turned on, otherwise leave blank. Moreover, another option is added to manage any game controller’s settings and firmware by clicking the Config button: Select the controller you’d like to manage and click Properties, you may calibrate and test the controller’s settings here: 83 Video Insight Administrator Guide IP Enterprise Version 5.0 If the Tools>Axis Joystick Control option is selected without having an Axis Joystick attached the following will appear: 84 Video Insight Administrator Guide IP Enterprise Version 5.0 Tools>Live Window The Live Window option is used as a free floating single or multi camera view and is another feature that is accessible from several different areas of the application with slightly different options with each method. When Launching Live Window from the main toolbar the following will appear: The Layouts dropdown will not appear if no Layouts exist Select the Server name from the Server dropdown; once selected that server’s camera(s) will become available for selection from the Camera dropdown. In addition, all Layouts for all servers in that Monitor Station will become available in the Layouts dropdown. The red outline shown above is used to signify motion was detected on this camera. To remove this red outline motion indicator simply uncheck the Red Outline on Live Window option in Tools>Options>Live Window tab. Tools>Media Player The Media Player is a standalone Video Player created by Video Insight with many capabilities and is built it to Monitor Station. The Media Player is discussed in detail in Chapter 7 found on page 277. 85 Video Insight Administrator Guide IP Enterprise Version 5.0 Tools>PTZ Operations The PTZ Operations pop-up and its many features are discussed on page 78. Tools>Synchronized Player The Synchronized player allows for multiple camera synchronized playing and this stand alone application is discussed in detail in Chapter 8 on page 278. Tools>Options The Options pop-up is additional configuration aimed at personalizing your Monitor Station. Each tab is explained in detail on the next few screens. 86 Video Insight Administrator Guide IP Enterprise Version 5.0 General Tab Exit Confirmation: This checkbox is checked by default and once a user closes Monitor Station or restarts it will show the following pop-up, to avoid seeing this message simply uncheck this box. Block Warning Messages: Warning messages in Monitor Station include pop-ups informing you of cameras when they lose connectivity and when the connection is restored as well as any disk write errors 87 Video Insight Administrator Guide IP Enterprise Version 5.0 that may occur. To avoid seeing these informational pop-ups simply check the box to prevent them from appearing. Integrated Player Initial Size: The Integrated Player size is the size of the player when playing files from the Main Dashboard; changes made in this dropdown do not affect Media Player player size. Choose a size your Monitor will support: 320x240, 400x300, 480x360, 560x420, 640x480, 720x540, 800x600, 960x720, 1080x810, 1280x960, 1440x1080, and 1600x1200. Show Layout: This checkbox, which is checked by default, determines whether the camera’s toolbar in Live view will display or not. When unchecked more of the screen is used to view the live image of the camera(s) rather than displaying the camera information. With it checked it will display as follows, notice the red rectangle: Choose a player size that can be supported by the size of your Monitor and screen resolution; otherwise you will NOT see the Controls bar at the bottom of the player 88 Video Insight Administrator Guide IP Enterprise Version 5.0 Unchecked it will appear as follows, notice no camera headers are displayed: Force Aspect Ratio: This checkbox is another customization aimed at displaying the best layout for your monitor’s screen resolution and Monitor size. With force aspect ratio checked all of the live images will be forced to a 4:3 size in the main layout. This option will not affect the Live Window pop-ups. Here is a sample of the view: 89 Video Insight Administrator Guide IP Enterprise Version 5.0 Use DirectX Display: This checkbox gives users the opportunity to save on CPU usage by attempting to use DirectX rather than the onboard graphics card installed. When selecting this option, the correct version of the installed DirectX should also be selected: DirectX 7, 9 or Legacy which is older than version 7. If the DirectX version selected is NOT available on this machine a “Cannot Initialize renderer (0x80040273)” will appear. Select a different version of DirectX or simply uncheck the option. Show Server Name: When checked (default) it will display the server name in the camera toolbar in the main view as well as Server and Camera Live window pop-ups. The show Layout checkbox must also be checked for this information to appear. This capability will affect only the first 4 cameras in live view and in layouts Show Camera Name: When checked (default) it will display the camera name in the camera toolbar in the main view as well as Server and Camera Live window pop-ups. The show Layout checkbox must also be checked for this information to appear. Double Click Expands Camera: This option gives you the ability to specify whether a single or double click is required to expand the camera in the left navigation tree to show recordings. If Double Click is selected, then a single click on the camera name merely shows the camera in the viewing panel. Use Tree Navigation Server Selection for Default Layout Buttons: This option determines which server’s layouts will be used when cycling manually or automatically. To learn more refer to Cycling Layouts on page 75. 90 Video Insight Administrator Guide IP Enterprise Version 5.0 On Screen Controls for PTZ Cameras: There are three options to select from: The On Screen PTZ is the defaulted selection; it will superimpose directional arrows on the view for PTZ Cameras to signify a PTZ camera was selected in live view on the main dashboard. If the Overview Window option is selected it will show a magnifying glass as a cursor in the live view. Draw a square with the cursor on the area you’d like to zoom to. Here is a sample view once the square shape has been drawn: Overview Window of full camera view Zoomed in area; to move it drag the orange square within the Overview Window The None option will not display any special cursors for PTZ cameras and for PTZ only the PTZ controls pop-up should be used found in the left navigation. On Screen Controls for Standard Cameras: There are two options to select from: 91 Video Insight Administrator Guide IP Enterprise Version 5.0 The default Overview Window option will show a magnifying glass as a cursor in the live view. Draw a square with the cursor on the area you’d like to zoom to, for standard non-PTZ cameras a digital zoom would be used. Here is a sample view once the square shape has been drawn: Overview Window of full camera view Zoomed in area; to move it drag the orange square within the Overview Window The None option will disable the ability to digitally zoom in live view for non-ptz cameras. 92 Video Insight Administrator Guide IP Enterprise Version 5.0 Tools Configuration Tab There are three options available to optimize the live view performance in Monitor Station depending on the bandwidth available at your organization. Normal Operation: will use all available resources to display the best live streaming, however, should network bottleneck occur it will be visible in live view; select this option for clients that have very good connectivity and thus you want to stream at Normal which will send all images as uncompressed MJPEG. If Low Bandwidth/High CPU option is selected at the Server level (page 38) these options for the client will be ignored since all images will already be compressed Low Bandwidth Mode: In Low bandwidth mode if you are viewing multiple images on a screen it will compress those images but if you switch to a single image it will send that image as uncompressed. 93 Video Insight Administrator Guide IP Enterprise Version 5.0 Very Low Bandwidth Mode: The difference between Low bandwidth mode and Very Low Bandwidth Mode is somewhat subtle. In Very Low bandwidth mode, all images will be compressed regardless of whether you’re viewing multiple or a single image. Choose this option for clients with poor connectivity. The Machine Performance dropdown has 3 options to improve live streaming when in multiple camera views; specifically 9 and above layout views. Normal: When selecting this option expect the Monitor Station to use the current capabilities of your client machine’s CPU. Workstation: When selecting this option expect the Monitor Station to use approximately the same CPU than in the Normal mode when in 4 camera layout and a higher performance of live streaming. Once 9 camera layout you will see an increase in CPU since more cameras are visibly streaming and of course better live performance. High Performance: When selecting this option expect the Monitor Station to use the most CPU to deliver the smoothest live view (16 camera layout and higher); a powerful machine with a strong processor is recommended for this option. Mini Toolbars for cycling layouts section is covered in greater detail in to Cycling Layouts on page 75. Local Settings: Once Monitor Station is configured to your liking you have the option of exporting those settings using two different methods: 1. Select Either Registry or XML 2. Click Export, the following will appear 94 Video Insight Administrator Guide IP Enterprise Version 5.0 3. Enter a name for the file and choose a save location from the dropdown 4. Click Save Here is a snippet of a sample file The Exit Confirmation checkbox value is true in this exported settings file The file may be used to configure other clients by clicking Import button above and selecting the file previously exported. Enable Access Control Viewer: This option is for our Blackboard integration Lock Down Access Control Viewer: This option is for our Blackboard integration View Sentry 360 Cameras in Quad View When in Single Camera Mode: When unchecked Sentry 360 cameras include multiple views: Full image, Quadview and a panoramic view as seen below: 95 Blackboard is discussed in greater detail on page260. Video Insight Administrator Guide IP Enterprise Version 5.0 Once the option is checked and the camera is selected from the main dashboard or the left tree only the quad view will appear as seen below: Enable Watermark for Clips: This option, which is checked by default, will interlace the Checksum security mark to detect any tempering with the created clips. To learn how to create clips refer to page 148. Force Motion JPEG Format for Clips: This option, which is checked by default, will create all clips in Motion JPEG format. This ensures that they can be read by most available off the shelf players 96 Video Insight Administrator Guide IP Enterprise Version 5.0 Live Window Tab Block Live Window Pop-ups: This option is unchecked by default. However, once checked it will suppress all possible Live Windows from popping up while Monitor Station is launched. Live windows may be sent to you from other users or by use of rules or may be launched manually. Live Window Always on Top: This option is unchecked by default. However, once checked it will show all received Live Windows on top of Monitor Station. Integrated Facility Map: When a Facility Map is selected it will, by default, appear as a pop-up. However, once this checkbox is checked the Facility map will appear in the main dashboard area of Monitor Station on the left side of the Left Navigation Tree as shown below. To learn more about Creating, maintaining and using Facility maps refer to page 111. 97 Video Insight Administrator Guide IP Enterprise Version 5.0 Use Four Camera Facility Map Display: This option is applicable for both integrated and nonintegrated maps. The four camera view is excellent when attempting to seam together a four eye camera such as the 180 or 360 Arecont cameras to view a complete hallway at a time. This view can also be used for all other cameras, here is a sample: 98 Video Insight Administrator Guide IP Enterprise Version 5.0 Force Record Option: Once checked this option will add a button to the Camera Toolbar in the Main Dashboard. This button, once pressed, will record immediately and will continue recording until the button is pressed again or the time set has been reached for a maximum of 200 minutes. Force Record Button The Camera’s Recording Type will not be changed permanently, record always will be performed once this action is triggered and when complete the camera will resume normal recording setting such as Motion Only for example. Red Outline on Live Window: When launching Live Window by right clicking on the Server node from the left tree it will display all cameras for that server and will outline each with a redline for a few seconds when motion is detected as shown below: 99 Video Insight Administrator Guide IP Enterprise Version 5.0 Pause Main Display When Live Window Launches: When launching Live Window either for a server from the left navigation tree or for a single camera, the main dashboard will pause all streaming to improve performance and conserve bandwidth. After a few seconds of paused images they will appear gray. Paused images When closing the Live Window click the Pause button as shown above to resume live streaming. Include Server Name for All Facility Maps: All Facility Maps appear in the Left Navigation Tree for quick access, but when multiple servers are added to a single Monitor Station it may be a bit difficult to decipher which facility Maps belongs to which server; adding the server name will make it easier. Once checked the server name will preface the Facility Map name. 100 Video Insight Administrator Guide IP Enterprise Version 5.0 Include Server Name for All Layouts: All Layouts appear in the Left Navigation Tree for quick access, but when multiple servers are added to a single Monitor Station it may be a bit difficult to decipher which Layout belongs to which server; adding the server name will make it easier. Once checked the server name will preface the Layout name. Layout Tour Cycle Time: When creating a camera tour you can set the time interval between each camera here. Rules Manager Triggered Actions: The creation of rules adds additional flexibility and customization to your software. Certain rules can include results that send notifications to all Monitor Stations or specific users. To Please Note: There is no way to prevent those pop-ups from appearing in your Monitor Station retrieve the messages you would simply check the applicable checkboxes. have received once they are Block rules from popping up messages/instruction blocked. Block rules from switching main layout Block rules from launching instant replay window 101 Video Insight Administrator Guide IP Enterprise Version 5.0 Flash Red on Motion: When checked this will highlight the Camera toolbar in red to indicate motion has been detected on a particular camera. This option makes it especially helpful when viewing many cameras at once as shown below. Use Maintenance View: When checked this will change the Contact Information tab in Camera Properties to Maintenance tab properties with offers different fields. To learn more about the two different tabs refer to The Camera Maintenance tab discussion on page 252. 102 Video Insight Administrator Guide IP Enterprise Version 5.0 Audio Tab Audio notification on motion: This option gives the user the ability to specify if there will be any audio notification on motion in a camera. You have the option of no sound, the default system beep, or you can load your own notification sound using a .Wav file. Audio notification on tasks: In some situations, rules have been created that specify that an audio notification will be generated based on some predetermined set of events. You can elect to have no sound, the default system beep or you can load your own custom notification sound. 103 Video Insight Administrator Guide IP Enterprise Version 5.0 Startup Tab Starting Layout: Upon launching the Monitor Station the main dashboard display will be determined by what is selected here. If you’d like to display one particular camera (for example the first one) choose the first Camera in layout option and choose a 1 Camera Layout from the dropdown. If displaying a specific customized layout is desired instead choose Custom Layout and the correct server/layout option from the dropdown. Hide Archive Tree on Startup: Hides the left navigation tree. Launch Facility Map on Startup: Check this option and select the desired Facility Map from the dropdown. Upon launching the Monitor Station a separate pop-up window will also launch with the previously selected Facility Map. 104 Video Insight Administrator Guide IP Enterprise Version 5.0 Auto Upgrade: When this option is turned on, the next time the Monitor Station is launched it will compare its version to all of the servers that are currently connected to it. If a later version is found on a server Monitor Station will be prompted with an Auto Upgrade pop-up. As shown above the Current version correlates to the Monitor Station version and the Upgrade version correlates to one of the servers this MS is currently connected to. Once Upgrade is selected the Monitor Station will close and the installation will quickly flash on the screen. Launch Monitor Station again and navigate to Help>About Video Insight to confirm the upgrade was successful. Start in Full Screen Mode: When this option is turned on, the next time the Monitor Station is launched it will display in full screen. Verify Active Directory: When login in using Active Directory and checking this box the authentication of the user’s credentials will be verified against Active Directory in real-time, not just the cache. If choosing this option please note that depending on your organizational security setting failed login attempts may lock your domain account. Enable Auto Login: Enter the credentials here to bypass the Login pop-up. To learn more refer to the Login section found on page 188. 105 Video Insight Administrator Guide IP Enterprise Version 5.0 Administration>Setup and Configuration The Setup and configuration module is used for many aspects of the video surveillance setup; options ranging from changing server properties to user management and other application integration such as Health Monitor settings and Live View Monitor setup. Administrator level access is required for most of the options. From this screen you may add servers manually or automatically by importing a list; follow the links or refer to page 65 for greater detail. Servers can also be deleted as well as modified by clicking properties. Use the Up and Down arrow keys to change the order in which the servers appear in the left navigation tree. Click the ‘?’ mark in the top right hand corner to view a copy of the manual Click the License button to view the available number of licenses per server, specifically the Total number of cameras licensed, the total used, and the total available: 106 Video Insight Administrator Guide IP Enterprise Version 5.0 Unknown will appear when server is not connected 107 Video Insight Administrator Guide IP Enterprise Version 5.0 Setup and Configuration Left Navigation Tree The left navigation tree may display one of three statuses explained below: = Server is connected and settings may be modified. = Server is not connected due to a login error, it will continue to record video to the specified location however, modifications to settings using MS or IPSM will not be allowed, = Server is not connected; may be due to service is not running or the connection properties are incorrect, confirm IP Address and port. Selecting a server from the left tree will display the server properties and will allow administrators to modify them. For a full explanation of each tab and fields refer to Server Customization on page 33. Expanding connected servers will also allow for quick access to Cameras properties as well. 108 Video Insight Administrator Guide IP Enterprise Version 5.0 Camera properties are explained in greater detail in Chapter 4, Modifying Camera Details, on page 232. 109 Video Insight Administrator Guide IP Enterprise Version 5.0 Setup and Configuration Tools Node The Health Monitor is discussed in great detail in Chapter 6 on page 267. Once installed enter the IP address and port of any Health Monitor you’d like to access from this Monitor Station. Connect: click Connect to test the connection parameters Add: click Add to simply add the Health Monitor without testing the parameters. Highlight an already added Health Monitor to view its status: 110 Video Insight Administrator Guide IP Enterprise Version 5.0 c. Facility Maps When viewing multiple cameras from multiple locations, camera names might not be descriptive enough to identify a camera. Use Facility Maps to upload images of your buildings and then place cameras on the image representing camera placement. This feature supports multiple layers of maps that can link to one another and supports cameras on each map. Layouts can also be placed on Facility Maps. If Facility Maps have been set up, then using Monitor Station, you can view all of your cameras by Facility Map views rather than the Server/Camera tree view. 111 Video Insight Administrator Guide IP Enterprise Version 5.0 Adding a Map 1. Select the Facility Map node 2. Select the applicable server to add this map to 3. Click New Map 4. Enter the Map name 5. Browse to the location of the Facility map image (JPEG images work best) 6. Select a size of the image taking into account the average monitor resolution size that will be used to view these maps in Monitor Station 112 Video Insight Administrator Guide IP Enterprise Version 5.0 7. Click OK Double click an already placed item to remove it from the map 8. Drag and drop the items of your choice from the items available pane on the left to the map and position them in the appropriate locations. Items such as cameras, layouts, doors (doors are access points used for Access Control type of integrations) and other facility maps may be overlaid on the newly created Facility Map. 9. Check the View Live Cameras checkbox to view live images of the camera to better assess its location on the map. 113 Video Insight Administrator Guide IP Enterprise Version 5.0 10. Click the Recent History button to view the last 30 seconds of recorded video 11. Once all items have been positioned on the map click OK Deleting a Map 114 Video Insight Administrator Guide IP Enterprise Version 5.0 1. Select the Facility Map node 2. Select the applicable server 3. Highlight the correct map from the Facility Maps grid 4. Click Delete 5. Click Yes to confirm 6. Click Apply and OK Modifying a Map 115 Video Insight Administrator Guide IP Enterprise Version 5.0 1. Select the Facility Map node 2. 3. 4. 5. 6. Select the applicable server Highlight the map to modify Click Modify Add or remove map items from the new pop-up. Click OK 116 Video Insight Administrator Guide IP Enterprise Version 5.0 Renaming a Map 1. 2. 3. 4. Select the Facility Map node Select the applicable server Highlight the map to rename Click Rename button 5. Enter the new map name 6. Click OK 117 Video Insight Administrator Guide IP Enterprise Version 5.0 d. Layouts Custom layouts can be created using cameras from multiple servers. When a custom layout is added to a server, then it is available to all Monitor Station users with the appropriate rights. Adding Layouts 1. Select the Layouts node 2. Click Add 118 Video Insight Administrator Guide 3. 4. 5. 6. IP Enterprise Version 5.0 Name the new Layout Add a description if desired, otherwise leave blank Select the Custom layout type from the dropdown Select cameras from the Available Pane and click the right arrow 119 Video Insight Administrator Guide IP Enterprise Version 5.0 7. Use the Up and Down arrow buttons on the right to reorder the cameras in the custom layout. 8. Click OK 9. Click Apply and OK 120 Video Insight Administrator Guide IP Enterprise Version 5.0 Adding Layout Tour 1. Repeat steps 1-5 in the Adding Layouts section 2. When selecting cameras to add to the Layout select the Camera Tour (will appear at bottom of Available pane) 3. 4. 5. 6. 7. Name the Tour Select which cameras should the tour cycle through Click OK Click OK again Click Apply and OK 121 Video Insight Administrator Guide IP Enterprise Version 5.0 Deleting a Layout 1. Navigate to the Layout Overview tab 2. Select the Layout to remove from the Layouts grid 3. Click Remove 4. Click Yes 5. Click Apply and OK 122 Video Insight Administrator Guide IP Enterprise Version 5.0 Modifying a Layout 1. Navigate to the Layout Overview tab 2. Select the Layout to modify from the Layouts grid 3. Click Properties 123 Video Insight Administrator Guide IP Enterprise Version 5.0 4. Modify Any desired fields 5. Click OK 6. Click Apply and OK 124 Video Insight Administrator Guide IP Enterprise Version 5.0 Adding Layout Groups A new concept called Layout Groups has been added to the Monitor Station and is visible in the Web Client. Layout groups can be used to logically group individual layouts; this can be useful when a group of individual schools needs to group by Regions for example. To create a Layout Group you must first have individual Layouts created for the server. Learn how to add Layouts on page 118. 1. 2. 3. 4. 5. 6. Access Administration>Setup and Configuration Select Layouts>Layout Groups from the left navigation Select the Server you would like to create the Groups for from the Server dropdown Click Add Replace the default Group Name, Group 1, with a name of your choice Select the Individual Layouts that should be part of this group. Only Layouts created on the server used will appear in this selection box. Image shown on the following page. 7. Click OK 8. The newly added Group and its layouts will appear in the Grid, see below. 125 Video Insight Administrator Guide IP Enterprise Version 5.0 Here is how it will display on the Web Client, granted the user logged in has access to view layouts: Here is how it will display on the Monitor Station, granted the user logged in has access to view layouts: 126 Video Insight Administrator Guide IP Enterprise Version 5.0 In the event an exact duplicate Layout Group with the same name and/or individual layouts is created the following error will appear: If a Layout Group is created with a unique name and exact individual layouts of an existing group a Warning will appear, you may bypass it and continue to create this group, by clicking Yes. 127 Video Insight Administrator Guide IP Enterprise Version 5.0 e. Rules Manager The Rules Manager is a configuration wizard for Comprehensive Event Trigger (conditions)/ Actions. It can be used to set up a simple activity such as recording schedules or complex cause and effect relationships with Boolean logic. Triggers can be o DIO Input o Motion Event o Alert Button o Scheduled o Programmed -Remote triggers from the SDK Resulting Actions include o Create an action event for the Video Player o Send a digital Output on a specific port o Audio Alert o Email custom message o Email video to a specified user o Flashback - Email a picture from a specific camera. The flashback function shows thumbnails of key motion movements for that recording. Instead of showing all motion, it analyzes the motion event and shows the most relevant image. o Live Window – Pops up a window displaying the live feed of a camera. o Move a PTZ camera to a specific preset o Record - Set a recording type o Create a video file with audio o Audio alert – This will play a sound on the monitor station o Instant Replay – Plays the last 30 seconds of recorded video. o Network Decoder – sends axis camera images to the network decoder o Record with audio – creates a file with audio included o Switch camera or switch layout – This option will have the monitor station change from the current layout to the one defined by this rule. You can set it up so that only a specific user will switch to that camera view. o Start time lapse recording o Copy, Move or Delete Files Example 1: When motion is detected or a door is opened during the time from 12 midnight to 8 AM, move the PTZ camera to a preset position and send an email. Example 2: On Sundays, if motion is detected, send an email and attach an AVI clip of the motion. Rules in the Rules Manager are specific combinations of trigger events and schedules (if required) and their resulting actions. Each rule must have a rule name. For instance, a rule called Off hour Motion in Boy’s Gym could be set up such that when motion is detected on a camera in 128 Video Insight Administrator Guide IP Enterprise Version 5.0 the Boy’s Gym during the time from 12 midnight to 6 AM, move the PTZ camera to a preset position, increase the recording frames per second and send an email to the security chief. Rules: Ability to Copy, Move or Delete a File A new feature that allows users to backup their files to another location using the Rules manager has been added. This feature takes the daunting task of remembering to back up important video recordings on the current server and automates it. File Manipulation also offers the ability to Move or Delete videos as well using the same process. Administrator level access is required to perform this task. To configure this new feature follow these steps: 1. 2. 3. 4. 5. Access Administration>Setup and Configuration Select the Rules Manager from the left tree navigation Name your new Rule Click Next In the Schedules screen, schedule the time and frequency you would like this rule to run. 6. Click Next 129 Video Insight Administrator Guide IP Enterprise Version 5.0 7. Bypass the type of Event screen this rule should trigger, by clicking Next 8. Double click File Manipulation from the Available Actions selection box 9. The following will appear: 10. Enter a Name for the File Copy, Move or Delete rule. 130 Video Insight Administrator Guide IP Enterprise Version 5.0 11. Choose the scope of this rule. If Server is selected all of the files for all of the cameras will be included in this rule. If Camera radio button is selected, only the checked cameras will be included. 12. Select the Task type: Copy, Move or Delete. You may create multiple rules to manage multiple cameras and server configurations. For example, copy some cameras’ videos, delete others and move the rest – it is flexible enough to manage at the camera level. 13. Select the number of days, maximum is 999 days and the minimum is 1 day. The number selected reflects the most current days to keep; for example if 3 is selected it will move, copy or delete all files older than 3 days. 14. Select the Destination folder, it may be a shared location or a local folder – the folder must exist first in order for the task to complete successfully. 131 Video Insight Administrator Guide f. IP Enterprise Version 5.0 TV Decoders Adding a Decoder Add a TV Decoder when outputting video to a TV monitor for example. 1. 2. 3. 4. Access Administration>Setup and Configuration Select TV Decoders from the left navigation Select the Server you would like to add a Decoder for from the Server dropdown Click Add 5. 6. 7. 8. 9. 10. Enter a Decoder Name; name for this Spot monitor Enter the IP Address of the decoding device Enter User Name and password for the decoding device Select the Decoder Type Select the Sequence mode: Auto or Manual Click OK Only Axis 292 decoders are supported at this time 132 Video Insight Administrator Guide IP Enterprise Version 5.0 Deleting a Decoder 1. 2. 3. 4. 5. 6. Access Administration>Setup and Configuration Select TV Decoders from the left navigation Select the Server you would like to remove a Decoder from the Server dropdown Select the Decoder from the grid Click Remove (no confirmation will appear) Click Apply and OK Modifying a Decoder 1. 2. 3. 4. 5. 6. 7. 8. Access Administration>Setup and Configuration Select TV Decoders from the left navigation Select the Server you would like to modify a Decoder from the Server dropdown Select the Decoder from the grid Click Properties Modify any desired fields Click OK Click Apply and OK 133 Video Insight Administrator Guide IP Enterprise Version 5.0 g. Live View Monitor The Live View Monitor is an extension application used in conjunction with Monitor Station and the IP Server applications to output control and manage a series of live images displayed on walls of televisions. In order to configure the Live View Monitor the server(s) must have existing Layouts created. Adding a Live View 1. Access Administration>Setup and Configuration 2. Select Live View Monitor from the left navigation 3. Select the Server you would like to add the Live View Layout to from the Server dropdown 4. Click Add 5. 6. 7. 8. 9. Enter a Name for this Live View Layout Add a Description if desired although not required Select the applicable custom layout from the Layout dropdown Click OK Click Apply and OK 134 Video Insight Administrator Guide IP Enterprise Version 5.0 Deleting a Live View 1. Access Administration>Setup and Configuration 2. Select Live View Monitor from the left navigation 3. Select the Server you would like to remove the Live View Layout from the Server dropdown 4. Highlight the Live View Layout 5. Click Remove 6. Click Yes 7. Click OK 8. Click Apply and OK Modifying a Live View 1. Access Administration>Setup and Configuration 2. Select Live View Monitor from the left navigation 3. Select the Server you would like to modify the Live View Layout from the Server dropdown 4. Highlight the Live View Layout 5. Click Properties 6. Modify any of the fields available 7. Click OK 8. Click Apply and OK 135 Video Insight Administrator Guide IP Enterprise Version 5.0 h. Left Navigation Tree The Left navigation tree is a core functionality area for many of the daily operations of an end user. The many functions are discussed below; there are three possible views of the left tree pane: Enterprise View (default) Facility Map View Layout View 136 Video Insight Administrator Guide IP Enterprise Version 5.0 Enterprise View All Servers node List of all added Servers List of all Layouts, pg 118 List of all Facility Maps, pg 111 Server Groups discussed on pg 138 Health Monitor, pg 267 Network Decoders, pg 132 Action buttons created by Rules, pg 128 ?? Layout Groups, pg 125 The All Servers node is the parent node; right clicking on it will show the following options: Add/Remove Server: This option when clicked will show the Add/Remove server screen in a pop-up, this screen is discussed in detail on page 65 . 137 Video Insight Administrator Guide IP Enterprise Version 5.0 Add Group: This option when clicked will allow the addition of Server groups. Creating groups of servers may be beneficial when organizing server locations by region or any other logical grouping of servers in the Monitor Station. 1. Enter a server Group Name 2. Check the applicable servers that should be added to that group 3. Click OK The newly added group will now appear at the bottom of the tree as follows: 138 Video Insight Administrator Guide IP Enterprise Version 5.0 There are three possible states for a server in the left navigation tree: = Server is functioning properly; streaming video to clients, recording video and reporting to HM, if applicable = Server is stopped and is NOT recording or streaming video; refer to possible reasons and solutions on page 276. = Login Error: The server is found but security is on and the server attempted to authenticate with the credentials we used when login in to MS initially (Administrator/blank). Log out and back into Monitor Station with the right credentials. The Enterprise view also allows for viewing recorded videos, assuming access has been properly granted if security is enabled. To view recorded video simply double click a camera node in the left tree to expand the tree. One or several folders may appear depending on the archiving settings configured for this server or the storage disk reserve space requirements which will move older files to a separate storage device (you can still access the long term storage location to view older files using the Media Player discussed on page 277.) When viewing a Recorded video from the Enterprise view there are several options available below the video that is currently playing. To play a video follow the steps on the following page: 1. Double or single click the camera node of your choice to expose the folders 139 Video Insight Administrator Guide IP Enterprise Version 5.0 Object Zoom Object Zoom 2. Click the desired file to play 3. Notice the file will begin playing immediately 4. The playback may be paused, stopped or Fast forward/backwards using the buttons provided above. In addition using a 1 frame forward or backwards are also provided. 5. Use the blue dot slider to jump to a point of interest in the video, the exact time of the image will appear in the bottom right corner of the file playing back. 6. You may also download a video (pg 149) or Clip a shorter file (pg 148) for distribution. Properties of any of the nodes, whether it is a camera layout, facility map, or any group can be accessed by simply right clicking the applicable node. 140 Video Insight Administrator Guide IP Enterprise Version 5.0 Contextual right click menu For Servers and Server Groups: 1. Right click the server node Live Window: Selecting Live Window will show a pop-up with all of the server’s cameras as shown below: View Servers Cameras: Choosing this option has the same effect as if clicking the server node; all of the server’s cameras will appear in the main viewable area. 141 Video Insight Administrator Guide IP Enterprise Version 5.0 Disconnect: This option will disconnect the server and cameras streams will no longer stream to this Monitor Station. A Connect option will be available when right clicking a disconnected server. Restart Service: When a restart of the service is needed select this option; the client requesting the restart request sends the request to the server, the IPSM application must be running for the server to accept the request. If the IPSM is not running at the time it will restart the next time it is launched. Status: Clicking this option will bring up the Server Statistics pop-up. Server Statistics is discussed in detail on page 157. System Log: Choosing this option will display the System log which is discussed in greater detail on page 221. Properties: Will display the Server Properties, discussed on page 33. For Cameras: 1. Right click the camera node Live Window: Selecting Live Window will show a pop-up with the selected camera’s view as shown below: 142 Video Insight Administrator Guide IP Enterprise Version 5.0 Send: when clicked this option will display the following pop-up; select the users to send the image to. Once sent, the same live window will appear on their Monitor Station, unless they have the block pop-ups option enabled. View Camera: Will bring the selected camera into focus and 1 camera layout in the main viewable area. Properties: Will open the Camera properties to change any of the settings. Camera properties are discussed in further detail on page 232. 143 Video Insight Administrator Guide For Layout: IP Enterprise Version 5.0 1. Right click the specific Layout node Live Window: Selecting Live Window will show a pop-up with the selected Layout’s view as shown below: View Layout: Will bring the selected Layout into focus in the main viewable area. Properties: Will open the Layout properties to change any of the settings, add/remove cameras and other modifications. Layout Configuration is discussed in further detail on page 123. 144 Video Insight Administrator Guide For Facility Map IP Enterprise Version 5.0 1. Right click the specific Facility Map node View Map: Will bring the selected map into focus in the main viewable area as an integrated map (if option is selected) or as a pop-up. View cameras: Will bring the selected cameras overlaid on the map as a layout into focus in the main viewable area. Properties: Will open the Facility map setup pop-up to change any of the settings, add/remove cameras and other modifications. Facility Map setup is discussed in further detail on page 111. 145 Video Insight Administrator Guide IP Enterprise Version 5.0 Facility Map View Expand a FM node to view the cameras Select a camera to view that camera’s live view Some individuals assigned to manage the video surveillance and security for their organization may elect to manage it using the Facility map view instead of the main live view from a tactical stand point knowing exactly the location of the cameras and their viewable area. To view a Facility Map simply click the desired node, it will appear as follows: 146 Video Insight Administrator Guide IP Enterprise Version 5.0 FM Toolbar, details below Hover over a camera to display the Live view on the right From this screen there are several options available to the video monitor user. Live button: Clicking this button will display a Live pop-up window. Recent History: Clicking this button will display a 30 Second Review pop-up with the most recent history as follows; use it in conjunction with the calendar control to select the desired date: 147 Video Insight Administrator Guide IP Enterprise Version 5.0 Fast backwards Create a Clip Play Download Video Handles/clippers Stop 1 Frame backwards From the 30 Second Review pop-up there are a few available options: Creating a Clip 1. Use the green triangular handles to select the length of your desired clip 2. Click the Create a Clip button 3. Select the Folder location to save the clip to by clicking the ellipses button 148 Video Insight Administrator Guide IP Enterprise Version 5.0 4. Change the default name of the clip or simply click OK to accept the default 5. Once complete the following will appear: 6. Click OK to dismiss pop-up Downloading a Recorded file 1. Click the Download Video button, the following will appear: 2. Select the Save location for the video 3. Enter a File Name of your choice 4. Click Save, the following will appear: 149 Video Insight Administrator Guide IP Enterprise Version 5.0 5. Once complete the following will appear: 6. Click OK to dismiss pop-up Facility Map Toolbar The Facility Map Toolbar allows for further customization of the Facility map view and behavior as discussed below. = Some Facility Maps have overlaid cameras as well as other Facility Maps to expose additional terrain detail. When viewing a sub Facility Map use the back button to return to the prior view. = pressing this will hide the Camera icon used to designate a camera on the map. = will hide the camera names that may sometime obstruct the terrain view = will hide the viewable cone icon on the map = will hide sub facility maps on the currently viewed map = will hide layouts on the currently viewed map = Clicking Options will display the following menu: 150 Video Insight Administrator Guide IP Enterprise Version 5.0 Select any of the options to change the camera name font and or the font color to make it more noticeable. In addition you may hide the Zoom bar functionality displayed on the bottom right of the screen. 151 Video Insight Administrator Guide IP Enterprise Version 5.0 Layout View Expand a Layout node to view the cameras Select a camera to view that camera’s live view To view a Layout simply click the desired node, it will display the chosen layout in the main view area. The ability to right click a Layout and expose the contextual right click menu is also available, discussed on page 141. Moreover, viewing recorded video is also available by double clicking the camera of your choice as shown below to expand the recorded video folders. 152 Video Insight Administrator Guide i. IP Enterprise Version 5.0 PTZ Controls pane PTZ functionality and PTZ controls pane is discussed in greater detail in Section B on page 78. 153 Video Insight Administrator Guide j. IP Enterprise Version 5.0 Search Pane Use the Search box in the Left Navigation tree to find any search string, change the radio button to the applicable item type: Camera, Server or simply All. Search can now show all matches with the search string entered. For example, if there are multiple cameras using “pos” in their name the search feature will now show the following: 154 Video Insight Administrator Guide IP Enterprise Version 5.0 Double click the row of your choice or highlight the row and click OK, the pop-up will close and the camera selected will be highlighted in the tree. Furthermore, now searching for an IP address will do a search In the IP field itself rather than just the camera name. 155 Video Insight Administrator Guide IP Enterprise Version 5.0 k. Live Audio Controls pane Use the Audio Controls pane to control the speakers’ volume and balance as well as the buffering. Live Audio must be selected and supported for the camera. 156 Video Insight Administrator Guide l. IP Enterprise Version 5.0 Layouts Toolbar Layout Toolbar is discussed in greater detail in Cycling Layouts on page 75. m. Camera’s Quick Access toolbar The Camera’s Quick Access toolbar includes several shortcut buttons and information. Pause live streaming Show Recent History Force record discussed in Tools>Options on page 86 Pop-up a Live Window Motion Indicator: will appear orange when motion is detected, click to reset n. Server Statistics A new sub menu has been added to the Administration set of options. This menu will allow administrators to manage all servers, review server and camera status, as well as manage storage, licensing and online users. 157 Video Insight Administrator Guide IP Enterprise Version 5.0 Overview Tab The over view tab will display All servers that are currently added to this Monitor Station. It will list the Server Name, Version of software installed on that server, the IP address and the port used for that service. If a particular server is offline or security is on and incorrect credentials have been used it will show the server name, but the version will appear as Unknown. 158 Video Insight Administrator Guide IP Enterprise Version 5.0 Server Status Tab The Server Status tab will list all servers and their current Processor usage in percentages, Memory Available to the IP service and Total Memory available on the machine. To refresh the values check the Constant Updates checkbox at the bottom to get the latest updates on 4.3 servers and higher. 159 Video Insight Administrator Guide IP Enterprise Version 5.0 Camera Status Tab The Camera Status tab will list the Camera name, the Last received communication from it to the server, the resolution being used, the number of Frames Per Second, The Bandwidth used by it currently, Frame size and the format configuration for the camera. There are instances when the Format will appear as Unknown if no connection to the camera has been done recently. Also, Cameras that belong to a version earlier than 4.3 will display most information as 0 or unknown. You may also filter the Camera list by filtering it by Server from the dropdown. Sample screen below: 160 Video Insight Administrator Guide IP Enterprise Version 5.0 Storage Tab The Storage tab will list all cameras and their corresponding storage usage for a listed number of days. 161 Video Insight Administrator Guide IP Enterprise Version 5.0 Licensing Tab The Licensing tab is a great way to manage all servers, and cameras and easily view whether a license needs to be upgraded or not. 162 Video Insight Administrator Guide IP Enterprise Version 5.0 Online Users Tab The Current Online Users feature will allow administrators to view all users connected to that server in real time. At the moment this feature will capture only users logged in using the Monitor Station. 163 Video Insight Administrator Guide IP Enterprise Version 5.0 G. Web Client The Web Client allows you to view live or recorded video from anywhere using a browser including Microsoft Internet Explorer, Firefox, Chrome, or Safari with optional Active X-plug-in. You can control PTZ cameras and playback recorded video. The system supports multiple users and is tightly integrated into the Windows operating system for complete security. Regardless of the installation type selected in the Installation section, the Web Client is automatically installed if IIS is configured. a. Configuring IIS The following steps are similar for all Operating Systems, however if the directions are slightly different consult your System Administrator or the Operating System’s manual to identify how to add IIS. 1. Access Control Panel 2. Navigate to Add/Remove Programs 3. Click Add/Remove Windows Components, the following will appear (on XP for example) 4. Check the Internet Information services (IIS) option 5. On a few Operating systems that option will show children nodes as well, here is an example on Windows 7: 164 Video Insight Administrator Guide IP Enterprise Version 5.0 6. Be sure to check those as shown above as well if applicable to the Operating System you are using. 7. Once configured you may continue to install the software. 165 Video Insight Administrator Guide IP Enterprise Version 5.0 b. Accessing the Web Client Starting with release 5.0.0.22 customers will have the option to either continue using the 4.3 Webclient or the newly redesigned 5.0 version. The new 5.0 Web Client offers: Seamless playback Simplified navigation Intuitive clip creation Optional H.264/MPEG streaming Snapshot Feature Customization Advanced configuration 1. 2. 3. Launch Internet Explorer Navigate to http://your server’s ip address/videoinsight/default.aspx If Security is off you will be shown all server(s) and cameras ready to be checked for viewing. Otherwise a login prompt will appear as follows: 4. 5. 6. Enter valid credentials Select the applicable Profile from the dropdown Click Sign In icon Both 4.3 and 5.0 Web Clients IIS directories are installed. http://serveripadd/videoinsight/ http://serveripadd/videoinsight4/ 166 Video Insight Administrator Guide IP Enterprise Version 5.0 The Profile option is used primarily when you are accessing the system over the internet or when you need to limit how much bandwidth you use for video. For example, you may have an intranet user profile that permits high speed video over a local area network and an internet user profile that limits video frame rates for use on slower internet connections you are using the web client from. c. Using the Web Client Upon login in the following will appear: Login details and additional menus Left tree navigation similar to Monitor Station Switch to High Speed Mode (HSM) to view non-MJPEG cameras Select the server node to display all cameras or check individual cameras instead Sort IP Servers Hide Left Navigation Tree 167 Video Insight Administrator Guide IP Enterprise Version 5.0 Left Navigation Tree Structure The Left Navigation Tree Structure on the Web Client functions in a manner very similar to the Monitor Station. Just above the navigation tree structure there are three options for sorting the tree: Enterprise View (default) Facility Map View Layout View 168 Video Insight Administrator Guide IP Enterprise Version 5.0 Enterprise View Orders the navigation tree based on server hierarchy; you can view the cameras, layouts, and facility maps for each server. Icon indicates a PTZ camera Under this view, a listing of all servers and cameras is shown. Click the magnifying glass to search ALL of the nodes including Enterprise, Facility Maps and Layouts. 169 Video Insight Administrator Guide IP Enterprise Version 5.0 Facility Map View Orders the navigation tree based on a facility hierarchy; this view lists all of the cameras and layouts for each facility map. Once you select a facility map, the map appears in the viewing pane. You can mouse over the camera icons on the maps to view live images from that camera. Hover over a camera name to see a live window pop-up of that camera’s image. Use the top left arrows to move the Facility Map or to zoom in or out for better view. 170 Video Insight Administrator Guide IP Enterprise Version 5.0 Layout View Orders the navigation tree based on a layout hierarchy; this view lists all of the cameras for each layout. Selecting the layout from the tree displays the layout on the right hand side of the screen. You may also select individual cameras from each layout, or mix and match multiple layouts and cameras by checking the box next to each item. Expand a layout by clicking the Layout name to view the included cameras. d. Layouts Tool Bar The collapsible section in the top right offers several different options for layouts. Simply click the desired layout and the cameras will be rearranged. For multiple cameras exceeding the selected layout view several pages will be available at the bottom. 171 Video Insight Administrator Guide IP Enterprise Version 5.0 There is also the ability to have a layout automatically selected for the number of cameras checked. For example, if only one camera is currently displayed and there are 4 specific cameras checked, click the icon and the view will automatically change to the 2x2 layout for easier viewing. 172 Video Insight Administrator Guide IP Enterprise Version 5.0 e. High Speed Mode Low Speed mode is the defaulted streaming mode which utilizes higher bandwidth and higher processing power on the server. However, in some instances a better refresh rate is needed and viewing MJPEG cameras is a must; along with the added benefit of lower bandwidth. To activate HSM: 1. click the button in the Layout toolbar, the following will appear: 2. Click OK 3. Click Install Now 4. When the ActiveX installs properly the following confirmation will appear: 173 Video Insight Administrator Guide IP Enterprise Version 5.0 5. Click OK. f. Configuration Menu The Configuration menu has several options that will allow for further customization. Those options are discussed below. When changes in this menu are made they will affect ALL other Web Clients connected to that server. 1. Click Configure, the following message will appear regardless if Security is on. 2. Click the Sign in link Customizable Login Message 3. Enter the Administrator credentials 4. Click Configure again 174 Video Insight Administrator Guide IP Enterprise Version 5.0 The options available are as follows: Video Set to high speed by default – Applies to Internet Explorer only and will prompt all newly connected WCs to install the HSM ActiveX. Preserve aspect ratio – All cameras are displayed at a 4x3 image size for layout and maximized use of the viewing area, but if displaying the camera’s true resolution size is desired check this box. Without Aspect ratio checked: With Aspect ratio checked: 175 Video Insight Administrator Guide IP Enterprise Version 5.0 Buffer recorded video – Each time a recorded video is played back a temp file is created in the TEMP directory for faster viewing later. This prevents the need to re download a file over and over again. However, emptying the TEMP directory often is recommended when space is an issue. Limit video streaming to ‘X’ minutes – Zero is the default value and means there is no limit for streaming live. However if efficiency and bandwidth are important simply change the time out to a desired time of inactivity. In this case after 30 minutes of inactivity the streaming will cease: Click where indicated (or refresh your browser) and the streaming will resume. Navigation Click the preferred view or simply uncheck the “Show navigation panel” to hide the left tree completely. Content Stretch map to fit screen – depending on the original size of the map that was loaded, it will be stretched to occupy most of the FM viewable area. Show camera labels – this option is checked by default, when unchecked the camera names will not be shown on the facility map, just the camera icon. Show map labels- This option is unchecked by default, when it is checked the nested FM name will appear on the map 176 Video Insight Administrator Guide IP Enterprise Version 5.0 Login Login Message – This is an empty text field used for entering messages for all of your Web Client users and will appear on the main login page when Security is on or when accessing Configure menu. The limit is 255 characters. Notice the sample text in orange: g. Viewing Recordings (Playback) Viewing recording in a seamless way is as simple as clicking a camera from the live view; when a camera is clicked it will be brought into focus as shown here: Still Playing Live Camera Toolbar Create a clip Timeline View Playback controls 177 Video Insight Administrator Guide IP Enterprise Version 5.0 The Timeline view will notate the times and type of recording at a glance: Orange dots: Motion events recording only Solid blue line: Recordings without motion events To begin playing click and hold the timeline and drag it left or right; release the mouse click to play. Here is a sample of a timeline on a camera that was changed from Motion Only to Record Always: The Calendar on the bottom left, when expanded, will highlight all calendar days where recordings are available with orange. h. Camera Toolbar The camera toolbar at the bottom of the view has several functions: Will list all presets, must be logged in to use presets Click the PTZ button to start using PTZ Digital Zoom After zooming in, press this “Actual Size icon to revert to original size Reset Create a JPEG still image 178 Video Insight Administrator Guide i. IP Enterprise Version 5.0 Creating a Clip To create a clip for later playback or distribution: 1. Click the icon 2. Drag and drop the timeline or type in the exact time above 3. Use the blue handles to lengthen or shorten the clip time 4. Click the icon to begin the download, a progress bar will display: 5. Choose to save location or open the newly created clip 179 Video Insight Administrator Guide IP Enterprise Version 5.0 Chapter 3: Security Security is the business we are in and as such it is very important to us. We have several features implemented to secure access to the software, watermarking of recorded video and the ability quickly know when something has been modified and by whom by using the logs. A. User Manager The User Manager utility is used to add, modify and delete users. Adding groups and assigning permissions per group instead of individual users can also be done from this screen. 1. Launch Monitor Station by clicking the Desktop icon 2. Navigate to Administration>Setup and Configuration 3. Click the User Manager node on the left hand side 180 Video Insight Administrator Guide IP Enterprise Version 5.0 Adding Users 1. Select the server for the new user 2. Click Add Enter the User’s information. Select whether the user is an Administrator Send a test email if desired Click Add if Administrator. If creating a NonAdmin user refer to Modifying Users to grant the desired access discussed on page 183. 7. Repeat the process to create additional users 3. 4. 5. 6. 181 When designating a user as an administrator access to all cameras, facility maps and layouts is granted automatically Video Insight Administrator Guide IP Enterprise Version 5.0 Deleting Users 1. Navigate to User Manager 2. Select the server from which the user should be removed 3. Select the user from the Users grid 4. Click Remove (no confirmation will appear) 182 Video Insight Administrator Guide IP Enterprise Version 5.0 Modifying Users 1. 2. 3. 4. Navigate to User Manager Select the applicable server Select the user from the Users grid Click Properties 5. Modify the user’s personal information in the User tab if needed. 6. To modify the user’s group association, click the Groups tab 183 Video Insight Administrator Guide IP Enterprise Version 5.0 7. Select groups from the Available Groups pane and click the right facing arrow 8. Selected groups will now appear in the Groups Assigned to this User pane 9. Click OK if complete To modify camera permissions or add permissions to a newly added camera click the Camera Permissions tab 184 Video Insight Administrator Guide IP Enterprise Version 5.0 10. Check the boxes next to the camera and available feature this user should have access to perform otherwise leave unchecked to prevent access. Cameras without Audio or PTZ capabilities will remain unchecked regardless of the user 11. Click OK if complete To modify Facility Map permissions or add permissions to a newly added FM click the Facility Maps tab. 12. Check the boxes next to the Facility Map this user should have access to view, otherwise leave unchecked to prevent access. 13. Click OK if complete To modify Layout permissions or add permissions to a newly added Layout click the Layouts tab. 185 Video Insight Administrator Guide IP Enterprise Version 5.0 14. Check the boxes next to the Layout this user should have access to view, otherwise leave unchecked to prevent access. 15. Click OK if complete Please Note: The permissions granting process will need to be repeated for all users and groups with each new camera, Layout, Facility Map or Rule that is added. To modify Rules permissions or add permissions to a newly added Rule click the Rules tab. 186 Video Insight Administrator Guide IP Enterprise Version 5.0 16. Check the boxes next to the Rule this user should have access to view, otherwise leave unchecked to prevent access. 17. Click OK if complete 18. Click Apply and OK to exit the Setup and Configuration module 187 Video Insight Administrator Guide IP Enterprise Version 5.0 Importing Users When using multiple databases and there are multiple servers used by the same users, you may create the users on one server and then import them to the rest of the servers with a few simple clicks. 1. Navigate to User Manager 2. Select the applicable server the users selected will be imported TO 3. Click Import 4. 5. 6. 7. Check the users to import Click OK Click Refresh Repeat the process for all servers to import users to 188 Video Insight Administrator Guide IP Enterprise Version 5.0 Adding Groups 1. Navigate to the User Manager 2. Click the Group Manager tab 3. Select the applicable server 4. Click Add 5. Name the new group 189 Video Insight Administrator Guide IP Enterprise Version 5.0 6. Check the Active Directory box if Active Directory has already been configured, otherwise 7. Select users from the Available Users pane and click the right facing arrow 8. Selected users will now appear in the Users in Group pane 9. Click Add 10. Repeat the process to add additional groups 11. Refer to Modifying Groups on page 192 for setting permissions 190 Video Insight Administrator Guide IP Enterprise Version 5.0 Deleting Groups 1. Navigate to User Manager 2. Select the server from which the group should be removed 3. Select the group from the Group grid 4. Click Remove (no confirmation will appear) 191 Video Insight Administrator Guide IP Enterprise Version 5.0 Modifying Groups 1. 2. 3. 4. Navigate to User Manager Select the Group Manager tab Select the applicable server Select the Group from the Group grid 5. Click Properties 192 Video Insight Administrator Guide IP Enterprise Version 5.0 6. Modify the Group’s name if needed 7. To add newly added users to this group select users from the Available Users pane and click the right facing arrow 8. Selected users will now appear in the Users In Group pane 9. Click OK if complete To modify camera permissions or add permissions to a newly added camera click the Camera Permissions tab Cameras without Audio or PTZ capabilities will remain unchecked regardless of the user 193 Video Insight Administrator Guide IP Enterprise Version 5.0 10. Check the boxes next to the camera and available feature this group should have access to perform otherwise leave unchecked to prevent access. 11. Click OK if complete 194 Video Insight Administrator Guide IP Enterprise Version 5.0 To modify Facility Map permissions or add permissions to a newly added FM click the Facility Maps tab. 12. Check the boxes next to the Facility Map this group should have access to view, otherwise leave unchecked to prevent access. 13. Click OK if complete 195 Video Insight Administrator Guide IP Enterprise Version 5.0 To modify Layout permissions or add permissions to a newly added Layout click the Layouts Permissions tab. 14. Check the boxes next to the Layout this group should have access to view, otherwise leave unchecked to prevent access. 15. Click OK if complete Please Note: The permissions granting process will need to be repeated for all users and groups with each new camera, Layout, Facility Map or Rule that is added. 196 Video Insight Administrator Guide IP Enterprise Version 5.0 To modify Rules permissions or add permissions to a newly added Rule click the Rules tab. 16. Check the boxes next to the Rule this group should have access to view, otherwise leave unchecked to prevent access. 17. Click OK if complete 18. Click Apply and OK to exit the Setup and Configuration module B. Login 197 Video Insight Administrator Guide IP Enterprise Version 5.0 Upon installation the software is installed with security off enabling login free access to the Monitor Station and Web Clients. Security can be easily turned on by accessing the Server properties as discussed on page 38. Depending on your specific company and security specifications you may choose any one or a combination of login options currently available to you; each is explained in detail below. 1. Launch Monitor Station by clicking the Desktop icon Local User Mode: The first option when selected can be used on its own or in combination with the Windows Login checkbox (discussed later). When used on its own it behaves differently depending on several settings. Security On: when Security is turned on for the server the credentials entered will be checked for validity against the User Manager in Monitor Station. How to create users is covered in page 181. Security Off: when Security is not enabled for a server all logins will be accepted, any combination of With Windows Login Check enabled: In this case it assumes that an Active Directory (AD) or an LDAP configuration has been implemented and ALL users will be authenticated against Active Directory and/or the User Manager in Monitor Station (since all AD/LDAP users are imported to the User Manager) as long as Security for the server is turned on. To login using Active Directory from the Login screen: 198 Video Insight Administrator Guide IP Enterprise Version 5.0 1. Launch Monitor Station by clicking the desktop icon 2. Click the Options>> button 3. 4. 5. 6. Check the Windows Login checkbox Select the Domain from the dropdown if not already defaulted Enter the Username and Password Click OK 199 Video Insight Administrator Guide IP Enterprise Version 5.0 Network User Mode: This option is very useful in large environments where there are multiple Clients and servers. Instead of adding every server to each client and then having to manage multiple lists when adding or removing servers from Setup and Config, the following may be utilized; In one Monitor Station add all of the servers: 1. 2. 3. 4. Navigate to Setup and Config Add all of the servers, one by one, to the Known Video Servers list. Click Export List, save it on a Shared location An “.lsl” file is created with all servers Point all other users to Browse to that same file which will give them the latest server information each time they log in without having to manage hundreds of clients , the administrator will just need to manage that one .lsl file by adding or removing any servers at any time without affecting daily business functions. This option may also be used with Active Directory or LDAP configuration using the Windows Login Mode checkbox. You may also bypass the Login pop-up all together with or without Security being on by setting the Auto Login option as follows: 1. 2. 3. 4. Launch Monitor Station Navigate to Tools>Options Click the Startup Tab Check Enable Auto Login a. With security off you may just check it; credentials are not needed b. With security on you must provide valid credentials. 200 Video Insight Administrator Guide IP Enterprise Version 5.0 C. Active Directory Active Directory is organizational wide software used to manage users and their access to multiple applications. To avoid the need to create, maintain and remember multiple sets of credentials AD makes it easy by allowing users to enter their usual domain credentials to login to Monitor Station or Web Client. If you’d like to learn more about Active Directory in general refer to the FAQs section on page 1. 2. 3. 4. 5. 6. Pre-requisites Active Directory server should already be configured and have users and groups configured. When multiple IP servers are AD can be configured when using local separate installed and AD configuration is being DB for each server OR when using a shared considered we recommend using a shared database environment. DB install type to avoid having to import Administrator level user credentials to users and groups multiple times to each authenticate against the domain and should have administrator level access on the server where AD DB. is configured (do not use your account) The PC where the IP server is installed is part of the Network domain. System should be able to communicate with all domain controllers via port 389 (cannot be changed) or 636 (used for encryption.SSL) When configuring IP Server you must be logged into the domain with a valid domain account; this is required by Windows for security purposes. It is recommended when importing users you actually import a Group versus individual users. The group will need to be created in Active Directory before you can import them. For example, one to assign administrator rights to and another for assigning view only rights to in Video Insight’s IP Server. Configure the IP Video Enterprise service to run under an Active Directory account. 1. 2. 3. 4. 5. 6. 7. 8. Navigate to Start >Run Type services.msc and press <enter> Locate the IP Video Enterprise service Right-Click and choose Stop Right-Click and choose Properties Select the Log On tab Select the second option for This account Provide an Active Directory account with minimal rights. A basic domain user account should suffice. 9. Navigate to the General tab and choose Start. 10. Click OK 11. Restart the IIS Admin service if using Web Client 201 Video Insight Administrator Guide 1. 2. 3. 4. IP Enterprise Version 5.0 Configuring Active Directory Access the IP Server PC Right click the IPSM icon in System Tray Select Server Configuration Click Network Options, following will appear: 5. Click the Configure link 6. Click the Use Active Directory link 7. Click Next 202 Video Insight Administrator Guide IP Enterprise Version 5.0 The Directory server name should automatically populate with the domain name; if it still shows blank it could be because the pre-requisites above haven’t been met, review them and restart from step 1 above. 8. Confirm the domain name 9. Check the SSL box if using Secure Socket Layer for AD configuration 10. Click Next 203 Video Insight Administrator Guide IP Enterprise Version 5.0 11. Enter the credentials of the administrator user as shown in the example above 12. Click Next 204 Video Insight Administrator Guide IP Enterprise Version 5.0 The Base Distinguished Name should automatically populate; if it still shows blank it could be because the pre-requisites above haven’t been met, review them and restart from step 1 above. Otherwise the Base DN should be the top root folder to allow for adding of any users from any group. If the Base DN is extremely long it could mean the restrictions or the path this user has access to is limited and so the number of users they’ll have access to add will also be limited. Request Timeout: This value is uneditable as it is a reflection of what the setting is on the Active Directory server. Any requests made to the AD server that exceed that time will timeout. Limit Search Results: This value is uneditable as it is a reflection of what the setting is on the Active Directory server. This is the maximum number of results returned from AD server. 13. Click Next 14. Click Test Connection 205 Video Insight Administrator Guide IP Enterprise Version 5.0 Once the connection is established an Apply button will appear on the left of Cancel button, if a failure is encountered click Back and retrace steps 1-14 above and correct any settings necessary. 15. Click OK to dismiss message 16. Click Apply, the following will appear Video Insight and Active Directory are now integrated, however users and groups should be added in order for users to begin login in to the Monitor Station using their domain credentials. Refer to the next page to add users. 206 Video Insight Administrator Guide IP Enterprise Version 5.0 Adding Users or Groups 1. From the Network Options screen click the Give users or groups access to the system link Choose to add Users or Groups by selecting the applicable tab 2. Select Add Add User Screen 207 Video Insight Administrator Guide IP Enterprise Version 5.0 Add Group Screen 3. Simply type either the user name (swilliams for example) or the group name (QA for example) in the applicable screen 4. If the user name or group entered is valid it will appear in the following screens Sample list of users added 208 Video Insight Administrator Guide IP Enterprise Version 5.0 Sample list of groups added Another possibility is when entering a user name or group that are not valid either because the name is not exactly as it is defined in AD or it simply does not exist. In that case the following error will appear: To avoid entering the wrong name you may also Browse to the directory and simply click the desired groups and users. 17. From the Add pop-up click Browse 209 Video Insight Administrator Guide 18. 19. 20. 21. 22. IP Enterprise Version 5.0 Highlight the applicable node on the left and click OK to add that group or user. Click OK again Click Apply and OK Refer to Monitor Station User Manager section to import these users discussed on page 183. To Login using the newly configured AD refer to page 198. Please Note: An error will appear when attempting to add a user in the Group Add screen and when adding a group in the User Add screen. 210 Video Insight Administrator Guide IP Enterprise Version 5.0 Removing Users or Groups To remove Active Directory Users or Groups follow these steps: 1. Launch the Network Options screen 2. Click the Give users or groups access to the system link 211 Video Insight Administrator Guide IP Enterprise Version 5.0 3. Select one or multiple users using the SHIFT or CTRL keys 4. Click Remove 5. Click Apply 6. Click OK 212 Video Insight Administrator Guide IP Enterprise Version 5.0 Viewing Users Permissions Due to the integration between Active Directory and Video Insight we offer the option to view effective permissions for a user both in Active Directory and the Video Insight application. Permissions may be reviewed from several screens: Network Options screen, Add User screen, and the User Manager in Monitor Station discussed on page 183. 1. Launch the Network Options screen 2. Click the View effective permissions link 213 Video Insight Administrator Guide IP Enterprise Version 5.0 3. Enter the Username 4. Click View, the following will appear: The Group Membership tab will show all groups the user belongs to in Active Directory. No modifications can be made from this screen. 214 Video Insight Administrator Guide IP Enterprise Version 5.0 The Effective Permissions tab will show all items the user has access to in the Video Insight application. No modifications can be made from this screen; refer to the User Manager section on page 183 to modify user permissions in Monitor Station. Name: Will list the name of the entity the user has access to. Type: Will list the entity type; sample entities include Cameras, Facility maps, and layouts. Source: Will list the source of the permission, in this example the user was created individually and permissions granted exclusively to this user, not as part of a group. The options for this column are User or Group. 215 Video Insight Administrator Guide IP Enterprise Version 5.0 To view permissions from the Add User screen: 1. Launch the User Assignment screen 2. Click the user of your choice 3. Click Properties button, the following will appear: List of Active Directory groups the user belongs to. 4. Click Close to dismiss 216 Video Insight Administrator Guide IP Enterprise Version 5.0 D. LDAP LDAP is the industry standard way of accessing a directory service over a TCP/IP network whereas Active Directory is Microsoft’s directory service. Other directory services include Novell eDirectory and OpenLDAP. Directory services store, organize, and provide access to information in a directory containing information about users, computers, and permissions. The syntax that LDAP uses to identify objects in the directory is referred to as a Distinguished Name. The DN is composed of four distinguished name parts. CN – Common Name – Jane Doe OU – Organizational Unit – Sales DC – Domain component – mydomain Domain component – net The DN reads from the most specific part of the node on the left, to the least specific node on the right. The root of the DN is actually the last two parts (mydomain.net). To configure and manage users using LDAP refer to the Active Directory instructions discussed on page 201 given the process to configure both is the same. 217 Video Insight Administrator Guide IP Enterprise Version 5.0 E. CheckSum The CheckSum (specifically MD5) logic incorporated into the Video Insight software prevents modifications that can be made to recordings using other software. This feature will guarantee the authenticity of the recording and ensure the delivered recording hasn’t been tempered with; this is imperative when using as evidence in legal proceedings. Enabling this feature is processor intensive (server will need to decompress and recompress each image to interlace the watermark) and can affect either full recorded files or clips depending on your selection. It is invisible to the naked eye and can only be verified using the Standalone Player utility provided by us to decipher the security. Enabling Checksum Watermark 1. 2. 3. 4. 5. Launch Monitor Station using the Desktop icon Highlight a camera from the left navigation tree Right click the camera node and choose Properties Click Record tab Click Advanced tab, the following will appear 6. Check the Insert Watermark on all raw video files at capture checkbox 7. Click Apply and OK 218 Video Insight Administrator Guide IP Enterprise Version 5.0 To verify the video hasn’t been tempered with use the Standalone Player utility provided in the full DVD download for your Operating system type (32 or 64 bit). Verifying a Checksum Watermark 1. Launch the Standalone Player utility (also called Video Insight Standalone Media Player) 2. Navigate to the file that needs verification by clicking File>Open 3. Select the file and Click Open 219 Video Insight Administrator Guide IP Enterprise Version 5.0 4. Click File>Check WaterMark 5. The file will be checked, if the video is watermarked and hasn’t been tempered with it will show the following: 6. Should the file have been tempered with or no watermarking is found the following will appear: 220 Video Insight Administrator Guide IP Enterprise Version 5.0 F. System Log The System Log is an excellent way to identify user actions, server and camera messages as well as obtain any error logs which will aid in troubleshooting possible issues. The System Log can be accessed from multiple areas of the application discussed throughout this manual, but the functionality and available actions are exactly the same. With Security on only Administrators may access and view the System Log 1. Launch the System Log Please Note: The number of pages available and is saved in the DB depends on the System Log setting in Server properties, Advanced tab, discussed on page 38; the default is 30 days and the maximum is 1000 days. 221 Video Insight Administrator Guide IP Enterprise Version 5.0 = The Save icon is used to export the System Log list, once pressed, the following three options are available: = The Refresh icon is used to refresh the list of system log items displayed = Use this dropdown to select the server of your choice. All servers added to the Monitor Station with a status of Connected will appear here. However, using the Diagnostics System Log all servers in a shared database will appear, regardless of their connection status. = Use this dropdown to select the type of log to view; the default is the system log. Use the dropdown to select Alarm Log to view Motion alarms and Access Control logs discussed in the next section found on page 225. = Use the text field next to this icon to Find a specific search string = use this calendar control to select the through date of the logs. For example, when 12/31/2011 is selected all logs available up until and including 12/31/2011 will be shown. The compilation on the next page was added to aid in understanding a few common messages and how to mitigate them if needed. 222 Video Insight Administrator Guide IP Enterprise Version 5.0 System Log Entry Message Source Warning: Server has started Initialization in Demo mode. Explanation A reminder that this server is in Demo mode Resolution Upgrade to a fully licensed version to avoid this message Message will appear each time the server is started whether manually or using Auto Restart User logged in to Monitor Station Informational message Video Server started at 2:45 PM - 12/22/2011 Initialization Administrator has logged in at 2:45 PM - 12/22/2011 CommandChannel.GetS erverClass Administrator The servers properties were updated 12:15 PM - 12/27/2011 CommandChannel.Upda teServer Administrator happens to be the user (security is likely off) that updated server properties Informational message ErrCode: 0 -Fail to write file: c:\video\127.0.0.11963630245\12.31.2011\18h1 7m14s.avi (10:0:8) Camera failed to write to path listed Cannot delete folder:(c:\video\127.0.0.11794956641\12.22.2011) GeneralTimer.CleanDri ve() Deletion routine is unable to delete the folder Video Server Task: DIOAlarm Log 10.10.5.151 - Axis - Model: P3301 (10.10.5.151) is down Task Manager This entry is due to a rule that was just triggered Camera streaming is down Could not find a part of the path 'c:\video\10.10.5.148453894083'. System.IO.__Error.WinI OError(20:0:1) Check permissions: could be due to an invalid path, the folder may have been moved or rights to write to that folder have changed A folder for one camera has many files spanning several weeks, if one of the files is currently being viewed or is locked for another reason the folder cannot be deleted. The server deletion routine will now revert to deleting one file at a time in this folder instead Informational message The server will continue to attempt to restore connection. Check the path and that the camera is indeed still added to the server with that GeneralTimerClass.Che ckStreamsStatus 223 Was unable to find the path to write to. Informational message Video Insight Administrator Guide IP Enterprise Version 5.0 Restart Request CommandChannel.Rem oveCamera A client has requested a server restart Video Server was shut down at 2:58 PM - 12/22/2011 Board.Close The server was properly shutdown 10.10.5.212 - Hikvision Model: Universal (10.10.5.212) is restored Object reference not set to an instance of an object. GeneralTimerClass.Che ckStreamsStatus Camera connectivity is restored Videoinsight.LIB.Acces sControl_BlackBoard.C heckForNewEvents(200 :0:45) No Security granted user JWhitcomb permission to map Facility Map (ID:1073740123) 10:57 AM 12/31/2011 vicorp.videoinsight.net\swillia ms has logged in at 6:39 PM 12/31/2011 vicorp.videoinsight.net\swillia ms updated camera properties at 12/31/2011 2:29:22 PM : Camera login, vicorp.videoinsight.net\swillia ms [GetUserGroupMembership] CommandChannel.User Update Access Control Blackboard is configured for specific cameras and constantly checks for new alarms. The camer can no longer be found, it was removed from the server. Security was off on this server when the JWhitcomb user was granted access to a Facility Map Access to the path 'C:\Program Files\VI Enterprise\Enterprise Service\app\mycamera.bin' is denied. Login successful for User ID administrator User Address : ::1 A New Camera was added at 12:41 PM - 12/2/2011 System.IO.__Error.WinI OError(9:0:1) Camera Unique ID The next time the IPSM is running it will process the request automatically Each time a server is stopped either manually or using Diagnostics this informational message will appear The server was able to resume connection. Change the camera in Blaclboard or readd the original camera to the server. Informational message CommandChannel.GetS erverClass A user logged in with AD or LDAP and security was on Informational message CommandChannel.Upda teCamera Specific LDAP or AD user made changes to a camera Informational message LDAP Authentication Prior to actually logging an AD/LDAP user login in the server authenticates the user against AD/LDAP The action performed at this time did not have the right access to write to that folder Informational message With security enabled Web Client users logins are also captured User added a new camera tothis server Informational message WebClient CommandChannel.Add NewCamera 224 Check the user logged in, they should have local admin rights Informational message Video Insight Administrator Guide IP Enterprise Version 5.0 G. Alarm Log The Alarm Log is a list of all Motion events for all cameras that are set to Motion Only recording or Record Always with the Calculate Motion Detection option in the Record tab on page 236. 1. Launch System Log 2. Navigate to View>Alarm Log Please Note: The number of pages available and is saved in the DB depends on the Alarm Log setting in Server properties, Advanced tab, discussed on page 38; the default is 30 days and the maximum is 1000 days. All Motion events, the camera name and the duration will be listed in the grid above. The following options are available from this screen: 225 Video Insight Administrator Guide IP Enterprise Version 5.0 = The Save icon is used to export the Alarm Log list, once pressed, the following three options are available: = The Refresh icon is used to refresh the list of Alarm Log items displayed = Use this dropdown to select the server of your choice. All servers added to the Monitor Station with a status of Connected will appear here. However, using the Diagnostics Alarm Log all servers in a shared database will appear, regardless of their connection status. = Use this dropdown to select the type of log to view; the default is the system log. Use the dropdown to select Alarm Log to view Motion alarms. = The Find functionality is disabled in this view = use this calendar control to select the through date of the logs. For example, when 12/31/2011 is selected all logs available up until and including 12/31/2011 will be shown. 226 Video Insight Administrator Guide IP Enterprise Version 5.0 Chapter 4: Cameras a. Adding Cameras To add cameras at any time after install or an upgrade follow these steps: 1. Launch Monitor Station from your Desktop 2. Enter credentials if Security is enabled or press OK to Login 3. From the Main dashboard navigate to Administration> Setup and Configuration 4. Select your server from the left navigation 5. Click Camera tab You may also access Server Properties by simply right clicking the server name in the left navigation and choosing Properties>Camera tab 227 Video Insight Administrator Guide IP Enterprise Version 5.0 Automatically This wizard searches your current network segment for existing online IP cameras. When it detects an IP camera, it examines the MAC address to determine the manufacturer. It then accesses the camera using the user name and password. If the camera successfully responds, then the software obtains the camera model. 1. From the Cameras tab click the Auto Discovery button 2. The following sample screen will appear: Our Auto Discovery feature can search multiple networks (dual NIC card Server is required); just select a different option from the dropdown prior to beginning the search process Enter Camera credentials here. We default the most commonly used username of root. Some manufacturers use their own default set, refer to the camera manual or access a full list here: Appendix E Once Start is pressed, Any and all discovered cameras will appear here ready to be added now or later. You may select individual cameras by checking them or click Select All button to add all at once 228 Video Insight Administrator Guide IP Enterprise Version 5.0 Manually 1. From the Cameras tab click the Manual Add button 2. The following sample screen will appear: Camera Name: The Camera Name field can be used to enter a descriptive name as to the location of the camera or simply the IP address. The default is ‘Camera Name.’ Time Stamp: The timestamp, when selected will stamp all recorded video with the server time. If you select “Burn Time Stamp on Video” and if the camera does not support a Time Stamp, the server will insert one but this will use additional CPU time and can affect overall performance. For PTZ capable cameras a ‘Disable PTZ’ checkbox will also appear, check it if you’d like to disable PTZ for users. Disabling PTZ will also disable Presets. Manufacturer/Model: Choose the appropriate Manufacturer and Model number here; incorrect selections may cause the image to not appear. The software supports a wide variety of camera models from major camera manufacturers. Each camera has a mechanism for communicating with the server. By selecting the correct model, the system then knows certain information about the camera such as method of communicating, whether it supports DIO, what type of compression it uses, and whether it supports audio. . If your particular camera model is not found, use the ONVIF universal protocol currently offered with most cameras. 229 Video Insight Administrator Guide IP Enterprise Version 5.0 IP Address: Enter the internal ip address as shown or choose to enter a domain name as well such as demo1.stardotcams.com, do not include the http:// or www prefixes. Camera Credentials: Enter the camera credentials here. Some manufacturer may require credentials just to view live image, and others only when modifying camera settings. It is recommended to enter correct credentials when security is enabled on the camera for proper integration and to perform some configuration on the camera such as using camera side motion detection or camera flip. Shared IP Address: This checkbox should be used with certain camera models such as Areconts; Arecont is a 4 lens camera available in a panoramic (180) or a 360 views using 1 license only. To add it to our software the same information will need to be added 4 times; each time selecting a different channel number (1-4) for all views to appear and record. If a 1 eye camera is used leave the Shared IP Address unchecked. Alternate Ports: Should a camera or encoder report to a port other than the standard port of 80; change it here. Check the Alternate Ports box and enter the proper HTTP, RTSP and or FTP ports for a proper connection. Web Access: Once the camera information is added the Web Access link is useable, you may click it to ensure the camera information is correct. Each camera manufacturer has a different user interface and setup functionality that can be performed at the camera level. An image of the camera will appear once the link is clicked; if no image appears it is most likely incorrect IP address or credentials; review the information and make any necessary edits. 230 Video Insight Administrator Guide IP Enterprise Version 5.0 Importing from 3.x Version This option has been removed from version 5.0. 231 Video Insight Administrator Guide IP Enterprise Version 5.0 b. Removing Cameras To remove cameras once they are added: 1. Launch Monitor Station from your Desktop 2. Enter credentials if Security is enabled or press OK to Login 3. From the Main dashboard navigate to Administration> Setup and Configuration 4. Select your server from the left navigation 5. Click Camera tab 6. Double click the camera to be removed from the ‘Cameras to be Monitored’ pane. The camera will now be removed and appear in the ‘Unassigned Cameras’ pane. 7. Click Apply and OK Cameras are never truly deleted; they become unassigned, if necessary to re-add to another server sharing the same Database simply click the Load button to view Unassigned Cameras. c. Modifying Camera Details Cameras may need to be modified or tweaked post install or after some time due to environment changes and or firmware upgrades or simply as part opf the initial setup. Details of possible changes are discussed in detail below. 1. Navigate to Administration>Setup and Configuration 2. Expand Server from Left Navigation Tree. Sample Screen is shown below: 3. Each tab is explained in detail below 232 Video Insight Administrator Guide IP Enterprise Version 5.0 General Tab Camera Name: The Camera Name field can be used to enter a descriptive name as to the location of the camera or simply the IP address. The default is ‘Camera Name.’ Time Stamp: The timestamp, when selected will stamp all recorded video with the server time. If you select “Burn Time Stamp on Video” and if the camera does not support a Time Stamp, the server will insert one but this will use additional CPU time and can affect overall performance. Manufacturer/Model: Choose the appropriate Manufacturer and Model number here; incorrect selections may cause the image to not appear. The software supports a wide variety of camera models from major camera manufacturers. Each camera has a mechanism for communicating with the server. By selecting the correct model, the system then knows certain information about the camera such as method of communicating, whether it supports DIO, what type of compression it uses, and whether it supports audio. . If your particular camera model is not found, use the ONVIF universal protocol currently offered with most cameras. For PTZ capable cameras a ‘Disable PTZ’ checkbox will also appear, check it if you’d like to disable PTZ for users. Disabling PTZ will also disable Presets. IP Address: Enter the internal ip address as shown or choose to enter a domain name as well such as demo1.stardotcams.com, do not include the http:// or www prefixes. Camera Credentials: Enter the camera credentials here. Some manufacturer may require credentials just to view live image, and others only when modifying camera settings. It is 233 Video Insight Administrator Guide IP Enterprise Version 5.0 recommended to enter correct credentials when security is enabled on the camera for proper integration and to perform some configuration on the camera such as using camera side motion detection or camera flip. Shared IP Address: This checkbox should be used with certain camera models such as Areconts, Arecont is a 4 lens camera available in a panoramic (180) or a 360 views using 1 license only. To add it to our software the same information will need to be added 4 times; each time selecting a different channel number (1-4) for all views to appear and record. If a 1 eye camera is used leave the Shared IP Address unchecked. Alternate Ports: Should a camera or encoder report to a port other than the standard port of 80; change it here. Check the Alternate Ports box and enter the proper HTTP, RTSP and or FTP ports for a proper connection. Web Access: Once the camera information is added the Web Access link is useable, you may click it to ensure the camera information is correct. Each camera manufacturer has a different user interface and setup functionality that can be performed at the camera level. An image of the camera will appear once the link is clicked; if no image appears it is most likely incorrect IP address or credentials; review the information and make any necessary edits. 234 Video Insight Administrator Guide IP Enterprise Version 5.0 Record Tab Resolution: Any given camera can support at least one and possibly multiple resolutions. This resolution can be configured on the camera itself using the link described above under Web Access. The software also provides the functionality for changing the resolution on the camera without going to the camera itself. Unfortunately, different camera manufacturers have different ways of expressing resolutions. For example, Axis expresses resolution in CIF, 2 CIF, 4 CIF, D1 whereas ACTi expresses resolution as 1280 x 1024, 640 x 480 etc. As a result, the resolution settings in this option are more generic and are mapped to the appropriate resolution based on the camera. The options range from Low-Highest, as well as the default Use Camera Setting option. Moreover, for some high resolution cameras it is Camera recommended to use the Highest setting. Note that if this option is “grayed” out, you Properties can also be do not have the capability to change the resolution for this camera. accessed by: 1. Right clicking a Record Per Option: The software can capture individual images at a rate between 1 Live image stream and 30 frames per second (FPS). Adjust each camera to the desired images per 2. Right Clicking second with the larger number providing more fluid movement. When adjusting camera from Left cameras, select higher frames per second to improve details between frames; decrease less important cameras by reducing the FPS. By making these adjustments, the total Navigation storage space is optimized. The value set here is not necessarily the value the camera is producing, that is the maximum value you are willing to accept from the camera and depending on bandwidth and camera performance the actual received FPS may be lower, but never higher. The field following the ‘Per’ is the time interval you’d like to receive those frames, seconds is the default. Other options for Time Lapse recording are available as: per Minute, per Hour or per Day. 235 Video Insight Administrator Guide IP Enterprise Version 5.0 Capture Quality: Capture Quality, much like Resolution ranges from Use Camera Setting to Highest. Quality is a function of the size of the image that is transmitted from the camera, i.e. the higher the quality, the larger the image. When you select Highest, High, Normal, Low, or Lowest, you modify the quality setting on the camera. Note, if the camera model does not have settings for quality, this option will be “grayed” out. Recording Type: There are 4 options to select from when choosing a Recording Type; Motion Only is the default. Record Off: The device images will not be recorded, live will still be accessible as well as live audio if available and selected. Record Always: The device will be recording 24 hours a day, seven days a week granted no interruptions with network or the camera. Storage should be considered when selecting this option; refer to the Storage Consideration section on page 11for more information. Audio options will appear if camera supports Audio: Enable Audio – Capture live and listen using Monitor Station Record Audio – Capture Live and Record with Video. Note that Enable Audio must be set in order to Record Audio. Motion Only: The device will be recording when Motion is detected. Motion sensitivity can vary depending on motion zones, camera environment, and sensitivity settings. In addition, the Pre and Post settings are also taken into account. For details regarding Motion settings refer to the Motion Settings tab on page 243. Schedule: The schedule is a great option when attempting to capture very specific time period while reducing the storage requirement usually required with a Record Always option. When Schedule is selected a Config button will appear on the right of the Recording Type field. To setup a Scheduled Recording Type follow these Steps: 1. Click Config button, the following will appear: 236 Video Insight Administrator Guide IP Enterprise Version 5.0 Notice you have two options, Record Always and Record Motion, the Add action for both options is the same, only in the Record Motion the system will take into account the Pre and Post motion settings of the camera. 1. Click Add, following will appear: 237 Video Insight Administrator Guide IP Enterprise Version 5.0 2. Name your Schedule 3. Depending on the occurrence Type selected the middle pane options will vary. a. Weekly- Check the days of the week that this rule should trigger on. Holidays are not taken into account and the rule will execute as usual. b. One Time- Enter a begin date and time and an End date and time. Rule will trigger only once at the date and time scheduled. Should the rule not be able to run due to Server or Network problems, the rule will NOT execute. c. Daily- Choose Day, Week Day or WeekEnd Day. Holidays are not taken into account and the rule will execute as usual. d. Monthly- You may choose monthly by date ranging from 1-31 OR by First, Second, Third, Fourth or Last Day of the Month by choosing a day (Sunday-Saturday); Day; Weekday, or Weekend day. 4. Enter your scheduled Start and End time. You can setup more than one schedule and or type for each camera. Behind the scenes, the software is actually setting up a rule in the Rules Manager. For additional info regarding the Rules Manager refer to page 128. Capture Format: The Capture Format is the method used to stream video from the camera to the server. Some cameras offer one or many formats, others limit the number of streams allowed per format type. Dropdowns on the Record tab as well as their values will change depending on the camera type selected due to available capabilities of that camera. MJPG: This is probably the oldest streaming method available, MJPG formats create the largest file sizes due to the raw images received from the camera. If your camera only supports this format you may want to consider Transcoding for better storage; however, Transcoding is CPU intensive. To learn more, refer to the Transcoding section found on page 239. MPEG4: MPEG4 is the second oldest format available and is a better technology than its predecessor; the images are slightly more compressed, but still much larger than today’s new formats. MPEG4 absorbed many of the features of MPEG1 and MPEG2 and other related standards as well as AAC standardization for audio compatibility. H.264: This format is the newest addition to the streaming capability of IP cameras. The newly added video compression initially used for HDTVs, blue Rays and other high quality video allows for higher quality and lower bit rate, lower storage capital and improved audio capture and playback. In some cases you may notice the same Capture Format but with an (RTSP) appended to it. Video Insight created this modified Capture Format protocol to bridge the gap between the thin 238 Video Insight Administrator Guide IP Enterprise Version 5.0 support provided by the SDK and our customers’ needs. Usually the RTSP class will offer tighter integration and avoidance of some known bugs found when using the manufacturer provided SDK. The RTSP class is not available or needed for all models and manufacturers. Record Always at 1 FPS Checkbox: This option is best used in conjunction with the Motion Only recording option. Its purpose is to combine the benefits of the Record Always (no missed events) by recording 1fps always with the Motion Only (Record only events) type to reduce the storage as compared to Record Always and still be sure that when motion occurs the playback is smooth and includes the full event by switching to the higher frame rate defined in the Record field. Calculate Motion Detection When Recording Always Checkbox: Choose this option when Record Always is your chosen method but would still like the server to calculate motion percentages and include them in Timeline view and Media Player as motion events. Doing so will increase CPU utilization, but accessing the motion events immediately as compared with viewing video after video of no events may be worthwhile. Insert Watermark on all raw video files at capture: Choosing this option is recommended if it is anticipated the video may be tampered with. During capture of the raw video our server will interlace all images with a checksum that can only be read or verified with Video Insight’s CheckSum Utility found in the stand alone Media Player. For more details regarding Watermarking access Chapter 3 – Security on page 180. Transcoding: Transcoding was created to mitigate the large size files created by older cameras utilizing the MJPEG format only. Transcoding is a process done by our server while the images are received and saved into the avi container or file. The large MJPG images are received by the server and then converted to WMV format simultaneously compressing the images thus using large amount of CPU. Motion Buffers don’t apply to MPEG4 Capture Format The greater number of cameras on one server utilizing Transcoding , the greater the likelihood of a slower server performance and even a server crash. The Transcoding quality selected will also determine the CPU usage, the higher the quality (options are: Use Camera Setting, Highest, High, Normal, Low, Lowest) the larger the image and file size. Motion Buffers: Motion Buffers are used when the camera is using a Recording Type of Motion Only and is used to ensure the pre and post motion pictures are also captured, for example the person is walking into the room rather than just appearing. S ta n d a r d m o tio n d e te c tio n r e c o r d s fra m e s 1 ,2 a n d 3 -2 -1 1 2 3 4 5 P o s t M o tio n P r e M o tio n 239 Video Insight Administrator Guide IP Enterprise Version 5.0 Camera ID: This field in un-editable and used as a reference only. Unique camera ID’s are added as a precaution to identify each stream individually on the server. This ID also correlates to the exact folder in which this camera’s specific recordings are held. Re-adding the same camera (which is different than assigning and unassiging cameras) will create different unique ID’s for each instance. In the case of a 4 stream Arecont camera, adding the same camera ip address 4 times, once for each stream, will allow for different folders of recorded video; one for each view. 240 Video Insight Administrator Guide IP Enterprise Version 5.0 Advanced Tab Some 200mb files recorded times may vary depending on the following: Bitrate Quality Resolution Compression format Recording type Resulting is some files being 2 minutes long and others 2 hours. Max Disk Space: This dialogue box allows you to specify a maximum amount of disk space for each camera. Enter the number of Gigabytes that a camera can use. If the value is 0, then this value will be ignored and the camera recordings will defer to the server disk space minimum before the deletion logic will trigger to clean oldest files. Image Location: Recordings can be stored in different folders for each camera and can also be stored across multiple hard drives. The path to the recording is a combination of values specific to this configuration entered during server and camera setup. For example: The storage device entered during Server configuration; refer to Chapter 2, Section B. C:\video\10.10.1.158-1916672252 The IP Address assigned to this camera during camera setup. Refer to Adding Cameras section. A system defined unique ID value generated when the camera is added. Refer to Camera Unique ID for details. Max File Size: Each camera is recorded in a unique file that is configured to be limited to a certain file size. A new file is created after that limit is reached. For example, if you have a camera set to 3fps with 241 Video Insight Administrator Guide IP Enterprise Version 5.0 motion activation, you might find one file used for the entire day. However, if you have the same camera set to record always, you might find (5) 200mb files for the day. The system automatically creates a new file for each camera at midnight. The system creates a new file whenever the file size has reached the specified size (default is 200mb). Live Maximum Refresh Rate: Used to set live refresh frame rates sent to the Monitor Station or Web Client. By using lower fps, you can save bandwidth. These settings at the camera level will override the server settings for this camera. Optimize Video Streams: These settings affect the video streams from the IP Server to the Monitor Station and/or Web Client. There is a tradeoff between bandwidth utilization and CPU utilization. You can either optimize for a low bandwidth/ high CPU utilization or high bandwidth/ low CPU Utilization. When you optimize for a low bandwidth environment, the compression occurs at the server level. The server then sends a compressed MPEG4 image to the Monitor Station or Web Client. When you optimize for a high bandwidth situation, no compression occurs at the server level. Full uncompressed images are sent to the Monitor Station or Web Client. Low CPU/High Bandwidth- Sends uncompressed images directly to the Monitor Station High CPU/Low Bandwidth- This compresses the image, sends them and then decompresses them. It allows the system to get a much higher frame rate over slower networks. User Server Default- These options can be set at the server level or the camera level. If Server Default is selected the server level options will be used. 242 Video Insight Administrator Guide IP Enterprise Version 5.0 Motion Settings Tab Motion Settings capability and the extent in which we integrated each camera and encoder differs drastically for each camera model. Cameras May offer partial motion detection with zones and others only one default motion zone which spans the entire image. You may Pause Received Image: This checkbox can be used before creating motion create unlimited zones to pause the image which may cause the motion zones to flicker while Motion Zones drawing them if not paused. when using Server Side Motion Server Side Motion Detection: Server Side Motion Detection is extremely detection processor intensive due to the Server having to compress each image and should be used only in the event your camera does not support motion detection. Camera Side Motion Detection: Many cameras have their own built in capability for detecting motion. When camera detection is used, there is no need to decompress the image and the CPU utilization on the server will be a non-issue. Server Motion Settings: This section of the Motion Settings tab is very important when considering setting up motion zones on your camera and are enabled only when Camera Side Motion Detection radio button is selected. Event Trigger: The Event Trigger slider determines how large or small a particular Event (also called Object) the motion trigger will look for when determining whether something is considered motion or not. Moving the slider to the right reduces the alertness level of the software, causing it to only watch for larger, more impressive changes. Moving that slider to the left raises the alertness level, instructing the 243 Video Insight Administrator Guide IP Enterprise Version 5.0 software to watch for smaller and more subtle changes. As you set the motion detection closer to the maximum, you’ll get more and more recordings. This ensures you don’t miss important events, but can also cause you to get false positives in your recordings if the trigger level is set too high. Below the live image is a sliding bar showing the current level of the Event Trigger. The max object size I s 30 (which correlate to 100% of the image surface area, or in other words a very large object.) Sensitivity: The Sensitivity slider sets proximity distance thresholds for any changes to be counted in determining motion. At a high sensitivity, a random pixel change across the picture from another pixel change would be added to the sum of other changes to determine if motion thresholds have been met. At low sensitivity, changes would be required to be in close proximity to other changes or those changes will be ignored. To increase sensitivity, move the slider bar to the right. To decrease sensitivity, move the slider bar to the left. Sample Interval: This option is only available for server side motion settings. The Sample Interval slider will determine interval time setting the server will check for changes in milliseconds. For example a 750 milliseconds value will have the server check for motion changes every 7.5 milliseconds; the lower the value the more often the server will check. Setting up Motion Zones: The Event Trigger Labels section is yet another option created to offer even more precise motion detection for your environment. Setting up motion zones will allow the Motion Only recording type to ignore certain areas in the camera’s view. For example: in the case of an outdoor camera overlooking a playground you may not want the motion recording to trigger simply when the leaves move on a tree, but rather only when the playground has other identifiable objects such as a car or a person or a pet. In that case you may decide to set motion zones only in areas that are important to you, ignoring the sideline movements which occur often. To Create a Motion Zone: 1. From the Motion Settings tab of a camera start drawing a square shape over the live image on the left. 2. Once a square image is drawn a zone will be added to the Event Trigger Labels pane. 3. Continue drawing squares and moving them on the live image to position them properly. 4. You may add as many images as the camera allows, when you’ve reached the max number of zones you will no longer be able to draw zones (no error will appear). 5. Click Apply and OK. 6. You may also check the camera Web Interface to ensure the zones were sent to the camera properly. 244 Video Insight Administrator Guide IP Enterprise Version 5.0 To Modify a Motion Zone: 1. Select the zone from the Event Trigger Labels panel. 2. Click Properties, the following screen will appear: 3. Name the zone or leave the default, naming it will allow for a descriptive manner to identify the location quickly. 4. Choose specific Event Trigger Level and Sensitivity settings only for this motion zone 5. Choose specific dimensions to enlarge or minimize the size of the motion zone. By setting the trigger level higher, you can make that zone more sensitive than the rest of the camera view; by setting the trigger level lower, the drawn box will become less sensitive. If the box you draw is set to 0% trigger level, it will completely prevent motion detection from operating in the motion zone. This can be handy if you have continual motion sources you wish to screen out, such as busy roads or fans. It is also possible to manually move or resize the motion zone, using the location variables at the bottom of the properties box. 245 Properly naming zones will make the motion event appear in the Motion Log with the specified name (i.e. Door Open) rather than the default of Zone - 1. Video Insight Administrator Guide IP Enterprise Version 5.0 Video Settings Tab This Video Setting tab provides the user with the ability to modify certain settings on the camera. Based on the camera model, the software determines which settings can be modified. Any options that cannot be modified are “grayed out” due to the camera’s inability to support it. In general there are two ways of defining color, HSV (Hue, saturation, Most digital value) or RGB (red, green, blue). Most digital cameras use HSV rather than RGB. cameras use HSV rather than RGB color Image Quality Settings: scheme. Brightness: The image brightness can be adjusted in the range 0-100 where a higher value produces a brighter image. Hue: Hue is described with the words we normally think of as describing color: red, purple, blue, etc, i.e. all the colors in the spectrum. You can adjust the camera color to make it more true by sliding the bar from left to right. Color Adjustment: Saturation: Saturation describes the difference of a color from the gray of the same lightness. Increasing saturation will deepen the colors of your images, making reds redder and blues bluer. Decreasing saturation will bring your image closer to a grayscale (i.e. monochrome, black-and-white) image. Contrast: Adjust the image’s contrast by raising or lowering the value in this field Sharpness: Adjust the sharpness of the image, it changes colors, similar to saturation, but generally makes images look more flat when reduced. 246 Video Insight Administrator Guide IP Enterprise Version 5.0 RGB Color Adjustments: If the camera is using the RGB color model, you can use these sliding bars to adjust the levels of red, green and blue in your image. Rotate Image: This dropdown allows users to control the way the image displays, some cameras default to an upside down image in some cases, and so rather than accessing the camera site to correct it you may do from this tab. Use Camera settings: Use the image as it is received from the camera. No rotation: image is not rotated, if camera itself rotated the image, then the system will flip it back. Flip: Flips image 180 degrees 247 Video Insight Administrator Guide IP Enterprise Version 5.0 Optional Controls Tab The Optional Controls tab is used to list any specific complex features that may apply to a very specific model of cameras. For example a Sentry 360 camera has dewarping capabilities and configuration settings specific to that feature. An IQEye camera may have a Cameo feature. The screenshot above is an example of a Sentry 360 camera example where those features are enabled. To learn how to configure specific camera types refer to the appendices section for details regarding Sentry and IQEye cameras. 248 Video Insight Administrator Guide IP Enterprise Version 5.0 Privacy Zone Tab Privacy zones allow a section of the live and recorded view of the camera to be blocked. That section will not be able to be viewed, recorded or monitored. Moreover, if a camera is set to Motion Only Recording Type, all motion in the Privacy zone area will not trigger recording. To create a privacy zone, left click and draw a box around the area to be blocked. You will be asked to name the zone after which the zone name will appear in the list. Pause Received Image: This checkbox can be used before creating privacy zones to pause the image which may cause the privacy zones to flicker while drawing them if not paused. privacy zones can only be created for JPEG based cameras To Create a Privacy Zone: 1. From the Privacy Settings tab of a camera start drawing a square shape over the live image on the left. 2. Once a square image is drawn a zone will be added to the Privacy Zone Labels pane. 3. Continue drawing squares and moving them on the live image to position them properly. 4. You may add as many images as the view field allows. 5. Click Apply and OK. 6. You may also check the camera Web Interface to ensure the zones were sent to the camera properly. 249 Video Insight Administrator Guide IP Enterprise Version 5.0 To Modify a Privacy Zone: 1. Select the zone from the Privacy Zone Labels pane. 2. Click Properties, the following screen will appear: 3. Name the zone or leave the default, naming it will allow for a descriptive manner to identify the location quickly. 4. Choose specific dimensions to enlarge or minimize the size of the privacy zone. 250 Video Insight Administrator Guide IP Enterprise Version 5.0 Contact Information Tab The Contact Information Tab is an excellent way to identify the camera in more detail. The Camera Name is the only defaulted field on this tab, the rest will be entered by the server administrator with the specific camera information. Once completed, save the information by clicking Apply and OK. 251 Video Insight Administrator Guide IP Enterprise Version 5.0 Maintenance View Tab The Maintenance Tab is another option that could be used instead of the Contact Information tab, switching between the two will erase all information used on the previously active tab type. The Camera Name and Model are the only defaulted fields on this tab, the rest will be entered by the server administrator with the specific camera information. All information entered in the New Service Record field will be added to the Service History for later review. Once completed, save the information by clicking Apply and OK. 252 Video Insight Administrator Guide IP Enterprise Version 5.0 d. Dual Streaming Capability The VP series (VP 1, 8, and 16) offers a sub stream for H.264. This is an excellent option when bandwidth and CPU power are a concern. This new feature will allow the user to add the VP 16 using channels 1-16 in Monitor Station for Live view using one stream of H.264 with lower FPS, and resolution and add channels 17-32 with a much higher FPS and resolution for recording purposes. Adding the VP Encoder as suggested results in a smoother live view that will work best with a lessthan-ideal environment for live view, while still providing great quality and highest resolution possible for the recorded video. 253 Video Insight Administrator Guide IP Enterprise Version 5.0 Chapter 5: Access Control Configuration A. S2 Video Insight and S2 certification is another offering to those customers that would like to use Video Insight as a robust, dependable NVR system on the backend with an S2 UI Interface. This integration requires a Video Insight version 4.3.0.40 and higher and a S2 version of 4.2 and higher. The complete documentation on how configure and use S2 can be found by browsing to the following link for the latest OVID installer and an integration manual. http://downloadvi.com/downloads/Current/OVID_S2_SERVER.zip B. RS2 RS2 is a command line integration that can be executed using a batch file or a simple command line. RS2 integration offers a Live and Recorded play of each camera. Here are few examples: Recorded Video 1. Open a command prompt and type the following command at the prompt 2. DVRViewer -sserverip -c1 -ddate -bbegintime –eendtime 3. Here is an example: DVRViewer -s10.10.1.213 -c1 -d07062011 -b09:00:00 -e10:00:00 The following stand alone player will appear: 254 Video Insight Administrator Guide IP Enterprise Version 5.0 Live Video 1. Open a command prompt and type the following command at the prompt 2. DVRViewer –sserverip:portnumber-c1 -dlive Here is an example: DVRViewer -s38.100.66.196:4021 -c1 –dlive The following stand alone player will appear: 255 Video Insight Administrator Guide IP Enterprise Version 5.0 Customer installations and general support for this integration will be handled by RS2; RS2 contact information: http://www.rs2tech.com/RS2WebApp/Support_Form.aspx RS2 Direct (877) 682-3532 C. DSX We have supplied an installer that will install the required files; the installer can be downloaded from http://downloadvi.com/ . DSX integration will offer both Live and Recorded video as well as the ability to use your camera’s PTZ presets. For DSX support please contact: DSX Install (800) 346-5288 D. Isonas At the time of this writing this integration is currently in progress, the manual will be updated once it is completed. E. Paxton At the time of this writing this integration is currently in progress, the manual will be updated once it is completed. 256 Video Insight Administrator Guide IP Enterprise Version 5.0 F. MonitorCast MonitorCast is an added integration offered by Video Insight. The Access control capability, hardware, features and integrations are built in to our software. To configure MonitorCast integration you must have a MonitorCast server up and running, contact our Tech Support for instructions on installing a Monitor Cast server. We support MonitorCast version 8.8.61 and higher. Prior to configuring Monitor Station you must first add the Video Insight’s server’s IP address to the authorized clients list of MonitorCast: 1. Log on to the MonitorCast server 2. Click the Hardware Manager Icon at the top 3. Highlight the Web Service Node as shown below: Press the Lock to Unlock and make changes 4. Enter the Video Insight’s IP Server IP address into the list of the “SDK Allowed IP Client(s)” . A comma should separate all IP addresses. 5. Take notice of the pre-defined port number named: “SDK TCP Port” you’ll need that when configuring Monitor Station. 6. Click Save 7. Click the Lock to lock in changes. To configure MonitorCast in Monitor Station: 257 Video Insight Administrator Guide IP Enterprise Version 5.0 1. Access the server with a Monitor Station client or direct access to the IP Server 2. Navigate to Server Properties> Access Configuration Tab 3. Populate the fields as shown below MonitorCast IP address, TCP port number and an administrator username 4. Once Test is clicked the following message should appear “Access control system connection successful.” If a failure is shown refer back to the pre-installation steps on the previous page. 5. Click Import 258 Video Insight Administrator Guide IP Enterprise Version 5.0 6. All of the Doors and Access Points configured in MonitorCast will appear on the left in the “Available Access Control Doors” pane. 7. You may select one, multiple or all access points by using a single click, CTRL+Click or SHIFT+Click respectively. 8. Click the Add button in the center 9. All selected doors will now appear on the right in the Imported Doors pane as seen below: 10. Once the Contact Points are added, Click Properties to assign a camera to the correct Access Control contact point. 11. Enter a descriptive name for the Door/Device Name field. 12. Select the desired camera from the dropdown 13. Click Ok To modify MonitorCast in Monitor Station: 1. Right Click a Server from the Left Navigation and choose Properties. 2. Click Access Configuration tab 259 Video Insight Administrator Guide IP Enterprise Version 5.0 3. Select an Imported Door and Click Properties 4. Modify the Door/Device Name and/or the Associated Camera. 5. Click OK Should the name of an Access point change on the MonitorCast server simply click the Import button in the Access Configuration tab and click the Sync Names button. G. BlackBoard Blackboard is an added integration similar to MonitorCast in the setup process but requires an ORACLE server to be running instead. To configure Blackboard in Monitor Station: 1. Access the server with the Video Insight’s IP Server 2. Navigate to Server Properties> Access Configuration Tab 3. Populate the fields as shown on the next page 260 Video Insight Administrator Guide IP Enterprise Version 5.0 Connection string values will be specific to your ORACLE installation 4. Once Test is clicked the following message should appear “Access control system connection successful.” If a failure is shown contact your System Administrator to confirm the connection string and ensure the ORACLE client is running. 5. Click Import 6. All of the Doors and Access Points configured in BlackBoard will appear on the left in the “Available Access Control Doors” pane. 261 Video Insight Administrator Guide IP Enterprise Version 5.0 7. You may select one, multiple or all access points by using a single click, CTRL+Click or SHIFT+Click respectively. 8. Click the Add button in the center 9. All selected doors will now appear on the right in the Imported Doors pane as seen below: 10. Once the Contact Points are added, Click Properties to assign a camera to the correct Access Control contact point. 11. Enter a descriptive name for the Door/Device Name field. 12. Select the desired camera from the dropdown 13. Click Ok 262 The Delete Door button removes the Door/Device from Monitor Station only Video Insight Administrator Guide IP Enterprise Version 5.0 To modify Blackboard in Monitor Station: 1. Right Click a Server from the Left Navigation and choose Properties. 2. Click Access Configuration tab 3. Select an Imported Door and Click Properties 4. Modify the Door/Device Name and/or the Associated Camera. 5. Click OK Should the name of an Access point change on the Blackboard server simply click the Import button in the Access Configuration tab and click the Sync Names button. There are two additional areas where Blackboard is used: Lane Viewer and Access View in Facility Maps. 263 Video Insight Administrator Guide IP Enterprise Version 5.0 a. Lane Viewer Lane Viewer is used when the need to view several cameras and their associated card swipes at the same time. To enable Lane Viewer: 1. 2. 3. 4. 5. 6. Launch Monitor Station Navigate to Tools>Options Select the Tools Configuration tab Check the “Enable Access Control Lane Viewer” checkbox Click Apply Click OK Once checked a new option will appear in the Tools menu; select it. The following pop-up will appear: List of all cameras for all servers added to this MS Live view will appear here List of all imported doors Pause Live image Save Configuration changes Card swipe details Configuration menu 264 Video Insight Administrator Guide IP Enterprise Version 5.0 1. Select the camera of your choice from the top dropdown OR 2. Select the door of your choice and the corresponding camera will appear in the live view and will be automatically selected for you. 3. When a card is swiped all f the applicable information will populate below the image as follows: If a photo does not exist a No Photo message will appear: 265 Video Insight Administrator Guide IP Enterprise Version 5.0 The Configuration menu available in Lane Viewer allows the user to customize the behavior and view for this option. From the Lane Viewer pop-up, click Config button. Picture size width and height: The sizes entered here will determine the Lane size Always show last entry checkbox: When selected will display the last card swipe data, if unchecked will blackout after 30 seconds or a defined time Keep History checkbox: When Pause is pressed below the image it will allow the user to iterate through the preceding 10 images or a predefined number Viewing options: Select the number of lanes to view at once (6 is the max). In addition, you may elect to check or uncheck any of the other available view options Live Video: as shown in the sample above the Live stream was shown as well due to this option. You may uncheck it to view only the card swipe information and photo. 266 Video Insight Administrator Guide IP Enterprise Version 5.0 b. Access View The Access View option in Facility maps is available once the configured door is added to a Facility map. When a card swipe is detected the following pop-up will appear: List of doors to select from Additional history explained below Prior Card swipe information Photo, if available Live view Card swipe information A Live Window pop-up A 30 second review pop-up User Entry History tab: Once selected this tab will show a complete list of all of the most recent card swipe history. Double click any row to view the motion event associated with the card swipe Click Reload to refresh the list 267 Video Insight Administrator Guide IP Enterprise Version 5.0 Chapter 6: Health Monitor The Health Monitor is a separate application used to monitor the health of one or all of your servers. It is peace of mind knowing a passively running server is there to monitor and ensure your video surveillance servers are running and cameras are recording to minimize the risk associated with a down server or camera. To complete the risk mitigation and disaster recovery associated with your security initiative you may also want to consider installing a Failover server, discussed on page 31. a. Pre-Requisites 1. The Health Monitor may reside on the same machine as an existing IP server or a dedicated machine separate from all other IP servers. The latter is recommended in the event that combined server loses connectivity so will the HM. 2. Any one of the following Operating Systems (32 or 64 bit): o 2008 Server R2 o 2008 Server Web Edition o 2008 Server Standard or Enterprise o 2003 Server Web Edition o 2003 Server Standard or Enterprise o Windows 7 o Windows Vista o Windows XP Professional 3. The HM does not have to be on the same Network subnet, it could be completely remote. However, if the internet connection between the two locations is lost, it will report the servers are down when they may not actually be down. 4. HM will need to install a database locally on the server the HM is installed on OR on a remote database server. If installing on a remote DB server the HM database will need to be created first, manually. 268 Video Insight Administrator Guide IP Enterprise Version 5.0 b. Installation 1. Double click the accsetup.exe executable, following will appear: 2. Click Next 3. Click the Agree button to accept the terms and continue the installation; otherwise choose Cancel to terminate the installation. The following will appear: 269 Video Insight Administrator Guide IP Enterprise Version 5.0 4. Enter the destination folder if different than the default by selecting Browse; most customers using a server with multiple drives may choose to install Programs in the D:\ location rather than the OS drive. 5. Click Install, following will appear: 6. Choose the shortcut location if different than the default. 7. Click Install 8. Click Finish, new red cross Health Monitor icon will appear on your desktop 270 Video Insight Administrator Guide IP Enterprise Version 5.0 c. Configuration 1. Double click the Health Monitor icon on your Desktop, following will appear: 2. Enter the IP Address of the server with the Health Monitor database and the sa credentials or leave defaults if installed locally. 3. Click OK 4. View the Health Monitor icon in the System Tray and ensure it is a green cross signifying the health monitor service is running. 5. Right click on the green cross in System Tray and choose Launch Console 6. Navigate to Setup>User Manager 7. Click Add 271 Video Insight Administrator Guide IP Enterprise Version 5.0 8. Enter all Contact information in the fields provided, a name and an email are the minimal fields required. 9. Optional: Click Test to send a test email 10. Click OK to add Contact, repeat steps 7-10 to add additional contacts The Health Monitor is now installed and running pending incoming server data. Configure each server to point to this Health Monitor as outlined in the Health Monitor Server tab configuration details on page 40 and in Setup and Configuration: Health Monitor on page 267 to establish a connection and begin reporting status. 272 Video Insight Administrator Guide IP Enterprise Version 5.0 d. Server Configuration Once the Server(s) are configured to report to the Health Monitor they will connect by sending all pertinent server information as shown below: The server name, IP Address, last contact date and time, Server version number as well as number of cameras up and down will be listed. The server status above is indicated by a gray dot, there are three possible states in the Health Monitor for servers, each is detailed below: = Server reported to the Health Monitor, but isn’t managed; configure it as shown on page 274 = Warning condition: Server hasn’t reported in the allotted time configured previously = Error condition: Server is down, attention is required; reasons and solutions are on page 276 273 Video Insight Administrator Guide IP Enterprise Version 5.0 1. Right click the Server row with a gray status, following will appear: 2. Choose Manage Server 3. This Add Server: General tab pop-up can be used to configure the following: Server Name: This field will populate the Server name reporting to the HM, you may add a prefix to this name, but you may not delete and replace the name completely. Minutes to Warning: The allotted time for a warning before an email is sent to the HM contacts with the warning details. 274 Video Insight Administrator Guide IP Enterprise Version 5.0 Minutes to Error: The allotted time for an Error before an email is sent to the HM contacts with the error details. 4. Select the Email Tab 5. Check the desired contacts to be notified in the event of an Error or a Warning condition is encountered. How to Add Contacts can be found on pages 92-93. 6. Click the Conditions tab 7. Check the desired conditions 275 Video Insight Administrator Guide IP Enterprise Version 5.0 8. An email will be generated once the condition is met and the minutes to Warning or minutes to Error have been exceeded. e.g. if a server/camera time threshold is set to 30 minutes and a server is shutdown and restarted within 5 minutes an email will not be generated. Conversely, if a server/camera’s time threshold is set to 1 minute and it takes the server five minutes to restart an email will be generated and sent to all selected contacts. In some instances it is possible for the Health Monitor to report it is unable to connect to the IP Server. A list of possible reasons and their solutions are shown below. IP Address Changed Server is either manually or automatically restarted Diagnostics is running The time interval set to warning or error is extremely long and server status hasn’t updated in quite some time AND the last known status is a down server Port 11000 is blocked The ‘enable Health Monitor ‘checkbox has been unchecked in Server Properties as shown on page 40 The Health Monitor information is removed from Setup and Configuration>Health Monitor Section IP service is not started due to a demo version expiring Network outage The Server’s name has changed The DB information (location, IP address, credentials and or access using current credentials) has been changed and the server can no longer access the database. Update the server’s IP address as discussed on page 34 This is occasionally performed for updating server settings or database modifications and is usually less than two minutes, refresh the HM and the Server should report back to the HM shortly. During Diagnostics mode the Service is stopped for troubleshooting purposes, access Diagnostics as discussed on page 54 and start the service. Refer to recommended settings (default is 30 minutes) on page 274 Perform a netstat command in a DOS prompt to ensure port is available and listening Check the checkbox again to enable managing of the server Add the Health Monitor back to this section Remedy this issue by signing up for a full license and click Update Activation in Diagnostics discussed on page 60. Ensure the Network service is restored. In this case the old entry in the HM using the original name will now appear red and a NEW entry in the Health Monitor will appear with the new name with a gray status waiting to be configured. Either remove the original and configure the new entry in HM or simply change the name of the server back to restore connectivity with the HM. Use Diagnostics on page 54 to check DB connectivity 276 Video Insight Administrator Guide IP Enterprise Version 5.0 Chapter 7: Media Player Media Player is Video Insight’s built in player for videos, it offers a slew of filtering options, printing and managing of videos making it easy and fast to find the video or motion event desired. MP Toolbar MP Left Navigati -on tree Timeline View Playback area MP Controls a. Left Navigation Tree The left navigation tree has multiple panes; the initial pane will appear expanded and is the Quick Select option. Each pane is explained in detail below: Browse Video Servers Browse Folders for Video Quick Select Motion Events Player Controls 277 Video Insight Administrator Guide IP Enterprise Version 5.0 Browse Video Servers Browsing the Video Servers is performed exactly as you would from the Monitor Station’s left navigation tree. Browse to the server, camera, day folder and file you would like to view. The file will begin playing on the right; downloading a clip, printing an image and performing an object search can all be done from this view as well. 278 Video Insight Administrator Guide IP Enterprise Version 5.0 Browse Folders for Video Browsing Folders for Video is similar to browsing using Windows Explorer. 1. To change the Root Directory simply click the icon 2. Choose a location of your choice and all video recordings in that network path will appear on the left. 3. Choose recorded file to play 279 Video Insight Administrator Guide IP Enterprise Version 5.0 Quick Select Quick Select is especially useful when viewing the recorded files as motion events in the timeline view shown above as orange tick marks. 1. 2. 3. 4. 5. Select the server from Server dropdown Select the applicable camera from Camera dropdown Select a date from the calendar Click Load Timeline Place your cursor anywhere in the timeline mode where it is marked orange (motion events). 6. The file will begin playing on the right If the event you are searching for occurred around a known time, using the Last Event before Specific Time” option is for. Enter the time closes to when the event occurred (past the event, not before) and click Play. 280 Video Insight Administrator Guide IP Enterprise Version 5.0 Motion Events All added cameras, by default, are set to Motion Only Record Type. Rather than going through hours of video to view a specific motion event this panel is a good option to consider when looking for an exact recording when camera, server, and time of the event are known. 1. Select the server from Server dropdown 2. Check the specific camera, if known or simply select all 3. Uncheck the Restrict Times checkboxes for a greater interval or change to the desired times. 4. Click Reload 5. A full List of Motion Event snippets will appear, click the desired motion event and the file will play on the right. Motion Events can also be filtered to include specific Motion types: Motion Events: all Cameras set to Motion Only Record Type will show events here Access Events: all positive alarms of successful Access Control swipes will appear here, for integrations such as Blackboard, MonitorCast, etc. 281 Video Insight Administrator Guide IP Enterprise Version 5.0 Access Alarms: all negative alarms of failed Access Control swipes will appear here, for integrations such as Blackboard, MonitorCast, etc. Rule Event: all motion events created because of a Rule will be shown here. Video Analytics: all motion events created because of VCA Analytics (which are also rules.) Player Controls The Player Controls are available both below the video playback on te right and also in the left pane for several reasons. The left pane controls are there for use when the player size in increased thus making the controls below disappear or when the size of the monitor coupled with the camera resolution size causes the controls below to disappear. 282 Video Insight Administrator Guide IP Enterprise Version 5.0 b. Toolbar Magnify Current image (Object Zoom) Motion Event Player Single Player Mode, when pressed will show the 2 Player mode button here Timeline Mode Open File Increase and Decrease Player size Single/dual Player Mode: These buttons will allow you to either display one or two players to play the same video and control it in two different players. Timeline Mode: Timeline mode is best used with cameras that are set to Motion Only Recording Type, pressing the Timeline Mode button will display the following: The orange tick marks designate motion events/recordings, use the plus and minus buttons to display whole days, hours or minutes. Place your cursor on any of the orange tick marks to begin playing that motion event. Motion Event Player: Pressing this button will expand the Motion Events pane; refer to page 281 to learn about Motion Events. Open File: In some cases browsing to video location is not enough and the ability to open a specific file is needed. In that case press this button and browse to the location of this specific file. Magnify Current Image (Object Zoom): Object zoom, when pressed, each click will produce a pop-up titled Object Zoom that will allow for printing, zooming in and out as well as saving to a location for later retrieval. Here is a sample: 283 Video Insight Administrator Guide IP Enterprise Version 5.0 Please Note: Regardless of the option selected the size of the image that will print will always be the resolution size the camera is configured for. 284 Video Insight Administrator Guide IP Enterprise Version 5.0 Chapter 8: Synchronized Player The new Synchronized player is easy to access and use, to access it follow the steps outlined below: To use cameras in the Sync Player the server the cameras reside on must be upgraded to 5.0. 1. Launch Monitor Station 2. Navigate to Tools>Synchronized Player 3. Drag and drop up to 6 cameras of your choice from the left navigation tree to the main playing area. Please Note: all of the cameras selected should be from the same server 285 Video Insight Administrator Guide IP Enterprise Version 5.0 Playback Speed Current playback date and time All connected servers will appear here, you may select up to 6 cameras from any one 5.0 server. Camera Name Selected cameras Playback area Click X to remove camera Date Selection Player Controls Correlating camera names and their available recordings Available recordings Playback speed controls File Export; Clip creation Once the cameras are placed in the playback area all of the available recordings for the selected date (default date is Today) will begin loading and will appear as they do in the Available Recordings area. Recording Types: The solid blue line indicates a camera that is using the Record Always Recording Type; the thin scattered blue lines indicate the camera is using the default Motion Only Recording Type. Once the recordings load, the vertical orange bar will move to the earliest recording and begin playing the video for the applicable camera(s). As seen above not all cameras added to Synchronized Player will have recordings at the same time and as such the camera(s) without recording will pause or remain gray while the camera(s) with recording continue to play. Once the recording is synchronized (e.g. all cameras show a blue mark for the same time) all of the camera(s) with recordings at the same time will play synchronously. Here is a sample to illustrate that scenario: 286 Video Insight Administrator Guide IP Enterprise Version 5.0 3 cameras are playing: position 11, position 4 and position 7 Position 9 camera is gray because there are no motion events or recordings to display Replay Video: As the video is playing back the vertical orange bar will progress along the timeline until end of day or end of recordings is reached. You may click anywhere in the timeline to replay a motion event. Changing Date: Upon launching the Synchronized Player, the Scheduled Date dropdown will default to today’s date as shown below; simply elect a different date from the calendar to load those videos. Playback Speed: Click the ‘+’ or ‘-‘signs to accelerate either forward or backwards speed of the of the video. The number 1 signifies normal playback speed, a 64 is the fastest forward speed and a -64 is the fastest backwards speed. 287 Video Insight Administrator Guide IP Enterprise Version 5.0 Player Controls: The player controls, by default, will first show 3 buttons: Play, Pause and Rewind. Once any of the buttons is pressed additional speed controls will also appear: a. Synchronized Player Clip Option Once Synchronized Player is used with a set number of preselected cameras and the video with the interesting footage is displayed it is possible to create a synchronized clip that will play in all supported media players just as a regular video would; only displaying the synchronized view of the matrix. 1. From the Synchronized Player pop-up click the File Export icon below the left navigation 2. 3. 4. 5. 6. Save the file to a location of your choice Accept or change the default File Name Change the default date and time if different than what is currently playing Choose a compiled image resolution Click OK 288 Video Insight Administrator Guide IP Enterprise Version 5.0 7. Once the export is completed, choose Cancel to close this pop-up. 289 Video Insight Administrator Guide IP Enterprise Version 5.0 Chapter 9: Troubleshooting Your registered Video Insight product includes a one year software maintenance and technical support plan that begins on your purchase date verified by the serial number used to activate the software. This one year of included Software Upgrade Program (SUP) entitles users to one full year of free Software upgrades and unlimited Tech Support. To avoid lapse in support and ensure the latest features and fixes are readily available to you we recommend renewing before your maintenance expires. Our tech support team is highly versed in the IP world of cameras and our software as well as Networking and Access Control Systems. You can be sure that your issue will be resolved with the utmost consideration. A. Frequently Asked Questions a. What types of cameras are supported? Video Insight supports a slew of camera manufacturers and models as well as a wide array of features for each camera type and model. The most up to date list can be found on our site at: http://video-insight.com/Support/Supported-Cameras.aspx b. Why am I seeing skipping in live view? Live view performance heavily depends on the Server, Client, Network and number of concurrent connections to the camera exhibiting the skipping. To alleviate these symptoms and optimize live view performance refer to Chapter 1. c. I’m having trouble installing the IP server on my machine, what should I do? The Video Insight Application Suite installer was created taking all pre-requisites into consideration to allow users to install any or all of our applications using one installer without having to consider which SQl or IIS version are needed and when and how they should be installed. Due to that design of including third party software into the VI installer there may be cases when SQL or IIS will fail to install thus preventing the VI suite to be installed and configured properly. There are two options to overcome any possible installation issues. Option I: if the server you are installing on is not in production currently and can be reformatted completely prior to installing our software that is recommended as the fastest route to a successful install. Option II: if the server you are installing on is currently being used in production and cannot be reformatted due to other installed software or the need to minimize downtime, the following items must be removed manually: 290 Video Insight Administrator Guide IP Enterprise Version 5.0 1. Uninstall all VI software using Add/Remove Please Note: Database backup programs is highly recommended prior to 2. Remove VI Enterprise folder from any installed any database modifications or locations, usually C:\Program Files removal. 3. Remove Registry keys related to VI, 32 bit installed location will be different than 64 bit location 4. Remove all SQL related applications using Add/Remove programs, this includes SQL Server Management studio, SQL Native Client and ALL other SQL apps that appear in Add/Remove programs as installed applications** 5. Remove MSSQL* folders found under C:\Program Files** 6. Remove all Registry keys related to MSSQL installation 7. Restart server 8. Reinstall the VI suite of applications. d. I can’t get the Health Monitor and my Server to connect Ensure the Health Monitor Data has been entered properly into the Health Monitor tab of the Server’s Properties and the Health Monitor Installation and Configuration steps depicted in Health Monitor Install on page 267. If all settings seem to be accurate here are a few steps to consider: 1. Server name must not exceed 30 characters; that is the limit for the HM. 2. Ensure your Health Monitor service is running on the server where HM was installed (it may be a different machine than the IP Server) by looking at the Task Manager; service name is: HealthMonitorService.exe e. I just added my servers, why does it keep asking me to reenter them? Not saving added servers. If the Server Setup pop-up is continuously appearing each time the Monitor Station is restarted it means the user logged on to this computer does NOT have rights to edit the registry. Both the Monitor Station and IP server require access to the Registry of the server being used to save specific settings; in this case the Server list. Log off the user and log back on to the PC using a local system Administrator. Another reason would be UAC (Windows User Access Control) is still turned on which means following the Monitor Station installation a reboot was not performed as requested. Reboot and import the server list again. 291 Video Insight Administrator Guide f. IP Enterprise Version 5.0 Full list of all ports used by our application and their purpose? Port Number 4010 Name Data Port 4011 Command Port 3010 Ovid Server 80 HTTP 2051 MonitorCast 554 RTSP 21 FTP 11000 N/A 636 Active Directory SSL 389 Active Directory non-SSL 292 Purpose used for the sending live video streaming from IP Server to Monitor Station used by the Monitor Station to get and set system information Used for the communication between S2, IP Server and the Ovid Server for the Video Insight and S2 Access Control Configuration Used by IIS for serving the Web Client Note: Some ISP’s block port 80 access. You may need to configure IIS to use a different port) Used for communication between Video Insight and MonitorCast for Access Control May be used for specific camera [found in camera properties] May be used for specific camera [found in camera properties] Used for IP Server and Health Monitor Communication Open this port when AD will be configured with Secure Socket Layer (SSL) Open this port when AD will be configured Video Insight Administrator Guide IP Enterprise Version 5.0 g. What does ‘There was a database error, or this version of the database…’ mean? This error may appear at several different areas, but is most likely due to one root cause: The Database. Either the HM or the IP server is unable to connect to the database to capture the current settings and configurations. To correct this issue you may use Diagnostics to check for database connectivity in case it is a credentials or IP Address change as discussed on page 276. Another cause may be that the SQL service itself is not running, check to ensure it is running by doing the following: 1. 2. 3. 4. 5. 6. Right click ‘My Computer’ on your Desktop Choose ‘Manage’ Expand the left tree option named: ‘Services and Applications’ node Select ‘Services’ from left tree Sort the Name column in the right pane Look for ‘SQL Server (MSSQLSERVER)’ service 7. Notice the Status and Startup Type columns and their value for this service 8. Right click the service and choose ‘Properties’, the following will appear: 293 Video Insight Administrator Guide 1. 2. 3. 4. 5. IP Enterprise Version 5.0 Change the Startup Type dropdown to ‘Automatic’ Click ‘Apply’ Click the newly enabled ‘Start’ button Click ‘OK’ Restart the HM and the IP Service if applicable to reestablish a connection h. What is Active Directory anyway? At the top level of the Active Directory hierarchy is the Forest. The Forest contains all objects in the directory: users, groups, computers, and security permissions. The Forest is basically the entire Active Directory. A Forest contains many trees and a tree is simply a collection of domains that are organized and share the same DN namespace. For example, dallas.videoinsight.net and houston.videoinsight.net might reside in the same tree. Objects within the domain are often grouped into Organization units (OU’s); OU’s make administration easier by resembling the organizational structure. Domains can contain many OU’s or even nested OU’s. The structure of Active Directory will vary widely between organizations. Here is an example: Forest – Video Insight Tree – Southern USA Domain – Dallas Domain – Houston OU – Development Tom Mike OU – Sales Chris 294 Video Insight Administrator Guide i. IP Enterprise Version 5.0 How do I set the IP Service to restart in the event of a crash? Since the IP Server runs as a service under Windows, it can be automatically restarted if the service crashes for any reason. This parameter can be set using Windows in the Services utility. 1. 2. 3. 4. 5. Right click ‘My Computer’ on your Desktop Choose ‘Manage’ Expand the left tree option named: ‘Services and Applications’ node Select ‘Services’ from left tree Sort the Name column in the right pane 6. Right click the IP Video Enterprise service, the following screen will appear: 295 Video Insight Administrator Guide IP Enterprise Version 5.0 7. Select the Recovery tab When the IP Server is installed, the installation automatically sets this parameter to restart the service on failure. 296 Video Insight Administrator Guide j. IP Enterprise Version 5.0 How do I backup and restore my Video Insight database? To prepare for a disaster recovery a safeway option that we recommend is backing up your database regularly; to do so follow these steps. Backup 1. 2. 3. 4. 5. 6. 7. 8. 9. 10. 11. 12. Navigate to Start>Run Type: services.msc and press <enter> Locate “Microsoft SQL service” Right click and choose Stop Browse to My Computer>Local Disk C>Program Files>Microsoft SQL Server>MSSQL.1>MSSQL>DATA folder Copy Insightent.mdf and Insightent_log.ldf files Save these to a safe location of your choice Navigate to Start>Run Type: regedit and press <enter> Browse to HKLM>Software>Video Insight folder Right-Click the Video Insight folder and choose Export Save this file to the same location you put your database files in Restore 1. 2. 3. 4. 5. 6. 7. 8. 9. 10. 11. Navigate to Start>Run Type: services.msc and press <enter> Locate “Microsoft SQL service” Right click and choose Stop Locate your saved files and copy InsightENT.mdf and InsightENT_Log.ldf Browse to My Computer>Local Disk C>Program Files>Microsoft SQL Server>MSSQL.1>MSSQL>DATA folder Paste InsightENT.mdf and InsightENT_Log.ldf and replace the existing files Locate your saved files and double-click your Registry export file (ends with .reg.) This will re-install your registry keys Repeat steps 1-3 Right click and choose Start 297 Video Insight Administrator Guide IP Enterprise Version 5.0 k. I’d like to migrate all of my servers to one centralized database, how should I do that? Choose the Primary Server to host the Database on, review the SQL Consideration and Storage Consideration sections on pages 12 and 11, respectively to ensure the proper server is selected. 1. Stop the service on all secondary servers (learn how on page 47) 2. Uninstall SQL from all secondary servers (optional) refer to FAQ below 3. Delete ServerID from registry on secondary servers by: a. Navigate to Start>Run b. Type: regedit and press <enter> c. Browse to HKLM>Software>Video Insight>IP Server Ent folder d. Right click on ServerID key on the right 4. Run "Initialization" on Secondary servers (learn how on page 23) 5. Enter correct SQL information ( learn how on page 25) 6. Restart the IP Service l. How to remove Microsoft SQL without having to reformat SQL removal is a bit complex given simply using the Add/Remove Programs feature doesn’t remove all of the installed files and the leftover remnants will interfere with a new install of SQL and the VI Software. We offer 3 possible methods of removing SQL manually: Method 1 1. Remove SQL from the Add/Remove Programs a. MSDE: there is only one entry, select and remove it b. SQL Express: there are four entries. Start from the top and work your way down. 2. Download MSIINV and MSIZAP from www.downloadvi.com/downloads/ftp 3. Extract the files to C:\ 4. Navigate to Start>Run 5. Type: cmd and press <enter> 6. In the command prompt type: cd \ 7. In the command Prompt type: msiinv >C:\openme.txt 8. Browse to C:\ and open the file named: openme.txt 9. Within the openme.txt document type “CTRL F” - this will open a find pop-up 10. Type SQL in this window and click “Find” 11. Once it finds SQL locate the {product id} and make note of this (leave this document open) 298 Video Insight Administrator Guide IP Enterprise Version 5.0 12. Back in the command prompt type: msizap T {product id} (including the brackets from what you noted in step 11) 13. Repeat msizap steps until all references of SQL have been removed with MSIZAP 14. Verify that all services have been removed 15. Navigate to Start>Run and type: services.msc, press <enter> 16. In Services locate any service that starts with “Microsoft SQL” or “SQL” 17. Right-Click each of these and choose Stop 18. Go to Start >Run and type: cmd 19. In the command prompt type: cd \ 20. In the command prompt type: sc query state= all>c:\openme1.txt 21. Browse to C:\ and open the file named: openme1.txt 22. Press “CTRL F” and enter SQL then click Find 23. Once it finds SQL locate the “Service Name” Please Note: 24. In the command prompt type: sc delete <service name> Modifying 25. Repeat steps delete steps until all services have been removed. Registry settings 26. Navigate to My Computer >Local Disk C>Program Files and can render your delete the folder Microsoft SQL Server Operating System 27. Navigate to Start>Run and type: regedit unusable, backup Browse to HKLM>software>microsoft your registry first. 28. Remove any folder that has SQL in the name 29. Browse to HKLM>Services>Current Control Set 30. Remove any folder that has SQL in the name 31. Reboot the server before attempting another installation Method 2 1. Download the Microsoft Windows Installer Clean Up Utility from www.support.microsoft.com/kb/290301 2. Install the Software and run the program. 3. Select the product you wish to uninstall and then click Remove 4. Navigate to C:\Program Files and delete the folder Microsoft SQL Server 5. Verify that all services have been removed. 6. Navigate to Start>Run and type: services.msc, press <enter> 7. In Services locate any service that starts with “Microsoft SQL” or “SQL” 8. Right click each of these and choose Stop 9. Go to Start>Run and type: cmd 10. In the command prompt type: cd \ 11. In the command prompt type: sc query state= all>c:\openme1.txt 12. Browse to C:\ and open a file named: openme1.txt 13. Press “CTRL F” and enter SQL then click Find 14. Once it finds SQL locate the “Service Name” 299 Video Insight Administrator Guide IP Enterprise Version 5.0 15. In the command prompt type: sc delete <service name> 16. Repeat deletion steps until all services have been removed 17. Navigate to Start>Run and type: regedit 18. Browse to HKLM>software>microsoft 19. Remove any folder that has SQL in the name 20. Browse to HKLM>Services>Current Control Set 21. Remove any folder that has SQL in the name 22. Reboot the server before attempting another installation Please Note: Modifying Registry settings can render your Operating System unusable, backup your registry first. Method 3 1. Download CCleaner from http://www.piriform.com/ccleaner/download/standard Install (be sure to uncheck the option to install the Toolbar) and run CCleaner. 2. Click on Tools, select the software and then click Run Uninstaller 3. Navigate to C:\Program Files and delete the folder Microsoft SQL Server 4. Verify that all services have been removed 5. Navigate to Start >Run and type: services.msc, press <enter> 6. In Services locate any service that starts with “Microsoft SQL” or “SQL” 7. Right click each of these and choose Stop 8. Navigate to Start>Run and type: cmd 9. In the command prompt type: cd \ 10. In the command prompt type: sc query state= all>c:\openme1.txt 11. Browse to C:\ and open a file named: openme1.txt 12. Press “CTRL F” and enter SQL then click Find 13. Once it finds SQL locate the “Service Name” 14. In the command prompt type: sc delete <service name> 15. Repeat steps 5-7 until all services have been removed. 16. Go to Start → Run and type: regedit 17. Browse to HKLM>software>microsoft 18. Remove any folder that has SQL in the name 19. Browse to HKLM>Services>Current Control Set 20. Remove any folder that has SQL in the name 21. Reboot the server before attempting another installation m. Getting errors when playing recordings in Windows Media Player and VI’s Media Player In some cases you may see similar errors “unable to play file”, black screen, or SonyNetwork.dll didn’t load or the like when attempting to play recordings in Media Player or in Windows Media Player. These errors are indicative of codecs missing on that 300 Video Insight Administrator Guide IP Enterprise Version 5.0 server, codecs allow video players to decode the video files and play them properly. It is recommended the latest codecs package be installed on each server expected to play back videos. http://download.cnet.com/Windows-7-Codec-Pack/3000-13632_410965840.html?tag=mncol;3 n. How do I add a VP1, VP16, VP8 Encoder or an Arecont type camera with multi channels? Multi Channel devices are cost effective and all inclusive devices with either multiple ports such as the Vp series of encoders or multi-eye such as the Arecont camera line. Adding them to our software is as simple as checking the channel number and assigning it the value of the port (1-16 in the case of the VP devices) or position of eye (1-4 in the case of Areconts). To learn more about the channel option refer to page 229. o. How do I disable Map Labels for the Web Client? Often Facility Maps for a campus will have lots of cameras along with their names, to declutter the map view in WC by hiding the labels simply add a registry key as described below. An example prior to the change: 1. From the Run menu type regedit 2. Navigate to HKEY_LOCAL_MACHINE>SOFTWARE>Video Insight>Web Client>4.0 (this path is for a 32bit system, when using 64bit use the Wow64 folder) 3. On the left side pane right click and select New>String Value 4. Name it: ShowMapLabels 5. Press <enter> key to save name 6. Right click the newly created string value and choose Modify 7. In the Value data field enter 0 301 Video Insight Administrator Guide IP Enterprise Version 5.0 Here is a sample of the same map post change, notice the camera names/labels no longer appear: p. My C Drive is filling up due to Temp Cache, how do I delete it? Viewing videos in Web Client wll add temporary folders on the local machine while buffering, or downloading the video. Windows automatically does this to avoid redownloaing media by saving a local copy. To create some space and remove these files there are two options: Automatically: “First go to Start, then run and type in gpedit.msc Next select -> Computer Configuration/Administrative Templates/Windows Components/Terminal Services/Temporary Folder. Then right click "Do Not Delete Temp Folder upon Exit" Go to properties and hit disable. Now next time 302 Video Insight Administrator Guide IP Enterprise Version 5.0 Windows puts a temp file in that folder it will automatically delete it when it’s done! Remember, GPEDIT (Group Policy Editor) is only available in XP Pro.” (Source: http://www.marvswindowstips.com/cleanup.htm) Manually: 1. 2. 3. 4. Start>Run Type %TEMP% in field and press Enter Sort files by date descending Highlight the files you’d like to remove and press delete. 303 Video Insight Administrator Guide IP Enterprise Version 5.0 B. Online Resources Youtube Tutorials: http://www.youtube.com/user/videoinsighttv Additional FAQs: http://video-insight.com/Support/FAQ/4.X/ Downloads: http://downloadvi.com C. Remote Support In the event there are still issues requiring a personal assistance from one of our Tech Support representatives, feel free to contact us using one of the available contact methods. Prior to requesting remote support install the Team Viewer client application as described here: 1. 2. 3. 4. 5. 6. Navigate to www.downloadvi.com Click the VI Remote Support QS button Click Run at the prompt Click Run again Call us at 713-621-9779 Give the representative ‘Your ID’, sample shown below: Please Note: ‘Your ID’ will be randomly generated each time 7. The representative will log on to your computer and in most cases show you how to correct the issue or fix it for you. 304 Video Insight Administrator Guide IP Enterprise Version 5.0 D. Contact Us Physical Location: 3 Riverway, Suite 700 Houston, TX 77056 Fax: 713-621-7281 By Phone: Telephone: 713-621-9779 Toll Free: 800-513-5417 By Email: 9:00 AM - 6:00 PM CST, Monday – Friday 8:00 AM - 6:00 PM CST, Monday - Friday: For Saturdays and Holidays: 10:00 AM - 2:00 PM - Please call our Answering Service at 877-743-2403 and the support engineer on call will be paged to assist you. mailto:[email protected] Feature Request http://www.questionpro.com/akira/TakeSurvey?id=1028953 Hours of Operation: Tech Support Hours: 305 Video Insight Administrator Guide IP Enterprise Version 5.0 Appendices 306 Video Insight Administrator Guide IP Enterprise Version 5.0 Appendix A – License Agreement IMPORTANT – READ CAREFULLY BEFORE ACCESSING VIDEO INSIGHT SOFTWARE: This license agreement (“License Agreement”) is a legal agreement between the user (referred to herein as “You” or “Licensee”, and meaning either an individual or a single entity) and Video Insight, Inc. and its suppliers (collectively, “Video Insight” or “Licensor”) for the Software (the “Software”). BY USING OR ACCESSING THE SOFTWARE; LOADING THE SOFTWARE OR ALLOWING THE SOFTWARE TO BE LOADED; OR UTILIZING ANY DEVICE OR OTHERWISE UTILIZING THE SERVICES OR FUNCTIONALITY OF THE SOFTWARE, YOU AGREE TO BE BOUND BY THE TERMS OF THIS LICENSE AGREEMENT . IF YOU DO NOT AGREE TO THE TERMS OF THIS LICENSE AGREEMENT, YOU MAY RETURN THE SOFTWARE TO YOUR PLACE OF PURCHASE FOR A FULL REFUND. 1. GRANT OF LICENSE. a. Overview of the License Agreement. This License Agreement describes your rights to use or otherwise utilize the services of the Software. This License Agreement does not entitle You to any ownership rights of the programming code. The Software is licensed, not sold. The Software is protected by copyright and other intellectual property laws and treaties. Video Insight owns the title, copyright and other intellectual property rights in the Software. You may not rent, lease, or lend the Software or the License Agreement. b. Product Coverage. You may also use this License Agreement to access or otherwise use the services or functionality of Video Insight Software utilized by other individuals or entities provided that the other individuals or entities obtain a valid license. c. System Limits. You may use the Software with one unique system identified by its unique capture board. Each unique system requires a separate License Agreement. 2. TERMINATION. Without prejudice to any other rights, Video Insight may terminate this License Agreement if You do not abide by the terms and conditions herein, in which case you must destroy all copies of the Software and return all component parts. 3. TRANSFER. You may move the Software to a different server. 4. LIMITATION ON REVERSE ENGINEERING, DECOMPILATION AND DISASSEMBLY. You may not reverse engineer, decompile, or disassemble the Software. 5. CONSENT TO USE OF DATA. You agree that Video Insight and its affiliates may collect and use any technical information You provide as part of support services related to the Product. Video Insight agrees not to use this information in a form that personally identifies You. 6. LIMITED WARRANTY. Because of uncertain or unknown conditions and incidental hazards under which the Software is used, Video Insight does not warrant or guarantee that any particular result will be achieved. You understand and agree that suppliers and/or installers of the Software are independent contractors that are not employed by or under the control of Video Insight. Video Insight disclaims all liability and responsibility for damages or other loss caused by any independent supplier/installer or other third-party. The sole and exclusive warranty provided by Video Insight is that (1) the media on which the Software is furnished will be free of defects in materials and workmanship; and (2) the Software substantially conforms to its published specifications (the “Limited Warranty”). The Software is warranted only for its initial installation. This warranty shall 307 Video Insight Administrator Guide IP Enterprise Version 5.0 survive inspection of, payment for and acceptance of the Software, but in any event shall expire ninety (90) days after the date you receive the Software, unless prohibited by law. As to any defects discovered after ninety days from receipt, there is no warranty or condition of any kind. Any supplements or updates to the Software, including without limitation any (if any) service packs or hot fixes provided to You after the expiration of the ninety-day Limited Warranty period are not covered by any warranty or condition, express, implied or statutory. Except for the Limited Warranty and to the maximum extent permitted by applicable law, Video Insight provides the Software and support services (if any) “AS IS” AND WITH ALL FAULTS. THERE ARE NO OTHER WARRANTIES (NOR REPRESENTATIONS) HEREUNDER OR ELSEWHERE MADE BY VIDEO INSIGHT, EXPRESS OR IMPLIED, AND ALL OTHER WARRANTIES, INCLUDING, BUT NOT LIMITED TO, THE IMPLIED WARRANTIES OF MERCHANTABILITY, SUITABILITY AND FITNESS FOR A PARTICULAR PURPOSE, OF GOOD AND WORKMANLIKE PERFORMANCE, ALL WITH REGARD TO THE SOFTWARE AND THE PROVISION OF OR FAILURE TO PROVIDE SUPPORT SERVICES, ARE DISCLAIMED BY VIDEO INSIGHT AND EXCLUDED FROM THIS AGREEMENT. ALSO, THERE IS NO WARRANTY OR CONDITION OF TITLE, QUIET ENJOYMENT, QUIET POSSESSION, CORRESPONDENCE TO DESCRIPTION OR NONINFRINGEMENT WITH REGARD TO THE SOFTWARE. NO AFFIRMATION WHETHER BY WORDS OR ACTIONS BY VIDEO INSIGHT, ITS AGENTS, EMPLOYEES OR REPRESENTATIVES SHALL CONSTITUTE A WARRANTY. 7. Limited and Exclusive Remedy. Video Insight’s sole responsibility and Your exclusive remedy for any nonconformance or defect is expressly limited to the refund of the purchase price paid, if any, or the replacement of the Software determined by Video Insight, in its sole discretion, to possess such a defect. As a condition precedent to any remedy described herein, or otherwise available to You, You shall seek and accept Video Insight’s reasonable effort to replace the allegedly defective or nonconforming Software. In furtherance of such undertaking, if You reasonably believe that the Software contains a defect or nonconformity for which Video Insight is responsible, You shall inform Video Insight immediately by telephone at (713) 621-9779 and by providing written notification to Video Insight within forty-eight (48) hours of discovery. All returned Software shall be shipped at customer’s expense. This Limited Warranty is void if failure of the Software has resulted from accident, abuse, misapplication, abnormal use, or a virus. Any replacement Software will be warranted for the remainder of the original warranty period or thirty (30) days, whichever is longer. 8. NO CONSEQUENTIAL OR OTHER DAMAGES. NOTWITHSTANDING ANYTHING TO THE CONTRARY, EXPRESS OR IMPLIED, (1) VIDEO INSIGHT’S LIABILITY FOR ANY CLAIM OR ACTION OF ANY KIND ARISING OUT OF, IN CONNECTION WITH OR RESULTING FROM THE MANUFACTURE, SALE, DELIVERY, RESALE, TRANSFER, USE OR REPAIR OF THE SOFTWARE OR SERVICES RENDERED BY VIDEO INSIGHT SHALL NOT EXCEED THE PRICE, IF ANY, YOU PAID FOR THE SOFTWARE OR $5.00, WHICHEVER IS GREATER; AND (2) VIDEO INSIGHT SHALL IN NO EVENT BE LIABLE FOR SPECIAL, INDIRECT, PUNITIVE, INCIDENTAL OR CONSEQUENTIAL DAMAGES OR CONTINGENT LIABILITIES ARISING OUT OF THIS LICENSE AGREEMENT OR THE FAILURE OF THE SOFTWARE TO OPERATE PROPERLY, INCLUDING BUT NOT LIMITED TO ANY DAMAGE OCCASIONED BY DELAY, DOWNTIME, LOST BUSINESS OPPORTUNITY, LOSS OF CONFIDENTIAL INFORMATION, LOSS OF PRIVACY, LOST PROFITS OR OTHERWISE (NOTWITHSTANDING THE CAUSE OF SUCH DAMAGE AND WHETHER OR NOT CAUSED BY VIDEO INSIGHT’S NEGLIGENCE, FAULT OR STRICT LIABILITY). CUSTOMER ASSUMES THE RISK FOR AND INDEMNIFIES VIDEO INSIGHT FROM AND AGAINST ALL LIABILITIES FOR ANY LOSS, DAMAGE OR INJURY TO PERSONS OR PROPERTY ARISING OUT OF, CONNECTED WITH OR RESULTING FROM THE USE OF OR INABILITY TO USE THE SOFTWARE, THE PROVISION OF OR FAILURE TO PROVIDE SUPPORT SERVICES, OR THE POSSESSION, USE OR APPLICATION OF THE SOFTWARE, EITHER ALONE OR IN COMBINATION WITH OTHER 308 Video Insight Administrator Guide 9. 10. 11. 12. 13. 14. IP Enterprise Version 5.0 PRODUCTS. VIDEO INSIGHT ASSUMES NO RESPONSIBILITY OR LIABILITY, WHETHER EXPRESS OR IMPLIED, WHETHER IN TORT OR IN CONTRACT, AS TO THE CAPACITY OF THE SOFTWARE TO SATISFY THE REQUIREMENT OF ANY LAW, RULE, SPECIFICATION, OR CONTRACT PERTAINING THERETO, INCLUDING, BUT NOT LIMITED TO, ANY CONTRACT BETWEEN ANY CUSTOMER OF ITS PRODUCTS AND PARTIES WITH WHOM SUCH CUSTOMER HAS CONTRACTED. INDEMNIFICATION: YOU AGREE TO PROTECT, INDEMNIFY, HOLD HARMLESS AND DEFEND VIDEO INSIGHT FROM AND AGAINST ANY CLAIMS, DEMANDS, LIENS, CAUSES OF ACTION, JUDGMENTS, LOSSES AND LIABILITIES OF ANY NATURE WHATSOEVER ARISING IN ANY MANNER, DIRECTLY OR INDIRECTLY OUT OF OR IN CONNECTION WITH OR IN THE COURSE OF OR INCIDENTAL TO (1) YOUR WORK OR OPERATIONS WITH THE SOFTWARE REGARDLESS OF CAUSE OR OF THE SOLE, CONCURRENT OR CONTINUING FAULT OR NEGLIGENCE OF VIDEO INSIGHT OR ITS EMPLOYEES OR AGENTS; OR (2) ANY BREACH OR FAILURE TO COMPLY WITH ANY OF THE PROVISIONS OF THIS LICENSE AGREEMENT. YOU AGREE TO PROTECT, INDEMNIFY, HOLD HARMLESS AND DEFEND VIDEO INSIGHT FROM AND AGAINST ANY CLAIMS, DEMANDS, LIENS, CAUSES OF ACTION, JUDGMENTS, LOSSES AND LIABILITIES FOR INJURY TO OR DEATH OF YOU, YOUR AGENTS OR EMPLOYEES OR ANY EMPLOYEE OR AGENTS OF ANY CO-VENTURER, CONTRACTOR, SUBCONTRACTOR OR PERSONS AT YOUR WORK LOCATION ARISING IN ANY MANNER, DIRECTLY OR INDIRECTLY, OUT OF OR IN CONNECTION WITH OR IN THE COURSE OF OR INCIDENTAL TO YOUR WORK OR OPERATIONS WITH THE SOFTWARE, REGARDLESS OF CAUSE OR OF ANY FAULT OR NEGLIGENCE OF VIDEO INSIGHT OR ITS EMPLOYEES OR AGENTS. SEVERANCE: Should any provision of this License Agreement, or a portion thereof, be unenforceable or in conflict with the laws of the United States of America or of any state or jurisdiction which governs any transaction between Video Insight and You, then the validity of the remaining provisions, and any portion thereof, shall not be affected by such unenforceability or conflict, and this License Agreement shall be considered as if such provision, or portion thereof, were not contained herein. UNLAWFUL PURPOSE. Use of the Software for any unlawful purpose or in any unlawful manner, use for any improper or unintended use, or use by anyone other than you is strictly prohibited and constitutes a material breach of this License Agreement. APPLICABLE LAW. This License Agreement is governed by the laws of the State of Texas. Video Insight and Licensee hereby agree that exclusive jurisdiction of any, controversy, claim, suit or proceeding arising out of or relating in any way to the Software or this License Agreement or the breach, termination or invalidity thereof shall lie within the courts of the State of Texas or within the courts of the United States of America located within the Southern District of Texas. Video Insight and Licensee consent to venue and jurisdiction within the Courts of Harris County, Texas. NO WAIVER: Failure to enforce any or all of this License Agreement in a particular instance shall not act as a waiver or preclude subsequent enforcement. ENTIRE AGREEMENT. This License Agreement (including any addendum or amendment to this License Agreement which is included with the Software) constitutes the entire agreement between You and Video Insight relating to the Software and any support services, and this License Agreement supersedes all prior or contemporaneous oral or written communications, proposals, and representations with respect to the Software or any other subject matter covered by this License Agreement. To the extent the terms of any Video Insight policies or programs for support services conflict with the terms of the License Agreement, the terms of the License Agreement shall control. 309 Video Insight Administrator Guide IP Enterprise Version 5.0 Appendix B – System Overview As depicted in the diagram below we offer many different options for any type of user, from the stationary Video Monitors to walkthrough security officers. 310 Video Insight Administrator Guide IP Enterprise Version 5.0 Campus Location Security Operations Center Encoder Mobile Devices IP Cameras Analog Tiny PC Monitor Station Client Public View Monitor Video Insight Web Client Monitor Station Client Ethernet Virtual OS Box 1 Virtual OS Virtual OS Box 2 Virtual OS Virtual OS Virtual OS Box x Virtual OS 311 ic at m r to ve Au a i l o F Virtual OS Box 3 Video Insight Administrator Guide IP Enterprise Version 5.0 The system is a robust software platform that has 3 main components that are used to capture and view live or recorded video from anywhere: the IP Server; the Monitor Station and the Web Client. Product Suite: Enterprise IP v4.2 Client Applications Monitor Station Web Client Smart Phone/PDA Client Live & recorded video Internet Explorer, Firefox, Safari, Chrome, Opera with Optional Active X-plug-in iPhone, iPad, BlackBerry, Android Live, recorded, and PTZ control Windows Mobile Professional IP Server Server & Storage IP Server Manager Storage Health Monitor Client application Live & recorded video Centralized administration Alarm notification Runs as a Windows Service Alarm Processing Server communicates with cameras 3rd party/access control/analytics integration Server or camera side motion detection Web client uses Microsoft IIS Support for Active Directory, LDAP, and Novell eDirectory Monitors the IP Server and gives a visual status on a per server basis Allows for network connection administration Provides a Diagnostics version for trouble shooting and system optimization Support for Local, Direct Attached, SAN/NAS, and iSCSI Pivot3 and Intransa Dell EqualLogic Accessory application which monitors the health of all of your servers and cameras from a single location Email notification on error 312 Utilities Video Insight Administrator Guide LTS – Long Term Storage IP Enterprise Version 5.0 Accessory application which can move recordings from the server to a storage location Scheduled on a per camera basis 313 Video Insight Administrator Guide IP Enterprise Version 5.0 Appendix C - Current Customers Examples Klein ISD – is using HP servers with Dual Xeon E554 2.53GHz processors with 8GB memory and Windows 2003 Server. 1. Server CS21 has (90) 1.3MP H.264 cameras 2. Server 41 has (100) 1.3MP H.264 cameras and (30) D1 cameras running MJPEG Pflugerville ISD – is using Dell R510’s with Dual Xeon E5620 2.4GHz processors, 12GB memory and Windows Server 2008 R2. The servers are running 1,200 2MP H.264 cameras and 400 D1 cameras spread across the servers. 314 Video Insight Administrator Guide IP Enterprise Version 5.0 Recommendations - the following are general guidelines based on the previous discussion assuming Xeon processors and camera side motion detection: a. D1 or 4CIF cameras – 150-200 cameras per OS b. 1.3 MP cameras – 90 cameras per OS c. 3 MP cameras – 50 cameras per OS 315 Video Insight Administrator Guide IP Enterprise Version 5.0 Appendix D - Acronyms VI – Video Insight FPS- Frames Per Second ONVIF- Open Network Video Interface Forum (ONVIF) was several manufacturers attempt to create a non proprietary standard for camera streaming, there are different versions of the standard and they all act differently. We support version 1.03 only. TV- Team Viewer application used by Video Insight’s Tech Support to gain remote access to customer’s machine. IPSM- IP Server Manger application LDAP– Lightweight Directory Access Protocol 316 Video Insight Administrator Guide IP Enterprise Version 5.0 Appendix E – Commonly Used Camera Credentials Here is a list of the default usernames/passwords for a few of the supported IP camera manufacturers. Should your camera model not appear here please refer to the manual included with your camera. Brand UserName Password 3S root root Acti Admin 123456 admin admin blank or pass Axis root Basler admin You will be asked to create a root password the first time you go into the cameras interface. admin No credentials needed Bosch Dinion Brickcom or 'admin' with lowercase a No credentials needed Arecont Vision Avigilon Notes admin admin You will be asked to create a root password the first time you go into the cameras interface. Cisco Dlink root blank Grandstream admin admin Hikvision admin 12345 Honeywell Administrator 1234 Huviron Admin admin Huviron root root Infinova infinova INFINOVA IPX-DDK root admin Iqeye root system 317 To change settings To view images Also try 'Admin' Video Insight Administrator Guide IP Enterprise Version 5.0 IQinVision root system Mobotix admin meinsm Panasonic admin 12345 Pelco Sarix admin admin Pixord admin admin Samsung Electronics root Samsung Techwin (new) admin Samsung Techwin (old) admin Sanyo admin admin Scallop admin password Sony admin admin Stardot admin admin Starvedia admin leave blank Toshiba root ikwb Toshiba root ikwd Trendnet admin admin Ubiquiti ubnt ubnt VideoIQ supervisor supervisor Vivotek root leave blank VP16 admin 12345 VP16-A Admin 12345 root 4321 1111111 318 or admin/4321 Video Insight Administrator Guide IP Enterprise Version 5.0 Appendix G – Configuring a CNB camera Due to the nature of the CNB camera integration and the capabilities of the camera will turn on Motion detection inside the camera, but we cannot draw zones inside the Motion Detection page, all zones must be created inside the CNB web page under Motion Detection as shown below. 1. Access the camera’s Web page 2. Click the Motion Detection option 319 Video Insight Administrator Guide IP Enterprise Version 5.0 With the CNB cameras the best way for Motion Detection to work is to draw at least two zones; the camera will not detect motion anywhere there is not a zone and allows you to draw up to three zones. The Sensitivity adjusts the threshold for the amount of motion that needs to occur. The lower the number, the less amount of motion that needs to occur to trigger a motion event, setting the Sensitivity to 10 turns off Motion Detection in that area. Motion Zones can over lap and it appears the zone with the lower sensitivity takes precedence over the other zone. The window is dynamic once you save the changes you have made, but as you can see from the picture, it does not tell you the amount of motion, just that motion has occurred and in which zone. While testing we discovered that a zone with sensitivity between 3 and 5 work the best, but it will depend on the size of the zone drawn as well. The bigger the zone, the lower the number will need to be. 320 Video Insight Administrator Guide IP Enterprise Version 5.0 Appendix H – Configuring a Sentry FS1000 and FS2000 cameras Web client requirement of cameras streaming JPEGs may require specific configuration to ensure these two models are streaming both H.264 and JPEG to properly display in Monitor Station and the Web Client. If the Sentry cameras you are dewarping have menus that look like this: Then the correct setting should be H.264 + MJPEG for the web client and the dewarp to work properly. Conversely, if the camera’s web interface looks like this: No changes are needed; the camera streams both h.264 and JPEG as requested, regardless of what the image settings are set to. 321 Video Insight Administrator Guide IP Enterprise Version 5.0 Appendix I – Configuring an IQEye Camera using Optional Controls Once the camera is added to the software, access the Optional Controls tab in the Camera’s Properties. These controls change the way that the IQ Eye cameras handle different light settings and adjust the iris accordingly. Gain Style- The autogain algorithm of your camera will set brightness to best display. The gain style setting chooses which pixels within the exposure window will be used by the autogain algorithm for setting brightness levels. Peak Detect: uses only the brightest pixels in the exposure window, making sure they're appropriately-adjusted for bright pixels. This is a good setting for watching bright areas. Backlight: uses only the darkest pixels in the exposure window, making sure they're appropriately-adjusted for dark pixels. This is a good setting for outdoor scenes where you want to watch a shaded region. Average: uses all of the pixels in the exposure window This is a good setting for indoor scenes where there are no very bright or very dark areas to skew the gain calculations. 322 Video Insight Administrator Guide IP Enterprise Version 5.0 Clip Average: uses all pixels except for the very darkest and brightest pixels. This is a good setting for outdoor scenes where you want to ignore both sky and shadows and to watch a region of intermediate brightness levels. This is also a good setting for interior scenes. Undefined- This setting turns off Gain Style Light Graber- Enables or disables special processing for low-light images. These values can be seen at the camera’s web page under Image tab. Most Frames- Sets the Light Grabber value to 4x, which specifies “integration” of four frames, twice the lowlight correction as the 2x setting which specifies integration of two frames. Medium- Sets the Light Grabber value to 2x. Undefined- Sets the Light Grabber value to 4x Disabled- Turns Light Grabber off at the camera. Light Behavior- This setting adjusts the electronic shutter values for the IQeye camera Optimize speed: Use this setting for fast moving subjects. This setting may cause images to appear grainy in low light conditions. Optimize quality: Use this setting for high quality images. This setting may cause images to blur in low light conditions. Auto: This setting is ideal when there is adequate light and objects are not moving too fast. The other values set a fixed exposure. This is useful for tuning a camera to minimally changing conditions or to capture objects moving at predictable speeds. The list of available exposures may change based on other settings like frame rate, Light Grabber and resolution. 323 Video Insight Administrator Guide IP Enterprise Version 5.0 Index 3 H 30 Second Review pop-up ................................... 146 Health Monitor .......... See Chapter 6: Health Monitor Health Monitor tab ............................................. 40 A Adding a Map ..................................... 122, 123, 133 Adding Cameras ................................................ 222 Administration>Setup and Configuration ........ 106 All Servers Node.................................................. 135 Auto Restart ........................................................ 49 L Layouts .............................................................. 118 Adding Layout Tour ....................................... 121 Adding Layouts .............................................. 118 Left Navigation Tree ......................................... 134 Enterprise View ............................. 135, 165, 166 Facility Map View ......................................... 144 Layout View .................................................. 150 Licensing ............................................................... 8 Live View Monitor ............................................ 132 Adding a Live View........................................ 132 Deleting a Live View ...................................... 133 Modifying a Live View ................................... 133 Long Term Storage Application ......................... 11 B Backup of OS Drive ............................................. 11 C Cameras .................................................................7 COLDSTORE ..................................................... 11 Contextual right click menu .............................. 139 For Cameras.................................................... 140 For Facility Map ............................................. 143 For Layout ...................................................... 142 For Servers and Server Groups ........................ 139 Creating a Clip .................................................. 146 M maintenance plan ................................................ 277 Maintenance Tab ................................................ 247 D N Desktop Clients .......................................................7 Do I want a single local database or a shared one? ......................................................................... 12 Downloading a Recorded file ............................ 147 Network ................................................................. 8 O OS drives ............................................................. 11 E P Enterprise View Left Navigation View Options135, 144, 150, 165, 166 PTZ Controls pane ................................................. 151 PTZ Controls .................................................... 78 PTZ Controls ...................................................... 78 PTZ Operations Creating a preset............................................. 80 F Facility Maps ..................................................... 111 Adding a Map ................................................. 112 Deleting a Map................................................ 115 Facility Map Toolbar ....................................... 148 Modifying a Map ............................................ 116 Renaming a Map ............................................. 117 File Manipulation Rule ........................................ 11 File Menu Exit ................................................................... 72 Media Fixer ...................................................... 69 R RAID ................................................................... 11 Router Configuration ............................................ 10 Rules Manager .................................................. 128 S Server Group .................................................... 136 Server Install ....................................................... 13 Server States ....................................................... 137 Servers ................................................................... 6 324 Video Insight Administrator Guide IP Enterprise Version 5.0 Setup and Configuration Left Navigation Tree 108 Setup and Configuration Tools Node ................ 110 SQL Password ..................................................... 21 SQL Server .......................................................... 21 SQL Username: ................................................... 21 Storage Consideration ......................................... 11 PTZ Operations .............................................. 86 Synchronized Player ....................................... 86 System Log ...................................................... 82 TV Decoders...................................................... 130 Adding a Decoder ........................................... 130 Deleting a Decoder ......................................... 131 Modifying a Decoder ...................................... 131 T V Tools Menu Options Audio Tab................................................... 103 Configuration Tab ......................................... 93 Live Window Tab ......................................... 97 Startup Tab ................................................. 104 Tools Menu Axis Joystick Control ...................................... 82 Live Window ................................................... 85 Media Player ................................................... 85 Options General Tab .................................................. 87 Options ............................................................. 86 View Menu Cycle Layouts .................................................. 75 View Menu Archive Tree ................................................... 73 Full Screen ...................................................... 74 Layout ............................................................. 74 Mini Toolbars ................................................. 75 View Menu Toolbars .......................................................... 81 W Web Client ............................................................. 7 325