1
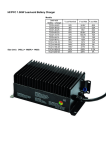
●
●
HF/PFC 4KW Lead-acid Battery Charger
●
Models
Size (mm):367(L) × 352(W) × 139(H)
Lead-acid
Battery Charger
TCCH-48-70
TCCH-60-60
TCCH-72-50
TCCH-84-42
TCCH-96-36
TCCH-108-32
TCCH-120-30
TCCH-144-24
TCCH-156-22
TCCH-168-20
TCCH-180-18
TCCH-192-18
TCCH-216-16
TCCH-240-14A4
TCCH-288-12
TCCH-312-11
V out Nominal
V out Max
A out Max
48V
60V
72V
84V
96V
108V
120V
144V
156V
168V
180V
192V
216V
240V
288V
312V
66V
82.6V
96.2V
112V
130V
144.7V
168V
192V
208V
233.3V
243V
258V
289.5V
337V
389V
417V
70A
60A
50A
42A
36A
32A
30A
24A
22A
20A
18A
18A
16A
14.4A
12A
11A
I Product Summary & Application Scopes
The charger is applicable for various Lead-acid batteries like Flooded, GEL, AGM, hemi colloid etc., It features light weight, small
volume, stable performance, high efficiency and reliable security etc., It can be switched automatically between the floating and
balancing charging and also has the protection functions of reverse connection, output short-circuit and overload and so on.
The charger is widely used for battery-charging cycles in electric vehicles such as electric forklift, golf cars, electric trucks, electric tour
bus, electric yacht, cleaning machines, or Uninterruptible Power Supply (UPS), solar energy, wind power dynamo and electric
communication system on the railway etc.
II Technical Target
AC Input Voltage Range
AC85V~AC265V
AC Input Frequency
45~65 Hz
AC Power Factor
≥0.98
Full Load Efficiency
≥93%
Mechanical Shock &
Conformance to
Vibration Resistance Level
SAEJ1378 Standard
Environmental Enclosure
IP46
Operating Temperature
-40℃~+55℃ (-40℉~+131℉)
Storage Temperature
-40℃~+100℃ (-40℉~+212℉)
10 Charging Curves
Charging Mode
Charging Control
III
Available
Intelligent temperature compensation,
never to be charge-off or charge due
Protection Features
1. Thermal Self-Protection: When the internal temperature of the charger exceeds 75℃, the charging current will reduce
automatically. If it exceeds 85℃, the charger will shut down protectively. When the internal temperature drops, it will resume
charging automatically.
2. Short-circuit Protection: When the charger encounters unexpected short-circuit, it will automatically stop to output. When fault
removes, the charger will re-start in 10 seconds.
3. Reverse Connection Protection: When the battery is polarity reversed, the charger will cut off the connection between the
internal circuit and the battery, and refuses to start. It can avoid any destroy.
4. Input Low-voltage & Over-voltage Protection: When the
AC input Voltage is lower than 85V or higher than 265V, the charger will
shut down protectively and automatically resume working with the voltage is normal again.
IV Main Accessories & Wiring Diagram
Accessories:
Thermal Sensor TC-615 together with LED TC-618 (as per the specific vehicle model) or a single Thermal Sensor TC-615.
Functions:
Thermal sensor TC-615 provides the real-time detection of the battery’s temperature in the charging process to prevent
charge-off or charge due.
LED TC-618 shows the state of the charging such as <80% or >80% or 100% and can be fitted onto the vehicle panels.
Wiring Diagram:
Note: Thermal sensor and LED share the connector SP1310/P
which pairs up with the charger’s communication port (SP1312/S,
near the charger’s output terminal). Plug in the connectors before
charging. Place the LED at the conveniently location. A thermal
sensor should be fixed on the battery shell. Recommend to place it in
middle position
between two cells. Make sure the DC cord is
connected to the battery properly. .
Ⅴ Appearance Labels
Please check carefully the labels on the casing of the charger before using in order to
completing the transaction check the
label on the charger before using, it can provide some help for you to understand the performance and the specification of the
charger.
i. Bar Code Label:
Attaches on the output terminal of the charger. For example, SN10071001
1007: Production batch number.
1001: Bar code number.
48-25: Hardware model(48V 25A).
HD VER 1.6 : Version number from the manufacturer
ii. Model Label:take the model TCCH-48-25 for example
INDUSTRIAL
48V
BATTERY
CHARGER
Input:100~240VAC
50/60Hz
Output:
48V
Battery:
Lead-acid
Model:
TCCH-48-25
14/8.1A
25A@240VAC 48V
24.5A@115VAC
24 cells
Environmental Enclosure : IP46
a) “Input 100~240VAC 50/60Hz 14/8.1A”: The rated input current is 14A at 115VAC and 8.1A at 220VAC;
b) “48V
25A@240VAC 48V
24.5A@115VAC”: The maximum output current is 25A at input 220VAC, and 24.5A at input
115VAC.
iii. LED Label
It is the important symbol to evaluate whether the charger works normally.
The LED will flash red several times when AC is first connected, then the LED will flash green once. The
number of red flashes denotes the present curve. e.g. If the red flashes three times, it means the present curve is
curve 3, and so on.
Red-Green flash
(one second interval)
Battery Disconnected
Red flash
(three seconds interval)
Red flash
(one second interval)
Yellow flash
(one second interval)
Green flash
(one second interval)
Repair Battery
<80% Charge Indicator
>80% Charge Indicator
100% Charge Indicator
iv. Charging Curves Label
Ten charging curves respectively represent different capacities of the Lead-acid battery. I4 means the equalizing current.
Algorithms_105 means the procedure code from the manufacturer. e.g. the charger of Lead-acid flooded battery 48V for
example,
48V Flooded Battery-1.5KW Charger (Algorithms_105)
Cur
Amp Hour
I4
Cur
Amp Hour
I4
1
105~126ah
3.36A
6
262~315ah
8.37A
2
126~152ah
4.04A
7
315~378ah
10.05A
3
152~182ah
4.84A
8
378~454ah
12.06A
4
182~219ah
5.81A
9
454~544ah
14.47A
5
219~262ah
6.98A
10
544~653ah
17.36A
Charging Curves Setup (curve 1~10)
1. The LED will flash red several times when AC power is connected, and then the LED will flash green once. The number of
red flashes denotes the present curve. E.g. If the red flashes three times, it means the present curve is curve 3.
2. To choose another curve, please cut off the power supply first, then uncover the label, pressing the button while connecting
the power. If you want to choose curve 3, release the button after the 3rd LED Flash. Now the selected curve (e.g. curve 3)
will be recorded in memory. If you want the charger to work with the selected curve (e.g. curve 3), cut off the power and
reconnect it.
Note: 10 charge curves are only available for volume order instead of sample order.
VIII
Common Faults & Solutions
In case of the charging fails, please examine all the outside lines carefully to make sure that they are connected correctly.
Apart from the circuit’s failure, please check the failure code of charging LED and handle it according to the following table.
LED Flashing
Indication
Sequence (One Cycle)
1
RG______
Wrong Battery
2
RGR_____
Overcharged
3
RGRG____
Battery Overheated
4
RGRGR___
Incorrect AC Input Voltage
5
RGRGRG__
External Thermal Sensor Fault
6
RGRGRGR_
Communication Interface Fault
7
GR______
Charger Overheated
8
GRG_____
Charger Relay Fault
9
GRGR____
Charger Itself Fault
Note:
1. R—red
G—green
2. “_” denotes one second pause
3. Above LED flashing sequence is one cycle; the LED will flash repeatedly if the fault has not been removed.
Solutions
▲ Wrong Battery: Verify the battery voltage range matching with charger or inspect the battery for damage.
▲ Overcharged: Confirm the battery capacity and the selected curve are matched or if the battery is defective.
▲ Battery Overheated: Check the temperature at the external thermal sensor. If overheated, the charger will start the
battery protection.
▲ Incorrect AC Input Voltage: Check that the AC input voltage is in accordance with the
requirement. ▲ External Thermal Sensor Fault: Ensure connect the thermal sensor correctly.
▲ Communication Interface Fault: Make sure the communication have been correctly connected or if it is
damaged. ▲ Charger Overheated: Check if the ambient temperature is too high or the ventilation is smooth.
▲ Charger Relay Fault: Repair.
▲ Charger Itself failure: Repair.
IX Charging Curve
1.The charging curve is custom build to your battery set.
a.Typical charge curve for flooded 6v Lead Acid Trojan batteries (under temperature of 25℃)
1. Pre-charge: after connecting the charger and battery pack, the charger detects the voltage
of the battery pack. It will pre-charge the cells or the pack when the voltage is between
V1~V2 with constant current of I1.when the battery voltage reaches V2 (or the charging
time reaches S1), it will enter the next stage of charging.
2. Constant current charging: charging current is I2, when the charging voltage reaches V3, it
will enter the next step of charging.
3. Constant voltage limited current charging (or constant power charging). Charging voltage
goes up gradually until the maximum point V4.under constant voltage, the charging
current goes down to I3 (or the charging time reaches S3), it enters the next step.
4. Trickle charge: charge current turns to I4. Maximum voltage is V5, charging limited time is
S4.
5. Floating charge:charge voltage is V6, charging time is S5
b.Temperature compensation curve (single cell):