1
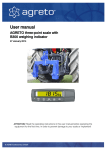
Benutzerhandbuch AGRETO Wiegeanzeige XK3 19.03.2014 © AGRETO electronics GmbH AGRETO Weighing Display XK3 Content 1 2 3 4 5 6 Introduction .................................................................................................. 3 Scope of delivery ......................................................................................... 3 Intended use ................................................................................................ 3 Security ........................................................................................................ 4 Technical specifications ............................................................................... 5 Getting started ............................................................................................. 6 6.1 6.2 Connecting the load cells ............................................................................................... 6 Connecting the power supply ......................................................................................... 7 7 Weighing ...................................................................................................... 8 7.1 7.2 7.3 7.4 7.5 7.6 Turning on the weighing display ..................................................................................... 8 Zeroing ............................................................................................................................ 8 Standard weighing procedure ........................................................................................ 8 Weighing with Tare function ............................................................................................ 9 Weight summation .......................................................................................................... 9 Animal weighing mode ................................................................................................. 11 8 9 Parameter ................................................................................................... 12 Calibration .................................................................................................. 14 9.1 9.2 Performing a calibration ................................................................................................ 14 Calibration parameters ................................................................................................. 15 10 RS232 Interface.......................................................................................... 17 10.1 10.2 11 12 13 14 15 Connection pin-out .................................................................................................... 17 Configuration ............................................................................................................. 17 Troubleshooting ......................................................................................... 19 Warranty ..................................................................................................... 20 Disposal ..................................................................................................... 20 Declaration of Conformity .......................................................................... 21 Imprint ........................................................................................................ 22 © AGRETO electronics GmbH Seite:2 AGRETO Weighing Display XK3 1 Introduction Thank you for choosing this AGRETO weighing display. You have just purchased a robust appliance for everyday use. Please read this manual carefully before putting the weighing display to use. As in common parlance, the word 'load' is used instead of 'mass' in this user manual. 2 Scope of delivery The AGRETO Weighing Display HD1 consists of: The weighing display itself Brackets for wall and table mounting This user manual 3 Intended use The AGRETO weighing indicator XK3 is intended to be use in dry locations. The protection class is IP63. The display can be connected to most of the common load cells, weighing platforms or other weighing devices. © AGRETO electronics GmbH Seite:3 AGRETO Weighing Display XK3 4 Security 4.1 Safety Instructions for the Buyer Important! Make sure that each person who works for the first time with the AGRETO XK3 Weighing indicator, has read and understood this manual. 4.2 Safety instructions for the operator DANGER! The AGRETO XK3 Weighing indicator may only be operated by persons who are familiar with the operation of the device. PRECAUTION! Keep the work area clean! Soiled areas contributes to accidents. ATTENTION! Repairs and other technical interventions on the device may only be performed by qualified personnel. There is a danger of electric shock. © AGRETO electronics GmbH Seite:4 AGRETO Weighing Display XK3 4.3 Residual Hazards Working with the device residual risks may arise for persons and objects that cannot be prevented by design or technical protection measures. WARNING! The AGRETO Weighing indicator XK3 must not be operated in explosive enviroment. 5 Technical specifications Size (W/H/D) 280mm / 160mm / 100mm for table mounting 280mm / 150mm / 145mm for wall mounting Weight: 1.685g Operationg temperature: -10 bis +40 °C Maximum load: adjustable Resolution: adjustable Unit: choice between kg or lb Power supply: AC 85 to 245V, 50 / 60Hz Accumulator: internal Accumulator power: DC 6V, 4Ah Accumulator runtime: ~. 24h (4 load cells without energy saving mode) Accumulator charging time: ca. 24h Accuracy class: III, n=3000 Input sensitivity: >= 1.5uV/e Weighing frequency: 10x per second Power supply load cells: DC +5V No of load cells: 1 to 6 load cells with 350 Ohms in parallel operation © AGRETO electronics GmbH Seite:5 AGRETO Weighing Display XK3 6 Getting started 6.1 Connecting the load cells AGRETO weighing scales are supplied with a connection cable that fits in the weighing display. In this case, connect the 9-pin D-SUB connector of the cradle cable to the matching port on the back of the weighing indicator. To connect to other weighing scales you use the connection diagram as explained by the following table: Calbe connector Rear view (soldering side) © AGRETO electronics GmbH Front view Seite:6 AGRETO Weighing Display XK3 No Description Function 1 EX - Power supply - 2 FB - Feed Back - 5 SHI Shield 6 EX + Power supply + 7 FB + Feed Back + 8 SI - Signal - 9 SI + Signal + 3 4 If you have load cells without FeedBack lines PINs 1 and 2 and the PINs 6 and 7 are to be connected. 6.2 Connecting the power supply Connect the small round plug of the power cord into the socket provided on the back of the display and plug the power adapter into the power outlet. The display can also be used with the built-in battery. Charge the battery completely before the first use definitely on. © AGRETO electronics GmbH Seite:7 AGRETO Weighing Display XK3 7 Weighing 7.1 Turning on the weighing display Press the [ ] button. The weighing display will now run a self-test. The display is ready for use when the weight readout appears. In standard mode the display isn't put to zero, but shows the actual load, based on the null position that was last used. NOTE: Calibration parameter 3 allows you to configure if and up to what load the display automatically reverts to the zero position during start-up. 7.2 Zeroing With the [ 0 ] button the display's zero position is reset. Use this function before every weighing if the display isn't set to zero. If the display is zero the LED (Zero) lights. NOTE: Calibration parameter 2 allows you to configure the range for manual zero positioning. 7.3 Standard weighing procedure Make sure that the display is set to zero. Put the weighing object on the scale. Wait until the display shows a stable value or until the LED () lights. Read the weighing result. © AGRETO electronics GmbH Seite:8 AGRETO Weighing Display XK3 7.4 Weighing with Tare function When you'd like to weigh an object in a container or package, the weight of the empty container can be automatically subtracted without changing the zero position, by using the tare function. Make sure the display is set to zero. Put the empty container on the scales. Wait until the display shows a stable value, or until the LED () lights. Press the [ Tare ] button. The display goes back to zero and the LED (Net) lights. Now put the weighing object in the container. Wait until the display shows a stable value and until the LED () lights. Read the weighing result. This is the net weight of the object without container. If you would like to weigh several objects in the same container, you can put them on the scales one after the other. As long as the NET – LED ist lighting, the previously measured tare will be subtracted and only the net weight shown. To end the tare function you take the load from the scales and press the [ Tare ] button again. 7.5 Weight summation Do the following if you would like to perform several weighings and add up all the loads: Make sure the display is set to zero. Put the weighing object on the scales. Waid until the display shows a stable value and the LED () lights. Read the weighing result. Shortly press the [ ∑ ] button. The display will show the sum of the objects weighed so far, followed by the amount of weighed objects so far (n 0001), after which it returns to the normal weighing mode. The LED ( ∑ ) lights up as long as the sum and amount of weighed objects are displayed. Remove the first load from the scales and introduce the next load. © AGRETO electronics GmbH Seite:9 AGRETO Weighing Display XK3 Shortly press the [ ∑ ] button again. Again, the display shows the sum of the objects weighed so far, followed by the amount of weighed objects so far (n 0002) after which it returns to the normal weighing mode. Repeat this procedure with all weighing objects. ATTENTION: The summation function will only start after a load of at least 5 increments (for instance: for scales with a 1 kg resolution the summation function starts at a load of 5 kg) Displaying the sum To display the sum of weighed loads permanently press the [Σ] key and keep it pressed until a beep sounds. If you release the button the sum of the weights is displayed and the two LEDs (Fn) and (Σ) light. While the sum is displayed, you can use the [ ] button to switch to the amount of weighed objects. By pressing the [ ] button again you return to the normal weighing mode. The sum remains stored, so you can add additional weighings. Deleting the sum Press the [Σ] key and keep it pressed until a beep sounds. If you release the button the sum of the weights is displayed and the two LEDs (Fn) and (Σ) light (as above). Press the button [ ], the display shows „CLEAR“. Press the [ ] button to confirm the deletion. The sum and amount are set to 0 again, and the display reverts to the normal weighing mode Press the [ Fn ] button to cancel the deletion. © AGRETO electronics GmbH Seite:10 AGRETO Weighing Display XK3 7.6 Animal weighing mode If you'd like to weigh restless animals or unstable loads, you can use the animal weighing mode. Take the following steps: Make sure the display is set to zero. Put the weighing object on the scale. If you now press the [Fn] key and the weight display will be replaced by underscores for about 5 seconds. During this time, however, the weighing continuous and then the average of all weighings in those 5 seconds is displayed as a result. This result remains on the display until you either press again the [Fn] key or unload the scale (weight below 5 resolution parts). CAUTION: The animal weighing mode is only started at a load of at least 5 resolution parts. (For example: At a scale that displays a resolution of 1kg it starts at a load of 5 kg) ATTENTION: If you press the [ Fn ] button for too long, parameter configuration will start up instead of animal weighing mode. © AGRETO electronics GmbH Seite:11 AGRETO Weighing Display XK3 8 Parameter The Weighing Display HD1 has several configurable parameters that influence the way the system functions. Normally these parameters have been preconfigured correctly and need only be altered in special circumstances. Take the following steps to start parameter configuration: To enter the parameter menu press and hold down the [Fn] key until a signal sounds Pressing the [ ] button confirms the entry and returns to the next parameter. After the last parameter the parameter menu is closed and the display returns again in weighing mode. The [ ] button allows you to select the desired parameter value. The [ ] button allows you to switch between digits for multi-digit entries. The parameters are described in the following table. Parameter Nr 1 Description Function of the [ Fn ] button Display Fn Comment ** Lb = switch between kg and lb ANL = animal weighing mode function (standard) -- = no function 2 Power Save Mode PS ** OFF = no power save mode oN = power save mode after 5 minutes without change in weight onP = turn off the display after 5 minutes without change in weight (standard) 3 Baudrate RS232 Interface Br **** 600 1200 2400 (standard) 4800 9600 4 Communication mode Co © AGRETO electronics GmbH * 1 (standard) see chapter: RS232 Seite:12 AGRETO Weighing Display XK3 RS232 interface 5 Target weight range HI interface H***** Is the weight display higher than the value set here, then the (LED HI) lights. Default value: 75% of the rated load of the load cells (3000 in a display without weighing technology) 6 Target weight range LO L***** Is the weight display lower than the value set here, then the (LED LO) lights. Default value: 0 © AGRETO electronics GmbH Seite:13 AGRETO Weighing Display XK3 9 Calibration If you bought the weighing display together with AGRETO weighing scales, the display is already fully calibrated and checked. Calibration is only needed: If you didn't buy the weighing display together with AGRETO weighing scales. If you use the scales for a special construction, for example when you want to retrofit mechanical scales. If the location of the weighing system is outside of the geographical area between 45 and 52 degrees latitude. If the location of the weighing system is at an altitude higher than 1000 m above sea level. If for whatever reason you do not succeed in using the scales in the prescribed mounting position. 9.1 Performing a calibration ATTENTION: A calibration determines the accuracy of the scales. A calibration cannot be undone! To perform a calibration you need a reference load that is as close as possible to the nominal load. It should be at least 20% of the nominal load of the load cells. This means that scales with a nominal load of 4000 kg need to be calibrated with at least 800 kg. Take the following steps to start the calibration procedure: For entry into the calibration, remove the protective cover on the back and press the inner button until the display shows the word CAL. Pressing the button [ ] confirms the entry and returns to the next parameter. After the last parameter the parameter menu is closed and the display returns into weighing mode Press the [ ] the desired value or the desired setting can be selected within a parameter. The [ ] button allows you to switch between digits for multi-digit entries All the steps of the calibration process are described in the following table. They must be performed in this order. © AGRETO electronics GmbH Seite:14 AGRETO Weighing Display XK3 Step Nr 1 Description Division Display E ** Comment 01 02 05 10 20 50 Depending on the weighing scales 2 Amount of decimal dC **** 0 0.0 0.00 0.000 places Depending on the weighing scales 3 Nominal load F ***** Nominal load of the load cells 4 Zero position noLoAd No load on the scales 5 Calibrating load AdLoAd Introduce the calibrating load and enter the weight of the calibrating load ****** 9.2 Calibration parameters ATTENTION: These parameters change the characteristics of the weighing display. Improper use can cause a distortion of weighing results. Take the following steps to enter the calibration settings: For entry into the parameters remove the small cover on the back and press the inner button until the display shows the word CAL. Then press successively the [ ] and [ ] keys. Press the [ ] confirms the entry and returns to the next parameter. After the last parameter the parameter menu is closed and the display returns into the weighing mode. The[ ] button allows you to select the desired parameter value. The [ ] button allows you to switch between digits for multi-digit entries. The parameters are described in the following table. Parameter Nr Description © AGRETO electronics GmbH Display Comment Seite:15 AGRETO Weighing Display XK3 1 Zero point stabilisation Zot ** 0.5 1.0 1.5 2.0 2.5 3.0 3.5 4.0 division units Standard setting: 2.0 2 Range for manual zero positioning Nt *** 0 2 4 10 20 100 percent of nominal load can be zero positioned Standard setting: 100% 3 Range for automatic zero positioning At -- 0 2 4 10 20 100 percent of nominal load can be automatically zero positioned Standard setting: -- 4 Responsiveness FL *** Stb: slow responsiveness Sen: fast responsiveness (standard) © AGRETO electronics GmbH Seite:16 AGRETO Weighing Display XK3 10 RS232 Interface The weighing indicator has a serial interface for controlling an additional display, a printer, or to communicate with a PLC or a PC. 10.1 Connection pin-out Connector view display side (soldering side of connector) 1 RX 3 2 2 TX 4 1 3 GND 4 Input big display 5 5 Output big display 10.2 Configuration With the parameter 3, the baud rate is set. The other interface parameters of the RS232 interface can be used by default. The parameter 4, the operation of the interface is defined. 1: Automatic output of the net weight without a unit in toppled sequence of digits, 8 digits i.e.: 23,45 kg -> 54.3200 -23,45 kg -> 54.320- 2: Automatic output of the gross weight without a unit in toppled sequence of digits, 8 digits i.e.: 23,45 kg -23,45 kg -> 54.3200 -> 54.320- 3: Automatic output of the net weight with unit, 14-digit i.e.: 23,45 kg -> 0023.45 (kg) + HEX(0D) + HEX(0A) 4: Automatic output of the gross weight with unit, 14-digit © AGRETO electronics GmbH Seite:17 AGRETO Weighing Display XK3 i.e.: 23,45 kg -> 0023.45 (kg) + HEX(0D) + HEX(0A) 5: command mode, issue on the request Gross weight request command: HEX(02)+“A“+“HEX(03), answer: GW:0023.45 (kg) Net weight request command HEX(02)+“B“+“HEX(03): answer: NW:0013.45 (kg) Tare weight request command HEX(02)+“C“+“HEX(03): answer: TW:0010.00 (kg) Trigger zero position command HEX(02)+“D“+“HEX(03): answer: D Trigger Tare funktion command HEX(02)+“E“+“HEX(03): answer: E 6: Output of the weight when pressing the SUM function on the display, for connecting a printer directly © AGRETO electronics GmbH Seite:18 AGRETO Weighing Display XK3 11 Troubleshooting The following error messages can appear on the display screen: Display Description Solution Err 01 Range for zero positioning has been exceeded Reduce the load on the scales or set calibration parameter 2 to a higher value. Err 02 Load for this function is too low Some functions are only available for loads of 5 increments onwards. Err 03 Overloaded Reduce the load on the scales. Err 04 Weight not stable The weight isn't stable during calibration. The calibration procedure can't be performed. Err 05 Weight is too low A higher load must be used for the calibration procedure. The calibration procedure can't be performed. Err 09 Internal checksum error Please contact the manufacturer. The weighing display is malfunctioning. Err10 Internal SCM error Please contact the manufacturer. The weighing display is malfunctioning. © AGRETO electronics GmbH Seite:19 AGRETO Weighing Display XK3 12 Warranty Over and above statutory warranty for AGRETO hydraulic balance following warranty provisions apply : The AGRETO electronics GmbH guarantees the function and repairs or replaces all the parts that have a material or manufacturing damage within the warranty period. Warranty services will be performed by the AGRETO electronics GmbH. The decision on the existence of a warranty claim is sole responsibility of the AGRETO electronics GmbH. The warranty period begins with the first accounting to an end customer and ends 5 years from this date of invoice. Prerequisite for warranty service are the presentation of the original invoice and compliance with all elements of this instruction manual. Excluded from warranty are wear, normal wear and tear, damage due to misuse, negligence or accident. When processing a warranty claim transport costs incurred will be charged to the buyer. 13 Disposal Dispose the product in the definitive shutdown or parts of environmentally friendly (metal to the respective metal scrap, plastic to plastic waste, etc. - Do not dispose as household waste!) Detailed information can be found in Directive 2002/96/EC © AGRETO electronics GmbH Seite:20 AGRETO Weighing Display XK3 14 Declaration of Conformity EC Declaration of Conformity For the following named product AGRETO XK3 Weighing Indicator This is to confirm that it complies with the essential protection requirements of Council Directive on the approximation of the laws of Member States relating to electromagnetic compatibility (2004/108/EC) and Low Voltage Directive (2006/95/EG). For the evaluation the following standards were applied: EN 61010-1:2001, EN 61326-1:2006, EN 61000-3-3:2008, EN 61000-3-3:2008, EN 61326-1:2006 This explanation is given by the manufacturer AGRETO electronics GmbH Pommersdorf 11 3820 Raabs Submitted by: Anton Eder Business Manager Pommersdorf ___________________ © AGRETO electronics GmbH 12.03.2014 ________________ ______________________ legally binding signature Seite:21 AGRETO Weighing Display XK3 15 Imprint All information, specifications and images are correct according to the status in 2014, and subject to technical adjustments or changes in design. Despite careful treatment and examination of the contents, no warranty is made with respect to information in this user manual. Any liability of the author is excluded. Copyright © 2013, AGRETO electronics GmbH AGRETO electronics GmbH Pommersdorf 11 A-3820 Raabs Tel.: +43 2846 620 60 Fax: +43 2846 620 69 Mail: [email protected] Internet: www.agreto.com © AGRETO electronics GmbH Seite:22