1
Installation
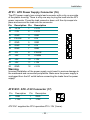
ATX1: ATX Power Supply Connector (16)
The ATX power supply has a single lead connector with a clip on one side
of the plastic housing. There is only one way to plug the lead into the ATX
power connector. Press the lead connector down until the clip snaps into
place and secures the lead onto the connector.
Pin Description Pin Description
13
+3.3V
1
+3.3V
14
-12V
2
+3.3V
15
GND
3
GND
16
PS-ON
4
+5V
17
GND
5
GND
18
GND
6
+5V
19
GND
7
GND
20
-5V
8
PW-OK
21
+5V
9
+5VSB
22
+5V
10
+12V
23
+5V
11
+12V
24
GND
12
+3.3V
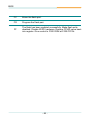
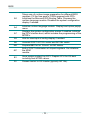
Warning
13
1
24
12
Incorrect installation of the power supply could result in serious damage to
the mainboard and connected peripherals. Make sure the power supply is
unplugged from the AC outlet before connecting the leads from the power
supply.
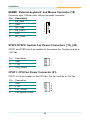
ATX12V1: ATX +12V Connector (17)
Pin
Description
Pin
Description
2
GND
1
GND
4
+12V
3
+12V
2
1
4
3
ATX12V1 supplies the CPU operation ATX +12V (Vcore).
- 23 -