1
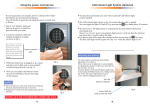
Using the power override box
If your keypad does not respond, don’t be alarmed. Most likely
the batteries are dead and need replacing.
You will be able to open the safe using the power override box
as follow:
Changing the Master Code
This safe box also has a secondary code called “Master Code”
This code can be used as an additional code to the user code you
previously programmed.
1. Take a 4 AA batteries and install them into the
black external battery box (included with your safe)
The factory default master code is: 8-8-8-8-8-8-8-8, this code will
also open the safe. You can leave this code as is or you can change it.
We recommend changing this code for added security.
2. Locate the outlet on the top right edge of keypad
and insert the jack.
To change the master code please follow these steps:
1. Press and hold the # key for 5 seconds until the orange
LED “alarm” indicator blinks.
3. While the battery box is plugged in, go a head
and enter your code as you normally would and
open the safe.
2. Enter the existing master code (Factory 8-8-8-8-8-8-8-8) and
press #. The green LED “open” will stay lit.
4. Now you can replace the batteries inside the safe
3. Enter a new 6-10 digit master code and press # to end.
The green LED indicator will light up and you will hear
2 fast beeps confirming the new master code is accepted
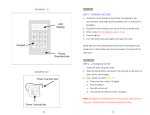
The battery override
feature is used to
give power to the
lock from the outside
of the safe when the
internal batteries are
dead.
4. Now try to open the safe by entering the new master code follow by #.
IMPORTANT:
Battery override box
Make sure to remember the master code as this is your alternative
way to open the safe if the user code is lost or forgotten.
TIPS:
The override box is only to be used in an emergency
when the internal batteries die or very low.
Unplug the override wire after replacing the internal
batteries.
If you open the safe by using the master code, the user code will
return to the factory setting of 1-1-1-1.
NEVER LOCK THE OVERRIDE BATTERY BOX INSIDE THE SAFE
-5-
-6-
Low battery warning
Troubleshooting
PROBLEM
Green light is on but
safe will not
open
REASON
Batteries are
low
SOLUTION
Replace batteries
The lock is equipped with a “low battery” warning indicator.
If the red “low volt” LED indicator lights up, it is time to change
batteries.
We recommend always using Duracell or Energizer brand of Alkaline
batteries. 4AA batteries are needed to operate the lock.
Low Battery
Indicator
Orange light is on
and lock is
beeping
Wrong code was
entered
Enter the correct
code again
Keypad is not
responding,
(dead)
Batteries are dead
and need
replacement
Open safe using
the override battery
box and replace
internal batteries
Orange LED is on
and keypad will not
respond (lockout)
The wrong code
was entered 3
consecutive times
Must wait 12
minutes for the lock
to reset from a
lockout mode
Note: The safe keeps the code in memory up to 6 months without power.
You will not need to reprogram your code after changing batteries.
Changing Batteries:
Remove screw to
open battery cover
To replace the batteries, locate the battery box
in the back of the door.
Unscrew the phillips head screw and remove the
cover.
Remove the 4 batteries and replace with new high
quality Alkaline AA batteries.
Replace the cover and check your code to make
sure that the safe is working properly.
NEVER USE OLD OR LEAKING BATTERIES.
Battery Cover
-7-
-4-
Notes
Enrolling / Changing a code
Enrolling a new code for the first time
Serial Number:
1. Open the door and turn the knob so the bolts are out (Locked position).
2. Press the pound (#) key 2 times (This will enter the lock into
a code-change mode) and orange LED will light up.
3. Now enter the factory default code “1111” and press the # key.
4. Enter your new 4-10 digit code and press the # key,
(The green “open” LED will light up) you will
hear two beeps confirming the acceptance of the new code.
Model Number:
Date of Purchase:
Notes:
5. Check your new code by entering your code and then #.
6. Refer to page 6 to change the secondary (MASTER) code.
IMPORTANT:
Do not pause for more then 7 seconds when you do steps 2-4.
We recommend that you right your new 4-10 digit code on a piece
of paper to avoid any errors when programming.
Always make sure to remember your new code and destroy the piece of
paper it’s written on, NEVER LOCK YOUR CODE INSIDE THE SAFE.
TIPS:
Your code must consist of 4 to 10 digits
Always press the # key after the (last) digit to open
Check your new code at least 3 times with the door open before you close the safe.
Changing your code
Repeat steps 1-5 on this page except enter your existing code (the code
you are using to open the safe) instead of the factory code “0” in step 3.
-3-
-8-
PROTEX SAFE CO. LIMITED WARRANTY
Opening the safe
Opening your drop box for the first time:
Protex Safe Co. ("Protex Safe Co.") warrants to the original
purchaser that the product(s) shall be free of defects in
material and workmanship for a period of one (1) year from the
date of manufacture by Protex Safe Co. (complete safes). This
warranty applies provided there is compliance with all
installation/operating instructions supplied by Protex Safe
Co. and, provided further, that the product has been subject
to normal use without any misuse, negligence, modification, or
the occurrence of accidental damage.
PROTEX SAFE CO. MAKES NO OTHER WARRANTY WITH RESPECT TO THE
PRODUCT, EXPRESSED OR IMPLIED, INCLUDING WITHOUT LIMITATION
ANY WARRANTY AS TO SUITABILITY OF THE PRODUCT FOR ANY
PARTICULAR PURPOSE OR USE OR THE MERCHANTABILITY THEREOF AND
SHALL NOT BE LIABLE FOR ANY LOSS OR DAMAGE SUSTAINED THROUGH
BURGLARY, THEFT, ROBBERY, FIRE OR OTHER HAZARD. THIS LIMITED
WARRANTY IS IN LIEU OF ALL OTHER WARRANTIES OR CONDITIONS
EXPRESSED OR IMPLIED BY LAW AND/OR CUSTOM.
In the event of a defect in materials or workmanship covered
by this warranty, the purchaser shall return, at purchaser's
expense, the product to Protex Safe Co. for repair or
replacement. Repair or replacement shall be at the election of
Protex Safe Co. The purchaser's sole remedy shall be the
repair or replacement of the product and under no
circumstances shall Protex Safe Co. be liable to the purchaser
or any other person for any consequential, incidental,
economic, direct, indirect, general or special damages arising
out of any breach of warranty. In no event shall Protex Safe
Co.'s liability exceed the original cost of the product.
This warranty and remedies set forth above are exclusive and
in lieu of all others, oral or written, expressed or implied.
No dealer, distributor, agent or employee is authorized to
make any modification or addition to this warranty.
PROTEX SAFE CO. EXPRESSLY DISCLAIMS ANY WARRANTY OF
NONINFRINGEMENT PROVIDED UNDER KRS 355.2.312, UCC §2-312, OR
SIMILAR LAW. PROTEX SAFE CO. SHALL NOT INDEMNIFY NOR BE
RESPONSIBLE FOR ANY DAMAGES ARISING OUT OF A CLAIM THAT THIS
PRODUCT INFRINGES ANY PATENT.
Some states do not allow the exclusion or limitation of
implied warranties or limitation of liability for incidental
or consequential damages, so the above limitation or exclusion
may not apply to you.
NOTICE
Installation of the product with any unapproved accessorial
item or product may invalidate the Protex Safe Co., Limited
Product Warranty.
1. Press 1-1-1-1-# (This is the factory default code)
the green LED light “open” will light up confirmed by
a beep sound.
2. You now have 3 seconds to turn the knob clockwise
and open the door. (If you do not open the door within those
3 seconds, the safe will relock itself and you will need to enter
the code again).
If the orange LED “alarm” flashes with 3 rapid beeps, it
means that you entered the wrong code. Please try again.
If you enter the wrong code for 3 consecutive times,
the lock will go into a LOCKOUT mode and you won’t be
able to open the safe for 5 minutes. (During this period there will
be no response from the keypad).
If this happens, please wait and try again after 5 minutes.
The LOCKOUT mode is a security feature to prevent someone
from trying to manipulate the lock by entering guessed codes.
GREEN “OPEN” LED
EXTERNAL POWER
SUPPLY OUTLET
RED “LOW BATTERY” LED
ORANGE “ALARM” LED
KNOB
-9-
-2-
Content
Opening the safe
2
Enrolling /Changing a code
3
Low battery warning
4
Replacing batteries
4
Using the power override box
5
Changing the master code
6
Troubleshooting
7
Notes
8
Warranty
9
-1-
P
PROTEX
SAFE CO.
User Manual
SDL-400E
ELECTRONIC DROP BOX
P
PROGRAMMING
AND OPERATION
V 10.4.12
PROTEX
SAFE CO.
Protex Safe Company
8445 Canoga Avenue
Canoga Park, CA 91304
USA
TEL: 818-773-8030
FAX: 818-773-8003
www.protexsafe.com