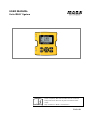
1
USER
R MANU
UAL
Xsite E
EASY Sy
ystem
Please completely re
ead this docum
ment and the contained
safety instructions
i
an
nd note all givven informatio
on before
usage.
urther consideeration!!
Keep a vailable for fu
ENGLISH
Original user manual
Order-No.:10-02-02321
Date: 03.2013
This manual applies to software version 2.2.
Please handle this document confidentially. It is intended only for use by persons involved
with the product.
The text and graphics of this document have been elaborated with the greatest possible
care. However, we may not be held liable for possible errors and failure effects.
Should you wish to make suggestions regarding the arrangement of this document or point
out possible errors, please contact your local dealer. We will gladly take up any of your
ingenious ideas and suggestions.
Some company and label names are subject to label-, patent- or trade-mark protection.
All rights reserved. This document must not be duplicated or transferred for any purpose
whatsoever without MOBA’s written consent, irrespective of the way or the means that are
used.
Copyright by
MOBA Mobile Automation AG
Kapellenstraße 15
65555 Limburg
Internet: www.moba.de
Table of contents
3
Table of contents
1. Safety instructions ....................................................................................... 5 1.1. Intended use ............................................................................................ 6 1.1.1. 1.1.2. Conventional use ......................................................................................... 6 Inappropriate use ......................................................................................... 6 1.2. The operator’s responsibility ..................................................................... 7 1.3. Special risks ............................................................................................. 8 1.4. Proceeding in case of danger and accidents............................................. 11 2. Transport, packaging and storage............................................................... 12 2.1. Transport inspection ................................................................................ 12 2.2. Transport ................................................................................................ 12 2.3. Storage ................................................................................................... 13 2.4. Disposal .................................................................................................. 14 3. Product overview ......................................................................................... 15 4. Initial operation ............................................................................................ 17 4.1. Connecting the cables ............................................................................. 17 4.2. The user interface ................................................................................... 18 4.3. The buttons ............................................................................................. 18 4.4. Switching the system ON/OFF ................................................................. 20 4.5. Display settings ....................................................................................... 21 4.5.1. 4.5.2. 4.5.3. 4.5.4. 4.5.5. Brightness ................................................................................................. 21 Sound settings ........................................................................................... 21 Power button function ................................................................................. 21 Date and time ............................................................................................ 21 Language ................................................................................................... 21 4.6. Accuracy check ....................................................................................... 22 4.6.1. 4.6.2. 4.6.3. Depth and distance accuracy test 1 ............................................................ 22 Depth and distance accuracy test 2 ............................................................ 23 Tilt bucket accuracy test ............................................................................. 24 4.7. Detaching the laser receiver .................................................................... 25 4.8. Replacing a tilt bucket with a non-tilting bucket ........................................ 26 5. Applications ................................................................................................. 27 5.1. Measurement mode ................................................................................. 27 5.2. Screen views ........................................................................................... 28 4
Table of contents
5.3. Status bar .............................................................................................. 29 5.4. Number editor ........................................................................................ 29 5.5. Text editor .............................................................................................. 30 5.6. Wizards .................................................................................................. 31 5.7. Menus .................................................................................................... 32 6. Bucket settings ........................................................................................... 33 6.1. Changing the bucket and the measuring point ......................................... 33 6.2. Adding/ editing/ calibrating the bucket ..................................................... 34 6.2.1. 6.2.2. 6.2.3. 6.2.4. Bucket measurements ................................................................................ 36 Bucket calibration ...................................................................................... 37 Tilt bucket calibration ................................................................................. 38 Bucket name ............................................................................................. 40 6.3 Angle calibration ........................................................................................ 41 7. Depth measurement .................................................................................... 43 7.1. Depth measurement from a reference point ............................................. 43 7.1.1. 7.1.2. 7.1.3. Digging from the zero level ........................................................................ 43 Digging with a known starting level ............................................................. 44 Moving the excavator when measuring the depth ........................................ 45 7.2. Depth measurement from the laser jobsite height .................................... 50 8. Slope measurement .................................................................................... 53 8.1. Creating/ editing a slope ......................................................................... 53 8.2. Slope digging from the zero level ............................................................ 54 8.3. Slope digging with a known starting level ................................................ 55 8.4. Moving the excavator when measuring the slope ..................................... 56 9. Distance measurement ............................................................................... 59 10. Target levels ............................................................................................ 60 10.1. The XD2 LED display .......................................................................... 61 11. Warning levels ......................................................................................... 62 12. Service and Maintenance ......................................................................... 65 13. Technical data .......................................................................................... 66 14. Declarations of conformity ...................................................................... 68 Safety instructions
5
1. Safety instructions
Warning notices
in this document is symbolized with a “Danger“ icon and a
coloured headline.
Signal words specify the extent of this danger.
To prevent accidents, personal injuries and material damage it is
imperative to strictly observe this information.
General information
in this document is symbolized with an “Information“ icon.
Signal words describe of the type of information.
This information will contribute to flawless, efficient and proper
use of the product.
This document contains texts and drawings concerning the correct handling of
the system and must be read before installation or use.
Observe this description’s information. Non-observing the notes, operating in nonaccordance with the use requirements described below, wrong installation or
handling may cause serious harm regarding people’s and plant’s safety.
The product may only be installed, connected and commissioned by qualified staff.
Externally disconnect the product before performing any operation. As the case may
be, also disconnect the separately supplied output load circuits.
In case of malfunctions or uncertainties please contact the manufacturer. To prevent
risks and ensure optimal performance, alterations, attachments or rebuilding of the
product may not be carried out without the manufacturer’s explicit permission.
6
Safety instructions
1.1. Intended use
1.1.1. Conventional use
Xsite EASY has been exclusively designed and constructed for
conventional use as described here.
• Positioning the bucket of an excavator using gravitation
sensors, laser receivers or other sensors.
• Indication of the measuring point’s position.
• Comparison of the measuring point’s position with various
types of reference information.
Any other use not listed here as well as any application not
complying with the technical data is not conventional and
inappropriate.
WARNING
Risks caused by inappropriate use!
Any non-conventional use and/or different operation of the
product can lead to hazardous situations.
y
Only use the product in a conventional manner.
1.1.2. Inappropriate use
•
•
•
•
•
•
•
•
•
Non-conventional use
Exceeding the limit values given on the data sheet
Use of the product without instructions
Use of the product beyond the limits of use
Invalidation of safety equipment
Removal of indicating or warning labels
Opening, rebuilding or altering the product
Use of the product in spite of obvious defects or damages
Use of the product with unauthorized accessory from other
manufacturers
• Use of the product at insufficiently secured construction sites
Safety instructions
7
1.2. The operator’s responsibility
The product is used in the industrial sector. Therefore the
operator of the product is liable to the legal responsibilities for
operational safety.
Besides the operational safety instructions in this manual the
safety, accident prevention and environmental protection
regulations valid for the operational area of the product have to
be observed.
Particularly applying:
• The operator has to inform himself/herself about the current
operational safety regulations and, in a risk assessment, detect
additional risks that are caused by the special working
conditions at the usage site of the product. These then have to
be implemented in the form of directives for the product’s
operation.
• These directives have to be kept near to the product and
permanently be available for the persons working with it.
• The operator has to clearly define the personnel’s
responsibilities referring the appliance.
• The operator has to ensure that the instruction manual’s content
is fully understood by the operating personnel.
• The statements of the instruction manual have to be observed
thoroughly and unrestrictedly!
• The operator has to ensure that all maintenance, inspection and
assembling processes are carried out by qualified specialized
personnel, which have informed themselves sufficiently by
closely studying the instruction manual.
• The operator informs the manufacturer or the authorized dealer
if any safety defects occur at the product or during operation.
8
Safety instructions
1.3. Special risks
CAUTION
Epilepsy warning!
Some people are susceptible to epileptic seizures or loss of
consciousness when exposed to certain flashing lights or light
patterns.
• Immediately discontinue use and consult a doctor if any of
the following symptoms occur while using the Xsite EASY
or the XD2 LED display: dizziness, blurred vision, eye or
muscle twitches, loss of consciousness, disorientation or
any involuntary movement or convulsion.
DANGER
Risks caused by electric current!
When working close to electricity systems, there is danger to life
due to electric shock.
y
Keep sufficient safety distance to electric systems.
If working at such systems is indispensable, inform the
responsible authorities before starting the working
process and follow their instructions.
CAUTION
Risk of injury caused by moving machine parts!
During the controlling of the tool the machine’s components and
assembly groups are moved manually or automatically. Rotating
and/or linearly moving components and assembly groups of the
machine can cause severe injuries and material damages.
y
Keep persons away from the machine’s and the tool’s
working range respectively.
y
Remove objects from the machine’s and the tool’s
working range respectively.
•
Do not interfere with the moving components during
operation.
•
Always switch off the product before leaving the driver’s
seat or when the machine is standing still.
•
Do not carry out any operations at the sensorics when the
system is in automatic mode.
Safety instructions
9
CAUTION
Risk of injury caused by overlapping machine parts!
Subsequently assembled system components (e.g. sensors) can
overlap the typical machine dimensions. This can lead to injuries
and material damages.
y
Ensure that the machine is operated by a qualified
and experienced operator.
•
Keep away persons from the machine’s and the
tool’s working range respectively.
•
Remove objects from the machine’s and the tool’s
working range respectively.
WARNING
Risk of injury caused by malfunction!
Uncontrolled machine actions caused by the malfunction of a
system component can lead to severe personal injuries in the
machine’s working range or cause material damage.
y
Ensure that the machine is operated, controlled and
inspected by a qualified and experienced operator, who
has to be able to induce emergency measures e.g. an
emergency stop.
y
Keep away persons from the machine’s and the tool’s
working range respectively.
y
Remove objects from the machine’s and the tool’s
working range respectively.
y
Secure the construction site.
WARNING
Risk of injury caused by lacking or insufficient instruction!
Lacking or insufficient instruction can lead to operating errors or
incorrect use. This can lead to severe personal injuries as well as
severe material and environmental damages.
y
Observe the manufacturer’s safety instructions
and the operator’s directives.
10
Safety instructions
WARNING
Risk of injury caused by insufficient safeguarding!
Insufficient safeguarding of the construction site and the
component’s location, e.g. of the laser emitter, can lead to
hazardous situations in traffic and at the construction site.
y
Ensure sufficient safeguarding of the construction
site.
y
Ensure sufficient safeguarding of the single
components’ locations.
y
Observe the country-specific safety and accident
prevention regulations as well as the current road
traffic regulations.
NOTICE
Risks caused by faulty measurement results!
Faulty measurement results due to use of a dropped product,
another illegitimate demand or an alteration can lead to severe
material damages.
y
Do not use obviously damaged products.
y
Before reusing a dropped component carry out a
check measurement.
WARNING
Risk of injury caused by unreadable signs!
In the course of time labels and symbols on the product can get
dirty or get unrecognizable due to other events.
Due to immoderate mechanical effects labels and symbols can be
detached.
y
Always keep safety, warning and operation instructions in
a well readable state.
y
Regularly check the adhesiveness of the labels and
symbols on the product.
y
Do not remove labels and symbols from the product.
Safety instructions
11
1.4. Proceeding in case of danger and accidents
Preventive measures
• Always be prepared for possible accidents or the event of fire!
• Keep first-aid-equipment (ambulance box, blankets etc.) within
reach.
• Familiarize the personnel with accident notification and first-aidequipment as well as emergency services.
• Keep the access routes clear for emergency vehicles.
If the event occurs: proceed appropriately:
• Immediately put the product out of action by using the emergency
stop.
• Induce first-aid-measures.
• Recover persons out of the hazard zone.
• Inform the responsible person at the usage site.
• Alarm a doctor and/or the fire brigade.
• Keep the access routes clear for emergency vehicles.
12
Transport, packaging and storage
2. Transport, packaging and storage
2.1. Transport inspection
To ensure sufficient protection during transport the products have
been packed carefully.
Please immediately check the delivered goods for completeness
and transport damage.
In case of external transport damage proceed as follows:
• Do not or only under reserve accept delivery.
• Record the extent of the damage on the transport documents or
the transporter’s bill of delivery.
• Induce complaint.
• Do not put obviously damaged products into operation.
Claim every defect as soon as it is detected. Compensation
claims can only be asserted complying with the current claim
periods.
2.2. Transport
When taking your equipment to the usage site or in the field
always ensure that the product is transported in secured and
suitable containers.
Never transport the product loosely in the car. The product’s
function can be severely harmed by hits and thrusts.
In case of transportation by railway, plane or ship always use the
original packaging, transport containers and transport boxes or as
the case may be analogical packaging. The packaging protects
the product against hits and vibrations.
Transport, packaging and storage
13
2.3. Storage
Only store the product in well aired, dry rooms. During storage
protect it against dampness and preferably use the original
packaging.
Avoid strong thermal fluctuation during storage. Incipient
formation of water condensation can harm the product’s function.
When storing observe the product’s temperature limits; especially
in summer when the equipment is stored in vehicle interiors. For
the valid storage temperatures see the product’s technical data.
14
Transport, packaging and storage
2.4. Disposal
Packaging
During transport the products are protected ex works by special
packaging, which consists of environment-friendly, easy dividable
materials and are recyclable.
We recommend waste managers for the packaging disposal.
Product
The product must not be disposed together with the domestic
waste. It has to be properly disposed.
Unless no agreements to take back and dispose have been
made, recycle the disjointed components after disassembling
them appropriately.
• Scrap metallic material rests
• Dispose electronic components according to the local
regulations
CAUTION
Risk of injury caused by inappropriate disposal of the
product!
When burning plastic parts toxic gases emerge that can cause
illnesses.
y
Dispose the product properly according to the current
national country-specific disposal regulations.
Careless disposal enables unauthorized persons to improperly
use the product. In doing so these persons and/or third persons
can be severely injured and also pollute the environment.
y
At all times protect the product against the access
of unauthorized persons.
Product overview
15
3. Product overview
Xsite EASY is a machine guidance system for excavators. It indicates the measuring
point’s position compared to a reference level.
By default the system contains the following components:
•
•
•
Display unit
Connection box for LED display
Gravitation sensors for bucket, dipper stick, main boom and frame
The system can be expanded by adding the following optional accessories:
•
•
•
•
Tilt bucket sensor
Dual block boom sensor
Laser receiver
LED display
The display is not completely waterproof. If the display or other
components are taken away from the construction machine, a
carrying case should be used. Make sure that the components as
well as the case are clean and dry before packing.
16
Product overview
Initiaal operation
17
7
4. Initiial operation
This cha
apter provvides inforrmation ab
bout conn
necting the
e cables, starting and
a
shuttin
ng
tests. It aalso introduces the
down th e system,, display settings
s
a nd basic accuracy
a
detachm
ment of the
e laser receiver and
d replacin
ng a tilting
g bucket w
with a basic bucket..
4.1. Co
onnectin
ng the ca
ables
Connectt the powe
er cable and
a
the CA
AN cable to the con
nnectors oon the dis
splay’s rea
ar
of the diisplay as shown be
elow. Then
n twist the
e connecto
ors clockw
wise while
e pushing..
The con
nnectors are
a properrly conneccted when
n, with medium pow
wer applied
d, they do
o
not turn further cl ockwise. The cable
es are dis
sconnected by twistting the co
onnectors
anticloc kwise.
IMPORT
TANT!
Do not connect
c
th
he CAN ca
able and power
p
cabble to each
h other
since the
e CAN buss would be
b perman
nently pow
wered and
d therefore
e
discharg
ge the exccavator’s battery.
b
After the
e cables have
h
been
n connecte
ed, attach
h the displlay to the excavator’s window
w
with the suction cup.
c
Position the dissplay in a way that it obstruccts the cabin view as
a
little as possible.
18
1
In itial operration
4.2. The u
user inte
erface
Xs
site EASY
Y is operatted via a button
b
inte
erface. Us
se the “Bu
ucket” buttton to perrform
the function
n shown at
a the botto
om left an
nd corresp
pondingly use the “ 0.0” butto
on to
pe
erform the
e function shown on
n the botto
om right ( see picturre below)..
4.3. The b
buttons
Th
he Xsite E
EASY systtem is con
ntrolled ussing five f unction bu
uttons andd four arro
ow
ke
eys. The fu
unctions for
f the diffferent butttons are explained
e
in the folllowing table.
A rrow keys
s
• Navigatiing within the menu
us
• Changin
ng the buc
cket meassuring poi nt while working
w
ussing the le
eft and
right arrrows
ng the screen view while worrking using the up aand down arrows
• Changin
• Changin
ng the currsor positi on in text and number editorrs using th
he left
and righ
ht arrows
• Changin
ng charactters in texxt and num
mber edito
ors using the up an
nd down
arrows
Initiaal operation
OK but ton
Press
• To
o accept th
he choice in menuss and dialogs
• To
o accept th
he new va
alue/namee in numbe
er/text
ed itor
Hold 3 sec
s
• To
o open the
e action dialog in w
wizards
Bucket button
Press
• To
o change bucket
b
• To
o cancel/g
go back in the menuus
• Le
eft function
n key
Hold 3 sec
s
• To
o set slope
e
0.0 buttton
Press
•
•
To
o zero the measurement valuues
Ri ght function key
Hold 3 sec
s
•
To
o set the starting
s
level
Press
•
Se
ettings
Hold 3 sec
s
•
Insstallation settings
Press
•
•
To
o turn ON the syste
em
La
aser/memo
ory functio
on ON/OF
FF
Hold 3 sec
s
•
To
o turn OFF
F the system
Menu button
b
Power button
19
9
20
Initial operation
4.4. Switching the system ON/OFF
Turn the system ON by pressing the “Power” button. When the XD2 light bar powers
up, the LED on the bottom right corner blinks.
The sensors are equipped with an internal heating. When the
excavator is used at cold temperatures, it takes time for the
sensors to warm up and provide satisfying accuracy.
The time needed between switching ON the system and starting to
work is shown in the table below. Allow sufficient warm-up time to
ensure accurate measurement results.
Temperature
Heating time
-20°C
~20 min
-10°C
~10 min
-5°C
~5 min
The system is turned OFF by pressing and holding the “Power” button for 3
seconds.
Initial operation
21
4.5. Display settings
In the following the different settings found under “Display unit settings” are
described.
See the chapter “User interface” for instructions on how to change the settings.
4.5.1. Brightness
The display’s brightness can be set in “Main menu” → “Display unit” → “Display” →
“Brightness”. Choose between bright, medium and dim.
4.5.2. Sound settings
The sound can be adjusted in “Main menu” → “Display unit” → “Sounds”.
Select which laser, target and button sounds are ON by pressing the corresponding
“OK” buttons. The volume can be switched to high, low or muted.
4.5.3. Power button function
The short cut function of the “Power” button can be adjusted in “Main menu” →
“Display unit” → “Buttons”.
Choose between the option to switch the laser ON or OFF by pressing “OK” in the
“Laser” selection or to use the memory function by pressing “OK” in the “Memory”
selection. Please also see the chapters “Moving the excavator with the laser
receiver” and “Moving the excavator via the memory function”.
4.5.4. Date and time
The date and time can be changed in “Main menu” → “Display unit” → “Date and
time”. Select the 1/2 page to adjust the time and the 2/2 page to adjust the date.
The digit order for the date is year, month, day.
4.5.5. Language
Select the option language in “Main menu” → “Display unit” → “Language”. Select
the favoured language and press the “OK” button to confirm the change. After the
language has been chosen, press any key for the system to shut down. Turn the
system ON again by pressing the “Power” button.
Regardless of the chosen language, the language selection can always be accessed
as follows: press the “Main menu” button → press the “Down arrow” until the last
selection is chosen (at the bottom) → press “OK”. The language menu opens.
22
2
In itial operration
4.6. Accu racy che
eck
Th
he system
m accuracyy should always
a
be tested be
efore startting any ooperation. The
following prroceduress provide an
a easy w
way to do so.
Du
uring the test,
t
all ma
achine pa
arts (bucke
et, stick, bboom) sho
ould
mo
ove to ach
hieve a 10
00 % certa
ainty for th
he system
m accuracy
y.
h and dis
stance accuracy te
est 1
4. 6.1. Depth
1. Place
e the buckket on a re
eference p
point and zero the measurem
ment value
e.
2. Witho
out tilting it sideway
ys turn the
e bucket to
t a different positioon and pla
ace it on
ame pointt again.
the sa
3. The d
depth and distance readings should b e close to
o zero in eevery posiition
(with a permisssible accu
uracy tole rance of +/+ 1 cm).
Initiaal operation
23
3
4.6.2. De
epth and distance
e accurac
cy test 2
1. Pllace the bucket
b
on the groun
nd and ze ro the measuremennt value.
2. M ove the bucket
b
and
d use a ta
ape measu
ure to mea
asure the depth and distance
e
di fference between
b
the
t
bucke t measuring point and
a
the zeeroed poin
nt.
3. Th
he system
m should indicate th
he same r eadings with
w
an acccuracy tolerance o f
+//- 1 cm.
24
2
In itial operration
4. 6.3. Tilt b
bucket ac curacy te
est
W hen using
g the tilt fu
unction, te
est the ac curacy of the bucke
et edges ((see pictu
ure
be
elow).
1. Straig
ghten the tilt rotator.
2. Switcch the mea
asuring po
oint to cen
ntre and select
s
a measureme
m
ent mode
show
wing depth and dista
ance.
3. Align the buck et blade to a horizo
ontal leve l and mov
ve the cenntre of the
e bucket
to the
e referencce point. Zero
Z
the d
depth and distance readings by pressing the
“0.0” button.
he bucket and put the left co rner on th
he referen
nce point. Change the
t
4. Tilt th
meassuring poin
nt to the lowest corrner.
5. Depth
h and disttance read
dings sho uld be “0..00” in eve
ery positioon (make sure
that tthe correcct measuriing point iis in use).
6. Repe
eat this acccuracy test with the
e other bu
ucket corn
ner.
7. In casse the acccuracy is worse tha
an +/- 2 cm
m carry ou
ut a tilt buucket calib
bration
(see chapter “T
Tilt bucket calibrati on”).
Initiaal operation
25
5
4.7. De
etaching
g the laser recei ver
It is reco
ommende
ed to detac
ch the lasser receive
er when not being uused, for example
when ca
arrying ou t work wh
here there is a risk of damaging the lasser receiv
ver, such as
dredging
g.
When re
emoving t he laser receiver, b
be sure to
o connect the detacched cable
es togethe
er
afterwarrds. Applyy a small amount
a
off anti-corrrosion gel or greasee onto the
e cable’s
connect or parts to
o prevent water ing
gress.
Always remember
r
r to apply anti-corro
osion gel oor grease onto the
connecto
ors (e.g. S
SuperLube
e® Anti-C
Corrosion G
Gel).
26
Initial operation
4.8. Replacing a tilt bucket with a non-tilting bucket
Detach the cable connecting the tilt bucket sensor, apply grease to the cable
connector and attach a cap to protect the connector.
Select the bucket to be used from “Main menu” → “Buckets” and go to “Tilt
calibration”. The page 1/7 serves to switch the tilt function ON or OFF. If the tilt
function is ON, press the “0.0” button to switch it OFF.
Always remember to apply anti-corrosion gel or grease onto the
connectors (e.g. SuperLube® Anti-Corrosion Gel).
A
Applicatio
ons
27
7
5. App
plicatio
ons
5.1. Me
easurem
ment mod
de
Screen vviews with
h differentt measure
ement sym
mbols can be changged with the up and
d
down arrrow keys.. In the picture belo
ow four off the most commonlly used measuring
m
function s are sho wn. “0.0” indicates the pointt where the bucket has been zeroed.
The follo
owing tab le lists all symbols..
Depth
Heightt from the zero poin
nt to the bucket
b
me
easuring ppoint
Distance
e
Horizo
ontal dista
ance from the zero point to th
he bucket measurin
ng point
Slope
Heightt from the target su
urface to t he buckett measurinng point
Laser jo bsite height
Heightt of the bu
ucket mea
asuring po
oint compa
ared to lasser jobsite
e height
Bucket figure
f
sid
de view
Illustra
ation of the bucket angle view
wed from side
T°
Bucket tilting
t
ang
gle in deg
grees
T%
Bucket tilting
t
ang
gle in perrcent
R°
Machine
e roll in degrees
Angle of the tilt bucket co
ompared to
t horizon
ntal level iin degrees
s
Angle of the tiltiing bucke
et compare
ed to horiz
zontal levvel in perc
cent
Angle of the sid
de tilt of th
he cabin in
n degrees
s
28
Applications
R%
Machine roll in percent
B°
Bucket angle in degrees
P°
Machine pitch in degrees
P%
Machine pitch in percent
CL
Digital clock
CLa
Analogue clock
BFR
Bucket figure front view
S%
Slope percentage
F°
Pitch angle for flat bucket or drill/pile attachment in degrees
Angle of the side tilt of the cabin in percent
Angle of the bucket compared to the calibrated plumb line
Angle of the forward and backward tilt of the cabin in degrees
Angle of the forward and backward tilt of the cabin in percent
Shows the time
Traditional alternative to the digital clock
Illustration of the bucket angle viewed from front
Slope percentage from the zero point to the bucket measuring point
Angle of the bucket’s forward and backward tilt in degrees
F%
Pitch angle for flat bucket or drill/pile attachment in percent
X°
Roll angle for flat bucket or drill/pile attachment in degrees
X%
Roll angle for flat bucket or drill/pile attachment in percent
Angle of the bucket’s forward and backward tilt in percent
Angle of the bucket’s side tilt in degrees
Angle of the bucket’s side tilt in percent
5.2. Screen views
Four preset screen views and two optional screen views can be edited by pressing
the “Menu” button and selecting “Screen views”.
First select either “Custom1” or “Custom2”, then choose the layout type. There are
six different layout types with up to four different components being displayed at the
same time.
The components can be set in “Custom1” and “Custom2” → “Components”. You can
choose from a total of fourteen different components (see table above). Optional
screen views can be switched off by selecting the blank “_” value for the first layout
component.
A
Applicatio
ons
29
9
5.3. Sta
atus barr
Below th
he measu rement da
ata the sta
atus bar is
s displaye
ed, which can show
w the nam e
of the acctive buckket, measurement p
point or la
aser status
s (see piccture below
w).
What is shown in the status bar can be set in “Main me
enu” → “S
Screen vie
ews” →
K” button to switch the selected optionn (Laser, Measure“Status bar”. Presss the “OK
oint or Buccket name
e) ON or O
OFF. If mo
ore than one
o
optionn is switch
hed ON, th
he
ment po
selected
d options alternate in the sta tus bar.
5.4. Nu
umber ed
ditor
ntering nu
umbers in certain m
menus (su ch as the bucket leength or th
he jobsite
When en
height), use the le
eft and rig
ght arrow keys to s elect the number too be changed and
use the up and do
own arrow
ws to choo
ose the co
orrect num
mber for thhe currentt selection
n.
Press th
he “0.0” bu
utton to se
et the num
merical va
alue to “0.00”. Acceept the new
w value
with the “OK” buttton or und
do the cha
anges wit h the “Buc
cket” buttoon.
1
2
3
4
5
6
Title
+/- Syymbols an
nd the num
merical vaalue
Active
e number or +/- cha
aracter
Undo
o the chan
nges using
g the “Buccket” butto
on
Acce pt the cha
anges usin
ng the “OK
K” button
Zero the nume
erical value
30
3
Ap
pplication
ns
5.5. Text e
editor
Te
ext is ente
ered the s ame way as numbe
ers.
Us
se the leftt and rightt arrow ke
eys to sele
ect the character to
o be changged and use
u the
ect character/symb
up
p and dow
wn arrows to choose
e the corre
bol for the current
se
election. B
By pressin
ng the “0.0
0” button tthe selectted charac
cter is cle ared. Acc
cept the
ch
hanges wi th the “OK
K” button or undo th
he change
es with the “Buckett” button.
1
2
3
4
5
6
Title
Charactters
Active ccharacter
Undo th
he change
es with the
e “Bucket”” button
Accept tthe chang
ges with th
he “OK” bbutton
Clear th
he selecte
ed charactter
A
Applicatio
ons
31
1
5.6. Wiizards
With the
e left and right arrow
w keys th e wizard menus
m
are
e browsedd through. Use the
“Bucket”” button to
o perform the funct ion shown
n on the bottom
b
leftt, and
correspo
ondingly use
u
the “0
0.0” button
n to perforrm the fun
nction shoown on the
e bottom
right. Byy pressing
g and hold
ding the “O
OK” button for three
e secondss the actio
on dialogu
ue
is opene
ed, from where
w
it is also posssible to ex
xecute the
e commannds availa
able in the
e
selected
d wizard menu.
m
Use
e the up a
and down arrows to select thee favoured comma nd
and acc ept the se
elected ch
hoice with the “OK” button.
1
2
3
4
5
Title
Status
The “B
Bucket” bu
utton functtion
Numbe
er of the wizard
w
pag
ge
The “0
0.0” button
n function
32
3
Ap
pplication
ns
5.7. Menu
us
Prress the “M
Menu” buttton to enter the ma
ain menu.. Use the up and doown arrow
w keys
to select the
e favoure d option and
a
press the “OK” button to proceed.. Note tha
at many
me
enus have
e more th an three options,
o
n ot all visib
ble at the same tim
me. Press the
“B
Bucket” bu
utton to go
o back in the
t
menuss. By pres
ssing the “Bucket” bbutton in the
t
main
me
enu, the m
measurem
ment mode
e can be ccalled up and chang
ged.
1
2
3
Title
T
List
L of opttions
(The
(
highllighted pa
art is the active
a
seleection.)
Bar
B indica
ating the position
p
Buckket settin
ngs
33
3
6. Buc
cket setttings
6.1. Ch
hanging the buc
cket and the measuring point
To chan
nge the bu
ucket
1.
O
Open the bucket se
election lisst by pressing the “Bucket” bbutton.
2.
C
Choose th
he favoure
ed bucket on the lis
st and press either “OK” or th
he right
a
arrow buttton.
S
Select the
e correct measuring
m
g point.
3.
NOTE!
For instrructions on
n working
g with a ne
ew or an ooutworn bucket or
changed
d measure
ements se e chapterr ”Adding// editing/ calibrating
c
g
the buck
ket”.
While w orking the
e measuring point ccan be ch anged witth the left and rightt arrow
hoose leftt, centre, right or au
utomatic measuring
m
g point. Inn case the
e automati c
keys. Ch
mode ha
as been chosen,
c
the system selects th
he bucket’s lowest point as measuring
m
g
point wh
hen the bu
ucket blad
de is tilted
d over 3 degrees. In
n case thee bucket blade
b
is
tilted lesss than 3 degrees, the syste m selects
s the buck
ket centre as measu
uring poin
nt.
The currrent bucke
et and the
e measurin
ng point aare shown in the
status ba
ar.
34
Bucket settings
6.2. Adding/ editing/ calibrating the bucket
NOTE!
Before a new bucket can be used, it has to be calibrated. In
case a bucket is worn out or the measurements have changed,
recalibration is necessary.
Always check the bucket’s measuring accuracy after the
calibration.
To select an existing bucket for editing, go to “Main menu” → “Buckets” and choose
the favoured bucket.
To create a new bucket, go to “Main menu” → “Buckets” and choose “<New
bucket>” from the bottom of the list. To create a bucket with no preset values, select
“Blank values”.
To copy values from an existing bucket, select “Copy existing” and select the
favoured bucket from the list.
Bucket settings:
Measures
Entering or changing the bucket’s measurements
Calibration
Performing the bucket calibration
Name
Changing the bucket name
Tilt calibration
Running the tilt calibration wizard (includes bucket calibration)
Type
Choosing the bucket type
Angle calibration
Performing the angle calibration (only shown when bucket type
is “Flat” or “Drill/Pile”)
Remove
Deleting the selected bucket
Bucket settings
35
The buckets need to be calibrated either via a normal bucket calibration or a tilt
calibration. Which one of these calibrations has to be carried out depends on the
circumstances outlined in following table.
Bucket
calibration
•
•
A new bucket has been added that does not tilt sideways.
A new bucket has been added that tilts sideways, whose tilt
calibration parameters have to be copied from an existing
bucket.
Tilt calibration
•
A new bucket has been added that tilts sideways, whose tilt
calibration parameters are not copied from an existing bucket.
A new bucket has been added that tilts sideways, whose tilt
calibration has not been carried out.
The tilting part (e.g. tilt rotator or tilting quick coupler) has
been changed.
•
•
The tilt calibration wizard includes a bucket calibration.
When the bucket type “Flat” or “Drill/Pile” are chosen, the
standard bucket and angle calibration has to be carried out as
described in the following chapters.
36
3
Bu
ucket setttings
6. 2.1. Buck
ket measu
urements
Ad
dd/ edit th
he bucket measurem
ments in ““Main men
nu” -> “Bu
uckets”, seelect the correct
c
bu
ucket and “Measure
es”. Measure and e
enter the “ Length”, “Left
“
Widtth”, “Rightt Width”
an
nd “Horizo
ontal dista
ance” (4 Quick
Q
coup
pler) parameters.
In case the bucket do
oes not tillt sidewayys the “Ho
orizontal distance”
d
vvalue is not
required.
1
2
3
4
Leng th
width
Left w
Rightt width
Quickk coupler
Buckket settin
ngs
37
7
6.2.2. B ucket callibration
To carryy out a bu cket calib
bration, se
elect “Calibration” in
n the buckket setting
gs. The
bucket ccalibration
n requires a calibra tion magn
net and a plumb lin e. Set the
e plumb lin
ne
on the lo
owest pivo
ot pin of the stick. T
Turn the bucket
b
slo
owly towarrds the plumb line.
When th
he bucket’’s tip touc
ches the s tring with out movin
ng it, keepp the buck
ket steadyy
and presss the “CA
ALIB” buttton. After a few sec
conds the calibratioon is comp
plete.
IMPORT
TANT!
After the
e calibratio
on it is essential to test the bbucket acc
curacy.
Perform an accura
acy test as
a described in the chapter “A
Accuracy
check”. If
I the accu
uracy is le
ess than +/+ 1 cm, rrecalibrate
e the
bucket.
38
3
Bu
ucket setttings
6. 2.3. Tilt b
bucket ca libration
W ith the tiltt calibratio
on the parrt between
n the buck
ket and sttick that ti lts sidewa
ays (e.g.
tiltt rotator, ttilting quicck couplerr) is calibrrated.
In case the calibration
om an exissting calib
brated
n data is copied fro
bu cket, a ne
ew calibra
ation is no
ot necessa
ary.
Ho
owever, th
he accuraccy test sh ould still be
b perform
med as de
escribed
be fore.
To
o carry ou t a tilt cal ibration, go
g to “Ma in menu” and selec
ct “Bucketts”. Create
e a new
bu
ucket or ch
hoose an existing bucket
b
fro
om the listt. Then select “Tilt ccalibration
n” in the
bu
ucket settiings menu
u.
Ca
arry out th
he tilt buc ket calibra
ation as fo
ollows:
1.
2.
3.
Swittch the tiltt bucket ON
O by presssing the “0.0” buttton.
In ca
ase the tillt function
n is not ussed, switch
h the tilt bucket
b
OF
FF in this menu
m
afte r the calib
bration has been ca
arried out..
Drivve the macchine to a flat surfa
ace and le
et it rotate until the roll value is close
to ze
ero (until the “Turn!” text cha
anges to “OK!”).
“
Stra
aighten the
e tilt rotator. Do so by turning the bucket in andd straighte
ening
the ttilt rotatorr with a sp
pirit level a
as shown below.
Buckket settin
ngs
4.
A
Align the bucket
b
to a horizon
ntal level as
a shown below.
5.
P
Perform th
he bucket calibratio
on using a plumb lin
ne (see “66.2.2 Buck
ket
ccalibration
n”).
T
Turn the bucket
b
in, press “CA
ALIB” and
d turn the bucket byy approx. 180
d
degrees (ssee drawing below)).
T
Then presss “CALIB” again to
o accept th
he calibration.
6.
39
9
40
4
Bu
ucket setttings
7.
n the tiltin g axis to a horizon tal level and
a
press “CALIB”.
Turn
8.
If th e tilt calib
bration has been su
uccessfully
y completted, presss the “Bucket”
butto
on twice to
t save the settingss. Finally test
t
the accuracy aas described in
the cchapter “A
Accuracy check”.
6. 2.4. Buck
ket name
Th
he bucket name can
n be set in
n “Main m
menu” → “ Buckets” → old/new
w bucket →
“N
Name”. Eitther choosse a prese
et bucket name from the list (page 1/22) or rename the
bu
ucket (pag
ge 2/2). A lso see ch
hapter “Te
ext editor””.
Buckket settin
ngs
41
1
6.3 An gle calib
bration
When ussing a flatt-bottomed bucket, the opera
ator can measure
m
thhe angle of
o the
bucket’ss bottom. When using a drill//pile attachment, the operatoor can measure the
angle off the attacchment.
An angle
e calibratiion can on
nly be don
ne if the bucket
b
type is “Flat”” or “Drill/Pile”.
Flat-botttom bucket
Drill/Pile attachmeent
The buccket type can
c
be chosen in “M
Main men u” → “Buc
ckets” → oold/new bucket
b
→
“Type”.
To carryy out the bucket an
ngle calib
bration, go
o to “Main
n menu” aand selec
ct “Bucket s”.
Create a new bu
ucket or choose
c
an
n existing
g bucket to
t be cal ibrated frrom the li st.
elect “Ang le calibrattion” from the buck et settings menu.
Then se
42
4
Bu
ucket setttings
Ca
arry out th
he calibra tion as follows:
1. Drrive the machine
m
to a flat ssurface an
nd rotate the machhine until the roll
va
alue is clo se to zero
o (until the
e “Turn!” text
t
chang
ges to “OK
K!”).
2. Ch
hoose the
e calibratio
on orienta
ation.
In “Normal”” orientatio
on the bo
ottom of th
he flat bucket is al igned horrizontally
wh
hile the drrill/pile atttachment is aligned
d vertically
y.
In the “90 degrees” orientati on the bottom of the flat bbucket is aligned
ve
ertically w hile the drill/pile atttachment is aligned
d horizonttally.
“N
Normal” orie
entation
“90 degrees”
d
orrientation
3. Pr ess “CAL
LIB”. Afterr this step
p the ang
gle calibra
ation is coomplete. Go back
witth the “Bu
ucket” buttton and sa
ave the se
ettings.
Affter the a
angle calib
bration, test the a
accuracy by placing the bu cket on a known
su
urface. Th
he F and
d X readings sho uld be consistent
c
with thee actual surface.
Alternativel y, also a spirit leve
el or a poin
nt laser ca
an be use
ed to test tthe accuracy.
Depth meeasureme
ent
43
3
7. Dep
pth mea
asurem
ment
7.1. De
epth mea
asureme
ent from
m a reference po
oint
Ch
heck the ssystem acc
curacy be
efore startting to ope
erate (also
o
see “Accura
acy check””).
The dep
pth from a reference
e point ca
an be mea
asured in two
t
differeent ways:
Digging
g from zerro
level
The measu
urement va
alue is zeroed at thhe starting
g point. Th
he
ows the bu
ucket depth compa red to the
e zero leve
el.
diisplay sho
Digging
g with a kn
nown
starting
g level
The height differenc e between
n the starrting point and the
ta
arget levell is set as
s the startiing level. When the
e
measureme
m
ent value is zeroed, the startting level value
ap
ppears on
n the scre en. When moving tthe bucket towards
th
he target l evel, the reading on the screeen decre
eases and
fin
nally show
ws zero when
w
the ta
arget leveel has bee
en reached
d.
7.1.1. D igging fro
om the ze
ero level
When diigging fro m the zerro level, se
et the buc
cket at the
e favouredd level or starting
point (th
he stake fo
or examplle) and th en press the “0.0” button. Thhe reading
g “0.00”
appearss on the sccreen.
44
4
De
epth mea
asurement
Me
easure th e depth with
w
the bu
ucket. The
e system shows
s
the
e depth off the meas
suring
po
oint compa
ared to th e zero lev
vel. The vvalue abov
ve the zerro level is positive while
w
the value be
elow the zero
z
level is negativve.
7. 1.2. Diggiing with a known starting llevel
Se
et the heig
ght differe
ence betw
ween the sstarting po
oint and th
he target llevel as th
he
sta
arting leve
el (3.00 m in the ex
xample) in
n “Main m enu” -> “S
Starting leevel”. Use the
arrrow keys to set the
e favoured
d height a nd press “Save”. You can al so set the
e
sta
arting leve
el by presssing and holding th
he “0.0” button in th
he measu rement mode
m
for
three secon
nds.
Mo
ove the b ucket to a stake or another rreference point. Zero the meeasuremen
nt value
by
y pressing
g the “0.0”” button. The
T
startin
ng level (“ 3.00” in th
his exampple) appea
ars on
the screen.
Depth meeasureme
ent
45
5
During tthe diggin g process
s the value
e decreas
ses. The target leveel has bee
en reache d
when th e reading is “0.00”.
e excavattor when measurin
ng the de
epth
7.1.3. M oving the
When th
he excava
ator is mov
ved, its he
eight conttinuously changes.
c
To mainta
ain the
original reference
e level, the
e bucket h
has to be taken to a predefinned refere
ence pointt
again orr a rotatin g laser ha
as to be u sed as reference.
NOTE!
When moving the excavato
or it is reco
ommendeed to use a laser
st accurac
cy.
receiver to achievve the bes
46
4
De
epth mea
asurement
Mo
oving the
e excavattor with th
he laser rreceiver:
W hen the e
excavator is moved to a new place and
d the deptth is beingg measure
ed, a
rotating las er has to be set to a horizon
ntal level.
Se
et the lase
er transmiitter to a horizontal
h
level at any
a heightt. Go to “M
Main menu” →
“Laser”. Pre
ess the “R
Right arrow
w” button twice to enter
e
page
e 3/3 and switch ON the
las
ser. The l aser can also be co
ontrolled w
with the “ Power” bu
utton. Preessing the
“P
Power” buttton turns the laser “ON” or ““OFF”.
Mo
ove the bo
oom slow ly in a wa
ay that the
e laser rec
ceiver hits
s the laserr beam. It is
recommend
ded to movve the dip
pper stick to a posittion as up
pright as ppossible when
w
reaching th e laser be
eam. The laser rece
eiver sym bol on the
e screen i ndicates laser
hitts. The la ser hit ha s been ac
ccepted w
when the te
ext “Hold!” changess to “Hit
ac
ccepted!” and the b lack back
kground ch
hanges to
o a white backgroun
b
nd as shown
be
elow.
NO
OTE!
Be
e sure to use
u the co
orrect lase
er transmitter if therre is more
e than
on e at the jo
obsite!
Mo
ove the b ucket to a stake or another rreference point. Zero the meeasuremen
nt value
by
y pressing
g the “0.0”” button (“Starting le
evel” = “0.00” in the
e examplee).
Depth meeasureme
ent
47
7
Measure
e the deptth.
Move th e excavattor to a ne
ew place. Then move the las
ser receiveer to the beam
b
as
shown b
below. It iss recommended to move the
e dipper sttick to a pposition as
s upright as
a
possible
e when rea
aching the
e laser be
eam and to
o make su
ure that thhe laser beam is no
ot
covered by mach ine parts.
After the
e laser hitt has been
n received
d, the digg
ging proce
ess can bee continue
ed. The
depth is measure
ed comparred to the original r eference level, eveen though the altitu de
of the exxcavator might
m
hav
ve change d (see pic
cture below).
48
4
De
epth mea
asurement
Mo
oving the
e excavattor using the mem
mory functtion:
W hen meassuring the
e depth, th
he excava tor can be
e moved via
v the meemory function.
Sw
witch on th
he memorry function
n in “Main
n menu” → “Display
y unit” → ““Buttons” and
prress the “O
OK” butto n in the “M
Memory” sselection. Measure the depthh. In the example,
e
the bucket h
has been zeroed on the stakke with a “Starting
“
level” valuue of “0.00
0”.
Be
efore movving the exxcavator, move the
e bucket to
o a fixed point
p
(e.g.. the stake
e). Save
the altitude of the fix ed point to the mem
mory by pressing
p
th
he “Powerr” button. The text
”M
MEMORY” appears on the sc
creen and the memo
ory functio
on is activvated.
Mo
ove the exxcavator to
t a new place
p
and move the
e bucket to the fixe d point. Release
R
the saved h
height valu
ue by pres
ssing the “Power” button
b
aga
ain. The “ MEMORY
Y” text
dis
sappears..
Depth meeasureme
ent
49
9
The digg
ging proce
ess can be continu ed. The depth
d
is measured ccompared
d to the
original reference
e level, ev
ven though
h the altitu
ude of the
e excavatoor might have
h
changed
d.
avator usiing the ze
ero funct ion:
Moving the exca
avator ca n be move
When m
measuring the depth
h, the exca
ed to conttinue the digging
process at the sa me depth (e.g. whe
en digging
g a founda
ation) withh the help
p of the ze
ero
function . Measure
e the deptth. In the example, the “Starting level”” is “0.00”.
Move th e machin e to a new
w place, i..e. to a po
oint where
e the digg ing process can be
e
continue
ed. After the
t
excava
ator has b
been moved, reach to the meeasuring point
p
on th
he
complet ed surfac e and zerro the mea
asuremen
nt value by
y pressingg the “0.0”” button.
After ze roing, the
e digging process
p
ca
an be con
ntinued.
50
Depth measurement
7.2. Depth measurement from the laser jobsite height
The laser jobsite height function requires a rotating laser that has been set to a
known height. Set the rotating laser to a horizontal level.
NOTE!
It is recommended to use the fastest laser rotation speed
possible.
Go to “Main menu” and select “Laser”. Press the “Right arrow” button twice to enter
page 3/3 and switch the laser ON. It is also possible to control the laser via the
“Power” button.
The laser jobsite height function can be used for depth measurement in two different
ways:
Jobsite height is “0.00”
ZL value indicates the height from a laser beam to
the bucket’s measuring point
Jobsite height is the absolute
height of the laser beam
ZL value indicates the absolute height of the
bucket’s measuring point
To set the jobsite height go to “Main menu” → “Laser” and press “EDIT” in “Jobsite
height”. Enter the favoured height and press “ACCEPT”.
NOTE!
In case the XD2 LED display is used, the jobsite target height can
be adjusted in “Main menu” → “Laser” → page 2/3 “Jobsite target
height”. See chapter “Target levels” for further information.
Depth meeasureme
ent
51
1
Slowly m
move the boom in a way thatt the laserr receiver hits the laaser beam
m. It is
recomm ended to move the
e dipper sttick to a position
p
as
s upright aas possiblle when
reaching
g the lase r beam. The
T
laser receiver symbol
s
on
n the screeen indicattes laser
hits. The
e laser hitt has been
n accepte
ed when th
he text “Hold!” channges to “H
Hit
accepte d!” and th
he black backgroun d change s to a whiite backgrround.
he beam has
h
been accepted,, the ZL v alue indic
cates eitheer the heig
ght
When th
differencce betwee
en the buc
cket and tthe laser beam
b
(“Jo
obsite heigght” = “0.0
00”)…
e absolute height off the buckket (“Jobsite height”” = “30.000”).
…or the
52
5
De
epth mea
asurement
W hen movi ng the ex cavator, the laser rreceiver h as to be taken
t
to thhe laser beam
b
ag
gain.
Th
he digging
g process then can be contin
nued and the
t
depth is measuured comp
pared to
the original reference
e level, ev
ven thoug h the altittude of the
e excavattor might have
h
hanged.
ch
Slope meeasureme
ent
53
3
8. Slo pe mea
asurement
Check th
he system
m accuracy
y before starting
s
to operate (also
(
see
“Accurac
cy check”)).
The slop
pe can be
e measure
ed in two d
different ways:
w
Slope di gging from
m zero
level
The
T
slope ’s starting
g level is set
s to “0.000”. The re
eading is
zeroed
z
at the slope ’s starting
g point. Thhe display
y shows th
he
height
h
of tthe measu
uring point compareed to the target
t
grade.
g
Slope di gging with
ha
known s tarting levvel
The
T
heigh t from the
e starting point to thhe target level
l
is se
et
for the slo pe’s startting level. When thee measure
ement val ue
is
s zeroed, the slope
e’s starting
g level apppears on the scree
en.
When
W
movving the b ucket tow
wards the ttarget level, the
reading
r
on
n the scre en decrea
ases and finally sho
ows zero
when
w
the ttarget lev el has bee
en reacheed.
8.1. Cr eating/ editing
e
a slope
When m
measuring slopes, select a sccreen view
w that sho
ows the “ “ icon. Choose
C
the
e
slope un
nit by sele
ecting “Ma
ain menu” → “Slope
e” → “LIST
T”. Choosse “Percen
nt”,
“Fractio n” or “Deg
grees”. Fo
or exampl e, a +10%
% slope is about 5.77° in degrees and
1/10 in ffractions.
To edit tthe slope go to “Ma
ain menu” → “Slope
e” and pre
ess “Rightt arrow”, or
o press a nd
hold the
e “Bucket” button fo
or three se
econds wh
hen in measuremennt mode. Adjust
A
the
e
slope byy selecting
g “EDIT” and
a
settin g the slop
pe rate. Selecting a negative
e ( - ) slop
pe
creates a downhi ll slope while seleccting a pos
sitive ( + ) slope creeates an uphill
slope.
ne gative Slope
positivee Slope
54
5
Sllope mea surement
8.2. Slope
e diggin g from the
t
zero
o level
Se
et the slop
pe value as
a describ
bed in “Cre
eating/ ed
diting a slo
ope”.
Se
et the starrting level to zero (press “0.0
0” for 3 se
econds or “Main meenu” → “S
Starting
lev
vel”).
Mo
ove the b ucket to t he slope’s
s starting point. Zero the measuremennt value by
prressing “0 .0”. The r eading “0.00” appe
ears on th e screen.
Th
he “ “ va lue showss the height differen
nce betwe
een the bu
ucket and the targe
et
su
urface. Th e value a bove the surface iss positive while the value bellow the su
urface is
ne
egative.
Th
he target ssurface ha
as been re
eached w
when the “
“ readin
ng is “0.000”.
Slope meeasureme
ent
55
5
8.3. Slo
ope digg
ging with a know
wn startting leve
el
Set the slope valu
ue as described in “Creating/ editing a slope”.
The heig
ght differe
ence betw
ween the sstarting po
oint and th
he target llevel is the starting
level (3. 00 m in th
he example). Set th
his starting level in “Main meenu” → “Starting
level” orr hold the “0.0” buttton for 3 sseconds.
Move th e bucket to a stake
e or anoth
her referen
nce point. Zero the measurement valu
ue
0.0” button. The sta
arting leve
el (“3.00” in the exaample) appears on
by presssing the “0
the scre
een.
The “ “ value sh ows the height
h
diff erence be
etween the bucket aand the ta
arget
surface. The valu
ue above the
t
surfacce is posit ive while the value below the
e surface is
negative
e.
The targ
get surfac e has bee
en reache d when “
“ is “0.00”.
56
5
Sllope mea surement
8.4. Movin
ng the excavato
e
or when measurring the slope
W hen the e
excavator is moved, its heigh
ht continuo
ously changes. To maintain the
orriginal refe
erence levvel, the bu
ucket eithe
er has to be taken to a certaain referen
nce
po
oint before
e and afte
er moving the mach
hine or a r otating laser has too be used.
NO
OTE!
Wh
hen movin
ng the exccavator it is recomm
mended too use a laser
recceiver to achieve
a
th
he best ac
ccuracy.
oving the
e excavattor with th
he laser rreceiver:
Mo
Ti lt the lase
er transmi tter to the
e gradient already entered
e
into the sysstem. Set the
las
ser transm
mitter to any
a
heightt. Make su
ure that th
he slope in
n Xsite EA
ASY has been
b
set
to the same
e value. Go
G to the “Main men
nu” → “Laser”. Pres
ss the “Rigght arrow” button
tw
wice to entter page 3/3
3 and sw
witch the llaser ON. The laser can alsoo be contrrolled
with the “Po
ower” buttton.
ove the bo
oom slow ly in a wa
ay that the
e laser rec
ceiver hits
s the laserr beam. It is
Mo
recommend
ded to movve the dip
pper stick to a posittion as up
pright as ppossible when
w
reaching th e laser be
eam. The laser rece
eiver sym bol on the
e screen i ndicates laser
hitts. The la ser hit ha s been ac
ccepted w
when the te
ext “Hold!” changess to “Hit
ac
ccepted!” and the b lack back
kground ch
hanges to
o a white backgroun
b
nd as shown
be
elow.
Slope meeasureme
ent
57
7
Zero the
e reading at the slope’s startting point (“Starting level” = ““0.00” in the
t
example
e).
Measure
e the slop
pe.
ew place. Then move the las
ser receiveer into the
e beam ass
Move th e excavattor to a ne
shown b
below. It iss recommended to move the
e dipper sttick to a pposition as
s upright as
a
possible
e when rea
aching the
e laser be
eam. The laser rece
eiver symbbol on the
e screen
indicate s laser hitts. The laser hit ha s been ac
ccepted when
w
the teext “Hold!!” changess
to “Hit a
accepted!”” and the black
b
bac kground changes
c
to a white backgrou
und.
58
5
Sllope mea surement
Th
he digging
g process can be co
ontinued a
and the sllope is me
easured inn comparison to
the original reference
e level.
oving the
e excavattor using the zero function:
Mo
W hen meassuring a s lope, the excavatorr can be moved
m
via
a the zero function.
Me
easure th e slope. I n the example, the “Starting level” is “0.00”.
“
ove the m
machine to
o a new place. Afterr the exca
avator has
s been mooved, reac
ch to the
Mo
me
easuring point on t he comple
eted surfa
ace and ze
ero the measuremeent value by
prressing the
e “0.0” bu
utton. After zeroing,, the digg ing proces
ss can bee continued.
Dis
stance meeasureme
ent
59
9
9. Disttance measur
m
rement
Select a screen view
v
which
h indicatess the hori zontal dis
stance fro m the zerro point to
o
the buckket measu
uring point.
Check th
he system
m accuracy
y before starting
s
to operate (also
(
see
“Accurac
cy check”)).
When m
measuring the horizo
ontal dista
ance, the starting point
p
alwaays is “0.00”. The
measure
ement val ue is zero
oed at the
e starting point.
p
The
e display sshows the
e distance
e
from the
e starting point to th
he bucket .
Move th e bucket to a stake
e or anoth
her referen
nce point. Zero the measurement valu
ue.
The read
ding “0.00
0” appears
s on the sscreen.
he bucket is moved away fro m the exc
cavator, th
he distancce value in
ncreases.
When th
When th
he bucket is moved nearer to
owards the
e excavattor, the disstance va
alue
decreasses.
60
Target levels
10. Target levels
The user can set four reference levels: top level, high level, target level and low
level.
To set limits for the reference levels, go to “Main menu” → “Target levels” →
“Limits”. Choose the level to be edited using the “Right” and “Left” arrow key and
press “EDIT”.
Target level default settings:
Level
XD2 colour
Top level
Yellow arrow pointing Above the target level,
downwards
8-15 cm
High level
Blue arrow pointing
downwards
Above the target level,
3-8 cm
Green line
Target level +/- 3 cm
Target level
Default values
Sound
_¯
_¯
_¯
_¯
̶ ̅
̶ ̅
̶ ̅
_¯
̶ ̅
_¯
̶ ̅
̶̶̶̶̶̶̶̶̶̶̶̶̶̶̶̶̶̶̶̶̶̶̶̶̶̶
Low level
Red arrow pointing
upwards
Below the target level,
3-8 cm
̶_
̶_
̶_
̶_
̶
To switch the target level sounds ON or OFF, go to “Main menu” → “Display unit” →
“Sounds” and press the “OK” button in the “Target” selection.
The setting of the target level mode determines which measurement type the target
level function complies with. Set the target level mode in “Main menu” → “Target
levels” → “Mode”. Choose depth, distance, slope, laser jobsite height or auto as
target level.
The jobsite target level can be adjusted in “Main menu” → “Laser” → page 2/3
“Jobsite target height”.
If the laser jobsite height is 100 m, for example, (the rotating laser is set to a height
of 100 m) and the jobsite target height is 95 m, the XD2 LED display shows a green
light when the bucket measuring point is 5 m below the laser beam.
Taarget leve
els
61
1
10.1. T he XD2 LED dis
splay
CAU
UTION
Epilepsy
y warning
g
Some pe
eople are susceptib
ble to epile
eptic seizuures or loss of
consciou
usness wh
hen expos
sed to certain flashiing lights or light
patterns.
• Im
mmediatelyy disconti nue use and
a
consuult a docto
or if any off
the
e followin g sympto ms occur while usinng the Xsite EASY
or the XD2 LED display: dizzin
ness, blur red vision
n, eye or
uscle twitcches, loss
s of consc
ciousness , disorientation or
mu
n.
an
ny involun tary move
ement or convulsion
c
The XD2
2 LED dissplay is an
n optional accessorry. It indicates the hheight diffference
between
n the buckket measu
uring pointt and the target surrface with light sign
nals.
In the piicture belo
ow the bucket mea suring point curren
ntly is at thhe target surface.
1.
2.
3.
4.
Top lev
vel/ yellow
w
High le
evel/ blue
Target level/ gre
een
Low lev
vel/ red
he brightn
ness of the XD2 LE
EDs, go to “Main me
enu” → “T
Target leve
els” →
To set th
“Limits” and selecct the 5/5 page. Se lect “LIST
T” and cho
oose “Brigght”, “Medium” or
“Dim”.
62
6
W
Warning le
evels
11
1. Warn
ning lev
vels
CAUTIO
ON
Ris
sk of inju
ury cause
ed by mov
ving machine partts!
Du
uring the controlling
c
g of the t ool the machine’s
m
compone
ents and
or autom atically. Rotating
asssembly groups are
e moved manually
m
R
an d/or linea
arly movin
ng compo
onents and
d assembbly groups
s of the
ma
achine can
n cause s evere inju
uries and material ddamages.
y Keep p
persons away
a
from
m the maachine’s and
a
the
tool’s w
working ra nge respe
ectively.
y Remove
e objects from the machine’ss and the tool’s
working
g range re
espectively
y.
• Do not interfere with
w
the moving
m
co mponents
s during
on.
operatio
• Always switch off
o the ma
achine beefore leav
ving the
w
the machine
m
iss standing
g still.
driver’s seat or when
Th
he warnin
ng level function gives an
n alarm if
i the bucket or boom rea
aches a
prredefined warning le
evel.
IM
MPORTANT!
Th
he warning
g level fun
nction doe
es NOT stop the moovement of
o the
bo om!
Th
he warning
g level fun
nction doe
es NOT gu
uarantee yyour safetty!
Ple
ease obse
erve the ssecurity in structions
s in this m
manual.
Th
here are fo
our warni ng levels:
1
2
3
4
Higgh limit
Low
w limit
Farr limit
Neaar limit
Warrning leve
els
63
3
The sys tem meassures the position o
of the pivo
otal points
s: the tip oof the bucket, the
point betw
ween the bucket
b
and
d the stick
k and the pivotal pooint betwe
een the
pivotal p
stick and
d the boo m.
Some pa
arts of the
e bucket or
o boom m
may reach the warning levelss before th
he system
m
gives th e alarm. Therefore
T
a safety margin ha
as to be applied whhen setting
g a warnin
ng
level (se
ee drawin g below).
To set a warning level go to
t “Main m
menu” → “Warning
“
levels” annd choose
e one of th
he
four warrning leve ls.
For exam
mple, to set
s the hig
gh limit go
o to “Main menu” → “Warningg levels” → “High
limit”. If the high limit
l
is OF
FF, switch
h it ON by pressing “CHNG”. Press the
e “Right
arrow” to
o proceed
d. Lift the boom up until the bucket
b
or boom is nnear the favoured
high lim it and pre
ess “SET”.. The upp er reading
g on the screen
s
is tthe set wa
arning lev el
(values of high an
nd low lim
mit are com
mpared to the main boom’s ppivotal poiint and
values o
of far and near limitt are comp
pared to the
t
rotatin
ng centre ppoint (/piv
vot bogie)
of the m
machine). The
T
lowerr reading in parenth
heses is the curren t position of the
bucket.
When th
he warning
g level ha
as been se
et, go bac
ck by pressing “EXIT
T” (bucke
et button).
64
Warning levels
If any of the pivotal points reaches the predefined limit, the system alarms the
operator in the following ways:
•
•
•
Warning sound
Warning message in the screen’s status bar
Exclamation mark blinking on the XD2 light bar
(XD2 is an optional accessory)
To switch OFF the high/low/far/near limit go to “Main menu” → “Warning levels” →
“High/Low/Far/Near limit”. Press “CHNG” to switch the warning level function OFF.
Go back by pressing “EXIT” (bucket button).
IMPORTANT!
After the excavator has been moved, the warning levels have to
be reset.
Service and Maintenance
65
12. Service and Maintenance
The product has been developed to meet a high degree of operational reliability.
All electronic components are enclosed in robust housings to safeguard them
against any possible mechanical damage.
Nevertheless the device as well as the junction and connection cables should be
periodically checked for potential damages and soiling.
The product’s service and maintenance may only be carried out by
qualified specialized personnel.
CAUTION
Risk of injury caused by inappropriate service!
Inappropriate service can lead to severe personal injuries or
material damages.
y Have service operations exclusively carry out by
suitably qualified personnel.
y Before starting operation ensure suitable mounting
conditions.
y Care for order and cleanliness at the mounting site!
Assembly parts and tools loosely lying about or on
top of each other are accident sources.
NOTE ON CLEANING:
Do not on any account clean the display with agents containing
abrasive substances. Otherwise the surface will be scratched and
tarnished and the display gets complicated to read.
1)
Switch off the product.
2)
Put standard cleaning agent on a soft, lint-free cloth.
3)
Clean the display without applying any pressure.
4)
With a clean cloth, completely remove the cleaning agent.
66
Technical data
13. Technical data
Xsite EASY display unit
Display size
Resolution
Operating voltage
Power consumption
IP classification
Operating temperature
Dimensions
Weight
I/O
2.7”
128 x 64 pixels
10... 36 VDC
2W
IP44
-20°C... +60°C
132 mm x 144 mm x 45 mm
(without RAM mount)
0.4 kg
CAN
G1 sensor
Measuring axes
Resolution
Measuring range
Operating voltage
Power consumption
IP classification
Operating temperature
Dimensions
Weight
I/O
X, Y, Z (three axes)
0.05°
360° per axis
10...36 VDC
2.5 W (heating on), 1 W (heating off)
IP67
-20°C...+60°C
98 mm x 41 mm x 33 mm
0.2 kg
CAN
EL2 laser receiver
Receiving angle
Receiving area
Resolution
Operating voltage
Power consumption
IP classification
Operating temperature
Dimensions
Weight
I/O
Compatible lasers
180°
150 mm
5 mm
10...36 VDC
2.5 W
IP67
-20°C...+60°C
315 mm x 96 mm x 55 mm
0.7 kg
CAN, RS-232
Rotating lasers (visible light and infrared)
Technical data
XD2 LED display
LED type
Number of LEDs
Operating voltage
Power consumption
IP classification
Operating temperature
Dimensions
Weight
I/O
RGB
50
10...36 VDC
<2 W (type)
IP43
-20°C...+50°C
120 mm x 60 mm x 25 mm
(without RAM mount)
0.04 kg
2 x CAN
67
68
6
De
eclaration
ns of con
nformity
14
4. Decla
aration
ns of co
onformiity
Declara
a tions of conform
m ity
69
9
Notes:
03/2013
Copyright by
MOBA Mobile Automation AG
Kapellenstraße 15
65555 Limburg
Internet: www.moba.de