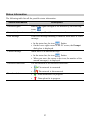
1
Wonderful Communication, Mobile Life.
Wireless Broadband
User Manual
Copyright © 2007 Huawei Technologies Co., Ltd.
All Rights Reserved
No part of this manual may be reproduced or transmitted in any form or by any
means without prior written consent of Huawei Technologies Co., Ltd.
Trademarks
and HUAWEI are trademarks of Huawei Technologies Co., Ltd. All other
trademarks mentioned in this manual are the property of their respective holders.
Notice
The information in this manual is subject to change without notice. Every effort
has been made in the preparation of this manual to ensure accuracy of the contents,
but all statements, information, and recommendations in this manual do not
constitute the warranty of any kind, expressed or implied.
Contents
1 Descriptions of the Wireless Broadband GUI ......................................................................1
Launch the Wireless Broadband....................................................................................1
Interface Overview ........................................................................................................1
2 Internet Services....................................................................................................................3
Accessing the Internet ...................................................................................................3
Statistics Information.....................................................................................................3
3 Text Message.........................................................................................................................5
Creating and Sending a Message ..................................................................................5
Inbox ..............................................................................................................................5
Outbox ...........................................................................................................................7
Important, Draft, Deleted and Reports ..........................................................................7
Viewing a Message in the SIM/USIM Card .................................................................7
Text Message Settings ...................................................................................................8
4 Phonebook...........................................................................................................................10
Phonebook Management in Local...............................................................................10
Phonebook Management in the SIM/USIM Card.......................................................12
Import/Export ..............................................................................................................13
5 Settings and Information Query..........................................................................................15
Switching a Language .................................................................................................15
PIN Operations ............................................................................................................15
Choosing a Device.......................................................................................................16
Viewing Diagnostic Information .................................................................................16
Startup Settings............................................................................................................17
Network Settings .........................................................................................................17
Connection Profile Settings.........................................................................................18
6 FAQs....................................................................................................................................20
7 Acronyms and Abbreviations..............................................................................................21
i
1
Descriptions of the Wireless
Broadband GUI
Launch the Wireless Broadband
To launch the Wireless Broadband, double-click the shortcut icon of the Wireless
Broadband on the desktop.
Note:
y If you are required to enter the Personal Identification Number (PIN) code, enter
the correct one and click OK. If you fail to enter the correct PIN or PIN
Unblocking Key (PUK) code, the network-related functions are unavailable.
y Contact your service provider for whether a Subscriber Identity Module (SIM)/
UMTS Service Identity Module (USIM) card is needed.
y The SIM/USIM card is supplied by the service provider. For details, contact
your service provider.
Interface Overview
Shortcut Icons
The following table lists the shortcut icons provided by the Wireless Broadband.
Click…
To…
Display the Connect interface.
Query the statistics of the transferred data.
Display the Text interface.
Display the Phonebook interface.
1
Status Information
The following table lists all the possible status information.
Status Information
Network signal
Description
Indicate the signal strength of the network by the following
icons:
Network information
Display the profile of the current network.
New message
If the Text message handling is enabled, when there is a new
message:
Unread message
flashes.
y In the status bar, the icon
y On the lower right corner of the PC screen, the Prompt
dialog box is displayed.
When there is an unread message:
Network connection
y In the status bar, the icon
flashes.
y When you move the cursor to the icon, the number of the
unread message(s) is displayed.
The information of the network connection:
Transferred data
y
: The network is connected.
y
: The network is disconnected.
y
: Data download is in progress.
y
: Data upload is in progress.
2
2
Internet Services
Accessing the Internet
After setting the network and connection profiles, you can access the network through the
Wireless Broadband.
You can do as follows to connect the network.
1.
2.
3.
4.
to display the Connect interface.
Click
Select the network type and a correct profile.
Click Connect to set up the connection.
Launch the browser on the PC to access the internet.
Note:
y When the connection is established, the statistics interface displays the details of
the current network, including connected duration, data statistics, transferred
rate and so on.
y When the connection is established, click Disconnect to disconnect from the
network.
Statistics Information
You can use the Statistics function to check the traffic of the network.
Viewing the Statistics Information
You can do as follows to view the statistics information:
1.
2.
y
y
to display the statistics interface.
Click
In the navigation tree, click the following tabs to display the corresponding diagram.
Transfer: View the uploaded/downloaded speed and data of the current connection.
Statistics: View the current connected duration, last reset time, and
daily/monthly/yearly uploaded and downloaded data.
3
Note:
The statistical data of the traffic is only for your reference. The actual traffic
information is accounted on the basis of the traffic data collected by the operator.
Resetting the Statistics Information
You can operate as follows to reset the statistics information:
1.
2.
3.
In the navigation tree, right-click a tab.
Choose Reset Statistics.
In the Confirm dialog box, click Yes.
4
3
Text Message
The Wireless Broadband provides Text message services. The local mailbox can store the
messages without capacity limitation and can be easily managed.
Creating and Sending a Message
1.
Click
to display the Text interface.
2.
3.
y
y
4.
5.
y
y
y
Click
to display the New interface.
Enter the recipient number by one of the following options:
Click Send To.... Then select a phone number in the Select Number interface.
Enter the recipient number directly.
Enter the message content.
After the edit, you can choose the following options:
Click Send: To send the message.
Click Save: To save the message in the draft.
Click Close: To exit from editing the current message. If you click Yes in the Confirm
dialog box, the message can be saved in the Draft.
Note:
y You can group send a message to up to 20 phone numbers. Each number should
be separated by ";".
y You can enter up to 2,048 characters in a message each time.
Inbox
Inbox stores the received messages.
To display the Inbox interface, do as follows:
1.
2.
to display the Text interface.
Click
Choose Local > Inbox to display the Inbox interface.
5
Searching a Message
Click
content.
. Then enter the name/phone number of the message sender, part of the message
Note:
y You can enter part of the message content to search.
y When you search the message, a list of the matched messages is updated
automatically according to your entered information. The matched contacts in
the searched group are displayed. None is displayed when no matched message
can be searched.
Viewing a Message
You can view a message in the inbox as follows:
1.
2.
3.
y
y
y
y
y
y
Display the Text interface and select a message to read.
Click the selected message.
The name and phone number of the message sender, message content and receiving
time are displayed below the message list.
Right-click the selected message for the following options:
Edit: Re-edit the message.
Reply: In the Edit interface, re-edit the message and send it to the message sender.
Forward: Forward the message to another person
Save Number: In the New Contact interface, enter other information and save the
contact.
Delete: Delete the message.
Delete All: Delete all the messages in the inbox.
Note:
y You can press and hold Shift or Ctrl, and click the selected messages; or you
can press Ctrl + A to select all the messages in the list.
y The messages deleted from the inbox are stored in the Deleted box.
y You can forward only one message a time.
You can also click the shortcut icons above the message list to perform the following
operations:
y
: Reply the selected message.
y
: Forward the selected message.
y
: Delete the selected message.
6
Outbox
Outbox stores the sent messages, including the messages sent both successfully and
unsuccessfully.
To display the Outbox interface, do as follows:
1.
2.
to display the Text interface.
Click
Choose Local > Outbox to display the Outbox interface.
Note:
For details, refer to "Inbox" on page 5.
Important, Draft, Deleted and Reports
Important stores your important messages.
Draft stores the drafts of messages.
Deleted stores the messages deleted from the local mailbox.
Reports stores the delivery notifications after sending messages.
Note:
y For details, refer to "Inbox" on page 5.
y The Deleted box does not store the messages deleted from the SIM/USIM card.
y If you delete the messages in the Deleted box, the messages will be deleted
permanently. Be cautious with your operation.
Viewing a Message in the SIM/USIM Card
If a SIM/USIM card is used in your terminal, you can save the sent and received messages
in the SIM/USIM card.
The operations to the messages in the SIM/USIM card are as same as those to the messages
in the local message box. For details, refer to "Inbox" on page 5.
Note
y Contact your service provider for whether a SIM/USIM card is needed.
y The SIM/USIM card is supplied by the service provider. For details, contact
your service provider.
7
y If your terminal does not need a SIM/USIM card, you can save the sent and
received messages in the terminal. The operations to the messages in the
terminal are as same as those to the messages in the SIM/USIM card.
You can move a message from the SIM/USIM card to the local inbox or local outbox.
1.
2.
3.
4.
y
y
5.
to display the Text interface.
Click
Click the SIM/USIM tab.
Select one or more contacts in the contact list and right-click.
Right-click the selected message(s) for the following options:
Move to Local: Move the selected messages from the SIM/USIM card to Local.
Move All to Local: Move all the messages from the SIM/USIM card to Local.
In the Confirm dialog box, click OK.
Note:
y When the messages in the SIM/USIM card are moved to Local, the messages
are deleted from the SIM/USIM card.
y The received messages in the SIM/USIM card are moved to the local inbox, and
the sent messages in the SIM/USIM card are moved to the local outbox.
Text Message Settings
Choose Tools > Option, and click the Text Message folder.
Text Message Alerts Settings
In the Text message handling area, you can select the visual prompt and audio prompt.
Option
Show a notification
when a new text
message arrives
Play a sound when a
new text message
arrives
Description
When there is a new message, a dialog box is displayed.
Then you can:
y Click View to view the new message.
y Click Close to view the message later.
y Click Browse to select a sound file.
y Click Test to play the sound; click Stop to stop playing
the sound.
When there is a new message, the selected sound is played.
8
Note:
The sound file must be a *.wav file.
Setting the Text Centre SMSC Number and Message Validity
The information of text centre number is provided with the SIM/USIM card. When the
SIM/USIM card is inserted, the information is changed automatically. If the information is
null or you delete the information by accident, contact your card provider.
The message validity is the period for storing messages in the text centre, including such
options as 12 hours, 24 hours, 30 days and Maximum.
Requesting a Delivery Report
You can select Request delivery report to enable the delivery report function.
When the function is enabled, the network can deliver a status report of the sent message.
9
4
Phonebook
You can manage contacts in the phonebook conveniently by the Wireless Broadband.
Phonebook Management in Local
You can do as follows to enter the local phonebook:
1.
2.
to display the Phonebook interface.
Click
Click Local in the navigation tree.
Creating a Contact
1.
2.
3.
Click
to display the New Contact interface.
Enter the information.
Click OK to save the contact.
Note:
The contact information cannot be null or contain spaces or new-line characters
only.
Searching a Contact
Click
. Then enter the contact information.
Note:
y You can enter part of the contact information to search. Each field of the contact
can be supported.
y When you search the contact, the contact list is updated automatically according
to your entered information. The matched contacts in the searched group are
displayed. None is displayed when no matched contact can be searched in the
group.
10
Viewing a Contact
You can view a contact as follows:
1.
2.
3.
y
y
y
Enter the local phonebook, select a contact to view.
Click the selected message.
The contact name, mobile number, office number, home number, E-mail address and
remarks are displayed below the contact list.
Right-click the selected message, and you can do as follows:
Edit Contact: Change the information of the contact.
Delete Contact: Delete the contact.
Send: Send a message or name card to the mobile number of the contact.
You can also click the shortcut icons above the contact list to perform the following
operations:
y
: Edit the selected contact.
y
: Delete the selected contact.
y
: Send a message or name card to the mobile number of the contact.
Group Management
You can create a group to manage the local contacts by category.
Creating a Group
You can create a group to manage local contacts by category.
1.
2.
Right-click Local in the navigation tree, and choose New Group.
Enter the group name.
Note:
y The group name cannot be null or identical to any existing one.
y You can manage only local contacts by group.
Modifying a Group Name
1.
2.
3.
Select a group to modify.
Right-click the selected group in the navigation tree, and choose Rename Group.
Enter the new group name.
Note:
You cannot rename the two default groups, Local and SIM/USIM Card.
11
Adding a Contact
You can add a contact from Local to another group as follows:
1.
2.
Select one or more contacts in Local.
Drag the selected contacts to another group.
Note:
When you drag the selected contact(s), if you press and hold Ctrl, the contact(s)
can be copied to another group; otherwise, the contact(s) are moved to another
group.
You can add a contact to a group as follows:
1.
Select a group in the navigation tree.
2.
3.
; or right-click in the contact list and choose New Contact.
Click
Enter the information.
Removing a Contact
1.
2.
3.
Display the contact list of a group.
Select a contact to remove.
Right-click the selected contact and choose Remove from Group.
Note:
The contact is removed from the group but not deleted.
Deleting a Group
1.
2.
Right-click a group in the navigation tree and choose Delete Group.
Click OK.
Note:
When you delete a group, contacts in the group cannot be deleted. They are still in
the phonebook of Local or in other groups.
Phonebook Management in the SIM/USIM Card
You can save the contacts in the SIM/USIM card.
The operations on the contacts in the SIM/USIM card are similar to those on the contacts in
Local. For details, refer to "Phonebook Management in Local" on page 10.
12
Note:
y Contact your service provider for whether a SIM/USIM card is needed.
y The SIM/USIM card is supplied by the service provider. For details, contact
your service provider.
y If your terminal does not need a SIM/USIM card, you can save the contacts in
the terminal. The operations to the contacts in the terminal are as same as those
to the contacts in the SIM/USIM card.
Import/Export
You can export the contacts from Local or the SIM/USIM card to a *.csv file, and import
the contacts from a *.csv file to phonebook in Local or the SIM/USIM card.
Note:
In the local phonebook, select one or more contacts. Drag the contact(s) to the
SIM/USIM card in the navigation tree. Then the contact(s) are exported to the
phonebook of the SIM/USIM card.
Importing Contacts
You can import the contacts from a *.csv file to the local phonebook or the SIM/USIM
card.
1.
2.
3.
4.
5.
6.
to display the Phonebook interface.
Click
Click Local or SIM/USIM in the navigation tree.
Right-click the contact list and choose Import….
Choose a file to import. Click Open to display the Map interface.
Drag the value in the file to the corresponding field on the right respectively.
Click OK.
Note:
y The maximum number of contacts that can be saved in the SIM/USIM card is
subject to the capacity of the SIM/USIM card.
y When you import contacts to the SIM/USIM card, if its capacity is full, the
import stops automatically. The content of the imported contacts is not affected.
13
Exporting Contacts
You can export contacts from the local phonebook and the SIM/USIM card. The exported
contacts can only be saved in a *.csv file.
to display the Phonebook interface.
1. Click
2. Click Local or SIM/USIM in the navigation tree.
3. Choose one of the following operations:
y Right-click the contact list and choose Export All Contacts.
y Choose one or more contacts and right-click to choose Export Selected Contacts.
4. Choose the path to save the contact(s).
5. Enter the file name and click Save.
Note:
You can press and hold Shift or Ctrl, and click the selected contacts; or you can
press Ctrl + A to select all the contacts in the list.
14
5
Settings and Information Query
Switching a Language
The Wireless Broadband provides several interface languages for you.
During the running of the software, you can choose Tools > Language to switch the
languages.
PIN Operations
If a SIM/USIM card is used in your terminal, the Personal Identity Number (PIN) code
protects your card from unauthorized use. You can modify the PIN code and enable/disable
the PIN verification.
Note:
The PIN code and PIN Unblocking Key (PUK) code are provided along with your
SIM/USIM card. For details, contact your service provider.
Enabling/Disabling the PIN Verification
You can enable the PIN verification. If it is enabled, you need to verify the PIN code when
launching the Wireless Broadband again.
y To enable: Choose Tools > PIN Operations > Enable PIN Verification.
y To disable: Choose Tools > PIN Operations > Disable PIN Verification.
Modifying the PIN Code
1.
2.
3.
4.
Choose Tools > PIN Operations > Modify PIN.
In the Modify PIN dialog box, enter the current PIN code and the new PIN code.
Enter the new PIN code again.
Click OK to complete the modification.
Note:
The PIN code should be a numeric string of 4–8 digits.
15
Entering the PIN Code
When the PIN verification is enabled, you need to enter the correct PIN code to use the
network-related functions.
1.
2.
3.
After the Wireless Broadband is launched, the Enter PIN dialog box is prompted.
Enter the correct PIN code.
Click OK to complete the verification.
Note:
If you enter wrong PIN codes for a preset number of times, the SIM/USIM card is
locked and you cannot use it until you enter the PUK code. The Wireless
Broadband prompts you the remaining number of attempts for entering the PIN
code or the PUK code.
Unlocking the PIN
1.
2.
3.
4.
When the SIM/USIM card is locked, the Unlock PIN dialog box is displayed after you
start the Wireless Broadband.
Enter the correct PUK code.
Enter the new PIN code.
Click OK to complete the modification.
Choosing a Device
The Wireless Broadband can support different terminal products.
When the Wireless Broadband is launched, it searches the matched terminal automatically.
If two or more terminals are found, the connected terminals are displayed on the Choose
Device interface. You can choose a terminal to run and click OK.
If two or more supported terminals are connected with the PC, you can change or choose a
device during the running of the Wireless Broadband.
1.
2.
3.
Choose Tools > Choose Device.
Select a device in the device list.
Click OK to terminate the current terminal and switch to the selected one.
Viewing Diagnostic Information
Choose Tools > Diagnosis to view the information of the Wireless Broadband and
SIM/USIM card, such as the number of messages and contacts saved in the SIM/USIM
card, firmware version, hardware version, and IMSI number.
16
Note:
y The number of messages/contacts in the SIM/USIM card is displayed as
XX/YY. XX means the number of messages/contacts and YY means the
capacity of the SIM/USIM card.
y The diagnostic information is subject to the terminal that is used.
Startup Settings
You can set the Wireless Broadband to launch automatically along with Windows and
minimize the interface after the startup.
1. Choose Tools > Options.
2. Click General in the navigation tree.
3. You can choose the following options:
y Select Launch on Windows startup: The Wireless Broadband launches automatically
along with Windows.
y Select Minimize window on startup: The interface of the Wireless Broadband is
automatically minimized after the Wireless Broadband is launched.
4. Click OK to complete the settings.
Network Settings
To display the Network interface, you can do as follows:
1.
2.
Choose Tools > Options.
In the navigation tree, click Network.
Selecting a Network Type
You can select different network types to quickly search and access the network.
1.
2.
3.
4.
5.
Click the Network Type tab.
In the Network Type drop-down combo box, select the corresponding network type.
In the Band down-drop list box, select the corresponding frequency band.
Click Apply.
Click OK to save and enable the settings.
Selecting a Registration Mode
You can set the searching and registration mode after selecting the network type.
1.
2.
Click the Registration Mode tab.
Select Auto search and register or Manual search and register.
17
Auto Search and Register
When you select Auto search and register, the terminal product can automatically search
and register to a supplied network.
Manual Search and Register
1.
2.
3.
4.
Select Manual search and register.
Click Refresh.
Select an operator name in the list.
Click Register.
Connection Profile Settings
To display the Dial-Up interface, you can do as follows:
1.
2.
3.
Choose Tools > Options.
In the navigation tree, click Profile Management.
Click the Dial-Up tab.
Note:
For details about setting the profile, contact your service provider.
Creating a Dial-up Profile
1.
2.
3.
4.
5.
Click New to set the profile name, access number, user name, password, Access Point
Name (APN) and APN status, and select a default device.
Click Advanced to set the IP information, authentication protocol, Domain Name
Server (DNS) and Windows Internet Name Service (WINS).
Click OK to save the advanced settings and return to the Dial-Up interface.
Click OK and the Prompt dialog box is displayed.
Click Yes to save the settings; or click No to cancel the settings.
Editing a Dial-up Profile
1.
2.
3.
4.
5.
6.
In the Profile Name drop-down combo box, select a setting.
Click Edit to modify the profile name, access number, user name, password, APN
name and APN status, and select a default device.
Click Advanced to set the IP information, authentication protocol, DNS and WINS.
Click OK to save the advanced settings and return to the Dial-Up interface.
Click OK and the Prompt dialog box is displayed.
Click Yes to save the settings; or click No to cancel the edits.
Deleting a Dial-up Profile
1.
In the Profile Name drop-down combo box, select a setting.
18
2.
3.
Click Delete and the Prompt dialog box is displayed.
Click Yes to delete the setting; or click No to cancel the deletion.
Importing a Dial-up Profile
1. Click Import and the Import interface is displayed.
2. You can choose the following options:
y Select the 3G/GPRS network operator(s) in the list.
y Click Browse and choose a *. prof file to import. Then click Open.
3. In the Import interface, click OK.
Exporting a Dial-up Profile
1.
2.
3.
Click Export and the Export interface is displayed.
Select one or more network operators and click OK.
Select the path to save the file and enter the file name. Then click Save.
Note:
The dial-up profile of the selected operator is exported to a *. prof file (a
configuration file).
19
6
FAQs
What shall I do if I cannot access the Internet?
1.
2.
3.
Check the network signal strength.
Check whether you have activated the wireless online service. You can ask the local
network operator on how to activate it.
If the wireless online service is activated, check network settings according to the
instructions in "Internet Services" on Page 3.
Why only part of the pasted content can be displayed during the
edit?
When editing a message, at most 2048 characters can be entered. If the quantity of the
pasted information exceeds the limit, the exceeding part will be deleted automatically.
When a message is received, no prompt is displayed. Why?
You have not set the vision alert of messages.
Choose Tools > Options > Text message handling. In the Text message handling area,
select Show a notification when a new text message arrives.
Why the phone number cannot be pasted?
A valid phone number can only contain "0123456789#*+". Confirm that no other character
is in the cut or copied text.
20
7
Acronyms and Abbreviations
Numerics
3G
The Third Generation
A
APN
Access Point Name
D
DNS
Domain Name Server
G
GPRS
General Packet Radio Service
GSM
Global System for Mobile communications
P
PIN
Personal Identification Number
PUK
PIN Unblocking Key
S
SIM
Subscriber Identity Module
U
USIM
UMTS Service Identity Module
W
WINS
Windows Internet Name Service
21