1
Kilpatrick Format // Modular Synthesizer // System Manual
Enclosure and Module Installation
Enclosure Setup
The smallest size of one module is called a space and occupies a quarter rack width.
Larger modules may occupy two or more spaces. An enclosure generally provides four
spaces and fits into a 19” equipment rack. Other sizes such as five or six spaces can be
custom ordered. Rack ears are used for rack mounting, and stacking brackets are used to
attach two enclosures together for table-top use.
Enclosures can be ordered as active or passive. Active enclosures take power from an
external power supply and generate power for modules internally. Passive enclosures take
power from an active enclosure to add additional modules to the same power supply. An
active enclosure can power approximately 8-12 modules.
When using multiple active enclosures together in the same system it is necessary to
connect a ground cable between systems. Banana sockets are provided on each enclosure
for this purpose. Connect a short banana cable between the systems and always ensure it
is in place before powering up your system. Only connect one of the enclosures to external
equipment such as mixers or amplifiers to prevent ground loops.
Power Supply
The Kilpatrick format system uses a single 15V regulated switching power supply to feed the system.
The power input is located on the back of an active enclosure. Only use the included 15V regulated
power supply for powering the system. Use of other types of power supplies could damage the system.
Module Installation
Modules use a plug-and-play system and requires no internal cables. A single captive
screw is used to secure the module to the enclosure. Never install or remove modules
with power applied!
To remove a module:
• Power down the system
• Loosen the captive screw with the included 2.5mm hex key
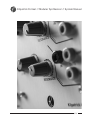
• Plug a banana cable into two jacks near the top or bottom of the module
• Grip the banana plugs and gently pull the unit out at one end
• Gently lift the module up out of the enclosure until the internal connectors are completely unplugged
// 6 //