1
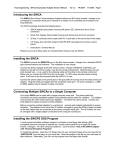
U S E R
M A N U A L
Procomm® and Windows® are registered trademarks of Datastorm Technologies and
Microsoft respectively.
No part of this document may be photocopied or reproduced without the prior written
consent of Novel Ways Limited.
While every effort has been made to ensure the accuracy of the information in this
manual, Novel Ways Limited accepts no responsibility for any errors or their
consequences.
The contents of this manual are subject to change without notice.
Version NW/0507
GrassMaster II user guide
Contents
Features
1
Assembling the GrassMaster
2
One step
2
Quick-start instructions
4
Taking readings
4
Making corrections
5
Displaying readings
6
More detailed explanation
7
Best time to measure
7
Taking readings
7
Manual Entry of Dry Matter Estimate
9
Pausing the GrassMaster
9
Paddock memories
9
FAST and SLOW measurement speeds
10
Readings per paddock
11
Continue to a different paddock
11
Error message
11
Cleaning
12
Downloading paddock data
13
Auto viewing all paddocks
13
GrassMaster II user guide
i
Downloading in Windows® 95/98/2000/NT
Downloading in Windows® 3.1x
14
Clearing all paddock data
18
Battery charging
19
GrassMaster care
21
Capacitance measurement system
22
Calibration
23
How the dry matter density is calculated
23
Adjusting the calibration
23
Post-Grazing Residual Pasture Measurements
24
Installing a new calibration
25
Resetting
27
ii
13
GrassMaster II user guide
Features
Simple one-handed operation.
Easy to use keypad.
16-character alphanumeric display with audible 'beep' prompt.
Calculates dry matter in kilograms per hectare (or pounds per
acre).
Store results from 200 paddocks.
No data loss, even with a flat battery.
2 measurement modes, fast and slow.
User adjustable calibration for different pasture conditions.
Internal Ni-Cad battery.
Battery charger included: no risk of over charging.
Auto power-off when not in use.
Low battery warning.
Downloading of paddock information.
Fully waterproof and detachable indicator.
UNDO facility for removing accidental / incorrect measurements.
GrassMaster II user guide
1
Assembling the GrassMaster
The GrassMaster will arrive complete with:
GrassMaster indicator.
Probe.
Bottle of GrassMaster polish and cotton cloth.
Power box (battery charger / download unit).
User manual.
9 pin to 25 pin serial adaptor.
One step
Slide the GrassMaster indicator onto the probe.
The indicator must be fully engaged to ensure that the contacts align
with those on the probe.
If the indicator and probe are not fully engaged when measuring, the
WIPE PROBE & TIP error message will appear.
You should receive your GrassMaster indicator partially charged.
The GrassMaster should be charged for 16 hours before it is used
for the first time.
See Battery charging on page 19.
2
GrassMaster II user guide
GrassMaster II user guide
3
Quick-start instructions
Taking measurements
Wipe the probe using GrassMaster polish before every paddock. See
Cleaning on page 12.
until the
Press and hold
second beep to turn the indicator on.
Press
to start paddock
selection.
Press
or
paddock.
to move to the required
Press
to select.
Press
to confirm OK to delete
previous data, or press
cancel.
to
Hold the probe by the black handle
with the probe tip at least 30 cm above
the pasture.
Air readings are taken and displayed
until a valid datum is calculated.
The air reading is confirmed.
The GrassMaster is now ready to take
the first reading.
4
GrassMaster II user guide
Place the tip of the probe on the
ground until the indicator beeps.
First valid reading is displayed.
Move to next position and place the
tip of the probe on the ground until the
indicator beeps.
Second valid reading is displayed.
Repeat at least 30 times.
Press
when readings have
been taken for the current paddock.
Average value for the paddock is
displayed.
Press
Press
to start next paddock selection, or press
to end.
again to shut down.
Making corrections
If an invalid reading is displayed,
press
.
The previous valid reading is
displayed and an * will appear.
GrassMaster II user guide
5
Displaying readings
Press and hold
second beep.
Press
until the
to start paddock
selection.
Press
or
paddocks.
to move to the required
Press
to end. Press
again to shut down.
6
GrassMaster II user guide
More detailed explanation
Best time to measure
It is best to measure when conditions are dry, typically in the
afternoon, once dew has lifted and wind has dried the pasture.
In these conditions, you are less likely to encounter the
WIPE PROBE & TIP error message.
In similar pasture conditions, the GrassMaster readings are consistent,
with variations normally less than 5%.
In moist conditions, the readings may be up to 5% higher.
Taking readings
Wipe the lower 60 cm of the GrassMaster probe using the cotton
cloth, taking particular care to clean the tip. Do this prior to
measuring every paddock. Apply GrassMaster polish if required.
Always take the GrassMaster polish and cotton cloth with you.
until the second beep to turn indicator on.
Press and hold
Press
Press
to start paddock selection.
or
to move to the required paddock.
Hold the GrassMaster in the air about 30 cm above the ground and
pasture, and at least 20 cm away from your body.
Press
again to confirm OK to delete previous data and initiate
the air calibration. The indicator will beep when air calibration is
complete and you are ready to proceed with pasture measurement.
GrassMaster II user guide
7
Commence actual measurement by placing the probe quickly and
precisely into the pasture sward in front and to one side of you. Take
at least 30 individual measurements, more if possible. Walk past the
GrassMaster to ensure the probe is kept as vertical as possible in the
pasture sward.
It is important to keep the GrassMaster vertical for accurate readings.
Time your walking so that the GrassMaster beep coincides with the
probe being vertical in the sward. Measurements taken with the probe
at an angle may give erroneous readings.
Lift the probe well clear of the pasture sward and repeat the process.
The lifting process re-sets the probe for the next sample, and also tests
for dirt on the tip.
Do not allow the bottom of the probe to drag through the pasture
between measurements. This may cause false readings that would
decrease the paddock's average.
Press
to remove any false readings.
Do not hold the GrassMaster too close to your body because this
may influence the GrassMaster's readings. Hold the GrassMaster
in a comfortable position at least 20 cm away from your body.
To finish this paddock press
. The average dry matter yield
will be displayed in kilograms per hectare and stored in the
GrassMaster's paddock memory. The GrassMaster will then
automatically move to the next paddock for measurement.
8
GrassMaster II user guide
Manual Entry of Dry Matter Estimate
With the GrassMaster II a dry matter yield can be entered and
downloaded. To enter a manual estimate follow the steps to take a
reading as above. Once the air reading has been taken, press
and then press
or
to enter the manual dry matter estimate.
There are no relative capacitance readings associated with these
manual entries.
Pausing the GrassMaster
To temporarily stop taking readings within a paddock, perhaps to shift
a temporary fence, press
. Press
again to resume
taking readings for the paddock.
Paddock memories
The GrassMaster has 200 paddock memory locations. These are
displayed sequentially in a continuous loop. Press
or
to cycle
through them.
GrassMaster II user guide
9
Auto viewing all paddocks
Each paddock's data is stored in one of the GrassMaster's 200 memory
locations and can be viewed in sequence at any time.
Turn the indicator on and press
. It is not necessary to
connect the indicator to a computer to simply view the paddock data.
to select slow scrolling
Press
of the paddock data.
Press
to advance more quickly through the paddocks once in
the slow scroll mode.
FAST and SLOW measurement speeds
When in FAST measurement speed (the default), place the probe in
the pasture sward about every fourth step (about every 2 to 3 seconds).
Trying to proceed more often may result in a non reading.
Use FAST measurement mode for normal measurement purposes.
This allows you to get on with the job with reliable results.
Good measurement technique and keeping the probe vertical when it
reads (beeps) will give very good results.
When in SLOW measurement speed, place the probe ensuring that it
is vertical and stable when measuring. The GrassMaster will only
read (beep) when it sees stable readings. This results in very precise
and reliable data. At SLOW measurement speed, you may have to
pause for readings to take place, particularly in longer pasture swards.
SLOW is often suitable for normal use in shorter pasture situations.
See Installing a new calibration on page 25 for details of how to
change the measurement (walk) speed.
10
GrassMaster II user guide
Readings per paddock
Thirty readings is the minimum number normally required to get a
statistically sound average reading. Take more readings for long
pastures, as they tend to be more variable in cover.
The GrassMaster will allow you to take up to 250 individual readings
in a paddock. It will then automatically calculate and record the
average for that paddock. The number of readings taken is noted on
the screen at each reading.
Continue to a different paddock
Press
Press
Press
Press
to end previous paddock.
or
to select a new paddock.
to start walk.
to end. Press
again to shut down.
Error message
If the GrassMaster beeps and the error message
WIPE PROBE & TIP appears, there may be dirt on the tip of the
probe, or too much water, or not enough GrassMaster polish. Wipe the
probe, paying particular attention to cleaning the tip, then press
to continue.
Wait for the GrassMaster messages AIR READINGS OK and
YOUR WALK to occur before proceeding. The GrassMaster
will not have lost any pasture readings to that point, and will allow
you to continue and complete the paddock walk.
START
GrassMaster II user guide
11
Cleaning
Use only GrassMaster polish. This has been selected after extensive
testing for its water dispersing, non corrosive, non conductive, non
static, non staining and non toxic properties.
Do not use wax.
Apply a small amount of GrassMaster polish to the cotton cloth. Wipe
and polish the lower 60 cm of the GrassMaster, paying particular
attention to the tip. This will remove any moisture, dirt, dust, pollen,
and debris from the probe that may otherwise influence the
GrassMaster's air calibration readings.
It is important to use only cotton materials for your cloth as synthetic
materials will cause static electricity build up which may influence the
GrassMaster's pasture readings.
In moist conditions you may need to apply the GrassMaster polish
before every paddock.
A correctly polished GrassMaster will allow only small and well
dispersed water droplets to adhere to the probe when used in moist
conditions.
When individual GrassMaster pasture readings appear to be
progressively higher than expected, the probe may need polishing.
Avoid wiping GrassMaster polish onto the indicator and probe
contacts as this may interfere with readings and the
WIPE PROBE & TIP error message may appear.
12
GrassMaster II user guide
Downloading paddock data
The paddock data includes the paddock number, dry matter in
kilograms per hectare (or pounds per acre) and the relative capacitance
(CR) value. This information can be useful when using CR data to
derive your own calibration equations.
The GrassMaster will step through each paddock as it downloads the
data, and will indicate with a long beep when finished.
Downloading in Windows® 95/98/2000/NT
A program, Link_GM, is provided with the GrassMaster to
download GrassMaster readings to your personal computer. If you
do not have a copy of this program you can download it from the
Novel Ways website www.novel.co.nz.
1. Connect the GrassMaster to the selected serial port on the
computer via the GrassMaster power box.
2. Start the GrassMaster Link_GM on the computer.
or press F1 at any time for help with this program.
Click
to change the serial port setting if the
3. Click
GrassMaster is not connected to COM1.
4. Press and hold
GrassMaster on.
5. Click
6. Press
until the second beep to turn the
to enable the computer to receive data.
to start downloading data.
7. Data will scroll through the memo box. When the scrolling stops,
the download is complete.
GrassMaster II user guide
13
8. Click
to save the data to a text file. The file name is
GMYYMMDD.CSV where YY is the last 2 digits of the year, MM
is the month and DD is the day.
9. You can now open this file in a spreadsheet or feed budget
program. The program may prompt for a delimiter. Enter comma.
If the csv extension is associated with your spreadsheet you will be
able to open the file by double clicking the file name in Explorer.
Downloading in Windows® 3.1x
Connect the GrassMaster to a spare COM port on your PC via the
power box download cable. Take a note of the port number for
later use in set up.
In Program Manager start Terminal from the Accessories group.
If prompted about the default COM port to use, select the port you
have connected the GrassMaster to and click OK.
From the Settings menu, select Communications... , set the
following values and click OK.
Turn the GrassMaster on.
14
GrassMaster II user guide
To test the connection, press
on the GrassMaster.
Data will appear on the screen in Terminal as it appears on the
GrassMaster display.
When satisfied that it is working, press
GrassMaster to stop data transfer.
on the
To save the data to a file, from the Transfers menu select Receive
Text File... .
Type a filename to save the captured data to and click OK.
GrassMaster II user guide
15
Press
on the GrassMaster and the data will start to scroll
down the Terminal screen.
When all 200 paddocks are finished, stop the capture by clicking
Stop on the status bar at the bottom of the screen. The file is now
saved, you may exit from Terminal.
If prompted to save the changes in Terminal settings, click Yes.
Type a file name to save the Terminal settings to and click OK.
16
GrassMaster II user guide
Use these GrassMaster settings next time Terminal is used to
download. From the File menu select Open... , pick the file (e.g.
grassmas.trm) and click OK.
The captured text file can now be imported into Microsoft® Excel
or any other compatible software package. (Before importing into
a spreadsheet, use a text editor like Notepad to delete the first three
lines of the file to help position data into columns.)
GrassMaster II user guide
17
Clearing all paddock data
This will clear all data from the GrassMaster indicator's memory.
This data cannot subsequently be recovered.
Press and hold
until the
second beep to turn the indicator on.
Press
Press
and
together.
to confirm OK to clear
all data from memory.
All data is being cleared from
memory. Several beeps sound when
the operation is complete.
Ready for normal operation.
18
GrassMaster II user guide
Battery charging
You should receive your GrassMaster indicator partially charged.
The GrassMaster should be charged for 16 hours before it is used
for the first time.
At start-up, the GrassMaster shows the operational time remaining.
Each block of the display corresponds
to about 1 hour.
However, if the GrassMaster has not been used for several weeks, then
this may be inaccurate, and the GrassMaster should be charged for 16
hours. There is no risk of over-charging.
The GrassMaster detects when it is
being charged.
Data can be downloaded while the battery is charging.
For long-term storage, charge the GrassMaster for 48 hours, remove
from the power box and store. The battery will then discharge during
storage. Place on the power box and charge for 16 hours before using
again.
When fully charged, the GrassMaster should provide a full day's use.
If the GrassMaster is then charged after each use, the battery should be
fully charged and ready for use again in just 6 hours.
If the GrassMaster has been used for more than 12 hours without
being charged, then a warning message appears at next start-up.
For best results, charge the GrassMaster indoors where the
temperature is mild.
The GrassMaster automatically turns off after 20 minutes if no key is
pressed, or no measuring or downloading is taking place. This stops
the battery from accidentally going flat.
GrassMaster II user guide
19
The GrassMaster can be recharged many hundreds of times with the
battery unlikely to need replacement for several years.
Contact your supplier if the battery fails to keep its charge. An
authorised service centre can install a replacement battery.
The standard GrassMaster power box is prewired to a 230 V step
down system for Australasian use. Other voltages require a different
power box. Please contact your supplier for details.
Outside Australasia your distributor should be able to provide a power
supply with a 12 V, 300 mA output suitable for local conditions.
20
GrassMaster II user guide
GrassMaster care
The GrassMaster is a precision electronic device that should give
many years of service if used with care.
Always keep the probe in a clean and highly polished state. Avoid
scratching or scoring of the probe. This will minimise the
likelihood of dirt, dust, pollen, and debris adhering to the probe,
the presence of which may influence the GrassMaster's
performance.
Separate the indicator from the probe by sliding the indicator
forward and attach it to the battery charger when not in use.
Clean and apply polish to the probe after use and store in a warm
and dry place like an airing linen cupboard. Do this after each use,
not just at the end of the season. Avoid high humidity storage
situations like dairies and outside sheds.
The indicator is fully waterproof and should be cleaned with only
water and mild detergent.
Avoid touching the contacts with your fingers. Excess grime or
GrassMaster polish on these contacts may lead to measurement error
messages and downloading errors. Excess polish may be removed
carefully with methylated spirit.
Warning
Avoid touching live electric fences with the probe end of the
GrassMaster because the electrical spike may damage sensitive
internal electronics. Damage to the GrassMaster from an electrical
spike like this will be readily apparent when servicing, and is not
covered under the warranty.
GrassMaster II user guide
21
Capacitance measurement system
The Capacitance probe method of pasture measurement works by
measuring the changes in capacitance of a circuit in the probe. The
more grass there is, the more the capacitance is influenced. The
indicator processes these data and converts them into kilograms per
hectare (or pounds per acre) of dry matter.
The GrassMaster has several built-in software features which
compensate for, and minimise the effects of, different pasture
characteristics like internal pasture moisture (dry matter content),
external pasture moisture (dew, rain), pasture morphology (leafy or
stalky), ambient temperature and relative humidity, and even ground
soil moisture.
The Capacitance probe system of measurement allows for these
variations because the capacitance technique measures the volume of
pasture not just its surface or height.
22
GrassMaster II user guide
Calibration
How the dry matter density is calculated
The GrassMaster uses a formula which is the best linear fit (in the
least-squares sense) of the relative capacitance measured by the sensor
with the actual dry grass weight determined by cutting, drying and
weighing the pasture samples. The grass measured for the default
calibration was from a New Zealand dairy pasture composed of about
80 % perennial rye grass, 20 % white clover at between 14 % and 16
% dry matter content, which is typical of many actively growing
spring and autumn pastures. The equation with these parameters is:
DM = 0 . 7200 × C R − 2200
where
DM is the dry matter density in kilograms per hectare
CR is the relative capacitance of the grass measured by the
sensor.
Adjusting the calibration
The default parameters above may be adjusted to suit seasonal
variations or different pasture types. If you have access to calibration
data more appropriate for your own pasture type you can change the
parameters of the equation. Contact your GrassMaster supplier, farm
advisor or professional agronomist for suitable calibration data for
your grass type. The GrassMaster II can store up to 12 different
calibration equations that are selectable for different sward types or
seasons.
The simplest adjustment is to change the offset. This raises or lowers
the calculated dry matter for any given corrected meter reading by a
fixed amount. This is the most common change that occurs
seasonally.
GrassMaster II user guide
23
In some circumstances, such as non-New Zealand swards, or when the
pasture goes to seed a more accurate calculation will be obtained by
also adjusting the slope of the equation.
In the equation above the slope is 0.7200 kg/ha per sensor reading.
This means an increase of 100 in the sensor capacitance reading
corresponds to an increase of 72 kg/ha of dry matter density. See the
next page for instructions on adjusting these parameters.
The GrassMaster II has 12 locations to store equations that may be set
to apply to different pasture types or seasons. Rather than having to
enter a new equation for each location select the appropriate equation.
The equations are labelled from (A) to (L). See Installing a new
calibration on page 25 to select and set up these equations.
Post-grazing residual pasture measurements
For measurement of residual pasture an alternative equation will give
better results. This is because the relative capacitance is not linear for
the entire range of grass densities. Equation B has been initially set to
DM = 0 . 4800 × C R − 300
which will give a better reading on low grass densities
24
GrassMaster II user guide
Installing a new calibration
Press and hold
beep to turn on.
Press
until the first
to adjust calibration.
Press
or
to change the value of
the equation offset.
to confirm.
Press
Press
or
to change speed.
Press
to confirm walk speed.
Press
selection.
to enable equation
Press
or
to select one of the 12
saved equations (A) to (L).
Press
to confirm selection
Press
to change the equation.
Press
or
Press
Press
GrassMaster II user guide
to change the slope.
to confirm slope.
or
to change the intercept.
25
Press
Press
to confirm intercept.
to end.
Ready for normal operation.
26
GrassMaster II user guide
Resetting
To reset the GrassMaster and restore the offset scale and equation to
factory default settings.
Press
off.
to turn the indicator
Press and hold down
, then
turn the indicator on by pressing
.
When the first message is displayed,
release the keys.
Restoring factory default settings.
GrassMaster version.
Ready for normal operation.
GrassMaster II user guide
27
Novel Ways Freephone 0800 003 003