1
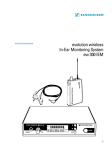
Instruction manual evolution wireless In-Ear Monitoring System ew 300 IEM 33 1 Contents Chap. Contents 1 2 3 4 5 6 7 8 9 Page Contents ............................................................................................ 34 Short description .............................................................................. 35 System components .......................................................................... 35 Important notes ................................................................................ 35 Preparing the devices for use ........................................................... 37 SR 300 IEM stereo transmitter ................................................. 37 EK 300 IEM stereo pocket receiver .......................................... 40 Operation .......................................................................................... 43 Troubleshooting ............................................................................... 54 Care and maintenance ..................................................................... 55 Overview .......................................................................................... 56 Wireless transmission system .................................................... 56 HDX noise reduction .................................................................... 57 Technical data ............................................................................. 58 Accessories .................................................................................. 60 Thank you for choosing Sennheiser! We have designed these products to give you reliable operation over many years. Please take a few moments to read these instructions carefully, as we want you to enjoy your new Sennheiser products quickly and to the full. 34 2 Short description With the Sennheiser evolution wireless in-ear monitoring system ew 300 IEM (suitable for both stage and broadcast use), musicians, video and sound amateurs, reporters/broadcasters, etc. can directly monitor the received sound signals without troublesome cables or monitor speakers being required. In addition, the system can also be used for any application where talkback signals are to be transmitted. The evolution wireless in-ear monitoring system ew 300 IEM is a highquality state-of-the-art RF transmission system with a high level of operational reliability and ease of use. Transmitter and receiver permit wireless transmission with studio-quality sound. Due to further optimised PLL and microprocessor technology and the HDX noise reduction system, this transmission system ensure interference-free transmission and minimise dropouts in the RF link. The system can be supplied in five frequency ranges within the UHF band. Please note: Frequency usage is different for each country. Your Sennheiser agent will have all the necessary details on the available legal frequencies for your area. Range A: Range B: Range C: Range D: Range E: 518 – 550 MHz, 630 – 662 MHz, 740 – 772 MHz, 790 – 822 MHz, 838 – 870 MHz. Transmitter and receiver of the Sennheiser ew 300 IEM system are 8-channel switchable. Transmitter and receiver have 8 frequency memories to store up to 8 transmission/receiving frequencies. The frequencies are selectable in 25-kHz steps, giving a selection of 1280 frequencies within the preset 32 MHz frequency range. The system has 8 factory pre-programmed frequencies, so that – the system is ready for immediate use after switch-on, – several in-ear monitoring systems can be operated simultaneously on the factory-preset transmission and receiving frequencies without causing intermodulation interference. However, all frequency settings can be changed to your individual needs, if required. 3 System components The system consits of: EK 300 IEM stereo receiver, SR 300 IEM stereo transmitter, 9 V PP3 alkaline battery, transmitting antenna and receiving antenna, NT 2 mains unit, IE 1 in-ear headphones, user manual. 4 Important notes Never open electronic devices! This must only be done by authorised personnel and is all the more important for units connected to AC outlets. If devices are opened by customers in breach of this instruction, the warranty becomes null and void. Always disconnect the devices from the mains by removing the plug when you wish to change connections or move the devices to a different place. 35 Keep the devices away from central heating radiators and electric heaters. Never expose them to direct sunlight. Use the devices in dry rooms only. Use a damp cloth for cleaning the devices. Do not use any cleansing agents or solvents. Attention! High Volume! This is a professional transmission system. Commercial use is subject to the rules and regulations of the trade association responsible. Sennheiser, as the manufacturer, is therefore obliged to expressly point out possible health risks arising from use. This system is capable of producing sound pressure exceeding 85 dB(A). 85 dB(A) is the sound pressure corresponding to the maximum permissible volume which is by law (in some countries) allowed to affect your hearing for the duration of a working day. It is used as a basis according to the specifications of industrial medicine. Higher volumes or longer durations can damage your hearing. At higher volumes, the duration must be shortened in order to prevent damage. The following simple formula applies: Double the volume = half the duration An increase of 3 dB corresponds to doubling the volume; you can thus go by the following table: Maximum duration 8 hours 4 hours 2 hours 1 hour 30 minutes 15 minutes 8 minutes 4 minutes 2 minutes 1 minute at a sound pressure of: 85 dB 88 dB 91 dB 94 dB 97 dB 100 dB 103 dB 106 dB 109 dB 112 dB Pain threshold 120 dB The following are sure signs that you have been subjected to excessive noise for too long a time: ! You can hear ringing or whistling sounds in your ears. ! You have the impression (even for a short time only) that you can no longer hear high notes. ! After using this system, your hearing is impaired for a short time. In all of the above cases, you should consult a specialist or at least have your hearing tested. Ear damage builds up gradually. Once the initial symptoms have died down, you no longer perceive acute changes. In the long term, however, the repeated effects of loud noises can cause severe hearing impairment or even deafness. 36 5 Preparing the devices for use SR 300 IEM stereo transmitter ' ( ! ) , + # " - Headphone output, 1/4” (6.3 mm) jack socket (PHONES) . Headphone volume control (VOL) ! LC display ) ! button (UP) , " button (DOWN) + SET button * POWER (ON/OFF) button # Cable grip for power supply DC cable " DC socket for connection of mains unit (DC-IN) $ Audio input, 1/4” (6.3 mm) jack socket (left and MONO) (AF IN BAL/UNBAL) % Audio input, 1/4” (6.3 mm) jack socket (right) (AF IN BAL/UNBAL) & BNC socket, antenna output (ANT) $ % * & 37 Mounting the rubber feet To ensure that the transmitter cannot slip on the surface on which it is placed, four self-adhesive soft rubber feet are supplied. These feet are stuck into the recesses on the bottom side of the receiver. (N.B.: Do not use these feet if rackmounting the transmitter). ! Ensure that the recesses are clean and free from grease before fixing the feet. Attention! Some furniture surfaces have been treated with varnish, polish or synthetics which might cause stains when they come into contact with other synthetics. Despite a thorough testing of the synthetics used by us, we cannot rule out the possibility of discolouration, since we don’t know your furniture. Connecting the antenna The SR 300 IEM transmitter can be used with either a telescopic antenna (supplied) or a remote antenna (available as an accessory). & The supplied telescopic antenna can be mounted quickly and easily to the rear of the transmitter and is suitable for all applications where – good transmission conditions provided – a wireless transmission system is to be used without a large amount of installation work. ! Connect the telescopic antenna to BNC socket & at the rear of the transmitter and pull the end cap to extend the antenna. If the transmitter position is not the best antenna position for optimum transmission, you can use a remote antenna (available as an accessory). Connecting the mains unit # 38 " ! Insert the DC connector on the power supply output cable into socket " at the rear of the transmitter. ! Pass the cable through the cable grip #, as illustrated. Connecting the pre-amplifier/mixing console ! Connect the outputs from the pre-amplifier/mixing console/etc. to the 1 /4” (6.3 mm) jack sockets $ (left or MONO) and % (right). Both balanced and unbalanced connection is possible. Note: " # $ Any device that is only suitable for mono operation must be connected to jack socket $. In this case, the stereo operation must be switched off via the menu. % 1 /4” (6.3 mm) jack plug balanced unbalanced Switching the transmitter on/off * ! Press the POWER button * to switch the transmitter on. ! To switch the transmitter off, press the POWER button until “OFF” appears on the display. You can then release the button. After a power failure, the device returns to the previous setting (ON/OFF). Connecting the headphones/monitoring the audio signal ' ( ! Connect the headphones to the headphone output (PHONES) ' for monitoring the audio signal. Only connect headphones with a 1 /4” (6.3 mm) stereo jack plug. ! Use the headphone volume control ( to adjust the volume. Attention: First set the volume control to the lowest volume by turning it to the left as far as possible! Volume up? – NO! 1 /4” (6.3 mm) stereo jack plug for headphone connection When people use headphones, they tend to choose a higher volume than with loudspeakers. Listening at high volume levels for long periods can lead to permanent hearing defects. Please protect your hearing, Sennheiser headphones have an excellent sound quality even at low volumes. 39 EK 300 IEM stereo pocket receiver ' ( ! + 40 * # ) " , $ % & ' Antenna ( Red LED for operation and battery status indication (ON/LOW BAT) ! Green LED for RF signal indication (RF) ) Cover plate for battery compartment , Cover plate for display and operating controls + Headphone output (EARPHONES), 3.5 mm stereo jack socket * On/off/volume control # Balance control " SET button $ LC display % " button (DOWN) & ! button (UP) / Inserting and changing the battery ! Slide the cover of the battery compartment 0 in the direction of the embossed arrow until it clicks audibly. ! Open the cover. ! Insert the 9 V PP3 battery (IEC 6 LR 61). Please observe correct polarity when inserting the battery. ! Close the battery compartment. ! To remove the battery, push the small red lever / in the battery compartment towards the bottom side of the receiver. ) Note: We recommend powering the receiver by a standard PP3 alkaline battery. If powered by a rechargeable 9 V battery, the operating time will be drastically reduced. Connecting the antenna ! Screw the antenna - onto the antenna socket (M3 connection). ' Connecting the headphones If you use the receiver as part of the monitoring system, connect the supplied in-ear headphones to the 3.5 mm jack socket + on the receiver. If you use the receiver for other applications, you can also connect any Sennheiser stereo headphones. ! Connect the headphones to the headphone output (EARPHONES) 1 via a 3.5 mm stereo jack plug. + 3.5 mm stereo jack plug for headphone connection Signal indication ! ( The green LED 2 at the top of the EK 300 IEM receiver indicates that an RF signal is being received. Battery status indication The red LED ( provides information on the (remaining) battery capacity: LED lit up: The receiver is switched on and the battery capacity is sufficient. LED flashing: The battery is going flat! You should immediately replace the battery! 41 Switching the receiver on Turn the volume control 4 clockwise (the volume control has an integral on/off switch – the receiver is switched off when the control is turned fully to the left until it clicks). Note: The receiver has a switch-on delay of approx. 1.5 seconds to suppress the switch-on surge and protect your ears. * # Adjusting the volume Use the volume control * to adjust the volume to suit. Volume up? – NO! When people use headphones, they tend to choose a higher volume than with loudspeakers. Listening at high volume levels for long periods can lead to permanent hearing defects. Please protect your hearing, Sennheiser headphones have an excellent sound quality even at low volumes. Adjusting the balance During stereo operation, the balance control # serves to adjust the balance between the left and right stereo signal. 3 During FOCUS operation, the balance control serves to adjust the relative levels of the two separate channels in the mixed mono signal (for full description of FOCUS operation see page 49). Attachment of the receiver to clothing The EK 300 IEM receiver is attached to e.g. the belt with the supplied clip 3. This is reversable so that the receiver can also be attached with the antenna pointing downwards, if required. 42 6 Operation The evolution wireless system ew 300 IEM has been factory-preset to allow immediate use after switch-on (# “5 Preparing the devices for use”). Please note, however, that the transmitter sensitivity is dependent on the application. To avoid overmodulation and distortion, please first check whether the preset sensitivity is suitable for your particular application (# “Adjusting the sensitivity”). Operating controls POWER Press the POWER button to switch the SR 300 IEM transmitter on or off. The EK 300 IEM is switched on or off via the volume control with integral on/off switch. SET Press the SET button – to select a menu, – to change to the next menu, – to change to the next segment when entering a name (SR 300 IEM only), – to return to the top menu level. ! Press the UP button – to adjust the setting of a menu, – to change a single character when entering a name (SR 300 IEM only). " Press the DOWN button – to adjust the setting of a menu, – to change a single character when entering a name (SR 300 IEM only). 43 LC display panel SR 300 IEM transmitter ' , + ' ( ! * ) # ' 8-step level display for audio signal, left or MONO ( 8-step level display for audio signal, right ! 6-segment alphanumeric main display 0 “MUTE” display. Lights up for a short moment when switching on the transmitter or when changing the frequency. , Display for the “Frequency” menu. (This display can be the transmitter’s standard display which always appears after switch-on). + Display for the channel number “Channel”. (This display can be the transmitter’s standard display which always appears after switch-on). * Display for the “Name” menu. (This display can be the transmitter’s standard display which always appears after switch-on). 5 “MHZ” (MHz) display. Lights up when the frequency is displayed. ( EK 300 IEM receiver ' 8-step level display for audio (AF) signal ( Alphanumeric main display ! 8-step level display for incoming RF signal Note: ! 44 If the operating steps for adjusting the settings via the menu are similar for both devices, only the main display of the SR 300 IEM transmitter is shown. Basic functions of the Sennheiser operating menu A special feature of the Sennheiser evolution wireless system ew 300 IEM is the similarity of the operating controls of both transmitter and receiver. In stressfull situations, for example on stage or during a live show or presentation, it is important that the devices are easy to operate and that adjustments to the settings can be made quickly and instinctively. Therefore, the necessary operating steps for each device are similar. Important: With the !/" buttons you can directly switch between the factorypreset frequencies (channel presets). The display starts flashing. Your selection becomes effective immediately. ' Press the SET button to enter the top menu level: By briefly pressing SET again, you can change to the next menu. After approx. one second, the selected menu appears on the display and then the current setting of the menu is indicated. ( Press the "/ ! buttons to adjust the settings of the selected menu: The new setting starts flashing on the display. If you return to the previous setting, the flashing stops. Important: N ew settings becom e effective im m ediately and will be retained in memory on switch-off! N.B.: W hen changing transmitter frequencies, care should be taken to avoid causing interference to other channels/users. In the “TUNE” and “NAME” menu, the "/! buttons feature a “fast search” function. By briefly pressing the "/! buttons, the display jumps either forwards or backwards to the next setting. If you hold down a button, the cycling of the display is continously accelerted. If you release the button and start over again, the cycling of the display restarts at normal speed. The “fast search” function allows you to get fast and easily to your desired setting. ! Press the SET button to return to the top menu level: Have you finished your entries? Press the SET button to return to the top menu level. The display then switches back to the standard setting. 45 Overview of menus To ensure that transmitter and receiver of the Sennheiser evolution wireless system ew 300 IEM are easy to operate, the operating menus have been largely standardised: Display SR 300 IEM Transmitter SENSIT Adjusting the sensitivity (# page 47) SqELCH STEREO 46 – Stereo/Mono selection (# page 49) EK 300 IEM Receiver – Adjusting the squelch threshold (# page 48) – FocuS – Stereo/FOCUS selection (# page 49) Ltd – Limiting the volume at the headphone output (# page 49) DISPL DiSPL Selecting the content of the standard display (# page 50) Selecting the content of the standard display (# page 50) TUNE tune Setting the transmission frequency (# page 51) Setting the receiving frequency (# page 51) NAME Assigning a name (# page 52) LOCK Loc Activating the lock-mode function to prevent accidental adjustment (# page 53) – Activating the lock-mode function to prevent accidental adjustment (# page 53) Selecting the frequency, channel number ! With the !/" buttons you can directly switch between the factorypreset frequencies (channel presets). The display starts flashing. Your selection becomes effective immediately. ! Press the SET button to acknowledge your selection. The display stops flashing. Note: You can choose the content of the standard display i.e. whether the frequency, the channel number or – with the SR 300 IEM – a name is displayed (# “Selecting the content of the standard display”). The devices are factory-preset to show the frequency setting as standard. SENSIT Adjusting the sensitvity (SR 300 IEM only) To match the transmitter to the output level of the connected device (e.g. mixing console), you can adjust the input sensitivity in 4 steps of 5 dB from 0 to -15 dB. ! Select the “SENSIT” menu by pressing the SET button until “SENSIT” appears on the display; after a short pause the current input sensitivity setting is displayed. ! With the !/" buttons you can now select a different setting. The input sensitivity can be adjusted in 5-dB steps from 0 to -15 dB. The new setting starts flashing on the display and becomes effective immediately. ! Press the SET button to return to the top menu level. The display then switches back to the standard display. 47 SqELCH Adjusting the squelch threshold (EK 300 IEM) The EK 300 IEM receiver is equipped with an adjustable squelch which eliminates annoying noise when the transmitter is switched off. It also suppresses sudden noise when the receiver leaves the transmission area and there is no longer sufficient transmitter power received by the receiver. ! Select the “SqELCH” menu by pressing the SET button until “SqELCH” appears on the display; after a short pause the current squelch setting is displayed. ! With the !/" buttons you can now select a different setting. The squelch can be switched off (0 dB) or adjusted in 5-dB steps from 5 dB to 40 dB. Selecting a smaller value reduces the squelch threshold, selecting a higher value increases the squelch threshold. The new setting starts flashing on the display. Set the squelch threshold – with the transmitter switched off – to the lowest possible value that suppresses hissing noise. If the squelch threshold is set too high, the transmission range will be reduced. Note: With the transmitter switched off and the squelch threshold set to “0 dB”, hissing noise will occur. With the EK 300 IEM receiver, the AF level bargraph will completely light up. ! STEREO Press the SET button to return to the top menu level. The display then switches back to the standard display. Stereo/Mono selection (SR 300 IEM) To set the SR 300 IEM transmitter to mono operation, you need to switch off the stereo operation. ! Select the “STEREO” menu by pressing the SET button until “STEREO” appears on the display; after a short pause the current setting is displayed. ! Press the ! button to switch the stereo operation on – if you press the " button, the stereo operation is switched off. The new setting – i.e. “ST ON” or “ST OFF” – starts flashing on the display. ! Press the SET button to return to the top menu level. The display then switches back to the standard display. Note: Please note that a device that only delivers a mono signal (see page 39) must be connected to jack socket $ (left input). The EK 300 IEM does not need to be set to mono operation. The receiver automatically “identifies” the transmitted audio signal. 48 FocuS Stereo/FOCUS selection (EK 300 IEM) With the EK 300 IEM you can switch between stereo and FOCUS operation. During stereo operation (FOCUS “OFF”), the left-right signals are available as usual (SR 300 IEM transmitter in stereo mode). During FOCUS operation, the left-right signals are mixed and are available as a mono signal in both headphone channels (SR 300 IEM transmitter in stereo mode). You can, for example, set the receiver to FOCUS mode to: • allow an individual mix of the signals for vocals and backing music, or • mix two signals with different volume levels (which are then heard as a correctly mixed mono signal). Ltd ! Select the “FocuS” menu by pressing the SET button until “FocuS” appears on the display; after a short pause the current setting is displayed. ! Press the ! button to switch the FOCUS operation on – if you press the " button, the FOCUS operation is switched off. The new setting – i.e. “Fo on” or “Fo OFF” – starts flashing on the display. ! Press the SET button to return to the top menu level. The display then switches back to the standard display. Limiting the volume at the headphone output (EK 300 IEM) The EK 300 IEM is equipped with a switchable limiter which limits the volume at the headphone output. With the limiter switched on, the volume at the headphone output will be reduced by approx. 18 dB. ! Select the “Ltd” menu by pressing the SET button until “Ltd” appears on the display; after a short pause the current setting is displayed. ! Press the ! button to switch the limiter on – if you press the " button, the limiter is switched off. The new setting – i.e. “Ltd on” or “Ltd OFF” – starts flashing on the display. ! Press the SET button to return to the top menu level. The display then switches back to the standard display. 49 DISPL DiSPL Selecting the contents of the standard display With the SR 300 IEM you can choose the contents of the standard display i.e. whether the frequency, the channel number or a name is displayed. With the EK 300 IEM you can choose whether the frequency or the channel number is displayed. ! Select the “DISPL” menu by pressing the SET button until “DISPL” appears on the display; after a short pause the current setting is displayed. ! With the !/" buttons you can now choose between: Name (SR 300 IEM only): Frequency: Channel number: “NAME” “FREQU” “CHANNL” The new setting for the standard display starts flashing on the display. ! 50 Press the SET button to return to the top menu level. The display then switches to the new standard display. Configuring a channel preset Transmitter and receiver of the evolution wireless system ew 300 IEM have 8 switchable frequencies (channel presets) respectively to store up to 8 transmission/receiving frequencies. With the SR 300 IEM transmitter, you can additionally assign a name. TUNE Frequency DISPLAY CH NO Channel No. 1 DISPLAY NAME TUNE Frequency CH NO Channel No. 2 NAME TUNE TUNE Frequency Frequency CH NO CH NO Channel No. 3 Channel No. 8 NAME Name Name Name 1 2 3 NAME Name ... 8 You can switch directly between the channel presets (# “Selecting the frequency, channel number”). TUNE tune Setting the transmission/receiving frequency Transmission and receiving frequencies are tunable in 25-kHz steps within a switching bandwidth of 32 MHz max. Special notes on multi-channel operation: Several devices of the Sennheiser evolution wireless system ew 300 IEM can be used simultaneously on different frequencies. The factory-preset frequencies are intermodulation-free. Before you program new frequency combinations, please refer to the information on the correct frequency choice given in the planning brochure “Practical Applications in RF Technology” available from your local Sennheiser agent. ! Select the channel preset for which you wish to set a frequency. ! Select the “TUNE” menu by pressing the SET button until “TUNE” appears on the display; after a short pause the currently set frequency is displayed. ! With the !/" buttons you can now select a different frequency. The frequencies are tunable in 25-kHz steps. The new frequency starts flashing on the display and becomes effective immediately. ! Press the SET button to return to the top menu level. The display then switches back to the standard display. 51 NAME Assigning the SR 300 IEM a name The SR 300 IEM transmitter can be assigned a name. The name can consist of up to six characters such as: 52 − − − letters (without pronounciation marks), numbers from 1 to 0, special characters e.g. () - ⎥ _ and spaces. ! Select the “NAME” menu by pressing the SET button until “NAME” appears on the display; after a short pause the name entered is displayed. ! Press the !/" buttons to start with your entry. The first segment starts flashing on the display. ! With the !/" buttons you can now choose a character. ! Press the SET button to change to the next segment and choose the next character. ! Have you entered the name completely? Press the SET button to return to the top menu level. The display then switches back to the standard display. LOCK Loc Activating/deactivating the lock-mode function You can lock the !/" buttons and the POWER button to prevent accidental programming or switching off during operation. Activating the lock-mode function ! Select the “LOCK” menu by pressing the SET button. The current setting is indicated on the display. ! Press the ! button to activate the lock-mode function. “LOCON” starts flashing on the display. ! Press the SET button to return to the top menu level. Note: If you press the !/" buttons or the POWER button, “LOCK” appears on the display and the buttons are now locked. Deactivating the lock-mode function ! Select the “LOCK” menu by pressing the SET button. “LOCON” appears on the display. ! Press the " button to deactivate the lock-mode function. “LOC OFF” begins to flash on the display. ! Press the SET button to return to the top menu level. The display switches back to the standard display and the buttons can now be operated as usual. 53 7 Troubleshooting Error checklist Problem No operation indication $ Batteries are flat $ No mains connection No RF signal $ Transmission frequency is not the same as the receiving frequency $ Transmitter is out of range RF signal available but no audio signal $ Receiver’s squelch threshold adjusted too high Audio signal has a high level of background noise $ Transmitter sensitivity adjusted too low Audio signal distorted $ Transmitter sensitivity adjusted too high $ Receiver’s AF output level adjusted too high ! 54 Possible cause If problems occur that are not listed in the above table, please contact your local Sennheiser agent for assistence. Recommendations and tips ... for optimum reception $ Transmission rangedepends to a large extent on location and can vary from about 10 m to about 150 m. There should be a “free line of sight” between transmitting and receiving antennas. $ To avoid overmodulating the receiver, observe a minimum distance of 5 m between transmitting and receiving antennas. $ Observe a minimum distance of 50 cm between antennas and metal objects (such as cross members or reinforced-concrete walls). ... for multi-channel operation $ You cannot use all adjustable frequency combinations simultaneously. The factory-preset frequencies (presets), however, are intermodulation-free. If you wish to program new frequency combinations, please contact your local Sennheiser agent who will provide you with information on the correct frequency choice. $ When using several transmitters simultaneously, observe a minimum distance of 40 cm between transmitting antennas. $ Use special accessories for multi-channel applications (# “Accessories”). $ When using the ew 300 IEM system in combination with radiomicrophone systems, a minimum channel spacing of 8 MHz should be maintained to avoid RF breakthrough between systems. 8 Care and maintenance Use a damp cloth for cleaning the devices. Do not use any cleansing agents or solvents as these could damage the surface of the equipment. 55 9 Overview Wireless transmission systems With the evolution wireless series, Sennheiser puts an end to cable tangles and enables complete freedom of movement at an affordable price. The systems operate exclusively in the UHF band. UHF transmission is extremely reliable and is far less prone to interference than the overcrowded VHF band – harmonics from mains units, fluorescent tubes, refrigerators, computers, etc. are virtually eliminated. Also indoor propagation of UHF radio waves is better than VHF so that the RF power can be kept low – this is also an advantage when using multi-channel systems. Finally, UHF frequency ranges are being approved all over the world for radiomicrophone usage – in some countries licence-free. Fresh batteries ensure good reception during operation. Always use alkaline batteries for best operation – a 9 V PP3 battery has a much longer operating time than a NiCd rechargeable battery (approx. 4 to 6 hours with a 9 V PP3 or 1 hour with a rechargeable). Correct adjustment of transmitter sensitivity is vital. Too high and you get overmodulation and distortion, too low and you get undermodulation and a noisy signal. Please set the sensitivity correctly for the microphone/usage and check it before every performance to ensure best operation. Interference such as distortion, hissing or “birdying” may occur if several transmitters are used together and the frequencies have not been correctly chosen. Sennheiser standard frequencies (as supplied) are all intermodulationfree. For other frequency sets please contact your local Sennheiser agent, who will be able to provide you with information on correct frequency choice and/or be able to calculate special frequency sets for you. 56 HDX noise reduction O dB O dB - 10 dB - 10 dB - 20 dB - 20 dB - 30 dB - 30 dB - 40 dB - 40 dB - 50 dB - 50 dB - 60 dB - 60 dB - 70 dB - 70 dB - 80 dB - 80 dB - 90 dB - 90 dB - 100 dB - 100 dB - 110 dB - 110 dB Transmitter Receiver Progress you can hear: The evolution wireless series is equipped with HDX, the new Sennheiser noise reduction system that reduces RF interference. It increases the signal-to-noise radio in wireless audio transmission to up to 110 dB. HDX is a wideband compander system which compresses the audio signal in the transmitter in a 2:1 ratio (related to dB) to lift it above the inherent noise floor of the RF link. A 110 dB dynamic range signal is thus transmitted with an effective dynamic range of only 55 dB, which is above the 60 dB noise floor of the RF link. In the receiver the signal is expanded in an identical and opposite way in a 1:2 ratio to restore the original signal, at the same time reducing the RF noise to below the noise floor of the receiver. Giving a radio link with a better signal-to-noise ratio than a CD. HDX has been specially developed for high quality radiomicrophone systems. Note: Only transmitters and receivers that are equipped with HDX can work correctly with each other. If non HDX equipment was mixed with HDX, the dynamic range would be drastically reduced and the transmission would sound blunt and flat. HDX is permanently active and cannot be switched off. 57 Technical data System RF characteristics Modulation Frequency ranges Transmission/receiving frequencies Switching bandwidth Nominal/peak deviation Pilot tone deviation (stereo operation) Frequency stability AF characteristics Noise reduction system AF frequency response Signal-to-noise ratio at 1 mVRF and peak deviation, HDx THD at nom. deviation and 1 kHz Overall device Temperature range Dimensions Carrying case [mm] Weight Carrying case In compliance with wideband FM stereo, MPX Range A: 518 – 550 MHz Range B: 630 – 662 MHz Range C: 740 – 772 MHz Range D: 790 – 822 MHz Range E: 838 – 870 MHz 1280, tunable in steps of 25 kHz, 8 switchable channels 32 MHz ± 24 kHz / ≤ ± 48 kHz ± 5 kHz ≤ ± 15 ppm Sennheiser HDX 50 – 15,000 Hz ≥ 100 dB(A) ≤ 0.9 % -10°C ... +55°C 380 x 370 x 70 approx. 3100 g ETS 300 422, ETS 300 445 (CE), FCC EK 300 IEM Receiver RF characteristics Receiver principle Sensitivity (with HDX, peak deviation) Squelch threshold Antenna inputs Antenna length [mm] AF characteristics AF output voltage at peak deviation 1 kHzAF PHONES 58 non-diversity < 2.5 µV at 52 dBArms S/N 0–100 µV, adjustable M3 thread 518 – 550 MHz: 130 630 – 662 MHz: 110 740 – 772 MHz: 90 790 – 822 MHz: 90 838 – 870 MHz: 80 3.5 mm jack socket: 2 x ≥ 100 mW at 32 Ω Overall device Power supply Power consumption (operating time) Dimensions [mm] Weight 9 V alkaline PP3 battery (IEC 6 LR 61) ≤ 75 mA (4 – 6 h) depending on volume level 110 x 65 x 22 approx. 255 g SR 300 IEM Transmitter RF characteristics RF output power at 50 Ω Antenna output ≥ 20 mW, internally adjustable to 10 mW BNC socket, 50 Ω AF characteristics Headphone output Output power at headphone output AF input AF input voltage (at peak dev., 1 kHz ) /4” (6.3 mm) stereo jack plug ≥ 100 mW at 32 Ω (2 x) 2 x 1/4” (6.3 mm) stereo jack socket, balanced + 10 dBu Overall device Power supply Max. power consumption at nom. voltage Dimensions [mm] Weight 10.5 – 16 V DC, nominal voltage 12 V DC approx. 200 mA 212 x 145 x 38 approx. 1100 g 1 59 Accessories GA 1 19” rack adaptor, for mounting two SR 300 IEM/AC 1 or one SR 300 IEM/AC 1 with AM 1 into a 19” rack AM 1 Antenna mount for connecting antennas to the front of the GA 1 A 1031-U UHF antenna, passive, omni-directional, can be mounted onto a stand GZL 1019-A1 Antenna cable with BNC connectors 1 m GZL 1019-A5 5m GZL 1019-A10 10 m AC 1 Antenna combiner, for combining the RF signals of up to four transmitters onto a single antenna and for powering up to four transmittes NT 3 Plug-in mains unit for AC 1 IE 1 In-ear headphones IES 1 1 pair of ear-moulds CC 1 Carrying case for SET ew 300 IEM 60