1
Page 2 of 3
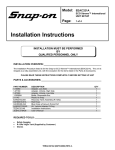
PARTS & ACCESSORIES: _______________________________________________
PART NUMBER
1-2405
1-15080
1-6181
2-7642
2-7742
EAK0027C00AS
EAA0248L50A
EAA0248L51A
TEEAC315A0
ZEEAC315A
DESCRIPTION
Screw
Low Side Adapter Fitting
Filter, Conical
Temperature Probe (15’)
Temperature Probe (25’)
O-Ring Kit for Service Couplers
Boom Hanger, High Side
Boom Hanger, Low Side
Installation Instructions
User’s Manual
QTY
4
1
2
1
1
1
1
1
1
1
UNPACKING UNIT AND ACCESSORIES: ___________________________________
1. Cut bands and slide the complete carton off the pallet.
2. Remove the top of the carton and packing pads from top of KoolKare DiagnosTech system.
3. Slide large box off the KoolKare DiagnosTech system.
4. Remove packaging material from all sides of the KoolKare DiagnosTech system. Remove the
plastic wrap from the KoolKare DiagnosTech system.
5. Remove accessory box from rear of the KoolKare DiagnosTech system and set aside.
6. Break the back side of the lower carton to allow the KoolKare DiagnosTech system to roll out.
7. Carefully slide the KoolKare DiagnosTech system off the lower carton. Tipping the KoolKare
DiagnosTech system on the back wheels will assist in removing from lower carton.
8. Remove shipping pad from underneath the KoolKare DiagnosTech system.
PARTS & ACCESSORIES SETUP: ________________________________________
1. Remove all parts and accessories from box. Verify against list above.
2. Locate the 2 Boom assemblies (EAA0248L50A & EAA0248L51A). Locate the screws (4).
3. Mount the 2 Boom assemblies to the back of the KoolKare DiagnosTech system using the
supplied screws.
4. Locate the Blue Pod Hose Assembly (EAA0248L07A). Remove the packing material.
5. Drape the Pod Hose Assembly over the boom for storage.
6. Locate the Red Pod Hose Assembly (EAA0248L06A). Remove the packing material.
7. Drape the Pod Hose Assembly over the boom for storage.
8. Locate the 2 Temperature Probes (2-7642, 15’, & 2-7742, 25’). Connect the 2-7642 to the Temp
1 and the 2-7742 to Temp 2 near the top left side of the rear of KoolKare DiagnosTech system.
INSTALLING VIRGIN TANK: _____________________________________________
1. Locate a new R-134a Virgin Tank.
2. Connect the yellow tank hose (located in the back of the KoolKare DiagnosTech system from
underneath the cabinet) to the R-134a Virgin Tank.
3. Turn tank upside down and set on top of the virgin tank holder. Secure using the Velcro strap.
4. Turn virgin tank valve on.
TEEAC315A0 (06/30/2000) REV A.