1
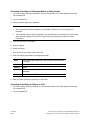
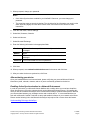
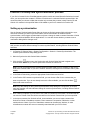
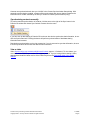
Contact folder setup Please use the following steps to setup a new Outlook contact folder for synchronization purposes: 1. Open Microsoft Outlook. 2. Choose Folder Tab then click on New Folder. 3. Give your folder a name that will clearly designate this as a business contacts folder and function. Example: Firm Name Contacts. 4. Under Folder contains: choose Contact Items from the drop down list. 5. In the Select where to place the folder: section choose your primary Mailbox. Note: It is important that the contact folder is created in your Exchange Account Mailbox. This folder should be on the same level as your Inbox and not listed as a Subfolder within your Mailbox. 6. Click OK. Enabling active synchronization within Virtual Office CS / SaaS ActiveSync technology allows NetStaff CS users 24/7 wireless access to their Microsoft Outlook (Exchange) data. Please use the following instructions to activate Active Sync within Virtual Office \SaaS. Requirements Your firm must be licensed for Virtual Office CS Microsoft Exchange. The NetStaff CS user must have a Virtual Office CS Microsoft Exchange account. The NetStaff CS use will have access to the following personal information: iPhone/iPad: Calendar, Contacts, and Email Personal handheld device with ActiveSync: Calendar, Contacts, Email, and Tasks Android device capable of Exchange synchronization with OS 2.1 or higher: Calendar, Contacts, and Email You must have a Service contract with cellular provider that includes a data plan that supports synchronization with a Microsoft Exchange server. Enabling ActiveSync for a NetStaff CS user 1. Login as the portal administrator. 2. Click the Admin button. 3. Click on the NetStaff CS tab. 4. Highlight each NetStaff CS user whom you will enable ActiveSync and mark for ActiveSync. TL 26665 Page 2 Practice CS: Synchronizing Contacts with Microsoft Outlook Copyright 2004 – 2013 by Thomson Reuters. All rights reserved.