1
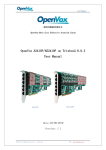
ZYCOO® ZD1P Asterisk Digital card
User’s Manual
V1.1
The information contained in this document is subject to change at any time without
prior notification.Specifications of the product are subject to change at any time
without notice.If you want to learn more info about our product,please visit our web
www.zycoo.com.
Version
Date
Editor
Description
1.1
2009-1-10
Yu
Editor
How to Install ZD1P in Asterisk Version 1.2
Notice: before install ZD1P, please read carefully the ZD1P jumper setting and set the
jumper properly
1: go to asterisk source file ./asterisk/channels/misdn.
Run make misdn, then asterisk will update the misdn driver from @cvs.isdn4linux.de, so
make sure your internet connection before running it.
[root@localhost misdn]#make misdn
2: And then go to ../asterisk directory
And run: make to build asterisk.
[root@localhost asterisk-1.2.13]# make clean
[root@localhost asterisk-1.2.13]# make
3: Then you will see chan_mISDN.so under ../asterisk/channels directory.
4: go to ../asterisk, run make install to install asterisk. And the mISDN driver will be
installed together with asterisk
[root@localhost asterisk-1.2.13]# make install
5: Then make samples.
6: Configure ZD-1P
Run
[root@localhost /]# /etc/init.d/misdn-init scan
If it shows
[OK] found the following devices:
Card=1,0x1<==ZD1P is detected
[ii] run “/usr/sbin/misdn-init config” to store this information to /etc/misdn-init.conf
Then run
[root@localhost ~]# /etc/init.d/misdn-init config
[OK] /etc/misdn-init.conf already present. Backing it up to /etc/misdn-init.conf.save
[OK] /etc/misdn-init.conf created. It’s now safe to run “/usr/sbin/misdn-init start”
And then configure:
/etc/misdn-init.conf & /etc/asterisk/misdn.conf
Then run /usr/sbin/misdn-init start to load ZX-1E. for more info of how to configure ZX-1E,
Please refer description in the /etc/misdn-init.conf and /etc/asterisk/misdn.conf file.
How to Install ZD1P in Asterisk Version 1.4
Notice: before install ZD1P, please read carefully the ZD1P jumper setting and set the
jumper properly, insert the card on the PCI slot.
1. First, download and install mISDN and chan_mISDN. To do it, please follow
a) cd /usr/src
b) wget http://www.misdn.org/downloads/mISDN.tar.gz
c) wget http://www.misdn.org/downloads/mISDNuser.tar.gz
d) tar –zxvf mISDN.tar.gz
e) tar –zxvf mISDNuser.tar.gz
f) cd mISDN-1_1_2
g) make install
h) cd ../mISDNuser-1_1_2
i) make install
2. After that you should be able to reconfigure asterisk like:
a) cd /usr/src/asterisk
b) ./configure
c) Make menuselect
d) Now you should enable chan_misdn in the menuselect, you can find chan_misdn
in channel Driver Section.
3. Reinstall asterisk with
a) make clean
b) make
c) make install
4. After doing above, you should able to run misdn-init tool to scan and configure the
ZD-1P
a) misdn-init scan
It shows:
[OK] found the following devices:
card=1, 0x1<==ZD1P is detected
[ii] run “/usr/sbin/misdn-init config” to store this information to /etc/misdn-init.conf
b) misdn-init config
c) configure the /etc/misdn-init.conf file and /etc/asterisk/misdn.conf file.
d) misdn-init start
;to load the card, you should see the LED of card
blinking.
How to Install ZD1P in Trixbox 2.6
Notice: before install ZD1P, please read carefully the ZD1P jumper setting and set the
jumper
Properly, insert the card on the PCI slot. The default jumper configure of ZD-1P is
configure A which is the general setting for TE.
1. First, download and install the Trixbox 2.6 version
2. Second, you need to install the mISDN driver for Asterisk. The mISDN driver can be
installed via yum:
[trixbox@localdomain ~]# yum –y –enablerepo=trixboxbeta install asterisk-chan_misdn
mISDNuser mISDN-modules mISDN
The Trixbox will auto download the needed driver and install.
3. load the mISDN driver.
[trixbox1.localdomain ~]# amportal stop
To stop the asterisk. The mISDN driver should be loaded before the asterisk running.
Otherwise the asterisk can not load the mISDN module.
[trixbox1.localdomain ~]# misdn-init scan
[OK]found the following devices:
Card=1, 0x1 ==>found the ZD1P card
[ii]run “/usr/sbin/misdn-init config” to store this information to /etc/misdn-init. confmisdn-init
config
Configure the /etc/misdn-init.conf file and /etc/asterisk/misdn.conf file.
[trixbox1.localdomain ~]# misdn-init config
To generate the configure file for the card. You need to modify /etc/misdn-init.conf and
/etc/asterisk/misdn.conf file to make the card work. There are configure samples together
with the manual.
[trixbox1.localdomain ~]# misdn-init start
To load the card driver.
[trixbox1.localdomain ~]# amportal start
To start the asterisk and run:
[trixbox1.localdomain ~]# asterisk –vvvvvvvvvgrc
To open the asterisk CLI.
In the CLI, you can run
Trixbox1*CLI> misdn show port 1
BEGIN STACK_LIST:
*Port 1 Type TE Port. PTP L2Link DOWN L1Link:DOWN Blocked:0 Debug:0
To see the L1 and L2 layer status of ZD1P.
4. Add the mISDN on auto run when after reboot.
Add the line:
Misdn-init start
To the /etc/rc.d/rc.local file. Remember that this command should be in front of
“amportal start” to make sure the mISDN is running before asterisk.
Jumper Setting of ZD1P