1
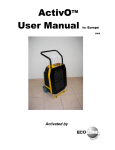
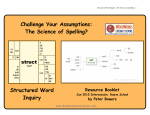
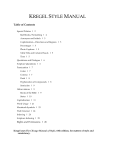
A complete line of low-cost web applications developed for synagogues and Jewish non-profits
Tools 4 Shuls
Users Manual
www.Tools4Shuls.com
An Inspired Online Venture
Inspired Multimedia, Inc.
www.InspiredOnline.com
Technical support is available at www.tools4shuls.com/support
or by emailing [email protected]
This manual corresponds to version 1.22 of the Tools 4 Shuls software
Your version number is located on the bottom-right corner of your control panel homepage.
Download the latest version of this manual at www.tools4shuls.com/manual
Table of Contents
A. Welcome to Your Control Panel
B. Working with Site Categories
B-1. Adding a New Category
B-2. Editing Existing Categories
B-3. Deleting Existing Categories
C. Administrator and General Site Settings
C-1.1. Setting General Organization Details
C-1.2. Setting Your Outgoing Email
C-1.3. Setting Your Paypal Settings
C-2.1. Setting Administrative Users
C-2.2 Creating a New Administrator
C-2.3 Editing an Existing Administrator
C-3.1. Setting Website Base Links
D. The Calendar Module
D-1. Adding Events to the Calendar
D-2. Editing Events
D-3. Deleting Events
D-4. Duplicating Events
D-5. RSVPs
D-5.1 Viewing RSVPs
D-5.2 Closing RSVPS
D-5.3 Default RSVP Notification Emails
D-5.4 RSVP Field Sorting Options
D-6. Calendar Options
D-6.1 Calendar Categories – Viewable by public
D-6.2 RSVP Notification Emails
D-6.3 RSVP Field Options
E. The Donations Module
E-1 Managing Funds and Fund Categories
E-1.1 Creating New Donation Fund Categories
E-1.2 Creating new Funds
E-1.3 Editing Funds and Categories
E-2 Viewing Donations
E-3 Editing Donation Notification Contacts
E-4 Donation Options
E-4.1 Enabling Tributes
E-4.2 Donation Email Template
F. The Announcements Module
F-1 Creating new Announcements
F-2 Viewing All Announcements
F-3 Viewing Active Announcements
F-3.1 Sorting All Active Announcements
F-3.2 Sorting Active Announcements by Category
F-4 Viewing Upcoming Announcements (Start date in the future)
F-5 Viewing Expired/Archived Announcements
G. The Archive Module
G-1 Adding an item to the archive
G-2 Viewing Existing Archive Items
G-3 Editing existing archive items
H. The Photo Gallery Module
H-1 Creating a New Gallery
H-2 Editing Existing Galleries
H-3 Deleting a Gallery
I. The e-Newsletter Module
I-1 Managing Mailing Lists
I-1.1 Creating New Mailing Lists
I-1.2 Editing existing Lists
I-1.3 Adding users to mailing lists
I-2 Managing Subscribers
I-2.1 Adding Individual Subscribers
I-2.2 Adding Multiple Subscribers
I-2.3 Managing Subscriber Information
I-3 Templates
I-3.1 Creating a new template
I-3.2 Editing an existing template
I-3.3 Sending a message from a template
I-4 Messages
I-4.1 Sending a basic message (one time)
I-4.2 Sending a templated message (one time)
I-4.3 Sending an automated message (recurring)
I-4.4 Viewing upcoming scheduled Automated Messages
I-4.5 Duplicating a message
I-4.6 Message Drafts
I-4.7 Sent Messages and statistics
I-4.8 Creating a link to a message
I-5 e-Newsletter Options
A. Welcome to Your Control Panel
1. To access your Control Panel, visit www.tools4shuls.com/manage. Log in using
the email address and password you have been provided with.
2. After logging in, you will be taken to your control panel homepage, shown above.
1. Depending on which modules you have installed, you may see fewer than the six
shown above. Additionally, the icons across the top of the page will only be in color
for those modules installed on your system. To install addition modules, please
contact Inspired Multimedia at (818)56-INSPIRE.
3. To edit site categories, click “Site Categories” in blue, below the Tools 4 Shuls logo.
4. To edit administrator settings and create new users, click “Admin Settings” in blue,
below the Tools 4 Shuls logo.
5. To begin using any of the modules, click the appropriate icon on the top of the page, or
use the links in the body of the homepage.
B. Working with Site Categories
With Tools 4 Shuls, you have the capability to update any page of your site quickly and
easily by adding information within the Tools 4 Shuls modules, and applying the
appropriate category to it. To use this feature, code needs to be added to the pages of
your site that you wish to update this way. Please contact Inspired Multimedia for
more information.
Please note: This page is only accessible to “superuser” administrators.
Depending on how many modules you have installed on your website,
the Categories page might look different from the image above.
B-1. Adding a New Category
1. In the “add new” field, enter a name for your new category.
2. Check off the box(es) for the module(s) you would like to apply the category to. You
should select at least one, and may check them all. You will be able to come back to
this page and edit the category later, if needed.
3. Click the “add/update” button at the bottom of the page to save your new category.
B-2. Editing Existing Categories
1. Simply change the name of the category you wish to edit. To undo your change
before saving, click the blue arrow to the right of the text box.
2. If you would like to apply the category to more or fewer modules, check or
uncheck the appropriate boxes.
Please note: if a category is in use on a specific module, you will not be able to
disable it within that module (denoted by the checkbox being gray). In other words, if
the “youth” category already has events in the calendar applied to it, you will not be
able to remove the “youth” category from the calendar module, since the events
require that category to exist. To remove a category from a module, you must first
delete all items within that module using that category – including any events,
announcements, archive items or galleries.
3. When finished making changes, click the “add/update” button at the bottom of the
page. You may make changes to multiple categories at once.
B-3. Deleting Existing Categories
1. Click the red X to the left of the category name.
Please note: If the X is gray rather than red, that means the category is in use
by a module, and cannot be removed. You will not be able to delete categories
that are currently in use by any module. You must first delete all items within
that category.
C. Administrator and General Site Settings
Certain information about your organization is used by many modules. You can update
that information, as well as create and edit administrators, through the “Admin
Settings” Pages. To reach this section, click on the blue “Admin settings” button at
the top of the page.
Please note: This page is only accessible to “superuser” administrators.
C-1.1. Setting General Organization Details
1. Use the “Org Details” page to set or update your information. Reach this page by
clicking on “Org Details” in the blue sub menu (circled above)
2. Click the disk icon in the bottom, right corner of this section to save your
changes
C-1.2. Setting Your Outgoing Email
You may choose to have a copy of outgoing system emails sent to a mailbox for your records.
This is helpful to be sure the system is working properly, and to have a record of all
confirmations the calendar and donations systems are sending to your users.
1. To set an outgoing e-mail box, enter the email address in the field and click the
disk icon in the bottom, right corner of this section to save the changes.
C-1.3. Setting Paypal Details
Paypal is used to take payments for calendar events and to allow for online donations. If you
are using either of these features, your organization's Paypal administrative email address is
required.
1. Within the Paypal configuration Settings panel, set the Paypal Server Selection
dropdown to “Live – Production Environment”
2. Enter the email address associated with your organization's Paypal account in the Live
Business Email Address box.
3. If you are using your system in test mode, select “sandbox” in the Paypal Server
Selection, and enter your testing email address in the Sandbox Business Email box.
Most likely, you will not be using this feature unless instructed to do so by a Tools 4
Shuls Team Member.
C-2.1. Setting Administrative Users
You may create as many administrators as you would like, and specify which modules they
should have access to. To access this page, click on “Administrators” in the blue submenu.
C-2.2 Creating a New Administrator
1. Click the “Create admin user” link in the Administrative Users
section.
2. In the expanded section, enter the desired username, email address and password.
3. Check the boxes for each module you would like the user to have access to.
1. SuperUsers will have access to all modules, as well as the Categories and Admin
Settings pages of the control panel
2. Admins that are not SuperUsers will have access to their specified modules, but not
to the Categories or Admin Setting pages.
3. Click the “Create User” button to save the new administrator.
C-2.3 Editing an Existing Administrator
1. Click the pen icon to the left of the administrator's name.
1. In the expanded section, you may edit the username, email address, and check or
uncheck boxes for the modules you would like the user to have access to.
2. To save changes to the username, email address, and module access for the
administrator, click on the disk icon to the left of the username.
3. You may cancel your changes at any time by clicking the red cancel icon to the
left of the username.
4. To reset the administrator's password, click the “reset password”
link. In the popup window, enter a new password, click “ok”, then
enter the password a second time for confirmation, and click “ok” again. The
password is now changed.
5. To delete an administrator, click the “delete admin” link, and click “ok”
in the popup message. The administrator is now deleted.
C-3.1 Setting Website Base Links
Some modules, such as the e-Newsletter, may link to the modules on your website from
outside locations. For the links to function properly, your Tools 4 Shuls system must know the
location of the main applications on your website. Most of the time these fields will be set by
the programmer who installed your modules. If you need help with this section, or are
concerned that your links might not be set correctly, please contact Tools 4 Shuls tech
support at (818)564-6774.
D. The Calendar Module
Your calendar comes equipped with English and Hebrew calendar dates,
Jewish holidays, Torah portion names and candle lighting times specific
to your location. If installed, you also have the ability to allow users to
RSVP for events and pay for events using a credit card or PayPal
account.
To access the Calendar module, click the orange “calendar” icon at the
top of the page.
In the control panel, you have many of the same display options as your general users have
on your website, with some enhancements that make managing the calendar a little bit easier.
In the screenshot above, you see the default view for the calendar, which is the monthly grid.
You may reach this view at any time by clicking the large orange “View Calendar Grid” button
near the top of the page. In this view, you are able to display events by category using the
“Events Categories” bar on the left. You can scroll through or jump to specific months and
years using the navigation bars at the top and bottom of the calendar grid. You may also
change the view by clicking on the “Year” “Month” “Week” and “Day” links just above the
calendar grid.
D-1. Adding Events to the Calendar
1. Begin the process of adding an event by performing one of the
following actions:
1. Click the large, orange “Add New Event” link near the top of the
page.
2. Locate the date of your event in the calendar grid, and click the small, gray event
addition icon next to the Hebrew date. Please Note: this icon is also
available in the “week” and “day” calendar views, and is only
displayed while logged in to the control panel – normal users will not see this icon.
2. On the “Create New Event” page, fill in the fields with all available information.
1. Category – check off at least one category to file the event under. You may select
as many categories as you would like.
2. My Jewish Portal Integration – Post your events to the community calendar on
MyJewishPortal.com as you create your events in your own calendar. Doing so will
help spread the word about your events and organization, as well as set up links to
your website, which help with search engine optimization. When you update your
events, they will update on the community calendar as well. You may remove or
delete events at any time.
To add your event to the community calendar, check the box labeled “Post this
event to the MyJewishPortal Calendar. Then check off the appropriate boxes
within the Age Groups, Program Types and Volunteer Opportunities tabs.
3. Event Title – give your event a short, descriptive name. Keep in mind that this
name will appear in different places on your website, sometimes without the
category or description. As such, try to use short, useful titles such as “Youth
Group membership committee meeting” rather than “committee meeting”.
4. Event Description – make it as long or as short as you would like. Use the
formatting options to edit text as you would in a word processing program such as
Microsoft Word. Please Note: the less formatting, the nicer it will look. If you use
different fonts, sizes and colors for your text, it may look less professional.
5. Event Start Date/Time – click the calendar icon to select a start date for the event,
and use the time dropdown to select the starting time. You may check “all day
event” if appropriate.
6. Event End Date/Time – by default, the end date and time will be automatically set
to one hour after the start time. Please note: the end date does not refer to the last
recurrence of the event, it refers to one instance of the event.
7. Recurring Events – Just as in other calendars, you may set this event to recur on
a regular basis. After checking this box, use the first or second set of dropdowns to
specify a recurrence schedule. Use the “End By” date to note the last recurrence.
If no “end by” date is specified, it will automatically end the recurrences after six
months.
8. Public Event – Keep this box checked to allow all users to view the event. If
unchecked, the event will be created in the calendar, but will only be viewable by
administrators who are logged in.
1. Non-public events are useful for internal planning purposes or for creating
events ahead of time that might not be finalized. Once the information is ready
for the public, edit the event and check this box to make it public.
9. Allow RSVPs – check this box if you would like your event to accept RSVPs
Please note: RSVPs may not be enabled on your calendar installation. If they are
not, and you would like to enable them, please contact Inspired Multimedia.
1. OPEN and CLOSED RSVPS – once you allow users to RSVP, you may specify
whether your event is accepting RSVPs. If it is, keep this set to OPEN. If you
are not ready to accept RSVPs, or if the RSVP deadline has passed, change
this to CLOSED.
2. Closing RSVPs – you may set an end date and time to close RSVPs. If you do
not set an end time, RSVPs will automatically close when the event has passed.
You may manually close RSVPs without setting an automatic end time.
1. The yellow box to the right of the RSVP section
indicates how many days or hours the RSVP window
will close prior to the event. For recurring events,
since RSVPs cannot be closed on the same calendar date each time,
RSVPs will close this number of days/hours prior to the event.
3. RSVP Fields – check off any RSVP fields you would like to ask users for. You
may specify whether the information is requested or required, based on which
box you check.
1. To create new RSVP fields
1. Enter the field name in the “Add New Field” box at the bottom of the
RSVP section.
2. RSVP field types include:
1. Alpha – restricts users to entering only letters – no numbers or
symbols
2. Email – checks to make sure the input is in the form of an email
address
3. Generic Input – no restrictions or error checking (use this if you are
not sure)
4. Number – restricts users to entering only numbers
5. Phone – checks to make sure input is in the form of a phone number
3. Click the blue “Add” button to finish creating the new RSVP field. You
must then check the box to request or require that field for this
event
4. To sort the display order of the RSVP fields, please see section D-6.3 of
this guide.
4. RSVP notification emails – Once per day, Tools 4 Shuls will send an email to a
specified administrator (or multiple administrators) with an update of any RSVPs
received since the previous update was sent. You may enter an email address
or multiple email addresses separated by commas, and a time to send the email
update each day.
10. Location – enter the location of the event, whether it is the address of your
building, the room within your building, or an outside location. Be as descriptive as
you would like.
11. Cost
1. If the event is free, leave this field alone.
2. If the event is not free, select “Event Requires Payment” from this dropdown.
1. Creating Tickets – you may create as many different ticket types as you
would like. The default ticket is “General”, however you may change this to
any ticket name and price.
2. Adding more tickets – click “Create Another Ticket Type” below the existing
tickets, and fill in the fields with the new ticket's information.
3. Removing tickets – click “remove ticket type” to delete a ticket.
3. Payment – Check the box(es) that are appropriate for your event.
1. Pay at the door – indicates that users will be able to bring a check or cash to
the event
2. Pay online – indicates that users can pay online.
Please note: if online payments are enabled for your calendar installation,
checking this box will allow users to complete their online transactions
during the RSVP process. If you do not have this feature enabled, checking
this box will inform users that they may pay online, but they will not be given
a checkout option as they RSVP.
3. Pay by Check – indicates that users may send a check in the mail. Upon
checking this box, you will be given the option to enter an address where
users should send their checks. This information will be displayed as the
user completes their RSVP, and will be included in their confirmation email.
12. URL – if your event has a web page outside of this event posting in the calendar,
please enter it here.
13. Do not display on homepage – check this box if you would like this event to be
added to the calendar, but not displayed on the homepage of your website.
If you are using a calendar module on your homepage to display upcoming events
(must be installed by Inspired Multimedia), you may wish to keep certain events,
such as minor board meeting or classroom events from displaying there.
14. When you have entered all of your event details, click the “Add” button to save the
event in the calendar. You will then be shown what your event looks like on your
website. If you wish the edit the event further, use the “Edit Event” link in the “Event
Admin Options” box on the right side of the screen
D-2. Editing Events
1. From the event grid view, locate the event you would like to edit
in the calendar and click on the event title to be taken to the
event details page. Then click on “Edit Event” in the orange
“Event Admin Options” box on the right side of the screen (shown above).
OR
Locate the event from the “View Events List” page and click on
the pen icon corresponding to the event you would like to edit.
2. Edit the event information just as you would if you were creating
an event.
3. When you are finished editing the event information, click “Submit” at the bottom of the
page.
1. Editing Recurring events: If you are editing a recurring event, you have two
options:
1. To edit all instances of the event, check the box at the bottom of the page
marked “Apply to all recurring events”.
2. To only edit one instance of the event, leave this box unchecked and only this
specific date will be edited.
D-3. Deleting Events
1. From the event grid view, locate the event you would like to edit in the calendar and
click on the event title to be taken to the event details page. Then, click on “Delete
Event” in the “Event Admin Options” box on the right side of the screen (shown above).
OR
Locate the event from the “View Events List” page and click on the red X delete
icon corresponding to the event you would like to edit.
1. If the event is part of a series (i.e. recurring event) you will be prompted to either
delete just this instance of the event, or delete the entire series.
D-4. Duplicating Events
1. From the event grid view, locate the event you would like to edit in the calendar and
click on the event title to be taken to the event details page, and then click on
“Duplicate Event” in the “Event Admin Options” box on the right side of the screen
(shown above).
OR
Locate the event from the “View Events List” page and click on the duplicate
icon corresponding to the event you would like to duplicate.
2. Change the event title, date and any other information necessary.
3. Click “Add” at the bottom of the page to add your new event to the calendar.
D-5. RSVPs
D-5.1 Viewing RSVPs
1. There are several ways to view RSVP information:
1. From the “View Events List” page of the calendar control panel, you will be
able to get a quick view of your events with RSVPs, and how many tickets
have been sold. Simply look for the RSVP envelop icon next to each event
accepting RSVPs. The number next to each envelop indicates the total number of
RSVPs accepted. To view RSVP details, click this icon.
2. Locate the event on the grid or list views and click on the event title to view the
event details page. The total number of tickets sold and a link to view all RSVPS
can be found in the orange “Event Admin Options” box on the right side of the page.
D-5.2 Closing RSVPS
1. If you are no longer accepting RSVPs for your event, and have not set RSVPs to
automatically close, you may close RSVPs from the “View Event RSVPs” page,
accessed above. Simply Click “close RSVPs for this event” located at the top, right
corner of the RSVP details page.
D-5.3 Default RSVP Notification Emails – see D-6.2. RSVP Notification Emails
D-5.4 RSVP Field Sorting Options – see D-6.3 RSVP Field Options
D-6. Calendar Options
1. Access Calendar Options by clicking on the large, orange “Calendar
Options” button at the top of the Calendar administration pages
D-6.1 Calendar Categories – Viewable by public
In order to allow enhanced categorization across modules, you have the ability to hide
categories being used within the calendar, to make it easier to use and less cluttered. Here's
an example of why you might hide calendar categories:
Your synagogue has two different youth groups – Kadima for the younger kids
and USY for the older kids. Both of these groups can be categorized within the “youth
group” category, but since you have a separate page on your website for each group,
and events in the calendar specific to each group being displayed on those two pages,
you need to be able to keep them separate internally. However, on the main calendar,
it's easier for everyone to be able to see or hide all “youth group” events, rather than
“kadima” and “USY” categories specifically. So, simply hide the “kadima” and “USY”
categories on the calendar, and when you add USY events, add them within the “USY”
and “Youth Groups” categories. Do the same with Kadima events within the “kadima”
and “youth groups” categories. Now, on the calendar, users can sort by all youth
groups without have to check or uncheck “kadima” “usy” and “youth groups” boxes.
D-6.2 RSVP Notification Emails
1. Once per day, an administrator may receive an update of all RSVPs that have been
submitted. You may change this for each event. However, you may set a default
administrator by entering an email address and clicking the disk icon to save it.
D-6.3 RSVP Field Options
1. Create new RSVP fields using the “Add New RSVP Field Option” section.
2. Edit existing RSVP fields by clicking on the pen icon next to the corresponding field.
3. Delete existing RSVP fields by click on the Red X icon next to the corresponding field.
Please note: if an RSVP field is in use, you will not be able to delete it.
4. Sort the order of RSVP fields by clicking on the grab icon to the left of the field
name and dragging the box to the desired location
E. The Donations Module
Your Donations system allows you to create unlimited categories and
funds within each category, to allow user-specified or fixed donation
amounts, and to take tribute information for each donation.
To access the Donations module, click the red “donations” icon at the top
of the page.
E-1 Managing Funds and Fund Categories
From the “Manage Funds” page you will be able to create new fund categories, new funds
within each category, edit and re-order the funds.
To get to the “Manage Funds” Page, from the Tools 4 Shuls control panel
homepage, click on the “Manage Funds” link within the donation section, OR
from any of the donation control panel pages, click on the large, red,
“Manage Funds” button link near the top of the page
E-1.1 Creating New Donation Fund Categories
1. Your installation comes with one standard donation type – “General Donation”, which
cannot be deleted or moved. It will always appear on the top of the donations page.
You may edit the title and description.
2. To create a new category, on the “Manage Funds” page, click the green plus sign or
“Create a New Fund Category” within the green bar near the top of the page.
1. On the next page, enter a category name and optional description for the category.
2. Click the “Create Fund Category” button to save your new category.
E-1.2 Creating new Funds
1. Click the green plus sign or “Create a New Fund” link within the green bar of the
category you would like to add the fund to.
2. On the next page, enter the fund name and description.
3. If you would like to add the fund to a category other than the one you selected, you
may change the category by selecting a different one from the “Fund Category”
dropdown. Each fund may only exist in one category.
4. By default, your fund will allow the user to input a unique donation amount. If you
would like to specify an exact donation amount (i.e. for memberships or event tickets),
check the box next to “Specify a fixed donation amount for this fund” and enter a dollar
amount in the box that appears below it.
5. Fund Description
Be as descriptive as you like, but keep in mind that there is limited space to display
fund information. Include information about how the money will be used, so that
donors know why they should select that fund.
6. Fund Donation Contact Information
You may select to have an email sent to any address upon successful donations to
each fund. This is useful if individuals in charge of separate groups within your
organization need to be notified of donations. For example, each time a donation is
made to a Sisterhood fund, the Sisterhood treasurer may be notified. Use the “Fund
Donation Contact Information” box to select where to send the notification.
7. Once all fields have been filled in, click the “Create Fund” button to save the new fund.
E-1.3 Editing Funds and Categories
1. From the “Manage Funds” page, locate the category or fund you would like to edit
and click the fund or category name, or pen icon next to the appropriate fund.
2. On the next page, edit any details you wish.
3. When finished, use the “Save Changes” button to complete the update.
4. To delete a fund, click the red X icon next to the appropriate fund on the Donation
Funds page.
E-2 Viewing Donations
1. To view all past donations, click on the large, red “View Donations”
button at the top of the page.
2. The donations received will be listed in blue bars, including the
date and time of the donation, the amount donated, who made the donation and if a
refund was generated through the processing gateway (PayPal), the refund will be
noted.
3. View more information about any of the donations by clicking on the blue bar for that
donation.
4. In the expanded box, details including processing fees, tribute information, and a
break-down of funds is available.
E-3 Editing Donation Notification Contacts
As seen above, you may elect to have a notification email sent to
any address upon successful donations to each fund. This is useful
if individuals in charge of separate groups within your organization
need to be notified of donations. For example, each time a donation
is made to a Sisterhood fund, the Sisterhood treasurer may be notified. You can create and
edit notifications, and set the default contact person through the Donation Notification
Contacts page.
1. Click on the large, red “Notification Contacts” button on the top of the page.
2. Create a new contact by clicking the “Create New Contact” button at the bottom of the
page. Fill in the name and email address of the contact, and click “Save contact
information” to save.
3. Edit existing contacts by clicking the pen icon next to the contact you would like
to edit.
1. Once you have edited the information, click the disk icon to save the
changes.
2. If you would like to cancel changes before saving them, click the red cancel
icon.
4. To delete an existing contact, click the red X icon next to the appropriate person.
5. To set a default contact, check the “default” box next to that person. You may select as
many default contacts as you like. Default contacts will automatically be notified of
EVERY donation made through the donation system – including new and existing
funds.
E-4 Donation Options
General options and settings for the Donations module can be found on the
Donations Options page. To reach this page, click the large, red “Options”
button on the top of the page.
E-4.1 Enabling Tributes
You have the option to allow donors to include tribute instructions with their donations. You
may disable tributes completely, enable them on a per-donation basis, or enable them on a
per-fund basis.
1. Enabling tributes on a per-donation basis allows donors to enter one set of tribute
information for the entire donation. To enable this option, click the “Enable Tributes”
box on the Donation Options page. This change is saved immediately.
2. Enabling tributes on a per-fund basis allows users to include separate tribute
information for each fund they are donating to. To enable this option, check the box
next to “Enable tributes on a per-fund basis” in addition to the “Enable Tributes”
checkbox. This change is saved immediately.
E-4.2 Donation Email Template
For each donation, a confirmation email will be sent to the donor with information about his
donation. You have the ability to edit this email however you would like. A default
confirmation is included with your installation, however, you may edit the message or subject
line. Do so using the “Email Templates” section of the “Donation Options” page.
1. Edit the information within the body of the email as you would any text document.
2. You may add pre-set indicators to provide the user with an accurate receipt and a
personalized message. The indicators will be replaced by the appropriate information
when the email is sent.
1. To use the indicators, click within the body of the message, so that the cursor is
located where you would like to add the indicator.
2. Click on the indicator you would like to add from the list on the right side of the
Email Body box. The indicator will appear where the cursor was located.
3. These indicators include:
1. Organization Name
2. Organization Tax ID – your non-profit tax ID number, for donation receipts
3. Donor Name – the name of the person making the donation
4. Donation Details – the amount(s) donated, and fund(s) donated to.
5. Tribute Details – the tribute information provided
3. When you have completed your changes, click the “Save changes” button at the
bottom of the page. This button will only appear if changes have been made to the
email template.
F. The Announcements Module
The Tools 4 Shuls announcements module enables you to add text-based
content to any page of your site, quickly and easily. You will be able to
edit and delete information, as well as set dates to add and remove the
content automatically, so that your website will never be out of date.
To Access the Announcements module, click the purple
“announcements” icon at the top of the page
Please note: code must be added to each page of your website that will feature information
from the announcements module. Please contact Inspired Multimedia for more information.
F-1 Creating new Announcements
1. Click on the large, purple “Create New” button near the top of the
page.
2. Leave the “Publish” box checked if you would like your
announcement to be displayed on the website, based on your start and end dates. If
you would not like your announcement to appear on the website at all (regardless of
start and end dates), uncheck this box.
3. Do not show on homepage – if you are using the announcements system to display
information on assorted pages within your website, and will be posting an item that
should not be shown on the homepage, check this box. By doing so, your
announcement will only show on the pages set up to show the category that the
announcement is posted to.
4. Category – check the boxes next to each category you would like to file the
announcement under. You may select as many categories as you would like. If you do
not see the category you would like, it is possible that it has not been activated for the
Announcements module. Use the “Site Categories” link to enable it for the
announcements module. Please see the Site Categories section of this manual for
more information.
5. Title – give your announcement a descriptive, but brief title. Keep in mind that space
might be limited in some locations where your announcement will be posted
6. Author – you may leave this field blank or enter your name. This information is not
displayed to the public, but is noted for your internal use.
7. Start and End date – choose a date and time for your announcement to begin to
display on your website, and for the announcement to be automatically removed from
your site. The default start date will be the current date.
8. Announcement Content – enter as much text as you would like. You may use the
formatting buttons above the content box to change fonts, colors, sizes and apply
various other styles. Please note: the first few lines of your announcement content
might be displayed on various pages of your website. It is best to keep these
descriptive, so that visitors will get a taste of the announcement without having to click
on it.
9. When completed, click the “Save Announcement” button at the bottom of the page.
F-2 Viewing All Announcements
In your announcements system, all announcements are retained until you delete them. Once
an announcement is outdated, it is archived rather than removed from the system, allowing
you to refer to them in the future if needed. To view all announcements, click the large, purple
“View All” link at the top of the page.
From this page, you may click on an announcement title to edit it, click on the
red X icon to delete it, or click on the publish or un-publish icon to perform either
action.
F-3 Viewing Active Announcements
Use the “View Active” button at the top of the page to view only those
announcements that are within the period between the designated start and
end dates. These are announcements that are currently being displayed on
your site.
F-3.1 Sorting All Active Announcements
1. From the “View Active” page, locate the purple bar just above the announcements list,
and select “All Categories” from the dropdown menu.
2. All active announcements are now being displayed. Use the grab bar icon on the left
side of each announcement to drag and drop the announcement to the desired
location. Once you let go of the announcement, it will automatically update the
location, without the need to click a “save” button.
F-3.2 Sorting Active Announcements by Category
You have the ability to display announcements in different orders based on categories. You
may wish for certain announcements to be at the top of the list on one page and lower down
on others. Changing the order in one category will not affect the order in other categories. To
sort based on category,
1. Locate the purple bar just above the announcements list, and select the desired
category from the dropdown menu.
2. Use the grab bar icon on the left side of each announcement to drag and drop
the announcement to the desired location.
F-4 Viewing Upcoming Announcements (Start date in the future)
Use the large, purple “View Upcoming” button near the top of the page to
view only those announcements with start dates after the current date.
F-5 Viewing Expired/Archived Announcements
Announcements are never automatically deleted. When they are unpublished or when their
end date has passed they will remain in the Announcements system even
though they are no longer shown to website visitors. View all expired
announcements using the “View Expired” button near the top of the page.
1. To re-activate expired announcements, click on the announcement title to be taken to
the edit page. From there, make sure the “publish” box is checked and change the end
date to a date in the future. Once you have saved your announcement, it will again
appear on your website until the end date has been reached.
G. The Archive Module
Originally developed to hold audio and text files of sermons, the Tools 4
Shuls Archive has evolved into a full-featured, multi-use tool for
uploading audio, video, text and pdf files to any page of your website.
Just like the calendar, announcement and gallery modules, the Archive
uses categories to organize media files and post your items to your
website.
To access the Archive module, click on the blue “Archive” icon at the top
of the page.
G-1 Adding an item to the archive
1. Click on the large, blue “Upload New Item” button near the top of the
page.
2. On the Upload page, select at least one category to file the item
under. You may select as many categories as you would like. If you do not see a
specific category listed, it might not be activated for the Archive module. To activate it,
use the “Site Categories” link at the top of the page, and check off the box next to that
category, corresponding to the Archive column. See the “Site Categories” section of
this User Manual for more information.
3. Select a File Date from the calendar on the right. The file date is used for sorting
purposes, and is often displayed on the website for visitors to see. The default date
will be the current date. It is advised that you change it to correspond to the date the
item would have been created or publish on. For example, if you are posting a
sermon, the file date should be the date the sermon was delivered to the congregation.
If you are posting a monthly newsletter, the file date might be the first day of the month,
even if you are posting it on a different date.
4. Enter a title for the item. Be as descriptive as necessary, keeping in mind that the
Description will not always be listed for the visitors. If you do not enter a title, the
filename of the document will be used.
5. Enter an optional description. The description is not always necessary, since many
archive views do not show the full description. However, since some do, a brief
summary or note might be helpful.
6. To upload an item to the archive, use the Java Jumploader application near the bottom
of the page. Java must be enabled for this program to run.
1. Click on the “add” icon.
2. A box will open up. Find the file you wish to upload from your computer, and once
you have selected it, click “open” near the bottom, right corner of that box.
3. The item you wish to upload should now be displayed in the Jumploader box, in the
form of a large icon. If you wish to remove this item and select another one, simply
click on the item to highlight it, and click the “remove” button just above it.
4. If you are ready to upload the item from your computer to the archive, use the “Add
File to Archive” button at the bottom of the page.
5. As the file uploads, the page will display a status message, indicated its progress.
When the file has completely uploaded, you will be taken to the “View Archive”
page to see your item in the archive.
G-2 Viewing Existing Archive Items
1. Click the large, blue “View Archive” button near the top of the page to
view all items within the archive
2. To filter the list of archive items, use the “sorting options” box on the left
side of the page. You may check or uncheck boxes next to the categories you would
like to display, search by keyword, and choose which media types to show.
3. To delete an item, click the red X icon in the row of the item you wish to delete.
4. To view or download an item, use the view or download icons. Please note,
these functions work differently for different media types, and within
different browsers.
G-3 Editing existing archive items
1. From the “View archive” page, click on the item title or the pen icon
corresponding to the item you would like to edit.
2. On the next page, edit the information you would like to change. If you choose a new
file to upload, it will replace the existing file. If you change information, but do not
upload a new file, the existing file will remain in place.
3. When you are finished making your changes, click “update item” on the bottom of the
page.
H. The Photo Gallery Module
The Tools 4 Shuls photo gallery makes it easy for anyone to create new
galleries within categories, and post links to them on any page of your
website.
To access the Gallery Module, click on the light blue “Gallery” icon on the
top of the page.
H-1 Creating a New Gallery
1. From the Galleries Overview Page, locate the category you would
like to add the gallery to and click “Create New Gallery” in the green
bar. If the category is not displayed on this page, it is possible
that it has not been activated for the Gallery module. To activate
it, use the “Site Categories” button at the top of the page and
check the box in the appropriate category's row, corresponding
to the “Gallery” column. See the “Site Categories” section of this manual for more
information.
2. On the next page, enter a Name and brief description for your new gallery and click
“Create New Gallery”
3. You will then be taken to the photo upload page, where the Java Jumploader
application will load. Java must be enabled for this program to run.
4. Once Jumploader has loaded, locate the folder and files you would like to upload from
your computer. Locate the folder using the file browser on the left. The images within
the folder will be displayed in the top section, on the right side.
5. There are several ways to choose the specific images to upload:
1. Drag images one-by-one from the top, right section to the area below it, labeled
“drop files here”
2. While holding the ctrl button, click on each of the images you would like to add to
the album. Be sure that the ctrl button is pressed the entire time, or you will not be
able to select multiple files. Once you have ctrl+clicked all files you wish to add,
drag them all at once into the box below and drop them in place.
3. Click on the first image you would like to add, then while holding the shift key, click
on the last image. This will select all images in between the first and last selected
images. Drag and drop them all at once to the box below.
6. Once all images have been added to the box on the bottom right
portion of the Jumploader screen, you may edit any pictures that
need editing.
1. To rotate an image, click on the light blue arrows pointing out from
each of the images.
2. To edit an image, click on the paint brush on the bottom, right
corner of the image thumbnail, just above the image name.
3. To remove an image, click on the red X icon in the top right corner
of that image icon.
7. When you are happy with your images and ready to upload them, click the
large green arrow near the bottom of the screen. The progress bar will
show the upload status and estimated time remaining. Do not refresh the
page or navigate away from the uploader screen.
8. When the upload has completed, all of the images will have a green
check in the top-right corner of their thumbnails. You may now use the
link near the top of the page to view the gallery.
H-2 Editing Existing Galleries
1. From the Galleries Overview Page, locate the gallery you would like to edit and click
the gallery title or the “Edit/View gallery” icon.
2. On the gallery page, you will see all images in the gallery.
3. To edit the gallery name or description, use the “Edit Gallery Details”
link above the images section.
4. To delete an image, click the red X icon for that picture.
5. To edit the name, description or to move an image to a different gallery,
click on the image or on the edit image icon below the image you
would like to edit.
1. When you are finished changing the details of the image, click the
“Save changes” button at the bottom of the page to return to the gallery page.
6. To add more images to the existing gallery, click the “upload more photos”
image in the green box and use the Jumploader application to add more
images. View more information about uploading images beginning with
Step 3 of “Creating a New Gallery” above.
7. To set an image as the gallery icon, click on the “Set as Icon” icon
below the image you would like to select. The Gallery Icon is used on
your website when a thumbnail image is needed to represent the entire
gallery. By default, the first image of the gallery will be set as the
gallery icon.
8. To change the display order of the images in the gallery, drag any
image and drop it in the desired location.
9. Group Actions are used to edit multiple images at once. To use group actions:
1. Check the boxes in the top-right corner of those images you wish to edit, or, from
the “Group actions...” dropdown, choose “Select all” or “Deselect all”.
2. From the “Group actions...” dropdown, select the action you would like to perform.
10. Changes are saved as you make them. There is no need to click a “Save” button.
H-3 Deleting a Gallery
1. From the gallery overview page, click the folder with the red X corresponding to the
gallery you would like to delete
I. The e-Newsletter Module
Similar to other e-Newsletter systems, the Tools4Shuls e-Newsletter module
allows you to maintain large numbers of users in separate mailing lists and
send beautifully formatted messages to them. Unlike other systems, with
the Tools4Shuls e-Newsletter module, you are able to automatically
generate messages using existing information from your other modules.
To access the e-Newsletter Module, click on the yellow e-Newsletter Icon on the top,
right corner of your control panel, or select a quicklink from the control panel
homepage.
I-1 Managing Mailing Lists
I-1.1 Creating new mailing lists
1. Within the e-Newsletter section of the control panel, click on the yellow “Lists”
link.
2. Click on the green “Create a New Mailing List” link near the top
of the page.
3. Enter a list name and description. Both of these may be visible by the public, so name
them appropriately.
4. Select administrators to have access to the list. Only administrators with access will be
able to send messages to the list.
5. Select categories to associate with the list. Categories are used within your site, to
give users the ability to sign up for select mailing lists. Categories are optional, but
recommended.
6. When finished, click the “Save Changes” button on the bottom of the page.
You will be taken to the list details page to view the information about the
list you just created.
I-1.2 Editing existing mailing lists
1. Click on the yellow “Lists” link near the top of the page.
2. All active lists will be displayed in the center of the page. The lists include the list
name, number of users and description.
3. To view list details and edit a list, click on the list name or on the pen icon to the
right of the list.
4. To delete a list, click on the red X in line with the list name.
5. After clicking the link to edit the list, you will be taken to the list details page,
showing all important list information and all users assigned to the list. To edit the list
details, click the “edit list details” link within the area above the subscribers section.
After updating the list details, click “Save changes”.
I-1.3 Adding Users to Mailing lists
Depending on whether the users exist within your subscribers list or not, there are several
ways to import a user into a specific list.
1. From the list details page (step 3 above), you may add a single email address by
entering it into the “add subscriber” field and clicking the “add” button. See “importing
single subscribers” below.
2.
3. From the subscribers section, locate the subscriber you would like to add to a list, and
add them through the subscribers details page. (see subscribers section below)
I-2 Managing Subscribers
I-2.1 Adding Individual Subscribers
1. While within the e-Newsletter section of the control panel, click on the
yellow “subscribers” button to access the subscribers page.
2. To add an individual subscriber, click on the green “add a
single subscriber” link near the top of the page.
3. On the following page, enter the email address and any other optional information you
would like to record for the subscriber.
4. If you would like the subscriber to receive html formatted email, click the checkbox
labeled “HTML email”. If this box is not checked, the subscriber will receive plain text
versions of each email. This is useful if the subscriber will be receiving most
messages on a hand-held devise, such as a cell phone or blackberry, which do not
always show formatted emails.
5. If you would like the subscriber to receive emails immediately, check the box labeled
“confirmed”. If this box is left unchecked, the subscriber will be unconfirmed, and will
need to manually confirm their subscriber status. Until a subscriber is confirmed, that
user will not receive any emails. Note: if you would like the user to manually confirm
his status, make sure that you send a confirmation email when adding him to the list.
see step 7 below.
6. Add the user to any existing lists by checking the appropriate boxes in the “lists”
section. You may subscribe a user to as many lists as necessary.
7. In the box on the right side of the page, select what actions to
take as you add the user to the list. If you are not confirming
the subscriber as you add him, it is recommended that you
choose to send a confirmation e-mail. Otherwise, you may
choose to send a welcome email, confirmation email, or
nothing at all.
8. When you are finished filling in all necessary fields and
options, click “save changes” at the bottom of the page to add the user.
I-2.2 Importing Multiple Subscribers
1. While within the e-Newsletter section of the control panel, click on the
yellow “subscribers” button to access the subscribers page.
2. Click on the green “import multiple subscribers” button near
the top of the page.
3. On the next page, click the black “select import file” button and locate
the file containing the list(s) you would like to import.
4. Click “open” in the dialogue box, after locating your import file. The page will run a
test-import and show you the output. If the data looks correct to you, continue. If it
does not, consider the following suggestions:
5.
6.
7.
8.
1. Convert your file to a different file type. If you are using a new version of microsoft
word or excel, try saving the file as one compatible with older versions.
2. If you are using a spreadsheet file that only has email addresses listed (and no
other data for each entry), try copying the information and pasting it into a more
basic file format, such as a notepad, wordpad or microsoft word file.
3. If you continue to have trouble importing your list, please email
[email protected].
If you are importing a spreadsheet with multiple columns of data for
each user, use the dropdown menus at the top of each column to
specify what information you are importing.
Select which lists you would like to add users to by
checking off one or more list names in the center column
near the top of the page. You may also create a new list by
entering it in the box labeled “new list name” and checking
the box next to it.
Important note: Subscribers may be added to multiple lists, however, if they
exist within many lists, they will only receive each message once – you do not
need to worry about sending the same message multiple times to one
subscriber.
In the “Import options” column on the right side of the page,
you may leave the settings as they are, however, if you find
that your file is not importing properly, you may choose to edit
the settings.
1. The delimiter is referring to the character in the import file
that divides one piece of information from another. If you
have used a tab, comma or other symbol to do this, you may select it in the
delimiter dropdown.
2. If your file contains a header row, with the names of each data column, leave this
box checked. By doing so, it will aid in importing the data properly.
When you are satisfied with the sample input, click “proceed with
import” to save the complete list.
Important note: if subscribers already exist (based on email
address), they will not be added. Rather, their subscription preferences may be
updated. In other words, if [email protected] is already a subscriber to mailing
list A and he is on the list you are trying to import into mailing list B, the original
record will be updated so that he is subscribed to both mailing lists, rather than
creating a second record.
I-2.3 Managing Subscriber Information
1. From the e-Newsletter section of the control panel, click on the “subscribers” button
near the top of the page.
2. All subscribers will be listed. By selecting an option from the dropdown menu labeled
“show all”, you can filter the list.
3. To delete, confirm or add multiple subscribers to a specific list, check the boxes to the
left of those subscribers and select the appropriate action from the “actions” dropdown
menu.
4. To edit an individual subscriber, click on the subscriber's name or the pen icon for that
subscriber. On the next page, you will be able to update the subscriber's information.
When completed, click the “save changes” button at the bottom of the page.
I-3 Templates
I-3.1 Creating a new template
1. From the e-Newsletter section of the control panel, click on the “templates”
button near the top of the page.
2. Click on the green “create a new template” button.
3. On the next page, you are given several options, represented
within three columns.
1. If you have created previous templates, you may use one of them as a starting
point by clicking on the template you would like to start from in the lefthand column.
This template will be duplicated, so the original is not disturbed.
2. If you have not previously created templates, or would like to start from scratch,
choose one of the template wizard options in the center column.
3. If you are an advanced user, with experience in html, and would like to design your
template from scratch, select the option in the third column (COMING SOON)
4. After selecting an option from either the left or center columns, the next page will allow
you to select colors for your template. Use the column on the left to change the colors
or titles, text and backgrounds. Clicking on the box will open the color palette tool.
Use the palette to choose your desired color, then click the red “Save” button to set the
color and close the palette tool.
5. Once all of your colors have been selected, click the “step 3: format layout” button at
the bottom of the page. You may save your changes at any time before that as well.
6. On the next page, give your template a name and description. Be as specific as
possible, so that it will be easier to identify when needed.
7. The lower portion of the page uses the Tools4Shuls drag and drop template editor. It is
suggested that you spend a few minutes getting used to dragging and dropping
widgets, as you may have trouble at first. To drag a widget,
left-click your mouse while positioning your mouse over the
title bar of the widget. While continuing to hold the mouse
button down, drag the widget to the desired location. A
yellow box will appear where ever you are able to drop the
box. Once the widget is in the desired location, let go of the
mouse and the widget will be placed in that spot. All widgets may be moved between
columns and page sections, such as headers and footers. If you attempt to drag and
drop a widget and it does not move to the desired location, try again, and pay close
attention to the location you are dropping it.
8. To delete a widget, click the red X in the top, right corner of the widget.
9. To minimize a widget, click the blue arrow in the top, right corner of the widget. You
may click the same arrow to maximize it as well.
10. To edit the contents of a widget, click within the content area of that widget. It will
change colors, and become an editable field. Please note that this is simply a
template that could be used for multiple different emails in the future. You do
not need to enter information into any of the widgets, as you will be able to do
so when you send the email to the list.
11. Widget options include the following (some might be pre-set within the default layout,
and can be moved or deleted as needed.
◦ Header – Drag and drop this widget where you would like to place
large, bold text. While editing the header text, you have the option to
specify that it is a header or sub-header. Sub-headers are slightly smaller.
◦ Article – Drag and drop this widget where you would like to add a block
of text, or have advanced editing capabilities. After placing the
widget, click in the title or content area to edit the text. To access
the advanced editor, click on the pen icon on the right side of the
widget. Within the advanced editor, you have the ability to treat
text as you would in most word processing softwares. You also
have the ability to add images, or use the “source” button to edit
the html code of the article (recommended only for advanced users)
◦ Image – Drag and drop this widget to place an image. At this time, you
will not be able to upload your own images. They must already exist on
your website. Enter the URL of the image, and choose an optional URL for the
image to link to (as a banner advertisement might on a website). You may also
enter alternate text, which will be used when the image does not load.
◦ Links – Drag and drop this widget to place a series of text links. You
may specify that they be horizontal (next to each other), such as in a
menu bar along the header or footer, or vertical (stacked on top of each other),
such as in a sidebar. For each link, enter the text that you would like to appear as
well as the full URL to link to.
▪ The URL must begin with http://. Beginning it with www will not create a proper
link.
▪ You may re-order the links by grabbing the icon to the left of the link, that looks
like six dots, and dragging it above or below another link.
▪ You may also delete links by clicking on the delete icon for that link.
◦ Tools4Shuls Module widgets – depending on which modules you have installed,
some of these widgets may not be available.
▪ Calendar widget – drag and drop this widget to add an
automated list of upcoming events into your newsletter. This
widget will always use the criteria you set to populate the
newsletter with information based on the date the email is sent. After dropping
the widget into place, fill in a number of days worth of events to include, a
maximum number of events and the categories to include. Edit the title of the
widget by clicking on “edit title” at the top of the box. You may choose to include
a link to the main calendar on your website, as well as the option to omit this
widget if no events match your settings at the time of sending.
▪ Announcements Widget – drag and drop this widget to add an
automated list of announcements to your newsletter. This
widget will always include announcements that are current and
published at the time of sending the email. Outdated or unpublished
announcements will be omitted. After dropping the widget into place, you may
edit the title by clicking on “edit title” near the top of the box. Select which
categories of announcements to include, and choose to optionally omit this
widget if no current announcements are published at the time of sending.
▪ Archive Widget – drag and drop this widget to add an
automated list of recently added items in your archive. This
might be useful to send out recently posted sermons,
newsletters or educational material. After dropping the widget into place, you
may edit the title by clicking on the “edit title” link near the top of the box, and
edit a brief descriptive line of text just below that. Enter a date range, maximum
number of items to include, and which categories of archival items to display, as
well as whether or not to omit this widget should no information match your
criteria.
▪ Photo Galleries Widget – drag and drop this widget to add
an automated list of recently created or updated photo
galleries. Informing people about photo gallery updates is a
great way to attract more visitors to your website, and inform them about the
great events you have going on. After dropping the widget into place, you may
edit the title by clicking on the “edit title” link near the top of the box, and edit a
brief descriptive line of text just below that. Enter a date range, maximum
number of items to include, and which categories of archival items to display, as
well as whether or not to omit this widget should no information match your
criteria. You may also choose whether to include galleries that were recently
update (as opposed to only showing brand new galleries), and whether to
include the gallery thumbnail. If you choose not to include the thumbnail, only a
text link will be displayed.
▪ Ideas and tips for using the widgets:
◦ You may add as many widgets as you would like, including multiple
placements of each widget. This is useful if you want to put specific
events or announcements in one spot, and a more general, full list of
events or announcements in a different location.
◦ Create a “shabbat shalom” email by sending the email on Fridays with 3
days worth of events, and only including the candle lighting, torah portion
and religious services categories.
◦ Send a monthly events email by scheduling your email to send on the
first day of the month, and include 30 days of events from all categories.
Create different messages for different sub-lists by only including one
category from the calendar, and only sending to one of your mailing lists.
12. When all widgets have been placed, click “all done” on the bottom right corner of the
page to save the template.
I-3.2 Editing an existing template
1. From within the e-Newsletter section of the control panel, click on the “templates” link
near the top of the page.
2. Locate the template you would like to edit and click the pen icon for the
appropriate template.
3. See section I-3.1 for details about editing the template contents.
I-3.3 Sending a message from a template
See section I-4.2
I-4 Messages
I-4.1 Sending a basic message (one time)
Sending a basic message is useful when you need to send a pre-formated html message,
event invitation or notice that does not recur.
1. From within the e-Newsletter section of the control panel, click the yellow
“messages” button near the top of the page.
2. Making sure that the “messages” tab is selected, click the “create a new
message” button.
3. On the next page, select “New message with editor” on the left side of the page.
4. The next section contains 5 steps, each on its own tabbed panel. You may click
between the tabs as needed, but you must choose settings on most of the tabs prior to
being able to send a message.
1. Tab 1 – Compose.
1. Enter a from name and email address (who you want the email to be sent
by/coming from), as well as a subject line for the message.
2. Using the editor, create a message just as you would in a word processor. You
may use the various buttons within the editor to change text colors and sizes,
and add tables, links and other advanced elements. You may also click the
“source” button to edit the html source code directly.
Helpful Tip: you may check the box below the editor labeled
“show width guides” to display markings of different widths. It
it recommended that emails do not exceed 600 pixels in width. Keep this in
mind if you create a table or insert a very large image.
3. When finished, click “copy down” below the editor to create a
text-only version of your email. The text version will be sent to
all recipients who receive emails on cell phones or blackberrys,
who may not be able to see full html emails.
4. When your text version looks good, you may send a preview email to yourself
using the email box near the bottom of the page, or proceed directly to the
preview page (step 2) using the button on the bottom, right corner of the page.
2. Tab 2 – Preview
1. Your message will appear on this page. Confirm that the message and all of the
sender information and subject line look correct. If they don't, click on the
“compose” tab or the “back to previous tab” button on the bottom of the page to
make changes. You may also choose to send yourself a preview email at this
point (recommended)
2. If the email looks good, proceed to the next step by clicking the tab on the top or
the button on the bottom of the page labeled “Step 3: Select Mailing Lists”.
3. Tab 3 – Select Mailing Lists
1. Check the box next to the mailing list(s) you wish to send to. You may send to
as many lists as you would like.
Important note: if a recipient is subscribed to multiple mailing lists, he will only
receive each message once. You do not need to worry that he is on several of
the selected mailing lists.
2. After selecting mailing lists, proceed to step 4 by clicking the tab on top or the
button on the bottom labeled “step 4: schedule”
4. Tab 4 – Scheduling
1. Leave the settings of this page as they are to send the message immediately. (a
future software release will allow for scheduling a single message to delay its
arrival.)
2. Proceed to the next step by clicking on the tab on top or button on the bottom of
the page labeled “Step 5: Review and Send”.
5. Tab 5 – Review and Send
1. This page contains all details of your message for you to review. If necessary
information is missing, a red box will inform you. You may click the tabs along
the top of the section to return to any step of the process and fix the issues.
After making fixes, return to step 5 by clicking on the appropriate tab.
2. Once all information is correct, click “schedule to send” on the bottom, right
corner of the page. Sending will commence and you will be taken to a page
showing the processing of your message.
I-4.2 Sending a templated message (one time)
1. From within the e-Newsletter section of the control panel, click the yellow
“messages” button near the top of the page.
2. Making sure that the “messages” tab is selected, click the “create a new
message” button.
3. On the next page, select “new message from template” on the right side of the page.
4. Select the template you would like to start from on the next page, or create a new
template by clicking on the green button on the right side of the page. Please see
section I-3.1 for further instructions.
5. Once you have selected a template, you must proceed through the 5 steps,
represented by the five numbered tabs along the top of panel. Please see I-4.1, step 4
for details about these five steps, and see section I-3.1, steps 7-11 for details about
editing with the drag and drop template.
I-4.3 Scheduling an automated Message (recurring)
Automated messages allow you to integrate information from your Tools4Shuls modules,
allowing you to send emails with up-to-date information, without manually creating the
messages each time. At the time of sending, the Tools4Shuls e-Newsletter module will
automatically draw information from your modules, based on the criteria you set.
1. From within the e-Newsletter section of the control panel, click on the “messages”
button near the top of the page.
2. Click on the “automated messages” tab to open
the automated message display.
3. Click the green “create a new automated
message” button just below the tabs.
4. Select the template you would like to start from on
the next page, or create a new template by
clicking on the green button on the right side of the page. Please see section I-3.1 for
further instructions.
5. Once you have selected a template, you must proceed through the 5 steps,
represented by the five numbered tabs along the top of panel. Please see I-4.1, step 4
for details about these five steps, and see section I-3.1, steps 7-11 for details about
editing with the drag and drop template.
Important note: “step 4: Scheduling” of the message creation process differs in the
automated email setup. You are able to schedule your message to send daily, weekly
on a certain day of the week, or monthly on a certain day of the month using the
different dropdown options. You will also be required to select a start and end date.
Your messages cannot be sent indefinitely. Upon selecting a schedule, the upcoming
send dates will be listed on the right side of the page, to help confirm the schedule.
I-4.4 Viewing upcoming scheduled Automated Messages
A complete list of upcoming messages scheduled to be sent by the Automated Messages
system is available.
1. From within the e-Newsletter section of the control panel, click on the “messages”
button near the top of the page.
2. Click on the “automated messages” tab to open
the automated message display.
3. The second section of the page, entitled
“Scheduled messages”, displays all automated
messages. You may view the message by clicking
on the message name, and see the recurrence
schedule, and well as the next scheduled sending of the message in this table. If
you would like to cancel a recurrence, click the red cancel icon to the right of the
message.
I-4.5 Duplicating a message
1. From within the e-Newsletter section of the control panel, click on the “messages”
button near the top of the page.
2. Within the “scheduled messages” or “sent messages” sections of the page, locate
the email you would like to duplicate and click the duplicate icon to the right.
3. You will be taken to the message creation page, with the body of the duplicated
message already filled in. Proceed with the message creation.
I-4.6 Message Drafts
Your messages will automatically save themselves as soon as you complete the first step of
message creation.
1. From within the e-Newsletter section of the control panel, click on the “messages”
button near the top of the page.
2. The “send a message” box contains all previously-saved drafts. To continue
developing an email from a draft, click on the draft name or the pen icon. You will
be taken to the first step of message creation, with data from the draft already in place.
Continue to edit the draft and proceed through the five steps to send the message.
3. If a draft is no longer needed, you may delete it by clicking the red X for the
appropriate draft.
I-4.7 Sent Messages and Statistics
1. From within the e-Newsletter section of the control panel, click on the “messages”
button near the top of the page.
2. The bottom panel of the page is the “sent messages” section. It includes the message
subject, date and time it was sent, number of recipients, number of recipients that
opened the email and number that clicked on any link within the email. If the email that
you would like statistics on is not listed, click “view more” at the bottom of this panel.
3. To view detailed statistics about a specific message, click on the message subject line.
The following page displays which lists the message was sent to, what the contents of
the email were as well as a chart displaying statistics about how many recipients
viewed the message.
I-4.8 Creating a link to a message
Each message has a permanent web page created for it. The link can be found within the
“sent messages” panel of the “messages” page. (see I-4.7).
1. Click the message URL icon for the appropriate message and copy the link to
your clipboard. You can now send that link to someone or use it within your
website to create a log of sent messages.
I-5 e-Newsletter Options
1. From within the e-Newsletter section of the site, click on the yellow
“options” button near the top of the page.
2. Use the submenu on the left side of the page to navigate between option
settings.
3. Click on “default values” to set the “from
name” and “from email address”. This
value is used each time you send a
message. You can manually change it
as you send messages, but if the
majority of messages are coming from
one name and email (most likely your
organization's name and main email
address), you should set that here so
that it you do not need to do it each time
you send a message in the future.
4. Click on “confirmation email text” to edit
the text of the email sent to new users
who need to confirm their request to be
on your mailing list. Some of the information cannot be edited, but you may add your
own message within the editable fields.
5. Click on “welcome email text” to fully customize the message sent to new users to
welcome them to your list. It is recommended that you [listname] and [updatelink] tags,
as these are replaced by the actual name of the list they are subscribing to, and a real
link to allow the user to edit their settings.