1
修订
版本 标记 处数
V1
Please ensure the anode and
cathode of wires in the first
module are connected with the
cable of power supply correctly.
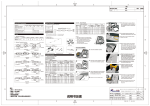
Malfunctions & Solutions:
Possible Causes
1.The power supply didn't connect
to the power grid .
All LED
don't works
07
Cut off the excessive modules.
Please do the insulation for the
ending wires with the terminals
or other method.
1.No output form part of power supply.
Part of LED
don't work
Note: Please cut from the middle of
wires between modules.
Remark:
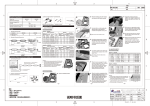
The above installing method is for the standard cascade. The maximum cascade
qty should not more than 25pcs. If the qty of modules is more than 25pcs, please
repeat the installing steps on the above.
.
Brightness
of the LED is
dim or not
even
LEDs are
blinking
1、Caution for installing & using:
1.1 Please check and ensure that the anode & cathode for the module's
wires are connected to power supply output's anode & cathode
accordingly. Otherwise, the product can not work normally.
1.2 Double side adhesive tape is only used for preliminary fixing. Please use
the screws or the neutral silicon sealant to fasten the modules,otherwise,
there will be caused defects such as product shift, fall off and so on.
1.3 The standard cascade quantity is 25pcs modules. The maximum
cascade quantity is 25pcs modules under single-end power feed and
50pcs modules for double-end power feed, prohibited to exceed this
limitation in the actual using.
1.4 Please dispose the exposed wire and the joints with insulation,
waterproof and anti-corrosion.
2、Cautions for others parts selected:
2.1 Please ensure that the output voltage for the using power supply are
12±5%V DC, and the rated power must be reserved 20% than the actual
loading.
2.2 The using power supply must pass safety certification which have the
protect functions in short circuit, over voltage and over current.
2.3 During the installing, please ask the qualified persons to count and
select the suitable cable according to the diameter and length when the
connecting cable need be extended, otherwise, there will be caused low
input voltage to product, or fire hazard due to the cable too hot.
2.The part of modules wrong
connected to the power supply.
Solutions
Power on.
Remove the malfunction
and power on again.
Check the connecting and ensure
the wires are connected correctly.
If the external flexible cable of light box is damaged, please replace it by
the manufacturers or theirs service agent or the qualified persons to avoid
a hazard.
The given data in this manual is based on our standard product. There
may be existed varies with the actual delivery products. Please subject to
the measure data for the actual product.
All illustrations in this user manual are for reference only. Please subject to
the received goods.
The product subject to change or modify without prior notice.
7
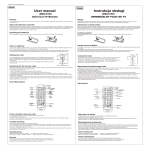
Venus Series
LED Modules
User Manual
Check the power supply and
remove malfunctions.
3. The wires for some modules are
connected reversely.
Connect the wires rightly.
1.The loading of power supply is
overloaded.
Use more supplies or replace
it with high power supply.
2.The line losing of the power
supply's wire is too big.
Make sure the operating
voltage of the modules is inside
of ±5% standard voltage.
3 Modules cascaded too many
per the strings.
1
Caution:
2.The power supply is auto
protected because the output is
short circuit.
3. Wrong connected for the wires of
modules.
变更者
Declaration:
Malfunction & Solution Table
Malfunctions
日期
1
1
08
1
内容
1.自备物件:增加自攻螺丝ST2.9;
2.模组安装步骤:第4步增加打螺丝步骤;
2013-03-01 肖云强
3.常见故障及排查方法整体修改;
4.注意事项内容整体修改;
5.警告语整体修改; 6.质保申明调整;7.申明内容修改.
M903LB
Lessen the cascaded qty for
the modules and ensure the
quantity for each electrical
circuit are within the maximum
cascade quantity which allowed.
1.Poor contacted in the joints.
Find out the malfunction and
remove it immediately.
2.Failures in the power supply.
Replace the power supply.
1
Warning:
Prohibited to disassemble, modify this product.
Prohibited to operate the product during power on.
Prohibited to use any organic chemical solvents to contact this product
directly or indirectly.
Installation、repair、maintain must be operated by the professional
persons.Prohibited to operate it by the unprofessional persons.
If the modules don't fasten with the screws, you can use the neutral silicon
sealant to fix it. During the using, please don't seal the light box until the
silicon is solidified fully. Prohibited to use any acid or alkalinity adhesive to
fix the product. Please pay attention to the silicon sealant don't stuck the
surface of the lens.
This product will generate the heat during working. Please consider the
installing density for the modules and use the materials with good heat
dissipation.
1
Warranty:
Warranty:5years or 22000 hours,whichever come first.
Additional Remarks:
The warranty period in the above refer to the product used in the inside of light box with
waterproof.
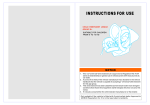
Please carefully read this manual before using our products and keep it properly
V1.0
·5·
备注:
1.尺寸:385*210mm;
2.材质:80g书纸;
3.公差:±1mm;
4.灰度双面印刷;
5.虚线不印刷,来料必须从虚线处折好;
·6·
·7·
材 质
说明书反面
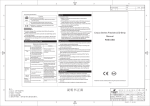
二代M903LB说明书
零件名称 启明星
(英文无LOGO)
设 计 肖云强 日 期
零件编码 308-01-107
审 核
图纸 编 号 RD-M903LB-BZ027 标 准 化
页
数
共 2 张
第 2 张 批 准
2013.03.01
表 面处理
日期
重 量
日期
比 例
日期
单 位
N/A