1
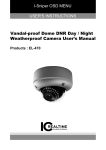
User Operation Guide
Universal Manual for IC Realtime Recorders
CAUTION
RISK OF ELECTRIC SHOCK
DO NOT OPEN
CAUTION: TO REDUCE THE RISK OF ELECTRIC SHOCK DO NOT
REMOVE COVER. NO USER SERVICEABLE PARTS INSIDE.
REFER SERVICING TO QUALIFIED SERVICE PERSONNEL.
The lightning flash with arrowhead symbol, within an equilateral triangle, is
intended to alert the user to the presence of un-insulated “dangerous voltage”
within the products’ enclosure that may be of sufficient magnitude to constitute
a risk of electric shock.
The exclamation point within an equilateral triangle is intended to alert the user
to the presence of important operating and maintenance (servicing) instructions
in the literature accompanying the appliance.
WARNING: TO PREVENT FIRE OR SHOCK HAZARD, DO NOT
EXPOSE THIS UNIT TO RAIN OR MOISTURE
CAUTION: TO PREVENT ELECTRIC SHOCK, MATCH THE WIDE
BLADE OF THE PLUG TO THE WIDE SLOT AND INSERT FULLY.
INTRODUCTION
This user’s manual is designed to be a reference tool for the end user of the system.
Before installation and operation, please read the following safeguards and warnings carefully.
•
Place the equipment on a hard, level surface.
•
Do not place your equipment in a closed-in wall unit, or on a soft, fabric surface such as a bed, sofa, carpet, or a rug.
•
Leave 10.2 cm (4 in) minimum of clearance on all vented sides of the equipment to permit the airflow required for proper
ventilation. Restricting airflow can damage the equipment or cause a fire.
•
Ensure that nothing rests on your equipment’s cables and that the cables are not located where they can be stepped
on or tripped over.
•
Keep your equipment away from radiators and heat sources.
•
Keep your equipment away from extremely hot or cold temperatures to ensure that it is used within the specified operating range.
•
Move equipment with care; ensure that all casters and/or stabilizers are firmly connected to the system.
Reproduction in whole or in part without written permission is prohibited. All rights reserved.
Trademarks: All brand names and products are trademarks or registered trademarks of their respective owners.
Disclaimer: The information in this document is subject to change without notice. The manufacturer makes no representations
or warranties, either express or implied, of any kind with respect to completeness of its contents.
Manufacturer shall not be liable for any damages whatsoever from misuse of this product.
2
The information contained in this publication is accurate as at the date of printing.
YOUR SYSTEM INFORMATION
This page is for unique information related to your system; this page should be filled in by your system integrator at the
time of install.
Device Model Number: Device Serial Number:
Amount of HDD Installed:
Date of Install:
Internal IP Address of device:
HTTP Port:
TCP Port:
External IP or DYNDNS Address:
Installation Company:
Support Number:
The information contained in this publication is accurate as at the date of printing.
3
CONTENTS
1. Mouse Operation.....................................................................................................................................5
2. Using the System.....................................................................................................................................6
a. Start-up.............................................................................................................................................6
b. On Screen Display Icons.............................................................................................................6
c. Default Password and System Login......................................................................................6
d. Quick Menu.....................................................................................................................................7
e. Camera Toolbar..............................................................................................................................8
3. Changing the Language......................................................................................................................9
4. Channel Names........................................................................................................................................9
5. PTZ Control.................................................................................................................................................9
6. Time Functions.........................................................................................................................................10
a. Setting the date and time..........................................................................................................10
b. Setting up DST (Daylight Saving Time).................................................................................10
c. Setting up NTP (Network Time Protocol).............................................................................10
7. Account Management...........................................................................................................................11
a. Changing Passwords...................................................................................................................11
b. Adding Accounts...........................................................................................................................11
c. Making Cameras Covert.............................................................................................................12
8. Hard Drive Management.....................................................................................................................13
a. Formatting Hard Drives..............................................................................................................13
9.Playback......................................................................................................................................................14
a. Search / Playback Function List...............................................................................................15
10.Backup..........................................................................................................................................................16
a. Formatting the backup device.................................................................................................16
b. Backing up Video..........................................................................................................................16
c. Clip Backup via Search................................................................................................................17
d. File Backup via Search.................................................................................................................17
e. Playing Backup Files.....................................................................................................................18
11. Remote / Network Access....................................................................................................................19
a. Web Browser...................................................................................................................................19
12. System Info.................................................................................................................................................21
a. HDD Info...........................................................................................................................................21
b. Log......................................................................................................................................................21
13.Software......................................................................................................................................................22
14.Warranty......................................................................................................................................................23
4
The information contained in this publication is accurate as at the date of printing.
1.MOUSE OPERATION
This device can be controlled using the remote control, front panel or by using the USB mouse.
We have found that using the USB mouse is the easiest and most efficient way of controlling the system
and with this in mind we have created the manual based on using the system with the USB mouse.
The mouse operates on a similar basis to a computer operated mouse; left and right click, double click,
click and drag and scrolling.
1. LEFT CLICK BUTTON
a. Single Click
i. Click to open the quick toolbar.
ii.
Opening menus.
iii. Checking a box.
iv. Selecting letters and numbers on the on-screen keyboard.
b. Double Click
i. Bringing a camera full screen on live view or playback.
ii. Selecting a playback event.
iii. Opening certain sub menus.
1
2
3
2. RIGHT CLICK BUTTON
a. Exits any menu or reopens previous window.
b. On live view it displays quick select options.
3. SCROLL WHEEL
a. Scrolls through menus or events in a list.
b. Increases or decreases numeric values in input boxes.
The information contained in this publication is accurate as at the date of printing.
5
2. USING THE SYSTEM
a.Start-up
Your device is fully operational and available to use when you hear the beep after system boot up.
The default GUI language will be English. Changing of language is described in section 3 of this manual.
The device will boot up initially in multi-screen mode and will save the last configured screen configuration after re-boot.
You can also setup screen layout favourites in the Display menu.
At default the system is set to continuous record on all channels, please observe the notification icons on each channel.
b. On Screen Display Icons
When in live view mode you will see the following icons display in the viewing windows of each channel.
1
Channel is recording.
3
Video Loss or No Camera is plugged in.
2
Motion has been detected.
4
Camera Lock or Camera is in privacy mode.
c. Default Password and System Login
➢
➢
By default, the login password is the same as the user name (for example: Username: guest Password: guest /
Username: admin Password: admin).
You will see two user names in the drop down menu.
➢
➢
➢
You can gain access to the main menu in a number of ways:
•
•
•
•
•
guest = Limited user access to live view, playback, backup and General menu.
admin = Full administrator access to all functions.
Right Click on live screen and select Main Menu from the options.
Left Click once on the live screen to bring up the system login.
Select a direct menu that requires a system login to continue.
6
Backspace / Delete.
Confirm Entry / Close keyboard.
Change to capital letters etc.
Space.
By clicking on a field such as a password or text entry it will display the above virtual keyboard.
The keyboard operates just like a regular on-screen keyboard, left click to select individual characters
and Shift to change the letters to upper case characters. The information contained in this publication is accurate as at the date of printing.
d. Quick Menu
You can access the quick menu by right clicking anywhere on the live screen.
The quick menu gives you access to the systems key functions.
➢
➢
•
•
•
•
•
•
•
Single View / Spilt: Select a camera in full screen or select a multi display option.
PTZ Control: Movement and Control for PTZ enabled cameras (not included).
Colour Setting: Configure colour settings for each channel.
Search / Playback: View recorded video from the system.
Record Set: Change recording settings for each channel.
Alarm Output: See current Alarm Output status.
Spot Output: Configure the spot output to display different views/cameras.
The information contained in this publication is accurate as at the date of printing.
7
e. Camera Toolbar
The camera toolbar is used to perform quick actions on a specific channel when in live view mode. To access the camera
toolbar move the mouse to the top centre of the channel and it will display options like this:
NOTE: You will need to login into your system and have rights
to use these functions.
Real time Playback
This function allows you to view the last 5~60 minutes (Programmable) of video from that selected channel. To operate this function just
click and it will playback recorded video (if available) from 5 minutes ago.
NOTE: At default the recorder will playback from 5 minutes ago, this can be increased up to 60 minutes by changing the value of ‘Real
time Play’ in Settings > General
Digital Zoom
➢•
➢•
➢•
➢•
➢•
Press the button to enable digital zoom on the channel the icon will then change to
Click and drag a box around the area you want to zoom in on.
Click and drag to pan the selected zoom.
Right click to reset back to full view.
Click again to disable digital zoom, the selected area will be at the same zoom until you right click inside the channel.
NOTE: You can use digital zoom on multiple channels at the same time. Using the digital zoom does not affect the recorded video.
Real time Backup
This function allows you to record live video of the selected channel directly onto a USB device (not included).
1. Insert the USB backup device into one of the USB ports on the device.
2. Click on the button to begin the real-time backup, the icon will change to if successful.
3. Click again to stop the real-time backup.
8
The information contained in this publication is accurate as at the date of printing.
3. CHANGING THE LANGUAGE
By default your system will boot up in English, if you wish to change the GUI language please follow these instructions (language
availability depends on model).
1.
Access the main menu and then go to
Settings > General.
2.
Select your required language from the
dropdown menu.
3.
Press OK to save and confirm re-boot.
4.
The device will now re-boot into the
selected language.
1.
Access the main menu and go to
Settings > Display Setup.
2.
Go to Channel Name and click Modify.
3.
Then enter the names for your cameras.
4. CHANNEL NAMES
5. PTZ CONTROL
1.
Right Click on the live screen and select PTZ Control.
2.
Main Movement Control.
3.
Zoom, Focus and Iris Adjustments.
4.
Setup Controls.
5.
PTZ Trace is a function which controls the PTZ with the
movement of the mouse pointer.
6.
Page Switch brings you to further menus where you
can call presets, patterns etc.
The information contained in this publication is accurate as at the date of printing.
9
6. TIME FUNCTIONS
It is highly recommend you set the system time on the day of install to avoid any duplication in files.
a.
Setting the date and time.
1.
2.
3.
Access the main menu and go to Settings > General.
Enter the current Date and Time according to the date and time format.
Click Save next to the time.
1.
Date and Time adjustment.
2.
Save button for Date and Time adjustments.
3.
Setup of DST (Daylight Saving).
b. Setting up DST (Daylight Saving Time)
DST settings will move the time forward and back for summertime adjustments. The system will have the settings
for UK and Ireland Summer Time pre-filled.
1.
2.
3.
Access the main menu and go to
Settings > General.
Press the Set button next to DST.
Enter your Start and End as needed for your region.
c. Setting up NTP (Network Time Protocol)
You can also sync your device to an internet based NTP server.
1.
2.
3.
4.
5.
6.
7.
10
Access the main menu and go to Settings > Network > Network Settings.
Tick the box next to NTP and proceed to double click on the option to display the NTP Settings.
Enter the IP or DNS Address of the NTP
Server in Server IP.
Across from Port enter the NTP Server Port.
Select your Time Zone.
Select the update interval of how often
the device will sync to the NTP.
Click Update to test the connection.
The information contained in this publication is accurate as at the date of printing.
7. ACCOUNT MANAGEMENT
Main Menu > Advanced > Account Manage
Every user in the system is in a group, and receives permission to access system functions based on their group settings.
The following user groups are setup at default in your system:
• admin: Accounts in the admin group have access to all menus and can control user accounts.
• user: Accounts in the user group have limited access to system menus.
You will see 3 usernames in the account list.
• guest = Limited user access to live view, playback, backup and General menu.
• admin = Full administrator access to all functions.
• default = This is a system account used for automated tasks that can be setup in the device,
this username will not be displayed in the drop down menu.
When adding a user you can control permissions to certain parts of the device (including which cameras the user can view
remotely as well as which channels can be played back on the device).
a. Changing Passwords
1. Access the main menu and go to Advanced > Account Manage, then click Modify Password.
2. Select the user from the drop down list.
3.Under Old Password enter the previous password.
4. Under New Password and Confirm enter the new password.
5.Click Save.
b. Adding Accounts
1. Access the main menu and go to Advanced > Account Manage, then click
Add User to display the following screen:
The information contained in this publication is accurate as at the date of printing.
11
7. You can now enter the details for the new user account.
1. User: Enter the desired username.
2.
Reusable: When this option is ticked it will allow this user to login multiple times simultaneously.
3.
Password: Enter a password for the account. Repeat password under Confirm.
4. Memo: This field is optional and is a description of the user account.
5.
User MAC: Optional, this allows you to enter the MAC address you permit to use with this account.
6Group: Select the group you want the user to be part of.
8. In the bottom half of the screen, you can disable certain permissions for this user.
Depending on which group you have selected it will automatically select all permission for the selected group. You can only
reduce the permissions for the account.
9.
Click Save to add the user.
c. Making Cameras Covert
If you want certain cameras to be in covert/privacy mode on boot up you can modify the “default “username.
So when the system boots up you will see the camera lock symbol on the particular channels.
1.
Access the main menu and go to Advanced > Account Manage, then click Modify User and change
the username to default from the drop down list to display the following screen:
On the bottom portion of the screen you can toggle access to particular channels by ticking and un-ticking
the box next to the particular channels.
2.
3.Click Save.
12
NOTE: When a user with access to the channel is logged in they will see that camera in live view, to
test your changes logout of the current username.
The information contained in this publication is accurate as at the date of printing.
8. HARD DRIVE MANAGEMENT
Main Menu > Advanced > HDD Manage
1.
Status of the Hard Drive.
2.
Hard Drive Number.
3.
Hard Drive Setting / Action.
4.
Selected Hard Drive Information.
HDD Manage allows you to format and manage the hard drives that are installed in your system.
a. Formatting Hard Drives
NOTE: Formatting of Hard Drives erases all data and cannot be un-done. System Software and Settings will not be affected by formatting Hard Drives.
1.
2.
3.
4.
5.
Access the main menu and go to Advanced > HDD Mange.
Select the HDD you want to format under HDD No.
Under “Set to”, select Format.
Click Execute and OK to confirm you wish to erase all data. Please wait while the system formats the HDD.
Press OK and the system will re-boot.
The information contained in this publication is accurate as at the date of printing.
13
9.PLAYBACK
Playback of the content that is recorded to your device can be accessed in a number of ways.
•
•
From the live view screen, right click and then click Search / Playback.
Access the Main Menu and go to Search.
You will be required to login, if so, select your username and enter your password (the default password is the same as the username).
1
2
3
14
4
1.
To view recordings simply select the date on the calendar, all days in green contain recordings.
2.
Select the cameras you wish to playback, depending on your model, up to 16 channels can be played simultaneously.
3.
When you have the date and channels selected, click inside the timeline to begin playback.
4.
By default the timeline will open in 24 hour mode, the scope can be changed to 2hr, 1hr & 30min in the bottom
right hand corner of the screen.
The information contained in this publication is accurate as at the date of printing.
a.
Search / Playback Function List
# Item
Function
Displays the playback content.
You can select to search for videos or snapshots or select to
play from HDD or External Source.
Shows dates that contain recordings.
Select the number of screens to display simultaneously.
You can also select which screens are played back.
Play forwards and backwards.
Allows for forwards and backwards frame control.
Speed up or slow down playback.
Smart Search function.
Saves snapshots to external media.
Adding marks to the playback time.
Volume Control for playback.
Enabling video clip function.
Shows the start point of the video clip.
Shows the end point of the video clip.
Card Search.
Management of Marks that have been placed on events.
Shows the recorded files in a list format.
Begins backup when files are selected.
Indicates video playback status - playing, paused, etc.
When unchecked, allows simultaneous playback of different channels
starting at different points in time.
Allows selection of which type of video recordings to search.
Shows the time period(s) that video was recorded, along with the
recording mode of that video.
Adjustments for the the scale of the timeline from 24 hours down to 30 minutes.
1
2
Playback Window
File Source/Type
3
4
5
6
7
8
9
10
11
12
13
14
15
16
17
18
19
20
Calendar
Channel Selection
Play/Pause
Frame Advance
Slow/Fast Play
Smart Search
Snapshot
Mark Volume
Clip Function
Video Clip Start Time
Video Clip End Time
Card Search
Marks Manager
File List
Backup
Status Indicator
Sync
21
22
Record Modes
Timeline
23
Timeline Time Scale
The information contained in this publication is accurate as at the date of printing.
15
10. BACKUP
Main Menu > Backup
You can use the following backup mediums for backing up video clips.
• USB Memory devices or USB External HDD (Not Included).
• DVD or CD Media (Model dependent).
• eSata Devices (Model Dependent).
a. Formatting the backup device
It is recommended you format your memory device before doing a backup.
NOTE: Formatting will erase all contents on the
memory device.
1.
Check the device you wish to format.
2.
Click Format.
b. Backing up Video
Main Menu > Backup
1.
Insert a backup medium into the system before
starting the backup process.
2.
Once a valid backup medium is detected it will be
displayed in the backup list.
3.
If there is multiple devices detected please select
only one device.
4.
Click Backup to continue.
5.
You will now be in the backup page where you select
the files you want to backup.
6.
Select the file format you wish to backup in, if you are using
a Windows PC select DAV and if you are using a Mac select ASF.
7.
Select 1 or all channels from the drop down list.
8.
Select the start and end time you wish to backup.
9.
Click Add and a list of files that match your selection
will appear in the list.
10. Ensure the space required does not exceed the
remaining space on the media.
11. Press Start to start the backup.
16
The information contained in this publication is accurate as at the date of printing.
c.
Clip Backup via Search
Clip backup is an alternative method to backing up video via the Search / Playback screen.
1.
Insert a backup medium into the system before starting this process.
2.
3.
4.
d.
Press the button to activate the clip function. When this is enabled you have the ability to
insert times here
Alternatively you can move the cursors from each end of the timeline to the desired time you wish to backup.
Press the to open the backup menu.
5.
Select the device where you would like
to save the file.
6.
Check the files you would like to backup.
7.
Click Backup to complete the process.
File Backup via Search
File Backup is an alternative method of backup up via Search / Playback screen.
1. Insert a backup medium into the system before starting this process.
2. In Search click the File List button to display the list of video files related to your selection.
3. Check the boxes you want to backup.
4. Press the Backup button to open the backup page.
file.
5. Select the device where you would dlike to save the
6.
Check the files you would like to backup.
7.
Click Backup to complete the process.
The information contained in this publication is accurate as at the date of printing.
17
e. Playing Backup Files
When you select DAV as the file format during backup the device will also copy on player files so you can play the files on a Windows
PC without the need to install extra software.
If you require to view the files on Mac OS please use ASF as the file format when backing up. ASF files can be played using VLC Media
Player which can be downloaded from www.videolan.org
1.
Insert the backup media into the PC.
2.
Open the device or media in Windows Explorer.
3.
Double click on the “play” file and it will launch
the player and begin to play the 1st file.
4.
Use the player controls to control playback and
move to other files. Hover over the buttons to see
the button action.
NOTE: To change where snapshots or recordings are saved to, right click on the viewing window and press Parameter Settings to
display the following screen:
18
The information contained in this publication is accurate as at the date of printing.
11. REMOTE / NETWORK ACCESS
This system is capable of being viewed over the internet through the following methods:
1. Web Browser
a. If using Internet Explorer you are required to install an Active X controller, if using Chrome or Firefox you require
Quick Time to view video.
b. Internet Explorer allows full live view, setup and playback. Chrome and Firefox currently do not support
playback functions.
2.
CMS (Software Download Required).
3.
Smart Phones (App download required, costs may apply).
4. Tablets (App Download required, costs may apply).
Please contact your system integrator about further information relating to options 2~4.
a. Web Browser
Prerequisites
• Your device must be connected to the network.
• If accessing remotely port forwarding must be setup on your router / firewall.
• You must have a DYNDNS or Static/Fixed IP if accessing over the internet.
We are basing this tutorial on accessing the device from within the LAN (Local Area Network).
Enter the IP Address and HTTP port of the device into the address bar of your browser - Example: http://192.168.1.199:89
On the above example we have entered the IP Address of the device followed by the HTTP Port (in red).
Both the IP Address and HTTP of your device can be found in the network settings of your device.
If you have entered the details successfully you will be greeted with the following screen, if you are prompted to install a plug-in
for the browser complete the installation of the plugin.
The information contained in this publication is accurate as at the date of printing.
19
Continue to enter your username and password in the input fields.
You have two login options to select from, LAN & WAN. Select
LAN if you want to have full control and view the main stream
(high quality). Select WAN if you want to utilise the Sub Stream
(lower quality) to conserve bandwidth and improved fluency.
Click Login to continue to the next page.
2
7
3
6
5
1
1.
2.
3.
4.
5.
6.
7.
4
Live View Options: Select the screen spilt you require.
Active Window: When a camera is selected it will be displayed in the window that is active which are highlighted
with a green border.
Camera Select: Here you can select the cameras you wish to view. Clicking on any camera will bring the camera
into the window that you have selected.
Multi Preview: This function allows for multiple cameras to be displayed in one window.
The Multi-Preview feature has to be enabled in the device.
Camera Controls: All viewing windows have individual camera controls, hover over the control to see the resulting action.
The main controls are digital zoom, recording, snapshot, audio listen and close channel.
PTZ Control: Controls for moving PTZ Cameras.
Menu Options: Quick selection of sub menus which include Live Viewing, Playback, Alarm, Setup and Logout.
NOTE: Online Performance is dependent on the network resources available and the PC specifications. When viewing your device
remotely (for example WAN) you have to have sufficient upload available to stream the video. The amount of bandwidth required is
set by the encode bit rate setting in the device, you also have the ability to select the sub stream which can be set to a lower quality to
reduce overall bandwidth requirements.
20
The information contained in this publication is accurate as at the date of printing.
12. SYSTEM INFO
The system information menu will display all information related to your device.
•
•
•
•
•
•
HDD Info: Status of all HDD(s).
BPS Info: Bit rate information of all connected cameras.
Log: System Log.
Version: Device Information and Upgrade Button.
Online Users: Displays all current online users and the ability to disconnect users.
Network Info: Displays network traffic information.
a. HDD Info
Main Menu > Info > HDD Info
HDD Info Displays all information related to the Hard
Drives are installed in your system including type, status,
total and free space per HDD.
Double clicking on individual HDD will display the
S.M.A.R.T (Self-Monitoring, Analysis and Reporting
Technology) info of the HDD.
Clicking on Recording Time will display a sub menu of
the start and end times of the recording saved to the
individual HDD’s.
b.Log
Main Menu > Info > Log
The information contained in this publication is accurate as at the date of printing.
1.
Under Type, select the type of event you wish
to search for.
2.
Select the start and end time of your search.
3.
Click Search to display results.
4.
Doubling clicking on results will display
more detailed information of that event.
5.
The log can also be backed up onto USB memory device (not included) as a text file.
21
13.SOFTWARE
To ensure you get the most up to date software we place all of our latest software for our products online, please see below selection of our most popular software currently available for IC Realtime products.
....
Application
PlatformFeatures
Cost
Source
SmartICRSS
Windows
Remote Client Software for managing
IC Realtime network devices Free
IC Realtime Website
SmartICRSS
Mac OSx
Remote Client Software for managing
IC Realtime network devices Free
IC Realtime Website
.DAV Video File Player Windows
Used for playing back .DAV video files
Free
that are taken from your recorder IC Realtime Website
IP Auto Search
Windows
Network Tool for finding, editing and
upgrading IC Realtime devices. Free
IC Realtime Website
ICRSS Pro Apple iOS
Mobile and Tablet Application for
Apple iOS platform
Paid App
Apple App Store
ICRSS Pro Android
Mobile and Tablet Application for
Google Android platform
Paid App
Play Store
Smart Phone Application for Windows
Phone Platform Paid App
Windows Phone Store
ICRSS Pro Windows Phone
IC Realtime Website
www.icrealtime.net 22
The information contained in this publication is accurate as at the date of printing.
14.WARRANTY
Product Warranty
IC Realtime warrants that this product will be free from defects in materials and workmanship for a period of (Refer to
relevant Pricelist /contract) from the date of shipment. If any such product proves defective during this warranty
period, IC Realtime at its option, either will repair the defective product without charge for parts and labor, or will
provide a replacement in exchange for the defective product.
In order to obtain service under this warranty, Customer must notify IC Realtime of the defect before the expiration of the
warranty period and make suitable arrangements for the performance of service. In order to return an Item for repair, contact
technical support via www.icrealtime.net for relevant number for your area and troubleshooting assistance. This may involve
repair of product by means of telephone support or completing a Returns Material Authorisation via support at
www.icrealtime.net Customers shall be responsible for packaging and shipping the defective product to the service
center designated by IC Realtime with shipping charges prepaid. IC Realtime shall pay for the return of the product to
Customer site.
Exceptions to Warranty
The warranty is void if the Product is not operated in conformance with installation, environmental, mechanical or electrical
requirements, or within thermal stress limits, or to the extent that any malfunction is the result of misuse, abuse, vandalism,
neglect, improper installation or application, alteration, accident, or negligence in use, storage, transportation, or handling, or
it the original identification markings on the product have been removed, defaced or altered, lighting, electricity, water, fire,
environmental or other hazard, or other impact outside of
normal operating guidelines.
IC Realtime assumes no responsibility for any other claims, including, but not limited to, loss of recording media and loss of
data etc., not specifically stated in this warranty. This warranty does not affect the consumer’s statutory rights under
applicable national legislation in force, or the consumer’s rights against the retailer arising from the sales / purchase
contract. In the absence of applicable national legislation, this warranty will be the consumer’s sole and exclusive remedy,
and neither IC Realtime nor its subsidiaries shall be liable for any incidental or consequential damages for breach of any
express or implied warranty of this product.
The information contained in this publication is accurate as at the date of printing.
23