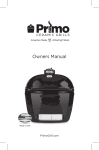
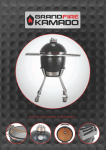
1
Owner’s Manual
Bonus: Primo Recipes Included
* * * Copyrighted Material * * *
Primo® Grills and Smokers Owner’s Manual
Copyright © 2007 by Primo® Grills and Smokers
Published by:
Primo® Grills and Smokers
5999 Goshen Springs Road
Norcross, GA 30071
USA
OFC: 770.729.1110
FAX: 770.729.1111
www.primogrill.com
All rights reserved. No part of this publication may be reproduced or
transmitted in any form or by any means, electronic or mechanical,
including photocopying, recording or any information storage or
retrieval system, without written permission from the publisher.
For information please contact us at [email protected].
MANUFACTURED IN THE USA
CONGRATULATIONS
We appreciate your choice of a Primo Grill and Smoker. Properly setup and
use, your Primo should provide years of worry-free outdoor cooking pleasure.
It’s important that you follow each step in this guide carefully to insure proper
use and maintenance.
SPECIFICATIONS
OVAL XL
OVAL JR
KAMADO
Weight
192 lbs
95 lbs
140 lbs
Cooking Surface
400 sq/in
210 sq/in
280 sq/in
Rack Extensions
up to 680 sq/in
up to 360 sq/in
N/A
Primo Grills and Smokers Warranty
Creative Ceramic Technologies, Inc. (CCT) warrants to the original purchaser of this
Primo grill and smoker that it is free of defects in material and workmanship at the date of
purchase for the following periods:
•
•
•
•
Twenty (20) years for all ceramic parts
Five (5) years for all metal parts (excluding cast-iron parts)
One (1) year for all cast-iron parts
Thirty (30) days on thermometers and felt gaskets
This warranty shall be limited to the repair or replacement of any part(s) which, under
normal use, Primo determines, after reasonable examination, to be defective. In order to
invoke this Warranty, Purchaser shall ship all defective parts at his/her expense to:
ATTN: WARRANTY REGISTRATION
Primo Grills and Smokers
5999 Goshen Springs Road, Norcross, GA 30071
Phone: 770.729.1110 | Fax: 770.729.1111
Primo shall replace parts found defective as provided above with equivalent parts and
shall ship such parts at the Purchaser’s expense to the Purchaser’s designated shipping
address.
THIS LIMITED WARRANTY SHALL NOT COVER THE FOLLOWING:
Any damage, failure, or operating difficulties caused by accident, abuse, misuse,
alteration, misapplication, vandalism, improper installation or improper maintenance;
cracks or chips in the exterior glazing after delivery to an authorized Primo dealer or
distributor; damage or failure caused by tampering with or altering the original Primo
design, except when directed or authorized by CCT; damage or failure caused by
Purchaser’s failure to follow federal, national, state, city or county building and fire codes.
TO THE MAXIMUM EXTENT PROVIDED BY STATE AND FEDERAL LAW, THIS
LIMITED LIFETIME WARRANTY IS IN LIEU OF ALL OTHER WARRANTIES,
EXPRESS OR IMPLIED, AND SPECIFICALLY EXCLUDES THE FOLLOWING:
•
•
•
WARRANTY TO ANYONE OTHER THAN THE ORIGINAL
PURCHASER;
WARRANTIES OF MERCHANTABILITY AND FITNESS FOR A
PARTICULAR PURPOSE;
ANY AND ALL LIABILITY FOR INCIDENTAL, SPECIAL OR
CONSEQUENCIAL DAMAGES, EXCEPT WHERE SUCH EXCLUSION
IS EXPRESSLY PROHIBITED BY LAWS OF THE STATE OR THE
ORIGINAL PURCHASER’S RESIDENCE.
Contents
INTRODUCTION
Greetings ................................................................................... 06
Kamado History ......................................................................... 07
The Primo Advantage ................................................................ 07
Safety and Maintenance ............................................................ 08
Standard Features ..................................................................... 09
Accessories ................................................................................ 10
GETTING STARTED
Primo Assembly ......................................................................... 13
Cradle Assembly ........................................................................ 14
Cradle Side Table Assembly...................................................... 16
Table Assembly ......................................................................... 17
FIRST USE
Natural Lump Charcoal .............................................................. 19
Prepare to Cook ......................................................................... 20
Lighting the Coal ........................................................................ 21
Temperature Control: vent adjustment guide ............................ 22
Preparation Temperature/time Guide ........................................ 23
Meat Temperature Guide ........................................................... 24
First Cooking Experience ........................................................... 25
1st Primo Turkey, Chicken, Burger. Fish ........................... 25
1st Primo Steak, Rib Roast, Ribs, Vegetable .................... 26
FREQUENTLY ASKED QUESTIONS....................................... 27
Greetings
From Maria Nation, Massachusetts
New Primo Owner!
If you’re at all like me or the many Primo-istas I’ve met in the last year,
your new grill is going to change your life; or at least the hours of your
life that you spend at the grill!
Let me tell you right off the bat that I’m an odd choice to be writing this
introduction. I’m not associated with the company, I don’t know the
difference between North Carolina and Kansas City barbecue, and until
very recently I thought of grilling as strictly a “guy thing,” like
understanding fantasy football or not asking for directions.
Primo® changed all that. It isn’t just the look and feel of the thing,
although the simple lines and the heavy ceramic heft have grown on
me, like a piece of art that is both prosaic and exotic. I love introducing
my friends to the Primo® by having them just lift the dome – all that
weight in your hand, yet balanced and manageable because of the
clever engineering of the hinge – then let it close, and the dome stops
with a satisfying thump, decisive and secure, on the felt gasket. Right
away the serious heft of the Primo® lets you know you’ve left the land
of “Webers” far behind.
But I’m not a Primo fan because it looks good. I’m a fan because Primo
makes me look good. Even for a grill novice like me, the Primo method
of grilling/smoking makes it easy to cook everything from perfectly flash
-seared tuna to 20-hour low & slow genuine barbecue, succulent,
smoky and falling-off-the-bone tender. I’ve always been a serious chef
inside my kitchen; Primo lets me take my culinary adventures outdoors
and it has become my partner-in-creation, inspiring me to try everything
from grilled pizza to cold-smoked cheese; from sour dough bread to (I
kid you not) fried eggs for breakfast. Why stop with burgers when the
Primo beckons me to ever new possibilities? It is a cooking phenom!
And then there’s the big secret that Primo has let me in on after all
those years: Grilling and smoking isn’t hard (so much for the “mystery
on the deck!”); in fact, it’s really fun. Perhaps this is why I’ve become
such a Primo fan. It’s just fun to use.
In this over-hyped world, where gizmos and gadgets are hawked 24/7,
it’s rare to come across a product, and a company, that is actually
better than it claims to be. The guys at Primo have made an amazing
product. They stand behind it with integrity, and with pride. Get to know
your Primo, and you’ll understand why.
Happy Grilling!
Maria Nation - Massachusetts (aka Grill Girll on the Primo Forum)
6
Introduction
Kamado History
The modern kamado-style grill is based on ancient Japanese
technology used over 2000 years ago. Originally composed of clay, the
kamado was typically built into the earth floor of pit homes—small
houses built into the ground.
By the early 1600”s advancements in the kamado design and function
included high-end, portable kamados which attracted the attention of
those in the elite and urban communities, and soon became commonplace in their households.
By literal translation, the word “kamado” in Japanese means “oven”,
“stove”, or “kitchen”. But it represents more than just perfection in
functional design and exquisite, flavorful food. Historically, the kamado
was and still is a symbol of family and home.
The Primo Advantage
Primo combines the concept of traditional kamado-style (round)
cookers, and charcoal grills with an innovative design, premium quality
ceramic materials, and a sophisticated, modern look, creating a best in
class, all-in -one cooking machine. What makes a Primo better than
other ceramic grills and smokers on the market today? The key is in the
composition and patented oval shape.
Ceramic Composition. Primo uses only the highest quality ceramic for
increased efficiency and durability. Meals prepare faster while moisture
and flavor remain locked inside, leaving food juicy and tender, not dry.
And the outer surface stays at a safe, warm-to-the-touch temperature.
Oval Shape. But it’s the versatility of our patented Primo Oval™ shape
that really sets us apart. Enjoy more features and options such as
reversible cooking grids, rack extensions* to increase total cooking
surface, or a drip pan rack* to catch meat juices. Add a firebox divider*
and cook directly over the heat on one side and smoke on the other.
We hope you enjoy your new Primo. Bon appétit!
*optional accessory
7
Introduction
Safety and Maintenance
•
•
•
•
•
•
•
•
•
•
When transporting your grill, never lift it by the hinge. Have at least
two individuals hold the bottom and back of the grill. Lower it into
your table or cradle with one hand on the inside of the grill grasping
the bottom vent.
Primos should only be used outdoors in an area where there is
adequate clearance for ventilation. Keep the space around your
grill clear of hanging tree limbs or other flammable objects.
Lighter fluid should never be used in a Primo. For best results, use
Primo natural lump charcoal, which is free of tars and other harmful
chemicals, so it won’t compromise the taste of your food.
For safe use on wooden tables or any surfaces other than a cradle,
always set your Primo on the ceramic feet provided with the grill.
The constant opening and closing of the grill may cause tension in
the hinge over time. Apply a very thin layer of lubrication to the
moving parts inside the hinge once or twice a year to keep the
mechanism operating smoothly.
To ensure your lid stays securely held by the hinge bands, tighten
the band bolts once or twice a year using an open end wrench.
It’s important to always take caution when opening the grill after the
top and bottom vents have been completely closed to extinguish
the fire. In this state the hot coals are suffocated of oxygen and a
rush of air could cause a flashback. Lift the lid only slightly at first
to allow built up heat and steam to escape. Then proceed.
When fueled with natural lump charcoal, Primos produce very little
ASH. However, allowing your Primo to accumulate too much
excess ash in the ash trap will suffocate the charcoal and impede
air flow. Occasionally check the ash trap and remove excess ash
with the recommended Primo ash tool by simply raking the cooled
remains out of the bottom vent door and into a receptacle for
disposal.
Unlike metal grills, a Primo’s ceramic body won’t scald the skin if
briefly touched when hot. However, as with any HOT item, be sure
to use caution when cooking and keep children away.
Primos are self CLEANING. Simply heat your grill to around 500 ºF
to incinerate food and other debris within the grill. When
necessary, use a non-abrasive tool to clean the grids. Never use
overly abrasive instruments to clean the grids as this will remove
the porcelain finish that helps keep food from sticking. For the grills
outer surface, use a damp cloth to wipe away dust as needed.
8
Introduction
Standard Features and Components
All Primo Grills and Smokers are composed of a premium grade
ceramic blend and coated with a protective, lead-free, scratch resistant
porcelain glaze. Additional standard features include:
•
Stainless-Steel Bottom Vent Door
•
Cast-Iron Chimney Top Vent
•
True Precision Temperature Gauge
•
Heat Safe Ceramic Feet
•
Hands-Free, Auto Locking Hinge System
•
Cool–Touch, Ergonomic Handle
•
Insulating Felt Gasket
•
Quick–Clean, Porcelain Coated Cooking Grids
•
20-Year Warranty
9
Introduction
Accessories
Upper Racks
Firebox Divider
Cypress Table
(featured w/Oval Jr.)
Cradle w/wood side tables
(featured with Kamado)
Lower Racks
Pizza Baking Stone
Heat Deflector Plates
Cradle w/stainless steel sides
table (featured with Oval Jr.)
Grill Lifter
Remote Thermometer
Chicken/Turkey Sitter
Ash Tool
Upper Rack
Grill Cover
QuickLights
10
Lump Charcoal
Getting Started
Accessories (continued)
Cypress Curve Table: The elegant Primo curve and compact table is
made from unfinished cypress wood and make the perfect addition to
your grill and smoker.
Cypress Compact Table: The Primo compact table, made from
unfinished cypress wood, is ideal fro smaller decks and backyards.
Cradle: Need to conserve on space? Then place your Primo in a cradle
with locking casters. Accessorize the cradle with the optional stainlesssteel or wood side tables for convenience during cooking. When not in
use, the side tables easily fold down and out of the way.
Firebox Divider: Use the cast iron firebox divider in a Primo Oval XL or
Oval Junior as the perfect solution for cooking direct and indirect at the
same time. Prepare food directly above the hot coal on one side of the
grill, then move it to the other side of the grill to finish cooking using the
indirect heat of the coal.
Upper Racks: The Upper rack accessory allows you to expand the total
cooking surface in a Primo grill and smoker. Use two in your Primo Oval
Junior to increase the total cooking surface from 210 sq/in to 360 sq/in
or use two in your Primo Oval XL to increase the total cooking surface
from 400 sq/in to 680 sq/in. You can use one in the Primo Kamado to
extend its total cooking surface by 145 sq/in. The upper racks are also
great for creating a multi-tiered cooking environment. Prepare more
food in less time or cook different items at the same time.
Lower Racks: The lower racks are designed to accommodate most drip
pans to prevent drippings from falling into the coal. Simply place any foil
pan on the racks and collect the drippings. Use just one lower rack with
your Primo firebox divider for simultaneous direct/indirect cooking or
use both lower racks with the Primos ceramic heat deflector plates for
baking, smoking and indirect cooking.
Heat Deflector Plates: Whether you’re slow-roasting a turkey, baking
chocolate chip cookies or smoking salmon, the Primo® ceramic Heat
Deflector Plates will truly enrich your indirect cooking experience on a
Primo grill and smoker. Set both d-shaped plates side-by-side on your
Lower/Drip Pan Racks to quickly and easily transform the entire grill
into an oven or low temperature smoker. The d-plates are available in
two sizes to fit the Primo Oval XL and Oval Junior grills.
Grill Lifter: Use the Primo Grill Lifter to safely and easily lift hot cooking
grids, Lower/Drip-Pan Racks and Upper Extended Cooking Racks to
and from the grill.
11
Introduction
Accessories (continued)
Pizza/Baking Stone: Try your hand at crispy pizzas, chewy cookies,
fresh baked bread, and more all in the comfort of your backyard with a
Primo Pizza/Baking Stone. This is the only ceramic baking stone coated
with a non-stick, porcelain-glaze finish for easy clean-up and is
available in two sizes to fit any grill.
Chicken and Turkey Sitters: Fill the chicken and turkey sitters with beer,
wine, apple juice or other liquids, add spices, place your poultry on top
and enjoy the flavor.
V-Rib/Roast Rack: The V-shaped Rib/Roast rack works in the upright
position for large pieces of meat such as roasts, chicken and turkey. In
the inverted position it can also be used to hold up to 6 racks of ribs.
Ash Tool: The ash tool is useful for raking ashes out of the bottom vent
door of the grill as well as stirring hot coal in the firebox.
Primo Natural Lump Charcoal: Primo’s 20 lb bag of 100%All-Natural
Lump Charcoal is the premium choice fuel for grills and smokers. This
special blend of charcoal is free of tars and other harmful chemicals. It
weighs less, lights faster, and burns hotter and longer than standard
briquettes. When used in a Primo, a single load can be reused several
times and when cooking low and slow, it can burn for up to 36 hours.
With average use, a 20 lb bag can last up to 35 cooks. Cook with Primo
natural lump charcoal alone or in combination with your favorite
seasoned wood for a great smoky flavor.
QuickLights (Fire Starters): Use Primo matchstick Quicklights to quickly
start your fire. Simply strike the tip against the lighting strip, wedge one
or two in the coal, and close the lid with both top and bottom vents open
and you’re ready to cook in just a few short minutes.
Digital Remote Thermometer: With the Primo digital remote
thermometer you can remotely monitor the grill dome temperature and
the internal temperature of your meat at the same time. Simply place
one heat-resistant probe wire inside the grill and insert the other probe
6" into meat. The wireless receiver beeps and flashes when meat or
grill temperatures exceed your programmed settings. Features also
include a count-up and count-down timer, LCD screen with a back light
for use at night, belt clip, grill rack clip and built in stand.
Grill Covers: Primo also offers covers in various sizes made to fit each
grill in either a table or cradle. These heavy-duty covers protect your
grill from moisture and the elements
12
Introduction
Primo Assembly
Resting the Primo in it’s final destination:
This product is heavy and not easy to more.
You must be careful when you move it to it’s
final resting destination. 2-3 people are
recommended to move the outer shells.
First remove all inside components and move
the outer shell (lid and bottom) to the desired
location. Do not attempt to loosen the bands or
the hinge assembly. Placing this unit in a
Primo Cradle or our Cypress Wood Table will
demand good handling and many hands to do
the work properly. Any mishandling will not be
covered under the warranty.
Firebox placement:
Your Oval firebox is manufactured as a one
piece unit. Notice the air vent in the front.
“Carefully” place the firebox inside the Oval
bottom with the vent holes aligning with the air
control vent of the Oval bottom. This is
important for proper air flow to your unit.
Placing the inside components:
Find the ceramic bottom plate and place into
the bottom of the firebox. The ceramic plate
puzzles into the base of the firebox with the
plate surface facing upward. Next, place the
bottom grate at the mid-base of the firebox with
the divider slots facing upward. These slots are
going to secure the Oval firebox divider which
is sold separately as an accessory.
Securing the screws of the band assembly:
Our factory ships units pre-assembled, but for
your benefit, please ensure that the screws are
tight at all times. Bent screws is a good sign,
but may loosen after some period of time. From
the heat, your bands may expand over time
and reduce it’s ability to fit tightly on your
13
Getting Started
Cradle Assembly
A - Oval Ring (2)
B - Long Crossbars (2)
C - Short Crossbars (2)
D - Raising Bars (4)
E - Caster Wheels (4)
F - Hardware Pack
G - Clinch Screws (2 long, 3 short)
H - Large Kept Nuts (4)
I - Round Head Screws (9)
J - Round Nut Cap (4)
K - Small Kept Nuts (14)
Lay the two longer crossbars
(B) down and fit with Round
Head screw in the center.
Place center-curved crossbar
under the straight crossbar.
Round Head Screw (T) and a
nut (K).
Place casters under crossbar. Preferably, place locking wheels on the
front as shown here. Locking wheel is unlocked when flap is up (shown
left). Use the (K) nut to secure the wheels in place and the (X) washer.
Secure raising bars (D)
on base with a large
round nut (H). Note that
the raising bars are
curved inward. The
raised bars are placed
inwards.
14
Getting Started
Cradle Assembly (continued)
For the upper support crossbar (C), secure with a short Clinch Stud. (G
& K). Then affix the upper crossbar to the raised bar by using the top
hole.
Secure the cross-bars. Use the longer clinch stud when connecting the
rings section to the upper crossbar. Connect in the upper hole.
Use the short clinch stud when connecting the ring to the upper
crossbar. Use (J) caps to secure.
15
Getting Started
Cradle Side-Table Assembly
Place the first bracket
on the cradle by
unscrewing the four nuts
located at the metal ring
with the 4 legs of the
cradle. Note that the top of
the brackets will have to
point outward to the sides.
Put each metal support
bracket on the outside of
the leg placing the upper
hole of the bracket through
the screw while replacing
the nut in position. Don’t
tighten yet and don’t place
the bottom screw;
adjustment may be
required.
Hardware
A) 4 Short Screws
B) 4 Black Washers
C) 4 Large Nuts
D) 8 Long Screws
E) 8 Small Nuts
Other
(8) Copper Ring Spacers
(4) Black Brackets
Place one (D) long screw from the outside of the bracket through the sliding
hole of the shelve hinge. The screw must be placed in from the outer part of
the bracket. Make sure that you insert the long screw into the copper ring
spacer before inserting into shelve hinge. Repeat the same on the other
bracket hole. Secure the screws with a nut and black washer (in between
shelve and bracket) on the top screw and a nut on the bottom screw.
The last step is to secure the
brackets with the large short
screw and the nut
accompanying it.
16
Getting Started
Cypress Table Assembly
The cypress or oak table comes shrinkwrapped for shipping purposes. Carefully cut
the wrapping and lay out the table pieces.
Look for the hardware package stapled under
one of the table panels.
Unscrew the protective wooden panels
temporarily attached to the table. These were
added for protection during shipping. Dispose
of them.
Place the top of the table down on a smooth
surface and erect the side legs of the table.
Position the locking wheels with the front of the
table as shown. Secure both side leg sections.
Place a bolt through the table and the side leg
stud and secure from the inside using a washer
and nut. Tighten the nut lightly. Later, when all
bolts are in, completely secure the nuts.
Do the same with the middle section of the
table, securing all four corners. On the second
round of tightening, secure the bolt until the
wood becomes slightly compressed.
17
Getting Started
Cypress Table Assembly (continued)
Place your grill inside the wooden table using
the ceramic shoes. Simply place the shoes at
the approximate position where your grill will
rest.
Carefully lift the grill by placing a hand inside
the vent and the other under the grill and make
your way to the opening of the table. Two
people are required for this lifting.
WARNING: You should NEVER lift Primo
Grill and Smoker from the hinge mechanism
attached to the black bands. Lifting the cooker
from the bands and hinge mechanism can
result in personal injury and will void the
warranty if damage occurs. If dropped, the
ceramic will break.
Once in place, the grill should be ready to go. You may adjust the
position of the ceramic feet as needed. You may also use a stain or a
polyurethane to seal on the cypress or oak wood.
18
First Use
Natural Lump Charcoal
For cooking purposes, charcoal comes in two different shapes: lump
charcoal and briquettes. Lump charcoal is charcoal which has not been
formed into briquettes. Briquettes are the pillow shaped little pieces of
compressed ground charcoal.
Always use lump charcoal in the Primo®. Primo® Grills and Smokers
use a fire bowl to hold the charcoal. As the charcoal burns, the ash falls
down into the bottom of the bowl. There isn't much room for a lot of ash.
Lump charcoal produces low amounts of ash and will burn at whatever
rate and temperature that you allow it to. It also tends to burn hotter
and light faster than briquettes.
The Process
Natural Lump Charcoal comes from partially burning wood or heating
wood without the use of oxygen. In doing so, this charred wood
becomes carbon. During the process of making charcoal, volatile
compounds in the wood (water, hydrogen, methane and tars) pass off
as vapors into the air, and the carbon is converted into charcoal.
The Properties
Since Charcoal is pure wood carbon, it weights much less than its
original state. It is also free of tars (which can contain carcinogenic
compounds, like benzo-a-pyrene). Unlike charcoal briquettes, which
contain different chemicals, natural charcoal is 100% carbon.
Types of Lump Charcoal
There are 2 types of charcoal: the first type comes from natural wood
which has been cut and made into charcoal. This is as natural as you
can get. The wood comes from trees, branches and scrap pieces from
saw mills. The second type comes from using processed scrap wood
and tuning it into charcoal. Processed scrap wood tends to burn faster
since its density is less than natural. This is because there is less
moisture in the wood at the time it is transformed into charcoal.
Lighting Lump Charcoal
Never use starter fluid! It will give an undesirable flavor to your food
and absorb into the ceramic. There are many other ways to light lump
charcoal. You can use paraffin fireplace starter blocks (Primo®
recommended), electric starters, propane sticks, weed burners,
propane torches, MAP gas torches and Chimney starters.
19
First Use
Prepare to Cook
DETERMINE FIRBOX FILLING
Half Firebox: Fill the firebox half way when preparing smaller amounts
of food or when cooking at milder temperatures. Use the Primo® firebox
divider (sold separately) to cook on one small section of your grill. Full
Firebox: Fill firebox to within four inches of the top. Use this for larger
amounts of food, hotter cooking temperatures, or longer cooking times;
i.e. slow-cooked ribs would require a full firebox.
FILL FIREBOX WITH LUMP CHARCOAL
Only use pure lump charcoal. No briquettes! Sprinkle in smoking woods
(fruit wood, hickory, etc) for flavor if desired. Fill the firebox either half
way or fully with lump charcoal.
REMOVE ASH AND DEBRIS (after the first use if needed)
Use the ash rake to “stir” the coal from your prior cooks to remove ash
from the leftover coal in the firebox (it naturally falls to the bottom of the
grill). Then use the ash rake to scoop ash out of the lower vent. Cold
ash and debris make great compost for gardens.
FULLY OPEN TOP AND BOTTOM VENTS
Doing so allows air flow to the coal when first starting the grill.
LIGHT THE CHARCOAL
For ½ a firebox, bury one or two starter pouches (Primo® Quick Lights
are recommended) halfway down in the charcoal. For a full firebox, use
two or three pouches. You may also use a starter chimney or, if
monitored closely, an electric fire starter.
CLOSE THE LID
Be sure the fire has started and the top and bottom vents are fully open.
INSERT RACKS
Wait a few minutes, open the lid and reinsert the cooking racks. Then
close the rack again.
MONITOR THERMOMETER
Watch the thermometer. Once the grill approaches the desired
temperature, partially close the vents to maintain that temperature.
Warning: Take caution when opening the lid. In rare instances, the burning coal may be
severely deprived of oxygen and could cause a fireball. To avoid this, always crack the
lid and pause before opening fully, allowing oxygen to reach the coal
20
First Use
Lighting the Charcoal - Illustration
With Firebox Divider
Without Firebox Divider
21
First Use
Vent Adjustment Guide
Review the illustration below for approximate chimney and bottom vent
settings for various food.
22
First Use
Primo Preparation Time Guide
The following meat temperatures are given as approximations.
Experience is your best guide. For your safety, we recommend using a
meat thermometer to ensure the quality and the proper safe
temperature of your food.
Helpful Hint: The Boston Butt Roast is the cut of choice for pulled pork
barbecue
since
it’s marbled
enough fat to keep the meat moist
Low
& Slow
Cooking
225°Fwith
- 275°F
while cooking.
Prime Rib Roast
2.5 - 3 hours
Chicken
WingsPork picnic roast or pork center
60 - cut
70 minutes
Substitutes:
loin roast (lower in fat;
Ribs
3 - 4 hours 2 hours per pound
roast(pork)
at a lower temperature and avoid overcooking)
Boston
Butt (pulled
9+ hours this is for the
at 225 degrees
is apork)
good rule of thumb. Remember
individual
piece
Two
5 pound butts (10
Roast
(8-15
lbs.)of meat not the total weight.
2-4
hours
pounds
total)
should
cook
in
about
10
hours
as
long
as there is some
Cooking at 325°F - 350°F
separation on the grill.
Chicken (whole)
60 - 80 minutes
Chicken (cut)
30 - 45 minutes
Ham
2 - 5 hours
Turkey (whole, stuffed, 18 lbs.)
3 - 4 hours
Turkey (whole, stuffed, 12 lbs.)
2 - 3 hours
Shrimp
5 - 8 minutes
Pork Tenderloins
20 - 30 minutes
Leg of Lamb
3 - 4 hours
Fish
15 - 20 minutes
Searing Temperatures 500°F - 700°F
Steak
Hamburgers
Pork Chops (2” thick)
London Broil (2lb)
6 minutes
6 -10 minutes
6 minutes
6 - 15 minutes
23
First Use
Meat (Internal) Temperature Guide
Ground Products
Hamburger
Beef, veal, lamb, pork
Chicken, turkey
160°F
160°F
165°F
Beef, Veal, Lamb Roasts & Steaks
Medium-rare
Medium
Well-done
145°F
160°F
170°F
Pork Chops, Roast, Ribs
Medium
Well-done
Sausage fresh
160°F
170°F
160°F
Poultry
Chicken, whole & pieces
Duck
Turkey (un-stuffed)
Whole
Breast
Dark meat
Stuffing (cooked separately)
180°F
180°F
180°F
180°F
170°F
180°F
165°F
Eggs Fried, poached
Yolk & whites are firm
Casseroles
160°F
Sauces
Custards
160°F
24
First Use
First Cooking Experience
1st Primo Turkey
Grill Temperature: 275°F - 300°F
• Place turkey, 10-15 lbs, on a Primo® Sitter (sold separately) and
coat with your favorite spices. You may place your beverage of
choice, herbs, or any flavored juices/sauces inside your sitter
before setting your turkey upright.
• Retain temperatures of 275°F - 300°F until done. Use a meat
thermometer for safe temperature of poultry.
• Raise the temperature to 500ºF in the last 20 minutes for a stronger
roasting effect.
1st Primo Chicken
Grill Temperature: 325°F - 350°F
• Place chicken on a Primo® Sitter (sold separately) and coat with
your favorite spices. You may place your beverage of choice,
herbs, or any flavored juices/sauces inside your sitter before setting
your chicken upright.
• Retain temperature of 325°F - 350°F until done. Use a meat
thermometer to gauge poultry temperature.
• Baste your chicken with extra sauce, though it isn’t necessary when
using your Primo® Grill. The moisture retaining capability of your
Primo® will not dry your food.
1st Primo Burger
Grill Temperature: 450°F - 500°F
• Cook burgers with onions, lid down, for 6 minutes on each side.
• Reduce temperature by closing top and bottom vents.
• Add cheese in the last minute of preparation time. Warm buns.
1st Primo Fish Salmon is the preferred 1st time choice
Grill Temperature: 325°F - 350°F
• Place your salmon steak or filet on the Primo® when temperature
level is achieved.
• Sprinkle herbs, sea salt and fresh ground pepper.
• Retain temperatures of 325°F - 350°F until done. 10-15 minute per
lb of fish. Use a meat thermometer for safe temperature for fish.
25
First Use
First Cooking Experience (continued)
1st Primo Steak
Grill Temperature: 650°F - 750°F
• About 30-40 minutes before cooking time, rub your favorite
marinade into the steaks, and let them come to room temperature
• Grill the steaks for 3 minutes, flip and cook for an additional 3
minutes
• Close both tope and bottom vents and allow to cook to desired
doneness
• Transfer steaks to a platter. Spread mushrooms over the tops of the
steaks. Cover each equally with your choice of sauce.
• Serve steaks immediately
1st Primo Rib Roast
Grill Temperature: 450°F
• Place your rib roast on a Primo V-rack and cook for approximately
35 minutes for a 6lb roast. If using the Primo Oval XL, use the
Primo firebox divider* and cook indirectly
• Reduce grill temperature to 300°F
• Turn roast over and cook to desired meat temperature. Use a meat
thermometer for accurate internal meat temperatures
1st Primo Ribs
Grill Temperature: 325°F - 350°F
• Place your ribs on the Primo v/rib roast rack (sold separately) or
directly on the Primo when temperature level is achieved. You may
sprinkle on herbs and spices. Wait until the last 20 minutes to pour
on your sauce.
• Retain grill temp
1st Primo Vegetables
Grill Temperature: 350°F
• Place your Zucchini on the grill first and cook for 10 minutes. Add
peppers, mushrooms and onions after 5 minutes.
• Lower the temperature to 300°F
• Turn over all vegetable and cook for another 10-15 minutes to
desired tenderness.
• Serve with balsamic vinegar.
26
FAQ
Frequently Asked Questions
Is it safe to use my Primo during all seasons?
Yes. You can use your Primo year-around. Primo grills perform
superbly in extremely hot or cold environments.
Can I leave my Primo outside in the rain?
Yes. The exterior shell of the Primo is protected with a lead-free
porcelain glaze that is thermally bonded with the ceramic material for
extra protection. However, we recommend the use of a Primo grill
cover to protect the metal parts of the grill.
What is the purpose of the felt gasket?
The felt gasket helps retain heat, lock in moisture and provide a soft
cushioning when closing the lid.
Do I ever need to replace the felt gasket?
Yes. The gasket is made of generic, chemical-free felt which will
deteriorate over time. It can be re-glued with high temperature
adhesive. You may purchase a replacement from you local dealer of
through Primo.
How do I get a whole bed of coal to burn?
You don't. With the Primo you don't use the old fashioned “let all the
turn grey” system. Simply watch the thermometer, and depending on
what you are cooking, adjust the vents to achieve optimum
temperature.
How long should I wait for the coal to heat?
This depends on what you are cooking: Low and Slow: Close both
vents before the thermometer reaches 220°F. Medium Roasting: Allow
your Primo to reach about 300°F then shut down the vents to about 1/2.
High-heat searing: Allow the temperature to reach about 500°F - 600°F,
then close the vents to about 1”. Other variable: the kind of charcoal
used, amount of food, ambient temperature, etc.
How do I extinguish the coal?
Completely close the top and bottom vents after cooking so the
remaining charcoal will extinguish. Re-use the remaining charcoal the
next time you grill. Due to the thermo-characteristics of the Primo, the
grill will take a few hours to cool down. DO NOT USE WATER TO
EXTINGUISH THE COAL.
27
FAQ
Frequently Asked Questions
How do I reduce the temperature quickly?
Close the bottom slide door and the top vent completely. Keep them
completely closed until you reach the cooking temperature; afterward
readjust the slide door and the top vent to regulate the temperature. For
extreme temperature reductions, open the lid for a few moments.
Should I use liquid lighter fluid?
No. You should never use liquid lighter fluid because the ceramic will
absorb the smell of the liquid and will affect the taste of your food.
Can I Cook With The Lid Open?
No. If you cook with the lid open you are losing all the cooking
characteristics of your Primo® and all the benefits of cooking with a
ceramic grill. In the end, you will wind up with dried-out food.
Do I Need A Rotisserie With My Primo®?
You will not need a rotisserie. Due to the equal distribution of the heat
within the Primo®, food cooks evenly. Most food, such as roasts, whole
turkeys, or chicken do not need to be turned.
Can I cook different kinds of food at the same time?
Yes. The Primo® allows you to cook different food simultaneously and
at fairly different temperatures when cooking with a half-filled firebox.
Can I bake pizza or bread in the Primo®?
Yes. Use a ceramic baking stone (Primo® Pizza Stone recommended)
for exceptional results.
Should I use a drip pan?
Using a drip pan helps prevent flame ups, and is recommended
especially when roasting large pieces of meat.
Should I raise or lower the cooking rack(s)?
No. The heat circulates all around the food and you don’t need to place
the grill closer to the charcoal.
Can I use my Primo® for smoking?
Yes. For smoking you need to adjust the temperature of your PRIMO®
between 150°F-250°F. If you want to add flavor you can put in some of
your favorite wood chips.
28
FAQ
Frequently Asked Questions
Do I need to clean the interior walls of the Primo®?
No. You don’t need to clean the interior walls of the Primo®...nor the
inside. It is best to simply clean the cooking grates and remove the
ashes only. You may clean the exterior glaze surface with warm water
and regular dishwashing soap.
Can I use the Primo® on a wood deck?
Yes. If you plan to put your Primo® on a wood deck, table or outdoor
kitchen, use the ceramic shoes provided with the grill. Be sure to follow
the grills clearance guidelines. Visit www.primogrill.com for updates on
building your unit into an outdoor kitchen.
How do I remove the Ash?
Very easily. Open the bottom vent and use your Primo® ash tool (sold
separately) to rake out the remaining ashes. Do not remove the firebox
or the ceramic plate. By using natural lump charcoal you will need to
empty the ashes probably every 8-10 uses. A high build up of ash will
reduce airflow to the coal, making it more difficult to heat properly.
My Primo® has tiny cracks. Should I be concerned?
No. These tiny cracks (or crazing) are normal and will not compromise
the grills durability or performance. However, if chunks of ceramic break
off, contact Primo®. Note: We do not use lead in our glaze mix; you
benefit from a manufacturer who cares about your health and the
environment.
How much meat should I prepare?
Use the chart below to calculate the lbs of meat to prepare per person.
# of men
# of women
# of children
x2=
x1=
x 1 = _________
Total ÷ 2.4 = lbs of meat to buy
29
Primo Grills and Smokers
5999 Goshen Springs Road
Norcross, GA 30071, USA
Office: 770.729.1110
Fax: 770.729.1111
www.primogrill.com