1
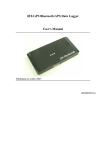
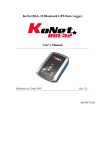
Driving Recorder
Continuous Loop Recording
Model :UER-03(single camera)
UER-04(dual camera)
User Manual Version: 0.3
1
Index
Important User Instructions……………………………………………………..
03
01
Product Description………………………………………………………..
06
02
Feature…………………………………………………………………….... 06
03
Hardware Specification…………………………………………………….
07
04
Product Overview…………………………………………………………..
09
05. Device Setup………………………………………………………………..
12
06. Application………………………………………………………………….
17
6.01. Setup…………………………………………………………………..
17
6.02. Language Selection…………………………………………………...
19
6.03. Open File……………..………………………………………………..
20
6.04. Event Selection………………………………………….…………….
25
6.05. Calendar…………………………………………………...………….. 25
6.06. Video………………………………………………………….……….
26
6.07. Map…………………………………………………………………....
27
6.08. G Sensor…………………………………………..........................…
27
6.09. Speed/Location/Direction……………………………….……………..
27
6.10. Personal Information…………..………………………………………
28
6.11. Video Navigation……………………………………….……………...
28
6.12. Volume Control……………………………………………………......
29
6.13. Timeline.…………………………….…………………………………
29
6.14. Function Button……………………………………………………......
29
6.15. Backup File…………………………………………………………….
30
6.16. Print File ………………………………………………………………. 31
6.17. Configuration…………………………………………………………..
33
07. Content List…………………………………………………………………
36
08. Appendix……………………………………………………………………
37
8.01. Greenwich Mean Time………………………………………………… 37
8.02. Troubleshooting………………………………………………………..
40
8.03. Troubleshooting………………………………………………………..
41
2
• Important User Instructions
1. Thank you for purchasing GPS Driving Recorder!
2. “GPS Driving Recorder” is an in-car electronic device which is designed
to integrate data storage and video recording while driving. It
faithfully saves driving records as data and video that can trace back
the original driving route, time and incidents. It provides evidence of
incident scene or critical evidence to incident cause.
3. However, our company will not be responsible for failure in recording
video or damage to video file. If any of the above incidents occurs, the
following are possible causes:
4.
5.
6.
7.
8.
9.
The product is not turned on.
Flash drive is not properly installed.
The product has been seriously damaged.
Flash drive is removed during recording.
Proper installation procedures are not followed.
To assure proper use of the product and your safety, prior to using the
product, please read the following description thoroughly and comply
with all the instructions and be aware of the meaning of warning
messages.
• Danger
1. The product can only be installed in a close space in vehicle.
2. Properly keep the product and its accessories in a place that children
cannot reach to prevent product damage or choking hazard.
3. Please do not use power source that is not DC12V or DV24V to
prevent fire or electric shock hazard.
4. Please keep the product away from fire.
5. Please make sure the product is properly installed prior to use. To
prevent detachment of the product due to wire movement, please
make sure all wires are properly installed.
6. A designated power cable is provided to connect to car cigarette
lighter. Using unapproved power cable may cause product damage or
fire hazard.
3
• Warning
1. Disconnect power immediately if odor or smoke occurs during the use
of the product.
2. The product can be only repaired by licensed and trained technician.
Please do not disassemble or repair the product.
3. Please do not open the product case, change the equipment, replace
parts and use non-original parts (including flash drive, AV cable… etc.)
as this will void the warranty!
4. The product has warranty label. If the label is damaged, the warranty
will be lost!
5. Please do not expose the product directly to sun light, high
temperature, rain or humid and contamination environment.
6. Please be careful not to spill any liquid on the product or leave the
product in any liquid.
7. Please do not use volatile solvent for cleaning.
8. Please do not adjust the product while driving.
9. When the product is plugged in, please do not touch the product with
wet hands.
10. If any of following situations occurs, please immediately remove the
power plug and send the product back to the original retail store for
repair:
– Power cable or power plug is damaged.
– Liquid gets inside the product.
– The product is dropped or the product case is damaged.
– The product cannot be started normally or fault occurs after
startup.
4
• Attention
1. The best performance occurs when the product is in horizontal
position. Please check the product frequently and keep it in horizontal
mode.
2. The meaning of indicator lights is detailed in the manual. Please follow
the instructions regarding indicator lights to operate the product.
3. If the cigarette lighter jack in your car is powered continuously even
with the car engine off, always disconnect the power cable from the
cigarette lighter jack before leaving your car, to avoid exhausting the
car battery.
4. Please make a backup copy to save the file of important driving
record.
5. Disconnect power before removing flash drive and wait until all lights
are off to remove the flash drive.
6. Any serious impact may cause loss of recording.
7. If the product comes with GPS function, please be aware of the
following instructions:
8. A general commercial GPS system may have average positioning error
over 15 meters. It only provides rough positioning data.
9. GPS reception performance is affected by weather or environment.
When GPS receiver is started, it usually takes a while to lock in satellite
and transmit data.
10. The tinted windshields may affect recording image quality and GPS
reception performance. It is recommended to use GPS external
antenna on car top to improve signal reception.
5
01. Product Description
UER-03 UER-04 provides Video recording integrated with GPS features. It combines
GPS and Digital Video (2-channel) functions into a system. The GPS is recording a
point every one second and the camera provides VGA (640 x 480) resolution. When
you use this device while you are driving a car, it provides GPS position with video
recording files.
According the Customize application, the video file that you record will show the
route on the Google Map as well as the live video for inside and outside of vehicle
02. Feature
1. Dual camera, Front/Back, VGA(640x480) with 300,000 pixels
2. MPEG-4 A/V encode @ VGA 30 FPS (each channel)
3. 2 USB Drives for storing video files
4. The file can be stored until the last second before electrical interruption
5. Backup battery: 10~15 seconds record for dual camera
6. miniUSB port for setup function & video download
7. G-Sensor (0.1~4.0G) & Voice record function
8. Alarm: under 10% memory space & no USB device inserted
9. Video OUT : NTSC / PAL
10. System boot up: Under 45 seconds
11. Record button (Can be set by configuration)
12. Multiple selection of recording camera (Can be set by configuration)
13. Resolution (640x480 VGA / 320x240 QVGA) & Frame Rate setup (1~30/sec)
14. Events Secured (Prevent the overwrite problem and must be released by
application)
15. Password for securing setup function
16. Can display two video files, map, GPS, G-sensor and personal information at
same time on application
17. Backup, Format, and Print function
18. Video recording with time-seamless
19. IR LED for the environment of low illumination
6
03. Hardware Specification
CMOS Sensor Module specification
Items
Spec
Array Element
640x480 (VGA)
Sensor Size
1/4”
View Angle
Front camera: 90;
Image Transfer Rate(Max)
VGA -30 fps.
Scan Mode
back camera: 120
Progressive
Electronic Exposure
Up to 510:1 (for selected fps)
Pixel Size
6 μm x 6 μm
Fixed Pattern Noise
<0.03% of VPEAK-TO-PEAK
Image Area
3.984 mm×2.952 mm
7
GPS specification
Category
Parameter
General
GPS Chipset
SiRF Star III
Frequency
L1, 1575.42MHz
Channels
12 CH for tracking
Antenna
GPS Patch Antenna
Datum
WGS-84
Cold Start
50 sec , typical*
Warm Start
33 sec , typical*
Hot Start
1 sec , average
Reacquisition
< 1 sec
GPS output
NMEA-0183 ( V3.01)
GGA , GSA , GSV , RMC ( default)
Acquisition
Protocol
Description
GLL, VTG (Optional).
Sensitivity
-158dBm
* It is measured under open sky accordingly.
Power Source
Power Source
DC
voltage
5.0 volt
Power Consumption
System power consumption is 3A @ 5volt
8
04. Product Overview
01
Video Out
07
Back camera for Inside
view of the car
13
Hole for Stand
02
MiniUSB (PC
Connection)
08
Illumination (Night View)
14
Front Camera for outside
view of the car
03
Screw
09
Light Sensor
15
Manual record button
04
Cap for the glare
10
GPS Indicator
16
Buzzer
05
DC Jack (5V/2A)
11
Record Indicator
17
USB port cover
06
The jack for External
Antenna
12
Microphone
9
Dual Camera
USB Port of CONFIG
1. Used for Configuration setting
and firmware updated.
2. The four golden fingers of
MicroPD need to face on the
word, CONFIG, for connection.
Single Camera
GPS & Record Indicator
1. GPS: Green/get single, Red/no
single
2. Record: Blue/recording
10
Microphone
Cap
Record the sound or voice.
Cap for reducing the glare.
Video Out & miniUSB
1. Video Out
Connect with monitor for live view.
Record button & Buzzer
1. Record button
Must setup the configuration to turn on
the function of manual record.
2. miniUSB
Connect with PC for file review.
2. Buzzer
System, event, low memory alarm.
11
05. Device Setup
1. Counterclockwise rotate the screw to open the bottom cover.
2. Plug the flash drive into any slot (golden finger face the device).
Note: if you want to setup the device, you need to plug the flash drive into the slot
which has the mark of “CONFIG”.
12
3. Clockwise rotate the screw to close the bottom cover.
4. Attach the mounting frame to the main device by following direction.
13
5. Place the suction cup and mounting frame on the windshield glass and push the
locking lever down to firm the mounting frame.
6. Turn the spinning axle of mounting frame to adjust the angle of the product.
The product needs to be paralleled with the road.
14
7. Connect the power cable with the product by plugging the DC port.
8. Start the car engine and connect the power cable to the car cigarette lighter. After
the buzzer has three beeps and GPS and record indicator light up, the system will
start recording.
15
9. Use the wire clamp to firm the cable for avoiding the danger when driving
Note: To get the best recording vision, we suggest to attach the product at the
location as close to the rearview mirror as possible.
Please do not replace or remove the flash drive when the device is operating.
16
06. Application
6.01. Setup
1. When insert the CD-ROM in your computer. The system will
automatically run the setup of application. Or, you can double click
“Setup.exe” in the CD-ROM to run the application.
2. Click “Next” to go to next step.
3. Select the path that you want to install the application. And then, click
“Next” to go to next step.
17
4. The system will start installing the application.
5. After the complete the setup, you will see an icon called “DVR Player”.
Double click the icon to run the application.
18
6.02. Language Selection
Select your language for application used.
19
6.03. Open File
Click the button to open the file
20
Select the path of the file
DISK
Camera
FILE
To read the file from MicroPD, you must plug it in your computer
To read the file from device, you must connect it with your computer
To read the file from hard drive, you must copy the file to your computer
6.03.01. Open File by “DISK”
1. Make sure MicroPD is connected with PC.
2. Select the Capital that represents your MicroPD. Then, press “Apply”.
6.03.02. Open File by “Camera”
1. Make sure DVT is connected with PC by miniUSB.
2. Select the Capital that represents your DVR. Then, press “Apply”.
21
6.03.03. Open File by “FILE”
1. Click “Browse” to find the backup file in your PC.
2. Select the backup file in your PC. Then, Press “Open”.
22
3. Click “Apply”
6.03.04. File format
23
If you want to use new MicroPD for recording file, you must plug it in your
computer and press the button to format it.
Note: For security issue, you must use this button to format the MicroPD.
Main Page Function
24
6.04. Event Selection
The event list is based on the system power. When user turns on the power,
the system will automatically create a new section of video file as the list
The list also shows what kind of event it is. (e.g. “over speed”, “G
sensor”)
1. Click “+” to extrude the tree of event list
2. Click “–” to shrink the tree of event list
3. Mark “G” represent G Sensor event
4. Mark “S” represent Over Speed event
25
6.05. Calendar
1. When user opens the video file as page 9, the calendar will
automatically show the date of video file. ( Red square represents the
recording date, Green square represents the current playing file. )
2. User can directly click the date on the calendar to playback the video if
there is the event on it.
6.06. Video
1. When user selects the section of the video file as step 2, the top two
frames will show the video of front and back scene with the date on the
top-right corner.
2. Click the icon on top-right corner or double click the video for full
screen function.
26
6.07. Map
1. When user select the section of the video file as step 2, the top-right
frame will show the location information on the map.
2. Click the icon on the top-right corner for full screen function.
27
6.08. G Sensor
1. The G Sensor will show the value of acceleration of X, Y, and Z axis
when user select the section of the video file as step.
2. The information is to review the crash of the direction when car
accident.
6.09. Speed / Location / Direction
1. Shows the information of speed, longitude, latitude, and direction.
2. Click the Red area for changing the unit.
28
3. Click “Speed” area to show and hide speed information.
6.10. Personal Information
Shows the company name, driver name, car license, version of application,
version of firmware, current time zone, and memory space of “Event”.
6.11. Video Navigation
1
2
3
4
5
6
7
1
Go to previous section of video file
2
Reverse the video frame(0.5~0.0625multiple)
3
Play the video frame
4
Pause the video frame
5
Stop the video and go to the first frame
6
Fast forward the video frame(2~32multiple)
7
Go to next section of video file
29
6.12. Volume Control
1. Video volume can be changed by using this function.
2. Click the icon of the speaker to mute the volume of video.
6.13. Timeline
The green and blue blocks are the recording area with time of hour and minute.
User can click the timeline to go to different events.
Green Block
Blue Block
Normal situation
Over speed or G sensor event
6.14. Function Button
1
Open File (Page 19 )
2
Backup File (Page 30 )
3
Print File (Page 31 )
4
Configuration (Page 34 )
30
6.15. Backup File
1. Select the file that you want to backup. Or, Click “All” to select all files
for backup.
2. Click the Backup button to select the place that you want to store the
video file.
3. Enter the file name. Then, press “Open” to save the file.
31
6.16. Print File
1.
Click “Pause” when playing the video.
2.
Use these two buttons to adjust the frame that you want to print out.
3.
Click Print button on the main page as above image.
4.
Select the item you want to print.
32
5.
6.
7.
Click the Print Preview to show the format of the report.
Click the Print button to print it out.
Or, you can click the Save button to backup the report.
33
6.17. Configuration
6.17.01. Video Mode
Manual Record
Auto Record
You need to press the button on the device when you want to record
The device would automatically record the video when you power
on the device
Manual Record Button
Off: The button on the device cannot be pressed
On: The button on the device can be pressed for manual record
Don’t Cover
Auto Cover Non-Event
Do not over write the recording file
Automatically over write the recording file which is not the event
when the memory is full
Event Protect Time
To protect the event that you don’t want the device to over write it
34
6.17.02. Sound Mode
Off
Do not record the sound
On
Record the sound
6.17.03. Video Resolution
Front Scene
On: Turn on the record function for outside view
Off: Turn off the record function for outside view
Back Scene
On: Turn on the record function for inside view
Off: Turn off the record function for inside view
320x240 (QVGA)
640x480 (VGA)
Frame
Small size of recording file
Maximum size of recoding file
Setup the frame per second
6.17.04. Speed
Limit Speed Off
Turn off the alarm of speed limit
Limit Speed On
Turn on the alarm of speed limit
The Value for Limit Speed
Set the speed value of speed limit
KM/hr
The speed unit of metric system
Mile/hr
The speed unit of imperial system
6.17.05. Time Zone
Change the time zone information to show the correct time when you are
in the different country or time zones.
6.17.06. G Sensor
35
Small Car
Default value of G sensor for small car
Big Car
Default value of G sensor for Big car
X Axis
Manually setup the value of X axis of G sensor
Y Axis
Manually setup the value of Y axis of G sensor
Z Axis
Manually setup the value of Z axis of G sensor
6.17.07. Alert Setting
Over Speed
G Sensor
Turn on the alarm when over speed
Turn on the alarm when G sensor event
6.17.08. Car Information
Company
Car Number
Driver
Enter the name of the company
Enter the car number
Enter the name of the driver
6.17.09. Password
The function of Password is to secure the setup items that only administrator can
change the value of System Setup.
The default password is 123456
Old Password
Enter old password
New Password
Enter new password
Confirm Password
Re-enter new password
07. Content List
36
1. DVR x1
2. Power Cable x1
3. Mounting Frame x1
4.
5.
6.
7.
8.
9.
Flash Drive x1
Video Cable x1
Wire Clamp Packet x1
User Manual x1
CD-ROM x1
Warranty Card x1
08. Appendix
37
8.01. Greenwich Mean Time
Time Zone
Place
(GTM+2:00) Athens, Bucharest, Istanbul
(GTM+2:00) Windhoek
(GTM+2:00) Helsinkj, Kyiv, Riga, Sofia, Tallinn, Vilnius
(GTM+3:00) Baghdad
(GTM+3:00) Nairobi
(GTM+3:00) Kuwait, Riyadh
(GTM+3:00) Moscow, St. Petersburg, Volgograd
(GTM+3:30) Tehran
(GTM+4:00) Baku
(GTM+4:00) Abu Dhabi, Muscat
(GTM+4:00) Caucasus Standard Time
(GTM+4:00) Tbilisi
(GTM+4:00) Yerevan
(GTM+4:00) Port Louis
(GTM+4:30) Kabul
(GTM+5:00) Ekaterinburg
(GTM+5:00) Islamabad, Karachi
(GTM+5:00) Tashkent
(GTM+5:30) Chennai, Kolkata, Mumbai, New Delhi
(GTM+5:30) Sri Jayawardenepura
(GTM+5:45) Kathmandu
(GTM+6:00) Astana
(GTM+6:00) Novosibirsk
(GTM+6:00) Dhaka
(GTM+6:30) Yangon (Rangoon)
(GTM+7:00) Krasnoyarsk
(GTM+7:00) Bangkok, Hanoi, Jakarta
(GTM+8:00) Beijing, Chongqing, Hong Kong, Urumqi
(GTM+8:00) Taipei
(GTM+8:00) Irkutsk
(GTM+8:00) Kuala Lumpur, Singapore
(GTM+8:00) Perth
(GTM+8:00) Ulaanbaatar
(GTM+9:00) Osaka, Sapporo, Tokyo
(GTM+9:00) YaKutsk
(GTM+9:00) Seoul
38
(GTM+9:30) Adelaide
(GTM+9:30) Darwin
(GTM+10:00) Brisbane
(GTM+10:00) Canberra, Melbourne, Sydney
(GTM+10:00) Vladivostok
(GTM+10:00) Hobart
(GTM+10:00) Guam, Port Moresby
(GTM+11:00) Magadan, Solomon Is., New Caledonia
(GTM+12:00) Petropavlovsk-Kamchatsky
(GTM+12:00) Coordinated Universal Time+12
(GTM+12:00) Fiji
(GTM+12:00) Auckland, Wellington
(GTM+13:00) Nuku'alofa
(GTM+2:00) Cairo
(GTM+2:00) Athens, Bucharest, Istanbul
(GTM+2:00) Windhoek
(GTM+2:00) Helsinkj, Kyiv, Riga, Sofia, Tallinn, Vilnius
(GTM+3:00) Baghdad
(GTM+3:00) Nairobi
(GTM+3:00) Kuwait, Riyadh
(GTM+3:00) Moscow, St. Petersburg, Volgograd
(GTM+3:30) Tehran
(GTM+4:00) Baku
(GTM+4:00) Abu Dhabi, Muscat
(GTM+4:00) Caucasus Standard Time
(GTM+4:00) Tbilisi
(GTM+4:00) Yerevan
(GTM+4:00) Port Louis
(GTM+4:30) Kabul
(GTM+5:00) Ekaterinburg
(GTM+5:00) Islamabad, Karachi
(GTM+5:00) Tashkent
(GTM+5:30) Chennai, Kolkata, Mumbai, New Delhi
(GTM+5:30) Sri Jayawardenepura
(GTM+5:45) Kathmandu
(GTM+6:00) Astana
(GTM+6:00) Novosibirsk
(GTM+6:00) Dhaka
39
(GTM+6:30) Yangon (Rangoon)
(GTM+7:00) Krasnoyarsk
(GTM+7:00) Bangkok, Hanoi, Jakarta
(GTM+8:00) Beijing, Chongqing, Hong Kong, Urumqi
(GTM+8:00) Taipei
(GTM+8:00) Irkutsk
(GTM+8:00) Kuala Lumpur, Singapore
(GTM+8:00) Perth
(GTM+8:00) Ulaanbaatar
(GTM+9:00) Osaka, Sapporo, Tokyo
(GTM+9:00) YaKutsk
(GTM+9:00) Seoul
(GTM+9:30) Adelaide
(GTM+9:30) Darwin
(GTM+10:00) Brisbane
(GTM+10:00) Canberra, Melbourne, Sydney
(GTM+10:00) Vladivostok
(GTM+10:00) Hobart
(GTM+10:00) Guam, Port Moresby
(GTM+11:00) Magadan, Solomon Is., New Caledonia
(GTM+12:00) Petropavlovsk-Kamchatsky
(GTM+12:00) Coordinated Universal Time+12
(GTM+12:00) Fiji
(GTM+12:00) Auckland, Wellington
(GTM+13:00) Nuku'alofa
40
8.02. Troubleshooting
Q1. How to proceed If indicator lights are not on after starting car?
A:Please first unplug. Wait until lights are off, plug the power card
and start the device. If the same problem occurs again, it means the
system may not function properly. Please send the product back to
the store for repair.
Q2. How to proceed if attachment clip does not adhere to windshield?
A:Make sure the windshield surface is smooth and clean without oils
and dust (use volatile cleaner for cleaning).
Q3. Can the recorded video be viewed on satellite navigation system?
A:No, the recorded video cannot be viewed on satellite navigation
system.
Q4. How to proceed if video picture is blurred?
A:Make sure lens is clean and use non-woven to wipe clean if
necessary. If video picture is still blurred, please return it to the
original store for repair.
Q5. How to proceed if other flash drive is not compatible with the
device?
A:The included flash drive has been thoroughly tested and will not
have compatibility issue with the device. Other flash drive due to
quality inconsistency may not be compatible with the device. Please
use the flash drive with well-known brands for Driving Recorder to
prevent video loss or deterioration problem.
Add list table at this place!!
Q6. How to proceed if the original flash drive faults?
A:If the included flash drive faults, it can be replaced free of charge
within warranty period. If the warranty is expired, please purchase
the original flash drive for Driving Recorder.
Q7. Can the flash drive be replaced when the device is running?
A:Replacing or removing flash drive must be performed when the
device is shut off and all lights are off.
41
8.03. Troubleshooting
Q1. How long video recording length does the product can take?
A:See the table below
Dual Camera + GPS
Single Camera + GPS
4 GB flash drive
120 minutes
240 minutes
8 GB flash drive
240 minutes
480 minutes
16 GB flash drive
480 minutes
960 minutes
Note: The recording length would be influenced by the different environments.
The recording length on the above table is for reference only.
42