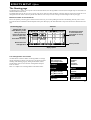
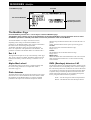
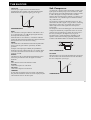
1
USERS MANUAL
FireworX
STUDIO EFFECTS PROCESSOR
IMPORTANT SAFETY INSTRUCTIONS
The lightning flash with an arrowhead symbol
within an equilateral triangle, is intended to alert
the user to the presence of uninsulated "dangerous voltage" within the product's enclosure that may
be of sufficient magnitude to constitute a risk of electric
shock to persons.
The exclamation point within an equilateral triangle
is intended to alert the user to the presence of
important operating and maintenance (servicing)
instructions in the literature accompanying the product.
1
2
3
4
5
6
7
Warning!
• To reduce the risk of fire or electrical shock, do not
expose this equipment to dripping or splashing and
ensure that no objects filled with liquids, such as vases,
are placed on the equipment.
• This apparatus must be earthed.
• Use a three wire grounding type line cord like the one
supplied with the product.
• Be advised that different operating voltages require the
use of different types of line cord and attachment plugs.
• Check the voltage in your area and use the
correct type. See table below:
8
9
10
11
12
13
14
Read these instructions.
Keep these instructions.
Heed all warnings.
Follow all instructions.
Do not use this apparatus near water.
Clean only with dry cloth.
Do not block any ventilation openings. Install in
accordance with the manufacturer's instructions.
Do not install near any heat sources such
as radiators, heat registers, stoves, or other
apparatus (including amplifiers) that produce heat.
Do not defeat the safety purpose of the polarized
or grounding-type plug. A polarized plug has two
blades with one wider than the other. A grounding
type plug has two blades and a third grounding
prong. The wide blade or the third prong are
provided for your safety. If the provided plug does
not fit into your outlet, consult an electrician for
replacement of the obsolete outlet.
Protect the power cord from being walked
on or pinched particularly at plugs, convenience
receptacles, and the point where they exit from the
apparatus.
Only use attachments/accessories specified by the
manufacturer.
Use only with the cart, stand, tripod,
bracket, or table specified by the
manufacturer, or sold with the apparatus.
When a cart is used, use caution when
moving the cart/apparatus combination to
avoid injury from tip-over.
Unplug this apparatus during lightning storms or
when unused for long periods of time.
Refer all servicing to qualified service
personnel. Servicing is required when the
apparatus has been damaged in any way,
such as power-supply cord or plug is damaged,
liquid has been spilled or objects have fallen into
the apparatus, the apparatus has been exposed to
rain or moisture, does not operate normally, or has
been dropped.
Voltage
Line plug according to standard
110-125V
UL817 and CSA C22.2 no 42.
220-230V CEE 7 page VII, SR section
107-2-D1/IEC 83 page C4.
240V
•
•
•
•
•
BS 1363 of 1984.
Specification for 13A fused
plugs and switched and
unswitched socket outlets.
This equipment should be installed near the socket
outlet and disconnection of the device should be easily
accessible.
To completely disconnect from AC mains, disconnect
the power supply cord from the AC receptable.
The mains plug of the power supply shall remain
readily operable.
Do not install in a confined space.
Do not open the unit - risk of electric shock inside.
Caution:
You are cautioned that any change or modifications not
expressly approved in this manual could void your authority
to operate this equipment.
Service
• There are no user-serviceable parts inside.
• All service must be performed by qualified personnel.
a
IMPORTANT SAFETY INSTRUCTIONS
EMC / EMI.
This equipment has been tested and found to comply with
the limits for a Class B Digital device, pursuant to part 15 of
the FCC rules.
These limits are designed to provide reasonable protection
against harmful interference in residential installations. This
equipment generates, uses and can radiate radio
frequency energy and, if not installed and used in
accordance with the instructions, may cause harmful
interference to radio communications. However, there is no
guarantee that interference will not occur in a particular
installation. If this equipment does cause harmful
interference to radio or television reception, which can be
determined by turning the equipment off and on. The user
is encouraged to try to correct the interference by one or
more of the following measures:
•
•
•
•
Reorient or relocate the receiving antenna.
Increase the separation between the equipment and
receiver.
Connect the equipment into an outlet on a circuit
different from that to which the receiver is connected.
Consult the dealer or an experienced radio/TV
technician for help.
For the customers in Canada:
This Class B digital apparatus complies with Canadian
ICES-003.
Cet appareil numérique de la classe B est conforme à la
norme NMB-003 du Canada.
b
Certificate Of Conformity
TC Electronic A/S, Sindalsvej 34, 8240
Risskov, Denmark, hereby declares on own
responsibility that following products:
Fireworx - Studio Effects Processor
- that is covered by this certificate and
marked with CE-label conforms with
following standards:
EN 60065
Safety requirements for mains
(IEC 60065) operated electronic and
related apparatus for household
and similar general use
EN 55103-1 Product family standard for
audio,video, audio-visual and
entertainment lighting control
apparatus for professional
use. Part 1: Emission.
EN 55103-2 Product family standard for
audio, video, audio-visual and
entertainment lighting control
apparatus for professional
use. Part 2: Immunity.
With reference to regulations in following
directives: 73/23/EEC, 89/336/EEC
Issued in Risskov, January 13th 1998
Anders Fauerskov
Managing Directo
TABLE OF CONTENTS
INTRODUCTION
Table of contents,
Welcome, . . . . . .
Features, . . . . . .
Front panel, . . . .
Rear panel, . . . . .
Signal flow, . . . . .
Setups, . . . . . . . .
BASIC OPERATION
PAGE
.
.
.
.
.
.
.
.
.
.
.
.
.
.
.
.
.
.
.
.
.
.
.
.
.
.
.
.
.
.
.
.
.
.
.
.
.
.
.
.
.
.
.
.
.
.
.
.
.
.
.
.
.
.
.
.
.p.
.p.
.p.
.p.
.p.
.p.
.p.
EFFECTS SETUP
12
13
14
14
14
14
15
16
16
16
16
16
17
18
19
19
19
20
21
21
25
25
25
27
27
28
.
.
.
.
.
.
.
.
.
.
.
.
.
.
.
.
.
.
.
.
.
.
.
.
.
.
.
.
.
.
.
.
.
.
.
.
.
.
.
.
.
.
.
.
.
.
.
.
.
.
.
.
.
.
.
.
.
.
.
.
.
.
.
SYSTEM AND MIDI
.p.
.p.
.p.
.p.
.p.
.p.
.p.
.p.
.p.
THE BLOCKS
The Special icons,
Dynamics, . . . . .
Filters . . . . . . . . .
Formant . . . . . . .
Distortion . . . . . . .
Vocode . . . . . . . .
Synth . . . . . . . . . .
Pitch . . . . . . . . . .
Chorus . . . . . . . .
Delay . . . . . . . . . .
Reverb . . . . . . . .
Pan . . . . . . . . . . .
EQ . . . . . . . . . . .
MOD, . . . . . . . . . . . . . . . . . . . . . . . . . . . . .P. 29
Modifier display, . . . . . . . . . .p. 29
The flow of the Modifiers, . . .p. 29
TC Electronic, Sindalsvej 34, DK-8240 Risskov - [email protected]
41
41
42
43
43
44
47
47
47
PAGE 48
.
.
.
.
.
.
.
.
.
.
.
.
.
.
.
.
.
.
.
.
.
.
.
.
.
.
.
.
.
.
.
.
.
.
.
.
.
.
.
.
.
.
.
.
.
.
.
.
.
.
.
.
.
.
.
.
.
.
.
.
.
.
.
.
.
.
.
.
.
.
.
.
.
.
.
.
.
APPENDIX
PAGE 29
29
31
31
32
33
37
38
39
40
PAGE 41
I/O SETUP, . . . . . . . . . . . . . . . . . . . . . . . . .P.
I/O Setup display, . . . . . . . . .p.
Signal page, . . . . . . . . . . . . .p.
Level page, . . . . . . . . . . . . . .p.
MIDI page, . . . . . . . . . . . . . . .p.
External Controllers, . . . . . . .p.
UTILITY, . . . . . . . . . . . . . . . . . . . . . . . . . .P.
Config. page, . . . . . . . . . . . .p.
Card page, . . . . . . . . . . . . . .p.
PAGE 19
EFFECTS, . . . . . . . . . . . . . . . . . . . . . . . . .P.
Effects display, . . . . . . . . . . . .p.
Edit page, . . . . . . . . . . . . . . .p.
Edit Exercises, . . . . . . . . . . . .p.
ROUTING, . . . . . . . . . . . . . . . . . . . . . . . . .P.
Routing page, . . . . . . . . . . . .p.
Routing Exercises, . . . . . . . . .p.
I/O of the blocks, . . . . . . . . . .p.
Block I/O Exercises, . . . . . . . .p.
Layout page, . . . . . . . . . . . . .p.
Tool page, . . . . . . . . . . . . . . .p.
Layout Exercises, . . . . . . . . .p.
MODIFIERS
3
4
5
6
8
9
10
PAGE 12
Quick reference, . . . . . . . . . .p.
Display overview, . . . . . . . . . .p.
RECALL, . . . . . . . . . . . . . . . . . . . . . . . . . .P.
Recall display, . . . . . . . . . . .p.
Preset page, . . . . . . . . . . . . .p.
List page, . . . . . . . . . . . . . . .p.
Recall Exercises, . . . . . . . . .p.
STORE, . . . . . . . . . . . . . . . . . . . . . . . . . . .P.
Store display, . . . . . . . . . . . .p.
Store page, . . . . . . . . . . . . . .p.
Name page, . . . . . . . . . . . . .p.
Delete page, . . . . . . . . . . . . .p.
Using a memory card, . . . . . .p.
Store Exercises, . . . . . . . . . .p.
Matrix page, . . . . .
Link page, . . . . . . .
Dials page, . . . . . .
Modifier Exercises,
Modifiers page, . . .
External loop, . . . .
Alpha Mod., . . . . .
Tempo, . . . . . . . . .
Insert loop, . . . . . .
2
.
.
.
.
.
.
.
.
.
.
.
.
.
.
.
.
.
.
.
.
.
.
.
.
.
.
.p.
.p.
.p.
.p.
.p.
.p.
.p.
.p.
.p.
.p.
.p.
.p.
.p.
48
48
51
54
54
55
58
59
59
62
66
68
70
PAGE 74
Reset page . . . . . . . . . . . . . .p.
Self test . . . . . . . . . . . . . . . . .p.
Troubleshooting . . . . . . . . . . .p.
MIDI implementation chart . . .p.
Tech spec . . . . . . . . . . . . . . .p.
Presets . . . . . . . . . . . . . . . . .p.
Prod No: 606057022
72
73
74
75
76
77
3
INTRODUCTION Welcome
Congratulations on the purchase of your new FireworX.
We hope that you have as much pleasure using it as
we had making it.
The FireworX is a studio multi-effects processor carefully
designed to produce ultimate sound effects. The versatile Routing
menu provides you with extremely flexible setup possibilities.
You can combine the effect blocks in any combination you like.
Check out the Modifier Matrix and discover a powerful tool for
real-time external and internal control of the many parameters of
the FireworX.
The FireworX is equipped with 24 bit AD/DA converters,
AES/EBU, S/PDIF, Toslink and ADAT interfaces.
About this Manual
Many people in the music business (and elsewhere) have an
aversion to reading manuals. We understand that. So if you feel
like starting without reading the whole manual, simply get going.
You can always use the manual for checking out areas that you
have questions about, or if you want to dig deeper into the unit.
Refer to the Table of Contents for further information.
On the other hand, you might want to know a little more about
the FireworX before you start pressing keys. The manual will
take you through all of the FireworX functions step by step. If
you want to read about a specific function, please refer to the
Table of Contents.
4
INTRODUCTION Features
The Processing power structure of the FireworX
The FireworX is a multi-effects processor with more than 35 different algorithms grouped under the twelve effect block keys on the
front panel. Each of these algorithms requires a certain amount of processing power. To be able to allow bigger algorithms that take up
large amounts of power when active, the FireworX uses a dynamic processing power allocation structure. This means that you always
get the advantage of the full power of the FireworX, in other words, you can keep adding algorithms to the signal chain until all the
processing power of the FireworX is used. The FireworX will prompt you when no more power is left. The total power allocation
between the different algorithms is shown in the “Effects, Tool” page.
The FireworX features:
- Any Effect block can be placed anywhere in the 8x8
- Insert Loop, enabling you to insert any other effects
Routing grid. Left/Right can be set up separately for
processor into the Routing of the FireworX. The Loop
Input/Output in each block.
can be Analog or Digital.
- More than 35 different algorithms, including Ring
- Alpha Modulation wheel for real time control of
Modulator, Digital Cruncher, Sweeping Filters,
parameters. The Alpha Mod. can send and receive
Formant Filters, Chaos Noise generation and
MIDI. The function of the Alpha Mod. can be written
many more.
into the preset name.
- Nine external and eleven internal Modifiers that can
- All tempo based parameters can be connected to the
be tied to numerous parameters. Up to twenty
global tempo. Each of these parameters can be set
connections can be made simultaneously. Each
from 16 bars through 1/1 to 1/32 straight, dotted or
connection’s Modifier relationship can be
triplet subdivisions of the global tempo. The global
transformed.
tempo can be tapped, dialed, or MIDI clock based.
- All nine External Modifiers can be controlled via MIDI
- Each of the effect blocks can be bypassed via MIDI.
controllers, Velocity, Pitchbend, Aftertouch, Note-onkey etc.
- Internal Modifiers include: ADSR’s, LFO’s, Envelope
detectors, a Pitch detector etc.
- 24 bit A to D and D to A converters. AES/EBU, S/PDIF,
Toslink and ADAT interface.
5
INTRODUCTION The Front Panel
POWER
Press and hold the Power
switch for about 3 seconds,
then release to power off.
IN/OUT KNOBS
The overall analog Input level
is adjusted via the knob in the
upper left corner of the
FireworX. The Input should
average approximately -3 to -6
dB on the Input meters.
Set your analog output level
using the Output knob.
CARD SLOT
The PCMCIA slot is used for
storing and loading presets.
Use Type 1 PC Cards with a
minimum 64 KBytes of SRAM.
6
INPUT METERS
These meters indicate the
level of Left and Right
inputs.
OVERFLOW LED
This LED indicates
internal overflow.
OVERALL BYPASS
The Bypass key in the upper left corner
is the overall bypass. With this key you
can bypass all effects in the FireworX
simultaneously.
ALPHA MOD. SETUP
Press this key to get an overview of the
parameters controlled by the Alpha
Mod. wheel.
TEMPO
Tap the global tempo using the Tempo
key or connect the global tempo to
MIDI clock.
Note: this may affect the current preset.
Pressing the Tempo key will enable the
Tempo pop-up menu. This menu will
disappear after a few seconds.
The Tempo key will indicate the global
tempo by blinking.
GAIN REDUCTION
Reads out the gain reduction of one of
the Dynamics blocks.
LED’s
The three LED’s indicate MIDI activity,
Preset Edited, and Digital lock . The
Digital Lock LED blinking indicates lack
of external clock.
INTRODUCTION The Front Panel
EFFECT MUTE
The twelve effect keys are
dedicated to mute/bypass
any of the twelve effect
blocks. These keys can
mute/bypass an effect
block at any time, no
matter what display you
are working in.
When you are in the
Effects Edit display,
double click for fast
access to the Edit
parameter menu.
ARROW KEYS
In many of the displays you can select
different pages by pressing the Arrow
keys, e.g. in the Effects display you can
choose between Tool, Edit, Routing and
Layout.
THE PARAMETER WHEEL
Use the Parameter wheel to change
position of the cursor in the display
THE VALUE WHEEL
Use the Value wheel to change the
values of parameters.
ENTER, EXIT
The Enter key is used to confirm actions,
or for accessing into a block. The Enter
key will blink when the FireworX needs
you to confirm.
The Exit key is used to exit a menu, or to
cancel an action.
ALPHA MOD.
The Alpha modulation
wheel can control a
number of parameters at
the same time. The specific
function of the wheel is
following the preset.
The function of the Alpha
Mod. is set up in the
Modifier Matrix.
ALPHA WHEEL METER
Is indicating the actual
output value of the Alpha
Mod. wheel
7
INTRODUCTION The Rear Panel
Main Power
Power Input
Switch
Balanced
XLR
Inputs
Balanced
XLR
Outputs
Serial
no.
Optional
Wordclock
RCA
Digital
In/Out
AES/EBU
S/PDIF
ADAT
TOS
MIDI
External
In,Thru,Out Control
Input
Notes:
Pin 2 is “Hot” on all XLR’s (IEC and AES standards)
External control jack can use momentary, alternating and continuous type pedals.
The FireworX power supply is capable of operating at any line voltage from 100-240 Volts, 50-60Hz.
Cables
8
XLR - XLR
Jack (unbalanced) - XLR
Jack (balanced) - XLR
Pin 1 - Pin 1 (Ground)
Pin 2 - Pin 2 (Hot)
Pin 3 - Pin 3 (Cold)
Sleeve - Pin 1 (Ground)
Tip - Pin 2 (Hot)
Sleeve - Pin 3 (Cold)
Sleeve - Pin 1 (Ground)
Tip - Pin 2 (Hot)
Ring - Pin 3 (Cold)
INTRODCUTION The Signal Flow
Con/Pro
Levels
Input
Gain
Input
Selector
Bypass
Output
Gain
Con/Pro
Levels
Analog
Outputs
[balanced]
Analog
Inputs
[balanced]
Digital
Input
Gain
Digital
Inputs
Digital
Output
Gain
Channel select
ADAT/OPTICAL
Digital
Output
Channel select
ADAT/OPTICAL
Modifier Flow
INSERT INSERT
Send Return
Input
Output
MIDI
Pedal
Dial
9
INTRODUCTION Setups
Setup
The FireworX can be used in a number of applications. Therefore we present a couple of suggestions on how to
connect the FireworX.
Send/Return
Connect the auxiliary out from your mixing console to the left or right input of
the FireworX. Connect the FireworX left/right outputs to the auxiliary return or
two channels on your mixing console. This leaves the one input open to be used
as Vocoder or Ring Modulator Carrier input.
Group insert
Connect the left/right insert send from your subgroups to the FireworX
left/right input.
Connect the FireworX left/right outputs to the subgroups insert return. This
setup makes it possible to mix several sources through the FireworX, and a
master or group effect to the sources.
Insert External Device
When using the Analog In/Outs of the FireworX, the Insert Loop makes it
possible to connect an external device to the Digital In/Outs or vice versa. The
Send and Return point of the Insert is set up in the Effects Routing menu.
10
BASIC OPERATION Quick Reference
General Control
General control of the FireworX is accomplished by dialing the
Parameter wheel to change position of the cursor, and the Value
wheel to change values. In many of the displays you can select
different menus by pressing the < > Arrow keys e.g. in the
Effects display you can select between Tool, Edit, Routing and
Layout. Press Enter to carry out an action (for example when
recalling a preset). Press Exit to decline an action or to leave a
sub menu.
Recall
Press Recall (if you are not already there). Make sure that the
cursor is placed on “Preset”, and dial the Value wheel to scroll
through the presets. Press Enter to load the new preset.
Quick Store
If you want to store a preset with the same name, press Store to
access the Store menu, and press Enter to confirm. The FireworX
will now automatically store your preset in the first free User
space, using the current name. When you restore an existing User
preset, the FireworX will default to the same User preset number.
Input/Output Levels
When using Analog input, turn the Input/Output knobs in the
upper left corner of the front panel to adjust the levels of the
FireworX. To access the Digital Input/Output levels press the I/O
Setup key and select the Levels page using the < > Arrow keys.
NOTE: The digital In/Out levels will also affect the Analog
In/Out levels.
Effect Mute/Bypass
The twelve effect block keys on the front panel are used for
bypassing or muting the active effect blocks. The mute mode can
be different in each block.
The Alpha Modulation wheel
The Alpha Modulation wheel (on the far right hand side of the
front panel) can control a number of parameters in the current
preset simultaneously. The function of the Alpha Mod. varies
with the preset. A short description/name of the function is
provided in the Recall display.
Editing
Press the Effects key and select the Edit display using the < >
Arrow keys. Now there are two ways of entering the Edit display
of an effect. Doubleclick the mute key of the block you want to
edit or dial the Parameter wheel to place the cursor on the block
you want to Edit and press Enter. Press Exit to leave the Edit
display.
Routing
Changing the order of the effect blocks is done in the Routing
display. Press the Effects key and select the Routing display
using the < > Arrow keys. Place the cursor where you want to
insert an effect block, double click the mute key of the block you
want to insert and dial the Value wheel to select the right subalgorithm (sub-algorithm is shown in the lower text line). Now
press Enter to insert the current effect.
Pressing Enter while pointing to an effect block will enable you
to set up input/output and Mute-mode of the current block.
11
BASIC OPERATION Display overview
The display pages in the FireworX
This overview of the pages in the FireworX shows what functions are located in which displays. Each box refers to a
key on the front panel of the FireworX. The text in the upper right corner of the boxes tells you whether the
parameters of that display are global or stored with the preset.
GLOBAL
RECALL
I/O SETUP
Preset page
Preset - Scrolls through presets.
Bank - Selects between Factory, User, Card.
Filter - Filters out presets containing a particular effect.
List page
Presents presets in list form.
MIDI page
Sets MIDI channel, Program change On/Off, Offset, Sysex id,
MIDI Map, Alpha Mod. local On/Off.
CTRL page
Sets up external control sources for External Modifiers 1-8,
Master Volume, Global Tempo, Overall Bypass, Effects block
bypass.
Level page
Sets Digital In/Out levels and displays Analog In/Out levels.
Signal page
Sets Input source, Insert loop I/O, Sample rate, ADAT channels.
Displays incoming sample rate.
STORE
Name page
Names User presets and Alpha Mod. function.
Store page
Selects store location and stores preset.
Delete page
Deletes presets in User bank and Card bank.
EFFECTS
UTILITY
PRESET
Tool page
Shows power consumation of current Routing, and provides a
number of tools to be used in the Edit page.
Edit page
Edits the effects blocks.
Routing page
Changes order and setup of the effects blocks.
Layout page
Changes the size of the Routing grid, Inserts/Moves and
Deletes. Rows and Columns.
Config page
Sets Viewing angle, Param. dial direction, Pedal
type/calibration, User bank protect, MIDI Bulk Dump.
Card page
Carries out preset transfer from or to PC-Card, Card status
reader, Format/Reset card.
TEMPO
PRESET
Matrix page
Connects External and Internal Modifiers to effects parameters.
Modifiers page
Sets up Internal Modifiers parameters.
Dials page
Simulates External Modifiers using the Value and Parameter
wheel.
12
GLOBAL
Tempo page
Sets global tempo via tapping, dialing or MIDI.
ALPHA MOD.
MOD
GLOBAL
PRESET
Alpha Mod. page
Shows the parameters controlled by the Alpha Mod. wheel and
the exact value of the Alpha Mod. wheel.
BASIC OPERATION Recall
Recalling a preset
When you want to Recall a Preset, simply use the Value wheel to scroll through the Presets and press the Enter key
to Recall.
The Recall Display
The FireworX contains 200 Factory Presets and has room for a maximum of 200 user Presets, however the actual number depends on the
size of your Presets and may be less than 200.
There are two different pages in the FireworX Recall display, “Preset” and “List”. They offer two ways of viewing the Presets of the
FireworX. Use the < > Arrow keys to select between them.
Basic operation is accomplished by using the Parameter wheel to change cursor position and the Value wheel to change values. Pressing
Enter will recall the selected preset.
“Preset” page selected
The Preset page
Factory/USER/CARD bank selector
Preset number
Filters out Presets not
containing the effect
selected in the Filter
Preset name
Function of the Alpha Mod.
The Preset page
The Preset page of the FireworX contains three parameters:
Preset - Bank - Filter. The name and number of the Preset is
displayed, and also the function of the Alpha Modulation wheel
in the current Preset is shown in the lower end of the Preset
page.
Change cursor location by dialing the Parameter wheel. Use the
Value wheel to adjust values.
Preset
Dial the Value wheel to preview the presets, Press Enter to
Recall.
Bank
Is used to select which bank you would like to recall from:
Factory bank, User bank, or Card bank (only available when a
pc-card is inserted).
Filter
Is used to search for Presets containing a specific block, e.g. if
the Filter is set to Reverb, the FireworX will only show Presets
containing the block Reverb.
The List Page
The List page shows the FireworX presets on a continuous list,
starting with the 200 Factory Presets marked “F”, followed by
the User Presets marked “U” and last but not least the optional
Card Presets marked “C”.
Dial the Parameter wheel to scroll through the list and press
Enter to recall.
13
BASIC OPERATION Recall
Exercise 1:
How to Recall a Preset
In this Exercise we are going to recall a couple of Presets. Press
the Recall key (if you’re not already there) and select the
“Preset” page using the < > Arrow keys. Make sure that the
“Bank” is set to Factory, and that the “Filter” is off.
Now select the Preset parameter and dial the Value wheel to
scroll through the factory Presets. While scrolling you will see
both the preset number and the LED of the Enter key blinking,
indicating that the current Preset has not been recalled yet.
Select Preset #10 and press Enter to confirm. Preset #10 is now
recalled.
Exercise 2:
How to search for Presets containing a specific effect
Exercise 1:
How to Recall a Preset
Press the Recall key
RECALL
Press the Recall key
RECALL
Dial Parameter
wheel to select
“Filter”
Dial Value
wheel to scroll
through
Presets
Press the Enter key
to Recall the Preset
Exercise 2:
How to search for Presets containing a specific effect
Now we will try to recall a Preset containing a specific effect, in
this exercise a delay. Select the “Filter” parameter by using the
Parameter wheel.
Dial the Value wheel until you see “DLY”. Now move the cursor
back to the “Preset” parameter.
Dial the Value to scroll through the Presets. Notice that the
FireworX only shows Presets containing the Delay block.
Select a Preset and press Enter to confirm.
Dial Value
wheel to
choose “Delay”
ENTER
Dial Parameter
wheel to select
“Preset”
Dial Value wheel
to scroll
through Presets
Press the Enter key
to Recall the Preset
14
ENTER
BASIC OPERATION Store
Quick Store with the same name
If you want to store an edited Factory Preset with the same name, simply press Store and Enter. The FireworX will
automatically store the Preset in the first empty User space.
If you want to store an edited User Preset with the same name, simply press Store and Enter. The FireworX will store
the Preset in the same User Preset position.
The Store display
The FireworX can hold a maximum of 200 User Presets, and up
to 999 additional Presets can be stored on card (depending on the
size of the card). Due to the dynamic Preset structure, the
maximum amount of presets storable in the FireworX will vary
depending on the size of the Presets.
The Store display consists of three different pages: Name - Store
- Delete.
Use the < > Arrow keys to select between them.
The Store page
The Store page displays the Preset name, the User or Card space
that you are about to store in, and the amount of free space in the
internal User bank.
The Bank indicator
The bank indicator tells you which bank and number you are
about to store in. The existing name of the current number is
displayed, if the number is free it will read <EMPTY>.
New Name
The New Name line shows the name the Preset will be stored
with. This name can be changed on the Name page.
Free space indicator
The Free space indicator tells you how much room there is left in
the FireworX internal RAM bank. The FireworX can hold a
maximum of 200 User Presets, however the actual number
depends on the size of your Presets and may be less than 200.
This is due to the dynamic Preset memory structure of the
FireworX.
The Name Page
In the Name page you can change the name of your Preset and
change the text describing the function of the Alpha Mod. wheel.
The Letterbox
Use the Parameter wheel to change cursor position. Dial the
Value wheel and press Enter to select new letters or numbers. To
switch to capital letters and between numbers and special
charaters, press the Exit key or select CAP with the cursor and
press Enter. Use DEL to delete a character, and INS to Insert a
character space.
To change the Alpha Mod. text, dial the Parameter wheel until
the cursor jumps to the Alpha Mod. line.
The Delete page
Dial the Value wheel to select the Preset you want deleted, and
press Enter to delete.
NOTE: The FireworX will automatically default to the Store
page if you leave the Store display in the Delete page.
Free space indicator
The Free space indicator tells you how much room is left in the
FireworX internal RAM bank. The FireworX can hold a
maximum of 200 User Presets, however the actual number
depends on the size of your Presets, and may be less than 200.
This is due to the dynamic Preset memory structure of the
FireworX.
Warning: All data of a deleted Preset will be lost.
15
BASIC OPERATION Store
The Store page
“Store” page selected
The Storing space
The Name of the
Preset
Free space indicator
The Name page
“Name” page selected
The New name of
the Preset
The function of the
Alpha Mod.
The Letterbox
Select “CAP” for
capital letters or
press the Exit key to
toggle “CAP” on/Off
Using a Memory Card
Insert the card.
When you want to store a single preset on a PC-card, you simply
dial through the User presets, and following that you will see the
card bank.
A card can hold up to 999 presets depending on the size of the
card.
Preset copy to or from card is done in the “Utility, Card” page
(see “Utility” for further description).
Card types
S-RAM Type 1 PCMCIA cards, with a minimum of 64Kbytes,
maximum of 2Mbytes S-RAM.
16
BASIC OPERATION Store
Exercise 3:
How to Store a preset with the existing name
This exercise shows you how to store a Preset with the existing
name. When you try to store a Factory Preset, the FireworX
automatically selects the first free storing space. If you try to restore a User Preset, the FireworX will automatically select the
same storing space.
- Press the Store key to access the Store display.
- Dial the Value wheel to select the storing space.
- Press Enter to confirm.
Exercise 3:
How to Store a Preset with the existing name.
Press the Store key
STORE
Exercise 4:
How to name a Preset and the Alpha Mod. function.
Dial Value
wheel to select
storing space
Press the Enter key
to Store the Preset
Exercise 4:
How to name a Preset and Alpha Mod. function
In this exercise we will try to name or rename a Preset and the
Alpha Mod. function.
If the Preset is not named before the storing, it will be stored
with the name of the Preset it was built from.
- Press the Store key to access the Store display.
- Use the < > Arrow keys to select the “Name” page.
- Now use the Parameter wheel to move the cursor in the name,
the Value wheel to select a letter in the Letterbox, and press Enter
to insert the chosen letter.
In order to change the Alpha Mod. function text, dial the
Parameter wheel until the cursor jumps to the next line.
The new name has to be stored with the preset (Please refer to
Exercise 3), press the right < > Arrow key to select the “Store” page.
Press the Store key
STORE
Use the Arrow
keys to select
the Name
display
ENTER
Dial Parameter
wheel to move
cursor
Dial Value
wheel to select
letters
Press Enter to
choose letters
ENTER
Dial the Parameter
wheel to select Alpha
Mod. function line
Repeat Exercise 3 to Store your Preset with the new
name.
17
BASIC OPERATION Store
Exercise 5:
How to delete a Preset
This Exercise will describe how to delete a single Preset. The
FireworX also has the ability to clear the whole User Preset bank
instantly (please see the “Reset” page for further instructions).
- Press the Store key to access the Store display.
- Use the < > Arrow right key to select the “Delete” page.
- Dial the Value wheel to select the Preset you want to delete.
- Press Enter to confirm the deleting of the current Preset.
Warning: All data of the deleted Preset will be lost.
Exercise 5:
How to delete a preset
Press the Store key
STORE
Use the Arrow
keys to select
the Delete
display
Dial Value
wheel to
select the
preset you
want to delete
Press Enter
to delete the preset
18
ENTER
EFFECTS SETUP Effects
The Effects display
The Effects display contains four pages: Tool - Edit - Routing - Layout. Use the < > Arrow keys to step between the
four pages.
The Tool page allows you to select different readouts in the blocks, and shows the total amount of DSP power usage.
The Edit page allows you to Edit the different blocks inserted.
The Routing page lets you change the setup and order of the blocks.
The Layout page helps you to move, insert or delete whole rows or columns simultaneously and change the size of
the Routing grid.
The Edit page
Selected
Double click on the
block mute key of the
effect you want
to edit
Select In and
press Enter to edit
the Preset In-level
Block name and
sub-algorithm
The Edit page
The Edit page enables you to edit the blocks of the current
Preset.
There are two different ways of accessing the Edit parameters
page. The first way is to dial the Parameter wheel to move the
cursor to the block you want to edit, and press Enter to edit the
current block. The lower text line displays the sub-algorithm
running in the current highlighted block.
The second way is to double click the key of the block you want
to edit. In case you have more than one of a specific block, the
first double click will take you into the block #1, the second
double click will take you into #2 and so forth. After entering the
last block, the double click will take you back to #1.
Example: The FireworX is set up with two delay blocks, DLY1
and DLY2. Double clicking the Delay mute key will take you
into the Edit parameters page of DLY1, double clicking the
Delay mute key again will take you into the Edit, Parameters of
DLY2 etc.
Select Out and
press Enter to edit
the Preset Out-level
Cursor position
Select the In and Out block and press Enter to edit the In/Out
level of the current Preset.
In the Edit parameter page, use the Parameter wheel to scroll up
and down, and the Value wheel to change Values (see “the
Blocks” for parameter descriptions).
NOTE: A black square in front of a parameter indicates that the
current parameter is modulated by an External or Internal
Modifier. The parameter will in that case only be controllable
through this Modifier. However, the setting in the Edit,
Parameters page will act as the default value in a recall situation
(See “Default parameter setting” in the Modifier chapter for
further instructions).
19
EFFECTS SETUP Effects
Exercise 6:
How to Edit an effect block
In this exercise we will edit an effect block.
- Press the Effects key (if you are not already there).
- Select the Edit page by using the < > Arrow keys.
- Double click the Mute key of the block you want to edit
(located on the front panel).
You will now enter the Edit, Parameters display.
Use the Parameter wheel to change the cursor position and the
Value wheel to change values.
In case the Preset contains more than one of the blocks you want
to edit, a second double click on the block Mute key will take
you into number two.
Exercise 6:
How to Edit an effect block
Press the Effects key
ENTER
Use the Arrow keys
to select the Edit
display
Double click the Mute
key of the block you
want to edit
DELAY
Dial Parameter
wheel to move
the cursor
Dial Value
wheel to
change values
Press Exit to exit to
the Edit page
20
EXIT
EFFECTS SETUP Effects
The Routing page
The Routing page is where you set up the order of the effect blocks, the sub-algorithm in each block, the left/right setup of each block and
the Mute mode of each block.
The full Routing grid can be up to 8 by 8 spaces, and you can place any effect anywhere in the grid, however, the FireworX will not scroll
through the last row unless a block is placed closer than two rows away. The size of the grid can be changed in the Layout page.
Maximum number of inserted blocks
Due to the dynamic processing power structure of the FireworX, you can keep adding new blocks to the Routing until all power is used.
The total amount of simultaneous blocks depends on the power taken up by the individual blocks. The power allocation is showed in the Tool
page.
The Routing page
Selected
Double click on the
block Mute key of the
effect you want to
insert and dial Value
wheel to select subalgorithm.
Press Enter to insert.
Dial Parameter wheel
to select effect and
press Enter to set up
block I/O
Block name and
sub-algorithm
Cursor position
Empty spaces
The sub-algorithms of the blocks
All effect blocks contain a number of sub-algorithms. To change
the sub-algorithm of a block, place the cursor on the block (while
standing in the Routing page) by dialing the Parameter wheel,
dial the Value wheel to select the new sub-algorithm and press
Enter to confirm.
Here is a complete list of sub-algorithms in the Effect blocks:
DYNAMIC
Expander/Gate
Soft Compressor
Hard Comp/Limiter
FORMANT
Formant
VOCODE
Vocoder
Ring Mod. Internal
Ring Mod. External
PITCH
Single Voice
Dual Voice
FILTERS
Resonance
Bandpass
Phaser
Resonator
Resochord
DISTORT
Drive
Cruncher
SYNTH
Curve Generator
Chaos generator
Noise Generator
21
EFFECTS SETUP Effects
Available blocks
Some of the Effects blocks can be inserted more than once. Here
is a complete list of blocks available:
Total
2x Cho/Fla
Totalamount
amountof
ofblocks
blocks
3x
Dynamic
2x Cho/Fla
3x Dynamic
1x
2x Dly 2x Dly
1xFilters
Filters
1x
1x Reverb
1x Reverb
1xFormant
Formant
1x
2x Pan 2x Pan
1xDistort
Distort
1x
1x EQ 1x EQ
1xVocode
Vocode
2x
Synth
1x Ext. loop
(1xloop
Send,
Return)
1x Ext.
(1x1xSend,
1x
2x Synth
1x
1x Feedback
(1x Send, 1x Return)
Return)
1xPitch
Pitch
Parallel or Serial
The Effects blocks of the FireworX can be set up parallel or
serial.
Serial
When two blocks are placed horizontally after each other in the
Routing display, they are working serially. That means that the
first effect will be fed through the second.
Example: If you have a Delay block in front of a Reverb block,
the regeneration of the Delay will be fed through the Reverb,
meaning that you will hear Reverb on the regeneration of the
Delay.
Parallel
When two blocks are Vertical to each other, they are working in
parallel. That means that the effects will not affect each other.
Example: If you have a Delay block below a Reverb block, the
regeneration of the Delay will not be fed through the Reverb,
meaning that the regeneration of the Delay will be dry.
CHORUS/FLANGER
Classic Chorus
Advanced Chorus
Classic Flanger
Advanced Flanger
REVERB
Simple
Advanced
EQ
Fixed EQ
Modifiable EQ
22
DELAY
Stereo
Dual
Dual three-tap
One-tap
Six-tap
Reverse
PANNER
Simple Tremolo
Advanced Tremolo
Simple Panner
Surround Panner
Stereo Enhancer
The Special Icons
There are a couple of different icons in the Routing that do not
apply to any of the effect blocks.
Pipeline
The Pipeline. If you simply want to lead the sound
through a point, you select the pipeline icon.
Loop
The Insert Loop. The External loop Send and
Return blocks apply to the Insert loop set up in “I/O
Setup, Signal”. Place the Send block where you
want to tap the sound, and place the Return block
where you want the sound to re-enter the signal
chain (See Insert loop for further descriptions).
Warning: The Insert loop is subject to small amounts of delay.
This could cause serious changes in the sound due to phase
cancellation.
Feedback The Feedback block can feed the sound back from
one point to another in the signal chain.
Place the Send block where you want to tap the
sound, and place the Return block where you want
the sound to re-enter the signal chain.
Warning: The Feedback can cause serious overloads in the
Routing.
EFFECTS SETUP Effects
Exercise 7:
Inserting an Effect
There are two ways of inserting an effect. Let’s start by setting
up a Phaser and after that a Delay
- Press the Effects key (if you are not already there).
- Use the < > Arrow keys to select the Routing page.
- Use the Parameter wheel to place the cursor in
the 1 1 position (position is indicated in the lower right
corner of the Routing display).
- Dial the Value wheel until you see “Filter - Phaser” in
the lower text line of the display and press Enter to
insert the Phaser in the Routing.
And the other way after accessing the Routing page:
- Place the cursor in position 2 1 in the Routing display
- Double click the Delay Mute key, Dial the Value
wheel until you see “Delay 1 - One-tap“ in the lower
text line of the display.
- Press Enter to confirm.
You now have a Delay block set in series with a Phaser.
Exercise 7:
Inserting an effect
Press the Effects key
EFFECTS
You now have a Dual delay algorithm, where you are able to set
different delay times in left and right channels (remember to set
the panning of the two delay taps).
Exercise 8:
How to change a sub-algorithm
Select the Routing page
Dial Parameter
wheel to select
effect block
Dial
Value wheel
to select new
sub-algorithm
Use the Arrow
keys to select
the Routing
display
Double click
the Mute key of
the block you
want to insert
Exercise 8:
How to change a sub-algorithm
The Delay that you just inserted is a One-Tap Delay that contains
only one delay time. Let’s try to find a delay with two delay
times so we can get it different in left and right:
- Move the cursor to the Delay block using the
parameter wheel.
- Dial the Value wheel until you see “Delay - Dual” in
the lower text line.
- Press Enter to confirm.
Press Enter to confirm
ENTER
DELAY
Dial Value
wheel to select
sub-algorithm
Press Enter to insert
the block
ENTER
23
EFFECTS SETUP Effects
Exercise 9:
Moving an existing block
This exercise shows you how to move an existing block to a
different position in the Routing. Let’s move the Delay block that
we set up in Exercise 7&8 from position 2 1 to position 1 2.
- Enter the Routing page.
- Move the cursor to the Delay block in position 1 2
using the Parameter wheel.
- Dial the Value wheel counter clockwise until you see a
black square.
- Press Enter to remove the Delay block, don’t worry the
settings of the block are still being remembered.
- Move the cursor to position 1 2 using the Value wheel.
- Double click the Delay Mute key on the front panel.
- Dial the Value wheel until you see “Delay 1 - Dual” in
the lower text line.
- Press Enter to confirm.
Now the Delay block is in a parallel position as opposed to the
Phaser from exercise 7&8.
Exercise 9:
Moving an existing block
Select the Routing page
Place the
cursor on the
block you want
to move
Dial Value
wheel counter clockwise until
you see no
effect
Press Enter to
confirm
ENTER
Place the
cursor in the
new position
Double click
the Mute key
of the block
you want to
re- insert
Press Enter to
confirm
24
DELAY
ENTER
EFFECTS SETUP Effects
The Block I/O page
Input Source
Mute Mode
Out Mode
Setting up Left/Right, In/Out in the blocks
Each block’s Input and Output can be set up independently. To
access the I/O display of a block, place the cursor on the current
block (in the Routing page) using the Parameter wheel, and press
Enter. Watch the block diagram of the block as you change the
settings.
Input:
The Input parameter controls what input source the
current block should use, Left (L), Right (R) or both
(L+R).
Out L/R: The Output parameter determines what should be
sent out of the current block, Off=No output on this
channel, Mix=Applies to the Mix parameter in the
“Edit, Parameter” page, Dry=The channel will only
pass direct signal, Wet=The channel will only pass
effect signal.
Press Exit to leave the Block I/O display.
NOTE: Some of the blocks have no input source i.e. the Synth
blocks.
The Mute modes of the blocks
The Mute mode sets up how the front panel mute key of the
current block is working.
NOTE: The Mute mode can influence the sound of the Preset
change if the FireworX is set to “Effect mute - Off” in the Utility,
Config. page (see “Recall - Recall Mode” for further
description).
Here is the description of what the five modes will do when the
front panel mute key is pressed:
Mix 0%: Will set the Mix parameter in the Edit, Parameter page
to 0% = Set direct signal level up to 100%.
FX Out: Will mute the output of the effect, and
preserve direct signal level, according to Mix.
Output: Will mute both the output of the effect and the
direct signal.
FX In: Will mute the input of the effect, and preserve the
direct signal level. This enables the block to finish an
effect tail after being bypassed, e.g. using this mute
mode on a delay will let the delay tail ring out, even
after being muted (only the Delay, Reverb and Pitch
have this mute mode).
Input:
Will mute both the input of the effect and the
direct signal. Same basic function as FX In,
only this mode will also mute the direct
signal (only the Delay, Reverb and Pitch have
this Mute mode).
NOTE: Using the Input/Output mute modes will mean that no
signal passes through the current block when muted.
Press Enter again while working in the block I/O
page to access the block edit page.
25
EFFECTS SETUP Effects
Exercise 10:
Setting up Left/Right conditions and mute modes in a
block
Each block’s Left and Right Input and Output can be set up
separately. In this exercise we will set up a Synth block to pass
only direct signal through the left output and only effect signal
through the right output. At the same time we will make sure that
once the block is muted it will still pass direct signal but no
effect signal. For this exercise insert a Synth block in a Routing
(See exercise #7).
- Press the Effects key and use the < > Arrow keys to
select the Routing display.
- Place the cursor on the Synth block.
- Press Enter.
- Select “Out L” by using the Parameter wheel.
- Select “Dry” by using the Value wheel.
- Select “Out R” by using the Parameter wheel.
- Select “Wet” by using the Value wheel.
Now the block is set up to only pass direct signal to the left
output, and only pass effect signal to the right output.
This setting is very useful when you want to use the
Synth block as a carrier in a Vocoder or Ring Modulator,
and want to pass an external source directly in the
Vocoder block.
Let’s set up the Mute mode.
- Select “Mute mode” by using the Parameter wheel.
- Select “Fx Output” by using the Value wheel.
As shown in the display, the effect will now be cut off on the
output of the block, when the Synth block is muted, but the left
channel will still feed direct signal through.
26
Exercise 10:
Setting up Left/Right conditions and mute modes in a
block
Select the Routing page
Place the
cursor on the
block you want
to setup
Press Enter to
access the I/O
of the block
Dial Parameter
wheel to move
cursor
Dial Value
wheel to
change
settings
ENTER
EFFECTS SETUP Effects
The Mem page
“Tool” Selected
Select “Tool” and
press Enter
The Layout page
The Layout page features a number of functions that all refer to
the Routing. In the Layout display, there is a miniature version of
the current Routing, showing the size of the grid and the position
of the blocks.
Grid Size
The vertical size of the grid can be changed using this parameter.
Dial the Value wheel to set the number of Rows you desire and
press Enter to confirm.
NOTE: If the blocks are located outside the grid, they will be
disabled. However, they will still be present if the grid size is
expanded again.
Columns and Rows
The function of the Columns are somewhat similar to the
function of a spreadsheet. Use these functions when you want to
move, insert or delete a whole Column or Row.
Column
Move Left - Will move the current Column to the Left.
Move Right - Will move the current Column to the Right.
Insert Col - Will insert a new Column.
Delete Col - Will delete the current Column.
Row
Move Up - Will move the current Row up.
Move Down - Will move the current Row down.
Insert Row- Will Insert a new Row.
Delete Row- Will delete the current Row.
Press Enter to carry out the selected function.
Total amount of
DSP power used
The Tool page
The Tool page offers a number of different readouts and shortcuts
to parameters that can be used in the Edit page on each block.
Select the information/function that you desire using the
Parameter wheel and press Enter to confirm.
The Tools can be bypassed in the Edit page by pressing the Exit
key.
In Meter - Mix
Will show the Input level in each block and when a block is
cursor highlighted, the Mix parameter will be instantly adjustable
via the Value wheel. The current setting of the Mix parameter
will be shown in the lower left corner of the Edit page.
In Meter - In level
Will show the Input level in each block and when a block is
cursor highlighted, the In level parameter will be instantly
adjustable via the Value wheel. The current setting of the In level
parameter will be shown in the lower left corner of the Edit page.
In Meter - Out level
Will show in the Input level in each block and when a block is
cursor highlighted, the Out level parameter will be instantly
adjustable via the Value wheel. The current setting of the Out
level parameter will be shown in the lower left corner of the Edit
page.
DSP Load
Will show the percentage of DSP power used in each block, and
the total amount of DSP power used will be shown in the lower
left corner of the Edit page.
Channel Routing
Will show how left/right is routed through each block.
27
EFFECTS SETUP Effects
Mix
Straight out lines indicates that the block is using the
“Mix” setting on the current output.
Dry
Straight through going lines indicates that the block is
using the “Dry” setting on the current output.
Wet
Dotted output lines indicate that the block is using the
“Wet” setting on the current output.
Off
No output line indicates that the block is using the
“Off” setting on the current output.
Mute Effect
Makes it possible to bypass each block individually using the
Value wheel. This can be very useful when more than one of a
certain block is inserted in the Routing. Place the cursor on the
block you want to mute using the Parameter wheel, and turn the
Value wheel.
Copy effect from Preset
This feature enables you to copy the setting of a corresponding
block from any Preset into the current block. Place the cursor on
the block you want to copy a setting into (after activating the
copy function). Press the Enter key to access the copy page. Use
the Value wheel to select the Preset you want to copy the setting
from and press Enter to copy the setting into the current block. In
case of there is more than one of the curent block to choose from,
use the Parameter wheel to select the desired setting.
DSP Load Indicator
The DSP load indicator to the far left on the Tool page is
showing how much of the FireworX DSP power you are
currently using.
Exercise 11:
Inserting a new column using the Layout
In this exercise you will see how the Layout functions can be
used to insert a new Column.
Let’s say we have a Delay and a Reverb in a routing. Now we
want to insert a Compressor in front of the Delay and Reverb.
Let’s insert a new Column before the Delay and Reverb block:
- Use the < > Arrow keys to select the Layout display.
- Place the cursor at “Insert Col” by using the Parameter
wheel.
- Dial the Value wheel fully counter clockwise to mark
the position where you want to insert a new Column.
28
- Press Enter to insert a new Column
- Press the < Arrow left key once to select the Routing
display.
- Place the cursor in the second position, first
column and double click the Compressor mute
key and press Enter to confirm.
There you go, a Compressor in front of the Delay and Reverb
blocks.
Exercise 11:
Inserting a new Column using the Layout
The Routing
Use the Arrow
keys to select
Layout page
Dial Parameter
wheel to move
cursor to
“Insert Col”
Dial Value
wheel to mark
the inserting
position
Press Enter
confirm
Now insert the
Compressor in
the new
Column
ENTER
MODIFIERS Modifier
The Modifier Display
The Modifier display contains three pages: Matrix - Modifiers - Dials. Use the < > Arrow keys to select between the
three pages.
The Matrix page features a powerful tool for setting up modulation connections for External or Internal Modifiers.
The Modifiers page contains setups of all Internal Modifiers.
The Dials page is used for simulating External Modifiers.
The flow of the Modifiers
The FireworX has nine external Modifiers, the Alpha Mod. and Ext. 1-8. These Modifiers can be controlled by MIDI Controllers,
Aftertouch, Note On/Off, Pitch Bend, MIDI Program Change, and the FireworX Ext. input 1/4” jack. This is set up in the I/O Setup,
CTRL page. The nine Modifiers (Ext. 1-8+Alpha Mod.) can be connected to a large number of algorithm parameters via the Modifier
Matrix (see the Matrix page for further details). The connections of the Modifiers are stored with the Presets of the FireworX, meaning
that you can use the same controller for various purposes just by changing Presets. The FireworX also contains several Internal
Modifiers i.e. LFO's, ADSR's, Envelope Follower etc. These Internal Modifiers are also present in the Modifier Matrix, and can be
connected to the same parameters as Alpha Mod. and Ext.. 1-8. Each Modifier can be connected to several parameters simultaneously
and up to 20 connections can be made in each Preset.
The conditions of the Internal Modifiers are set up in the Modifier, Modifiers page.
The Matrix page
The Matrix page is where External and
Internal Modifiers are connected to the
FireworX algorithm parameters.
When in the Matrix page, dial the
Parameter wheel to point to the parameter
you want to control and the Value wheel
to select the Modifier you want to use.
The Modifier entries
In the Matrix page, the Modifiers appear
in the upper line of the display. Scrolling
MIDI
through using the Value wheel will show
Pedal
the entries of: the Alpha Mod. Ext. 1-8,
Pitch detector, two Envelope detectors,
two ADSR’s, two LFO's with two outputs
each, a Freeform player and two
Functions (see Modifiers for further
description).
The Parameter list
On the right hand side of the Matrix you
have a list of the parameters available in
the current Preset. An effect has to be
present in the Routing before it can
Dial
appear in the parameter list.
NOTE: Not all parameters in an effect are
available (See “The Blocks” for details).
INSERT
Send
Input
INSERT
Return
Output
29
MODIFIERS Modifier
The Matrix page
Selected
External/Internal
Modifiers
Parameter list
Modifier and Parameter connected
Transformation active
The Link page
Link
Set lowest value
Set middle value
Set highest value
Change curve
Set reaction time
The Dials page
Transformation
Selected
Press Enter and dial
Value to change Ext.
Modifier, press Exit to
simulate.
Dial Parameter wheel to
move Ext. Modifier 1
30
Dial Value wheel to
move Ext. Modifier 2
MODIFIERS Modifier
To connect a Modifier to a parameter, dial the Parameter wheel to
select a parameter, and the Value wheel to select a Modifier. Dial
the Value wheel fully counter clockwise to remove a connection.
If you want to remove all links from the Matrix, press
Exit twice and you will see a pop up box asking you to
confirm with Enter or abort with Exit.
Place the cursor at an unconnected parameter and press
Enter to access the Editing of current parameter directly.
Press Exit to get back to the Modifier Matrix.
Each modifier can be connected to several parameters at the
same time but each parameter can have only one source.
The maximum number of connections that can be made in the
Matrix is 20.
Press Enter while the cursor is pointing to a connected
parameter, and discover the Link display.
Modifiers controlling Modifiers
The parameters for the Internal Modifiers are located at the very
end of the Parameter list, e.g. this makes it possible to control
Modifiers via Modifiers. That enables you to trigger the ADSR’s,
the Freeform Modifier etc., via the External Modifiers.
NOTE: A Modifier cannot be connected to it’s own parameters.
NOTE: These same parameters also apply to the other
modulation sources, for example Envelope, Low when the input
signal into the FireworX is at its lowest and High when it is at its
loudest.
Slope
Dial the Slope parameter to change the shape of the curve. Try it
out and watch the curve change.
Glide time
With this parameter you can set a minimum time that the
parameter should use to go from maximum to minimum or vice
versa, meaning that even though you move an expression pedal
from min. to max. in a split second, the current parameter will
still take some time to go through the same range.
This will also smooth out a Modifier movement e.g. when
connected to a pitch voice, instead of stepping through the pitch
values, FireworX will be sliding through.
Press Exit to leave the Link display.
Default parameter setting
The default setting of a Matrix connected parameter at Recall is
equal to its setting in the Edit parameter display.
Example: The Reverb mix level is set up to be controlled by a
MIDI controller, and the Mix parameter in the Edit parameter
display is set to 15%. When this Preset is Recalled, the Reverb
Mix will be 15%, and at first movement of the MIDI controller,
you will be in total control of the parameter.
The Link page
When you have a Modifier connected to a parameter, (e.g. the
Alpha Mod. connected to the Panner speed) it is possible to make
a transformation between the Modifier output and the parameter
input. Move the cursor to connect in the Matrix by dialing the
Parameter wheel and press Enter to get to the Link display.
In the Link display, you can change the transition between the
Modifier and the actual movement of the current parameter.
An active transformation will occur as a small square on the
connection between a Modifier and a parameter.
Low input
Sets the value that the controlled parameter will have when the
Modifier is in minimum position.
Mid input
Sets the value that the controlled parameter will have when the
Modifier is in middle position.
High input
Sets the value that the controlled parameter will have when the
Modifier is in maximum position.
The Dials page
Press the Mod key and use the < > Arrow keys to select the Dials
(see picture on page 31).
In the Dial page it is possible to simulate any two of the eight
External controllers using the Parameter and Value wheel. By
dialing, you can test if the links in the Matrix are responding
correctly without having any external device connected.
If you want to make sure that the external input jack is
calibrated correctly, you can test it by watching the
Dials while moving the external device from 0-100%.
31
MODIFIERS Modifier
Press Enter to change the External controllers simulated by the
two wheels. Use the Parameter wheel to select between Dial 1 or
2, and press Exit when you have set the desired external
controllers to be simulated.
Exercise 12:
How to connect a Modifier
In this exercise we will setup an LFO to control the speed of a
Panner (be sure that the Panner is in the current Preset).
- Enter the Modifier Matrix page.
- Dial the Parameter wheel until the cursor points to the
speed parameter in the Panner section.
- Dial the Value wheel until you see “LFO 1 Line1” in
the upper text box of the display.
The line connecting the two, indicates that LFO1 is now
controlling the Panner Speed.
Exercise 12:
How to connect a Modifier
Exercise 13:
How to use the Link display
This exercise gives an example on how the Link display can be
used to adapt a Modifier connection. We will set up a Ducking
delay.
- Select any Preset containing a Delay.
- Enter the Modifier Matrix page.
- Connect the Delay Mix parameter to ENV detect 1.
- Press Enter to access the Link display.
- Select “Low Input” by using the Parameter wheel.
- Set “Low Input” to 50% using the Value wheel.
- Set “High Input” to 0% using the Value wheel.
The Delay signal will now be ducked when audio is present at
the input, and will reappear when audio is not present.
Exercise 13:
How to use the Link display
Press the Mod
key
MOD
Select the Modifier Matrix page
Dial Parameter
wheel until the
cursor points
to the
parameter to
be controlled
Dial Value
wheel to
choose
Modifier
Dial Parameter
wheel to select
the connection
Press Enter to
access the
Link display
ENTER
Dial Parameter
wheel to move
cursor
Dial Value
wheel to
change value
Press Exit
leave the Link
display
32
EXIT
MODIFIERS Modifier
The Modifiers page
Selected
The Internal Modifiers
Press Enter to enter
Modifier parameters
The Modifiers Page
Press the Mod key and use the < > Arrow keys to select the Modifiers page.
The Modifiers page is where you set up the parameters of the Internal Modifiers. Use the Parameter wheel to select
the Modifier you want to edit and press Enter to access the parameters of the current Modifier.
All Internal Modifiers can output values between 0-100,
depending on the settings of the Internal Modifiers own
parameters. In the Modifier Matrix, these values are translated to
the format of the connected algorithm parameter.
All Modifier and Matrix settings are stored with the Preset.
Here is an explanation of the parameters in the Modifiers. The
parameters available in the Modifier Matrix are marked with a *.
The eight External inputs are set up in the I/O Setup, CTRL page.
They can be controlled via MIDI - Pitch Bend, Aftertouch, Note
On/Off, Note-On-Key, Note-On-Velocity, Controllers 1-127 or
Pedal.
detection range should be limited to the area where the source is
present.
NOTE: The Pitch detector takes up 4% of processing power.
Lo Note
Sets the lowest note of the Pitch detection range.
Range: C0-C2
Hi Note
Sets the highest note of the Pitch detection range.
Range: C4-C6
Master Tune
Offsets the Master tune of the Pitch detector. This can be used to
make sure that the Pitch detector is in tune with the incoming
source material.
Alpha Mod. wheel
ENV. (Envelope) detector 1&2
Ext. 1-8
The Alpha Mod. wheel can be used as a realtime modifier and
has several setup possibilities. The Alpha Mod. wheel is
described on page 39.
Pitch detector
The Pitch detector senses the pitch of the incoming source signal
and converts it to control information that can be used to control
the parameters of the Modifier Matrix. To achieve maximum
performance the input source should be monophonic and the
The Envelope detectors are reading the dynamic variations of the
input of the FireworX, and outputting control values according to
that. The Envelope detectors can therefore be used on effects that
you would like to respond to the input signal like dynamic filters
or dynamic delay. The Envelope detectors will follow the exact
motion of the input signal, but you can customize the response
time by using the Attack and Release parameters.
Attack - Sets the rising time of the Envelope detector.
Release - The fallback time of the Envelope detector.
33
MODIFIERS Modifier
Connect the ENV detector to a level parameter to create
an extra gate.
ADSR 1&2
ADSR is an abbreviation of Attack, Decay, Sustain, Release.
ADSRs are used to play short control signal sequences triggered
by the audio input. You set up a number of terms to describe the
curve of the control signal, and a trigger level also known as
Threshold.
Attack
Decay
Sustain
Release
Attack
The Attack or rise time of the curve i.e. how long it takes the
control signal to go from minimum to maximum value i.e. 0-100.
Decay
Sets how long it takes the control signal to fall back from
maximum to Sustain level.
Sustain
The amount of time that the control signal will stay at the Sustain
level.
Sustain level
The level that the control signal will stay at during the Sustain
period.
Release
The amount of time that it takes the control signal to fall from
Sustain level to zero. Release time will take over when the
Sustain time has expired (depending on the trig mode setting).
Retrig (Start/Stop)*
Sets the retrig possibility on or off. The ADSR can always be
trigged via the Modifier Matrix (called “Start/Stop”). If Retrig is
set to off, the ADSR can not be retrigged during the sequence.
LFO 1&2
LFO is an abbreviation of Low Frequency Oscillator. The LFOs
send out control values between 0 and 100 at speeds between
0.050Hz and 18.3 Hz.
The LFOs can be used for various purposes, for example you can
connect a pan parameter and create an extra panner or modulate a
filter to create a sweeping motion.
34
LFOs 1 & 2 each have two outputs, which means that you can
use the same LFO with different phase for different purposes.
The parameters available in the Modifier Matrix are marked with
an asterisk*.
Speed*
The speed of the LFO also known as Rate.
Range: Off - 0.050Hz-19.2 Hz.
Depth*
The depth of the LFO also known as Width.
Range 0-100%.
Tempo
Sets the LFO speed’s relationship to the global tempo (tapped on
the Tempo key). The subdivisions available are, 16/1 (16 bars for
performing one period), 8/1, 4/1, 2/1, 1/1, and 1/2-1/32 in
straight, dotted and triplet notes - 1/4 equals BPM (beats per
minute). When the Tempo parameter is set to “Ignored” the LFO
will not respond to the global tempo.
Curve
Select the curve that you would like on the current LFO. Choose
between: Square, Sine, Triangle and Random.
Square
Triangle
Sine
Pulsewidth*
Controls the division of the upper and lower parts of the current
curve, e.g. if Pulsewidth is set to 25% using a Square curve, the
upper half of the curve will be on for 25% of the time, while the
other curves will repsond differntly.
A Pulsewidth of 100% using a Triangle will create a
sawtooth waveform.
Pulsewidth
MODIFIERS Modifier
Out 2 Phase
An LFO phase change causes a small delay in the second
waveform starting point. This means that out 1 and 2 start the
current waveform at two different points. Example: If Out 2
Phase is set to 180 degrees, Out 1 and 2 will be exactly opposite.
90 phase
change
LFO PHASE
Default
Sets the default state that the LFO will be in when recalled.
When set to “Stopped”, the LFO will be stopped until triggered
via the Modifier Matrix.
When set to “Running” the LFO will continue to run until
retriggered via the Modifier Matrix.
Trig
Sets the action carried out when the LFO is triggered via the
Modifier Matrix. To change the state of the LFO the control
value must come from the opposite state. Example: If the LFO is
running and you want to stop it via the Trig input, the control
value must be above 55% to perform a valid Stop. (Value below
45%).
Stop/Cont -Will Stop the LFO when the control value is below
45%, and Continue LFO playback when the control
value is above 55%.
Stop/Rest - Will Stop the LFO when the control value is below
45%, and Restart LFO playback when the control
value is above 55%.
Restart - Will restart the LFO when the control value is above
55%.
Freeform
The Freeform modifier is a small sequencer that can output a
series of up to 32 samples of control values over a period of time.
The values of the samples can be edited individually and
playback speed can be adjusted according to the global tempo.
The parameters available in the Modifier Matrix are marked with
an asterisk*.
Speed*
Sets the playback speed of the Freeform modifier. The defined
number of samples will be played back over the amout of time
set by the Speed parameter. E.g. if Speed is set to 1Hz the
defined number of samples will be played back once every
second.
Tempo
Sets the Freeforms relationship to the global tempo. The defined
number of samples will played back during the value set by
Tempo. Example: If Freeform is set to 8 samples and Tempo is
set to 4/1 (4 bars) you will hear two samples in each bar.
Depth*
Sets the maximum value of Freeform. This means that all
samples can be scaled down using this parameter.
Loop mode
The loop mode determines how or whether Freeform is looping.
Off Will cause Freeform to playback the samples once
and then stop.
FWD Will make Freeform loop forward continuously.
BWD Will make Freeform loop backward continuously.
Switch - Will make Freeform switch between forward and
backward looping, starting with forward.
Gliding
Sets whether the Freeform jumps from one sample value to
another or glides to make a smoother transition between the
samples.
Default
Sets the default state that Freeform will be in when recalled.
When set to “Stopped”, Freeform will stay stopped until
triggered via the Modifier Matrix.
When set to “Running” Freeform will continue to run until
retriggered via the Modifier Matrix.
Trig (Start/Stop)*
Sets the action carried out when Freeform is triggered via the
Modifier Matrix. To change the playback state of the Freeform
the control value must come from the opposite state. Example: If
Freeform is running and you want to stop it via the Trig input,
the control value must be above 55% to perform a valid Stop.
(Value below 45%).
Stop/Cont -Will Stop Freeform playback when the control value
is below 45%, and Continue Freeform playback when
the control value is above 55%.
Stop/Rest - Will Stop Freeform playbackwhen the control value
is below 45%, and Restart Freeform playback when
the control value is above 55%.
35
MODIFIERS Modifier
Restart -
Will restart Freeform playback when the control
value is above 55%.
Samples
Sets the number of samples in one Freeform period. Maximum
number of samples is 32.
Slide Curve
Slides the Freeform curve in one sample increments, making it
possible to change the starting point to another position on the
curve.
Edit Curve
Select this parameter and press Enter to edit the curve. Use the
Parameter wheel to select the sample you want to edit and dial
the Value wheel to change the control value of the sample.
Press Exit to leave the sample editing.
Record Alpha Mod.
This makes it possible to write the Freeform sequence directly
using the Alpha Mod. wheel. Press Enter to arm the recorder and
dial the Alpha Mod. wheel. The recording will start as soon as
you start dialing the Alpha Mod. wheel.
By controlling the Alpha Mod. wheel via MIDI, you can
draw the Freeform curve using a sequencer or any other
kind of external MIDI device. The external control of the
Alpha Mod wheel is set up in the I/O Setup, CTRL page.
Function 1&2
The Functions of the FireworX can be used for several purposes.
A Function contains two control inputs called Feed 1 & 2 that are
present in the Modifier Matrix. The two inputs are combined in
different ways depending on the Function Type selected. Select
“Type” and dial the Value wheel to choose Function type.
(Feed 1+2) + Constant
This function adds the values of the two control inputs together
and adds a user definable constant. (Constant range: -1 to +1)
(Feed 1-2) + Constant
This function subtracts the values of the two control inputs and
adds a user definable constant.
(Constant range: -1 to +1)
(Feed 1x2) + Constant
This function multiplies the values of the two control inputs and
adds a user definable constant.
(Constant range: -1 to +1)
36
Note to Synth Freq
The “Note to Synth” Type converts control values to notes. This
can be used to convert Pitch detector or MIDI note information
to Synth control information. Feed 2 is used for Pitch Bender
control.
Example 1:
Connect the Pitch detectors output to Function 1, Feed 1 in the
Modifier Matrix. Connect the output of the Function to the input
of the “Freq” parameter of the Synth, Curve generator.
You’ve just created a monophonic synthesizer played by the pitch
of the incoming source material.
Example 2:
Set up Ext 1 to be controlled by MIDI Note-On-key. Connect the
output of Ext. 1 to Function 1, Feed 1. Connect the output of the
Function to the input of the “Freq” parameter of the Synth, Curve
Generator.
You’ve just created a monophonic synthesizer that can be played
via an external keyboard.
Check out a couple of monophonic synthesizers in
factory Preset 198 and 199 using a standard keyboard
transmitting MIDI on channel 1.
Transpose - Shifts the generated note in increments of semitones.
Range: +/- 48 Semitones.
Fine Tune - Shifts the generated note in increments of cents.
Range: +/- 50 cents.
Quantize into semitones - Makes the function approximate to the
semitone nearest to the incoming control value.
Feed 2 Pitch Bend - Feed 2 of the Function is used as Pitch
Bender. This parameter sets whether neutral position of the Pitch
Bender is “Null” or “Center” e.g. using a keyboard bender would
in most cases use the Center position as neutral.
Note to Resonance Freq
The “Note to Resonance Freq” Type converts control values to
frequency values. This can be used to convert Pitch detector or
MIDI note information to Resonance frequencies. By letting the
Resonance filter frequency follow the note or one of the
harmonics of the incoming source, you enhance the character of
that specific note. This function is very common in most older
keyboards.
Feed 2 is used for pitch bender control.
Transpose - Shifts the generated frequency in increments of
semitones.
Range: +/- 48 Semitones.
MODIFIERS Modifier
Fine Tune - Shifts the generated frequency in increments of
cents.
Range: +/- 50 cents.
Quantize into semitones - Makes the function approximate to the
semitone nearest to the incoming control value.
Feed 2 Pitch Bend - Feed 2 of the Function is used as Pitch
Bender. This parameter sets whether neutral position of the Pitch
Bender is “Null” or “Center” e.g. using a keyboard bender would
in most cases use the Center position as neutral.
Note to Resonator Freq
The “Note to Resonator Freq” Type converts control values to
Resonator notes. This can be used to convert Pitch Detector or
MIDI note information to Resonator notes.
Example 1:
Connect the Pitch detectors output to Function 1, Feed 1 in the
Modifier Matrix. Connect the output of the Function to the input
of a “Freq” parameter of the Filter, Resonator or Resochord.
The Resonator will now follow the pitch of the incoming source
material.
Example 2:
Set up Ext 1 to be controlled by MIDI Note-On-key. Connect the
output of Ext. 1 to Function 1, Feed 1. Connect the output of the
Function to the input of a “Freq” parameter of the Filter,
Resonator or Resochord. The Resonator can now be controlled
by an external keyboard.
Feed 2 is used for Pitch Bender control.
Transpose - Shifts the generated note increments of semitones.
Range: +/- 48 Semitones.
Fine Tune - Shifts the generated note in increments of cents.
Range: +/- 50 cents.
Quantize into semitones - Makes the function approximate to the
semitone nearest to the incoming control value.
Feed 2 Pitch Bend - Feed 2 of the Function is used as Pitch
Bender. This parameter sets whether neutral position of the Pitch
Bender is “Null” or “Center” e.g. using a keyboard bender would
in most cases use the Center position as neutral.
37
MODIFIERS Alpha Mod.
The Alpha Mod. page
Parameteres controlled
by Alpha Mod.
Alpha Mod. position
Press Enter to hyper
jump to Link display
The Alpha Mod. wheel
The Alpha Mod. wheel can be used as a realtime modifier and
has several setup possibilities. The Alpha Mod. can be connected
to several parameters simultanuously. It can be controlled
externally or work as an external controller for other devices by
sending out control information via MIDI. The LED bar above
the Alpha Mod. shows the current position of the wheel. The
exact setting and connections of the Alpha Mod. wheel is
displayed in the Alpha Mod. display.
The Alpha Mod. display
Press the Alpha Mod. key on the frontpanel of the FireworX to
access the Alpha Mod. display.
The display gives you an overview of the parameters controlled
by the Alpha Mod. wheel. Use the Parameter wheel to scroll
through the controlled parameters and press the Enter key for fast
access to the Link display of the current parameter.
Press Exit to return to the Alpha Mod. display.
Note that the parameter values displayed are the output values of
the link display.
Connecting the Alpha Mod.
Press the Mod key and select the Modifier Matrix page by using
the < > Arrow keys.
The Alpha Mod. is the first Modifier entry to the far left in the
top bar. Dial the Parameter wheel to select the parameter to be
controlled and dial the value wheel one click clock wise to select
the Alpha Mod. wheel.
38
The Alpha Mod. settings
The settings of the Alpha Mod. are located in the Mod, Modifiers
page. Select Alpha Mod. and press Enter.
Mode
Sets whether the Alpha Mod. should have a range of +/- 100 or
0-100.
Response
Sets whether the Alpha Mod. bounces back to 0 (called
“Bounce”) after it’s been dialed or stay steady at the value dialed
in (called “Steady”).
Delay
Sets the amount of time before the Alpha Mod. starts bouncing
back to 0.
Time
Sets the Bounce time, i.e. how long should it takes the Alpha
Mod. to bounce back to 0.
Midway
Makes it possible to change the bounce curve by changing the
Midway value.
Slope
Changes the slope of the bounce curve.
This delay is only active when the “Response” parameter is set to
“Bounce”.
All Alpha Mod. settings are stored with the Preset.
Controlling Alpha Mod. externally
The Alpha Mod. external controller is set up in the I/O Setup,
CTRL page. This controller is used to both send and receive
control values to and from the Alpha Mod., e.g. if the Alpha Mod.
is set up to be controlled by MIDI controller #7, the movements
of the Alpha Mod. will be sent out on that controller as well.
MODIFIERS Tempo
The Tempo page
Tapped or dialed time
Tapped tempo in BPM.
Slave to MIDI clock
Set default tempo at
Preset change
Tempo
Set the global tempo by tapping the Tempo key.
The global tempo can be used as a common tempo
guide in all Presets. All tempo related parameters like
Delay times and LFO speeds can be controlled by the
global Tempo, and each parameter can have its
subdivision of the global tempo.
The Tempo display, will read out the tapped BPM (Beats per
minute) and the tapped time in milliseconds. If you prefer to dial
the BPM simply place the cursor on BPM parameter, and dial the
Value wheel to change the Tempo. The FireworX is also capable
of following an incoming MIDI clock, place the cursor on the
MIDI clock parameter and select enabled.
Tapping a tempo into a Delay
All Delay algorithms and algorithms containing LFO speed
parameters have links to the Global Tempo. This means that a
tapped tempo can be used in any Preset that contains any of
these algorithms. To make the tempo fit your purpose, we added
a subdivision parameter to all these algorithms. All you have to
do is set up which subdivision you would like the tempo to
divide into.
Example: You want a Delay to perform 1/8 triplets. Enter the
Edit parameter page of the Delay and set the Tempo parameter to
1/8T. Now tap the BPM on the Tempo key, and the Delay will
automatically recalculate into 1/8 triplets in the current tempo.
The same goes for all the algorithms containing LFO speeds.
Maximum tempo - 300 BPM.
Minimum tempo - 20 BPM.
The algorithms able to use the global tempo are:
Delay
Chorus/Flanger
Phaser
LFO 1
Panner
LFO 2
Tremolo
Freeform
The Tempo display
Tapping the Tempo key will cause the Tempo display to pop up.
The Tempo display can stick on until you press the Tempo key
again, or it can disappear automatically. Choose whether the
Tempo should be “Sticky” or not in the Utility page.
At Preset change use default tempo
Controls whether a Preset should use the global tempo
instantaneously at Preset change or if the Preset should use the
value stored in the Preset until the next tapped tempo.
Example: You are using a delay Preset that is set to 1/4 notes,
and the global tempo is 120 BPM, that means that the actual
delay time of your Preset is 500ms. Now you make a Preset
change, and the new Preset is also set to 1/4 notes, but the delay
time parameter was stored at 400ms. Do you want the new Preset
to stay at the 400ms and not change until you tap the tempo
again, or do you want it to change to the current global tempo
(500ms)?
Selecting “Global” will make the Preset use the Global tempo,
while selecting ”Preset” will make the Preset to use the setting
stored in the Preset.
Tempo controlled via pedal/MIDI
The Tempo can be tapped via the External input jack on the back
panel of the FireworX or via a MIDI. That is setup in the I/O
Setup, CTRL (Control) display.
39
MODIFIERS The Insert loop
The Insert Loop
The Insert loop is a unique feature that makes it possible to insert an external device into the Routing of the FireworX
using the pair of I/O connectors not occupied by the FireworX’s main In and Outs.
The Insert loop setup
The External loop can be set up in a number of different ways.
Example: When the FireworX is using the Analog In/Outs, an
external device may be connected to the Digital In/Outs. The
Send and Return points of the External loop can be placed
anywhere in the signal routing of the FireworX (done in the
“Effects, Routing” page), place the “Send” block where you want
to tap sound, and place the “Return” block where you want the
signal re-enter the signal flow.
Setup of the FireworX In/Outs and the External loop In/Outs is
done in the “I/O Setup, Signal” page.
Example 2 .
The External loop contains an EQ (a serial effect).
All Dry signal should now be passing through the External loop,
no Dry signal should pass around the External loop. The Mix
parameter of the External loop should be kept at 100%. Effect
blocks that are not passing their signal through the External loop,
should only perform additive effects and not pass any Dry signal.
Example 1
Example 2
Avoiding Phase cancelation
The External loop is subject to small amounts of delay. This
could cause serious changes in the sound due to phase
cancelation. To avoid this, you must carefully consider the signal
path of the dry signal in the FireworX. The Dry signal and any
serial effect like EQ, Dynamics, Tremolo, Panner or Filters etc
should either go through or around the External loop, not both.
Here is a couple of setup examples on how to avoid phase
cancelation.
Example 1.
The External loop contains a Reverb set to 100% effect (an
additive effect).
All of the Dry signal must now be passing around the External
loop, no Dry signal should be coming through the External loop.
The Mix parameter of the External loop can be set anywhere
between 0% and 100% in the Return block.
40
Additive
effects
Total amount
of blocks
Phaser
3x Dynamic Synth
Resonator
Pitch
1x Filters
Resochord
Chorus
1x Formant
Cruncher
Flanger
1x Distort
Vocoder
Delay
1x Vocode
Ring
Mod.
Reverb
Serial
effects
2x Synth
Exp/Gate
Drive
1x Pitch
Soft 2x
Compressor
Cho/Fla Tremolo
Hard Comp/Lim
Resonance
2x Dly
Bandpass
1x Reverb
Formant
Panner
Stereo Enhancer
Fixed Parametric
Mod. Parametric
SYSTEM & MIDI I/O Setup
The I/O Setup display
The I/O Setup display contains four pages: MIDI - CTRL - LEVEL- SIGNAL. The four pages contain setups of all the
FireworX’s external connections. Use the < > Arrow keys to step between the four pages.
The MIDI page contains all global parameters i.e. basic MIDI channel, Program change offset, Bank selection, MIDI
Map etc.
The CTRL (Control) page contains control setup of all External Modifiers, the Alpha Mod. the global Tempo, the Block
Mute keys etc.
The Level page contains the Analog, the Digital In/Out level and displays the incoming sample rate when using
external clock
The Signal page contains the source select of the FireworX Input and Outputs, including the External Loop and
Dither.
All settings of the I/O Setup are global, i.e. they do not change with the Presets.
The Signal page
Input Channel
“Signal” page selected
Input Source
Signal is present on
these outputs
External Clock
indicator
Samplerate source
The Level page
Dither
“Level” page selected
Digital In/Out levels
Input gain range
+4dBu/-10dBV
Analog Input/Output level indicators
41
SYSTEM & MIDI I/O Setup
The Signal page
In the Signal page, the Input and Output routings are set up. The
Signal page includes the setup of the Insert loop. Use the
Parameter wheel to change cursor position, and the Value wheel
to change values.
Input
The FireworX can use Analog, AES/EBU, S/PDIF, TOS link or
ADAT inputs. Dial the Value wheel to select the input you desire.
Analog - The A/D and D/A converters of the FireworX are 24 bit.
To obtain maximum quality of the A/D converter, the Input level
should read approximately -6 to -3dB on the Input PPM. Adjust
Analog input by using the Input knob in the upper left corner of
the FireworX.
NOTE: The Input overrules the Insert loop selection, meaning
that the setting selected at the Input cannot be chosen at the
Insert loop.
AES/EBU - Digital AES/EBU can run up to 24 bit. Use the
balanced XLR Digital In/Out for this connection. AES/EBU
should use balanced 110 Ohm cables. The incoming sample rate
will be displayed in the Level page. The “Digital” LED will be
blinking if no clock is present or if the FireworX cannot lock to
the incoming clock.
S/PDIF - Digital S/PDIF can run up to 20 bit. Use the RCA jacks
In/Out for this connection. S/PDIF should use unbalanced 75
Ohm cables. The incoming sample rate will be displayed in the
Level page. The “Digital” LED will be blinking if no clock is
present or if the FireworX cannot lock to the incoming clock.
Tos link - Optical Tos link uses the S/PDIF digital format. Use
the Optical In/Out for this connection. Tos link uses fiber optic
cables. The incoming sample rate will be displayed in the Level
page. The “Digital” LED will be blinking if no clock is present
or if the FireworX cannot lock to the incoming clock.
ADAT - When using ADAT, use the Parameter wheel to move
cursor to Left/Right boxes, and the Value wheel to select channel
number. It is possible to select two ADAT channels, process them
and send them out on two different ADAT channels and
AES/EBU, S/PDIF and Analog simultaneously. The incoming
sample rate will be displayed in the Level page. The “Digital”
LED will be blinking if no clock is present or if the FireworX
cannot lock to the incoming clock.
NOTE: The six unprocessed channels are not passed through the
FireworX.
42
Ch. (Channel)
The Channel parameter selects which channels the FireworX are
using for Input. The four possibilities are:
Left input only (L).
Right input only (R).
Left and Right summed to Mono (L+R).
Stereo (STE).
Insert
The Insert loop is a unique feature that makes it possible to insert
an external device into the Routing of the FireworX. The Insert
can use either the Digital (AES/EBU or S/PDIF) or Analog
In/Outs of the FireworX, depending on what is taken up the
actual In and Outputs of the FireworX.
Example: The FireworX is set up to use the AES/EBU digital as
input source, the Insert loop can now use the Analog In/Outs (see
“Insert loop” for further description).
NOTE: The Input parameter always overrides the Insert setting,
meaning that if the Insert parameter is set to “Analog”, and the
Input parameter is changed to “Analog”, the Insert will
automatically be set to “None”.
Clock
The Clock parameter determines what source the FireworX is
using as digital clock. The FireworX can use internal 44.1kHz,
internal 48kHz, the incoming Digital sample rate (from the
selected Digital input) or the optional external sync (word clock).
The FireworX is capable of using its own internal clock while
using audio from the Digital input. This means that you can use
the FireworX as master clock when working in a digital setup.
The FireworX will automatically switch to the appropriate clock
when you select Input source, e.g. you select AES/EBU as your
input source, the FireworX now automatically switches the Clock
parameter to Digital.
NOTE: The optional external sync input will only recognize
standard word clock from 44.1kHz to 48kHz.
Digital external clock display
When the FireworX is locked to any external clock, this area will
display the incoming sample rate.
Dither
The FireworX can output dither for 8 through 22 bit resolution to
Off. The dither type is HP-TDF or High Passed Triangular
probability Density Function.
FireworX is using internal 24 bit resolution and 24 bit AD/DA
converters. Dither should therefore only be used in case the
digital outputs are used. It is recommended to not use dither until
the final stage of a production, so if there is a chance that the
source material is going to be dithered later in a production, do
not use dither.
SYSTEM & MIDI I/O Setup
Output
The FireworX will output signal on all available outputs
simultaneously, e.g. when the FireworX is using AES/EBU in,
and the Insert is set to Analog, the FireworX will send out on
AES/EBU, S/PDIF and Tos link (or ADAT) simultaneously.
The Tos link may be switched to any two ADAT channels. When
using ADAT, use the Parameter wheel to move cursor to
Left/Right boxes, and the Value wheel to select channel number.
The Level page
Input Sensitivity
Switches the Analog input sensitivity between +4dBu and
-10dBV.
Analog In/Out Level
These are read-only parameters displaying the Analog Input and
the Output level (adjusted with the front panel controls). The
analog Input level should be adjusted carefully to obtain
maximum performance from the A/D converters. The Input peak
meter should read approximately -6 to -3dB for maximum
performance.
Digital In/Out level
These parameters control the global digital in and out level of the
FireworX.
The Digital In level is placed immediately after the Digital input
and the A/D converter, which means that the Digital In level
setting will influence the Analog in level as well.
The digital Out level is placed before the digital outputs and the
D/A converter, which means that the Digital Out level will
influence the Analog out level as well.
The MIDI page
In the MIDI section the global MIDI parameters of the
FireworX are set, including program change, MIDI
mapping etc. All controller related functions are set up
in the Control page
Basic Channel
The basic MIDI channel of the FireworX. This is the channel that
you should transmit Program changes on to change Presets in the
FireworX. The FireworX outputs the on/off status of the blocks
at Preset change.
NOTE: The FireworX’s Modifiers and block on/off are
configured separately, meaning that they may be transmitting on
MIDI channels different from the Basic channel.
Alpha Mod. Local on/off
This parameter makes it possible to shut off the local Alpha
Mod. wheel. This can come in handy when using the Alpha Mod.
in combination with a sequencer to avoid MIDI feedback.
Program change
This parameter enables or disables MIDI program changes on the
FireworX. When set to Enabled the FireworX will respond to
program changes incoming on the “Basic Channel”.
Bank Selection
This function is a new MIDI standard, making it possible to
Recall Presets above #128. This parameter determines whether
the FireworX should respond to this message or not. If your
MIDI device is capable of using this function, you should select
Fine or Coarse.
(Please refer to your MIDI device’s owners manual to make sure
Control
Setup bank
Select setup bank
FireworX control
Main vol.
Bypass
Tempo
Modifier input
Alpha Mod.
Ext. 1 - 8
Effect bypass
Dyn
Fil
For
Dis
Voc
Syn
Pit
Cho
Dly
Rev
Pan
EQ
(Dynamic)
(Filters)
(Formant)
(Distort)
(Vocoder)
(Synth)
(Pitch)
(Chorus/Flanger)
(Delay)
(Reverb)
(Pan+Tremolo)
(EQ)
Press Enter and
move your External
controller for autodetection
MIDI
Global MIDI settings
Basic channel
Alpha Mod local
Program change
Bank selection
Bank size
Sysex device ID.
Program change map
Program change offset
Mapping mode
Custom map
Map program ch.. no.
Into Preset
Reset Custom Map
43
SYSTEM & MIDI I/O Setup
which type the current product is using).
If set to disabled, the FireworX will act as a standard MIDI
product.
Sysex device ID
The System exclusive ID of the FireworX. This is used when
performing bulk dumps to and from the FireworX.
Program change offset
With this parameter you are able to add to or subtract from the
incoming Program change; e.g. the incoming Program change is
Preset 123, and the offset is set to +1, the Program change will
now be 124.
NOTE: The FireworX Presets start at #1.
Mapping mode
Sets which bank incoming program changes should be send to:
ROM (Factory), USER, CARD or Custom. This means that you
can guide all incoming Program changes to any of the three
banks, or you can design your own Custom MIDI map.
Custom Map
In the Custom Map you can decide what every incoming
Program change should map to, using the “Map Program Change
No.” and the “Into Preset” parameters.
Map Program change no.
Use this parameter to select the Program change number you
want to remap.
Into Preset
Use this parameter to set the new destination of the selected
program change number.
Reset Custom Map
Place the cursor on this parameter and press Enter to Reset the
Custom map.
Ext. Controllers
There are two physical connection possibilities when connecting
an external controller to the FireworX. One way is to connect it
directly to the External Control jack on the back panel of the
FireworX. The other way is to MIDI controllers, connecting to
the MIDI In socket of the FireworX. The Alpha Mod. and the
Effect bypass uses the set up as both send and receive controller.
This means that e.g. the Alpha Mod. control values are
transmitted on the same channel and controller number as the
Alpha Mod. is responding to.
To make it easy for you to set up an External controller,
we designed a Learn function. Place the cursor on the
parameter you want to control, press Enter to activate
Learn, and move your External controller. The FireworX
44
will now automatically detect the incoming controller, no
matter if it is connected to MIDI or to the pedal jack.
In each of the following parameters, you can setup the input that
the current parameter should be controlled by. In the first column
you set up the source and in the second column you set up the
type of the controller. Here is a description of the possibilities Column 1
Pedal:
MIDI basic:
MIDI Omni:
MIDI 1-16:
The FireworX pedal input (see back
panel).
The parameter will respond to the basic
FireworX MIDI channel (set in MIDI).
The current parameter will respond to
all channels.
The parameter will only respond to this
channel.
Column 2
(please note that this column is only available when col.1 is set to
MIDI).
Pitch Bend
Standard MIDI Pitch Bend.
Aftertouch
Standard MIDI Aftertouch.
Note-On/Off
Standard MIDI Note-On/Off.
Note-On key
Standard MIDI Note-On key.
Note On Velocity Standard MIDI Velocity.
Controller 0-127 MIDI standard controllers.
Prg. Change
The Program Change feature is very
special.
If a parameter is set to a certain Program Change, the
current parameter will be toggled on/off by the current
Preset change.
NOTE: If you are using a Program Change on the MIDI basic
channel for controller purposes, the current Program Change will
be ignored and will not perform a program change on the
FireworX.
Setup bank
The FireworX has four banks that you can use for your different
setups. By using the Value wheel, you can change the active bank
from 1 through 4. The banks are instantaneously Stored and
Recalled, meaning that any change you make in the Control
menu is remembered in the current bank, and Recalled the next
time you select that particular bank.
Each bank holds every parameter setting in the Control menu.
SYSTEM & MIDI I/O Setup
FireworX control
Main Vol.Controls the main output volume of the
FireworX. Press the Enter key and move the
External controller for auto detection.
Tempo Use this parameter to tap the global tempo via
MIDI or the FireworX pedal input. Press the
Enter key and move the External controller for
auto detection.
Bypass Controls the overall bypass of the FireworX.
Press the Enter key and move the External
controller for auto detection.
Modifier input/output
Alpha The Alpha Mod. wheel can be used as a realtime
expression wheel. The parameters controlled by
the Alpha Mod. is set up in the Modifier Matrix.
The controller set up as to control the Alpha
Mod. externally is also used for transmitting the
Alpha Mod. movements. This makes it possible
to record the modulations of the Alpha Mod.
Ext. 1-8 -
These eight inputs can control numerous
parameters in the algorithms. Their functions are
set up in the Modifier Matrix page. Press the
Enter key and move the External controller for
auto detection.
Effect Bypass
The twelve block bypass functions can be externally controlled
via these inputs, meaning that you can bypass each of the twelve
effects independently. Press the Enter key and move the External
controller for auto detection.
The controllers set up to external control of the Effect bypass
keys are also used to trans mit the on/off status of the current
blocks at Preset change or at direct key strokes.
45
SYSTEM & MIDI Utility
The Utility display
In the Utility display, you can choose between Config.
and Card. Use the < > Arrow keys to select between
the two displays.
The Config. Page
In the Config. page you can set up a number of global parameters
for the FireworX such as memory protect, MIDI bulk dump etc.
Viewing Angle
Adjust for best contrast of the LCD display.
Sticky Tempo page
Determines whether the Tempo page sticks on until another key
is pressed or disappears automatically after a few seconds.
Param. dial direction
This parameter enables you to change the cursor direction when
dialing the Parameter wheel. Choose whether the cursor should
move up or down when dialing the parameter wheel clockwise.
DSP load check mode
Selects the repsonse of the FireworX when the DSP limit is
exeded. When set to “Secure”, the outpus of the FireworX will
be muted when the DSP power limit is exeded. When set to
“Free”, the FireworX will continue to play, however the sound is
must likely to be corupted until
you reduce the number of
effect blocks in the Routing.
Config
Pedal Type
Switches between momentary
and alternating. This parameter
should be set to alternating if
you are using an expression
pedal.
Pedal Calibration
Press Enter to enable
calibration of the External
input jack on the back panel of
the FireworX. Follow the
instructions in the display.
User Interaction
Display Viewing Angle
Sticky Tempo page
DSP Load check Mode
Environment
Pedal calibration
Pedal type
User Bank protect
Protect
Protect Lo-limit
Protect Hi-limit
MIDI Bulk dump
User Bank to MIDI
MIDI to User Bank
46
Protect
Sets the Preset Protect function On/Off.
Protect Low limit
Sets the lower limit of the Preset protect. The current number is
included in the protection.
Protect High limit
Sets the higher limit of the Preset protect. The current number is
included in the protection.
MIDI Bulk Dump
You can backup the User Presets of the FireworX to another
FireworX or to MIDI recording device using these functions.
User Bank to MIDI
Connect your FireworX’s MIDI Out to another FireworX, a
sequencer or any other MIDI recordable device. Press Enter
twice and the FireworX will perform a MIDI bulk dump of all
User Presets.
MIDI to User Bank
Connect the storing device to the FireworX’s MIDI In and press
Enter. The FireworX is now ready to receive a MIDI bulk dump
containing User Presets.
WARNING: This action will overwrite ALL existing User Presets
in the FireworX.
The Card page
The Card page features a number of tools for handling Cards,
including Preset copying to and from Card.
Use the Parameter wheel to scroll, and the Value wheel to change
values. Card type: SRAM PCMCIA, type 1, min. 64 K byte.
Show Card status
This function makes it possible to check the status of your PCCard. The FireworX will be able to display the size of the card,
the write protection status, the number of Presets on the Card and
the amount of free space.
NOTE: This information will only be available when the card is
FireworX formatted or contains FireworX Presets. The FireworX
will read “New Card” when the Card is inserted if the Card is not
formatted.
SYSTEM & MIDI Utility
Format/Erase Card
This function will Format and Erase the PC-card. Press Enter
twice to confirm this action.
WARNING: This action will overwrite ALL existing Presets on
the current Card.
User/Card Bank copy
This section makes it possible to copy a specified group of
Presets to or from a specific space on a Card. For example: You
want to copy User Preset 10-15 from the FireworX to Preset 5-10
on your Card. Now set the “User Bank Preset start” at 10
(because you start the group of Presets at #10), the “Card Bank
Preset start” at 5 (because you want the first copied Presetto start
at #5), the “Number of Presets” to 5 (because that is the number
of Presets you want to copy). Now select Copy “From User Bank
to Card” scroll to “Execute copy” and press Enter twice to
confirm the copy operation.
User Bank Preset start
This parameter determines where the copy action should start in
the internal User Bank.
Card Bank Preset start
This parameter determines where the copy action should start in
the Card Bank.
Number of Presets
This parameter sets the number of Presets to be copied.
Copy
Select whether you want to copy from User Bank to Card or
from Card to User Bank.
Execute Copy
Select this parameter and press Enter twice to carry out the copy
action.
47
THE BLOCKS
The Blocks
This chapter will go through each of the twelve block’s subalgorithms and explain the parameters in them. The required
power percentage for 44.1kHz and 48kHz samplerate is
stated at each block describtion. The parameters available in
the Modifier Matrix are marked with an asterisk*.
The Special Icons
There are a couple of different icons in the Routing that do
not apply to any of the effect blocks.
Pipeline
If you simply want to lead the sound through a point, you
select the pipeline icon.
Insert Loop
The Insert Loop Send and Return blocks apply to the
External loop set up in “I/O Setup, Signal”. Place the Send
block where you want to tap the sound, and place the Return
block where you want the sound to re-enter the
signal chain (See Insert Loop for further
descriptions).
In the Insert Return block you will find the following
parameters:
Mix*
Mixes between internal sound and the return of the Insert
Loop.
In Level*
Controls the input level of the block.
Out Level*
Controls the output level of the block.
In the Insert Send block you will find this parameter:
Send Level
Sets the level of the send out of the Insert Loop.
Warning: The Insert Loop is subject to small amounts of
delay. This could cause serious changes in the sound due to
phase cancellation.
you want the sound to re-enter the signal chain.
In the Feedback Return block you will find the following
parameters:
FB level*
Sets the amount of level returned into Routing.
Mix*
Mixes between direct sound and the return of Feedback.
Feedback Send
The Feedback Send block contains no parameters, since this
is just a Y split of the signal.
Warning: The Feedback can cause serious overloads in the
Routing.
Dynamics
Number of blocks: 3
Processing power: 12-14% per block
The Dynamics block of the FireworX contains three different
sub-algorithms: Expander/Gate, Soft Compressor, Hard
Comp/Limiter.
The gain reduction meter on the front panel will show up to
-20dB of gain reduction. When more than one Dynamic
block istive, it is possible to select which block will be
displayed in the gain reduction meter. This is set in the Edit,
Parameters display.
Expander/Gate
The Expander/Gate performs Downward Expansion.
Downward Expansion in general means that below a certain
threshold the input signal’s gain is reduced on the output
according to a specific ratio. Expanders and Gates are often
used to reduce or eliminate noise. The parameters available
in the Modifier Matrix are marked with an asterisk*.
Feedback
The Feedback block can feed the sound back from one point
to another in the signal chain. Place the Send block where
you want to tap the sound, and place the Return block where
48
EXPANDER/GATE
THE BLOCKS
Threshold
When the input signal falls below the threshold, the
Expander/Gate starts working. This means that the higher
threshold the more expansion or gating you will get.
EXPANDER/GATE
Ratio
This is the Ratio of the gain reduction. If the Ratio is set to
4:1 it means that for every 1dB the ínput signal decreases,
the output will decrease by 4dB.
When the Ratio is set to Infinite:1, it means that when the
input signal falls below the threshold, the output is turned all
the way down. This is also known as Gating.
Attack
The Attack time is the fallback time that the Expander/Gate
uses to reach the gain reduction specified by the Ratio
parameter.
Example: If the input signal suddenly drops 4dB below
threshold in no time with the Ratio set to 4:1 and the Attack
set to 20ms, the FireworX will use 20ms to reach the gain
reduction of 16dB.
Release
The Release is the rise time that the Expander/Gate uses to
release the gain reduction when the signal exceeds the
threshold.
Mix
Mixes between direct sound and effect sound.
In Level*
Controls the input level of the block.
Out Level
Controls the output level of the block.
LED Meter
If more than one Dynamics block is present in the Routing,
this parameter determines which one will be displayed by the
Gain reduction meter on the front panel.
Soft Compressor
A Compressor is meant to reduce the dynamic content of the
input signal, and thereby keep a more constant level. When
the input signal exceeds the threshold, the Compressor starts
to reduce the signal according to the Ratio. The Ratio
describes how much the signal is reduced, e.g. a Ratio at 2:1
means that for every 2 dB the signal exceeds the threshold,
only 1 dB comes out.
The Compressor responds to the RMS average level. This
means that if the source signal is very percussive, containing
high peak to average ratio, you probably will not have as
much compression as if the signal had a small peak to
average ratio.
The Compressor uses auto-makeup-gain. This means that the
Compressor automatically compensates for the loss of level
caused by the gain reduction, by turning the out level up i.e.
the more you compress, the higher level you get out.
The Attack time is scaled automatically depending on the
dynamic content of the incoming signal. The parameters
available in the Modifier Matrix are marked with an asterisk*.
SOFT COMPRESSOR
Threshold
When the input level exceeds the Threshold, the Compressor
will be activated. This means that the lower the Threshold,
the more compression you will get.
COMPRESSOR
49
THE BLOCKS
Ratio
The Ratio of the gain reduction. Example: When the Ratio is
set to 4:1 it means that for every 4dB the input level rises, the
output level increases by only 1dB.
Knee Mode
The Knee Mode parameter sets the bending point of the
compressor to soft knee or hard knee. When soft knee is
selected, the Compressor will gradually reach the Ratio,
while hard knee will cause the Compressor to go directly
from no compression to the current Ratio.
Release
Release sets the fall back time of the Compressor, after the
signal drops below the Threshold, meaning if the Compressor
is reducing the gain by 14dB and the Release is set to
28dB/S, it will take 0.5 second before the Compressor
reaches no gain reduction af the signal dropped below
threshold.
Gain
The Gain parameter makes it possible to compensate for the
loss of level in the Compressor. This is also known as
“Makeup” gain.
In Level*
Controls the input level of the block.
Out Level
Controls the output level of the Compressor block.
LED Meter
If more than one Dynamics block is present in the Routing,
this parameter determines which one will be displayed by the
Gain reduction meter on the front panel.
Hard Compressor/Limiter
The Hard Compressor/Limiter is somewhat similar to the Soft
Compressor. One of the main differences is that the
Compressor/Limiter responds to the peak level whereas the
Compressor responds to the RMS average level. Peak
compression in general is a bit more aggressive sounding.
The parameters available in the Modifier Matrix are marked
with an asterisk*.
HARD COMPRESSOR/LIMITER
50
Threshold
When the input level exceeds the Threshold, the Compressor
will be activated. This means that the lower the Threshold,
the more compression you will get.
COMPRESSOR/LIMITER
Ratio
The Ratio of the gain reduction. Example: When the Ratio is
set to 4:1 it means that for every 4dB the input level rises,
the output level increases by only 1dB.
Attack
Attack is the amount of time that the Compressor uses to
reach the gain reduction specified by the Ratio parameter.
Example: The Input signal rises 4dB above threshold in no
time, with the Ratio set to 1:4 and the Attack set to 20ms.
The Compressor will now use 20ms to reach the 3dB gain
reduction.
Release
Release sets the fallback time from when the input signal
falls below threshold till the Compressor/Limiter reaches no
gain reduction.
Gain
The Gain parameter makes it possible to compensate for the
loss of level in the Compressor/Limiter. This is also known
as “Makeup” gain.
Mix
Mix between direct sound and effect sound.
In Level*
Controls the input level of the block.
Out Level
Controls the output level of the block.
LED Meter
If more than one Dynamics block is present in the Routing,
this parameter determines which one will be displayed by
the Gain reduction meter on the front panel.
THE BLOCKS
Filters
Number of blocks: 1
Processing power: 11-45% per block
The Filter block contains five sub-algorithms: Resonance,
Bandpass, Phaser, Resonator and Resochord.
These sub-algorithms are capable of performing a wide
variety of effects that can be controlled in real time by
External or Internal modifiers using the Modifier Matrix.
Hicut Freq*
Sets the frequency of the Hicut Resonance filter.
Range 150Hz-15kHz
Lo Resonance*
Sets the amount of Resonance on the Locut filter.
Hi Resonance*
Sets the amount of Resonance on the Hicut filter.
Connect an LFO or an expression pedal to the
two frequency parameters using the Modifier Matrix.
Mix*
Mixes between direct sound and effect.
In Level*
Controls the input level of the block.
Out Level*
Controls the output level of the block.
Resonance
The Resonance filters consist of a high and low cut filter that
can be swept up and down the frequency range. When the
Resonance (Q-factor) parameter is increased, the filters peak
at the cutoff frequency gets very narrow and very steep. That
is the very core of the characteristic sound of Resonance
filters. The parameters available in the Modifier Matrix are
marked with an asterisk*.
NOTE: The peak of the filters can get very loud and can
easily reach the internal headroom, thereby causing
distortion. To prevent that, turn down the input level of the
Filter block.
Bandpass
The Bandpass algorithm contains two bands with a filter for
left and right. Bandpass in general is a filter that will only
pass the frequencies of the bands center frequencies. The
parameters available in the Modifier Matrix are marked with
an asterisk*.
NOTE: The peak of the filters can get very loud and can
easily reach the internal headroom, thereby causing
distortion. To prevent that, turn down the input level of the
Filter block.
RESONANCE
BANDPASS
Order
The Order parameter of the Resonance filters changes the
steepness of the filters. 2nd order filters are 12dB/Octave
while 4th order are 24dB/Octave. 4th order filters will “ring”
or resonate more than 2nd order filters.
Locut Freq*
Sets the frequency of the Locut Resonance filter.
Range 20Hz-5kHz.
Bands used
Sets whether you are using only the first or both bands.
First band left freq*
The first band’s frequency of the left channel.
Range: 20Hz-16kHz.
First band left bandwidth*
The bandwidth of the first band’s left filter. The bandwidth is
described in octaves.
Range: 0.05-2.5 octaves
51
THE BLOCKS
First band right freq*
The first band’s frequency of the right channel.
Range: 20Hz-16kHz.
First band right bandwidth*
The bandwidth of the first band’s right filter. The bandwidth
is described in octaves.
Range: 0.05-2.5 octaves
Second band is identical to first band.
Connect an LFO or an expression pedal to the
two frequency parameters using the Modifier Matrix.
Mix*
Mixes between direct sound and filter sound.
In Level*
Controls the input level of the block.
Out Level*
Controls the output level of the block.
Phaser
A Phaser in general is a group of comb filters that are swept
back and forth by an LFO within a certain frequency range.
When the comb filter sound is mixed with the direct signal,
the moving phasing sound is created due to the constant
moving phase cancelation of the combfilter frequencies in
the direct signal. The parameters available in the Modifier
Matrix are marked with an asterisk*.
triplets of the tapped tempo. 1/4 equals the BPM (tapped
Tempo).
The subdivisions available are, 16/1 (16 bars for performing
one period), 8/1, 4/1, 2/1, 1/1, and 1/2-1/32 in straight,
dotted and triplet notes - 1/4 equals BPM (beats per minute).
If you select “Ignored” the current parameter will use the
Preset value and will not be affected by the Global Tempo.
Depth*
Adjusts the Depth of the phasing filters.
Order
Sets the number of filters used to produce the Phaser. The
three possibilities - 4, 8 and 12 are very different sounding.
Check them out.
Feedback Level*
Controls the amount of feedback in the Phaser. Note that this
parameter can be negative, meaning feedback in reversed
phase.
Range
With the range parameter you can choose whether the Phaser
should work in the low or the high frequency area.
Mix*
Mixes between direct sound and phaser sound.
A Phaser is an additive effect, meaning that to
achieve the best performance a certain amount of
direct signal should be let through. Best Phaser
results are achieved with the Mix parameter set to
40-50%.
In Level*
Controls the input level of the block.
Out Level*
Controls the output level of the block.
PHASER
Mod link
Enables you to bypass the internal LFO of the Phaser, and
control the sweep manually through the Modifier Matrix.
When set to “Shape” the Speed entrance in the Modifier
Matrix works as manual control over the Phaser. “Speed”
lets the Phasers internal LFO handle the modulation.
Speed*
Controls the speed of the moving filters in the Phaser.
Tempo
The Tempo parameter sets the relationship to the global
Tempo e.g. if you set it to 1/4T you will get quarter note
52
Resonator
The Resonator is a parallel group of four short delays with
massive feedback, each creating a resonant comb filter with
a different family of harmonic frequencies. This adds a sonic
(possibly harmonic) quality to transient signals like drums or
speech. The parameters available in the Modifier Matrix are
marked with an asterisk*.
THE BLOCKS
NOTE: The peak of the filters can get very loud and can
easily hit the internal ceiling and thereby cause distortion.
To prevent that, turn down the input level of the Filter block.
Resochord
RESONATOR
Resonator Voice 1-4*
These parameters adjust the length of the four delays and
thereby change the resonant frequencies.
Range: 55Hz-1750Hz.
Feedback Voice 1-4*
The Feedback adjusts the resonance of the resonators.
The feedback of the resonators is preadjusted, but these
feedback parameters allow you to customize them for your
purpose. Note that negative feedback produces different
harmonics than positive.
Filter placement 1-4
These parameters switch the high and low cut filter and
levels to be placed before or after the resonators.
Locut Voice 1-4*
Cuts off frequencies lower than the selected frequency on the
Vocal input. The slope of the filter is 12dB/octave.
Range: 10Hz-16kHz.
Highcut Voice 1-4*
Cuts off frequencies higher than the selected frequency. The
filter is relative to the Frequency of the corresponding
Resonator voice. The slope of the filter is 12dB/octave.
Range: 0-100%.
Levels Voice 1-4*
Sets the level of each of the four resonators.
Panning Voice 1-4*
Sets the panning of each of the four resonators.
Mix*
Mixes between direct sound and effect.
In Level*
Controls the input level of the block.
Out Level*
Controls the output level of the block.
The Resochord is based on the same algorithm as the
Resonator. However, in the Resochord the four resonators
are scaled within chords. All you have to do is change the
master frequency to tune the chord in the key you desire.
The parameters available in the Modifier Matrix are marked
with an asterisk*.
RESOCHORD
Freq*
The master frequency, tuning the four resonators to one base
key simultaneously.
Chord
Sets the four resonators up in various chord relationships.
Choose between: Major, Major 6th, Major 7th, Major Maj
7th, Minor, Minor 6th, Minor 7th.
Feedback Voice 1-4*
The Feedback adjusts the resonance of the resonators.
The feedback of the resonators is preadjusted, but these
feedback parameters allow you to customize them for your
purpose.
Filter placement Voice 1-4
These parameters switch the high and low cut filter and
levels to be placed before or after the resonators.
Locut Voice 1-4*
Cuts off frequencies lower than the selected frequency. The
slope of the filter is 12dB/octave.
Range: 10Hz-16kHz.
Highcut Voice 1-4*
Cuts off frequencies higher than the selected frequency. The
53
THE BLOCKS
filter is relative to the Frequency of the corresponding
Resonator voice The slope of the filter is 12dB/octave.
Range: 0-100%.
Levels Voice 1-4*
Sets the level of each of the four resonators.
Panning Voice 1-4*
Sets the panning of each of the four resonators.
Mix*
Mixes between direct sound and effect.
In Level*
Controls the input level of the block.
Out Level*
Controls the output level of the block.
NOTE: The peak of the filters can get very loud and can
easily hit the internal ceiling and thereby cause distortion. To
prevent that, turn down the input level of the Filter block.
Formant
Number of blocks: 1
Processing power: 17-19% per block
The Formant filters are somewhat special. They can create a
new sound for you. Imagine an effect that does not say WAH
WAH, but instead goes OOWEE-OOWEE. Formants are also
known as the vowels of human speech. The Formant
algorithm allows you to set three coordinates, Start, Thru and
End in a frequency plane, and then move your sound back
and forth through the curve you created with the coordinates.
The parameters available in the Modifier Matrix are marked
with an asterisk*.
End
The End point of the curve.
Resonance*
Sets the amount of resonance on the Formant filter.
Brightness*
Is used to change the character of the formant curve from
low and dark to high and bright. Experiment a bit with this
parameter.
Sweep*
Dial the Sweep parameter to move through the formant
curve. This is the parameter that you should connect to a
pedal or some other modifier.
Try connecting the Sweep parameter to an LFO,
ENV or an external Modifier for real time parameter
control.
Mix*
Mixes between direct sound and effect.
In Level*
Controls the input level of block.
Out Level*
Controls the output level of the block.
Distortion
Number of blocks: 1
Processing power: 12-17% per block
The Distortion block can degrade the sound in a number of
different ways and thereby produce low-fi sounds.
The parameters available in the Modifier Matrix are marked
with an asterisk*.
Drive
FORMANT
Start
The Starting point of the formant curve.
Thru
The Thru point of the curve.
54
The Drive is a post distortion. It can be used for overdriving
a Delay, a Flanger or a Phaser etc. or simply to distort the
incoming source material. The parameters available in the
Modifier Matrix are marked with an asterisk*.
DISTORTION
THE BLOCKS
Drive*
The Drive parameter simulates the Input gain of a distortion
device. The extra Input gain is automatically compensated on
the Output level to avoid any clipping internally.
Brightness*
Brightness is used to reduce the amount of high frequency
content in the distorted signal. The Brightness control is flat
when set to 100%.
Body*
Body is used to reduce the amount of low frequency content
in the distorted signal. At heavy distortion the Drive will
emphasize a lot of low frequencies, which can be somewhat
annoying. These problems can be reduced by the Body
parameter. A number of preamps and pedals on the market
combine a lowcut filter with their Input gain to compensate
for the exact same problem.
Smasher*
The Smasher is used to change the character of the distortion
by emphasizing even order harmonics. Setting this parameter
to a high value, will smash your signal. Try experimenting
with the character of your distortion.
Out Drive*
Out Drive is simulating the kind of distortion that you would
get from the output stage of an amplifier.
Mix*
Mixes between direct sound and effect.
In Level*
Controls the input level of the block.
Out Level*
Controls the output level of the Drive block.
Cruncher
The Cruncher performs both Aliasing and Quantizing
simultaneously.
Aliasing is a residual artifact of digital conversion that was
common in the early days of the digital world. In the
FireworX this artifact is magified into an effect. Sound-wise,
the Aliasing appears as an unharmonic, fairly high frequency
distortion.
The Quantizer produces an artificial noise floor as if the
signal had been sampled at a lower bit resolution.
The parameters available in the Modifier Matrix are marked
with an asterisk*.
CRUNCHER
Aliaser Factor*
Sets the sample rate reducing-factor, and thereby enhances
the Aliasing artifacts.
Aliaser level*
The level of the Aliaser signal
Quantize grain size*
Sets the grain size or reduces the bit resolution that is used
to quantize the signal.
Quantize level*
The level of the Quantized signal.
In Locut*
Cuts off frequencies lower than the selected frequency on
the input. The slope of the filter is 12dB/octave.
Range: 10Hz-16kHz.
In Hicut*
Cuts off frequencies higher than the selected frequency on
the input. The slope of the filter is 12dB/octave.
Range: 10Hz-16kHz.
Out Locut*
Cuts off frequencies lower than the selected frequency on
the output. The slope of the filter is 12dB/octave.
Range: 10Hz-16kHz.
Out Hicut*
Cuts off frequencies higher than the selected frequency on
the output. The slope of the filter is 12dB/octave.
Range: 10Hz-16kHz.
Mix*
Mixes between direct sound and effect.
In Level*
Controls the input level of the block.
Out Level*
Controls the output level of the Drive block.
Vocoder
Number of blocks: 1
Processing power: 33-46% per block
The Vocoder block contains two different types of effects:
Vocoder and Ring Modulator. Both of these effects are Dual
55
THE BLOCKS
input, Mono out algorithms. They both require a Carrier on
one input channel and a Control (Vocal) on the other channel
input.
Vocoder
A Vocoder in general is a two-input, one-output device that
detects the spectral envelope of the Control (Vocal) input and
filters the signal of the Carrier input through a filter
controlled by that spectral envelope. To maintain a constant
output level the Vocoder contains a gated AGC (Automatic
Gain Control) on the Carrier input. The parameters available
in the Modifier Matrix are marked with an asterisk*.
VOCODER
Carrier Chnl
The Carrier channel parameter swaps the Left/Right inputs
Vox/Carrier connection.
Carrier AGC
Switches the Automatic Gain Control on the Carrier input
on/off.
AGC Maxgain
Sets maximum gain that the AGC will add to the Carrier
input signal.
Output Pan*
Controls the panning of the Vocoder output.
Vox Locut*
Cuts off frequencies lower than the selected frequency on the
Vocal input. The slope of the filter is 12dB/octave.
Range: 10Hz-16kHz.
Vox Highcut*
Cuts off frequencies higher than the selected frequency on
the Vocal input. The slope of the filter is 12dB/octave.
Range: 10Hz-16kHz.
56
Carrier Locut*
Cuts off frequencies lower than the selected frequency on
the Carrier input. The slope of the filter is 12dB/octave.
Range: 10Hz-16kHz.
Carrier Highcut*
Cuts off frequencies higher than the selected frequency on
the Carrier input. The slope of the filter is 12dB/octave.
Range: 10Hz-16kHz.
Out Locut*
Cuts off frequencies lower than the selected frequency on
the output signal. The slope of the filter is 12dB/octave.
Range: 10Hz-16kHz.
Out Highcut*
Cuts off frequencies higher than the selected frequency on
the output signal. The slope of the filter is 12dB/octave.
Range: 10Hz-16kHz.
Mix*
Mixes between direct sound and effect.
In Level*
Controls the input level of the block.
Out Level*
Controls the output level of the Vocoder block.
Ring Mod. External
A Ring Modulator in general is best explained in the
frequency domain: When two different sine wave signals
with frequencies f1 and f2, and dynamic range f1 and f2 are
applied to the inputs of a Ring Modulator, the upper sideband
produces a sine wave with the frequency f1+ f2 and the
dynamic range f1+ f2. The lower sideband produces a sine
wave with the frequency f1 - f2 and the dynamic range f1+f2.
The FireworX performs a generalized Ring Modulator called
quadrature modulator which makes it possible to control the
relationship between the upper and lower sideband. A fifty
fifty mix of the upper and lower sideband equals the sound
of a traditional ring modulator.
Note that the dynamic range of the sideband outputs is the
sum of the dynamic ranges of the two inputs, so
compression of one or both inputs is recommended. This can
be done by using the build in Carrier AGC (Automatic Gain
Control). The parameters available in the Modifier Matrix
are marked with an asterisk*.
THE BLOCKS
Ring Mod. Internal
RING MOD. EXTERNAL
Carrier Chnl
The Carrier channel parameter swaps the Left/Right inputs
Vox/Carrier connection.
Lower/Upper band balance*
Controls the relationship between the upper (freq 1 + freq 2)
and the lower (freq 1 - freq 2) sideband. A fifty fifty mix
equals the sound of a traditional ring modulator.
Output Pan*
Controls the panning of the Ring Modulator output.
Carrier AGC
Switches the Automatic Gain Control on the Carrier input
on/off.
In 1 and 2 Locut*
Cuts off frequencies lower than the selected frequency on the
two inputs. The slope of the filter is 12dB/octave.
Range: 10Hz-16kHz.
In 1 and 2 Highcut*
Cuts off frequencies higher than the selected frequency on
the two inputs. The slope of the filter is 12dB/octave.
Range: 10Hz-16kHz.
Low/Up Locut*
Cuts off frequencies lower than the selected frequency on the
Lower and Upper sideband. The slope of the filter is
12dB/octave.
Range: 10Hz-16kHz.
Low/Up Highcut*
Cuts off frequencies higher than the selected frequency on
the Lower and Upper sideband. The slope of the filter is
12dB/octave.
Range: 10Hz-16kHz.
Mix*
Mixes between direct sound and effect.
In Level*
Controls the input level of the block.
Out Level*
Controls the output level of the Ring Modulator block.
This variation of the FireworX Ring Modulator provides an
internal carrier sine wave generator with user controllable
frequency. That means that the left and right input of the
block is summed together and used as control input. The
parameters available in the Modifier Matrix are marked with
an asterisk*.
RING MOD. INTERNAL
Carrier*
Sets the frequency of the internal carrier sine wave
generator. Range: 2Hz - 2kHz.
Lower/Upper band balance*
Controls the relationship between the upper (freq 1 + freq 2)
and the lower (freq 1 - freq 2) sideband. A fifty fifty mix
equals the sound of a traditional ring modulator.
Output Pan*
Controls the panning of the Ring Modulator output
In Locut*
Cuts off frequencies lower than the selected frequency on
the input channel. The slope of the filter is 12dB/octave.
Range: 10Hz-16kHz.
In Highcut*
Cuts off frequencies higher than the selected frequency on
the input channel. The slope of the filter is 12dB/octave.
Range: 10Hz-16kHz.
Low/Up Locut*
Cuts off frequencies lower than the selected frequency on
the Lower and Upper sideband. The slope of the filter is
12dB/octave.
Range: 10Hz-16kHz.
Low/Up Highcut*
Cuts off frequencies higher than the selected frequency on
the Lower and Upper sideband. The slope of the filter is
12dB/octave.
Range: 10Hz-16kHz.
Mix*
Mixes between direct sound and effect.
57
THE BLOCKS
In Level*
Controls the input level of the block.
Out Level*
Controls the output level of the Ring Modulator block.
Try listening to the lower or upper sideband signal
alone and vary the Carrier from 2Hz and up.
Synth
Number of blocks: 2
Processing power: 14-16% per block
The Synth block contains three different types of generators:
the Curve generator, the Chaos generator and the Noise
generator. All three generators work great as carrier input in
the Vocoder block. The parameters available in the Modifier
Matrix are marked with an asterisk*.
Set the “Freq” parameter up to be controlled via
MIDI using one of the Functions in the Modifier
Matrix, and use this block as a mini synthesizer (See
“Modifiers, Functions” for further details).
Curve
Selects the curve being generated.
Choose between Square, Sine, Triangle and Sawtooth.
Square PW*
Controls the division of the upper and lower part of the
Square waveform e.g. if Pulsewidth is set to 75%, the upper
half of the waveform will be on for 75% of the time.
Locut*
Cuts off frequencies lower than the selected frequency. The
slope of the filter is 12dB/octave.
Range: 10Hz-16kHz.
Highcut*
Cuts off frequencies higher than the selected frequency. The
slope of the filter is 12dB/octave.
Range: 10Hz-16kHz.
Mix*
Mixes between direct sound and effect.
In Level*
Controls the input level of the block.
Out Level*
Controls the output level of the block.
Chaos Generator
CURVE GENERATOR
Curve Generator
The curve generator is a frequency oscillator that can output
tones from 2Hz-2kHz. There are four different shapes to
choose between: Sine-Triangle-Square-Sawtooth.
The curve generator works great as a carrier input of the
Vocoder block (Sine not recommended, though). The
parameters available in the Modifier Matrix are marked with
an asterisk*.
Freq*
The frequency being generated.
Range: 2Hz-2kHz.
58
The Chaos Generator produces random noise based on a
fractal formula. Use it as a carrier in the Vocoder block and
you’ll get some strange sounds.
The parameters available in the Modifier Matrix are marked
with an asterisk*.
Freq*
Sets the update frequency of the recursive formula, or
sound-wise the speed of the noise generator.
Range: 1-1000Hz.
Chaos*
Sets the complexity of the output sound or the degree of
Chaos in the algorithm.
Range: 0-100%.
Locut*
Cuts off frequencies lower than the selected frequency. The
slope of the filter is 12dB/octave.
THE BLOCKS
Range: 10Hz-16kHz.
Highcut*
Cuts off frequencies higher than the selected frequency. The
filter is relative to the Frequency of the Chaos generator. The
slope of the filter is 12dB/octave.
Range: 0-100%.
Mix*
Mixes between direct sound and effect.
In Level*
Controls the input level of the block.
Out Level*
Controls the output level of the Ring Modulator block.
Noise Generator
The Noise Generator produces White Noise and Pink Noise.
The Noise Generator works great as the carrier input of the
Vocoder block. The parameters available in the Modifier
Matrix are marked with an asterisk*.
Single/Dual Voice Pitch
PITCH
Noise type
Choose between White Noise or Pink Noise.
Locut*
Cuts off frequencies lower than the selected frequency. The
slope of the filter is 12dB/octave.
Range: 10Hz-16kHz.
Highcut*
Cuts off frequencies higher than the selected frequency. The
slope of the filter is 12dB/octave.
Range: 10Hz-16kHz.
Mix*
Mixes between direct sound and effect.
In Level*
Controls the input level of the block.
Out Level*
Controls the output level of the block.
Pitch 1-2*
Sets the amount of Pitch on each of the two voices in cents.
Maximum pitch is +/- 2400 cents.
Delay 1-2
Sets the Delay of each of the two voices. Maximum delay
time per voice is 400 ms.
Level 1-2*
Sets the level of the two Pitch voices.
Pan Position 1-2*
Controls the panning of each of the two Pitch voices.
Feedback 1-2*
Sets the amount of Feedback on the two voices. This can
create really weird effects since the signal will be pitched
over and over, meaning that it will rise/fall more and more
over a period of time.
Mix*
Mixes between direct sound and effect.
In Level*
Controls the input level of the block.
Out Level*
Controls the output level of the Pitch block.
Pitch
Chorus/Flanger
Number of blocks: 1
Processing power: 17-20% per block
The Pitch block contains two different sub-algorithms:
Single Voice and Dual Voice. The parameters available in the
Modifier Matrix are marked with an asterisk*.
Number of blocks: 2
Processing power: 9-10% per block
The Chorus block is based on the heritage of the TC 2290
Dynamic Delay and 1210 Chorus/Flanger.
Both Chorus and Flanger are created by a short delay that
gets modulated by an LFO. The modulation of the short
delay gives very small variations in pitch. These pitch
59
THE BLOCKS
changes blended with the direct sound give you the Chorus
sound, while the modulated signal alone will give you a
Pitch modulator also known as Vibrato. The difference
between Chorus and Flanging is the Feedback of the
Flanger, and the size of the modulated delay. Chorus
sounds use delay times around 10-20 ms while Flanger
tends to use times around 1-10 ms. The Feedback is the
parameter that gives you that classic mid-range tone. The
parameters available in the Modifier Matrix are marked
with an asterisk*.
minute).
If you select “Ignored” the current parameter will use the
Preset value and will not be affected by the Global Tempo.
Depth*
Adjusts the modulation depth of the Chorus, also known as
Intensity.
Mix*
Mixes between direct sound and effect.
In Level*
Controls the input level of the block.
Create a Vibrato by setting the Mix at 100%,
Depth at 5-10% and Speed to 1-2Hz.
Advanced Chorus
Classic Chorus
The Classic Chorus uses a relationship between Speed and
Depth called the Golden Ratio. This feature was inherited
from the TC 2290. The parameters available in the Modifier
Matrix are marked with an asterisk*.
CHORUS/FLANGER
Mod Link
Enables you to bypass the internal LFO of the Chorus, and
control the sweep manually through the Modifier Matrix.
When set to “Shape” the Speed entrance in the Modifier
Matrix works as manual control over the Chorus. “Speed”
lets the Chorus’ internal LFO handle the modulation.
Speed*
The modulation speed of the Chorus, also known as Rate.
Tempo
The Tempo parameter sets the relationship to the global
Tempo e.g. if you set it to 1/4T the Chorus will use quarter
note triplet of the tapped tempo to perform one cycle.
1/4 equals the BPM (tapped Tempo).
The subdivisions available are, 16/1 (16 bars for performing
one period), 8/1, 4/1, 2/1, 1/1, and 1/2-1/32 in straight,
dotted and triplet notes - 1/4 equals BPM (beats per
60
Advanced Chorus adds some extra parameters like LFO
Phase and Curve. The parameters available in the Modifier
Matrix are marked with an asterisk*.
Mod link
Enables you to bypass the internal LFO of the Chrous, and
control the sweep manually through the Modifier Matrix.
When set to “Shape” the Speed entrance in the Modifier
Matrix works as manual control over the Chorus. “Speed”
lets the Chorus’ internal LFO handle the modulation.
Speed*
The modulation speed of the Chorus, also known as Rate.
Tempo
The Tempo parameter sets the relationship to the global
Tempo e.g. if you set it to 1/4T the Chorus will use a quarter
note triplet of the tapped tempo to perform one cycle.
1/4 equals the BPM (tapped Tempo).
The subdivisions available are, 16/1 (16 bars for performing
one period), 8/1, 4/1, 2/1, 1/1, and 1/2-1/32 in straight,
dotted and triplet notes - 1/4 equals BPM (beats per minute).
If you select “Ignored” the current parameter will use the
Preset value and will not be affected by the Global Tempo.
Depth*
Adjusts the Modulation depth of the Chorus, also known as
Intensity.
Delay
As described earlier, a Chorus/Flanger is a Delay being
modulated by an LFO. This parameter makes it possible to
change the length of that Delay. A typical Chorus uses delays
at approximately 10ms, while a Flanger uses delays at
around 5ms.
THE BLOCKS
Golden Ratio
Sets the Golden Ratio between Speed and Depth On/Off. If
you want to create wild Chorus sounds you may want to turn
the Golden Ratio off.
Phase Reversed
Reverses the phase of the right channel, but only on the
effect signal. This function makes the stereo image much
wider.
LFO Curve
Sets the curve of the LFO. Choose between: Sine or
Triangle.
The most commonly used waveform in Chorus is Sine. (see
Curve figures in Tremolo).
LFO Phase
An LFO phase change causes a small delay in one of the
waveform starting points. This means that the left and right
outputs start the current waveform at two different points.
Example: If LFO Phase is set to 180º, left and right will be
exactly opposite.
90 phase
change
LFO PHASE
Mix*
Mixes between direct sound and effect.
In Level*
Controls the input level of the block.
Out Level*
Controls the output level of the Chorus block.
Flanger Classic
The Classic Flanger uses a relationship between Speed and
Depth called the Golden Ratio. This feature was inherited
from the TC 2290. The parameters available in the Modifier
Matrix are marked with an asterisk*.
FLANGER CLASSIC
Mod link
Enables you to bypass the internal LFO of the Flanger, and
control the sweep manually through the Modifier Matrix.
When set to “Shape” the Speed entrance in the Modifier
Matrix works as manual control over the Flanger. “Speed”
lets the Flangers internal LFO handle the modulation.
Speed*
The modulation speed of the Flanger, also known as Rate.
Tempo
The Tempo parameter sets the relationship to the global
Tempo e.g. if you set it to 1/4T the Flanger will use a
quarter note triplet of the tapped tempo to perform one
cycle. 1/4 equals the BPM (tapped Tempo).
The subdivisions available are, 16/1 (16 bars for performing
one period), 8/1, 4/1, 2/1, 1/1, and 1/2-1/32 in straight,
dotted and triplet notes - 1/4 equals BPM (beats per minute).
If you select “Ignored” the current parameter will use the
Preset value and will not be affected by the Global Tempo.
Depth*
Adjusts the modulation depth of the Flanger, also known as
Intensity.
Feedback*
Controls the amount of feedback in the Flanger.
Note that this parameter can be negative, i.e. feedback in
reversed phase.
Mix*
Mixes between direct sound and effect.
In Level*
Controls the input level of the block.
Out Level*
Controls the output level of the Flanger block.
Advanced Flanger
Advanced Flanger adds some extra possibilities like Cross
Feedback, LFO phase and Curve. The parameters available
in the Modifier Matrix are marked with an asterisk*.
Mod Link
Enables you to bypass the internal LFO of the Flanger, and
control the sweep manually through the Modifier Matrix.
When set to “Shape” the Speed entrance in the Modifier
Matrix works as manual control over the Flanger. “Speed”
lets the Flangers internal LFO handle the modulation.
Speed*
The modulation speed of the Flanger, also known as Rate.
61
THE BLOCKS
Tempo
The Tempo parameter sets the relationship to the global
Tempo e.g. if you set it to 1/4T the Flanger will use quarter
note triplet of the tapped tempo to perform one cycle.
1/4 equals the BPM (tapped Tempo).
The subdivisions available are, 16/1 (16 bars for performing
one period), 8/1, 4/1, 2/1, 1/1, and 1/2-1/32 in straight,
dotted and triplet notes - 1/4 equals BPM (beats per minute).
If you select “Ignored” the current parameter will use the
Preset value and will not be affected by the Global Tempo.
Depth*
Adjust the modulation depth of the Flanger, also known as
Intensity.
Delay
As described earlier, a Chorus/Flanger is a Delay being
modulated by an LFO. This parameter makes it possible to
change the length of that Delay. A typical Chorus uses delays
at approximately 10 ms, while a Flanger is uses delays at
around 5 ms.
Feedback*
Controls the amount of feedback in the Flanger.
Note that this parameter can be negative, i.e. feedback in
reversed phase.
Golden Ratio
Sets the Golden Ratio between Speed and Depth On/Off. If
you want to create wild Flanger sounds, you may want to
turn the Golden Ratio off.
Phase Reversed
Reverses the phase of the right channel, but only on the
effect signal. This function makes the stereo image much
wider.
Cross Feedback*
Controls the amount of feedback between the two channels.
Note that the Cross feed can be negative, i.e. Cross feed in
reversed phase.
LFO Curve
Sets the curve of the LFO. Choose between: Sine or
Triangle.
The most commonly used waveform in Flanging is Sine.
(See Curve figures in Tremolo).
LFO Phase
An LFO phase change causes a small delay in one of the
waveform starting points. This means that left and right
outputs start the current waveform at two different points.
Example: If LFO is set to 180º, left and right will be exactly
opposite. (See the LFO phase figure in the Chorus section).
62
Mix*
Mixes between direct sound and effect.
In Level*
Controls the input level of the block.
Out Level*
Controls the output level of the Flanger block.
Delay
Number of blocks: 2
Processing power: 19-23% per block
The Delay block contains six different sub-algorithms:
Stereo, Dual, Dual Three-Tap, One-Tap, Six-Tap and
Reverse.
The maximum delay time varies with the sub-algorithm.
These sub-algorithms can create powerful effects when
combined with other effects or when controlled by External
or Internal Modifiers.
Stereo
The Stereo Delay creates identical delays in the Left and
Right channels. This sub-algorithm is true stereo. The parameters available in the Modifier Matrix are marked with a*.
STEREO DELAY
Time
Sets the delay time of both the Left and Right channels.
Maximum delay time is 675 ms.
Tempo
The Tempo parameter sets the relationship to the global
Tempo e.g. if you set it to 1/4T the Delay will use quarter
note triplet of the tapped tempo to perform one cycle.
1/4 equals the BPM (tapped Tempo).
THE BLOCKS
The subdivisions available are, 16/1 (16 bars for performing
one period), 8/1, 4/1, 2/1, 1/1, and 1/2-1/32 in straight, dotted
and triplet notes - 1/4 equals BPM (beats per minute).
If you select “Ignored” the current parameter will use the
Preset value and will not be affected by the Global Tempo.
Feedback*
Adjusts the Feedback of both Left and Right channels.
If the Feedback parameter is set to 100%, the
FireworX will loop the Delay signal.
Lowcut*
Cuts off frequencies lower than the selected frequency. The
slope of the filter is 12dB/octave.
Highcut*
Cuts off frequencies higher than the selected frequency. So if
you feel that there is too much treble in your signal, you
remove this by adjusting the highcut filter down. The slope
of the filter is 12dB/octave.
Mix*
Mixes between direct sound and effect.
Connect the Mix parameter to the Envelope
follower in the Modifier Matrix to create dynamic
delay.
In Level*
Controls the input level of the block.
Out Level*
Controls the output level of the Delay block.
Dual
The Dual Delay allows you to set the delay independently in
channel one and two. Both channels can be cross-fed to each
other and each channel can be panned independently. This
sub-algorithm is true stereo. The parameters available in the
Modifier Matrix are marked with an asterisk*.
Time 1
Sets the delay time of the first Delay tap. Maximum delay
time is 675 ms.
Time 2
Sets the delay time of the second Delay tap. Maximum delay
time is 675 ms.
Tempo
The Tempo parameter sets the relationship to the global
Tempo e.g. if you set it to 1/4T the Delay will use quarter
note triplet of the tapped tempo to perform one cycle.
1/4 equals the BPM (tapped Tempo).
If you select “Ignored” the current parameter will use the
Preset value and will not be affected by the Global Tempo.
Feedback 1 to 1/Feedback 2 to 2*
Sets the amount of feedback from Delay 1 to 1 and from
Delay 2 to 2.
NOTE: The sum of the four feedbacks is limited to 100%.
Feedback 1 to 2/Feedback 2 to 1*
Sets the amount of cross feedback from Delay 1 to 2 and
Delay 2 to 1.
Levels*
Sets the level of each of the two delay lines.
Pan 1-2*
Controls the panning of the two Delay taps.
Connect an LFO to one or both of these parameters
and you have an extra autopanner.
Lowcut 1-2*
Cuts off frequencies lower than the selected frequency. The
slope of the filter is 12dB/octave.
Highcut 1-2*
Cuts off frequencies higher than the selected frequency. So if
you feel that there is too much treble in your signal, you can
remove it by moving the highcut down. The slope of the filter
is 12dB/octave.
Mix*
Mixes between direct sound and effect.
In Level*
Controls the input level of the block.
Out Level*
Controls the output level of the Delay block.
DUAL DELAY
63
THE BLOCKS
Dual Three Tap
The Dual Three Tap Delay is capable of performing three
delay taps on each of the two delay lines. The delay time is
shared between the two delay lines, e.g. if Delay line 1 is
using 500 ms Delay line 2 will have 850 ms available. The
two delay lines have their own Input level, which basically
means that they perform much like two individual delay
processors. The parameters available in the Modifier Matrix
are marked with an asterisk*.
Highcut 1-2-3*
Cuts off frequencies higher than the selected frequency. So if
you feel that there is too much treble in your signal, you can
remove it by adjusting the highcut filter down. The slope of
the filter is 12dB/octave.
Line Level 1-2*
Adjusts the input level of the two Delay lines. This enables
you to lower the level of one of the two lines without
affecting the second. The Line level is a percentage
adjustment of the algorithm In Level.
Mix*
Mixes between direct sound and effect.
In Level*
Controls the input level of the block.
Out Level*
Controls the output level of the Delay block.
One Tap
DUAL THREE -TAP
Delay Line 1&2
Time 1-2-3
Sets the delay time of the two taps on Delay line 1.
Maximum delay time per tap is 1350 ms.
Tempo
The Tempo parameter sets the relationship to the global
Tempo e.g. if you set it to 1/4T the Delay will use quarter
note triplet of the tapped tempo to perform one cycle.
1/4 equals the BPM (tapped Tempo).
The subdivisions available are, 16/1 (16 bars for performing
one period), 8/1, 4/1, 2/1, 1/1, and 1/2-1/32 in straight, dotted
and triplet notes - 1/4 equals BPM (beats per minute).
If you select “Ignored” the current parameter will use the
Preset value and will not be affected by the Global Tempo.
Feedback 1-2-3*
Sets the amount of feedback on Tap 1 and 2.
NOTE: The sum of the two feedbacks is limited to 100%.
Levels 1-2-3*
Sets the level of each of the two taps.
Pan Position 1-2-3*
Controls the panning of the two Delay taps.
Lowcut 1-2-3*
Cuts off frequencies lower than the selected frequency. The
slope of the filter is 12dB/octave.
64
The One Tap is a mono in, mono out sub-algorithm.
The parameters available in the Modifier Matrix are marked
with an asterisk*.
ONE TAP
Time
Sets the delay time. Maximum delay time is 1350 ms.
Tempo
The Tempo parameter sets the relationship to the global
Tempo e.g. if you set it to 1/4T the Delay will use quarter
note triplet of the tapped tempo to perform one cycle.
1/4 equals the BPM (tapped Tempo).
The subdivisions available are, 16/1 (16 bars for performing
one period), 8/1, 4/1, 2/1, 1/1, and 1/2-1/32 in straight, dotted
and triplet notes - 1/4 equals BPM (beats per minute).
If you select “Ignored” the current parameter will use the
Preset value and will not be affected by the Global Tempo.
Feedback*
Adjusts the amount of Feedback.
Pan Position*
Controls the panning of the Delay.
THE BLOCKS
Lowcut*
Cuts off frequencies lower than the selected. The slope of the
filter is 12dB/octave.
Highcut*
Cuts off frequencies higher than the selected frequency. So if
you feel that there is too much treble in your signal, you can
remove it by adjusting the highcut filter down. The slope of
the filter is 12dB/octave.
Mix*
Mixes between direct sound and effect.
In Level*
Controls the input level of the block.
Out Level*
Controls the output level of the Delay block
Six Tap
The Six Tap sub-algorithm contains six delay taps on one
delay line. Each of the Six Taps can be set up independently.
The parameters available in the Modifier Matrix are marked
with an asterisk*.
NOTE: The sum of the six feedbacks are limited to 100%.
Levels 1-6*
Sets the level of each of the Six Taps.
Pan Position 1-6*
Controls the panning of the six Delay taps.
Lowcut 1-6*
Cuts off frequencies lower than the selected. The slope of the
filter is 12dB/octave.
Highcut 1-6*
Cuts off frequencies higher than the selected frequency. So if
you feel that there is too much treble in your signal, you can
remove it by adjusting the highcut filter down. The slope of
the filter is 12dB/octave.
Mix*
Mixes between direct sound and effect.
In Level*
Controls the input level of the block.
Out Level*
Controls the output level of the Delay block
Reverse
The parameters available in the Modifier Matrix are marked
with an asterisk*.
SIX TAP DELAY
REVERSE DELAY
Tap 1-6
Sets the delay time of the Six Taps. Maximum delay time per
tap is 1350 ms.
Tempo
The Tempo parameter sets the relationship to the global
Tempo e.g. if you set it to 1/4T the Flanger will use quarter
note triplet of the tapped tempo to perform one cycle.
1/4 equals the BPM (tapped Tempo).
The subdivisions available are, 16/1 (16 bars for performing
one period), 8/1, 4/1, 2/1, 1/1, and 1/2-1/32 in straight,
dotted and triplet notes - 1/4 equals BPM (beats per minute).
If you select “Ignored” the current parameter will use the
Preset value and will not be affected by the Global Tempo.
Feedback 1-6*
Adjusts the amount of Feedback from each of the Six Taps.
Grade*
Sets the loop time of the Reverse delay. Note: The Reverse
delay is subject to pitch changes caused by the constant
crossfading at low grade settings.
Pan*
Controls the panning of the Delay.
Lowcut*
Cuts off frequencies lower than the selected. The slope of the
filter is 12dB/octave.
Highcut*
Cuts off frequencies higher than the selected frequency. So if
you feel that there is too much treble in your signal, you can
remove it by adjusting the highcut filter down. The slope of
the filter is 12dB/octave.
65
THE BLOCKS
Trig (Start/Stop)*
Sets the action carried out when Reverse is triggered via the
Modifier Matrix. To change the playback state of the Reverse
Delay the control value must come from the opposite state.
Stop/Play -Will Stop Reverse playback when the control
value is below 45%, and Play Reverse delay
when the control value is above 55%.
Restart - Will restart Reverse playback when the control
value is above 55%.
Mix*
Mixes between direct sound and effect.
In Level*
Controls the input level of the block.
Out Level*
Controls the output level of the Delay block
Try morphing a vocal signal from plain language to
reversed nonsense by increasing Grade from
0-100%.
Advanced Reverb
Number of blocks: 1
Processing power: 39-44% per block
The Reverb in the FireworX is based on the heritage of the
M5000 and M2000, and is tuned for studio use.
REVERB
The Reverb section of the FireworX can create a variety of
Reverb effects including the feature of emulating the initial
reflections of a room which creates some mind blowing
spatial effects until now only available in the TC M5000.
When using the FireworX Reverb, you should see the Reverb
as two parts:
1. Initial room reflections
2. The Decay
66
The initial room reflections are, depending on the size of the
room, the first 50-200 ms of the Reverb and it is these
reflections that contain the information of the size and shape
of a room and create the width and most of the depth
experienced in a real hall or room.
The Decay is the later part of a natural reverb which is
experienced as prolonging the sound and creating some depth
behind the source or direct signal, but integrating it in the
spatial characteristics of the hall or room, like you experience
in natural ambience or reverb.
By emulating initial room reflections, the FireworX can
create some very deep and wide stereo images, placing the
source or direct signal in the hall/room without using long
decay times - (which often makes the sound image very
“crowded” and disturbs your mix).
To check out what the initial reflections can do, reduce or
turn down the Decay level in the Decay parameters section
and turn up Room level in the Room parameters section.
Then change the Room size and the Room shape in the
Master section and choose the combination that you like.
Then change the Color in the Room parameters section to
find the tonal balance that suits you.
You will hear a short spatial reverb which sounds a little like
a “gated “ reverb. Then at last add the decay by turning up
the Decay level in the Decay parameters section and select
the decay time that you prefer.
You will also hear that you are able to create a very spatially
wide and deep stereo reverb with a relatively short and low
level decay.
When listening to the Reverb’s initial reflections alone at a
high level and when selecting Room size XL, you might get
a “slapback” effect, but by adding the right length and
amount of decay and by balancing the Room level you will
find that it will be transformed into width and depth.
Square: A typical square room with its defined
reflection patterns.
Round: A diffuse room with lively reflections.
Curved: A soft, yet still defined set of reflections.
THE BLOCKS
Room Size
Sets the size of the room that the initial room reflections
emulate.
It automatically changes the length of the Predelay (the time
until the first reflection appears) and the Decay start (the time
where the Decay tail of the Reverb starts).
The Predelay and the Decay start can be individually adjusted
to another length in the Room and Decay section of the
algorithm.
Box - Tiny - Small - Medium - Large - XL
The sizes: Box, Tiny are patterns emulating extreme room
sizes.
Reverb level
Adjusts the combined Room level and the Decay level, and
should be seen as a master level.
The Room level and the Decay can be individually adjusted
to another relation in the Room and Decay section of the
algorithm. Range +/-50.
High color
Sets the treble color of the decay. When Color in the Room
section of the algorithm is set to Auto, it also controls the
treble factor of the initial room reflections.
Wool - Warm - Real - Clear - Bright - Crisp - Glass
High factor
Emphasizes or reduces the character set by the High color.
Range +/-25.
Low color
Sets the Bass color of the Decay.
Thick - Fat - Round - Natural - Light - Tight - Thin - No
bass.
Low factor
Emphasizes or reduces the character set by the Low color.
Range +/-25.
Room parameters
Adjusts the level of the initial room reflections, which are
master controlled by the Reverb level.
With this control you can emphasize or reduce the initial
room reflection’s influence on the Reverb sound.
Range +/-50.
Color
Sets the tonal color of the initial reflections.
When set to Auto it is linked to High color
Auto - Wool - Warm - Real - Clear - Bright - Crisp - Glass.
Color Factor
Emphasizes or reduces the character set by Color.
Range +/-50.
Predelay
Allows adjustment of the predelay (the time until the first
reflection appears) which is automatically set when choosing
the Room size. Range +/-50.
Decay Level
Adjusts the level of the Decay, which is master controlled by
the reverb level.
With this control you can emphasize or reduce the decay
tail’s influence on the Reverb sound. Range +/-50.
Diffuse
Allows fine tuning of the density of the decay tails. It is set
automatically when choosing the desired Decay time. This
makes it possible to reduce flutter in the decay to an absolute
minimum. Range +/-25.
Decay Start
Allows adjustment of the Decay Start (the time where the
Decay tail of the Reverb starts), which is set automatically
when choosing the Room size. Range +/-50.
Mix
This parameter sets the mix relation between the dry (direct)
and the wet signal. If you are using FireworX as an insert
effect this means that your direct signal goes through the
FireworX.
In Level*
Controls the input level of the block.
Out Level*
Controls the output level of the Reverb block.
Simple Reverb
The Simple Reverb is based on the same algorithm as the
Advanced, but the number of parameters are reduced to 5.
This makes it possible for you to set up the Reverb easily and
quickly. The parameters available in the Modifier Matrix are
marked with an asterisk*.
Type
Sets the type of the Reverb, meaning the size and relationship
between Predelay, Early reflections and Decay automatically.
(See Advanced Reverb for further explanation).
Types: Room, Club, Hall, Church, Cathedral, Grand Hall,
Fast Decay, Slow Decay, Plate, Spring.
67
THE BLOCKS
Decay time
Sets the length of the reverb decay from
0.01 - 20.0 seconds
Predelay
Allows adjustment of the predelay (the time until the first
reflection appears) which is automatically set when choosing
Type. Range +/-50.
Reverb level
Adjusts the combined Room level and the Decay level, and
should be seen as a master level.
The Room level and the Decay can be individually adjusted
to another relation in the Room and Decay section of the
algorithm. Range +/-50
Color
Sets the tonal color of the initial reflections.
When set to Auto it is linked to High color
Wool - Warm - Real - Clear - Bright - Crisp - Glass Extreme.
Mix*
This parameter sets the mix relation between the dry (direct)
and the wet signal. If you are using FireworX as an insert
effect this means that your direct signal goes through the
FireworX.
In Level*
Controls the input level of the block.
Out Level*
Controls the output level of the Reverb block.
Pan/Tremolo
Number of blocks: 2
Processing power: 4-7% per block
The Pan block contains five sub-algorithms: Simple Tremolo,
Advanced Tremolo, Simple Panner, Surround Panner and
Stereo Enhance.
A Panner is basically a change of the level opposite in Left
and Right channels. An LFO is connected to these levels and
turns them up and down. A Tremolo is also a change of level
controlled by an LFO except the level change in Left and
Right channels are identical. So the basic difference between
a Panner and a Tremolo is whether the level change of Left
and Right channels is opposite or identical.
This Panner has a surround range, meaning that it will pan
further than a normal stereo image.
Simple/Advanced Tremolo
The Tremolo is pulsing the level of the source signal
according to the LFO curve, depth and speed.
The parameters available in the Modifier Matrix are marked
with an asterisk*.
PAN+TREMOLO
Speed*
Controls how fast the Tremolo is pulsing.
Tempo
The Tempo parameter sets the relationship to the global
Tempo e.g. if you set it to 1/4T the Tremolo will use one
quarter note triplet of the tapped tempo to perform one cycle.
1/4 equals the BPM (tapped Tempo).
The subdivisions available are, 16/1 (16 bars for performing
one period), 8/1, 4/1, 2/1, 1/1, and 1/2-1/32 in straight, dotted
68
THE BLOCKS
and triplet notes - 1/4 equals BPM (beats per minute).
If you select “Ignored” the current parameter will use the
Preset value and will not be affected by the Global Tempo.
Depth*
Will set the intensity of the Tremolo, i.e. how deep it sweeps.
Curve (Only in Advanced)
Sets the curve of the LFO. Choose between: Square, Sine, or
Triangle.
The most common LFO curve in Tremolo is Triangle.
Simple/Surround Panner
The Panner changes the level of the source signal opposite in
left/right according to the LFO curve, depth and speed. The
Surround Panner is capable of panning beyond normal stereo
image by changing the phase of the signal while panning.
The parameters available in the Modifier Matrix are marked
with an asterisk*.
Square
PAN+TREMOLO
Triangle
Sine
Use the Square waveform with 100% Depth to get
holes in your sound (called Transforming).
Pulsewidth* (only in Advanced)
Controls the division of the upper and lower part of the
current waveform, e.g. if Pulsewidth is set to 75%, the upper
half of the waveform will be on for 75% of the time.
Pulsewidth
LFO Phase (only in Advanced)
An LFO phase change causes a small delay in one of the
waveform starting points. This means that left and right
outputs start the current waveform at two different points.
Example: If LFO phase is set 180º, the left and right will be
exactly opposite.
Mix*
Mixes between direct sound and effect.
In Level*
Controls the input level of the block.
Out Level*
Controls the output level of the block.
Mod Link (Only in Simple Panner)
Enables you to bypass the internal LFO of the Panner, and
control the sweep manually through the Modifier Matrix.
When set to “Shape” the Speed entrance in the Modifier
Matrix works as manual control over the Panner. “Speed” lets
the Panner’s internal LFO handle the modulation.
Speed*
Controls the speed of the Panner. The simple Panner always
pans fully Left and Right.
Tempo
The Tempo parameter sets the relationship to the global
Tempo e.g. if you set it to 1/4T the Panner will use quarter
note triplet of the tapped tempo to perform one cycle.
1/4 equals the BPM (tapped Tempo).
The subdivisions available are, 16/1 (16 bars for performing
one period), 8/1, 4/1, 2/1, 1/1, and 1/2-1/32 in straight, dotted
and triplet notes - 1/4 equals BPM (beats per minute).
If you select “Ignored” the current parameter will use the
Preset value and will not be affected by the Global Tempo.
Curve (Only in Surround)
Sets the curve of the LFO. Choose between: Square, Sine, or
Triangle.
The most commonly used curve in Panning is Sine.
Pulsewidth* (Only in Surround Panner)
Controls the division of the Left and Right part of the current
waveform, i.e. if Pulsewidth is set to 75%, Left channel will
be on for 75% of the time. (See Pulsewidth figure above).
LFO Phase (Only in Surround Panner)
An LFO phase change causes a small delay in one of the
waveform starting points. This means that Left and Right
outputs start the current waveform at two different points.
69
THE BLOCKS
Example: If LFO phase is set 180º, the Left and Right will be
exactly opposite.
90 phase
change
EQ
Number of blocks: 1
Processing power: 19-22% per block
The EQ block contains two different sub-algorithms: Fixed
five band parametric EQ and modulatable four band
parametric EQ. Both of these EQs are true stereo.
LFO PHASE
Pan Center
Using this parameter, you can move the center of the Panner.
NOTE: Large increments of the Pan Center, in combination
with a broad Depth, will cause the Panner to pan beyond a
normal stereo image.
Width (Only in Surround Panner)
Controls the Width of the Panner. When Width is set to more
than 100%, the Panner will pan beyond a normal stereo
image. Check it out.
Mix*
Mix between direct sound and effect.
In Level*
Controls the input level of the block.
Out Level*
Controls the output level of the block.
Fixed parametric
The parametric EQ contains two shelving filters (#1 and #5)
and three bell filters (#2, #3, #4).
A low shelving filter is a filter that works from a certain
target frequency on down, meaning everything below the
target frequency will be adjusted. A high shelving filter is
equal to low shelving but now all the frequencies above the
target are adjusted.
A bell filter is a filter that works around a target. This means
that a certain number of the adjacent frequencies are
adjusted. The affected number of adjacent frequencies is
adjusted by the BW (bandwidth) parameter. The parameters
available in the Modifier Matrix are marked with an
asterisk*.
Stereo Enhancer
The Stereo Enhance sub-algorithm is very simple. It is
widening the stereo image by adding small amounts of delay.
The parameters available in the Modifier Matrix are marked
with an asterisk*.
STEREO ENHANCE
Mix*
Mixes between direct sound and effect.
In Level*
Controls the input level of the block.
Out Level*
Controls the output level of the block.
70
PARAMETRIC EQ
Freq 1-5
Use the freq parameter to set the target frequency of the
current band.
Slope/BW (bandwidth) 1-5
Use the Slope parameter to adjust the steepness of
the shelving filter. Bandwidth adjusts how broad the bell
filters are.
Gain 1-5
Use the gain to boost or cut the target frequency. All filters
can boost or cut +/-12dB.
Mix*
Mix between direct sound and effect.
THE BLOCKS
In Level*
Controls the input level of the block.
Out Level*
Controls the output level of the block.
Mod. Parametric
The Modulatable EQ
The parameters available in the Modifier Matrix are marked
with an asterisk*.
MODULATABLE EQ
Freq 1-4*
Use the freq parameter to set the target frequency of the
current band.
BW (bandwidth) 1-4*
Bandwidth adjusts how broad the bell filters are.
Gain 1-4*
Use the gain to boost or cut the target frequency. All filters
can boost or cut +/-12dB.
Mix*
Mix between direct sound and effect.
In Level*
Controls the input level of the block.
Out Level*
Controls the output level of the block.
71
APPENDIX The Reset Page
The Reset page
Enter User Data page
Store and load your setup to
or from card
Reset system parameters
Clear all user Presets
Test Programs
The User data page
Type your name here
and your phone number
How to enter the Reset page
Hold down the Overall Bypass key during power-up.
Move the cursor using the Parameter wheel and press
Enter twice to select and confirm the RESET type you
desire.
Set User Info
This function makes it possible to store your name and phone
number into the FireworX. Press Enter to access the User data
menu. Use the Value wheel and the Parameter wheel to write
your name and phone number into the FireworX. Press Enter to
accept. Your name and phone number will be displayed during
power-up.
Save setup to Card
Insert a pc-card into the card slot and press Enter twice to
confirm that you want to save the setup of the FireworX. All
72
system parameters are saved meaning all parameter settings of
Utility, I/O Setup (except analog in/out levels), Tempo, Alpha
Mod.
Load setup from card
Insert the pc-card containing your FireworX setup. Press Enter
twice to confirm that you want to load this setup.
All system parameters will be reset according to the saved setup,
meaning all parameter settings of Utility, I/O Setup (except
analog in/out levels), Tempo, Alpha Mod.
Reset System Setup
This will reset all system parameters back to the factory default.
This reset will NOT delete the User Presets of the FireworX.
Clear all Presets
This will delete all User Presets.
WARNING: This action will destroy ALL existing User Presets in
the FireworX.
APPENDIX Self Test
PRESS THE BYPASS KEY, WHILE POWERING UP, TO
ACCESS THE RESET MENU AND SELECT »RUN TEST
PROGRAM«
Turn the Value Wheel to scroll through Self tests
Key test
Select Key test by pressing Enter.
The keys must be pressed in the order they are requested by the
FireworX to pass the test.
Press Exit to leave Key test.
In/Out knobs test
Select In/Out knobs test by pressing Enter.
Turn the In/Out knobs to 30 and back to 0 to pass test.
Press Exit to leave In/Out test.
Parameter + Value + Alpha Mod. Wheel test
Select test by pressing Enter.
Turn the Parameter wheel, Value wheel and the Alpha Mod. to 30
and back to 0 to pass test.
Press Exit to leave Adjust Wheel test.
LED test
Select LEDs test by pressing Enter.
Turn Adjust Wheel to test the LEDs. The test is “ok” when
“None” LEDs is lit.
Press Exit to leave LED test.
Display test
Select Display test by pressing Enter.
Press Enter to check that all pixels are lit. Press any key to leave
the pixel test.
Press Exit to leave Display test.
Analog I/O test
Select Analog I/O test by pressing Enter.
Connect an Analog Output to the Analog Input, which has to be
tested and press Enter.
PPM must show -12dB to pass test.
Press Exit to leave Analog I/O test.
Digital I/O test
Select Digital I/O test by pressing Enter.
Connect AES/EBU output to AES/EBU input.
Connect S/PDIF output to S/PDIF input.
Connect ADAT output to ADAT input.
PPM must show 0dB to pass test.
Press Exit to leave Digital I/O test.
Midi I/O test
Select MIDI I/O test by pressing Enter.
Connect MIDI Out to MIDI In.
Prg. change 1-128 is sent out on MIDI Thru. Connect this socket
to a MIDI compatible device and confirm the Prg. changes.
Press Exit to leave MIDI I/O test.
Pedal socket test
Select Pedal test by pressing Enter.
Connect a momentary pedal to the Pedal socket.
When pressing the Pedal, the Result should be “OK”.
When released, the Result should be “Not OK”.
Press Exit to leave Pedal test.
NOTE: Result of test must be “OK” if no jack is inserted.
PCMCIA test
Select PCMCIA test by pressing Enter.
Insert PCMCIA card.
NOTE: All Data on PCMCIA card will be destroyed.
Press Enter to test.
Result reads:
Low battery - Time to change battery in your PCMCIA card.
“Not OK” - Try the test using another PCMCIA card.
Press Exit to leave PCMCIA test.
Battery test
Select Battery test by pressing Enter.
Confirm that Result is OK.
Press Exit to leave Battery test.
System test
Select System test by pressing Enter.
Confirm that Result is OK.
Result reads:
Eeprom Not OK - The unit will most likely work OK, the
message is for service matters only.
DSP Not OK - Contact your local dealer.
Ex. RAM bad - The memory fails, Contact your local dealer.
Press Exit to leave System test.
Power Off - On to start standard software.
Built in test v.3.04
73
APPENDIX Troubleshooting
You press Power switch, but there is no reaction.
- The power switch on the rear panel is switched off.
You cannot turn the power off.
- Press and hold the Power switch for 3 seconds, then release to power off
No sound through the FireworX.
- You are using Analog input, but the input selector in I/O Setup, Audio menu is set to AES/EBU, S/PDIF or ADAT or Insert is different
from “None”
The sound is phasing with your direct signal.
- You are running the FireworX in a parallel setup, but the Mix function in I/O Setup, Signal menu is set to “Wet”.
- The Insert loop is causing phase cancellation (See Insert loop for further explanation).
Right input meter is not showing any signal.
- You selected “L” in the source parameter in I/O Setup, signal page.
Effects only in the Left Output
- You are only using Left input, but the Input selector in I/O Setup is set to Stereo.
Your Expression pedal does not work properly
- Be sure the FireworX is set to the correct pedal type and the pedal is calibrated correctly in the Utility menu.
74
APPENDIX MIDI Implementation Chart
EFFECTS PROCESSOR FireworX - January, 1998 Version 1.0
Function
Basic Channel
Mode
Default
Changed
Default
Messages
Altered
Note Number
Velocity
After Touch
True Voice
Note ON
Note OFF
Key’s
Ch’s
Pitch Bend
Control Change
Prog Change
True#
System Exclusive
Common
System real time
Aux Messages
:Song Pos
:Song Sel
:Tune
:Clock
:Commands
:Local ON/OFF
:All Notes OFF
:Active Sense
:Reset
Transmitted
1(-16)
1-16
Recognized
1(-16)
1-16
X
X
X
X
X
X
X
O
O
0-119
1-127
1-127
O
O
X
O
O
0-119
O
0-127
O Bulkdump
X
X
X
X
X
X
X
X
X
O
0-127
O Bulkdump
X
X
X
O
X
(X)
O
X
O
Remarks
Notes
O:YES
X:NO
75
APPENDIX Technical Specifications
Analog Inputs
Connectors:
Impedance:
Max. Input Level:
Min. Input Level (for 0 dBFS):
Sensitivity:
A to D Conversion:
A to D Delay:
Dynamic Range:
THD:
Frequency Response:
Crosstalk:
XLR balanced (pin 2 hot)
20 kohm
+22 dBu (balanced)
-10 dBu
@ 12 dB headroom: -22 dBu to +10 dBu
24 bit (1 bit, 128 times oversampling)
0.8 ms @ 48 kHz
>103 dB (unweighted), >106 dB (A)
-95 dB (0,0018 %) @ 1kHz, -6 dBFS (FS @ +16 dBu)
10 Hz to 20 kHz: +0/-0.2 dB
<-80 dB, 10 Hz to 20 kHz, typical -100 dB @ 1 kHz
Analog Outputs
Connectors:
Impedance:
Max. Output Level:
Full Scale Output Range:
D to A Conversion:
D to A Delay:
Dynamic Range:
THD:
Frequency Response:
Crosstalk:
XLR balanced (pin 2 hot)
100 ohm (active transformer)
+22 dBu (balanced)
-10 dBu to +22 dBu
24 bit (1 bit, 128 times oversampling)x
0.57 ms @ 48 kHz
>100 dB (unweighted), >104 dB(A)
-86 dB (0.005%) @ 1 kHz, -6 dBFS (FS @ +16 dBu)
10 Hz to 20 kHz: +0/-0.5 dB
<-60 dB, 10 Hz to 20 kHz, typical -90 dB @ 1 kHz
Digital Inputs and Outputs
Connectors:
Formats:
Output Dither:
Word Clock Input:
Sample Rates:
Processing Delay:
Frequency Response DIO:
EMC
Complies with:
Safety
Certified to:
Environment
Operating Temperature:
Storage Temperature:
Humidity:
PCMCIA Interface
Connector:
Standards:
Card Format:
Control Interface
MIDI:
GPI, Pedal, Fader:
General
Finish:
LCD:
Dimensions:
Weight:
Mains Voltage:
Power Consumption:
Backup Battery Life:
Warranty Parts and labor:
76
XLR (AES/EBU), RCA Phono (SPDIF), Optical (Toslink, ADAT),
AES/EBU (24 bit),SPDIF (24 bit), EIAJ CP-340, IEC 958, EIAJ Optical (Toslink),
ADAT Light pipe
HPF TPDF dither 8-24 bit
RCA Phono, 75 ohm, 0.6 to 10 Vpp
44.1 kHz, 48 kHz
0.2 ms @ 48 kHz
20 Hz to 23,9 kHz +0,01/-0,1 dB @ 48 kHz
EN 55103-1, EN 55103-2 and Class B limits of FCC rules, part 15
EN 60065, UL 1419
32° F to 122° F (0° C to 50° C)
-22° F to 167° F (-30° C to 70° C)
Max. 90 % non-condensing
PC Card, 68 pin type 1 cards
PCMCIA 2.0, JEIDA 4.0
Supports up to 2 MB SRAM
In/Out/Thru : 5 Pin DIN
1/4" phone jack
Anodized aluminum front, Plated and painted steel chassis
56 x 128 dot graphic LCD-display
19" x 1.75" x 8.2" (483 x 44 x 208 mm)
5.2 lb. (2.35 kg)
100 to 240 VAC, 50 to 60 Hz (auto-select)
<20 W
>10 years
1 year (3 years with returned warranty card)
Technical Specifications are subject
to change without notice !
PRESETS
Factory Presets:
Nr.
Name
Description
Nr.
Name
Description
1
2
3
4
5
6
7
8
9
10
11
12
13
14
15
16
17
18
19
20
21
22
23
24
25
26
27
28
29
30
31
32
33
34
35
36
37
38
39
40
41
42
43
44
45
46
47
48
49
50
Ultimator
Vocode Tracker
Paranoia
Angry Moog
Walkietalkie
Arctic Strings
Dub The Universe
The Whisperer
Envelope Filter
Little Speaker
Warm Phaser
Phaser From Hell
Phlanges 'N' Faces
Classic Sweeper
Distorted Phaser
Distorted Chorus
Flange
WOW
Autowah (Tempo ctrl)
Autowah
FormantWah+Delay
Envelope Filter 2
Whopper
Synth-Filter
Old Synth-Filter
Techno-Filter
5th. AutoPhilter
Filter Dance
Low-Fi
Through 1 Foot Tube
King Of Transformer
Subtle Distort
Angry Effect
Angry Whammy 2up
Distorter
Uncertain Mutant
LFO VCF
Solinafier
Speakin' Struction
Heroin
Fattener
Sweep Clipper
Devils Voice
Basiac Intruder
Angry Robot
Dark Obsession
Vocoder
Grut Gut
Ring Modulator
Ring Mod R2D2
Gives your songs or single tracks a hole new feeling
Generates a robot from your vocal tracks
Be aware someones after you !!!!
Converts anything into an angry sequenzer sound
Talk through this and sound like a bad walkietalkie
Great wind sounds
Takes your songs to another universe
Makes any voice to a whisper (also try with a drum beat)
Adds on some wah effect on percussive material
Makes anything sound like your first transistor radio
Advanced phaser with chorus and delay
Modified Bandpass filter made to a phaser
Flanger and Phaser at the same time
Phaser with modified Depth
Heavy distorted Phaser with modified speed
Chorus and distorted phaser
Two flangers + more making really fat flanger
Pitch with Formant and Phaser on the Modifier Wheel
Tap the Tempo and get an autowah
Turn the modifier wheel and get another type of Autowah
Wah effect made with the Formant filter
Adds on some wah effect on percussive material
Formant filter with modified resonance
Simulation of old synthesizer sound
Simulation of old synthesizer sound
Simulation of old synthesizer sound
Simulation of old synthesizer sound
Modified Delays
Use the modifier wheel to make it sound noisy
Talk through a long tube and hear how it sounds at the end
Nasty solo guitar - use the modifier wheel to get more
Straight distortion
Resonance Filter and Pitch
Distortion, Reverb and Pitch modifiable 2 octaves up
Aggressive distortion e.g. for bass
Phaser, Formant and a Panner creates something special
Specially modified bandpass filter
Simulation of old synthesizer sound
Special autowah thing
Formant modified into a phaser look-alike (use Mod. Wheel)
Lifts your soloinstrument out in the space
Cuts your material in to a vibrato like sound
Use the modifier wheel to get the devil to sing with you
Ugly distortion for your bass
Use the modifier wheel to transform a voice into an angry robot
A dark sound made from Formant and Resonance filters
Straight Vocoder: Vox on L input, Carrier on R input
Ring modulator and chorus, good guitar sound
Heavy distorted Ring modulator
Use the modifier wheel to get R2D2 to speak with you
51
52
53
54
55
56
57
58
59
60
61
62
63
64
65
66
67
68
69
70
71
72
73
74
75
76
77
78
79
80
81
82
83
84
85
86
87
88
89
90
91
92
93
94
95
96
97
98
99
100
Ring Mod 2 Pedal
Ring Mod Delay
Dry Takeaway
Bellysizer
The Talking Machine
Plastic Oh No
Turbo Delay
Darth Vader
Creepy Vocals
Vocal FireworX
Vox Comp/Pitch/Delay
Vox Reverb/Chorus
Vox Reverb/Delay/Cho
Vox Reverb 1
Esser Reverb
Heavens Vox
Vocal Spread
Voice Doubler
Voice Doubler 2
Voice Doubler 3
Double Up
Moving Doubler
Stereo Chord/Contour
Space Tremolo
Slow Tremolo
Cabinet Tremolo
Drug Tremolo
Vibrato
Guitaratiug
Alomar Chunk Guitar
Metal Tweezer
Mutroid Guitar Pickr
Old Tubecombo
My Bass Is On Fire
Chorused Lightspring
Flange/Hall/Gate
Ultra Chorus
Lush Phase
A Kind Of Roraty
Flange Spacedelay
Dynaflange Reversals
Ping Pong Delay
Talking Delay
L:Reverb R:Wobbelay
The Great Outdoors
TC Walrus 2290
Big Pad Enlarger
Master Of Rings/+Dly
Reverse+Ring+Dly
Prime Time Delay
Very ugly guitar sound
Ring modulator combined with a slap back delay
Ring modulator combined with a Resonance filter
Ring modulator and delay, Mod Wheel creates endless feedback
Vocoder and Synth convertes anything into percussive sounds
Delay, Reverb and Flanger turned into a melodic effect
Compressor and delay
From Darth Vader to Mickey Mouse via the Modifier Wheel
Short and fast delay after each other
Mickey Mouse choir, Mod Wheel takes you to the bathroom
Delayed vocal effect
Nice vocal effect
Delayed vocal effect, plus reverb on the Mod Wheel
Straight reverb plus delay on the Mod Wheel
Reverb and Resonance filter
Special vocal effect. Use Mod Wheel to hear heaven
Spreads out your vocal or any other material
Pitcher and Formant filter
Pitcher and Reverb
Pitcher and Stereo Enhancer
Use the global Tempo to set the speed of the Flanger
Flanger and Surround Panner. Mod Wheel changes surround speed
Resochord spreads out the sound
Reverb and Tremolo creates a modulated sound
Straight Tremolo effect
Tremolo effect and Reverb on the Mod Wheel
Extreme Tremolo with delay and Formant filtering
Phaser used as vibrato z
Far out guitar effect with Reverse Delay, Formant and Distortion
Fat guitar effect
Extreme guitar sound
Solo Guitar
Guitar effect
Use the Mod Wheel to set your bass on Fire
Lifts up any instrument in the air
Compressor and Phaser plus Reverb on the Mod Wheel
Great Chorus with Pitch and Delay
Phaser, Chorus and Delay
Modified Pitch and Panner
Pitch, Flanger and Delay
Flanger and Reverb with Reverse delay on the Mod Wheel
Dual delay with Feedback on the Mod Wheel
The Formant filter "talks" in the Delayed signal
A very special construction of Reverb and Delay
Special Delay preset
Simulation of TC's famous 2290 delay
Delay and chorus with Reverb on the Mod Wheel
For dirty guitar, with Ring Modulator on the Mod Wheel
For guitar, with Reverse delay on the Mod Wheel
Straight stereo Delay, tap the speed on the Global Tempo
77
PRESETS
Factory Presets:
Nr.
Name
Description
Nr.
Name
Description
101
102
103
104
105
106
107
108
109
110
111
112
113
114
115
116
117
118
119
120
121
122
123
124
125
126
127
128
129
130
131
132
133
134
135
136
137
138
139
140
141
142
143
144
145
146
147
148
149
150
Ambience Comes Back
Smart Face
Under Water
Gated Verb LRG
Distorted Room
Short+Dark REV
Dimension Deep
Hangover
JustTrails
Octaves
Use Dis 4 Your 303
Dynamic Alienizer
Hip-Hop-Ifyed
Fireworlds
Drums/Meets Chords
Drums/Scratch It
Drums/Cartoons
Drums/Bigdip
Drums/Deephuge
Drums/TrulyUgly
Drums/Excessive
Drum Comp
Drum Room
Robot Drums
Drums/Princey
Break Killer
Intended for 909
Hardcore 909BD
Beat Crasher
German PadClipper
Trip Hop Loop
Crunchy Frog Perc
Tribe
Sick Kitchen Sink
Envelope FilteReverb
Super Skysaw
Old Cassettedeck
Bad Record
Vinyl Noize
Telephone
D-Day
Japanese Toys
Party Nextdoor
Hockey Hall
Wind Machine
Broadcasting Sick
Mastering
Pad Tremolo
Distant Pulser
LFOver The Rainbow
A great preset for your final mix
When you want something special on your tracks
Stick your head in the water
Short reverb with bandpass filter and optional gate
Heavily distorted Reverb
Short dark Reverb
Use this on your acoustic guitar
Chorus
Dark sounding Formant and Delay with Chorus on the Mod Wheel
Modified Pitch
Special effect for your snare drum
Funny effect, especially on percusive material
Try this out on your drum beats
Over much on anything
Gives percusive material a little lift
Scratch your drums on the Mod Wheel
Turns your drums into plastic
Fattens up your drum beats
Another effect for drums
If your drums sounds to good
Dirty Drum effect, add on Distortion with the Mod Wheel
Compressor for Drums
Special reverb for drums
Turns your drums into robot sound
Heavily compressed, pitched and distorted drum effect
Kills any break beat
Use this for your bass drum
Extreme bass drum effect
Bandpass and Distortion on your beats
Cuts your percusive material in pieces
Make a hype drum beat
A complete change of your percusive material
Lifts your material up
Another sick preset for special effects
Great reverb with Resonance filter on the Mod Wheel
Extremely modified Resonator and Pitch
Make it sound like an old cassettedeck with the Mod Wheel
Like an old bad recorded record
Pick-up noise
Call a friend
WW II broadcasting sound, try dial the Mod Wheel
Cheap plastic sound
When you want to sleep and there's a party going on nextdoor
Reverb and delay turned into a big hockey hall sound
….is blowing in the wind
Add a friend and distortion to your vocal
Compressor, Stereo Enhancer and EQ prepared for mastering
Chorus, Reverb, Delay and Tremolo
Creates pulsing sound out of an input
A very special preset for almost anything
151
152
153
154
155
156
157
158
159
160
161
162
163
164
165
166
167
168
169
170
171
172
173
174
175
176
177
178
179
180
181
182
183
184
185
186
187
188
189
190
191
192
193
194
195
196
197
198
199
200
Multivibrator
Autopanner
5th Spins Around Me
James Bondage
Freeform Trance
River's Edges
Funky Inquisition
The Driveby
Mars Invaders
Aliens In My Brain
Play-a-tune
Bubbles
Skitzo-Phrenia
Havok's Bad Dream
Synth Cracker
Simmons
Ambient And Bubbles
Resochord
Resochord 2
CloseAnd Farfazeverb
Sequencer
Chorus Room
Deep Space
Lost In Space
Dark Scary Place
Another Planet
Wide Open
Falling Downstairs
Where Will This End
Ping-Pong
Could Be Downstairs
Trance Gate
Moss Garden
Dual Effects
L:Phaze R.Ring Mod
Distorto Ghost
Syndique Distortion
Triple Squeeze Fuzzz
Voice Tracker 1
Voice Tracker 2
Sus4 Phasejumpers
Audio Softener
Echos Of Echos
Reverse Or Insane!!
Whammy 1up1down
Center Remover
1 kHz Testtone
Masian Synth
Garage Bass Synth
Empty Routing
Phaser, Ring Modulator and Pitcher
Turn up the Panner speed with the Mod Wheel
Advanced panner thing with Pitch, Phaser, Chorus and Delay
Bubble sounding preset
Freeform modifier controlling the Delay plus more
Hear the frogs
Funny preset with Distortion on the Mod Wheel
Hear the sound drive by
Mars mens invades your material
Don't use this with hangovers
Randomly gives you a new tune
Pitch, Reverb and EQ
Resonance filter, Flanger and Reverse delay
What a night
Resonance, Synth and Pitch modified in a funny way
Run your snare drum through this
Out in the great wide open, plus bubbles with the Mod Wheel
Another funny effect sound
Another funny effect sound
Chorus, Phaser and Reverb in a creative way
Plays a short piece for you without any input
Chorus and reverb
Extreme effect with Chorus, Delay and Reverb
Pitch, Delay and Tremolo
Dark Reverb with Pitch and compressor
Maybe another kind of Mars mens
Pitch, Flanger, Delay and Surround panner
Use the Mod Wheel to take the big step down
Pitch and Surround panner in an endless sound
Delay and Surround panner
Special preset that cuts your sound in pieces
Use this on percusive material
Flanger, Delay and Reverb
Take the Delay and Reverb off with the Mod Wheel
Gate, Phaser, Drive, Ring Modulator and Panner
A groovy mix of Phaser, Reverb, Distortion and Chorus
Funny little sound
Extreme compression
Modified Resonance filter
Modified Resonance filter
Space sound
Vocoder and Pitch adds on a friend
Endless Ping Pong delay and panning
Extreme guitar effect
Pitch one octave up and one down with the Mod Wheel
Check out the stereo information in your material
Generated with the Synth
Connect a standard MIDI keyboard and get a monophonic synth
Connect a standard MIDI keyboard and get a monophonic synth
Start to construct your own presets here
78
PRESETS
Factory Presets:
Nr.
Name
Description
Nr.
201
202
203
204
205
206
207
208
209
210
211
212
213
214
215
216
217
218
219
220
221
222
223
224
225
226
227
228
229
230
231
232
233
234
235
236
237
238
239
240
241
242
243
244
245
246
247
248
249
250
---=<DARKSIDE>=--B Minor Fugue
Bad Daze In G
Aggressive>>Impulse<<
Cousin it’
D-Whopper
Rippin Pattern
Bounching Raga
ModModModulation
HarleyWorx
.-=*AIR Raid*=-.
BeachWorx
Acid Wash
Toxin
Mutator
Big Fat Ass
Illbient
Sterioizer
Just Big Beats
Bass Balls
Bubbly Basslines
Space Echo
Ruff Seas
Space Cream
Env Cho Delay
Basic Bigness
Bigger Place
Filter Time Delay
GtrWah
Repetition Pan
Crazy Baby
Purty Tweeky 5s(git)
Nice w/sum 5’s
Natty Gitleap
Tight Drum
Indirky Q
Hawaii 5'0
Tiny AM Radio
Ship To Shore Radio
Police Radio
Bad Reception
Bad Phone Line
Phone Speak
Hall Intercom
Stadium Announce
Chruncher
Mod>Nofi Then Pb>Flt
Surround>Dist
Mom Filter
Filter + Distortion
Sweep Filters
Pins Notes
LFO Crunch Depth
Pulse Width
Spin To Talk
Pitch
Aliasing’ Pattern
Intensifies Rate
Carrier Freq
Step On It!!!
Reduce Siren
Brightens Waves
Mr. Clean
Cant Breath
Transformation
251
252
253
254
255
256
257
258
259
260
261
262
263
264
265
266
267
268
269
270
271
272
273
274
275
276
277
278
279
280
281
282
283
284
285
286
287
288
289
290
291
292
293
294
295
296
297
298
299
300
Density
Grace Note Remover
Plywood Box Rattle
Stomp The Silver Box
Tape Loop Insanity
Rock The Boat
Bounce back
Repeats
Flange/Delay
Distance
Less Is More
Speed/Feedback
Resolution
Oddness
The Fives - DT
Rez - DT
+Octave
Reverb
-DT
Lo-FI/Hi-Fi
Crud
Harshness
Worse Reception
Nastiness
Quality
Delay Amount
More
Nofi Amount
-Surround +Dist
+Fltr/Formant
Filter Sweep
Name
Description
Old School Vox
Little Dist!
Lift And Separate
Reverse Osmosis
Gargle
Natty Gitleap
Thin Flang>Fat Crunch
Flaming Dr Pepper
MbiThang
Robo Voice
Robo-Tracker
LocustStorm
Scary Six-Tap
Chaotic Vocal Smash
X-Wing Pilot
Carbonite Freezing
Synthsparks Melody
Grunt
Transposer
Nuclear Sub Bass
Cracked Muezzin
Lightsabre
Long Mono Tape Echo
Tape Compression
Pan By Volume
Pan By Pitch
Pull The Plug!
Phaser/Chorus/Echo
Microphone Bump
Formant Verb
Firing Jetfighter
Technoswept Fuzzed
Fazey Fuzzy
Funky Touch Wah
Formant Auto Wah Pan
Formant Dance
Phaser Dance
Autopan Resowah
PhaseBotz
Ampenstein's Monster
Rumple Room Tone
Digisub Stereo
Digisub Stereo2
Digisub Spread
Soundsmasher
Soundsmasher 2
Windy Atmosphere
Approaching Tornado
Thunderbolt SkyVerb
Left Shot Right Verb
EQ
More
Electrosqueeze
Diffusion Grating
Feedback
+Octave
Get Mean
151 Rum
Dullais-Dt
Modsquad
Animation
Tuning
Filtered Source
Pitch
Freeze Frequency
Reduce Delays
Pitch
Tune Me Now
Depth Charge
Add Him-Dt
Sun Through Clouds
Adds Tremolo
Brightnessness
Soft On Left Or Right
Low On Left Or Right
Trigger
Echo Lvl +Image
Stereo2mono/Resonance
Closer To You
Sweep Speed
Resonance
Intensity
Brightness
Brightness
Tonality
Resonance
Feedback
Brightness
Locut
Pitch
Pitch
Pitch
Distortion
Distortion
More Wind
Stronger Wind
Surround Position
Approaching
79
PRESETS
Factory Presets:
Nr.
Name
301
302
303
304
305
306
307
308
309
310
311
312
313
314
315
316
317
318
319
320
321
322
323
324
325
326
327
328
329
330
331
332
333
334
335
336
337
338
339
340
341
342
343
344
345
346
347
348
349
350
Spining Around
Spining Voices
Walk Around.........
Dream Space
Bandtune Verbdelay
Vocal Thickener
KrunchyKaos
DancinFilter
Volume To Pitch (+)
Volume To Pitch (-)
DistoPitch Amplipan
Alienizer Knobulizer
HipHop Addnotes
Cartoony Chorus
Pitch'd Fdbk In Time
Who's Your Mama
Gurgle Delay
Circles
Fltr'd Dr Loop
8'th Delay W/Stuff
Alien Entertainment
Backwards Chaos
Space Time
Ghrost
AttackFromBothSides
Underwater By
Wip Wap Verb
Big Echo Voice
Prices Falling
Comp/EQ/Flange/Echo
Comp/EQ/Phaser/Echo
Drive By Bass
Reversed Chorus Room
Chorus Wash
Housing Estate Ambi
Organic Echos
Multiplexed Room
Ensemble
Uber-Verb+Delay
Swing Delay
Forest Delay 1
Forest Delay 2
Forest Delay 3
Forest Delay 4
Contoured Echo
Echo Hall
Vocal Delay>Reverb
Elvis Room
Rhytmic Circles
Tube Rico
80
Description
Open The Door
Make It Slimer
Walking Position
Character
Band Tuner
Detune
Tweaky
Wackiness
Tuning
Tuning
Overdrive
Alienized
Lowers Reverb
Sweep Speed
Get Pitch>Hold
Parental Controller
Feedback
Speed/Space
Add 2 Da Ptn
Turn Me
Wobbles
Backward Levels
Takeoff
Yipes-DT
Overdrive
Doppler
Reduce Reverb
Effect Increase
Effect Increase
Boom
Speed And Mix
Delay/Verb Balance
Surround Position
Morph Flang To Chors
Delay Spacing
Add Echo
Wicked Feedback
Feedback
Echo Contour
Balance/EQ
Delay Amount
Bring To Center
Effect Mix%
Nr.
351
352
353
354
355
356
357
358
359
360
361
362
363
364
365
366
367
368
369
370
371
372
373
374
375
376
377
378
379
380
381
382
383
384
385
386
387
388
389
390
391
392
393
394
395
396
397
398
399
400
Name
Description
Fall Away
Simple Reverse
Kiss My Brass
Airstream
Room
Compressed Box
LA Detune+Room
Small Detune Room
Punch
ADR Helper
Chamber Under Ground
Ambulence Rooms
Recording Booth
Wood Room Sound
Bathroom Ting
Carpet Room
Inside >>>> Outside
Roomverb + Phase
Warm Nightclub
Underground Garage
The Classroom
The Jazz Club
Furnished Bedroom
Kitchen Verb
Club 1
Smallish Hall
Regular Hall
Front To Rear Hall
Parking Garage
Concrete Stairwell
Street Ambience
BetweenDistantBlocks
Alley Ambience
Street Echo
Street Party
St Marco Square
Hide Park
Behind Outdoor Stage
Sounds From The Hill
Distant Battlefield
Outdoor Spacelayers
Riverside Ambience
Lagoon Athmosphere
Skyverb For Airplane
Big Cave
Cave-Verb
Cannonshot In Desert
SkyVerb For Explosion
SurroundOpenAirAmbi
Surround Bigverb
Less
Cheese In A Can
Oxygen Content
Bright>Dark
Centers Signal
Bring It Close
Adds Detune
Width
Surround Position
Alters Mix/Image
Contour Adjust
Positioning
Ambience
Open The Door And Go
Adds Phaser
Adds Presence
Room Position
Change Position
Change Position
Hi + Lo Cut
EQ Adjust
To The Back
Verb
Metalness
Surround Position
Surround/Distance
Verb
Verb
Wall Slap
Listening Position
Surround Position
Walking Around Stage
More Hills
Surround Position
Closer To You
Reverb
Closer To The Sea
Approaching
Stereo To Mono
Dry It Up
Approaching
Surround Position
Surround Position
Add Ghost Echos