1
4-3
acoustic test of the system by running through the command set for the PORT-LF SD (See
section 3.3).
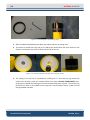
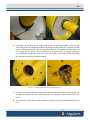
6. Replace the purge port plug and the anti-rotation block using the two nylon screws.
7. Purge the instrument as per the following section.
4.1.4 Leak Detection and Condensation Prevention
EdgeTech’s releases are provided with a 3/8-inch diameter purging port on the bottom (release end)
end cap. The recommended procedure for preparation of the instruments atmosphere is as follows. The
procedure assumes that the user has a vacuum pump, dry nitrogen gas cylinder and compound
pressure/vacuum gauge all arranged on a manifold setup.
1. Verifying that all other (other than the purge port) o-ring seals have been cleaned, lubricated
and assembled.
2. Prepare the purge port plug for installation by cleaning and greasing it, the plug must be ready
for immediate insertion.
3. Insert a purge port adaptor and draw a -3 PSIG vacuum, do not exceed -3 PSI.
4. Close the manifold valve to the instrument and allow the instrument to sit of for 15 minutes.
Check the gauge afterwards and verify that the vacuum did not change. This step is done to
detect gross o-ring problems (cut or missing).
5. Open the valve to the instruments purge port and:
a. Backfill the housing with dry nitrogen gas, do not exceed +5 PSIG.
b. Draw a -3 PSIG vacuum on the instrument, do not exceed -5PSIG.
c. In humid environments you should repeat this process up to four times.
d. After drawing the final vacuum in this process, quickly insert the purging plug before the
-3 PSIG vacuum is lost.
6. Secure the purge plug with the anti-rotation block and nylon screws.
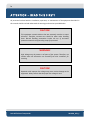
CAUTION!
When purging the instrument, be careful not to draw more than -5 PSIG
vacuum. Exceeding this figure can damage the batteries which in turn
can result in instrument failure. If a purging set up is not available, then
place a desiccant pack inside the housing to help reduce moisture.