1
Model 6010
GAUSS / TESLA METER
Instruction Manual
Manual UN-01-247
Item 359933
July, 1999
Rev. C
© Bell Technologies Inc.
All rights reserved.
This symbol appears on the instrument and probe. It
refers the operator to additional information
contained in this instruction manual, also identified
by the same symbol.
NOTICE:
See Pages 3-1 and 3-2
for SAFETY
instructions prior to first use !
Table of Contents
SECTION-1 INTRODUCTION
Understanding Flux Density..............................................
Measurement of Flux Density............................................
Product Description...........................................................
Applications.......................................................................
1-1
1-2
1-5
1-7
SECTION-2 SPECIFICATIONS
Instrument.........................................................................
Zero Flux Chamber............................................................
2-1
2-5
SECTION-3 OPERATING INSTRUCTIONS
Safety Instructions.............................................................
General Description...........................................................
Instrument Preparation......................................................
Power-Up..........................................................................
Power-Up Settings............................................................
Low Battery Condition.......................................................
Overrange Condition.........................................................
AC or DC Measurement Selection.....................................
UNITS of Measurement Selection.....................................
RANGE Selection..............................................................
HOLD Mode Selection.......................................................
MIN, MAX, PEAK HOLD Usage.........................................
FAST PEAK HOLD Usage................................................
ZERO Function..................................................................
Automatic ZERO Function.................................................
Manual ZERO Function.....................................................
RELATIVE Mode...............................................................
Automatic RELATIVE Mode..............................................
Manual RELATIVE Mode...................................................
ANALOG OUTPUT… … … … ..............................................
Analog Output Usage........................................................
i
3-1
3-3
3-5
3-5
3-7
3-7
3-8
3-9
3-10
3-12
3-13
3-15
3-16
3-17
3-19
3-21
3-21
3-23
3-24
3-24
3-25
Sources of Measurement Errors........................................
More details on AC Mode Operation.................................
More details on DC Mode Operation.................................
Temperature effects … … … … … … ...… … … … … … … … … .
3-26
3-29
3-31
3-31
SECTION-4 REMOTE OPERATION
RS-232 Interface Parameters............................................
RS-232 Interface Connection............................................
Remote Command Standards...........................................
Command Format..............................................................
Message Terminators........................................................
Error Buffer........................................................................
Status Registers................................................................
Status Byte and Request For Service (RQS)....................
Standard Event Register...................................................
Measurement Event Register............................................
Operation Event Register..................................................
Questionable Event Register.............................................
“Common”Command Syntax............................................
“Common”Commands… … … ...........................................
SCPI Command Syntax.....................................................
SCPI Commands...............................................................
Error Messages and Commands.......................................
Status Commands.............................................................
UNITS Commands............................................................
RANGE Commands..........................................................
HOLD Commands.............................................................
ZERO Command...............................................................
RELATIVE Commands......................................................
MEASUREMENT Commands............................................
DISPLAY FORMAT Commands........................................
Intermixing Common and SCPI commands.......................
Using Query Commands...................................................
Using the Operation Complete Status...............................
Example Program..............................................................
ii
4-1
4-1
4-3
4-4
4-4
4-5
4-5
4-6
4-9
4-10
4-10
4-11
4-11
4-13
4-16
4-18
4-21
4-23
4-25
4-27
4-28
4-29
4-29
4-30
4-31
4-32
4-32
4-33
4-34
WARRANTY....................................................................
5-1
List of Tables
Table 4-1
Table 4-2
Common Command Summary..................
SCPI Command Summary........................
4-13
4-18
List of Illustrations
Figure 1-1
Figure 1-2
Figure 1-3
Figure 2-1
Figure 3-1
Figure 3-2
Figure 3-3
Figure 3-4
Figure 3-5
Figure 3-6
Figure 3-7
Figure 3-8
Figure 3-9
Figure 3-10
Figure 3-11
Figure 3-12
Figure 3-13
Figure 3-14
Figure 3-15
Figure 3-16
Flux Lines of a Permanent Magnet............
Hall Generator............................................
Hall Probe Configurations..........................
Zero Flux Chamber....................................
Probe Electrical Warning...........................
Front Panel … … … .....................................
Rear Panel… … … … … … … … … … … … … ...
Power-Up Display......................................
Missing Probe Indication............................
Low Battery Indication................................
Overrange Indication ................................
The legends for UNIT Function… … … .......
HOLD Function..........................................
FAST PEAK HOLD… … … … … … … … … … .
Probe zeroing error code … … … … … … … ..
Adjusting the DC Offset of the Analog
Output........................................................
Probe Output versus Flux Angle................
Probe Output versus Distance...................
Flux Density Variations in a Magnet...........
Low AC Signal Indication...........................
iii
1-1
1-3
1-4
2-5
3-2
3-3
3-4
3-5
3-6
3-8
3-9
3-11
3-14
3-15
3-20
3-26
3-27
3-28
3-28
3-30
Figure 4-1
Figure 4-2
Figure 4-3
Figure 4-4
Figure 4-5
Figure 4-6
Figure 4-7
Figure 4-8
9-Pin Interface Connector..........................
Serial Port Connection Schemes...............
Condition, Event and Enable registers.......
Status Byte and Enable registers...............
Standard Event register.............................
Measurement Event register......................
Operation Event register............................
Questionable Event register.......................
iv
4-2
4-3
4-6
4-7
4-9
4-10
4-10
4-11
Section 1
Introduction
UNDERSTANDING FLUX DENSITY:
Magnetic fields surrounding permanent magnets or electrical
conductors can be visualized as a collection of magnetic flux
lines; lines of force existing in the material that is being subjected
to a magnetizing influence. Unlike light, which travels away from
its source indefinitely, magnetic flux lines must eventually return
to the source. Thus all magnetic sources are said to have two
poles. Flux lines are said to emanate from the “north”pole and
return to the “south”pole, as depicted in Figure 1-1.
Figure 1-1
Flux Lines of a Permanent Magnet
One line of flux in the cgs measurement system is called a
8
maxwell (Mx), but the weber (Wb), which is 10 lines, is more
commonly used.
Flux density, also called magnetic induction, is the number of flux
lines passing through a given area. It is commonly assigned the
symbol “B”in scientific documents. In the cgs system a gauss
(G) is one line of flux passing through a 1 cm2 area. The more
1-1
INTRODUCTION
commonly used term is the tesla (T), which is 10,000 lines per
cm2 . Thus
1 tesla = 10,000 gauss
1 gauss = 0.0001 tesla
Magnetic field strength is a measure of force produced by an
electric current or a permanent magnet. It is the ability to induce
a magnetic field “B”. It is commonly assigned the symbol “H”in
scientific documents. The unit of “H”in the cgs system is an
oersted (Oe), but the ampere/meter (A/m) is more commonly
used. The relationship is
1 oersted = 79.6 ampere/meter
1 ampere/meter = 0.01256 oersted
It is important to know that magnetic field strength and magnetic
flux density are not the same. The only time the two are
considered equal is in free space. Only in free space is the
following relationship true:
1 G = 1 Oe = 0.0001 T = 79.6 A/m
MEASUREMENT OF FLUX DENSITY:
A device commonly used to measure flux density is the Hall
generator. A Hall generator is a thin slice of a semiconductor
material to which four leads are attached at the midpoint of each
edge, as shown in Figure 1-2.
1-2
INTRODUCTION
Figure 1-2
Hall Generator
A constant current (Ic) is forced through the material. In a zero
magnetic field there is no voltage difference between the other
two edges. When flux lines pass through the material the path of
the current bends closer to one edge, creating a voltage
difference known as the Hall voltage (Vh). In an ideal Hall
generator there is a linear relationship between the number of
flux lines passing through the material (flux density) and the Hall
voltage.
The Hall voltage is also a function of the direction in which the
flux lines pass through the material, producing a positive voltage
in one direction and a negative voltage in the other. If the same
number of flux lines pass through the material in either direction,
the net result is zero volts. This sensitivity to flux direction makes
it possible to measure both static (dc) and alternating (ac)
magnetic fields.
The Hall voltage is also a function of the angle at which the flux
lines pass through the material. The greatest Hall voltage occurs
when the flux lines pass perpendicularly through the material.
Otherwise the output is related to the cosine of the difference
between 90° and the actual angle.
1-3
INTRODUCTION
The sensitive area of the Hall generator is generally defined as
the largest circular area within the actual slice of the material.
This active area can range in size from 0.2 mm (0.008”) to 19
mm (0.75”) in diameter. Often the Hall generator assembly is too
fragile to use by itself so it is often mounted in a protective tube
and terminated with a flexible cable and a connector. This
assembly, known as a Hall probe, is generally provided in two
configurations:
Figure 1-3
Hall Probe Configurations
In “transverse”probes the Hall generator is mounted in a thin, flat
stem whereas in “axial”probes the Hall generator is mounted in a
cylindrical stem. The axis of sensitivity is the primary difference,
as shown by “B”in Figure 1-3. Generally transverse probes are
used to make measurements between two magnetic poles such
as those in audio speakers, electric motors and imaging
machines. Axial probes are often used to measure the magnetic
field along the axis of a coil or solenoid. Either probe can be
used where there are few physical space limitations, such as in
geomagnetic or electromagnetic interference surveys.
Handle the Hall probe with care. Do not bend the stem or
apply pressure to the probe tip as damage may result.
1-4
INTRODUCTION
PRODUCT DESCRIPTION:
The MODEL 6010 GAUSS / TESLAMETER is a portable
instrument that accepts detachable Hall probes to measure
magnetic flux density in terms of gauss, tesla or ampere per
meter. The measurement range is from 0.1 µT (1 mG or 0.1 A/m)
to 29.99T (299.9 kG or 23.87 MA/m), depending upon the type of
probe that is used. The instrument is capable of measuring static
(dc) magnetic fields and alternating (ac) fields.
NOTE: Although ampere per meter is a measure of magnetic field
strength, in free space there is a direct relationship between flux
density and field strength. When using a Hall probe there will
always be an air gap between the probe and the magnetic
source. Refer to the relationship given on page 1-2
When an appropriate probe is used, the instrument can
compensate for errors due to probe temperature variations.
The instrument features a large display that is visible at
considerable distances. A dual readout allows you to measure
flux density and monitor an auxiliary function such as
temperature or the present flux density during the Peak, Max or
Min hold measurements. The meter can be operated from
standard line voltages and contains a rechargeable battery for
hours of portable operation.
Three measurement ranges can be selected or the instrument
can automatically select the best range based on the present flux
density being measured. A “zero”function allows the user to
remove undesirable readings from nearby magnetic fields
(including earth’s) or false readings caused by initial electrical
offsets in the probe and meter. Included is a “zero flux chamber”
which shields the probe from external magnetic fields during this
operation. Another feature, called “relative mode”, allows large
flux readings to be suppressed so that small variations within the
1-5
INTRODUCTION
larger field can be observed directly. Both the “zero”and
“relative”adjustments can be made manually or automatically.
Other features include four “hold”modes, allowing either the
arithmetic maximum, minimum, peak or true peak values to be
held indefinitely until reset by the user. An analog signal is
available from a standard BNC connector that is representative of
the magnetic flux density signal and is calibrated to ± 3 volts full
scale in dc mode or 3 Vrms in ac mode. This output can be
connected to a voltmeter, oscilloscope, recorder or external
analog-to-digital converter. An optional adapter allows the 6010
to accept probes designed for F. W. Bell’s model 9200
Gaussmeter.
The meter can be fully configured and flux density readings
acquired from a remote computer or PLC using the RS-232
communications port. This is a standard 9-pin “D”connector
commonly used in personal computers. The commands follow
widely accepted protocols established by the IEEE-488.2 and
SCPI-1991 standards.
The probes and accessories are protected when not in use by a
sturdy carrying case.
1-6
INTRODUCTION
APPLICATIONS:
•
•
•
•
•
•
•
•
Sorting or performing incoming inspection on permanent
magnets, particularly multi-pole magnets.
Testing audio speaker magnet assemblies, electric motor
armatures and stators, transformer lamination stacks,
cut toroidal cores, coils and solenoids.
Determining the location of stray fields around medical
diagnostic equipment.
Determining sources of electromagnetic interference.
Locating flaws in welded joints.
Inspection of ferrous materials.
3-dimensional field mapping.
Inspection of magnetic recording heads.
1-7
Section 2
Specifications
INSTRUMENT
RANGE
gauss
*
*
3G
30G
300G
3 kG
30 kG
** 300 kG
RESOLUTION
tesla
A/m
gauss
tesla
A/m
300 µT
3 mT
30mT
300 mT
3T
30 T
238.8 A/m
2.388 kA/m
23.88 kA/m
238.8 kA/m
2.388MA/m
23.88MA/m
0.001 G
0.01 G
0.1 G
1G
0.01 kG
0.1 kG
0.1 µT
0.001mT
0.01mT
0.1 mT
0.001 T
0.01 T
0.1 A/m
0.001kA/m
0.01 kA/m
0.1 kA/m
1 kA/m
0.01MA/m
* When used with high sensitivity probes
** When used with high stability probes.
ACCURACY (reading on display and from RS-232 port)
dc mode:
ac mode:
20 Hz - 1000 Hz:
1 kHz - 20kHz
ACCURACY (analog output)
± 0.25 % of reading, ± 3 counts
± 1 % of reading, ± 3 counts
± 5 % of reading, ± 3 counts
dc mode:
± 1 % of reading, ± 5 mV.
ac mode:
20 Hz - 1000 Hz:
± 2 % of reading, ± 5 mV
WARMUP TIME TO RATED
ACCURACY:
15 minutes
2-1
SPECIFICATIONS
MIN / MAX HOLD ACQUISITION TIME:
dc mode:
ac mode:
180 ms typical
300 ms typical
PEAK HOLD ACQUISITION TIME:
dc mode:
ac mode:
180 ms typical
300 ms typical
PEAK HOLD (FAST) ACQUISITION TIME:
dc mode:
ac mode:
1 ms typical
1 ms typical
ANALOG OUTPUT SCALING:
dc mode:
ac mode:
± 3 Vdc
3 Vrms
ANALOG OUTPUT NOISE:
4 mVrms typical
ANALOG OUTPUT LOAD:
10 kohm min, 100 pF max.
ACCURACY CHANGE WITH
TEMPERATURE
± 0.02 % / °C typical
ANALOG OUTPUT CONNECTOR:
BNC
TEMPERATURE MEASUREMENT
Range:
Accuracy:
-40°C to +100°C
(-40°F to +212°F)
±1°C (±1°F)
Analog Output
10 mV/°C (10mV/°F)
OPERATING TEMPERATURE:
0 to +50°C (+32 to +122°F)
STORAGE TEMPERATURE:
INPUT VOLTAGE:
-25 to +70°C (-13 to +158°F)
2-2
100 to 240 Vac, 50/60 Hz
SPECIFICATIONS
INTERNAL BATTERY :
Lead Acid
Rechargeable Sealed
BATTERY LIFE:
(Time between charges)
8 hours typical
METER DIMENSIONS:
Length:
Width:
Height:
31.75cm (12.5 in)
25.4 cm (10 in)
11.43 cm (4.5 in)
WEIGHT:
Instrument:
Shipping:
4.0 kg (8.8 lbs.)
6.2 kg (13.7 lbs)
REGULATORY INFORMATION:
Compliance was demonstrated to the following specifications as
listed in the official Journal of the European Communities:
EN 50082-1:1992
Generic Immunity
IEC 801-2:1991
Second Edition
IEC 1000-4-2:1995
Electrostatic Discharge
Immunity
ENV 50140:1993
IEC 1000-4-3:1995
Radiated Electromagnetic
Field Immunity
EN 50081-1:1992
EN 55011:1991
EN61010-1: 1993
Generic Emissions
Radiated and Conducted
Emissions
Safety
2-3
SPECIFICATIONS
COMMUNICATIONS PORT:
Format:
Lines supported:
Connector type:
Cable length:
Receive input resistance:
Receive voltage limit:
Transmit output voltage:
Baud rate:
Stop bits:
Character length:
Parity:
Standards supported:
RS-232C
Transmit, receive, common.
9-pin “D” female
3 m (9.8 ft.) maximum
3 kohm minimum
± 30 V maximum
± 5 V min, ± 8 V typical
2400
1
8
None
IEEE-1987.2, SCPI-1991
EMC APPLICATION NOTE
Use only high quality, double shielded cables for RS-232
connection. Keep the length of the cables less than
3 meters (9.8 ft.). Long cables (>3m) with insufficient EMI
shielding can cause excessive emissions or may be
susceptible to external interference.
2-4
SPECIFICATIONS
ZERO FLUX CHAMBER
MODEL NUMBER:
YA-111
CAVITY DIMENSIONS:
Length:
Diameter:
50.8 mm (2”)
8.7 mm (0.343”)
ATTENUATION:
80 dB to 30 mT (300 G)
PURPOSE:
To shield the probe from
external magnetic fields during
the ZERO or RELATIVE
operations.
Figure 2-1
Zero Flux Chamber
2-5
Section 3
Operating Instructions
SAFETY INSTRUCTIONS:
GENERAL:
For safe and correct use of this meter it is necessary that both
operating and servicing personnel follow generally accepted
safety procedures plus the safety cautions and warnings
specified.
If it is determined that safety protection has been impaired, the
meter must be made inoperative and be secured against any
unintended operation. For example, safety may be impaired if
the meter fails to perform or shows visible damage.
CAUTION:
All input and output voltages, except line (mains), are less than 20V.
WARNING:
The opening of covers or removal of parts might expose live parts
and accessible terminals which can be dangerous.
WARNING:
Any interruption of protective earth conductors or disconnection
of the protective earth terminals inside or outside of the meter
can create a dangerous condition.
CAUTION:
For continued protection replace the fuse with the same type
(0.25 ampere, IEC 127 type T).
3-1
OPERATING INSTRUCTIONS
WARNING:
The Hall probe is a non-contact measuring device. The probe is
not to contact a surface which exceeds a voltage of 30Vrms
(42.4V peak) or 60V d.c.
Figure 3-1
Probe Electrical Warning
CAUTION:
This instrument may contain ferrous components which will
exhibit attraction to a magnetic field. Care should be utilized
when operating the instrument near large magnetic fields, as pullin may occur. Extension cables are available to increase the
probe cable length, so that the instrument can remain in a safe
position with respect to the field being measured with the probe.
WARNING:
Replace battery only with Powersonic PS1220 or F. W. Bell Item
Number 335635.
3-2
OPERATING INSTRUCTIONS
GENERAL DESCRIPTION:
Figure 3-2
Front Panel
1
2
3
4
5
6
Power Switch: Push-on / push-off type switch to apply
power to the instrument.
Display: Liquid crystal display (LCD)
Probe Connector: The Hall probe or adapter cable plugs
into this connector and locks in place. To disconnect, pull
on the body of the plug, not the cable !
Range: Selects between automatic ranging and each of
the Manual ranges.
AC /DC: Selects between Periodic (AC) and Static (DC)
magnetic fields.
Units: Selects between Gauss (G), Tesla (T), Ampere per
meter (A/m). If a temperature compensated probe is
attached, it also allows the selection between degrees
Fahrenheit (°F) and degrees Celsius (°C).
3-3
OPERATING INSTRUCTIONS
7
8
9
10
11
Zero: Used to null low level magnetic field and electrical
offsets.
Relative: Used to offset an existing magnetic field. Once
the relative mode is activated, all measurements are
made relative to this field.
Manual Offset: Allows for a manual fine adjustment of
zero point.
Hold: Selects between “Peak Hold”, “Max Hold: and “Min
Hold”and Fast “Peak Hold”
Reset: Clears the held reading during HOLD operation.
Figure 3-3
Rear Panel
12
13
14
3-4
Power Entry: Accepts 100 Vac to 240 Vac and contains
line fuse.
RS-232 Port: Shielded 9–pin “D”connector supporting
RS-232-C serial communication.
Analog Output Connector. A voltage signal
representative of the magnetic flux density being
measured is available at this BNC connector. Calibration
is set to ± 3.0 V full scale dc or 3.0 Vrms ac, depending
upon the mode of operation . Minimum load is 10 kohm.
OPERATING INSTRUCTIONS
INSTRUMENT PREPARATION:
Install the probe or probe extension cable by matching the key
way in the connector to that in the mating socket in the meter.
The connector will lock in place. To disconnect, pull on the body
of the plug, not the cable!
POWER-UP
Depress the POWER switch. There will be a momentary audible
beeps and each display function will appear sequentially on the
display.
Figure 3-4
Power-Up Display
3-5
OPERATING INSTRUCTIONS
The instrument will conduct a self-test before measurements
begin. If a problem is detected the phrase “Err”will appear on the
display along with a 3-digit code. The circuitry that failed will be
retested and the error code will appear after each failure. This
process will continue indefinitely or until the circuitry passes the
test. A condition in which a circuit fails and then passes should
not be ignored because it indicates an intermittent problem that
should be corrected.
If the self test is successful the meter will perform a self
calibration, indicated by the phrase “CAL”on the display. During
this phase the meter will display the software revision number,
such as “r 1.1”. Calibration will halt if there is no Hall probe
connected. Until the probe is connected the phrase “Err”will
appear accompanied by a flashing “PROBE”annunciator as
shown in Figure 3-5.
Figure 3-5
Missing Probe Indication
3-6
OPERATING INSTRUCTIONS
POWER-UP SETTINGS:
The meter permanently saves certain aspects of the instrument’s
setup and restores them the next time the meter is turned on.
The conditions that are saved are:
RANGE setting (including AUTO range)
MODE (ac or dc)
UNITS of measure (gauss, tesla or ampere/meter,
°F or °C).
HOLD mode (Min, Max or Peak or fast Peak)
Other aspects are not saved and default to these conditions:
RELATIVE mode (turned OFF)
RELATIVE value (set to 0)
ZERO mode (inactive)
LOW BATTERY CONDITION:
The instrument is equipped with internal rechargeable battery.
When the battery is fully charged it can supply power to the unit
for a period of 8 hours. When the battery voltage becomes too
low the battery symbol on the display will flash, as shown in figure
3-6. As long as the instrument is connected to line power the
internal battery is being charged, whether or not the unit is turned
on.
Instrument specifications are not guaranteed when a low
battery condition exists !
3-7
OPERATING INSTRUCTIONS
Figure 3-6
Low Battery Indication
OVERRANGE CONDITION:
If the magnitude of the magnetic flux density exceeds the limit of
the selected range the meter will display a flashing value of
“2999”(gauss or tesla mode) or “2387”(ampere/meter mode).
The next highest range should be selected. If already on the
highest range then the flux density is too great to be measured
with this instrument.
When a temperature compensated probe is used and
temperature is being measured an overrange condition occurs
below –40°C
(- 40 °F) and above +100 °C ( +212 °F)
3-8
OPERATING INSTRUCTIONS
Figure 3-7
Overrange Indication
AC OR DC MEASUREMENT SELECTION:
The meter is capable of measuring either static (dc) or alternating
(ac) magnetic fields. To choose the desired mode, press the
AC/DC pushbutton to select AC or DC on the display.
The dc and ac modes are discussed in more detail later in this
section.
This setting is saved and will be restored the next time the meter
is turned on.
3-9
OPERATING INSTRUCTIONS
UNITS OF MEASUREMENT SELECTION:
The instrument is capable of providing flux density measurements
in terms of gauss (G), tesla (T) or ampere per meter (A/m). If a
temperature compensated probe is connected to the instrument,
it can also measure temperature in degrees Fahrenheit (°F) or in
degrees Celsius (°C).
To choose the desired units
1) Standard probe (without temperature compensation) is
connected to the meter:
Press the UNIT pushbutton to select between one of the three
available units of gauss (G), tesla (T) or ampere per meter (A/m).
2) Temperature compensated probe is connected to the meter:
Press the UNIT pushbutton. The symbol G will appear in the right
corner of the display. If no further key is pressed, the instrument
will display the flux density in gauss (G) without monitoring the
probe temperature.
If the UNIT key is pressed again, the legend TEMP and °C will be
displayed next to lower readout. This denotes that while the flux
density is measured and monitored on the upper readout in
gauss (G), the probe temperature will be displayed on the lower
readout in °C. Pressing the UNIT key one more time changes °C
to °F.
3-10
OPERATING INSTRUCTIONS
This process can be repeated for selecting tesla (T) or ampere
per meter (A/m). For each unit of flux density, the user may
choose:
• Not to display the probe temperature in the lower readout
• Display the probe temperature in lower readout in °C
• Display the probe temperature in lower readout in °F
By continuing to press the UNIT key, the user can choose to
display the probe temperature on the main (upper) readout in °F
or °C. In this mode flux density measurements are not available.
This setting is saved and will be restored the next time the meter
is turned on.
Figure 3-8
The legends associated with the UNIT function
3-11
OPERATING INSTRUCTIONS
RANGE SELECTION:
The meter is capable of providing flux density measurements on
one of three fixed ranges, or it can be programmed to
automatically select the best range for the present flux density. In
MANUAL range mode, the available ranges are listed in the
SPECIFICATIONS section of this manual. The ranges advance
in decade steps. The lowest range offers the best resolution
while the highest range allows higher flux levels to be measured.
In the AUTO range mode the range is advanced if the reading
reaches the full scale of the present range. This is 2999 if in the
gauss or tesla mode (such as 299.9 G or 299.9 mT), or 2387 if in
the ampere/meter mode (such as 23.87 kA/m). The range is
lowered if the present reading falls below 10% of full scale for the
present range. The speed at which the readings are updated
decreases slightly when AUTO ranging is used.
NOTE: When the MANUAL RANGE indicator does not appear
the instrument is in AUTOmatic ranging mode. Also the AUTO
range selection will be canceled if the RELATIVE mode or HOLD
mode is turned on.
Press the RANGE pushbutton for the desired range.
This setting is saved and will be restored the next time the meter
is turned on.
NOTE: The RANGE pushbutton has no effect when measuring
temperature on the main (upper) readout.
3-12
OPERATING INSTRUCTIONS
HOLD MODE SELECTION:
In some applications it may be desirable to hold a reading that is
either greater than or less than all previous readings, or which
has the greatest peak value whether positive or negative.
The MAX HOLD function holds the reading that is arithmetically
greater than all previous readings. For instance, a reading of
+125.0 is greater than +99.0 or -150.0.
The MIN HOLD function holds the reading that is arithmetically
less than all previous readings. For instance, a reading of -125.0
is less than -99.0 or +150.0.
The PEAK HOLD function captures and holds the peak value of
the flux density waveform within the response time capabilities of
the meter. See the SPECIFICATIONS section of this manual for
more information. The peak can be either positive or negative,
whichever has the greatest magnitude. For instance a peak
value of -100.0 is greater than a peak value of +90.0. PEAK
HOLD can operate in two different speeds, normal and FAST.
The response for each mode is given in the SPECIFICATIONS.
The FAST PEAK HOLD mode is used to track rapid events such
as magnetizing pulses.
When PEAK HOLD, MAX HOLD or MIN HOLD is activated the
main (upper) readout displays the held value and the lower
readout displays the actual or tracking value. The only exception
is when FAST PEAK HOLD mode is selected. In this case the
tracking value is not displayed. The word FAST will appear on the
lower readout.
Press the HOLD pushbutton to select any of the desired modes,
MAX HOLD, MIN HOLD, PEAK HOLD, FAST PEAK HOLD or off.
3-13
OPERATING INSTRUCTIONS
Note: The HOLD functions can only be used on a MANUAL
RANGE. If automatic ranging is used and a HOLD function is
turned on, the automatic ranging is cancelled and a manual
range is selected.
Note: If the instrument has been configured to measure flux
density on the main (upper) readout and temperature on the
lower readout the HOLD functions will override the temperature
readout. If the meter has been configured to display temperature
on the upper readout, the HOLD functions can be used to hold
the PEAK, MAX or MIN of the measured temperature. FAST
PEAK HOLD is not available.
This setting is saved and will be restored the next time the meter
is turned on.
HOLD value
Present (tracking) value
Figure 3-9
HOLD Function
3-14
OPERATING INSTRUCTIONS
HOLD Value
Indicates FAST PEAK HOLD mode
Figure 3-10
FAST PEAK HOLD
MIN, MAX, PEAK HOLD USAGE:
See the SPECIFICATIONS section for response time information.
The MAX HOLD function holds the reading that is arithmetically
greater than all previous readings. The MIN HOLD function holds
the reading that is arithmetically less than all previous readings.
The PEAK HOLD function holds the largest magnitude regardless
of polarity. In all three modes the present flux density reading
appears on the lower readout while the held reading appears on
the upper readout.
These modes are useful in determining the maximum or minimum
value of magnetic events that occur over a period of time.
3-15
OPERATING INSTRUCTIONS
If the reading exceeds the range limit the meter will hold a
flashing value of “2999”(gauss or tesla mode), “2387”
(ampere/meter mode) or the maximum value allowed in the
RELATIVE mode.
The held value can be reset by pressing the RESET pushbutton.
The next value displayed after a reset will be the present value of
flux density. For instance if the held reading is 200.0 G and the
present flux density is -100.0 G, the meter will display -100.0 G
after the reset.
If the analog output is being used the output signal will continue
to represent the real time flux density as seen by the probe. It is
not affected by the HOLD function.
FAST PEAK HOLD USAGE:
See the SPECIFICATIONS section for response time and
accuracy information.
In the FAST PEAK HOLD mode the input signal is sampled many
times each second. Each sample is compared to all previous
samples and that which has the greatest amplitude (regardless of
polarity) is held on the display. This mode can be used to
capture the peak value of a fast, one-time magnetic event such
as a magnetizing pulse. In this mode the present flux density is
not displayed. The lower readout will display the word “FAST”.
In FAST PEAK HOLD operation if the reading exceeds the range
limit the meter will hold a flashing value of “2999”(gauss or tesla
mode), “2387”(ampere/meter mode) or the maximum value
allowed in the RELATIVE mode. Pressing the RESET
pushbutton resets the held value.
3-16
OPERATING INSTRUCTIONS
The main differences between the FAST PEAK HOLD mode and
the MIN / MAX HOLD modes are:
- The PEAK HOLD mode considers only the magnitude of
the reading and not the polarity.
- The response time of the FAST PEAK HOLD mode is
much faster but final accuracy is less.
The analog output will continue to represent the real time flux
density as seen by the probe.
ZERO FUNCTION:
“Zeroing”the probe and meter is one of the most important steps
to obtaining accurate dc flux density measurements. The ideal
Hall generator produces zero output in the absence of a magnetic
field, but actual devices are subject to variations in materials,
construction and temperature. Therefore most Hall generators
produce some output even in a zero field. This will be interpreted
by the meter as a flux density signal.
Also, the circuits within the meter can produce a signal even
when there is no signal present at the input. This will be
interpreted as a flux density signal. Lastly magnetic sources
close to the actual field being measured, such as those from
electric motors, permanent magnets and the earth (roughly 0.5
gauss or 50 µT), can introduce errors in the final reading.
It is vital to remove these sources of error prior to making actual
measurements. The process of “zeroing”removes all of these
errors in one operation. The meter cancels the combined dc
error signal by introducing another signal of equal magnitude with
opposite polarity. After zeroing, the only dc signal that remains is
3-17
OPERATING INSTRUCTIONS
one that is produced by the probe when exposed to magnetic
flux.
NOTE: Zeroing the meter and probe affects only the static (dc)
component of the flux density signal.
NOTE: The process of zeroing also affects the analog signal.
There may be situations when the user prefers to shield the
probe from all external magnetic fields prior to zeroing. Provided
with the meter is a ZERO FLUX CHAMBER which is capable of
shielding against fields as high as 30 mT (300 G or 23.88 kA/m).
The probe is simply inserted into the chamber before the zeroing
process begins.
Handle the Hall probe with care. Do not bend the stem or
apply pressure to the probe tip as damage may result.
In other situations the user may want the probe to be exposed to
a specific magnetic field during the zeroing process so that all
future readings do not include that reading (such as the earth’s
field). This is possible with the following restrictions:
1) The external field must not exceed 30 mT (300 G or
23.88 kA/m).
2) The field must be stable during the zeroing process. It should
not contain alternating (ac) components.
If either of these conditions is not met the zeroing process will
stop and the meter will report an error code of E050 (see Figure
3-11).
3-18
OPERATING INSTRUCTIONS
AUTOMATIC ZERO FUNCTION:
The meter provides two methods to zero the probe. The first is
completely automatic. Prepare the probe for zeroing then press
the ZERO pushbutton. The “ZERO”legend will flash and actual
dc flux density readings will appear on the display. The meter will
select the lowest range regardless of which range was in use
prior to using the ZERO function. Recall that the maximum flux
density level that can be zeroed is 30 mT (300 G or 23.88 kA/m).
If the existing field is too large consider using the RELATIVE
mode (discussed later in this section). Recall that the zeroing
operation affects dc offsets only. If you wish to suppress an ac
field consider using the RELATIVE mode.
Press the ZERO pushbutton and the process will begin and the
“ZERO”legend will flash. Once automatic zeroing begins it must
be allowed to complete. During this time all controls are disabled
except for the POWER switch. The process normally takes from
5 to 15 seconds.
The instrument selects the lowest range and adjusts the nulling
signal until the net result reaches zero. No further electronic
adjustments are made, but at this stage a reading is acquired
which will be mathematically subtracted from all future readings
on this range.
If the nulling process is successful, the next higher range is
selected and the zeroing process is repeated for that range. The
zeroing process continues for all remaining ranges. During the
zeroing process the “ZERO”legend flashes. When finished, the
instrument will sound an audible beep and will resume normal
flux density measurements. The zero function has no effect on
temperature measurement.
3-19
OPERATING INSTRUCTIONS
The final zero values will remain in effect until the instrument and
probe are zeroed again, if the probe is disconnected or if the
meter is turned off and back on again.
NOTE: If the existing field is too large or unstable the meter will
sound a double beep and the phrase “ERR”will appear
momentarily on the display along with the error code E050 as
shown in figure 3-11. At this point the automatic process is
terminated.
NOTE: Zeroing the probe cancels the RELATIVE mode if it was
turned on.
Figure 3-11
Probe zeroing Error code
3-20
OPERATING INSTRUCTIONS
MANUAL OFFSET FUNCTION:
This feature also allows the user to manually set the “zero”point
to a value other than zero or to make a fine adjustment to the
zero point after an automatic zeroing. Position the probe for
zeroing, then rotate the MANUAL OFFSET knob to the desired
setting. This value will be added to (or subtracted from) all future
readings. Recall that the maximum flux density level that can be
zeroed is 30 mT (300 G or 23.88 kA/m). If the existing field is too
large, consider using the RELATIVE mode (discussed later in this
section). MANUAL OFFSET operation affects DC offsets only,
therefore it can only be used when DC mode is selected. If you
wish to suppress an ac field consider using the RELATIVE mode.
By turning the MANUAL OFFSET control in either direction the
reading will be altered. Turning the control clockwise adds to the
reading, turning it counterclockwise subtracts from the reading.
NOTE: Making a manual ZERO adjustment not only affects the
lowest range but also the higher ranges, though to a lesser
extent. For example, assume an automatic ZERO has already
been performed, after which all ranges should read zero. Now a
manual adjustment is made that causes the reading on the
lowest range to be non-zero. The reading on the other ranges
may also be non-zero depending upon the magnitude of the
change.
RELATIVE MODE:
The RELATIVE mode allows a specific flux density value to be
subtracted from all future readings. Thus all future readings will
be “relative”to that value. For instance if the relative value is
+100.0 gauss, and the present flux density is +112.0 gauss, the
actual displayed value will be +12.0 gauss. If the flux density
3-21
OPERATING INSTRUCTIONS
drops to +77.0 gauss, the actual displayed value will be -23.0.
Thus the RELATIVE mode allows for the direct readout of
variations around a given field, whether static (dc) or alternating
(ac).
There are two ways to generate a relative value. In the automatic
mode the meter uses the present flux density reading from the
probe as the relative value. In the manual mode, the user can
specify a value using the MANUAL OFFSET control. Each mode
will be discussed in more detail.
There are three restrictions when using the RELATIVE mode:
1) The RELATIVE mode can only be used on a fixed range. If the
automatic ranging feature is in and then the RELATIVE mode is
turned on the automatic ranging feature is canceled. Conversely,
if the RELATIVE mode is turned on and then the automatic
ranging feature is turned on, the RELATIVE mode is canceled.
2) If the RELATIVE mode has been turned ON and the probe is
zeroed via the ZERO function, the RELATIVE mode is canceled.
3) The point at which the meter declares an OVERRANGE
condition changes when using the RELATIVE mode. Normally
an overrange occurs when the reading reaches the full scale limit
of ± 2999 in the gauss or tesla mode (such as ± 299.9 G, ± 29.99
mT, etc.) or ± 2387 if in the ampere/meter mode (such as 23.87
kA/m). At that point the digits will remain at “2999”or “2387”and
will flash to indicate an overrange condition. If temperature is
being displayed, an overrange occurs for values below –40°C
(-40°F) or above +100 °C (+212°F)
In the RELATIVE mode the flux density can be exceeded by
about 35% to a maximum value of ± 4095 as seen by the probe.
3-22
OPERATING INSTRUCTIONS
To clarify this, suppose the meter is set to the 300 mT range and
the probe is in a +350 mT field. Under normal conditions this
would have resulted in an overrange condition (a flashing reading
of +299.9 mT). Now the RELATIVE mode is turned on with an
initial relative value of 0. In this mode the meter is able to
measure flux density up to ± 409.5 mT. A non-flashing reading of
+350.0 mT will now appear on the display.
There may be situations when the user may prefer to shield the
probe from all external magnetic fields prior to performing a
RELATIVE operation. Provided with the meter is a ZERO FLUX
CHAMBER which is capable of shielding against fields as high as
30 mT (300 G or 23.88 kA/m). The probe is simply inserted into
the chamber before the RELATIVE operation begins.
NOTE: The RELATIVE mode is canceled if the probe and
instrument are zeroed, if the probe is disconnected, if the
instrument’s range is changed or if the instrument is turned off
and back on again.
NOTE: If the analog output is being used, the output signal will
continue to represent the flux density as seen by the probe. It is
not affected by the RELATIVE operation.
AUTOMATIC RELATIVE MODE:
In the automatic mode, the present flux density as seen by the
probe is used as the relative value. Prepare the probe and
select an appropriate range and mode (ac or dc) as needed
(automatic ranging is deactivated when RELATIVE mode is
used).
Press the RELATIVE pushbutton to perform all automatic relative
operation. The “RELATIVE”legend will flash for a moment and a
3-23
OPERATING INSTRUCTIONS
reading will be acquired. This now becomes the new relative
value. The instrument will sound a single beep and the
“RELATIVE”legend will remain on to remind the user that the
RELATIVE mode is active and that the displayed value is a
relative value, not an absolute value. The reading should now be
zero. From this point the relative value will be subtracted from all
future readings
MANUAL RELATIVE MODE:
The second method by which to set a relative value is a manual
adjustment. In some cases the user will wish to set an absolute
relative value. To do this, insert the probe in the ZERO FLUX
CHAMBER provided with the meter. Perform an automatic
relative operation (see previous discussion). Upon completion
turning the MANUAL OFFSET control in either direction will alter
the reading. Turning the control clockwise adds to the reading,
turning it counterclockwise subtracts from the reading.
Once the desired relative value has been reached, the probe can
be removed from the ZERO FLUX CHAMBER and
measurements can begin. The final relative value will be
subtracted from all future readings.
ANALOG OUTPUT:
The meter is capable of providing an analog voltage signal
proportional to the present flux density level. Calibration is set to
± 3.0 V full scale dc or 3.0 Vrms ac, depending upon the mode of
operation. When measuring temperature and the temperature is
displayed in the upper readout, the analog output signal is
calibrated to 10 mV / °C or 10 mV / °F. This signal, available at
3-24
OPERATING INSTRUCTIONS
the rear BNC connector, can be connected to a voltmeter,
oscilloscope, recorder or external analog-to-digital converter.
3-25
OPERATING INSTRUCTIONS
ANALOG OUTPUT USAGE:
See the SPECIFICATIONS section for frequency range and
accuracy of the analog output.
For flux density measurements the analog output signal is
calibrated to ± 3 Vdc or 3 Vrms, depending upon the selected
mode. For instance on the 30 mT range a reading of -12.3 mT
relates to a output voltage of -1.23 Vdc whereas on the 3 T range
a reading of -1.23 T produces the same output. The analog
output can reach a maximum output of about ± 4.25 Vdc in order
to accommodate the peak value of a 3 Vrms ac signal. This
means that the analog output can be used to measure flux
density levels that exceed the normal range of the displayed
readings. For instance a level of 36.5 mT on the 30 mT range
would normally result in a flashing “29.99”mT overrange
condition, but the output will still be +3.65 Vdc.
When using AUTO range and the analog output features
together, the following situation can occur. Suppose the present
range is 3 kG and the present reading is +2.8 kG. The analog
output will be +2.8 Vdc. The signal then increases to +3.2 kG,
which would force an automatic change to the 30 kG range
setting. The analog output will now be +0.32 Vdc because of the
range change. This can lead to problems if the analog signal is
being used to make decisions, because there is no indication that
a range change has occurred. In these situations it is best to
select a fixed range that covers the expected flux density span.
The analog output signal contains both the dc and ac
components of the flux density signal. This means that it will also
contain any initial dc offsets in the probe and the meter’s circuitry.
These offsets can be removed by the ZERO function.
3-26
OPERATING INSTRUCTIONS
The MANUAL OFFSET control can also be used to introduce a
dc offset if desired. This is useful when observing ac waveforms
in which one portion of the waveform is being clipped because it
exceeds the ± 4.25 Vdc limit of the meter. Using the MANUAL
OFFSET control the center of the waveform can be moved to
reduce or eliminate the clipping, as depicted in the next figure.
Figure 3-12
Adjusting the DC Offset of the Analog Output
When measuring temperature on the upper readout, the analog
output is calibrated to 10 mV/°C or 10 mV/°F. Thus for the entire
temperature range the analog output will produce –400 mV to
+1000 mV for °C and –400 mV to +2120 mV for °F.
SOURCES OF MEASUREMENT ERRORS:
When making flux density measurements there are several
conditions that can introduce errors:
1) Operating the meter while the LOW BATTERY symbol
appears.
3-27
OPERATING INSTRUCTIONS
Instrument specifications are not guaranteed when a low
battery condition exists !
2) Failure to ZERO the error signals from the meter, probe and
nearby sources of magnetic interference.
3) Subjecting the probe to physical abuse.
4) One of the most common sources of error is the angular
position of the probe with respect to the field being measured.
As mentioned in Section-1, a Hall generator is not only sensitive
to the number of flux lines passing through it but also the angle at
which they pass through it. The Hall generator produces the
greatest signal when the flux lines are perpendicular to the
sensor as shown in Figure 3-13.
Figure 3-13
Probe Output versus Flux Angle
The probe is calibrated and specified with flux lines passing
perpendicularly through the Hall generator.
5) As shown in Figure 3-14 as the distance between the magnetic
source and the Hall probe increases fewer flux lines will pass
through the probe, causing the probe’s output to decrease.
3-28
OPERATING INSTRUCTIONS
Figure 3-14
Probe Output versus Distance
6) Flux density can vary considerably across the pole face of a
permanent magnet. This can be caused by internal physical
flaws such as hairline cracks or bubbles, or an inconsistent mix of
materials. Generally the sensitive area of a Hall generator is
much smaller than the surface area of the magnet, so the flux
density variations are very apparent. Figure 3-15 illustrates this
situation.
Figure 3-15
Flux Density Variations in a Magnet
3-29
OPERATING INSTRUCTIONS
8) The accuracy of the instrument and probe are affected by
temperature variations. Refer to the SPECIFICATIONS section
for specific information. Temperature variations are greatest
during the initial warm up phase after power-up (15 minutes).
Allow the instrument and probe to stabilize for best accuracy.
MORE DETAILS ON AC MODE OPERATION:
It is possible for the flux density signal to contain both a dc
component and an ac component. In the ac mode the value
displayed is the true rms value of the waveform with its dc
component removed. However if the dc component is too high it
may force the peak value of the waveform to exceed the
electrical limits of the meter, causing the waveform to clip and
introducing errors in the final reading. This can also lead to an
overrange condition on the display and can lead to erratic
behavior if the automatic ranging feature is being used. The
presence of a clipped ac signal can be verified by observing the
analog output signal.
The accuracy of the true rms reading is only guaranteed for
readings greater than about 3.3% of the full scale range. For
example this would be 1mT on the 300 mT range. When the
reading falls below 3.3% of full scale the “LO”legend on the
display will flash, as shown in Figure 3-16. This is intended to
remind the user that the reading may not be accurate. Select a
lower range if possible to regain accuracy.
3-30
OPERATING INSTRUCTIONS
Figure 3-16
Low AC Signal Indication
An ac reading, being a true rms value, has no polarity. However
when using the RELATIVE function in the ac mode readings can
be negative. A negative ac reading means that the present
reading is less than the RELATIVE value. An unsigned value
means the present reading is greater than or equal to the
RELATIVE value. For example if the original RELATIVE value
was 100 mT and the present field is 80 mT the result will be
-20 mT rms.
When using the MIN HOLD function without the RELATIVE
function turned on the minimum reading will be 0.0. With the
RELATIVE function turned on the minimum reading can reach the
negative full scale limit of the instrument.
3-31
OPERATING INSTRUCTIONS
MORE DETAILS ON DC MODE OPERATION:
It is possible for the flux density signal to contain both a dc
component and an ac component. In the dc mode this can lead
to unstable readings. If the peak value of the ac component
reaches the electrical limits of the meter, even though the
average dc level is within the limits, an overrange condition may
appear on the display. This situation can also lead to erratic
behavior if the automatic ranging feature is being used.
The presence of an ac signal can be verified by observing the
analog output signal or by using the ac mode to determine the
magnitude of the ac component.
TEMPERATURE EFFECTS:
The probe’s dc offset and sensitivity are affected by temperature.
Using temperature-compensated probes will minimize these
effects.
There can be substantial errors in uncompensated probes. A
typical probe’s dc offset can change by ± 0.1 G / °C. It is best to
allow the probe’s temperature to stabilize before performing a
ZERO operation. The probe’s sensitivity will drop as temperature
increases. Probes are calibrated at ambient temperature (23°C).
A typical probe may change by –0.05% / °C. For instance a
reading of 200 mT at 23°C may drop to 197 mT at 50°C.
3-32
Section 4
Remote Operation
RS-232 INTERFACE PARAMETERS:
Prior to using the RS-232 serial port several parameters such as
baud rate and character length must be set on the computer or
PLC to match that of the meter. The meter’s parameters cannot
be changed. These are:
BAUD RATE:
CHARACTER LENGTH:
PARITY:
STOP BITS:
2400
8
NONE
1
RS-232 INTERFACE CONNECTION:
EMC APPLICATION NOTE:
Use only high quality, double shielded cables for RS-232
connection. Keep the length of the cables less than 3 meters.
Long cables (>3m) with insufficient EMI shielding can cause
excessive emissions or may be susceptible to external
interference.
The interface connector is a standard 9-pin “D”type connector
commonly used on personal computers. Five signals are
supported as shown in Figure 4-1. One of these is the common
(ground) connection. Pins-1,4,6 and 9 are not connected.
4-1
REMOTE OPERATION
Figure 4-1
9-Pin Interface Connector
Data is transmitted to the meter on the receive (RX) line. Data is
transmitted from the meter on the transmit (TX) line. This is
known as a “full duplex”link.
In some RS-232 applications two lines called Clear-To-Send
(CTS) and Request-To-Send (RTS) are used to control the flow
of data between devices. This is often referred to as “hardware
handshaking”. However, although these signals are connected
electrically within the meter, the signals are not presently used.
The user’s computer or PLC should be configured to ignore
hardware handshaking lines.
In most cases a straight-through cable can be used between the
meter and a personal computer. In other words Pin-1 on the
meter would attach to Pin-1 on the computer, Pin-2 to Pin-2, etc.
Figure 4-2 depicts two possible connection schemes.
4-2
REMOTE OPERATION
Figure 4-2
Serial Port Connection Schemes
Generally most communications problems are caused by
incorrect wiring or failure to match the characteristics (baud rate,
parity, etc.). Consult the documentation for the computer or PLC
to determine the signal assignments for its communication
connector. Again, the hardware handshake lines RTS and CTS
are not supported and should be ignored.
REMOTE COMMAND STANDARDS:
Prior to 1987 most instruments that featured RS-232 communications interfaces had their own unique commands for
exchanging information. Eventually some manufacturers began
4-3
REMOTE OPERATION
offering models that recognized other manufacturer’s commands
so that customers could easily switch over without making
extensive changes to their programs.
The IEEE-488-1987.2 standard (also called “IEEE-488.2”) was
one step toward creating a universal way to communicate with
any instrument, regardless of the manufacturer or the type of
instrument used. This was later enhanced by the SCPI-1991
standard (Software Commands for Programmable Instruments),
which defined specific commands and responses that covered a
broad range of applications. Though these standards were
targeted for use with the IEEE-488 instrumentation bus they are
commonly used with serial (RS-232) interfaces as well.
The instrument supports many of the IEEE-488-1987.2 “common”
commands as well as a subset of the SCPI-1991 commands.
COMMAND FORMAT:
All commands consist of ASCII character strings. Some
commands contain numeric parameters that are used to set or
reset individual bits within binary registers. For instance a value
of 45 decimal is the same as binary 101101, thus setting bits 5, 3,
2 and 0 in the register and resetting all others. Sending the value
“00101101”would be interpretted as the number 101,101.
NOTE: No more than 250 characters can be sent in one
command string.
MESSAGE TERMINATORS:
When transmitting a string to the instrument the message must
be “terminated”properly to notify the instrument that the message
is complete. This is done by appending an ASCII line feed (LF)
4-4
REMOTE OPERATION
character as the final character in the string, which is a 0A hex or
00001010 binary. Note that 0A hex is equivalent to 10 decimal,
but sending the two ASCII characters “10”will not work. It must
be the single byte representation of the LF control character.
The meter will always send the LF character every time it
transmits a message to the host system.
ERROR BUFFER:
Errors are generated by a variety of sources, such as hardware
errors or errors in the command syntax. If an error occurs a
message is stored in an ERROR BUFFER. The message can be
retrieved by a specific command discussed later in this section.
STATUS REGISTERS:
There are four register sets that indicate the status of the
instrument, such as errors or the present state of the meter.
These are 8-bit registers, but in many cases not all of the bits are
used. The four register sets are called
MEASUREMENT EVENT
OPERATION EVENT
STANDARD EVENT
QUESTIONABLE EVENT
There is also an 8-bit register that provides a 1-bit summary for
each of the four register sets. This is called the STATUS BYTE.
Each register set consists of three individual registers, as
depicted in Figure 4-3.
1) The CONDITION register is a real time, read-only register that
is constantly updated to reflect current operating conditions.
4-5
REMOTE OPERATION
2) The EVENT register is fed by the CONDITION register, but
operates as a latch. Whenever any bit in the CONDITION
register goes to “1”, a corresponding “1”is latched into the
EVENT register and remains that way until cleared by a specific
command.
3) The ENABLE register is a mask register that is used to
generate the single status bit for the STATUS BYTE. Setting any
bit in the ENABLE register to “1”will allow a corresponding “1”in
the EVENT register to set the summary bit in the STATUS BYTE.
Figure 4-3
Condition, Event and Enable registers
STATUS BYTE AND REQUEST FOR SERVICE (RQS):
A bit in the STATUS BYTE called RQS (request for service) sets
whenever an event occurs that requires the attention of the
computer. The RQS bit can set if any of the summary bits from
4-6
REMOTE OPERATION
the MEASUREMENT EVENT, OPERATION EVENT, STANDARD
EVENT or QUESTIONABLE EVENT registers are set, or if an
error message exists. The STATUS ENABLE register is a mask
register that is used to allow any of these conditions to set the
RQS bit. Setting any bit in the STATUS ENABLE register to “1”
will allow a corresponding “1”in the STATUS BYTE register to set
the RQS bit. These registers are depicted in Figure 4-4.
Figure 4-4
Status Byte and Enable registers
4-7
REMOTE OPERATION
OSB Operation
Summary Bit:
If any of the bits in the OPERATION
EVENT register set, and their respective
enable bits are set, the Operation
Summary Bit (OSB) will set.
ESB Event
Summary Bit:
If any of the bits in the STANDARD
EVENT register set, and their respective
enable bits are set, the Event Summary
Bit (ESB) will set.
QSB Questionable
Summary Bit:
If any of the bits in the QUESTIONABLE
EVENT register set, and their respective
enable bits are set, the Questionable
Summary Bit (QSB) will set.
MSB Measurement
Summary Bit:
If any of the bits in the MEASUREMENT
EVENT register set, and their respective
enable bits are set, the Measurement
Summary Bit (MSB) will set.
EAV Error Available:
This bit sets any time there is an error
message available in the error buffer.
RSQ Request For
Service:
If any of the other bits in the STATUS
BYTE are set, and their respective
enable bits are set in the STATUS
ENABLE register, the Request For
Service (RQS) will set.
4-8
REMOTE OPERATION
STANDARD EVENT REGISTER:
If any of these bits set, and their respective enable bits are set,
the Event Summary Bit (ESB) will set in the STATUS BYTE.
Figure 4-5
Standard Event register
PON Power On:
Indicates that the meter was turned off
and on since the last communication.
CME Command Error:
Indicates that there was a syntax or
spelling error in the command, or the
command received is not supported.
EXE Execution Error:
Indicates that the meter detected an
error while attempting to execute a
command.
DDE Device Dependent
Error:
Indicates that the meter did not operate
properly due to some internal error.
OPC Operation Complete:
Indicates that all requested operations
have been completed.
4-9
REMOTE OPERATION
MEASUREMENT EVENT REGISTER:
If any of these bits set, and their respective enable bits are set,
the Measurement Summary Bit (MSB) will set in the STATUS
BYTE.
Figure 4-6
Measurement Event register
ROF Reading Overflow:
Indicates that the present reading
exceeds the present measurement
range.
RAV Reading Available:
Indicates a reading was acquired and
processed.
OPERATION EVENT REGISTER:
If any of these bits set, and their respective enable bits are set,
the Operation Summary Bit (OSB) will set in the STATUS BYTE.
Figure 4-7
Operation Event register
MEAS Measure mode:
4-10
Indicates the meter is in the process of
acquiring and processing a reading.
REMOTE OPERATION
QUESTIONABLE EVENT REGISTER:
If any of these bits set, and their respective enable bits are set,
the Questionable Summary Bit (QSB) will set in the STATUS
BYTE.
Figure 4-8
Questionable Event register
CAL Calibration summary:
Indicates that an invalid calibration
constant was detected during power up
or when the probe was installed. The
instrument will instead use a default
parameter. This bit will clear once the
meter and probe have been successfully
calibrated.
NOTE: Meter specifications are not
guaranteed when the CAL bit is set !
“COMMON” COMMAND SYNTAX:
The “common”commands are recognized and acted upon in a
similar manner by all instruments that follow the IEEE-488.2
standard, whether a DVM, scope, frequency meter, gaussmeter,
etc. These are the syntax rules:
1) A common command always begins with an asterisk character
(*) followed by a three or four character acronym and possibly
one other parameter. For instance the command to clear the
event registers is *CLS.
4-11
REMOTE OPERATION
2) The commands are not case sensitive. For instance the *CLS,
*cls and *cLS commands are identical.
3) If there is a fourth character in the acronym it will always be a
question mark (?) and indicates that information is being
requested from the instrument. For instance a command to read
the model number and manufacturer of the instrument is *IDN?.
4) If a parameter follows a command it must be separated from
the acronym by one space. The parameter is the ASCII
representation of an integer. For instance if the parameter to be
sent is binary 1100, the actual parameter sent would be the two
ASCII characters 12, since binary 1100 = decimal 12. If you were
to send the four ASCII characters 1100 it would be interpreted as
decimal 1100 (eleven hundred).
5) A number returned from the instrument is an ASCII
representation of a number. For instance if the instrument
returns the ASCII string 345 the number is decimal 345 (three
hundred forty five), which translates to 159 hex.
6) Multiple commands can be sent in one string. The commands
must be separated by semicolons (;). For instance, *CLS;*IDN?
first clears the event registers and then requests model and
manufacturer information. If more than one of the commands in
the string requests information from the instrument, the
instrument’s response will also have semicolons separating the
responses, such as 345;0;10.
4-12
REMOTE OPERATION
“COMMON” COMMANDS:
ACRONYM
*CLS
*ESE <NRf>
*ESE?
*ESR?
*IDN?
*OPC
*OPC?
*OPT?
*SRE <NRf>
*SRE?
*STB?
NAME
Clear status
BRIEF DESCRIPTION
Clear all event registers
and error buffer.
Program event
Program standard event
enable
enable register.
Event enable query Read standard event
enable register.
Event status query Read standard event
register and clear it.
Identification query Return manufacturer,
model number, software
version number.
Set operation
Set the Operation
complete
Complete bit in the
standard event register
after all commands have
been executed.
Operation complete Returns an ASCII “1”after
query
all commands have been
executed.
Option
Returns information about
identification query the attached Hall probe.
Program Status
Program STATUS enable
enable
register.
Status enable
Read STATUS enable
query
register.
Status byte query
Read status byte register.
Table 4-1
Common command summary
4-13
REMOTE OPERATION
*CLS CLEAR STATUS
Clears the MEASUREMENT EVENT,
OPERATION EVENT, STANDARD
EVENT and QUESTIONABLE EVENT
registers, but not their enable registers. It
also clears the error buffer.
*ESE <NRf> PROGRAM
STANDARD EVENT
ENABLE
REGISTER
A set bit in the STANDARD EVENT
ENABLE register allows its corresponding
event to set the ESB (event summary bit)
in the STATUS BYTE register. <NRf> is
an ASCII string representing an integer
mask. For instance a value of 45 decimal
is the same as binary 00101101, thus
setting bits 5, 3, 2 and 0 in the enable
register.
*ESE? STANDARD EVENT
ENABLE
REGISTER QUERY
Returns the contents of the STANDARD
EVENT ENABLE register.
*ESR? STANDARD EVENT
REGISTER QUERY
Returns the contents of the STANDARD
EVENT register.
NOTE: The STANDARD EVENT register
is cleared after an *ESR? command.
*IDN? IDENTIFICATION
QUERY
Returns the following string GAUSS /
TESLA Meter, Rx.x. The Rx.x string is the
firmware revision level, where x.x is a
decimal number, such as 1.1.
*OPC - SET
OPERATION
COMPLETE
Causes the OPC (operation complete) bit
to set in the STANDARD EVENT register
when all commands have been executed.
4-14
REMOTE OPERATION
*OPC? OPERATION
COMPLETE
QUERY
Causes the OPC (operation complete) bit
to set in the STANDARD EVENT register
and returns an ASCII “1”when all
commands have been executed.
*OPT? OPTION
IDENTIFICATION
QUERY
Returns a string that identifies the model
number and serial number of the Hall
probe. The model number will always be
12 characters in length including trailing
spaces, such as HTD61-0608. Following
the model number will be a comma (,).
Next will be the serial number, which will
always be ten characters in length
including trailing spaces, such as
9623004. If no probe is attached or can’t
be identified the string will default to
“UNDEFINED ,0”.
*SRE <NRf> PROGRAM
STATUS ENABLE
REGISTER
A set bit in the STATUS ENABLE register
allows its corresponding event to set the
RQS (request for service) in the STATUS
BYTE register. <NRf> is an ASCII string
representing an integer mask. For
instance a value of 45 decimal is the
same as binary 00101101, thus setting
bits 5, 3, 2 and 0 in the enable register.
*SRE? STATUS ENABLE
REGISTER QUERY
Returns the contents of the STATUS
ENABLE register.
4-15
REMOTE OPERATION
*STB? STATUS BYTE
QUERY
Returns the contents of the STATUS
BYTE register.
NOTE: The STATUS BYTE register is not
cleared after an *STB? command. Other
registers and buffers must be cleared for
the bits in the STATUS BYTE register to
be cleared.
SCPI COMMAND SYNTAX:
The SCPI commands go one step farther than IEEE-488.2 and
provide a language protocol and defines a standard set of
commands to program every aspect of the instrument. These are
the syntax rules:
1) The first character of any command string is a colon (:).
2) The commands are not case sensitive. For instance the
:MEASURE, :measure and :MEASure commands are identical.
3) A question mark (?) in a command means that the command is
requesting information from the instrument. This is called a query
command.
4) For any command there is a short and long spelling of the
command. Use the following rules for the short version:
a) If the length of the command is four letters or less,
there is no short version.
4-16
REMOTE OPERATION
b) If the command has more than four letters and the
fourth letter is a vowel, drop it and all letters that follow it. For
instance the command :RESET can be shortened to :RES.
c) If the command has more than four letters and the
fourth letter is a consonant, drop all letters that follow it. For
instance the command :MEASURE can be shortened to :MEAS.
d) If the command contains a question mark (?) or a nonoptional parameter it must be included after the short form
version. For instance a query command of :CONDITION? can be
shortened to :COND?.
e) The use of anything other than the short or long version
of a command is not permitted. For instance both the
:MEASURE and :MEAS commands are acceptable, but :MEASU
is not.
5) If a parameter follows a command it must be separated from
the command by one space.
6) Multiple commands can be sent in one string. The commands
must be separated by semicolons (;). A colon (:) must still
precede each command. If more than one of the commands in
the string requests information from the instrument, the
instrument’s response will also have semicolons separating the
responses, such as 345;0;10.
4-17
REMOTE OPERATION
SCPI COMMANDS:
In the following discussion the commands are written such that
the short form of the command is written in UPPER CASE letters
and the remainder of the command is written in lower case
letters. Either form can be used.
If parameters are required they will appear within <> brackets.
An <n> parameter is a single ASCII digit. <NRf> is usually a
multiple digit number.
The meter supports a subset of the available SCPI commands.
However, there are some functions that are not supported with
standard SCPI commands. In these cases these special
commands are patterned after other SCPI commands that are
similar in function.
ERROR MESSAGE COMMANDS
:SYSTem:ERRor?
:SYSTem:CLEar
STATUS REGISTER COMMANDS
:STATus:MEASurement:EVENt?
:STATus:OPERation:EVENt?
:STATus:QUEStionable:EVENt?
:STATus:MEASurement:ENABle <NRf>
DESCRIPTION
Retrieve error
message
Clear error message
DESCRIPTION
Query Measurement
Event reg.
Query Operation Event
reg.
Query Questionable
Event reg.
Program Measurement
Event Enable reg.
Table 4-2
SCPI Command summary
4-18
REMOTE OPERATION
:STATus:OPERation:ENABle <NRf>
:STATus:QUEStionable:ENABle <NRf>
:STATus:MEASurement:ENABle?
:STATus:OPERation:ENABle?
:STATus:QUEStionable:ENABle?
:STATus:MEASurement:CONDition?
:STATus:OPERation:CONDition?
:STATus:QUEStionable:CONDition?
:STATus:PRESet
UNITS COMMANDS
:UNIT:FLUX:AC:GAUSs
:UNIT:FLUX:AC:TESLa
:UNIT:FLUX:AC:AM
:UNIT:FLUX:DC:GAUSs
:UNIT:FLUX:DC:TESLa
Program Operation
Event Enable reg.
Program Questionable
Event Enable reg.
Query Measurement
Event Enable reg.
Query Operation Event
Enable reg.
Query Questionable
Event Enable reg.
Query Measurement
Condition reg.
Query Operation
Condition reg.
Query Questionable
Condition reg.
Clear all event
registers.
DESCRIPTION
Program ac gauss
units
Program ac tesla units
Program ac ampere
per meter units
Program dc gauss
mode
Program dc tesla units
Table 4-2 (cont.)
SCPI Command summary
4-19
REMOTE OPERATION
:UNIT:FLUX:DC:AM
:UNIT:FLUX?
:UNIT:TEMP:C
:UNIT:TEMP:F
Program dc A-M units
Query flux units
setting
Program degrees C
units
Program degrees F
:UNIT:TEMP?
Query temperature
units setting
RANGE COMMANDS
:SENSe:FLUX:RANGe:AUTO
:SENSe:FLUX:RANGe <n>
:SENSe:FLUX:RANGe?
DESCRIPTION
Program auto range
Program fixed range
Query range setting
HOLD COMMANDS
:SENSe:HOLD:STATe <n>
:SENSe:HOLD:STATe?
DESCRIPTION
Program hold mode
Query hold mode
setting
Reset presently held
value
:SENSe:HOLD:RESet
ZERO / RELATIVE COMMANDS
:SYSTem:AZERo
:SYSTem:ARELative:STATe <n>
:SYSTem:ARELative:STATe?
MEASUREMENT COMMANDS
:MEASure:FLUX?
4-20
DESCRIPTION
Initiates an automatic
zero operation
Program relative mode
Query relative mode
setting
DESCRIPTION
Obtain flux density
reading.
REMOTE OPERATION
:MEASure: TEMP?
Obtain temperature
reading
DISPLAY FORMAT COMMANDS
:DISPlay:FORMat <n>
DESCRIPTION
Formats upper and
lower readouts
Query display format
setting
:DISPlay:FORMat?
Table 4-2 (cont.)
SCPI Command summary
ERROR MESSAGES AND COMMANDS:
If an error occurs a message is placed in the error buffer. The
message will contain a number, a comma (,) and a brief
description of the error. Negative (-) numbers are used for SCPI
defined messages while positive (+) numbers relate specifically to
the meter.
Each time the buffer is read the error message is removed from
the buffer. If no error exists the message “0, No error”will be
returned. However, if the buffer contains any other message,
and a new error occurs before the old one is read or cleared, the
new message will be lost.
There are certain error status bits that will set in the STANDARD
EVENT register. These bits provide general error indications.
The error message will provide more detailed information about
the errors.
The error buffer can be read and cleared with the following
commands:
:SYSTem:ERRor?
Returns the error message and clears the
4-21
REMOTE OPERATION
error buffer.
:SYSTem:CLEar
Clears the error buffer.
If the meter detects an error in the command string (a spelling
error, a command that is not supported or a numerical value that
is incorrect) the meter will not execute the command. If the error
is detected in the middle of a multiple command string the
command that contains the error and all commands that follow
will not be executed. The user’s program should always check
the STATUS BYTE to determine if an error has occured.
The possible error messages are:
0, NO ERROR
-201, HARDWARE ERROR
-120, NUMERIC DATA ERROR
-224, ILLEGAL PARAMETER ERROR
-363, INPUT BUFFER OVERRUN
-103, INVALID SEPARATOR
-102, SYNTAX ERROR
-100, COMMAND ERROR
Most of these errors are associated with incorrect command
settings (wrong characters, illegal numeric values, etc.).
The “hardware error”is not an indication of a circuit failure.
Rather, a command is requesting an operation that is not
supported by the existing equipment. For example requesting a
temperature reading from a probe that does not support
temperature compensation.
4-22
REMOTE OPERATION
STATUS COMMANDS:
The STATUS commands control and query the MEASUREMENT
EVENT, OPERATION EVENT and QUESTIONABLE EVENT
registers.
:STATus:MEASurement:EVENt?
:STATus:OPERation:EVENt?
:STATus:QUEStionable:EVENt?
Returns the contents
of the specified
EVENT register, then
clears the register
contents.
:STATus:MEASurement:ENABle <NRf>
:STATus:OPERation:ENABle <NRf>
:STATus:QUEStionable:ENABle <NRf>
Programs the
specified EVENT
ENABLE register
with the value
<NRf>. <NRf> is an
ASCII string
representing an
integer mask. For
instance a value of
45 decimal is the
same as binary
00101101, thus
setting bits 5, 3, 2
and 0 in the enable
register.
:STATus:MEASurement:ENABle?
:STATus:OPERation:ENABle?
:STATus:QUEStionable:ENABle?
Returns the contents
of the specified
EVENT ENABLE
register.
4-23
REMOTE OPERATION
:STATus:MEASurement:CONDition?
:STATus:OPERation:CONDition?
:STATus:QUEStionable:CONDition?
Returns the contents
of the specified
EVENT CONDITION
register. The EVENT
CONDITION register
is a real-time register
reflecting the state of
the meter at the time
of the read. Some
conditions could
happen very quickly
and could be missed
by this query. It is
often better to rely on
the contents of the
EVENT register since
it latches the event
until cleared by a
specific command.
:STATus:PRESet
Clears all EVENT
ENABLE registers.
4-24
REMOTE OPERATION
UNITS COMMANDS:
These commands select flux density readings in either gauss,
tesla or ampere per meter, for either static fields (dc) or
alternating fields (ac). If a temperature compensated probe is
attached additional commands select temperature readings in
degrees Celcius (°C) or degrees Fahrenheit (°F). See Section-3
for more information.
:UNIT:FLUX:AC:GAUSs
Specifies ac flux density readings in
gauss.
:UNIT:FLUX:AC:TESLa
Specifies ac flux density readings in
tesla.
:UNIT:FLUX:AC:AM
Specifies ac flux density readings in
ampere/meter.
:UNIT:FLUX:DC:GAUSs
Specifies dc flux density readings in
gauss.
:UNIT:FLUX:DC:TESLa
Specifies dc flux density readings in
tesla.
:UNIT:FLUX:DC:AM
Specifies dc flux density readings in
ampere/meter.
:UNIT:FLUX?
Returns an ASCII string
representing the present mode
setting for the meter. The ASCII
string can be DC GAUSS, AC
GAUSS, DC TESLA, AC TESLA,
AC AM or DC AM.
4-25
REMOTE OPERATION
:UNIT:TEMP:C
Specifies temperature readings in
degrees Celcius (°C).
:UNIT:TEMP:F
Specifies temperature readings in
degrees Fahrenheit (°F).
:UNIT:TEMP?
Returns an ASCII F or C indicating
that temperature readings are in
degrees Fahrenheit (°F) or Celcius
(°C).
Note: The following conditions will generate a “–201, hardware
error”message:
1) If a “:UNIT:TEMP”command is issued but the attached probe
does not support temperature measurement.
2) If the meter has been configured to measure only
temperature (via the “:DISPlay:FORMat”command), and a
“:UNIT:FLUX”command is issued.
3) If the meter has been configured to measure only flux density
(via the “:DISPlay:FORMat”command), and a “:UNIT:TEMP”
command is issued.
It is always best to configure the meter with the
“:DISPlay:FORMat”command and then issued the appropriate
“:UNIT”command.
4-26
REMOTE OPERATION
RANGE COMMANDS:
These commands select either a fixed range or AUTO range. See
Section-3 for more information.
:SENSe:FLUX:RANGe:AUTO
Selects the AUTO RANGE
function.
:SENSe:FLUX:RANGe <n>
Selects a fixed range <n>,
where n =
0 for the lowest range
1 for the middle range
2 for the highest range
:SENSe:FLUX:RANGe?
Returns an ASCII digit
representing the present range
setting for the meter, as follows:
0 for the lowest range
1 for middle range
2 for highest range
Note: The actual ranges available depend upon the type of Hall
probe being used. See the specifications section for information.
For instance, the lowest range for a standard probe is 300G (30
mT) full scale, whereas the lowest range for a high sensitivity
probe is 3 G (300 µT) full scale
4-27
REMOTE OPERATION
HOLD COMMANDS:
These commands select one of the HOLD modes or reset the
presently held reading. See Section-3 for more information.
:SENSe:HOLD:STATe <n>
Selects the HOLD function, where
<n> is a single ASCII digit, as
follows:
0 = All HOLD modes turned off.
1 = MIN HOLD on.
2 = MAX HOLD on.
3 = PEAK HOLD on.
4= FAST PEAK HOLD on
:SENSe:HOLD:STATe?
Returns an ASCII digit
representing the present HOLD
mode setting, as follows:
0 = All HOLD modes turned off.
1 = MIN HOLD on.
2 = MAX HOLD on.
3 = PEAK HOLD on.
4= FAST PEAK HOLD on
:SENSe:HOLD:RESet
4-28
This command resets the presently
held reading.
REMOTE OPERATION
ZERO COMMAND
This command initiates an automatic ZERO operation. See
Section-3 for more information.
:SYSTem:AZERo
Automatic zeroing is initiated upon receipt
of this command.
Note: If the meter has been configured to measure only
temperature (via the ”:DISPlay:FORMat “and a zero command is
used a “–201, hardware error”message will be generated.
RELATIVE COMMANDS
These commands control the RELATIVE function. See
Section-3 for more information.
:SYSTem:ARELative:STATe <n>
The relative function is turned
off when <n> is 0. When
<n> is 1 the relative function
is turned on, using the
previously generated relative
value, if any. When <n> is 2
the relative function is turned
on and an automatic relative
operation is initiated.
:SYSTem:ARELative:STATe?
Returns a single ASCII digit
indicating the on / off state of
the relative function. A 0
indicates the relative function
is turned off. A 1 indicates
the relative function is turned
on.
4-29
REMOTE OPERATION
4-30
REMOTE OPERATION
MEASUREMENT COMMAND:
This command acquires a new flux density reading.
:MEASure:FLUX?
This command returns the latest flux density
reading. The returned string will contain a
signed real number and a unit indicator (G,
T, or A/m). If in the ac mode the reading will
not contain a polarity character (+ or -).
The ranges of possible readings for the
various units of measure are:
0.0G to 29990G
0.00000T to 2.999T
0A/m to 2,388,000A/m
:MEASure:TEMP?
This command returns the largest
temperature reading. A temperature
compensated probe must be attached for
this command to be accepted. The returned
string will contain a signed real number and
a unit indicator (C or F).
The ranges of possible readings for the
various units of measurements are:
-40.0°C to +100.0°C
-40.0°F to +212.0°F
Note: The meter must be configured to measure flux density
and/or temperature prior to requesting a measurement, otherwise
a “-201, hardware error”message will occur. See the
“:DISPlay:FORMat”command for details.
Note: If a “:MEASure:TEMP?”command is issued but the
attached probe does not support temperature measurement, a
4-31
REMOTE OPERATION
”-201, hardware error”message will be generated.
DISPLAY FORMAT COMMANDS:
This command contains the type of information displayed on the
upper and lower readouts.
:DISPlay:FORMat <n>
Configures the display format,
where <n> is a single ASCII digit, as
follows:
0= Flux density only (upper readout)
1= Temperature only (upper
readout).
2=Flux density (upper readout and
temperature (lower readout).
:DISPlay:FORMat?
Returns a single ASCII digit
indicating the format of the display:
0= Flux density only (upper readout)
1= Temperature only (upper
readout).
2=Flux density (upper readout and
temperature (lower readout).
4-32
REMOTE OPERATION
INTERMIXING “COMMON” AND SCPI COMMANDS:
As mentioned earlier a string sent to the instrument can contain
more than one command as long as the commands are
separated by semicolons(;). “Common”and SCPI commands can
be intermixed. For instance the string
*CLS;:UNIT:FLUX:DC:TESLA;:MEASure:FLUX?
is valid, first clearing the instrument’s event and error registers,
then programming it to supply readings in tesla in the dc mode
and requesting the latest reading. The host system should be
prepared to receive the reading immediately after transmitting this
command string to the meter.
USING QUERY COMMANDS:
When any query command is issued the meter will send its
response back immediately. However if a query command is part
of a multiple command string the meter will transmit the response
after all commands within the string have been executed. For
instance here is such a string:
:UNIT:FLUX:DC:GAUSS;:MEAS:FLUX?;:UNIT:FLUX:DC:TESLA;
:MEAS:FLUX? <LF>
In this string the meter is programmed for DC GAUSS mode and
a measurement is requested. Then the meter is programmed for
DC TESLA mode and another measurement is requested. When
the meter has finished executing the entire command string it will
transmit a string similar to this:
+1892G;+0.1892T;<LF>
4-33
REMOTE OPERATION
USING THE OPERATION COMPLETE STATUS:
There are several ways to determine if the meter has executed a
command. If the command string contains a query command the
program can simply wait for the meter to transmit its response.
But if the query command contains an error the command may
never be executed. Further, some commands do not require a
response. The best way to handle all situations is to issue the
*OPC? command once prior to sending any other commands.
This will cause the meter to always transmit an ASCII “1”each
time it receives the (LF) character. If the command string
contains one or more query commands, the “1”will be appended
to the end of the response separated by a semicolon (;). For
instance the response to the command string
*OPC?;:UNIT:FLUX:AC:GAUSS <LF>
would be “1;<LF>”, whereas the response to a command string
containing a query
*OPC?;:MEAS:FLUX? <LF>
might be “+221.3G;1;<LF>”.
4-34
REMOTE OPERATION
EXAMPLE PROGRAM:
Of the many programming languages available such as C,
Pascal, BASIC, Fortran, etc., BASIC is probably the best known
and understood by the most people. For this reason the following
example program was written in Microsoft MS-DOS Q-BASIC
for 80x86 style personal computers.
The following program is provided as a guide for programmers
who wish to develop their own programs. It was written for clarity
and is not necessarily the most efficient in terms of speed or size.
Not all of the commands are demonstrated, but enough are used
to serve as a general guide for using the other commands.
DECLARE SUB METER.I.O (expect.response%, timeout%)
DIM SHARED METER.CMD$, METER.RESP$, METER.ERROR%
CLS
PRINT "*********************************************************************"
PRINT "
RS-232 DEMONSTRATION PROGRAM "
PRINT "*********************************************************************"
PRINT "This program demonstrates the use of the RS-232 serial port"
PRINT "This Q-BASIC program was intended for using the COM2 serial port"
PRINT " To use another comm port change the OPEN statement near the start"
PRINT " of the program."
PRINT ""
PRINT "This program can be used to verify the connection between the meter"
PRINT " and computer as well as provide a template for system programmers"
PRINT " who wish to create their own programs. You can use a straight-thru"
PRINT " cable from the meter to the PC. See the user's manual for more"
PRINT " information."
PRINT
PRINT "Turn the meter on wait for measurement to begin.
PRINT " position. Press any key to continue...";
DO: LOOP UNTIL INKEY$ <> "": CLS
PRINT "Initializing COM2 port..."
OPEN "COM2:2400,N,8,1,CS,DS,CD" FOR RANDOM AS #1
4-35
REMOTE OPERATION
Now that the COM-2 port has been opened an attempt is made to
communicate with the meter. The *OPC? command is sent
which should cause the meter to send back a “1;”. If no response
is received an error message is displayed and the program is
terminated.
ON ERROR GOTO TRY.AGAIN
'============================
'Attempt to communicate with meter.
'============================
PRINT "Verifying interface..."
METER.CMD$ = "*OPC?": CALL METER.I.O(1, 1)
IF METER.ERROR% = 1 THEN
PRINT "Meter did not respond as requested. Please check your"
PRINT " interface cable. Make sure it is connected to the COM2"
PRINT " port on your computer."
END
END IF
Now that the communications link between meter and computer
has been established the I.D. information for the meter and probe
is requested and displayed.
'==========================================
'Request meter / probe I.D. information and display it.
'==========================================
PRINT "Retrieving meter I.D. information...": PRINT
METER.CMD$ = "*IDN?;*OPT?": CALL METER.I.O(1, 1)
POS1% = INSTR(METER.RESP$, ",")
PRINT "Device = "; LEFT$(METER.RESP$, POS1%-1);
POS2% = INSTR(POS1%+1, METER.RESP$, ";")
PRINT " Revision = ";
PRINT MID$(METER.RESP$, POS1%+1, (POS2%-POS1%-1));
POS1% = INSTR(POS2%+1, METER.RESP$, ",")
PRINT " Probe Model = ";
PRINT MID$(METER.RESP$, POS2%+1, (POS1%-POS2%-1));
POS2% = INSTR(POS2%+1, METER.RESP$, ";")
PRINT " Probe Serial = ";
PRINT MID$(METER.RESP$, POS1%+1, (POS2%-POS1%-1))
PRINT
4-36
REMOTE OPERATION
PRINT "Press any key to continue....."
DO: LOOP UNTIL INKEY$ <> "": CLS
The user is now instructed to insert the probe into the zero flux
chamber or any dc field lower than 30 mT (300G). The meter will
be instructed to perform an automatic zeroing, which will take
several seconds to complete. If the meter reports an error the
error message will be displayed.
'===============================
'Demonstrate the AUTO-ZERO function.
'===============================
PRINT "The automatic zeroing function will now be demonstrated."
PRINT
PRINT "Insert the probe into the zero flux chamber or in any magnetic"
PRINT " field less than 30 mT (300 G)."
PRINT
PRINT "Press any key when ready.....": PRINT
DO: LOOP UNTIL INKEY$ <> ""
PRINT "AUTO ZERO is in process...please wait...."
METER.CMD$ = ":SYSTEM:AZERO"
CALL METER.I.O(1, 15)
METER.CMD$ = ":SYSTEM:ERR?": CALL METER.I.O(1, 1)
POS1% = INSTR(METER.RESP$, ",")
IF VAL(LEFT$(METER.RESP$, POS1% - 1)) <> 0 THEN
CLS:BEEP
PRINT "The meter has reported an error of "; METER.RESP$
PRINT
PRINT "Press any key to continue....."
DO: LOOP UNTIL INKEY$ <> "": CLS
END IF
4-37
REMOTE OPERATION
The meter is now set to the dc tesla mode with a fixed range of
300 mT
.
'=====================================================
'Program meter for DC-TESLA measurement on the 300 mT range.
'=====================================================
CLS
PRINT "Programming meter for DC-TESLA mode, 300 mT range..."
METER.CMD$ = ":SYSTEM:CLEAR": CALL METER.I.O(1, 1)
METER.CMD$ = ":UNIT:FLUX:DC:TESLA;:SENSE:FLUX:RANGE 1"
CALL METER.I.O(1, 2)
Flux density readings are acquired and displayed on a continuous
basis. The user can move the probe in and out of a magnetic
field in order to observe the changes in the flux density readings.
'======================================================
‘Acquire measurements and display them until the user presses a key.
‘======================================================
LOCATE 10, 1
PRINT "Move the probe near a dc magnetic field and observe the
PRINT " change in the present flux density reading."
PRINT
PRINT "Press any key when finished....."
DO
METER.CMD$ = "MEAS:FLUX?": CALL METER.I.O(1, 2)
POS1% = INSTR(METER.RESP$, ";")
LOCATE 15, 15
PRINT "Present flux density = "; LEFT$(METER.RESP$, POS1% - 1)
METER.CMD$ = ":SYSTEM:ERR?": CALL METER.I.O(1, 1)
POS1% = INSTR(METER.RESP$, ",")
IF VAL(LEFT$(METER.RESP$, POS1% - 1)) <> 0 THEN
CLS: BEEP
POS1% = INSTR(METER.RESP$, ";")
PRINT "The meter has reported an error of ";
PRINT LEFT$(METER.RESP$, POS1% - 1)
PRINT
PRINT "Press any key to continue....."
4-38
REMOTE OPERATION
DO: LOOP UNTIL INKEY$ <> ""
EXIT DO
END IF
LOOP UNTIL INKEY$ <> ""
END
TRY.AGAIN:
RESUME NEXT
‘Comm error trap.
This subroutine handles the communications between the meter
and the computer. The header contains specific information.
SUB METER.I.O (expect.response%, timeout%)
'=====================================================
'
METER INPUT / OUTPUT SUBROUTINE
'=====================================================
' This subroutine transmits the contents of the global buffer
' <METER.CMD$> to the meter, followed by the line feed terminator.
'
' If the variable <expect.response%> is non-zero, the subroutine will
' wait for a response from the meter and store it in the global buffer
' <METER.RESP$>. The program will wait for <timeout%> seconds for
' a response. If no response is received the command will be issued
' again. If still no response the global variable <METER.ERROR%> will
' be set to 1 and a normal return will be made.
'=====================================================
RETRY = 2: METER.ERROR% = 0
'Clear error flag.
DO UNTIL EOF(1) = -1
METER.RESP$ = INPUT$(LOC(1), #1) 'Remove any residual bytes
LOOP
' from the input buffer.
SEND.COMMAND:
METER.RESP$ = ""
'Null response buffer.
PRINT #1, METER.CMD$ + CHR$(10); 'Send command string
' followed by a line feed.
IF expect.response% = 0 THEN EXIT SUB 'Return if no response
‘expected.
4-39
REMOTE OPERATION
RESET.TIMER:
START.TIME = TIMER
'Store as many characters as are in the input buffer. If one of them
' is the line feed character return to caller with the response in the
' <METER.RESP$> buffer. If no response is received within ‘<timeout%>
seconds, try again. If still no response, set ‘<METER.ERROR%> to non-zero
and return.
LOOK.FOR.INPUT:
IF EOF(1) = -1 THEN
IF (TIMER - START.TIME) > timeout% THEN
RETRY = RETRY - 1
IF RETRY <> 0 THEN
'Send command one more time.
GOTO SEND.COMMAND
ELSE
METER.ERROR% = 1
'Report an error if no response.
EXIT SUB
END IF
ELSE
GOTO LOOK.FOR.INPUT
END IF
ELSE
METER.RESP$ = METER.RESP$ + INPUT$(LOC(1), #1)
IF (INSTR(METER.RESP$, CHR$(10))) = 0 THEN GOTO
RESET.TIMER
EXIT SUB
END IF
END SUB
4-40
WARRANTY
This instrument is warranted to be free of defects in material and workmanship.
F.W. BELL’s obligation under this warranty is limited to servicing or adjusting
any instrument returned to the factory for that purpose, and to replace any
defective parts thereof. This warranty covers instruments which, within one
year after delivery to the original purchaser, shall be returned with transportation
charges prepaid by the original purchaser, and which upon examination shall
disclose to F.W. BELL’s satisfaction to be defective. If it is determined that the
defect has been caused by misuse or abnormal conditions of operation, repairs
will be billed at cost after submitting an estimate to the purchaser.
F.W. BELL reserves the right to make changes in design at any time without
incurring any obligation to install same on units previously purchased.
THE ABOVE WARRANTY IS EXPRESSLY IN LIEU OF ALL OTHER
WARRANTIES EXPRESSED OR IMPLIED AND ALL OTHER OBLIGATIONS
AND LIABILITIES ON THE PART OF F.W. BELL, AND NO PERSON
INCLUDING ANY DISTRIBUTOR, AGENT OR REPRESENTATIVE OF F.W.
BELL IS AUTHORIZED TO ASSUME FOR F.W. BELL ANY LIABILITY ON ITS
BEHALF OR ITS NAME, EXCEPT TO REFER THE PURCHASER TO THIS
WARRANTY.
THE ABOVE EXPRESS WARRANTY IS THE ONLY
WARRANTY MADE BY F.W. BELL. F.W. BELL DOES NOT MAKE AND
EXPRESSLY DISCLAIMS ANY OTHER WARRANTIES, EITHER EXPRESSED
OR IMPLIED, INCLUDING WITHOUT LIMITING THE FOREGOING,
WARRANTIES OF MERCHANTABILITY OR FITNESS FOR A PARTICULAR
PURPOSE OR ARISING BY STATUE OR OTHERWISE IN LAW OR FROM A
COURSE OF
DEALING OR USAGE OR TRADE.
THE EXPRESS
WARRANTY STATED ABOVE IS MADE IN LIEU OF ALL LIABILITIES FOR
DAMAGES, INCLUDING BUT NOT LIMITED TO CONSEQUENTIAL
DAMAGES, LOST PROFITS OR THE LIKE ARISING OUT OF OR IN
CONNECTION WITH THE SALE, DELIVERY, USE OR PERFORMANCE OF
THE GOODS. IN NO EVENT WILL F.W. BELL BE LIABLE FOR SPECIAL,
INDIRECT OR CONSEQUENTIAL DAMAGES EVEN IF F.W. BELL HAS BEEN
ADVISED OF THE POSSIBILITY OF SUCH DAMAGES.
This warranty gives you specific legal rights, and you may also have other rights
that vary from state to state.
5-1


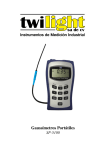
![G2 Decoder [obsolete] Second Generation User Manual](http://vs1.manualzilla.com/store/data/005963661_1-2c18e92993151caf68904a7a924089ff-150x150.png)
![AWD10SS [obsolete] User Manual](http://vs1.manualzilla.com/store/data/005777265_1-bc3e4afb4b891fb2fe3c32a930faa0e5-150x150.png)