1
Solutions for Demanding Applications
VARTECH
S Y S T E M S I N C.
VT231 Series
VT231W – VT231WX – VT231RP
User’s Guide
Read instructions completely before attempting to operate your Display
Contents
1
General Description
2
Handling Precautions
3
Specification
4
Power & Signal Connections
5
Operating Instructions
6
On Screen Display (OSD) Menu
7
Picture Adjustment
8
Trouble Shooting
9
Video Modes & Signal Timings
10
Glossary of Terms and Acronyms
VT231W, VT231WX, VT231RP
2 of 17
150-125
1
GENERAL DESCRIPTION
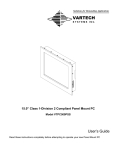
The monitor uses a TFT Liquid Crystal Display. It is fitted with interface circuits that allow
it to be connected easily to standard PC graphics cards or to a composite video source.
The TFT LCD has a 23.1” display diagonal with a native resolution of 1600 x 1200 pixels
(UXGA). The monitor can accept signals of lower resolution, such as VGA and SVGA, and
these signals are scaled so that they are displayed full screen.
Along with conventional brightness and contrast controls, this display has an
advanced brightness dimming technique, with a 1000:1 dynamic range, is employed
to meet the demanding needs of night-time operation in maritime environments.
The front panel houses an ambient light sensor, and in conjunction with the LED control
knob, adjusts the brightness of the panel LED to suit prevailing ambient light levels.
A simple user interface with On Screen Display (OSD) allows the user to adjust a wide
variety of parameters if necessary. Once the parameters are set they are stored in non-volatile
EEPROM. This ensures that the set-up is retained after power is switched off.
Operating parameters may also be modified using a RS232 serial data interface. There is a
loop through RS232 connector allowing the data to pass through to a series of similar
displays. With each display having a unique address (set on an internal DIP switch),
individual displays can be accessed from a remote controller for dynamically adjusting
display parameters.
The RGB input is buffered and routed to an auxiliary output socket to enable a single source
signal to be distributed to a string of serially linked displays. All incoming and outgoing
signals are terminated at 75 Ohms.
The AC model has an IEC mains outlet socket that supplies mains power to an auxiliary
piece of equipment whilst the monitor is powered and switched on.
The monitor is designed for operation from AC supply 90 - 265V.
.
2
HANDLING PRECAUTIONS
The casing of the monitor gives good protection to its internal components. However, to
prevent damage to the LCD display at the front it is important to observe a few simple
precautions.
When the surface is soiled, wipe lightly with clean absorbent cotton or other soft cloth.
The TFT panel and the circuit boards contain devices that are sensitive to Electrostatic
Discharge. Adequate ESD precautions should be taken during unpacking, handling and
installation of the TFT monitor.
There are no user serviceable parts inside the monitor and all servicing must be carried out
by qualified personnel.
The cover should never be removed by unqualified personnel, as there are potentially
harmful voltages within this equipment.
VT231W, VT231WX, VT231RP
3 of 17
150-125
3
SPECIFICATIONS
Supply Input voltage
Power consumption
Fuse Rating
90 - 265V AC (Automatic Detect)
65W max
5A (ceramic High Rupture) AC & DC models
Display area
Dot Pitch
Pixel Format
Intensity
Contrast Ratio
Colour Depth
Viewing Angle
Response Time
Brightness Uniformity
Backlight Life
376.3mm (H) x 301.1mm (V)
0.294mm
1600 (H) x 1200 (V)
200 cd/m2
(typical) see note 1
500:1
(typical)
8 Bits per colour (16 million colours)
+/- 85 deg.
15mS (typical)
25%
50,000 Hours (typical)
Image Resolutions
640 x 480 pixels
800 x 600 pixels
1024 X 768 pixels
1280 X 1024 pixels
1600 X 1200 pixels
Signal Sources
RGB + V&H syncs
(interlaced & non-interlaced)
PAL/NTSC
S-Video (Y/C)
Horizontal scan
Vertical scan
Clock rate
31- 91KHz
60 - 85Hz
135MHz max
Connectors
IEC mains inlet.
IEC mains outlet.
RGB video input.
RGB video output.
Composite video input
S-Video input.
RS232 input.
RS232 output.
Dimensions:
Fixing Centres
Fixing Screws
444mm (high) x 483 (wide) x 98.5mm (deep)
267mm (high) x 464.64mm (wide)
6mm
Ingress Protection
IP65 (front aspect)
VT231W, VT231WX, VT231RP
4 of 17
3 pin IEC Male
3 pin IEC Female
15 way ‘D’ socket
15 way ‘D’ plug
Phono (RCA 3mm) socket.
S-Video socket
9 way ‘D’ plug
9 way ‘D’ socket
IP20 (rear aspect)
150-125
Operating Temperature
Storage Temperature
Operating Humidity
Storage Humidity
-15 to +55 deg C
-20 to +60 deg C
30% to 90% (non-condensing)
10% to 90% (non-condensing)
For long term reliability, we do not recommend routine
operation at extreme temperature and humidity levels.
Construction
Aluminium Housing
Toughened safety glass with contrast enhancing optical
coatings.
Approvals
Designed to comply with:
th
IEC 60945
(2002) 4
Edition weather
protection. IEC 61174
Type Approvals
Pending
Note 1: Display Brightness (Intensity)
Display Brightness is specified with peak white picture content displayed at maximum
brightness and contrast settings of the monitor. The TFT backlights require 30 minutes of
continuous operation to warm up and reach full brightness.
Some flicker may be noticed during the first moments after switch on as the backlights settle.
VT231W, VT231WX, VT231RP
5 of 17
150-125
5
POWER AND SIGNAL CONNECTORS
The power and signal inputs to the monitor are located on the rear of the unit.
From left to right:
(Top) RS232 Input from controller – 9 way ‘D’ Socket
(Bottom) RS232 Output to other displays – 9 way ‘D’ Plug
IEC AC Power Outlet – AC model
(DC model does not have a power output connector)
IEC Filtered and Fused AC Power Inlet – AC model
(DC model has a 3 pole screw locking input connector in this location)
LED Brightness Adjustment Control
(Top) RGB Buffered Video Output – 15 way high density Plug
(Bottom) RGB Video Input – 15 way high density Socket S-VHS Video Input
PAL/NTSC Composite Video Input - Phono Socket. Blanking Plate for unused facility.
DATA INPUT
Standard hi-density 15way video connection
VIDEO PAL/NTSC INPUT
75Ω BNC input for PAL/NTSC composite video
1V peak-peak
VT231W, VT231WX, VT231RP
6 of 17
150-125
Pin
number
1
2
3
4
5
6
7
8
9
10
11
12
13
14
15
Function
Red video
Green Video
Blue Video
Not
connected
Not
connected
Red ground
Green
ground Blue
ground Not
connected
Sync ground
Not
connected
Not
connected
Horizontal
sync Vertical
sync Not
connected
VT231W, VT231WX, VT231RP
SVHS Y/C INPUT
4 way Mini Din socket for connection to SVHS
component video (Y/C)
RS232
See connector details in RS232 section of the
technical manual.
7 of 17
150-125
5
OPERATING INSTRUCTIONS
The monitor must be connected to a suitable ac power source and a suitable video signal.
The monitor is switched on using the push button on the front.
USER CONTROLS
Adjustments to the brightness & contrast are made by front panel controls.
Contrast
Brightness
On/Off standby
switch
Note: Standby switch requires only short press to switch ON, but button must be pressed for
5 seconds to switch OFF – This feature prevents accidental switching off by user.
To the left of the On/Off switch is the Power Indicator LED
To the right of the Brightness control is the ambient light sensor.
SERVICE/INSTALLATION (On Screen Display) CONTROLS
Pressing menu
button activates the monitor’s main set-up controls. When this is done the
monitor displays a menu of adjustments. The functions of the brightness and contrast buttons
are now changed to operate this menu.
By pressing the ш and ш SEL buttons the user may highlight different items on the menu.
The highlighted item may be adjusted or set by pressing the ш and ш ADJ buttons.
Note that these buttons are sometimes referred to as + and – on the OSD menu.
When OSD parameter setting is complete pressing the menu button can close the menu.
Alternatively, the menu can be left to time out and disappear by itself.
Detailed description of the OSD menus are included in the following pages.
VT231W, VT231WX, VT231RP
8 of 17
150-125
OPERATIONAL NOTES
In the absence of a video signal the display will show the message “No Signal”
For navigational applications an external, and variable source of illumination is required to
overcome the brightness knob and control pushbuttons not having variable self lighting.
The requirement is specified in IEC 60945, 6.5c, and can be accomplished with a gooseneck lamp on a dimmer circuit.
6
ON SCREEN DISPLAY (OSD) MENU
To turn on the OSD menu:
Press the MENU button
Move to next icon:
Press the MENU button
Select options within icon menu:
Use SEL UP/SEL DN buttons, the selected
option is in yellow. Increase/decrease setting:
Use +/- buttons
Move selection left/right:
Use +/- buttons, the selected option is in green
To confirm the selection:
Use + button
VT231W, VT231WX, VT231RP
9 of 17
150-125
OSD functions
Brightness and Contrast :
Brightness
Increase/decrease panel brightness level, total: 100 steps
Contrast
Increase/decrease panel contrast level, total: 100 steps
Color Temperature : 9500K / 8000K / 6500K / 5000K
Adjust the warmness of the image displayed. The higher temperature the coolest image looks like. The
lower temperature the warmest image looks like.
Video Adjustment :
Color:
Tint:
Sharpness:
(DISPLAYED IN VIDEO MODE ONLY)
adjust video color level
adjust video tint level
adjust video image sharpness level
Video Type: DVD / VCR change brand width to match the source
Frequency and Phase : (DISPLAYED IN PC MODE ONLY) Frequency
Phase
Adjust the image horizontal size
Fine tune the data sampling position (adjust image quality)
Video System : Select video system and input signals (DISPLAYED IN VIDEO MODE ONLY)
AUTO : automatic detection of NTSC and PAL system (not applicable in SECAM system)
NTSC / NTSC 4.43 : manual select NTSC system
PAL / PAL M : manual select PAL system
SECAM : manual select SECAM system
Status : (DISPLAYED IN PC MODE ONLY)
Display graphic information: resolution and frequency
Position :
Image up/down : Use SEL UP/SEL DN to move the image vertically
Image left/right : Use +/- to move the image horizontally
Rotation : (DISPLAYED IN VIDEO MODE ONLY)
Rotates the image from landscape format to portrait format.
VT231W, VT231WX, VT231RP
10 of 17
150-125
Picture in Picture : (DISPLAYED IN PC MODE ONLY)
PIP Size :
Off / 1 / 2 / 3
PIP Source :
Auto / Comp / Svid
/YCbCr
Select PIP window size: close, size 1, size 2 and size 3
Select video source to be display in PIP window:
Auto – automatic detection of Composite, S-video and
Component
Comp – manual select composite video only
SVid – manual select S-video only
YCbCr – manual select component video only
Horizontal Position
adjust the position of the PIP window horizontally
Vertical Position
adjust the position of the PIP window vertically
Advanced PIP Settings :
Brightness
adjust the image brightness of the PIP window
Contrast
adjust the image contrast of the PIP window
Sharpness
adjust the image sharpness of the PIP window Tint
adjust the tint of the image of the PIP window
Color
adjust the color of the image of the PIP window
Video Scaling : (DISPLAYED IN VIDEO MODE ONLY)
Use the UP and DOWN arrow keys to select the following scaling modes.
Normal
Letterbox
Letterbox with Subtitles
Nonlinear Scaling Modes : Horiz Clipping / Horiz Offset / Horiz Stretch / Vert Clipping / Vert Offset /
Vert Stretch
Graphic Scaling Modes : (DISPLAYED IN PC MODE ONLY)
Use the up and down arrow keys to choose a scaler mode.
Use the + or - key to modify a following scaler parameters.
One to One :
Horizontal Pan
Vertical Pan
Fill Screen :
enable full screen expansion for lower resolution Image
Fill to Aspect ratio :
enable fill screen expansion for lower resolution image according to aspect ratio
Nonlinear Scaling Modes : Horiz Clipping / Horiz Offset / Horiz Stretch / Vert Clipping / Vert Offset /
Vert Stretch
Language : Select OSD menu language display
1. English
2. Danish
Video source : Select the input video signal
Analog RGB / Component Video / Composite Video / S-Video.
VT231W, VT231WX, VT231RP
11 of 17
150-125
Utilities :
User Setting :
DPMS :
User Timeout : adjust the OSD menu timeout period in a step of 5 seconds
Disable / Enable the DPMS function
Auto Source Select :
Off - Disable auto source select function.
Low - Auto source select enable ONLY in power up.
High - Auto source select ALWAYS enable.
Gamma :
1.0 (Default setting)
1.6
2.2
OSD Setting :
OSD Horz Position :
move the OSD menu horizontally
OSD Vert Position :
move the OSD menu vertically OSD
Background : Translucent / Opaque
OSD Rotate : Normal / Rotate
Freeze Frame : Freeze the image (use “+” button)
Zoom : Zoom level :
enable the zoom in function on the image displayed.
Use “+” button to zoom in the image.
Use “-“ button to decrease the zoomed image.
Horizontal Pan :
Vertical Pan :
Direct Access #1:Define the hot key function (“+” and “-“) for one of the following
adjustments : Brightness / Contrast / Volume / Freeze / Zoom /Video Source*/ PIP
Direct Access #2:Define the hot key function (“SEL UP” and “SEL DN“) for one of the following
adjustments : Brightness / Contrast / Volume / Freeze /Zoom /Video Source*/ PIP
Display Orientation : Normal / Horizontal Inverse / Vertical Inverse / Inverse
Calibrate RGB Gain : Color Calibration (DISPLAYED IN PC MODE ONLY)
Load Factory Defaults : Recall factory default settings.
* By pressing the hot key, the source is in sequence of Analog RGB/Composite Video/S-Video/
Component Video.
Volume :
Adjust the audio volume level (functions only if the audio add-on installed)
Most products are not fitted with this option – contact factory for details.
Exit menu
The OSD settings chosen will be stored in memory. The OSD menu can be cleared from the screen
by moving the selection bar to the EXIT icon pressing the + button otherwise it will automatically clear after a few
seconds (time-out period) of non-use.
VT231W, VT231WX, VT231RP
12 of 17
150-125
OSD Firmware version
Activate the menu selection button, and repeat the menu button until the
“Utilities” page is displayed. The firmware version is displayed on the right hand
side of this page as V1.2E or similar.
VT231W, VT231WX, VT231RP
13 of 17
150-125
7
PICTURE ADJUSTMENT
When the monitor is switched on for the first time and a signal applied to the screen
will adjust itself to factory default settings and display a picture.
Use of the menu Autoset facility will bring the picture into near correct adjustment.
It is possible that some adjustments will be needed to obtain optimum picture quality.
Use the OSD controls to adjust the Frequency and Phase parameters. See Item 4 in
the
OSD Menu section.
The first step is to adjust the Frequency.
FREQUENCY ADJUSTMENT:
It is advisable to display a picture that has a large number of single pixels or vertical
lines. The Windows 95 or 98 Shutdown screen is very good for assessing the
frequency effect.
Poor adjustment of frequency causes vertical lines of noise to be displayed. Adjust the
frequency so that the noise lines move further apart from each other. Keep adjusting until
the noise lines disappear.
Windows Shutdown screen
showing poor frequency
VT231W, VT231WX, VT231RP
Windows Shutdown screen
showing correct frequency
14 of 17
150-125
8
TROUBLE SHOOTING GUIDE
Symptom
Picture not displayed
Cause
No power – blank screen.
No signal – blue screen with legend “No
Signal” Noisy picture over whole screen
Noisy picture in bands
9
Phase adjustment needed
Frequency adjustment needed
Video Modes & Signal Timings
Mode
Resolution
E1_70
E1_85
E2_70
E2_85
T_70
T_85
V_60
V_67
V_72
V_75
V_85
SV_56
SV_60
SV_72
SV_75
SV_85
X_60
X_70
X_72
X_75
X_87I
640 x 350
640 x 350
640 x 400
640 x 400
720 x 400
720 x 400
640 x 480
640 x 480
640 x 480
640 x 480
640 x 480
800 x 600
800 x 600
800 x 600
800 x 600
800 x 600
1024 x 768
1024 x 768
1024 x 768
1024 x 768
1024 x 768
X_85
SX_60
SX_72
SX_75
SX_85
NTSC
PAL
NTSC
PAL
1024 x 768
1280 x 1024
1280 x 1024
1280 x 1024
1280 x 1024
S-Video
S-Video
Composite
Composite
VT231W, VT231WX, VT231RP
Clock
(MHz)
25.175
31.500
25.175
31.500
28.322
35.500
25.175
31.500
31.500
31.500
36.000
36.000
40.000
50.000
49.500
56.250
65.500
75.000
75.000
78.750
44.900
94.500
108.000
135.000
135.000
149.844
14.318
17.75
14.318
17.75
Horizontal
Freq (KHz)
31.469
37.861
31.469
37.861
31.469
37.927
31.469
37.500
37.861
37.500
43.269
35.156
37.879
48.077
46.875
53.674
48.363
54.476
57.515
60.023
35.522
Interlaced
68.677
63.981
78.125
79.976
91.146
15.734
15.625
15.734
15.625
15 of 17
Vertical
Freq (Hz)
70
85
70
85
70
85
60
67
72
75
85
56
60
72
75
85
60
70
72
75
87
85
60
72
75
85
60
50
60
50
150-125
10
Glossary of Terms and Acronyms
Colour Depth
The number of bits used to store each of the primary colours.
IP
Ingress Protection rating for equipment sealing against liquid and dust.
LCD
Liquid Crystal Display
NTSC
National Television Standards Committee
composite video signal.
OSD
On Screen Display
PAL
Phase Alternated by Line signal.
PIP
Picture In Picture
RGB
Red-Green-Blue.
Video signal format using separate signal lines for
the three primary colours and sync signals.
Response Time
The average response time for the display to react to a change in
electrical signal from white to black, or black to white.
TFT
Thin Film Transistor – the mechanism for flat screen pixel control.
VGA
SVGA
XGA
SXGA
UXGA
Display resolution of 640 x 480
Display resolution of 800 x 600
Display resolution of 1024 x 768
Display resolution of 1280 x 1024
Display resolution of 1600 x 1200
- Standard for American
Standard for European composite video
Due to a policy of continual improvement the information in this manual is subject to change without notice.
VT231W, VT231WX, VT231RP
16 of 17
150-125
CONTACT
Vartech Systems Inc
11529 Sun Belt Ct
Baton, Rouge, LA 70809
Phone: 225.298.0300
Toll Free: 800.223.8050
Fax: 225.297.2440
Email: [email protected]
www.vartechsystems.com
VT231W, VT231WX, VT231RP
17 of 17
150-125