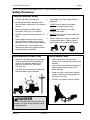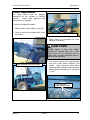
1
Model 2110 Pull-Type Peanut Combine MAN121 2nd Edition, Beg. S/N 490000 Read this manual before using this product. Failure to follow the instructions and safety precautions in this manual can result in serious injury or death. July 2011 ©2011 Updated 10/22/15 Model 2110 Pull-Type Peanut Combines are manufactured by Amadas Industries: You can find us on the Web at: www.amadas.com or e-mail us at: [email protected] or call us at: 757-539-0231 Mailing Addresses Shipping Addresses P.O. Box 1833 Suffolk, VA 23439 1100 Holland Road Suffolk, VA 23434 P.O. Box 3687 Albany, GA 31701 1701 South Slappey Blvd. Albany, GA 31706 2110 PT Peanut Combine Introduction Table of Contents Welcome .................................................. iii Specifications ........................................ v Dimensions .......................................... vi 1. Safety ................................................... 1 Safety At All Times! ............................... 2 Safety Practices .................................... 3 Additional Safety for this Machine ....... 10 Safety Decals ...................................... 11 2. Preparation ........................................ 17 Overview ............................................. 18 Safety Strut ..................................... 18 Pre-Delivery Check ............................. 19 3. Operation ........................................... 23 Combine Process ............................... 24 Hitching Combine to Tractor ............... 27 Attaching and Checking Driveline ....... 28 Daily Pre-Start Check ......................... 30 Operating Procedure .......................... 33 Proper Operation................................ 36 Optional Hydraulic Bin Lip/Dirt Trap ... 37 Road Towing Combine with Side Shift Tongue ................................... 38 4. Unloading Conveyor ........................ 39 Before Using the Conveyor ................ 40 Conveyor Safety ............................. 40 Using the Conveyor ............................ 41 Conveyor Tracking ............................. 42 Conveyor Maintenance ...................... 43 Conveyor Troubleshooting ................. 45 5. Controls and Adjustments ................ 47 Overview ............................................ 48 Control Locations ............................... 49 Controls and Adjustments .................. 50 MAN121 8/19/14 i Introduction 2110 PT Peanut Combine 5.Controls and Adjustments (Continued) Retention Board Adjustment ........... 50 Adjustable Overhead Teeth and Concave Teeth Controls ............... 51 Cleaning Air Control ........................ 52 Tailboard Adjustment ...................... 53 Elevator Air Control......................... 54 Pickup Header Speed Control With Combine Hydraulics ............ 55 Standard Pickup Header Speed Control ........................................ 56 Remote Auger Reverse .................. 56 PTO Speed Adjustment .................. 57 Pickup Header Height Adjustment .. 59 Header Auger Adjustment ............... 60 Optional Dual Speed Cylinder Drives61 Chain Adjustment .............................. 71 Lubrication ......................................... 73 PTO................................................ 74 Schedule ........................................ 75 Lubrication Locations .................. 76 Post Season Maintenance ................. 77 Troubleshooting ................................. 78 Tachometer Programming ................. 81 Warranty ................................................. 83 6. Performance ...................................... 63 Fine Tuning Operation........................ 64 Achieving Maximum Ground Speed ... 65 Increasing Separating Capacity .......... 66 Harvesting Under Wet Conditions ...... 67 7. Maintenance ...................................... 69 Belt Adjustment .................................. 70 ii 8/19/14 MAN121 2110 PT Peanut Combine Introduction With origins dating back to 1963, AMADAS Industries and its predecessors have a long history of providing high quality, reliable, and innovative equipment for the farming industry. AMADAS equipment is currently at work throughout the United States and in many other countries. This equipment ranges from the Magnum Fource Peanut Combine, Tree Bark Processing and Packaging Machinery, Hi-Speed Cotton Stalk Puller/Chopper, Reel Rain Traveler Irrigation Systems, to the 2110 Pull-Type Peanut Combines. Welcome To Amadas Industries Thank you for choosing AMADAS Industries. We are strongly committed to your satisfaction and safety. Our goal is for you to be satisfied with our machinery for many years and it is our hope that you will choose AMADAS again for your equipment needs. We are confident you will experience many good years of service with your AMADAS combine. If any need should arise, we pledge the best efforts of our people and dealers to assist you. One of the most important factors to both safety and maximum performance is for every machine operator to understand thoroughly the safe operation of this equipment. Please invest the time to read this manual to ensure that injuries are prevented and to receive the maximum productivity from your AMADAS machine. MAN121 8/19/14 iii Introduction 2110 PT Peanut Combine 2110 PullType Peanut Combine development, field testing, and continuous improvement. In response to our customers’ needs and industry demands, the AMADAS peanut combine has evolved to the model 2110, the most technically advanced pull-type peanut combine available. The combination of innovative technology, low yearly maintenance, and the industry’s largest threshing and separation capacity makes this machine the world leader in pull-type combines. Benefits The proven performance of the advanced picking and separating technology of the AMADAS 2110 provides the following benefits: • Increased harvesting capacity • Increased harvesting efficiency • Reduced harvesting costs • Improved performance harvest conditions • Reduced field loss, foreign material, LSKs. in tough Congratulations on your purchase of an AMADAS 2110 Pull-Type Peanut Combine! At AMADAS Industries, we are proud of our equipment and our more than thirty years of service to peanut farmers. AMADAS pull-type peanut combines are the culmination of our years of iv 8/19/14 MAN121 2110 PT Peanut Combine Introduction Specifications Length overall: Height (bin lip in): 25’ 6” 16’ 6” (outside wheel base) 14’ 4” (centerline wheel base) 13’ 10” Height (bin lip out): 15’ 8” Dump height: 11’ 8” Height (bin raised): 24’ Weight (empty) 20,000 lbs Header widths: 18’, 19’, 15’3” Inside working width: 96 ¼” Bin capacity: 7500 lbs (standard) Tire size (std): 24.5 x 32 12 ply R1 high flotation cleated Tire size (opt): 30.5 x 32 12 ply R1 high flotation cleated Operation/warning light kit: Standard Remote auger reverse: Standard Vine spreader: Optional PTO input: 1000 PTO @ 850 RPM input (2-speed option) 1000 PTO @ 790 RPM input (standard) Tongue: Side shift/ hydraulic height adjustable with pin hitch Hitch type: 2 5/16” ball, ball & pin type option Picking: Four 30” dia. spring-tooth picking cylinders Dual speed cylinder drives Adjustable retention board Two sets adj. overhead teeth (standard) Five sets adj. concave teeth (option) Separation system: Five retractable spring tooth walker cylinders Two beater cylinders 15-roll disc separator 14” dia. 24-blade cross induction cleaning fan Elevator system: 12” dia. collection auger to 9 ½” square duct 28” dia. 12-blade centrifugal fan Width: NOTE! The above specifications are for a 7500-pound Bin Dump Equipped combine. MAN121 8/19/14 v Introduction 2110 PT Peanut Combine Dimensions 6-Row 13’10” 25’ 6” \ 15’ 8” with bin lip extended 19’ 6” vi 8/19/14 MAN121 2110 PT Peanut Combine Safety 1. Safety Safety at All Times! ............................... 2 Safety Practices .................................... 3 Additional Safety for this Machine ....... 10 Safety Decals ...................................... 11 This symbol means: ATTENTION! BECOME ALERT! YOUR SAFETY IS INVOLVED! MAN121 10/22/15 1 Safety 2110 PT Peanut Combine Safety at All Times! Look for the Safety Alert Symbol! You, the operator, can help avoid accidents or injury by observing the precautions in this section and insisting that others working for or with you also follow them. • Do NOT attempt to operate this equipment under the influence of drugs or alcohol, or prescription/over-thecounter drugs that may cause impairment. • This equipment is dangerous to children and persons unfamiliar with its operation. They should never be allowed to operate this machinery or remain in its vicinity while in operation. • Only a trained operator familiar with this machinery and trained in its operation should be allowed to operate this machine. Do NOT allow any person to operate or perform maintenance on this machine until he or she has read this manual and understands the safety precautions. • To prevent injury or death, use a tractor equipped with a Rollover Protective System (ROPS). • NEVER exceed the limits of a piece of machinery. If its ability to perform a job safely is in question, DO NOT TRY TO DO THAT JOB. Shields • • Certain photographs or illustrations in this manual may show a safety shield removed. However, NEVER operate this machine without all shields correctly in place! If a shield must be removed to make a repair or adjustment, replace the shield prior to use. Safety Signal Words Used Three safety signal words are used on the machine and in this manual to indicate the degree or level of hazard seriousness. These three words are: DANGER Indicates an imminently hazardous situation that, if not avoided, will result in death or serious injury. This signal word is to be limited to the most extreme situations, typically for machine components that, for functional purposes, cannot be guarded. WARNING Indicates a potentially hazardous situation that, if not avoided, could result in death or serious injury, and includes hazards that are exposed when guards are removed. It may also be used to alert against unsafe practices. CAUTION Safety Decals 2 The Safety Alert Symbol indicates a potential safety hazard to personnel and that extra precaution must be taken. When you see this symbol on the machine, remain alert and carefully read the message that follows it. ALWAYS follow the recommended precautions and safe operating procedures accompanying this symbol. If you have any questions, please contact your dealer or the manufacturer. • Replace any CAUTION, WARNING, DANGER, or instruction safety decal that is not readable or is missing. • Do NOT paint over, remove, or deface any safety sign or warning decals. 10/22/15 Indicates a potentially hazardous situation that, if not avoided, may result in minor or moderate injury. It may also be used to alert against unsafe practices. MAN121 2110 PT Peanut Combine Safety NOTE! This section covers general safety. Some items may not apply to this type of machine. Safety Practices Transport Machine Safely • Comply with state and local laws. • Be familiar with tractor operations and follow all safety instructions in the tractor’s manual. 20 MPH when weight is less than or equal to the weight of the tractor • Before moving away, always check immediate vicinity (e.g., for children). 10 MPH when weight is more than weight of the tractor • NEVER exceed a maximum speed of 20 MPH. • NEVER tow a load more than double the weight of the tractor! • Always adapt ground speed to road or field conditions, making sure you have adequate control of steering and stopping. • Sudden braking can cause a towed load to swerve and upset. Reduce speed if towed load is not equipped with brakes. • Avoid sharp turns, holes, ditches, and obstructions which may cause the tractor to tip, particularly on hillsides. • Use following tow load weight ratios as guidelines: Avoid Electrical Power Lines Use a Safety Chain • • Use a safety chain to help control machinery if it separates from the tractor drawbar. • Use a chain with strength rating equal to greater than the gross weight of the towed machine. • Attach the chain to the tractor drawbar support, allowing only enough slack in the chain for turning. • Do NOT use a safety chain for towing. • Make sure all components are secured in the proper position before transporting machine (for example: basket bin lip extension, mower deck, off-loading conveyor, etc.). AVOID all lines, particularly low-hanging electrical cables, during transport. DANGER Contact with electrical lines will cause the operator to suffer severe electrical shock or possibly death. MAN121 10/22/15 3 Safety 2110 PT Peanut Combine NOTE! This section covers general safety. Some items may not apply to this type of machine. Avoid High Pressure Fluids CAUTION 4 • Use extreme care when working with hydraulic components and high pressure sprays. • Escaping fluid or spray under pressure can penetrate the skin, causing serious injury. • To avoid injury, relieve pressure before disconnecting hydraulic or other lines. • Tighten all connections before applying hydraulic or spray pressure. • Search hoses/connections for leaks with a piece of cardboard. • Take appropriate safety measures to protect hands, body, and face from high pressure fluids. • Always wear appropriate safety gear to protect hands, body and face from exposure to high pressure fluids. • Never try to block the flow or search for leaks of high pressure fluids with your hands even if wearing gloves. High pressure fluids can penetrate gloves as well as your skin. • Always avoid direct contact of any high pressure fluid flow. • If an accident occurs, respond as follows: 10/22/15 o Seek medical treatment immediately. Any fluid injected into the skin must be surgically removed within a few hours or gangrene may result. o Alert the medical professionals that a fluid injection or high pressure spray injury has occurred. o Give information on the type of fluid or spray and time the accident occurred. If known, include the amount of fluid injected and/or the system injection pressure. o Surgery will most likely be required, so no food or drink for the affected person. Doctors unfamiliar with this type of injury should reference a knowledgeable medical source. Such information is available in English from Deere & Company Medical Department in Moline, Illinois, U.S.A., by calling 1-800-822-8262 or +1 309-7485636. VERY IMPORTANT!! Although in some cases there is little or no pain from an injection or high pressure spray accident, THIS IS A SERIOUS EVENT THAT MUST BE TREATED BY MEDICAL PROFESSIONALS!!! MAN121 2110 PT Peanut Combine Safety NOTE! This section covers general safety. Some items may not apply to this type of machine. Work in Ventilated Area Engine exhaust fumes can cause sickness or death. • • If it is necessary to run an engine in an enclosed area, remove the exhaust fumes from the area with an exhaust pipe extension. If you do not have an exhaust pipe extension, open the doors and get outside air into the area. AMADAS DOES NOT RECOMMEND RUNNING ANY ENGINE IN AN ENCLOSED AREA EVEN WITH VENTILATION. Handle Fuel Safety – Avoid Fires • Handle fuel with care; it is highly flammable. • Do NOT refuel the machine while smoking or when near open flame or sparks. • Always stop engine before refueling machine. • Fill fuel tank outdoors. • Prevent fires by keeping machine clean of accumulated trash, grease, and debris. • Always clean up spilled fuel. Prepare for Emergencies Wear Protective Clothing • Be prepared if a fire starts. • • Keep a first aid kit and fire extinguisher handy. Wear close-fitting clothing and safety equipment appropriate to the job. • Operating equipment safely requires the full attention of the operator. Do NOT wear radio or music headphones while operating machine. • Keep emergency numbers for doctors, ambulance service, hospital, and fire department near your telephone. MAN121 10/22/15 5 Safety 2110 PT Peanut Combine NOTE! This section covers general safety. Some items may not apply to this type of machine. Handle Chemical Products Safely • Avoid Contact with Moving Parts Direct exposure to hazardous chemicals can cause serious injury. Potentially hazardous chemicals used with AMADAS equipment include such items as lubricants, coolants, paints, and adhesives. • Before you start any job using a hazardous chemical, check the MSDS so that you are aware of the risks and know how to proceed safely. Carefully follow all procedures, using only recommended equipment. • See your AMADAS dealer for MSDS on chemical products used with AMADAS equipment. • Wear close-fitting clothing to avoid entanglement with moving parts. • Keep hands, feet, and clothing away from power-driven parts. • Never clean, lubricate or adjust machine when it is running. Remove Accumulated Crop Debris • The buildup of chaff and crop debris near moving parts or heat sources is a hazard. • Check and clean these areas frequently. • Before performing any inspection or service, engage parking brake, turn off engine, and remove key. • Understand the service procedure before doing work. Use proper tools and refer to the User Manual. Keep all parts in good condition and properly installed. • Fix any damage immediately; replace worn or broken parts. • Keep service area clean and dry. • • Lower machine to ground, engage parking brake, turn off engine, and remove key before performing maintenance. Keep the machine free of any buildup of grease, oil, or debris. • Allow time for the machine to cool completely. • Never lubricate, service, or adjust machine while it is moving. • Keep hands, feet, and clothing from powerdriven parts. • Securely support any machine elements that must be raised for service work. Practice Safe Maintenance • 6 10/22/15 MAN121 2110 PT Peanut Combine Safety NOTE! This section covers general safety. Some items may not apply to this type of machine. Remove Paint/Protective Coating Before Welding Or Heating o Allow any fumes to disperse for at least 15 minutes before welding or heating. • Do NOT use a chlorinated solvent in areas where welding will take place. Hazardous fumes can be generated when paint or coatings are heated by welding, soldering, or by using a torch. • • Do all work in an area that is wellventilated to carry toxic fumes and dust away. Do all work outside or in a well-ventilated area. • • Dispose of paint/coatings and solvent properly. Remove paint/coatings before welding or heating: • Avoid potentially toxic fumes and dust. • o If you sand or grind paint, avoid breathing the dust. Wear an approved respirator. o If you use solvent or paint stripper, remove stripper with soap and water before welding. o Remove solvent or paint stripper containers and other flammable material from the area. Keep Riders off of Machine Avoid Using Heat Near Pressurized Fluid Lines • • Flammable spray can be generated by heating near pressurized fluid lines, resulting in severe burns to yourself and bystanders. Do NOT heat by welding, soldering, or using a torch near pressurized fluid lines or other flammable materials. Pressurized lines can accidentally burst when heat goes beyond the immediate flame area. MAN121 10/22/15 • Only allow the operator on the machine. Riders obstruct the operator’s view, which results in the machine being operated in an unsafe manner. • Riders are subject to injury such as being thrown off of the machine. • Children should NEVER be allowed on the machine. 7 Safety 2110 PT Peanut Combine NOTE! This section covers general safety. Some items may not apply to this type of machine. • Dispose Of Waste Properly Inquire about the proper way to recycle or dispose of waste from your local environmental or recycling center, EPA, or from your AMADAS dealer. Improperly disposing of waste can threaten the environment and ecology. Potentially harmful waste includes items such as oil, fuel, coolant, brake fluid, filters, and batteries. • Use leak-proof containers when draining fluids. • Do NOT use food or beverage containers that may mislead someone into drinking from them. • Do NOT pour waste onto the ground, down a drain or into a water source. Support Machine Properly Service Drive Belts Safely • When servicing drive belts, always observe these precautions: • Always lower the attachment or implement to the ground before you work on the machine. If the work requires that the machine or attachment be lifted, provide secure support for them. If left in a raised position, hydraulically supported devices can settle or leak down. Do NOT support the machine on cinder blocks, hollow tiles, or props that may crumble under continuous load. • Do NOT work under a machine that is supported solely by a jack. • Follow all safety procedures in this manual for supporting the machine. • When implements or attachments are used with a machine, always follow safety precautions listed in the implement or attachment operator’s manual. 8 10/22/15 • Avoid serious injury from hand or arm entanglement. Never attempt to clean, check, or adjust belts while the machine is running. Always shut off the engine, set the parking brake and remove the key. • Do NOT attempt to clean belts with flammable cleaning solvents. MAN121 2110 PT Peanut Combine Safety NOTE! This section covers general safety. Some items may not apply to this type of machine. Service Tires Safely Explosive separation of a tire and rim parts can cause serious injury or death. • Do NOT attempt to mount a tire unless you have the proper equipment and experience to perform the job. • Always maintain the correct tire pressure. • Do NOT inflate the tires above the recommended pressure. • Never weld or heat a wheel and tire assembly. The heat can cause an increase in air pressure resulting in a tire explosion. Welding can structurally weaken or deform the wheel. • When inflating the tires, use a clip-on chuck and extension hose long enough to allow you to stand to one side and NOT in front of over the tire assembly. Use a safety cage if available. • Check wheels for low pressure, cuts, bubbles, damaged rims, or missing lug bolts and nuts. NEVER fill a damaged tire or one that is missing lug bolts or nuts. Pay Close Attention to Notes Use Safety Lights and Devices • Throughout the manual, information that needs to be emphasized is set apart with either a "NOTE!" or "IMPORTANT!" heading. • Please be sure to carefully read this information, as it usually indicates a situation that could cause machine damage. Slow moving tractors, self-propelled equipment and towed implements or attachments can create hazards when driven on public roads. They are difficult to see, especially at night. • Whenever you drive on public roads, use flashing lights and turn signals according to local regulations. • To increase visibility, use the lights and devices provided with your machine. • Keep safety items in good condition. • Replace missing or damaged items. Maintain Your Machine • It is crucial you maintain your machine in proper working condition. • Perform all scheduled maintenance and repairs in a timely manner. • Do NOT perform unauthorized modifications to the machine as these could impair the function and/or safety of the machine and affect machine life. MAN121 10/22/15 9 Safety 2110 PT Peanut Combine Additional Safety for this Machine Operate PT Combine Safely Tow Combine Safely • ALWAYS stay clear of the header pickup and header auger at all times. • • ALWAYS be sure that the combine is on solid, level ground before you dump the bin. NEVER exceed the maximum towing speed of 10 MPH loaded and 20 MPH empty. • NEVER tow the combine without attaching safety chains from the towing vehicle to the combine. • These chains should have a minimum combined breaking strength of at least 40,000 pounds. • If the combine were to separate from the towing vehicle, serious personal injury or death could result. Service Combine Safely • ALWAYS install the safety strut before working under the raised bin. • Failure to do so can result in serious injury or death. Be Aware of Machine Height with Raised Bin • The combine height with the bin lowered ranges from 13’9” to 15’8”. With the bin raised, the height ranges from 23’6” to 27’0”. • Contact with an obstruction or overhead electrical line could cause electrocution, death, or serious personal injury. Safety Strut 10 10/22/15 MAN121 2110 PT Peanut Combine Safety Safety Decals • Safety decals identify specific hazards, as well as general safety. A signal word ( DANGER, WARNING, or CAUTION) is included on • each decal to alert you to the severity of the hazard. Please note the following about the decals: • Keep them clean and legible. • Never remove a safety decal from the machine. • When you replace a part with a safety decal, also replace that decal. For replacement AMADAS dealer. decals, call your Replacement safety decals are available free of charge. Safety decals used on this machine are shown on the following pages. Decal locations are also included. Decals 1 - 80933 3 - 80935 2- 80934 MAN121 10/22/15 11 Safety 2110 PT Peanut Combine 4 - 80945 5 - 80946 6 - 80947 12 10/22/15 MAN121 2110 PT Peanut Combine Safety 8 - 80950 7 - 80949 9 - 80941 10 - 80563 11 -80936 MAN121 10/22/15 13 Safety 2110 PT Peanut Combine 14 - 80886 12 - 80959 13 - 80564 80887 (only on OCS equipped machines) 15 - 80717 14 10/22/15 MAN121 2110 PT Peanut Combine Safety Decal Locations Note that the location number indicated on the photo corresponds to the first number of the decal. #2 #2 Behind Shield #9 Behind Shield #1 #9 MAN121 #9 Behind Shield #12 Behind Tire 10/22/15 15 Safety 2110 PT Peanut Combine #2 Behind shield #1 & #9 #11 #3 #5 #1 #2 Behind shield #5 16 #12 #15 #8 Behind Behind shield tire #10 #7 10/22/15 #9 #4 MAN121 2110 PT Peanut Combine Preparation 2. Preparation Overview ................................................18 Safety Strut ........................................18 Pre-Delivery Checks ..............................19 MAN121 8/19/14 17 Preparation 2110 PT Peanut Combine Safety Strut Overview Before operating the machine for the first time, go over the section titled “Pre-Delivery Checks” with your dealer to verify the combine is ready for operation. Every combine is test run at the AMADAS plant, but a thorough pre-delivery inspection is important, as items may have loosened during shipping. Chapter 3, Operation, contains a “Daily Checklist.” It is important that you perform these checks each day you intend to use your combine. These checks are intended to help you detect problems early, reduce downtime, and extend the life of your combine. 18 8/19/14 Read Chapter 1, Safety, before performing any checks on your machine. In addition, be aware of the safety strut that locks the bin in the open position. Always use the safety strut as intended before checking or working around the open bin. The safety decal located below the strut provides instructions for using the strut. Safety Strut MAN121 2110 PT Peanut Combine Preparation Pre-Delivery Checks 1. Open all shields and check chains and belts for proper tension. Safety Strut 2. Check bushing bolts, set screws, and jam nuts on all sprockets, sheaves, shafts, etc., for tightness. 3. Torque all lug nuts to proper specifications (400 ft/lb for flange type lug nuts, 475 ft/lb for Budd type lug nuts). 4. Check oil level in tongue gearbox by removing the level plug in the side of the gearbox. Add AGMA Grade 5 synthetic non-foaming oil if necessary. DANGER Install the safety strut over the hydraulic cylinder before working around or under the raised bin. Death or serious personal injury could result if the bin were to fall. Tongue gearbox 5. If equipped with combine hydraulics, check the hydraulic oil level in tank (approximately 32 gallon capacity). Level should be above midway in sight gauge when cold. 6. Check and lubricate all lubrication points. 7. Hitch the combine to a tractor. 8. Check hydraulic lines for leaks. (First read “Hydraulics Warning” on page 2 in Chapter 1, Safety.) 9. Lock bin in raised position with safety strut, and check for loose bolts or obstructions in the picking chamber. MAN121 8/19/14 19 Preparation 2110 PT Peanut Combine Pre-Delivery Checks 10. After checking around the picking 12. Slowly raise and lower the bin and chamber, remove the safety strut. Lower header several times to work air out of the bin slowly and carefully check the lines. alignment with the duct work. (first photo). If realignment is necessary, shorten or lengthen the two turnbuckles that support the duct as needed (second photo). CAUTION Check alignment as bin is slowly lowered Check overhead clearance to ensure that no power lines, overhead limbs, or any other obstructions exist. Combine exceeds 13’ 10” with basket lowered. When fully raised, the AMADAS 2110 stretches over 24 feet tall. Contact with an obstruction, or high voltage power line could result in death, or serious personal injury. 13. Position the combine speed monitor (below) in tractor. Check alignment Turnbuckles 11. Check the peanut elevator air duct for proper alignment at the bottom of the bin. Improper alignment can cause serious damage to the air duct system. CAUTION Misalignment between bin and elevator air duct will cause machine damage. 20 8/19/14 MAN121 2110 PT Peanut Combine Preparation Pre-Delivery Checks 14. Open cleaning fan adjustment to maximum. Check to see that the damper door opening on cleaning fan intake is at least 10 3/8” inches. CAUTION Replace all shields before starting combine operation. Driveline shields and guards must be in place anytime the combine will be in operation. If shields and guards are not in place, death or serious injury may result from entanglement. 10 3/8” 18. Stop the combine and check for loose bolts, nuts, chains, belts, sprockets, etc. Check for heat in pulleys and belts, indicating looseness. Also check for overheated gearbox and hot bearings. 15. Replace or close all shields. 19. Check machine to ensure that all safety decals are in place. 16. Install the PTO driveline and grease. Be sure to set the tractor hitch ball (or tractor clevis pin if equipped with pin hitch) at the 20. Check tire pressure and inflate tires to recommended pressure: specified length from the PTO output shaft (sketch). The PTO driveline should never Cold inflation pressure: bottom out or overextend while turning. 24 PSI – 24.5 x 32 12 ply (6 row) 26 PSI – 30.5 x 32 12 ply (6 row) 17. Start the tractor, then engage the PTO and increase slowly to operating speed (100% or 790 PTO RPM). Operate for twenty minutes prior to your first field operation. NOTE! 790 PTO RPM is standard for most machines. Some combines are equipped with optional drives that require different input speeds. Refer to the PTO RPM on your machine. MAN121 8/19/14 21 Preparation 2110 PT Peanut Combine NOTES 22 8/19/14 MAN121 2110 PT Peanut Combine Operation 3. Operation Combine Process...................................24 Hitching Combine to Tractor ..................27 Attaching and Checking Driveline ..........28 Daily Pre-Start Check ............................30 Operating Procedure..............................33 Proper Operation ...................................36 Optional Hydraulic Bin Lip/Dirt Trap .......37 Road Towing Combine with Side Shift Tongue ..................................................38 MAN121 9/17/15 23 Operation 2110 PT Peanut Combine Combine Process The AMADAS 2110 Pull-Type Combine functions as follows: • • Peanut Very dry or very wet conditions as well as excessive dirt or weeds in the windrow could reduce separation efficiency and cause an increase in loose shelled kernels (LSKs). The combine removes peanut pods from peanut vines which have been dug and windrowed. The steps of the picking, separating and cleaning processes are outlined on the next Once separated and cleaned, the two pages. peanuts are conveyed into the Peanut Dump Bin and vine material is passed out of the machine. • The combine is pulled and powered by a farm tractor capable of speeds as low as 1 MPH while maintaining engine RPMs that will produce a combine speed readout of 100%. • Optimum harvest conditions exist when windrows are harvested with peanut moisture content between 14% and 20%. 24 • 9/17/15 MAN121 2110 PT Peanut Combine Operation 14 10 6 3 5 9 8 12 13 11 1 7 4 2 1. The header pickup (1) lifts the peanuts 4. Peanuts and vine material fall through the extraction holes (8) in the fourth cylinder and vines off of the ground. The header auger (2) feeds them into the spring tooth concave onto the disc separator (9), or cylinders (3). travel back into the walker cylinders (10). 2. The spring tooth cylinders strip the 5. The walker cylinders separate the good peanuts from the vines. Large amounts peanuts from the coarse vine material of dirt and foreign material are removed and carry the vine material out of the by the tremendous cleaning area of the machine. Peanuts sift out of the cam cylinder dirt removal screens (4) under actuated walker cylinders and are swept down to the disc separator for final each cylinder. separation. 3. The first and fourth spring tooth cylinders have sets of adjustable overhead teeth 6. At the disc separator, the good peanuts (5) which increase picking are separated from vine material and aggressiveness when engaged. An other light trash. adjustable retention board (6) controls the time that the vines remain in the 7. The cleaning fan (11) agitates the fourth cylinder. material on the disc separator to aid in separation and blows light material such as leaves, pops (unacceptable immature Optional adjustable concave teeth (7) are or diseased peanuts), and other light available for the first, second, and third cylinders for increased harvesting trash over the tail board and out of the aggressiveness. back of the combine. MAN121 9/17/15 25 Operation 2110 PT Peanut Combine 8. The higher density good peanuts fall 9. As the good peanuts fall into the stemmer saws, their stems are removed. Cleaned through to the stemmer section (12), peanuts fall into the collection auger (13) while vine material and sticks advance across the disc separator and out of the and are conveyed into the elevator air back of the combine. system, which sends them up to the peanut dump bin (14). 26 9/17/15 MAN121 2110 PT Peanut Combine Operation Hitching Combine to Tractor 4. Position tractor so the hitch ball will slip into the tongue-mounted ball socket when lowered. Lubricate the ball socket 1. Set the tractor drawbar in the center fixed with grease. If combine is equipped with position with the hitch point centered optional pin hitch, lower/raise jack until behind the end of the PTO shaft. the pin hitch will be between the draw bar and the upper pin plate. Once in 20” for 1 3/8” 21 spline CV shafts position, install the pin and pin keeper. 20” for 1 ¾” 20 spline CV shafts An optional bushing is available to match the pin diameter of various tractors. An optional drawbar extension (AMADAS part #61359) will be necessary to reach 5. Using the jack, slowly lower the tongue the proper hitch point dimension on most until the ball release handle snaps into tractors with 1 3/8” 21 spline PTO output place. shafts. 6. Remove the jack and place on holding bracket. Stow jack here 2. Position the three-point hitch lower lift links in the raised position. IMPORTANT! If the tractor is equipped with a lift locking feature to prevent it from inadvertently lowering, engage the lock. If the tractor is equipped with a quick hitch, we highly recommend that you remove it. Failure to do so can cause damage to the PTO shaft and driveline. Header lift cylinder 7. Attach 3/8” or ½” x 84” or longer hydraulic hoses from the header lift cylinder to one of the tractor remote hydraulic valves. 3. Install a 2 5/16” hitch ball on the tractor stationary drawbar. A 1¼ ” hole size and 2 5/16” high strength hitch ball are required. Tighten the nut securely. DANGER ALWAYS use the safety chains when towing the combine. If the combine separates from the towing vehicle, death or serious injury can result. A hitch ball for a 1 1/8” and ½ size hole is also available as well as a number of 8. Install 3/8” or ½” x 84” or longer peanut bushings to ensure proper fit. dump bin operating hydraulic hoses to the combine. Attach the hoses to a second remote hydraulic valve. MAN121 9/17/15 27 Operation 2110 PT Peanut Combine Attaching and Checking Driveline IMPORTANT! Your AMADAS 2110 has been equipped with a constant velocity PTO driveline. Because of the double Cardan Joint incorporated into this shaft, you can expect a constant output shaft speed with minimal vibration. The shaft speed will remain constant with minimum vibration even in a tight turning radius. Please read the section on lubrication in Chapter 7, Maintenance, thoroughly as the PTO drive shaft has special requirements. 3. Attach the driveline to the combine and tractor PTO. 1 3/8” 21 spline and 1 ¾” 20 spline ends are available. DANGER All drive shields and guards must be in place when the combine is in operation. Death or serious personal injury will result from entanglement. CAUTION Failure to check driveline length and clearance can cause damage to combine and tractor. 1. Ensure that the tractor draw bar is set such that the center of the hitch ball is approximately 3 ½” below the centerline of the tractor PTO output shaft. Extend the tractor draw bar such that the center of the hitch ball is approximately 20” from the end of the tractor PTO output shaft (sketch). If your combine is equipped with a pin type hitch, use the same 20” dimension to center the tractor clevis pin. 2. If equipped with a side shift tongue, shift the tongue to the operating position (left side). 28 9/17/15 NOTE! A tractor draw bar extension (AMADAS part #61359) may be required to attain a distance of 20” between the tractor PTO output and the hitch ball on tractors with 1 3/8” 21 spline PTO. MAN121 2110 PT Peanut Combine Operation Attaching and Checking Driveline 4. Be certain that the driveline length does 7. Repeat in the opposite direction. not exceed 72 inches when fully extended (sketch). CAUTION Never exceed the observed limits of turning or severe damage to the combine and/or tractor will occur, whether the PTO is engaged or disengaged. NOTE! If the driveline length is more than 72 inches, check the drawbar setting and move the drawbar out. 5. Start the tractor engine and raise the pickup header to its highest position. 6. After proper safety measures are taken (see Chapter 1, Safety), slowly turn the tractor. Observe when the telescoping driveline is close to its closed position or when the tractor tire is close to the combine tongue. This is the minimum turning radius in that direction. CAUTION Do NOT allow the tractor tire to touch the tongue, or the universal driveline to reach its closed (bottomed out) position during operation. Do NOT allow the constant velocity joint to exceed 80 degrees. Severe damage to the driveline, tractor, or combine will occur. NOTE! In most cases, the tractor will turn until the tire is very close to the combine tongue, without the telescoping shaft bottoming out. If this is not possible with your tractor, do NOT exceed the observed limits or severe damage to the combine and tractor will occur, whether the PTO is engaged or disengaged. MAN121 9/17/15 29 Operation 2110 PT Peanut Combine Daily Pre-Start Check Perform these daily pre-start checks each day before taking the machine to the field. The pre-start check will help detect problems early, reduce downtime, and extend the life of your combine. 1. Service the combine. tractor and attach 6. Lock the bin in the fully raised position with the safety strut (photo). the CAUTION ALWAYS install the safety strut over the hydraulic cylinder before working under the basket. Death or serious personal injury can result if the bin falls. 2. Grease the PTO driveline as shown in the sketch (also see Lubrication Chart in Chapter 7, Maintenance). 3. Check all hydraulic lines for proper connection. 7. Inspect the combine for broken parts and wear. 4. With adequate overhead clearance, lift the bin to a fully raised position. 8. Inspect the cylinders and adjustable bars for damaged or broken spring teeth. Also inspect for metal, wood, or other foreign material lodged within the picking chamber. Check overhead clearance to ensure that no power lines, overhead limbs, or any 9. Remove vines wrapped around the other obstructions exist. The combine spring tooth cylinder and beater cylinder exceeds 13’10” with the basket lowered. shafts. When fully raised, the AMADAS 2110 stretches over 24 feet tall. Contact with 10. Remove any foreign material found; an obstruction or high voltage power line replace any missing or damaged spring could result in death or serious personal teeth. injury. DANGER 5. Put the tractor in park, shut off the engine, and remove the key. 30 9/17/15 NOTE! Continued operation with missing or damaged spring teeth may reduce picking efficiency and reduce service life of adjacent spring teeth. MAN121 2110 PT Peanut Combine Operation Daily Pre-Start Checks 11. Remove walker cylinder inspection cover (photo) and inspect for damage or foreign material. Pay particular attention for excessive wear or damage to the walker cylinder bar bushings, cam mechanisms, and cam follower bearings. CAUTION Failure to remove the safety strut before lowering the bin can severely damage the bin. 18. Check tire pressures and lug nut torques according to specifications. Walker cylinder inspection cover Lower separator inspection cover Collection auger 12. Remove the lower separator inspection covers below the disc separator and check the stemmer and collection auger for obstructions. Also check for trash build-up under the first disc separator shaft. CAUTION Make sure the lug nut torque and cold inflation tire pressure are at the required specifications. Improperly tightened lug nuts or incorrectly inflated tires can result in serious personal injury. 13. Check to make sure the area between the collection auger housing and stemmer 19. Continue with the operating procedure support hinge is clear of dirt and debris. when: Also, check to make sure no buildup has accumulated under the first disc separator • The combine is attached to a tractor. shaft or behind the side panels and disc • All of the daily pre-start checks have separator bearings. been performed. • Operating procedures are clearly 14. Check all belts and chain drives for proper understood by all operators. alignment, tension, and wear. 15. Check the hydraulic system for leaks and adequate fluid. 20. Start the tractor and leave it in PARK. 21. With the engine at idle, engage the PTO. Listen for any noise which could indicate 16. Check the cleaning fan for obstruction in a problem, such as a damaged or intake or damaged blades. defective bearing. 17. Replace all covers and shields, and remove the bin safety strut. Lower the bin. MAN121 9/17/15 31 Operation 2110 PT Peanut Combine Daily Pre-Start Checks 22. Increase the tractor engine to the combine operating speed and listen again for any noises that may indicate damaged bearings, etc. 32 9/17/15 DANGER • Replace all shields before starting combine operation. If shields are missing, death or serious personal injury can result. • ALWAYS use safety chains when towing the combine. If the combine separates from the towing vehicle, death or serious injury can result. • Beware of overhead obstructions. Combine height ranges from 13’10” to 15’8” when the bin is down. MAN121 2110 PT Peanut Combine Operation Operating Procedure Adjustable overhead teeth/concave teeth controls Make sure you have performed all of the daily pre-start checks before you operate the combine. 1. Set the retention board adjustment handle at the halfway position. Tighten the handle securely. Maximum position ¼ engaged Retention board adjustment Halfway point CAUTION 2. Set the adjustable overhead teeth and concave teeth controls in the disengaged NEVER make adjustments to harvesting position. Tighten the T-handles securely. controls while the combine is running. Note that the handle is shown in the “engaged” position in the photo. Push the handle all the way up to the top to 3. Set the cleaning air control handle threefourths open and tighten the T-handle disengage the teeth. securely. Cleaning air control NOTE! If green vine material is present in the windrow, engage the first set of overhead teeth (pictured in photo at top of next column) ¼ engaged. Closed position ¾ position Open position MAN121 9/17/15 33 Operation 2110 PT Peanut Combine Operating Procedure 4. Set the elevator air control handle in two- 6. Set the header height so that the pickup thirds open position. springs fingers will be one to two inches above the soil (with the combine wheels Elevator air control in the row centers as it moves over the windrow). 7. Engage the PTO and set combine speed at 100% (790 RPM tractor PTO output) (see “PTO Speed Adjustment” in Chapter 5, Controls and Adjustments, for more information). NOTE! 790 PTO RPM is standard for most machines. Some combines are equipped with optional drives that require different input speeds. Refer to the PTO RPM on your machine. Maximum position 8. Under normal conditions, operate the tractor at 1 to 2 ½ miles per hour. Travel down the windrow about 50 yards. Elevator air 2/3 open 9. Stop and check for proper operation. See “Proper Operation” on page 36. 5. Make sure that the bin lip extension is in the operating position. Leaving the lip folded obstructs the discharge of air from the bin. DANGER ALWAYS stop the combine, set the parking brake, and shut the tractor motor off before you leave the tractor for any reason. CAUTION It is important to perform the checks for proper operation. To skip this step puts the combine at risk for machine damage and you at risk for personal injury. 34 9/17/15 MAN121 2110 PT Peanut Combine Operation Operating Procedure 10. After making any necessary adjustments, run the combine down the windrow the same distance and check performance again. 11. Set the controls as desired and continue to the end of the row. 12. Harvest the first few bins of peanuts at moderate speed to become accustomed to the machine. 13. Before dumping the bin, always check for overhead obstructions or power lines. In very dirty conditions, dumping the bin slowly will help produce a cleaner sample by allowing the strainer at the bin lip to remove more dirt and small foreign material. ARNING Be certain the lip extension is folded out before dumping the bin. The combine can tip if the bin is dumped with the bin lip extension in the stored position. DANGER Check overhead clearance to ensure that no power lines, overhead limbs, or other obstructions exist. Combine exceeds 13’10” with the bin lowered. When fully raised, the AMADAS 2100 stretches over 24 feet tall. Contact with an obstruction or high voltage power line could result in death or serious personal injury. NOTE! When combine speed monitor reads 100%, tractor PTO should run at approximately 790 RPM PTO when the combine is equipped with standard drives. If the combine speed cannot be maintained +/- 1% by the tractor engine, installation of the optional RPM PTO kit should be considered. 790 PTO RPM is standard for most machines. Some combines are equipped with optional drives that require different input speeds. Refer to the PTO RPM on your machine. MAN121 9/17/15 35 Operation 2110 PT Peanut Combine Proper Operation NOTE! Make only ONE operational adjustment at a time between performance checks. This will allow you to determine which adjustment is working, rather than guessing at which adjustment made the change. Once your combine has been put into operation, it is important that you make the following checks for proper operation: DANGER Always stop combine, set the parking brake, and shut the tractor motor off before leaving tractor for any reason. If… Then… All peanuts are removed from the vines and no more shelling occurs than might be expected in a new machine Leave the combine controls where they are set. More than an occasional good peanut is left on the vines Increase tractor RPM or begin to close the retention board adjustment handle in ½“ increments, up to ¾ of the engaged position. An excessive number of peanuts are not removed from the vine and the retention board is properly set Begin to move the adjustable overhead teeth toward the engaged position in 1” increments, starting with the forward overhead teeth control. “Tails” are being left on the peanuts Engage the concave teeth (if equipped) in 1” increments beginning with the front set. There are NO leaves or other light foreign material present in the basket or peanuts blowing over the tailboard Make no changes to the cleaning air setting at this time. Only a few hulls and LSKs are in the bin during the first few acres of operation Make no changes to the elevator air setting at this time (unless the peanut hulls are very fragile or too little air is available to blow the peanuts to the bin). Picking aggressiveness and available cleaning and pneumatic conveyor air needs to be increased or decreased Adjust the combine speed from 90% to 110% as needed. 36 9/17/15 MAN121 2110 PT Peanut Combine Operation Optional Hydraulic Lip/Dirt Trap Bin • If your combine is equipped with the hydraulic bin lip/dirt trap option, please remember the following: • Your tractor’s hydraulics are used to operate the bin lip. • When lifting the bin, be sure to engage the tractor’s hydraulics long enough for the bin lip to reach its fully extended position. To retract the hydraulic bin lip/dirt trap for transport, lower the bin fully and continue to apply hydraulic pressure until the bin lip is fully retracted. Bin lip halfway extended • If you dump the bin without having the bin lip fully extended, peanuts will not fall uniformly from the lip but will spill out of the sides. MAN121 9/17/15 37 Operation 2110 PT Peanut Combine Road Towing Combine with Side Shift Tongue Side Shift Cylinder Specifications 2110 Combines for 8-30” Rows Only Combines with side shift tongues are designed to shift the tongue to the center of the machine for safer and easier transport. Retracted Length: Extended Length: Stroke: Inside diameter: Outside diameter: 20 ¼” 30 ¼” 10” 3” 3 ½” 1. Raise the header off of the ground. 3000 PSI Rating 2. Engage the hydraulic tongue shift cylinder to move the tongue to the center position. Cylinder ear hole sized for 1” diameter hitch pin. 3. Install the 1” x 4 ¼” hitch pin and safety clip. DANGER ALWAYS use safety chains when towing the combine. If the combine separates from the towing vehicle, death or serious injury can result. 38 9/17/15 MAN121 2110 PT Peanut Combine Unloading Conveyor 4. Unloading Conveyor Before Using the Conveyor ...................... 40 Conveyor Safety .................................. 40 Using the Conveyor ................................. 41 Conveyor Tracking .................................. 42 Conveyor Maintenance ............................ 43 Conveyor Troubleshooting ....................... 45 MAN121 08/19/14 39 Unloading Conveyor 2110 PT Peanut Combine Before Using the Conveyor A combine equipped with the Off-load Conveying System (OCS) option comes with an unloading conveyor. The conveyor operates as follows: • • The conveyor is controlled from two tractor remotes, one to swing the conveyor and one to power it. A container is placed underneath the conveyor whenever it is turned on. Note that running the conveyor without a container will cause you to dump product on the ground. DANGER • NEVER drive on roads with the conveyor extended. Always make sure the conveyor is in stowed position on the conveyor rest before taking it on a road. • Be aware of the length of the conveyor when traveling. Even when in the stored position, the conveyor extends several feet past the rear of the combine and presents a substantial hazard for hitting obstructions. • Take particular care driving around power lines. Hitting a power line can cause significant shock or even death for the combine operator. • NEVER stand or sit on the conveyor when it is in motion. • NEVER stick your hand or any body part into any moving part of the conveyor. Conveyor Safety It is important to remember the following safety items when your combine is equipped with the OCS option: • Always keep in mind the length of the conveyor and how far out it extends, even when in the stored position. • Be careful when backing the combine, as the conveyor extends several feet past the rear of the combine. • When not using the conveyor, retract it into its stowed position. Make sure the conveyor is in place on the conveyor rest. • 40 Always make sure the conveyor is in the stowed position when you drive it on a road. 08/19/14 MAN121 2110 PT Peanut Combine Unloading Conveyor Using the Conveyor 1. Hydraulic hoses were connected to the The OCS system requires that your tractor be conveyor at the factory. Connect the ends equipped with at least five remotes, as two are to your tractor hydraulics. required to operate your Off-load Conveyor System. One remote is needed to position the 2. Remove the shipping strap. conveyor in the offloading position, and one to operate the unloading augers and conveyor. 3. Operate the remote for the swing out cylinder until all air is out of the system. Note that you will need six remotes if you have Once the swing out cylinder is charged, the a side shift tongue. shipping strap is no longer needed. IMPORTANT! In order for the off-load conveyor system to function properly, your tractor’s hydraulic capacity needs to be at least 35 GPM @ 2500 PSI. CAUTION Refer to Chapter 1, Safety, for information on safely using hydraulics. For proper peanut flow: • Do NOT exceed a rate of 20 gallons/ minute hydraulic flow to the OCS system. • Make certain the shaft speed remains consistent at 250 RPM. Higher speeds result in shelling and decreased life of components. • If possible, make sure the return line is connected to the direct-to-tank port. Swing out cylinder Shipping strap 4. Position the conveyor in the off-loading position. 5. Check your tractor’s hydraulic oil level; top off to required level. 6. Operate the remote that controls the offloading conveyor belt and augers until all air has been removed from the system. 7. Check the tractor’s hydraulic oil level again and top off if required. 8. Refer to the safety information at the beginning of this chapter when operating your conveyor. MAN121 08/19/14 41 Unloading Conveyor 2110 PT Peanut Combine Conveyor Tracking Check conveyor tracking by having the operator engage the tractor remotes. Observe the tracking of the belt at both the head and pulley. The conveyor belt should be running centered to pulleys. A deviation of +/- 3/4" is the allowable limit. To adjust the tracking: 1. Use the tracking rod located at the lower, end of the conveyor. You may have to swing the conveyor out for easier access. 3. If the adjustment is not enough to correct, it may be necessary to use the tension rods at the upper end of the conveyor. WARNING Use a ladder or other safe means to access the tension bolts. NEVER use the conveyor as a means of access. NEVER make adjustments to the tension rods with the conveyor operating. Tracking rod Tension rods 2. Extend the rod to push the belt away from that side and shorten the rod to bring closer. WARNING Do NOT attempt to make these adjustments with the conveyor operating. Make minor adjustments with the conveyor stopped, then engage the conveyor and observe the results. 42 08/19/14 MAN121 2110 PT Peanut Combine Unloading Conveyor Conveyor Maintenance Lubricate grease points weekly. 1-2 pumps at each point is sufficient. • • • • Grease point on hydraulic arm pivot Bearings on each end Grease point on conveyor support on pivot Grease point for basket pivot point. Bearing grease points (top) Bearing grease points (bottom) Grease point MAN121 08/19/14 43 Unloading Conveyor 2110 PT Peanut Combine Conveyor Maintenance Grease point for basket pivot point Grease point for conveyor support pivot 44 08/19/14 MAN121 2110 PT Peanut Combine Unloading Conveyor Conveyor Troubleshooting 5. Check for bridging of material at the point where material is emptied from the basket onto the augers. Dislodge any packed 1. Make sure sufficient hydraulic oil is material and check for foreign objects. available in your tractor hydraulic reservoir. If the conveyor is not working correctly: 2. Make sure all quick disconnects on conveyor hoses are properly connected. 3. Change conveyor hoses to another tractor remote that is functioning properly. If the conveyor operates properly, then the remote is the problem. Contact your tractor dealer for service to the tractor. WARNING To avoid injury, make sure the tractor is in park, the engine turned off, and the key removed when cleaning or performing any maintenance on your conveyor. 4. Check for a foreign object (e.g., rock, etc.) under the conveying augers. If an auger is stalled, the conveyor will also stall. MAN121 08/19/14 45 Unloading Conveyor 2110 PT Peanut Combine NOTES 46 08/19/14 MAN121 2110 PT Peanut Combine Controls and Adjustments 5. Controls and Adjustments Overview ................................................48 Control Locations ...................................49 Controls and Adjustments ......................50 Retention Board Adjustment ...............50 Adjustable Overhead Teeth and Concave Teeth Controls .....................51 Cleaning Air Control ...........................52 Tailboard Adjustment..........................53 Elevator Air Control ............................54 Pickup Header Speed Control with Combine Hydraulics ...........................55 Standard Pickup Header Speed Control ...........................................................56 Remote Auger Reverse ......................56 PTO Speed Adjustment ......................57 Pickup Header Height Adjustment ......59 Header Auger Adjustment ..................60 Optional Dual Speed Cylinder Drives .61 MAN121 8/19/14 47 Controls and Adjustments 2110 PT Peanut Combine Overview The AMADAS 2110 combine performs efficiently over a wide range of peanut varieties and windrow conditions with few changes in operating controls. Once the controls and adjustments are set for average conditions, adjusting the ground and PTO speed is usually adequate to ensure efficient performance (when harvesting peanuts of similar varieties under similar conditions). To improve your combine’s performance, fine tune: • The picking operation by adjusting the retention board, overhead teeth, combine input speed, or the concave teeth. • The cleaning operation by adjusting the cleaning air and tail board. IMPORTANT! Make only one adjustment at a time between performance checks. This will allow you to determine which adjustment is actually improving the combine’s performance. CAUTION NEVER make adjustments to the harvesting controls while the combine is running. Serious personal injury could result. Changing the PTO speed will also affect picking and cleaning operations, and can be used to further fine tune these operations. 48 8/19/14 MAN121 2110 PT Peanut Combine Controls and Adjustments Control Locations Rear adjustable overhead teeth Forward adjustable overhead teeth Elevator air control Cleaning air control Optional concave teeth Adjustable retention board Header auger adjustment MAN121 8/19/14 49 Controls and Adjustments 2110 PT Peanut Combine Controls and Adjustments Retention Board Adjustment The retention board adjustment controls the time that the vines stay in the fourth picking cylinder. Retention board control Start with the retention control handle in the ½ position for normal conditions. Make adjustments as follows: • If the vines are brittle, move the control handle toward disengage for less aggressive action. This will help avoid tearing the vines apart excessively, which makes separation more difficult. • In “tough” conditions, or to remove very small peanuts from bunch type vines clustered around the tap root, move the control handle toward engaged. Only engage the handle enough to ensure that good peanuts are not being left on the vine behind the combine. Engaged Disengaged ½ position • 50 If the control is engaged too far, shelling may occur, and the vines will tear apart excessively, possible overloading the disc separator. The best performance is with the control handle engaged no further than necessary to remove the good peanuts from the vines. 8/19/14 MAN121 2110 PT Peanut Combine Controls and Adjustments Adjustable Overhead Teeth and Concave Teeth Controls Overhead teeth control Disengaged The adjustable overhead teeth handle controls the degree of aggressiveness of the overhead spring tooth bar. Always start with the control handles (all three photos) in the retracted or disengaged position. Make adjustments as follows: • If the vines are green and/or tough, progressively engage the overhead teeth to allow more threshing of the vines. • If you notice that an excessive number of peanuts are not being separated from the vines or a tough, wrapping condition develops, adjust the handle toward the engaged position in 1” increments between checks. • We recommend adjusting the forward overhead teeth handle first, and then adjust the rear handle. Engaging the overhead teeth will help clean wrapping vines from the corresponding spring tooth cylinder, thus increasing that cylinder’s effectiveness. • The optional concave teeth (bottom photo) may be engaged to increase aggressiveness as needed. Fully Engaged Overhead teeth rear control Disengaged Fully Engaged Concave teeth controls MAN121 8/19/14 51 Controls and Adjustments 2110 PT Peanut Combine Cleaning Air Control • Set the cleaning air control as follows: • For average conditions, set the cleaning air control handle at the ¾ open position • for operation. If the air is set too low, proper separation will not occur and peanuts may ride over the disc separator with the vines. The maximum opening of the cleaning air fan door should be at least 10 3/8”. Closed ¾ Open 10 3/8” Open • • It is often helpful to set the air higher than is needed and then adjust it back until no good peanuts are being blown out the • back of the machine. • Use the inspection doors at the rear of the combine to aid in setting the cleaning air. Opening the cleaning air control handle more will remove pods containing small shriveled peanuts. Always operate with the cleaning air control set no lower than necessary to save all peanuts of value, while still providing a clean sample. The maximum open setting may be necessary in some conditions. CAUTION NEVER make adjustments to cleaning air control while the combine is running. Serious personal injury could result. Inspection doors 52 8/19/14 MAN121 2110 PT Peanut Combine Controls and Adjustments Tailboard Adjustment The tail board affects the flow of material from the stemmer bottom out the back of the combine. Raising the tail board makes it harder to blow material out of the stemmer bottom, while lowering the tail board makes it easier. • Raise the tail board in wet or heavy vines where more cleaning air is needed. This allows the use of more cleaning air by making it more difficult to blow good peanuts out of the stemmer bottom. Raising the tail board increases agitation of the material load on the disc separator to aid in separation. • Note that raising the tail board in fields where heavy foreign material exists (stones, melons, wood, etc.) increases the chances for it to get into the bin. • Lower the tail board in very dry conditions. If dry, brittle vines are getting shredded up into small sticks that can penetrate the disc separator openings, lower the tail board to make it easier to blow this light, small trash out of the stemmer bottom. Under normal conditions, set the tail board in the half-raised position (middle of the adjustment slots). Usually, the tail board is adjusted only if the cleaning air or other adjustments do not produce the desired response. If adjustments are needed, make them as follows: • Loosen the seven ¼” fasteners and evenly raise or lower the tail board across the width of the machine. Fasteners MAN121 8/19/14 53 Controls and Adjustments 2110 PT Peanut Combine Elevator Air Control The elevator air control is normally set so that peanuts are conveyed about ¾ of the way across the bin. Make adjustments as follows: • If peanuts are very light or fragile, lower the air. • If the peanuts are very dirty or high yield, raise the air. • Lower the setting if the LSKs or empty hulls in the bin show excessive shelling within the conveyor system. • Be aware that too low a setting can quickly stop up the elevator air system. NOTE! On a new machine, or one that has been sitting idle, some LSKs may be seen in the bin due to roughness in the air ducts. Once the air ducts smooth out, the number of LSKs should decrease. 54 8/19/14 MAN121 2110 PT Peanut Combine Controls and Adjustments Pickup Header Speed Control with Combine Hydraulics (Optional) Combines are factory set for tractor hydraulics. Hydraulics are adjusted from the cab using the tractor’s hydraulics system. For machines equipped with optional combine-mounted hydraulics, speed can also be adjusted remotely from the cab (refer to photo). • Regularly check around the breather cap on the hydraulic tank for dirt buildup. If it is not clean, the breather can clog, which may result in damage to the system. Replace the oil filter yearly. • Check the fluid level in the hydraulic tank daily (capacity is approximately 32 gallons). Level should be at or above the center of this sight gage. The speed of the header spring fingers is infinitely adjustable within its range. Make changes as follows: DANGER NEVER adjust the header speed while the combine is running. Adjust the header speed manually when the machine is NOT running. NEVER GET BETWEEN THE TRACTOR AND THE COMBINE WHEN THE COMBINE IS RUNNING! • Set the header speed so the header picks up the windrow completely as the combine travels down the field. If the header is too slow, it will push the vines along before picking them up, causing peanuts to fall off the vines. If operated too fast, the vines will fall apart before entering the combine, and peanut loss will occur. Dry vines typically require higher pick up speeds than green vines. WARNING Hot oil can cause severe burns. Do NOT work on hydraulic system if oil temperature exceeds 100°F. Before working with hydraulics, read hydraulics warning in Chapter 1, Safety. NOTE! If windrows have excessive dirt, increase the header speed slightly to help shake out the dirt before it enters the machine. MAN121 8/19/14 55 Controls and Adjustments 2110 PT Peanut Combine Standard Pickup Header Speed Control Dry vines typically require lower pickup speeds than green vines. Pickup header speed is controlled by your tractor’s hydraulic remote setting. NOTE! If the windrows have excessive dirt, increase the header speed slightly to help shake out the dirt before it enters the machine. Set the header speed so the header picks up the windrow completely as the combine travels down the field. If the header is too slow, it will push the vines along before picking them up, possibly causing beans to fall off of the vines. If operated too fast, the windrow will pull apart before entering the combine and loss could occur. Remote Auger Reverse Remote reversing auger and header speed control are standard features built into the hydraulics package on the AMADAS 2110. They function as follows: • IMPORTANT! Read all hydraulics safety information in Chapter 1, Safety, before using hydraulics. • The remote auger reverse system consists of a hydraulic reversing valve and a second hydraulic motor. • The valve is installed between the hydraulic pump system and hydraulic motors that drive the auger and pickup. • When the remote auger reverse is engaged, the pickup stops and the header auger reverses, allowing material jamming the auger to be discharged over the pickup and onto the ground. • 56 There is a hydraulic pressure gauge at the valve block to indicate system pressure. Normally, the system operates in the 1100 PSI range while harvesting. 8/19/14 As the header begins to stall (jam), the pressure should reach 2700 PSI. If the header is stalling and the pressure gauge isn’t reaching 2700 PSI, there could be a problem with the tractor’s hydraulic system (or the system relief valve on the optional combine hydraulics system). WARNING NEVER remove material from the header/auger while the tractor engine and combine are running. Shut off the tractor before unclogging any part of the combine. An optional header/auger hydraulic drive kit is available that is powered solely by the combine. MAN121 2110 PT Peanut Combine Controls and Adjustments PTO Speed Adjustment Proper PTO speed is essential to efficient operation. PTO speed functions as follows: • • • A combine speed monitor, which monitors combine speed from the tractor cab, is included and should be mounted • in the tractor. The combine speed monitor measures combine speed as a percentage of machine design speed. Consistent combine speed is important for the best harvesting performance. If the combine speed fluctuates, check the combine drive belts and tractor PTO system for the source of problem. A magnetic pickup assembly senses combine speed. This pickup reads off of one of the disc separator drive sprockets, and should be adjusted to have a clearance of approximately 1/16” between sprocket tooth and pickup. Ensure that the sprocket never actually contacts the pickup, as the pickup may be damaged and rendered inoperable. Magnetic pickup • The AMADAS 2110 is designed to operate with 790 PTO RPM input, so the tractor will not be required to run at its full “PTO speed.” At machine design speed, the tractor PTO output should be 790 RPM and the combine speed monitor should read 100%. Magnetic pickup 1/16” clearance NOTE! 790 PTO RPM is standard for most machines. Some combines are equipped with optional drives that require different input speeds. Refer to the PTO RPM on your machine. MAN121 8/19/14 57 Controls and Adjustments 2110 PT Peanut Combine PTO Speed Adjustment • An electrical cable runs from the magnetic pickup to a connector located above the left side of the header. After the combine is hooked up to the tractor, plug the six-foot cable from the control box into the connector. Monitor cable • IMPORTANT! Never exceed 110% of the design speed – serious machine damage may result! The 711-869 PTO RPM range is standard for most machines. Some combines are equipped with optional drives that require different input speeds. Refer to the PTO RPM on your machine. • The combine design speed is 100% on the combine speed monitor or 790 PTO RPM. • For very dry peanuts, reduce the combine speed to below 100% to aid in performance. • For tough or wet conditions, raise the combine speed over 100% to increase aggressiveness and aid in performance. The combine speed monitor is composed of a digital speed indicator which resides in a control box and attaches to the • tractor fender using a Velcro strip. NOTE! When you route the cable to the tractor, stay clear of the PTO shaft and header. Do NOT connect the combine speed monitor while the machine or tractor is running. • 58 Maintenance of the combine speed monitor is minimal. The only item that may need replacing is the battery. The battery is located in the back of the digital speed indicator, and should be replaced at the beginning of each season. The normal operational range of the combine is 90% to 110% of the design speed as shown on the digital speed indicator. The tractor PTO should operate from 711 RPM (90%) to 869 RPM (110%) unless the combine is optionally equipped for 850 RPM operation. 8/19/14 MAN121 2110 PT Peanut Combine Controls and Adjustments Pickup Header Height Adjustment The pickup header height is controlled with a tractor-powered remote hydraulic cylinder. Header lift cylinder in storage position Operate the header low enough to pick up all the vines in the windrow, but high enough to allow dirt clods, soil, and other debris to fall out. This reduces the amount of foreign material entering the combine. To reduce excessive wear, avoid dragging pickup spring teeth in the soil. MAN121 8/19/14 59 Controls and Adjustments 2110 PT Peanut Combine Header Auger Adjustment The header auger is manually height adjustable. It can be raised or lowered to help feeding in varied crop conditions. The header auger adjustment functions as follows: • If the header stalls often (but the hydraulic system is operating properly), the header auger may need to be raised for additional crop clearance. • When the machine is new, it may be desirable to raise the auger until the finish of the auger has become polished for less resistance moving the crop. • Under normal conditions, the header auger is run at the halfway setting or lower for more efficient conveyance of crop and less rolling of vine material. • • The auger height is adjusted by loosening the four outer bolts holding the bearing mount plate and then turning the top mounted adjuster screw to raise or lower the auger. Outer bolts Adjust Outer bolts The header auger adjustment is accomplished using the adjustable • bearing mount plates on each end of the header. • It is important to keep the header auger level, so both ends should be adjusted to the same relative position. Make sure all bolts are retightened after the adjustments are made. Header auger adjustment 60 8/19/14 MAN121 2110 PT Peanut Combine Controls and Adjustments Optional Dual Speed Cylinder Drives The dual speed cylinder drives allow efficient operation in a wider range of conditions by allowing the operator to vary greatly the combine’s cylinder speeds as follows. • By switching the main drive chain from the larger high speed drive sprocket to the smaller low speed sprocket, cylinder speed can be significantly reduced for gentler threshing action. • Typically, the high speed cylinder drive setting is used in normal to tough conditions for more aggressive threshing action. • The low speed cylinder drive setting is used in very dry or brittle conditions to handle the crop more gently, threshing with less damage and leaving the vine material in larger pieces for better separation. The low speed cylinder drive setting results in around a 23% reduction in cylinder speed. This is a substantial speed reduction that can increase possible torque loads, so the low speed setting should never be used in green or tough conditions. • Shut the tractor off before changing the dual speed cylinder drive settings, and always remember to tighten thoroughly all of the accompanying idlers. MAN121 8/19/14 CAUTION Do NOT allow the combine to run in green or tough conditions with the dual speed cylinder drives in the low speed setting. Severe damage to the combine, driveline, or tractor will occur. NOTE! Combines equipped with two speed drives have a designated PTO input speed of 790 RPM unless equipped with an optional 13” sheave. In this case, the design PTO input speed is 850 RPM. 61 Controls and Adjustments 2110 PT Peanut Combine NOTES 62 8/19/14 MAN121 2110 PT Peanut Combine Performance 6. Performance Fine Tuning Operation ...........................64 Achieving Maximum Ground Speed .......65 Increasing Separating Capacity .............66 Harvesting Under Wet Conditions ..........67 MAN121 8/19/14 63 Performance 2110 PT Peanut Combine Fine Tuning Operation This chapter describes ways you can fine tune your combine’s performance. Also refer to Chapter 5, Controls and Adjustments, for more information on fine tuning your combine using the combine’s standard controls. CAUTION Do NOT adjust, clean, or repair the combine while it is in operation. Always use extreme care around moving parts. Be sure to follow all safety guidelines when working on the combine. 64 8/19/14 MAN121 2110 PT Peanut Combine Performance Achieving Maximum Ground Speed 4. When performance deteriorates, drop back to the next lower gear selection that offered satisfactory performance. This is Moisture, dirt clods, grass, weeds, peanut the maximum efficient ground speed for maturity, yield, stem characteristics, vine type existing conditions. and many other variables determine the most efficient ground speed. NOTE! Normally the cleaning air system is unaffected by the other components of If maximum ground speed is desired: the machine. If you experience peanut loss, determine whether the loss is 1. Shift the tractor into the next higher gear. resulting from the cleaning air systems or the walker cylinder section before 2. Operate machine for 70 yards and check adjusting the cleaning air controls. for harvesting loss. 3. Continue to increase tractor ground speed by shifting to the next higher gear speed if the performance check shows the machine performed satisfactorily at the last speed tried. CAUTION The auger may be subject to clogging at higher ground speed. Be sure the elevator air is sufficient to elevate increased peanut volume. MAN121 8/19/14 65 Performance 2110 PT Peanut Combine Increasing Separating Capacity Each of these adjustments increases aggressiveness and may cause some shelling. You must decide if higher capacity The separating capacity can sometimes be is worth a possible increase in shelling. increased by more aggressively engaging the retention teeth, overhead teeth, or concave The best separating efficiency can typically teeth. If the combine is operating with the be achieved when peanut kernel moisture is dual speed cylinder drives in the low range, 14% to 20%. capacity can be increased by switching to high range. Concave teeth control Retention teeth control Overhead teeth control 66 8/19/14 MAN121 2110 PT Peanut Combine Performance Harvesting Under Wet Conditions 4. Remove inspection cover located under the first few disc separator shafts. If equipped with dual cylinder drives, always 5. Using a flashlight, visibly inspect the area run on high in wet conditions. More in front of and around the first disc aggressive combine settings are typically separator shaft (front shaft). If any debris needed in wet conditions. is present, thoroughly clean this area. A long stick with a hook or compressed air If water droplets are present on or under is helpful in this cleaning. peanut vines when harvested, the surfaces of all components in the combine can become 6. When finished, replace inspection cover. coated in a layer of material composed of soil Failure to keep this area clean will and vine fiber. If it is not possible to lift the adversely affect peanut separation. windrows or wait until they dry before harvesting, proceed at a ground speed lower than normal and check frequently for buildup of residue on the stemmer saws, elevator air ducts and other surfaces subject to buildup. CAUTION Do NOT perform the following items with the combine or tractor running. After harvesting peanuts where buildup occurs, it is important to: 1. Clean the stemmer saw with a wire brush and scrape out the stemmer bottom. 2. Remove the elevator duct work and clean thoroughly to remove buildup. 3. Clean the walker cylinder concaves. MAN121 8/19/14 67 Performance 2110 PT Peanut Combine NOTES 68 8/19/14 MAN121 2110 PT Peanut Combine Maintenance 7. Maintenance Belt Adjustment ......................................70 Chain Adjustment...................................71 Lubrication .............................................73 PTO....................................................74 Schedule ............................................75 Post Season Maintenance .....................77 Troubleshooting .....................................78 Tachometer Programming .....................81 MAN121 8/19/14 69 Maintenance 2110 PT Peanut Combine Belt Adjustment V-belt drives power the fans, hydraulic power unit (optional), separating section and stemmer saws. They also transmit power from the PTO input gearbox to the main jackshaft. Properly maintaining the belts is essential to ensure efficient machine operation. Idler adjustment Check and adjust the belts as follows: 1. Be certain the tractor engine is shut off. 2. Open shields covering drive belts. Latch shields open. 5. Make sure that idlers are aligned and fasteners are tight. Replace shields before operating the machine. Idler Raise shields to access belts 3. Check belts and sheaves for wear. Replace if necessary. 4. The main drive belt should have no more than 2 inches of play when checked in the middle. Adjust the belt tension as necessary. 70 8/19/14 DANGER Replace all shields before starting combine operation. Death or serious personal injury may result if shields are not in place. MAN121 2110 PT Peanut Combine Maintenance Chain Adjustment The chain drives must be properly maintained for the combine to function correctly. Proper chain alignment and tension are very important. To check and adjust the chains: 1. Make sure the tractor engine is shut off. 2. Open or remove the shields which cover the chains. Open shield to access header drive chains 3. Check chains and sprockets for wear. Replace if necessary. CAUTION NEVER replace a chain only without checking for sprocket wear, too. New chains must run on sprockets with no visible wear to prevent premature wear of chains and/or sprockets. Raise shields to access drive chains 4. The chains should have approximately one inch of play when checked in the middle. Adjust using the chain idlers. Note that chains linking the disc separator shafts together should have no more than ½” play. ½” play for chains linking separator shafts MAN121 8/19/14 71 Maintenance 2110 PT Peanut Combine Chain Adjustment. 5. Lubricate chains if needed. 6. Make sure all idlers are tight and aligned, and replace all shields before operating the machine. Some idlers are shown in the photos. Idlers for separator cylinder chains DANGER Replace all shields before starting operation of combine. Death or serious personal injury may result. Idlers for header drive chains 72 8/19/14 MAN121 2110 PT Peanut Combine Maintenance Lubrication There are some components on the combine that require regular lubrication in order to continue functioning correctly. These items and their lubrication intervals are shown on the lubrication table and chart. DANGER NOTE! To avoid damaging bearing seals, do NOT use a power grease gun and do NOT exceed the specified lubrication intervals. Some sealed bearings contain no grease fittings, as they are lubricated for life and require no further lubrication. Do NOT lubricate the combine while it is operating. Doing so may result in death or serious personal injury. MAN121 8/19/14 73 Maintenance 2110 PT Peanut Combine PTO Daily greasing of the PTO is essential for proper operation. There are two grease fittings located 180 degrees apart on the telescoping shaft. 74 8/19/14 IMPORTANT! Daily lubrication of the CV driveline is essential to driveline longevity – it will fail if not correctly lubricated on a periodic basis. MAN121 2110 PT Peanut Combine Maintenance Schedule LUBRICATION SCHEDULE Frequency Action / Component Type of Lube Lubricate Ball Hitch Assembly A Lubricate PTO Shaft A Lubricate U-Joint (on gearbox output) A Lubricate Bin Pivot Points A Lubricate Bearings A Check Hyd. Tank Fluid Level (optional) B Change Hyd. Tank Fluid and Filter (optional) B Check Gearbox Oil Level D Oil Chains C Lubricate Wheel Bearings A Before Each Use 4-8 Hours 25 Hours 50 Hours 100 Hours Yearly X X X X X X X X X X X X A = Multi-Purpose Grease (EP2 rated) B = SAE 10 Wt. Hydraulic Fluid C = Chain Lube D = AGMA Grade 5 Synthetic Oil NOTE! For OCS equipped (conveyor) combines, refer to the OCS section for additional lubrication points and schedule. MAN121 8/19/14 75 Maintenance 2110 PT Peanut Combine Lubrication Locations Bin Pivot Points Gearbox U-joint PTO Shaft Wheel bearings Ball hitch NOTE! For OCS equipped (conveyor) combines, refer to the OCS section for additional lubrication points and schedule. 76 8/19/14 MAN121 2110 PT Peanut Combine Maintenance Post Season Maintenance To extend the life of your combine, take the time to prepare it properly for the long nonuse period. Follow these storage suggestions at the end of each season. NOTE! Use protective eye gear. Do NOT use high-pressure water or air directly on the bearing seals, as contaminant or moisture penetration may occur, which can dramatically shorten part life. 3. If possible, repaint worn and scratched parts, and coat the internal parts of the combine with light oil or another rust inhibitor. Open shields 4. Release tension on all belts. 5. Remove and clean all chains. Store in a container of oil or oil/diesel mix, if possible. If not, reinstall but do not tension. 6. Grease all fittings and the driveline. 7. Store the combine under shelter. Open shields 8. Collapse all hydraulic cylinders prevent them from rusting or pitting. to NOTE! If the combine must be stored outside, cover the optional hydraulic tank and breather cap to prevent water from entering the tank. 1. Clean the combine thoroughly to remove all dirt and moisture-holding materials. 2. Flush out the slots below the disc separator shafts with an air hose or blower to remove all trash and dirt. If dirt is packed tightly, it can be loosened with prodding. MAN121 8/19/14 77 Maintenance 2110 PT Peanut Combine Troubleshooting Problem Good peanuts attached to vines being discharged from combine. Cause Correction Retention board open too much. Close in 1” increments between checks. Main drive belt slips under surge loads. Tighten belt and slow down ground speed. Combine not at or near design Adjust RPMs and observe speed. combine speed monitor. Loose peanuts being discharged over back of walker cylinders. Good peanuts being discharged over disc separator. Lightweight foreign material in bin. 78 Ground speed too fast for conditions. Shift tractor into a lower gear. Moisture level in windrows is too high. Lift windrows and/or wait for moisture to dissipate. Adjustable overhead teeth or concave teeth not engaged enough. Engage overhead or concave teeth slightly (in 1” increments). Combine PTO not at or near design speed. Adjust and observe combine speed monitor. Ground speed too high for conditions. Ground Speed too high for conditions. Shift tractor to lower gear. Shift tractor to lower gear. Cleaning air control improperly set. Lower air setting if peanuts are being blown out. Raise air setting if peanuts are riding out in the vine hay. Combine settings are not aggressive enough. Engage overhead teeth and then concave teeth (1/8” increments). Main drive belt slips under surge loads. Tighten belt and reduce ground speed. Combine PTO not at or near design speed Adjust and observe combine speed monitor. Cleaning air control set too low. Adjust to a higher setting Separator section drive or cleaning air control air drive belts are slipping. Tighten belts. 8/19/14 MAN121 2110 PT Peanut Combine Problem Lightweight foreign material in bin. Excessive amounts of LSKs in bin. Excessive amounts of dirt clods in bin. MAN121 Maintenance Cause Correction Moisture level in windrows too high. Lift windrows and/or wait for moisture to dissipate. Retention board engaged too far in the closed position. Open in 1” increments between checks. Adjustable overhead/concave teeth are too aggressive. Disengage in 1” increments between checks. Main drive belt slips under surge. Tighten belts. Combine PTO over design speed. Adjust and observe combine speed monitor. Moisture content in peanuts too low. Minimize aggressive settings, reduce combine RPM. Increase to a higher tractor gear and ground speed if needed. Moisture level in windrows too high. Lift windrows or wait for moisture to dissipate. Obstruction in elevator air duct. Shut off tractor, disassemble duct and remove obstruction. Very dry harvest conditions. Shut off tractor, change dual speed cylinder drives to low speed setting. Windrows have been run over and the peanuts shell easily. None. Elevator air set too high. Lower elevator air setting. Excessive dirt in windrow. Reshake windrow. Pickup header is being operated too low. Raise header so that spring tips run just above the ground. Combine PTO not at or near design speed. Adjust and observe combine speed monitor. Main drive or cleaning air belts are slipping. Tighten belts and check elevator fan belt and Vsheave for wear. Concave teeth not engaged. Engage concave teeth. 8/19/14 79 Maintenance Problem Excessive amounts of dirt clods in bin. 2110 PT Peanut Combine Cause Correction Ground speed too fast for conditions. Shift tractor into a lower gear. Obstruction in elevator air duct. Disassemble duct and remove obstruction. Elevator fan or main drive belts are slipping. Tighten belts and check the elevator fan belt and Vsheave for wear. Combine PTO not at or near design speed. Adjust and observe combine speed monitor. Shut off tractor, open cleaning Stones or dirt clods in air duct. door and remove stones or clods. Tractor PTO load excessive. Hay is torn up excessively under dry conditions. 80 Animals have built nests in high pressure section of elevator system. Remove inspection door in jet tunnel and remove nest. Dirt buildup on inside of duct. Inspect and clean. Tractor PTO not at or near design speed. Adjust and observe combine speed monitor. Ground speed too fast for conditions. Shift tractor into a lower gear. Picking chamber jammed. Stop, shut off tractor, and remove excess material. Adjustable overhead/concave teeth set too aggressively. Disengage overhead/concave teeth in 1” increments between checks. Retention board engaged too far in the closed position. Open in 1” increments between checks. Combine is being operated above suitable PTO speed level. Reduce combine speed to lower speed level. Very dry harvest conditions. Shut off tractor, change dual speed cylinder drives to low speed setting. 8/19/14 MAN121 2110 PT Peanut Combine Maintenance Tachometer Programming 4. Select Tach Programming for Combines (Form 0367; Part #16441) The tachometer for your machine has been fully programmed at the factory. However, if you have a replacement tachometer, program the new tachometer using the instructions included with it in the packaging. Instructions can also be found on the AMADAS website as follows: IMPORTANT! Do NOT program your tachometer UNLESS you have received a replacement from AMADAS Industries. Tachometers on new machines are fully programmed at the factory and attempting to re-program them may cause errors. 1. Go to www.amadas.com 2. From the AMADAS home page, select Product Catalogs and Manuals 3. From the Product Catalogs and Manuals page, select Technical Bulletins MAN121 8/19/14 81 Maintenance 2110 PT Peanut Combine NOTES 82 8/19/14 MAN121 ONE-YEAR LIMITED WARRANTY For AMADAS INDUSTRIES Pull-Type Peanut Combine A. General Provisions The Warranties described below are provided by AMADAS INDUSTRIES (“AMADAS”) through its authorized dealers to the original purchaser of each new AMADAS pull-type peanut combine. AMADAS will repair or replace, at its option, any part covered under warranty which is found to be defective in material or workmanship during the applicable period of warranty. B. What is Warranted? All parts of any new AMADAS pull-type peanut combine, except tires, tubes, belts, chains, picking and header springs, and PTO drivelines are warranted for 12 months. The warranty period will begin when the combine is delivered to the purchaser. AMADAS will repair or replace, at its option, any new part or component under the above warranty, if a defect in material or workmanship appears in such part or component and is reported to AMADAS before the expiration of the applicable equipment warranty. Tires, tubes, belts, chains, picking and header springs, and PTO drivelines are not warranted by AMADAS beyond that offered by the items original manufacturer. Used equipment is not warranted by AMADAS unless it is specifically covered by a separate warranty document. The above warranties cover only defective material and workmanship. The warranties do not cover any depreciation or failure caused by normal wear, lack of proper maintenance or use, misuse, lack of proper protection during storage, or accident. The purchaser shall pay all costs of routine maintenance and/or replacement of maintenance and wear items. C. Unapproved Service or Modification All Obligations of AMADAS under this warranty are terminated if the combine is modified or altered in ways not approved by AMADAS. D. Securing Warranty Service To secure warranty service, the purchaser must (1) report the product defect and request repair within the applicable warranty period, (2) present evidence of the date of delivery of the peanut combine, and (3) make the combine available to an AMADAS authorized dealer within a reasonable period of time. E. No Dealer Warranty The selling dealer makes no warranty of his own on any item warranted by AMADAS, and makes no warranty on other items. The dealer has no authority to make any representation or promise on behalf of AMADAS, or to modify the terms or limitations of this warranty in any way. F. What are your Responsibilities? a. Read the operator’s manual before operating the equipment. b. Perform all necessary maintenance as described in the operator’s manual. c. Deliver the machine to an AMADAS authorized dealer at your expense during normal working hours for any needed warranty services. d. Contact an AMADAS authorized dealer promptly on any claim for warranty service. e. Sign the AMADAS machinery delivery form, which will be given to you by the dealer. G. Disclaimer There are no warranties that extend beyond the description here. ANY WARRANTIES OF MERCHANTABILITY AND FITNESS FOR ANY PARTICULAR PURPOSE ARE SPECIFICALLY DISCLAIMED AS ARE ALL OTHER REPRESENTATIONS TO THE PURCHASER. AMADAS specifically excludes any liability on behalf of the company for any incidental or consequential damages including, but not limited to, crop loss, loss of profits, rental of substitute equipment, or other commercial losses. AMADAS shall not be responsible for expenses or inconveniences that you might incur or experience with respect to the AMADAS peanut combine, nor shall AMADAS be liable for defects, damage, or failures caused by improper storage, unreasonable use, or abuse, or accident, including the failure to provide reasonable and specified maintenance. This warranty applies only to the original purchaser of the equipment. Because some states do not allow the exclusion of limitations of incidental or consequential damages, the above limitation may not apply to you. This warranty gives you specific legal rights. You may also have other rights, which vary from state to state. Where there is a conflict between a provision of this warranty and the provision of any state, the state legislation prevails. Revised 7/00