1
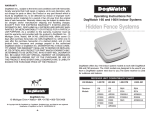
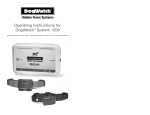
.........................................................................................................................
Your Authorized DogWatch Dealer
®
Performance Series
Owner’s Guide
If your dealer’s information is not listed above, please contact
Customer Service at 800-793-3436, x622 or visit the DogWatch website at
www.dogwatch.com and click on “Locate a Dealer.”
DogWatch, DogWatch logos, Performance Series, and SafeLink are registered trademarks of DogWatch Inc.
FastReact, AutoMemory, Pet-Friendly, PowerPak, Scoot, GroundsKeeper, HouseKeeper, It’s All About Your
Dog, Surrounding Pets With Freedom Since 1990 and Simply The Best... No Getting Around It are trademarks
of DogWatch Inc.
The Consumers Digest logo and Best Buy Seal are registered trademarks of Consumers Digest and used
under license.
DogWatch products are protected under U.S. Patent numbers:
5,353,744; 5,465,687; 6,079,367; 6,360,698; 6,467,435; 6,575,120; 6,825,768 and D,491,481.
This device complies with part 15 of the FCC Rules. Operation is subject to the following two conditions: (1)
This device may not cause harmful interference, and (2) this device must accept any interference received,
including interference that may cause undesired operation.
DogWatch products are lead-free and compliant with the Reduction of Hazardous Substances (RoHS) initiative.
©2007 DogWatch Inc. All rights reserved. 295001 Rev. C 01-07
®
®
Hidden Fence Systems
Hidden
Fence
Systems
.........................................................................................................................
10 Michigan Drive
■
Natick, MA 01760
■
800-793-3436
■
www.dogwatch.com
Thank You for Purchasing a
DogWatch Hidden Fence System!
®
Table Of Contents
Important Safeguards ...............................................................................................2
PT4 Transmitter Features ..........................................................................................3
It’s all about your dog.™ You’ve purchased the most technologically advanced
hidden fence system available, thanks to our patented SafeLink® FM digital
technology, AutoMemory™, FastReact™ and other pet-friendly™ features.
Our extensive research and testing has resulted
in a product that will add value to your lifestyle —
you can enjoy your pet and know he’s safe.
We’re also pleased to provide you with a solution that’s cost-effective and has no
impact on the aesthetics of your property.
Because of our commitment to excellence and value,
Consumer Digest has rated us a “Best Buy” every year
since 1998.
DogWatch® offers you great flexibility. Not only can you
contain your dog in your yard, you can also keep him out of your garden or
swimming pool. DogWatch can also be attached to an existing fence to keep your
pet from jumping over or digging under it.
We also have indoor systems that work throughout your home. Keep your dog off
couches and countertops, out of doorways and rooms — you name it. Ask your
DogWatch Dealer for a solution to your indoor needs.
To assure that your DogWatch Hidden Fence System works properly, please follow
the training procedures outlined in this manual. Any shortcuts may affect the
performance of the system and could be unsafe to your pet.
R7 and R8 Receiver Features ....................................................................................5
Batteries
R7 and R8 Receiver Battery Insertion Instructions ......................................................7
Replacement Batteries and Battery Plans ....................................................................7
Resetting The Battery Reminder Feature......................................................................7
User Programmable Features ..................................................................................8
Receiver and Transmitter Settings............................................................................9
How The System Works ..........................................................................................10
How The System is Installed ......................................................................................11
Important Reminders ..............................................................................................12
Containment Training
Your Dog’s Response To Stimulation..........................................................................13
Dog Personalities & Traits ..........................................................................................13
Avoidance Zone and Safety Zones ............................................................................14
Adjusting the Collar ....................................................................................................14
Containment Training Reminders ..............................................................................15
Phase 1: Audible Training.......................................................................................... 15
Phase 2: Introduction to Correction .......................................................................... 15
Phase 3: Introduction to Distractions ........................................................................16
Phase 4: Introduction to Increased Distractions ........................................................17
Phase 5: Letting Your Dog Off The Leash ..................................................................18
Phase 6: Taking your Dog Outside The Boundary......................................................18
What to Expect Off Leash ..........................................................................................18
Training Tips ..............................................................................................................19
If you have any questions, please contact your local authorized DogWatch Dealer.
Warranties
Warranty Registration ................................................................................................20
Manufacturer’s Warranty ............................................................................................20
System Maintenance Record ..................................................................................21
®
Surrounding Pets With Freedom Since 1990.™
2
PT4 Transmitter Features
Important Safeguards
DOGWATCH STRONGLY RECOMMENDS THAT YOU REMOVE THE COLLAR
AT NIGHT WHILE YOUR DOG IS INSIDE
■
Please read all the literature included with your DogWatch® Hidden Fence System
before turning the system on or beginning training.
■
Do not attempt to shortcut the complete training of your dog.
The transmitter sends a coded digital FM radio signal through the boundary wire. This
signal can be adjusted, allowing you to control the “hidden fence” around your property.
It operates on a standard 110 volt outlet.
9
Rate
■
■
■
8
The DogWatch Hidden Fence System is intended only for the purpose of
containing domestic dogs and cats. Use for any other purpose is at the system
owner’s risk.
In the event your system requires servicing, please contact your local authorized
DogWatch Dealer. Attempting to service the system yourself may invalidate the
warranty.
Training
Mode
1
7
Power
On/Off
Range
6
The DogWatch Hidden Fence System is recommended for dogs six (6) months or
older. Your Dealer will recommend if a puppy under 6 months old is ready.
■
Keep the collar and the transmitter out of the reach of children.
■
Never adjust the transmitter or receiver when your dog is wearing the collar.
■
DogWatch recommends that you unplug your transmitter from the wall outlet and
disconnect the loop wire during lightning storms or when it is left unused for
extended periods. This will prevent possible damage from lightning and powerline
surges.
■
This product is only intended for use with trained domestic dogs. If your dog is
aggressive or violent and could cause harm to itself or others outside the fenced
premises, you should take other measures to restrain your dog such as traditional
fencing.
Loop
Monitor
Display
2
Power Supply
3
Power Pak™
4
5
Ground Wire
Loop Plug
Never adjust the transmitter while your dog is wearing the receiver collar.
To contact your local dealer, please call DogWatch at 800-793-3436
or go to our website at www.dogwatch.com.
1. Power On/Off: This switch gives you easy access to turn the transmitter on or off.
The red Power light on the front panel lets you know that it is operating.
2. Power Supply: The transmitter is powered through a power supply that is plugged
into a properly grounded 110 volt outlet. The adapter is plugged into the transmitter
jack labeled “PWR.”
3. PowerPak™: Optional battery back-up system keeps the transmitter operating in
the event of a power failure. When transmitter is being powered by battery back-up,
the red power light will remain off. PowerPak plugs into the transmitter at “P-PAK”.
4. Ground Wire: The green ground wire is plugged into the transmitter at the location
labeled “GND.” The round connector on the green ground wire is attached under
the screw on the outlet faceplate. It will, however, only be effective if your outlet is
properly grounded. If you have any questions about having a properly grounded
outlet, consult your local electrician.
5. Loop Plug: Your system comes with zip cord with a plug on one end. This plug fits
into the hole marked “Loop” on the bottom of the transmitter. This is the beginning
of the boundary wire. Once your boundary wire has been properly installed and
plugged into the transmitter, the green Loop indicator light will turn on. If the
3
4
R7 and R8 Receiver Features
boundary wire is broken or the signal is interrupted, the Loop indicator light will go
out and an audible warning will sound. If the Loop light is out, consult your Dealer.
You should also check around your property for a visible broken wire.
6. Loop Monitor Display (LMD): The Loop Monitor Display provides a visual
indication of the status of your boundary signal. On traditional boundary wire
configurations each number on the scale represents the boundary signal distance
in feet, that is being broadcast from each side of the wire. A significant change
(drop) in signal range could indicate a partial wire break or other boundary wire
problem. Contact your dealer for troubleshooting tips or to schedule an
appointment.
Note: For non-traditional wire configurations where the boundary wires may be
close to one another, the LMD may not measure the boundary signal accurately in
feet, but is a visual setting reference point. Your DogWatch dealer will explain the
LMD setting and your actual signal range.
7. Range: The radio signal is transmitted from the boundary wire in all directions. The
signal is adjusted by the range control on the transmitter to create a signal field on
each side of the wire. The recommended signal field width is 6-10 feet. Your
DogWatch Dealer will adjust the radio signal distance according to the personality
and traits of your dog. Consult your DogWatch Dealer first before making any
adjustments yourself.
Signal Field: The signal field has two areas. When your dog first enters the signal
field, he will receive an audible warning. If he continues further into the signal field,
he will receive a correction. The audible area is approximately the first 13% of the
total signal field. To prevent your dog from entering the signal field and remaining in
the audible area causing depletion of the battery, the receiver will transition from an
audible warning to a short warning correction after a period of 15 seconds. This will
activate regardless of the mode switch setting, but will not activate if the receiver is
in the “Audible Only” Training Level (see Phase 1: page 15).
8. Training Mode: The training mode switch allows you to choose between two pet
friendly training options: Basic (Mode A) and QuickAlertTM (Mode B). When in the
Basic setting, your pet will receive an audible warning followed by a correction. For
harder to train dogs, when set to QuickAlert, your pet will receive a very quick
“alert” correction followed by the normal audible warning and correction.
If you have multiple dogs on the system, when you set the training mode on the
transmitter, it will effect all receivers.
9. Rate: This adjusts to three levels (1 = slow, 2 = medium, 3 = fast). When your dog
gets a correction, he receives it in a series of pulses. Increasing the Rate means
that he will receive a greater number of pulses per second. The Rate feature
operates when your Receiver Training Level is set to Level 1, 2, or 3.
See the Receiver Levels and Transmitter Settings chart on page 9.
Note: On the back of the transmitter are four small switches. These switches
set your transmitter to the correct broadcast frequency. Your dealer will set
these switches for your system.
Do NOT change these settings. They are for DEALER USE ONLY.
5
The lightweight radio receiver worn by the dog identifies the coded FM radio signal from
the boundary wire. It creates an audible warning followed by stimulation if he comes too
close to the boundary wire. It operates on a replaceable battery and is waterproof when
the battery cap is securely fastened.
Contact Posts
Adjustable
Nylon
Collar
Metal Lock
Washer
CollarBone
Test Light
Battery Cap
Magnet
Hold Magnet Between Two Lines
3.6 Volt Battery (R8)
Adjustable Collar: Your receiver comes fitted to an adjustable nylon collar. The
collar should be positioned above the dog’s regular collar. The collar should be
adjusted to insure that the contact posts touch the skin on the dog’s neck. Check the
fit for the first few days of wear to insure that the collar is not too tight or causing
irritation to your pet’s neck.
DogWatch recommends that you remove the collar at night while your pet is inside.
SafeLink® Digital FM Design: Our patented FM design allows the DogWatch
receiver to recognize and activate only to our unique radio signal. This protects your
pet from unintentional correction caused by stray radio signals which may be emitted
by other electronic devices.
AutoMemory™: Our patented AutoMemory feature automatically adjusts the
correction level of the receiver when your pet challenges the boundary. When the
receiver is set to one of the AutoMemory levels, and the dog enters the signal field,
the dog will receive the correction of the initial setting. If your dog leaves the signal
field, the receiver will automatically advance the correction level setting by one, and
only one level. If the dog does not re-enter the signal field within the next 24-hour
period, the receiver defaults to the original setting. The AutoMemory feature operates
when your Receiver Training Level is set to 4, 5, or 6.
FastReact™ Time: The DogWatch receiver offers the fastest reaction time available
in the pet containment industry. Whether your dog, strolls, runs or sprints into the
Avoidance Zone, the receiver will react — and correct — within 1/8 of a second (.125).
Automatic Shutdown: The DogWatch system is designed to protect your dog from
an over-correction in the unlikely event that your dog gets caught in the signal field. If
your dog does not exit the signal field, the receiver will automatically stop correcting
after 15 seconds — protecting your dog from over-correction. The receiver will
automatically reset once the dog leaves the signal field.
CollarBone: The CollarBone, metal lock washers and contact posts fasten the
receiver to the nylon collar. The plastic “collar bone” is designed to fit two collar
6
Batteries
thicknesses. For single-ply collars, mount the recessed holes of the CollarBone
against the collar strap and for double-ply collars, place the flat side of the
CollarBone against the collar strap. See the illustration on page 5.
Contact Posts: The receiver comes with a set of contact posts. Your DogWatch
Dealer will determine the correct set based on your dog’s neck shape, coat, and skin
sensitivity. The posts must make contact with the skin in order for the dog to feel the
correction. In certain cases, your dealer may recommend clipping some of the hair
around the contact posts so that they can touch the skin more easily. Use care if you
find it necessary to tighten the contact posts with the collar wrench, as overtightening could cause damage to the receiver.
Antenna: The receiver’s omni-directional antenna design assures optimal reception
from the signal field.
IMPORTANT: The use of any battery other than a battery authorized by DogWatch Inc. can
cause erratic operation of the Receiver or could cause permanent damage. The use of any
unauthorized battery will void the warranty on the receiver.
Battery Insertion Instructions
R7 Battery: The R7 receiver is powered by a 3 volt (1/3 N) lithium battery. The
receiver is designed for a battery life of up to 6 months. The negative (-) end of the
battery must be inserted down. (Figure 4)
R8 Battery: The R8 battery is powered by a 3.6 volt lithium battery. The receiver is
designed for a battery life of up to two years. The positive (+) end of the battery must
be inserted down. (Figure 5)
Test Light: The test light allows you to test the receiver.
Hold the test light over the contact posts as shown in
Figure 3 and carry the receiver into the signal field a few
feet from the ground. When the receiver picks up the
signal from the boundary wire, the audible warning will
sound and the test light will come on when you enter the
correction zone.
Status Light The light continuously monitors your receiver
and provides these features.
■
Start-Up When you first insert the battery into your receiver, the status light will
flash red and green. This indicates that the receiver has started properly. Once
started, the status light will continue to flash green once every 30 seconds
indicating normal operation. In the event that the light does not flash, check the
battery to be sure that it has been inserted properly.
(see Page 4).
■
Training Level Indicator When programming the
training level of your receiver, the status light will flash
green in conjunction with audible beeps. The number
of flashes will equal the training level you have chosen.
■
Signal Field Indicator When testing the receiver in
the signal field the status light will flash green when the
receiver is in the audible zone and will flash green and
red when the receiver is in the correction zone.
■
■
Figure 1
Insert R8 battery POSITIVE end down.
Figure 4
Figure 5
Battery Plans
Ask your DogWatch Dealer about a battery plan. If your DogWatch Dealer does not offer
a battery plan, you can join the DogWatch Battery Program, where a new battery is
mailed to you every 6 or 24 months, depending on the type of receiver you own. Call
DogWatch at 800-793-3436 or join through the website at www.dogwatch.com.
Figure 2: R7 Receiver
Correction Alert You will be able to tell if your pet
has tested the boundary by looking at the status light.
The status light will double flash green every 30
seconds during the 24-hour period after the dog has
entered the boundary area.
Battery Indicator This feature monitors the voltage
level of the battery. Once the receiver detects that the
battery has reached a low voltage level, the status light
Figure 3: R8 Receiver
will change from the normal blinking “green” every 30
seconds to blinking “red” every 10 seconds. This
indicates that your battery is close to the end of its useful life and you should
change the battery within the next 3-4 days.
See page 7 for how to change your battery and reset your receiver.
7
Insert R7 battery NEGATIVE end down.
Resetting the Battery Indicator on your Receiver
1. Remove the old battery.
2. Using your test light, hold the magnet in the programming position without the
battery in the receiver (see Figures 1 and 2) for five seconds to fully discharge the
unit. If you have misplaced the test light, let the receiver sit for five minutes without
a battery before inserting a new battery.
3. Insert a new battery. The Battery Reminder feature is now automatically reset.
If you forget to discharge your receiver prior to inserting a new battery the Battery
Indicator Feature will automatically reset within the next 24 hours.
8
Programmable Features
You can customize the receiver to one of 20 training settings, as outlined in the chart on
the right.
SETTING THE TRANSMITTER
Receiver Levels and Transmitter Settings
RECEIVER
TRAINING
LEVELS
T R A N S M I T T E R M O D E A N D R AT E S E T T I N G S
Mode A
Mode A
Mode B
Mode A
Rate 1
Rate 2
Rate 3
QuickAlertTM
Audible Only
Rates The Transmitter Rate switch adjusts to three settings: (1 = slow, 2 = medium,
3 = fast). When your dog gets a correction, he receives it in a series of pulses per
second. Increasing the rate means that he will receive a greater number of pulses per
second. Rate 1 is the slowest pulse rate per second; 3 is the fastest.
Training Modes The Training Mode switch allows you to choose between two
training options: Basic (Mode A) and QuickAlertTM (Mode B). When in the Basic setting
your pet will receive an audible warning followed by a correction. For harder to train
dogs, when set to the QuickAlert mode, your pet will receive a very quick “alert”
correction followed by the normal audible warning and correction.
Transmitter Rate Fixed at Medium
(extra low) 1
Slow
Medium
Fast
Slow
(low) 2
Slow
Medium
Fast
Medium
(low medium) 3
Slow
Medium
Fast
(medium) 4
Fast
(medium high) 5
(high) 6
(extra high) 7
Fast
Fast
X-Fast
X-Fast
XX-Fast
XX-Fast
}
AutoMemoryTM
self activates
and advances
to the next level.
Audible and XXX Fast Correction are Simultaneous
SETTING THE RECEIVER
Receiver Training Levels Your receiver provides eight training levels that allow you
to customize the training setting to your dog’s individual needs: Audible Only, Level 1
(extra low), Level 2 (low), Level 3 (low medium), Level 4 (medium), Level 5 (medium
high), Level 6 (high), and Level 7 (extra high). When the receiver is first shipped from
the manufacturer, it will automatically be set to Training Level 2 (low).
Changing the Receiver Settings Your Dogwatch Dealer will start the training on
the appropriate level according to your dog’s personality and traits. If you need to
change the Training Level on the receiver, hold your test light magnet to the two
raised lines on the side of the receiver (see Figures 1 and 2). Hold the magnet steady
and you will hear a series of beeps that indicate the current training level. The
“Audible Only” level is one long beep, Level 1 is one short beep, Level 2 is two short
beeps, Level 3 is three short beeps, etc. The Training Level will continue to advance
while the magnet is held in position. When you reach the desired setting, pull the
magnet away from the receiver. The receiver is now set.
Note: Any time the magnet activates the receiver, the number of beeps will indicate
the current receiver level. As long as the magnet is held in place, it will advance the
receiver to the next training level and continue to cycle through the settings in the
order shown in the chart on Page 9.
For example: If the receiver is on Level 1 and the transmitter is on Rate 1, your dog will receive the
lowest level of correction and the least number of pulses per second.
Please remember that if your Receiver Level is set to 1, 2, or 3 and you switch the Training Mode to
QuickAlert (Mode B), your training setting may change. For example, if the receiver is set to Level 3 and
the transmitter is set to Rate 1, your dog will receive a slow correction. If you switch your Training Mode
to QuickAlert, your dog will now receive a fast correction.
Handy Programming Tips
Recommended Settings: The majority of dogs respond well to transmitter Rate
Setting 2 or 3 and a receiver Training Level 3, 4 or 5. Sensitive or small dogs that train
easily respond best to lower rate settings and lower training levels. If your dog is not
responding to training, your DogWatch Dealer will adjust your system to a higher
training level.
If Your Dog Is Hard To Train: Training Levels 5, 6 and 7 of your receivers are
specifically designed to meet the needs of hard to train or stubborn dogs. These
setting will provide the extra correction that some dogs need as part of their training.
Multiple Dogs: Our receivers allow you to select Audible Only as your Training Level
setting on each individual receiver — allowing you to conduct training with one dog
while the other is still protected with the correction feature enabled. It is recommended
that the Audible Only setting be used only during supervised training sessions.
*** IMPORTANT ***
Figure 6: Using the test light magnet to
reset the R7 Receiver
Figure 7: Using the test light magnet to
reset the R8 Receiver
9
Never change the Receiver Training Levels when your dog is wearing the collar.
10
How the DogWatch System Works
The boundary wire creates the perimeter for the DogWatch Hidden Fence System, and can
enclose any area up to 200 acres. It is buried at least 3 – 4” beneath the surface of the yard
or can lie on top of the ground (e.g.: in wooded or rocky areas). It can also be installed
around gardens or swimming pools, or attached to an existing fence to prevent your dog
from digging under or jumping over it.
How The DogWatch System is Installed
Transmitter
Outside Wall
Inside Wall
Twisted Wire
Transmitter &
Surge
Protector
Surge
Protector
Zip Cord
Boundary Wire
PowerPak
(optional)
Signal Field
Ground Wire
Ground Wire
Power
Supply
Ground
Rod
Garden Loop
Boundary Wire
Boundary Wire: The boundary wire carries the coded FM radio signal around the
perimeter of your property. It is rated for underground burial.
Signal Field: The radio signal is transmitted from the boundary wire in all directions. It
can be used to keep dogs in or out of an area. The signal is adjusted by the Range
control on the Transmitter to create a signal field on each side of the wire. Your Dealer
has installed the wire to the recommended width of 8-10 feet and has carefully
configured the corners to avoid sharp angles.
Continuous Loop: In order for the system to work properly, the boundary wire must
form a continuous loop. Any break in the wire will cancel the signal field. If the
boundary wire is broken or unplugged, the green Loop Monitor Display (LMD) light
will go out and an audible warning will sound. Most breaks are caused by lawn/garden
equipment. If you cannot visibly locate the break, contact your Authorized Dealer for
service.
Surge Protector: For maximum protection against power surges, DogWatch offers
both internal an external surge protection. It is important that the surge protector
be properly grounded. This part of the system protects the transmitter from damage
due to lightning power surges. Your Dealer has attached it to the existing electrical
source house ground or a grounding rod and then connected it to the twisted wire
between the transmitter and the boundary wire.
Twisted Wire
DogWatch System Components
A
B
C
PT4 Transmitter
R7 Receiver or
R8 Receiver
and Nylon Collar
D
E
F
Surge Protector
Training Leash
Power Supply
F
G
H
I
A
I
D
G
E
H
B
After a lightning storm, check to be sure your transmitter is working properly.
Do not let your dog outside until you know the system is operating.
C
11
Test Magnet/Light
Collar Wrench
PowerPak™ (Optional)
12
Important Reminders
■
Keep the transmitter and receiver collar out of reach of children.
■
Never attempt to service the receiver or transmitter yourself.
■
Be sure your transmitter and surge protector are properly grounded. (page 10-11)
■
Fit the collar snugly around your dog’s neck. (page 14)
■
Make sure that battery is fresh and is inserted correctly. (page 7)
■
Train your dog as outlined in this manual. (pages 13-19)
■
Never adjust the transmitter or receiver while your dog is wearing the receiver collar.
Containment Training
This section covers the phases necessary to teach your dog to remain within the
designated boundary of your property by teaching you how to teach your dog, so it is
important that you understand each phase completely.
Your Dog’s Response To Stimulation
Stimulation has been a safe and effective part of dog training for over twenty years.
All dogs respond differently when they feel a mild stimulation. Some dogs may
demonstrate little, if any, reaction, while others may yelp or jump back. Some dogs
“freeze”. Do not try to comfort the dog if he receives correction or it will reinforce his
anxiety.
Dog Personalities and Traits
The System
If your dog is not staying within the boundary created by the DogWatch® Hidden Fence
System, check the following:
Keep in mind that a dog’s personality and traits differ among breeds. Dogs may not
exhibit the same personalities and traits within the same breed.
Your DogWatch dealer will ask you questions about your dog before training begins.
A shy or senior dog may require longer Phase 1 sessions, while a gregarious or
easily distract dog may require a short Phase 1, but longer Phase 2 or 3 sessions.
■
Did you and your dog complete the 6-Phase training program? See Containment
Training on pages 15-19.
■
Is the battery in the receiver collar depleted? See Test Light on page 6.
■
Is the battery installed properly? See Battery Insertion on page 7.
Creating The Right Environment
■
Is the receiver collar too loose? See Adjusting the Collar on page 14.
Attitude and Consistency is Important!
■
Is the receiver operating properly? See Test Light on page 6.
1. Keep the training “light”. Use lots of praise. Keep the dog’s spirits high.
■
Is the transmitter on and adjusted properly? See Power On/Off on page 3.
2. Use high happy tones for praise. Use low tones for negative commands.
■
Is the signal field too narrow? See Signal Range on page 3.
3. Move around the boundary in the same direction.
■
Is the Rate level too low? See Rate on page 3.
■
Is the Training Mode switch in the proper position? See Training Mode on page 4.
4. Reinforce the boundary with commands. Use the commands “Watch Out!” or
“Careful” as you slap or shake the flags.
■
Is the boundary wire unplugged? See Illustration on page 3.
5. Limit the training session to no more than 20 minutes.Keep training consistent.
■
Is the boundary wire broken? See Boundary Loop on page 11.
The better you know your dog, the easier the training will be for both of you!
6. Keep your dog on the lead in the yard for five days.
7. If you are training more than one dog, train each dog separately.
Other troubleshooting tips are available on line at www.dogwatch.com. If you are
unable to determine the cause of the problem, please contact your Authorized Dealer.
8. Use naturally occurring distractions such as a neighbor or children.
9. Contact your DogWatch Dealer if you have any questions.
Remember!
Proper training is essential for successful containment. If you have any questions
about the training phases, especially during the first few weeks, or if you have
questions about your dog’s behavior during his training sessions, please contact your
DogWatch dealer.
13
14
How The DogWatch Hidden Fence Works
Containment Training Reminders
Think of the property having two distinct zones:
Purpose: To teach your dog where the boundary
is and how to react to it.
1. SAFETY ZONE: This is the area where the dog is free to play (Figure 8).
2. AVOIDANCE ZONE: This is the signal field created by the boundary wire. When
your dog crosses the signal field, the receiver collar emits an audible warning
followed by a correction. When containment training is complete, your dog will remain
in the Safety Zone.
Boundary Wire
Avoidance Zone
Safety Zone
Figure 8
2. Playtime is very important! Remember to
reinforce the Safety Zone and play with your
dog before, during, and after each training
sessions. (Figure 11)
Your DogWatch Dealer has installed your DogWatch Hidden Fence System, set the
transmitter and receiver to the training levels appropriate for your dog’s personality
and traits, and has placed boundary flags around the perimeter of your yard. Your
Dealer has already begun your dog’s first day of containment training. Now it is your
turn to continue the training.
Before you begin containment training with your dog, be sure to place the DogWatch
receiver collar on your dog’s neck before you go outside.
1. The collar should be worn snugly on the dog’s neck. This is extremely important!
2. Place no more than one thumb width between the contact post and dog’s neck.
3. When checking snugness of collar, the dog’s
neck should be facing down (sniffing position)
as this is where the dog’s neck is the smallest.
(Figure 9).
Adjust
collar
strap
Figure 10
Contact
Posts
must
touch
skin
3. Never throw a ball or toy into the Avoidance
Zone during training.
4. There are 6 phases of training. Your DogWatch
Dealer will begin containment training on the
audible “beep” tone, Level 1 or Level 2,
depending on your dog’s breed and
personality. Your Dealer will work with you and
your dog to insure you understand the training
phases and at what phase you should continue
training.
5. If you have questions about containment
training, please contact your DogWatch Dealer
for assistance.
Adjusting the Receiver Collar
1
Figure 11
PHASE 1 (1-2 days)
Audible or “Beep” Training
During this phase, your DogWatch Dealer has turned off the Mode switch on the
transmitter and correction rate on the receiver. Your dog will hear only an audible
“beep” tone and will not receive a correction during this phase.
1. Put the receiver collar on your dog 20 minutes before training. Your dog’s regular
collar should be positioned below the DogWatch collar.
2. Clip the green DogWatch training lead on his regular collar.
3. Take your dog outside and play with him in the Safety Zone for a few minutes.
4. Walk your dog around the perimeter of your yard, keeping inside the Safety Zone
and away (about 3 to 4 feet) from the training flags.
4. If the collar is too tight, the receiver unit will
stick out to the side when the dog shakes his
head.
5. When you finish the walk, approach a training flag. Hold the dog by the leash in
one hand and slap or shake a flag with the other,warning the dog firmly (in a low
stern voice) “Watch out! or “Careful!” (Figure 12.) You can also use a friend or
family member to sit in the Avoidance Zone to slap or wave the flag as you
approach the flags.
5. If the collar is too loose, the dog will not receive
the intended correction when he or she
wanders into the Avoidance Zone. (Figure 10.)
6. Give a leash (tug) correction, and quickly retreat into the Safety Zone. This creates
a sense of urgency to the retreat. It is not a casual turn. Remember to use of lot of
“Good dog!” praise after you’ve retreated into the Safety Zone.
6. Remember to periodically check for irritation
around the dog’s neck.
7. DogWatch strongly recommends that the
collar be removed daily and when the dog is
inside the house.
15
1. Only a portion of the yard, the Avoidance Zone,
is to be avoided.
Figure 9
7. Now walk your dog around the property allowing him to enter the Avoidance Zone
between the two flags.
16
3
8. When your dog enters the Avoidance Zone,
he will receive an audible “beep” warning.
Immediately yell, “Watch out!” and quickly
tug on the leash and direct him back into
the Safety Zone and praise (Figure 13.)
PHASE 3 (2-5 days)
Introduction to Distractions
1. Put the receiver collar on your dog at least 20 minutes before going outside.
2. Clip on the green DogWatch training lead and take your dog outside and play a few
minutes in the Safety Zone.
9. Repeat several times in different locations
(where flags are visible) and watch for
hesitation as you approach the flags. Your
dog may turn or shake his head when he
hears the beep.
3. Walk around the Safety Zone and have an assistant (friend or family member)
appear outside the Safety Zone at least 10 to 15 feet back from the flags. Walk
past your assistant without speaking, but remain in the Safety Zone.(Figure 14.)
Remember: Playtime is very important!
4. If your dog approaches your assistant and enters the Avoidance Zone, allow your
dog to receive a correction. Yell, “Watch out!” and tug him back into the Safety Zone.
Praise and play with your dog in the Safety
Zone for a few minutes. Take your dog inside
and remove the DogWatch receiver collar after
about 20 minutes. Train your dog in this
manner for a least two days before moving
on to Phase 2.
5. Let your assistant leave, walk your dog
around the perimeter again, and let your
assistant appear again. Your assistant can
call out the dog’s name, but do not allow
your assistant to ask the dog to “Come”.
2
Figure 12
Figure 13
PHASE 2 (2-5 days)
Introduction to Correction
1. Put the DogWatch receiver collar on your
dog at least 20 minutes before going
outside to train.
2. Clip on the green DogWatch training lead
and take your dog outside and play a few
minutes in the Safety Zone.
3. Walk around the complete perimeter, remaining inside the Safety Zone. Pause a
few times along the way to slap a flag and yell, “Watch out!” or “Careful!”
4. Your dealer has set the receiver to the training level appropriate for your dog and
has helped you introduce your dog to correction. Phase Two will help reinforce
your dog’s new boundary and the consequences if he crosses the training flags.
Select a new location to teach your dog today. Allow your dog to walk into the
Avoidance Zone while saying the negative command. When your dog retreats out
of the Avoidance Zone after he hears the warning “beep”, praise him for a few
minutes in the Safety Zone. Select another location and repeat the exercise.
If your dog does not react to the correction, first check to be sure the contact posts
are touching the dog’s skin. If your dog still does not respond to the correction, con
tact your dealer.
Remember: Keep the training sessions to no longer than 20 minutes, once or twice a day.
5. After training, praise your dog and play with him in the Safety Zone for a few
minutes, bring your dog into the house and remove the DogWatch collar after
about 20 minutes.
Note: It is important not to remove the receiver collar immediately following the
training as you do not want your dog to associate the receiver collar with the
correction.
17
Figure 14
6. If your dog attempts to go over to your
assistant, reinforce the flags and yell,
“Watch out!” Repeat the exercise for no
more than a total of 20 minutes.
7. If your dog makes no attempt to go over to
your assistant, reinforce the flags, end the
exercise and praise your dog in the Safety
Zone.
8. Repeat the exercise for 2 to 5 days. Then
move to Phase 4.
4
PHASE 4 (2-5 days)
Introduction to Increased Distractions
1. Put the DogWatch receiver collar on your
dog at least 20 minutes before going
outside to train.
2. Clip on the green DogWatch training lead to
your dog’s regular collar and take him
outside. Play a few minutes in the Safety
Zone.
3. Reinforce the flags.
4. Introduce “real life” distractions to your dog.
Have a friend drop by or start training when
the letter carrier or school bus is scheduled.
Take extra care if you use a vehicle as a
distraction. (Figure 15.)
5. Keep the dog on leash when you first introduce the distraction. If your dog attempts to
18
Figure 15
run past the flags and receives a correction, he should retreat to the Safety Zone.
Praise and play with your dog.
6. If your dog retreats to the Safety Zone, drop the leash (but keep it within reach) and
reintroduce the distraction. Praise and play.
7. If your dog is afraid to move, tug him back into the Safety Zone. Continue to train
with distractions for 2 to 5 days.
Remember: Play and praise at the end of each training session.
Training Tips
1. Never call your dog to “come” or give a recall command when you are outside the
flag line.
2. Never walk your dog through the flags during the training process.
3. Always reinforce the retreat concept by shaking the flag while saying “Watch out!”
and commanding “back-back-back” when your dog receives an audible warning
or a correction during the training process.
4. Adjust the receiver collar, test the battery regularly, keep the contact posts clean.
5
PHASE 5 (2-5 days)
Letting Your Dog Off The Leash
1. Put the DogWatch receiver collar on your dog at least 20 minutes before going
outside to train.
5. After the training period, your dog may wear the receiver collar during the day, but
remove it at night. Check your dog’s neck area and make sure there is no irritation.
6. Keep the training consistent: 15 to 20 minutes once or twice a day.
7. NEVER throw a stick or toy into the Avoidance Zone.
8. ALWAYS maintain a positive attitude when training your dog.
2. Clip on the green DogWatch training lead to your dog’s regular collar and take him
outside and play a few minutes in the Safety Zone. Remove the training leash and
let him run freely in the yard. Shake the flags to reinforce where his boundary is.
3. Important: Your dog will expand his comfort level over a period of time. Your dog
should remain about 6 feet away from the flags when he is first let off the leash.
Gradually your dog’s safety zone will increase to his individual level of comfort.
Remove the flags, every other one, every other day.
What To Expect Off Leash
1. Your dog will run toward the flags, see them and stop.
2. Your dog will run into the system, hear the “beep” warning and retreat.
3. Your dog will run into the system, hear the “beep” warning, receive a correction,
and retreat.
4. In rare cases, your dog will run through the boundary.
- Retrieve the dog. Take off the receiver collar and walk him back into the yard.
- Bring the dog into the house and call your DogWatch Dealer. Additional flag
training or an increase in correction level is necessary. Your DogWatch Dealer will
instruct you over the phone or meet with you and your dog for additional training.
Important: Do not punish the dog verbally for making errors. He’s still learning!
6
PHASE 6 (2-5 days)
Taking Your Dog Outside The Boundary
Your dealer will recommend when it is time to take your dog across the boundary for a
walk. It is important to be consistent when taking your dog for a walk. Be sure to use
your dog’s regular collar and leash and go to and from your walk using the same “exit”
area. You can also pick up a small dog and carry him over the flagged boundary
during the first weeks of training.
19
20
Warranties
System Maintenance Record
Warranty Registration
TRANSMITTER SETTINGS
Your Warranty Registration card must be complete for your warranty to be activated.
Fill out the enclosed Warranty Registration card and mail back to DogWatch within
seven (7) days. For your convenience, you can also complete your warranty
registration online at www.dogwatch.com.
Rate
Mode
Range
R7 Batteries must be replaced every 6 months. Replacement battery: 3.0 Volt (1/3 N) Lithium.
R8 Batteries must be replaced every 24 months. Replacement battery: 3.6 Volt Lithium.
Manufacturer’s Warranty
1. WARRANTY: DogWatch Inc., subject to the terms and conditions set forth hereunder, hereby warrants that
it will repair or replace, at its own discretion, without charge for parts or labor, the Product or any part thereof
(other than insulated wire) which is found by DogWatch Inc. to be defective by reason of improper
workmanship and/or materials for the warranty period from the original date of sale hereunder. Warranty
claims may be subject to dealer service charges and/or manufacturer shipping and handling charges. Except
for the express warranty stated above, DogWatch inc. disclaims all express and implied warranties or
merchantability or fitness for a particular purpose. As a condition of this warranty, Customer must (a) mail the
warranty card provided with the product to DogWatch Inc, 10 Michigan Drive, Natick, MA 01760, (800) 7933436, or complete warranty registration on line at www.dogwatch.com, within seven (7) days after purchase
hereunder, (b) notify DogWatch Inc. within the warranty period after the purchase hereunder of a claimed
defect, and (c) mail product back, insurance and postage prepaid, to DogWatch Inc. at the address above.
dogwatch inc.’s sole liability under this warranty will be to repair or replace, at its option, any product or part
which dogwatch inc. determines to be defective. In no event will dogwatch inc. be liable for any special,
indirect, or consequential damages arising out of the purchase or use of the product. in no event shall
DogWatch Inc.’s liability exceed the purchase price of the product.
PET NAME
PET NAME
RECEIVER SETTINGS
BATTERY HISTORY
Receiver Setting
Battery Type
Receiver Type
Date of Change
RECEIVER SETTINGS
BATTERY HISTORY
Receiver Setting
Battery Type
Receiver Type
Date of Change
D O G WAT C H P R O D U C T WA R R A N T Y
TRANSMITTER
Manufacturer
Dealer-Installed*
RECEIVER
Manufacturer
PT4
3 Years
Lifetime
R7 & R8
Lifetime†
System 1200
3 Years
Lifetime
System 1200
Lifetime†
PowerPak
1 Year
1 Year
PET NAME
RECEIVER SETTINGS
BATTERY HISTORY
† Includes dog chews
2. *DEALER-INSTALLED WARRANTY: Any Performance Series or System 1200 transmitter installed by an
authorized dealer, equipped with a DogWatch Lightning Surge Protector and grounded to Dogwatch Inc.
specifications, will be warrantied for as long as the original owner owns the system. For this additional
coverage to be in effect, the installing Dealer and Customer must sign the Customer Order Form and forward
it to DogWatch within seven (7) days of purchase.
3. INSTALLATION AND MAINTENANCE: Dealer shall, for a non-refundable installation fee, install the
Product in accordance with DogWatch Inc.’s installation manual. In no event shall Dealer or DogWatch Inc. be
responsible for damage to underground pipes, wires, lines, or other items, nor shall Dealer or DogWatch Inc.
be responsible for restoring Customer’s premises to its original condition.
4. WARNING: YOU MUST TRAIN YOUR DOG IN ACCORDANCE WITH THE TRAINING MANUAL FOR THIS
SYSTEM TO BE EFFECTIVE. THE SYSTEM IS NOT INTENDED FOR USE WITH DOGS WITH A HISTORY OF
AGGRESSIVE BEHAVIOR. BY SIGNING THE DEALER ORDER FORM, CUSTOMER ACKNOWLEDGES THAT
THEIR DOG(S) HAVE NO SUCH HISTORY. THE PRODUCT WILL NOT KEEP ALL DOGS WITHIN THE
FENCED PREMISES IN ALL INSTANCES. IF CUSTOMER’S DOG(S) COULD CAUSE HARM TO ITSELF OR
OTHERS INSIDE OR OUTSIDE THE FENCED PREMISES, CUSTOMER SHOULD TAKE ADDITIONAL
MEASURES TO RESTRAIN THE DOG(S).
21
PET NAME
Receiver Setting
Battery Type
Receiver Type
Date of Change
RECEIVER SETTINGS
BATTERY HISTORY
Receiver Setting
Battery Type
Receiver Type
Date of Change