1
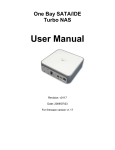
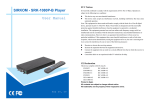
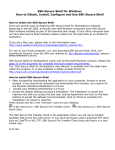
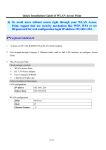
User Manual Reference
www.LowDogHobby.com
Prepared by:
NORMAN CHIU TAN
Freelance Web Developer
(April 12, 2013)
LowDog Hobby User Manual Reference
1
TABLE OF CONTENTS
Introduction
•
•
•
Introduction
Terminologies
Basic HTML Usage
Page#
3
3
4
Hosting Configuration & Administration
•
•
•
•
•
Web Hosting & Control Panel
File Transfer Protocol (FTP) Configuration
E-Mail Configuration
Logging in to your E-Mail Account
List of existing E-Mail accounts
5
5
5
5
5
5
Product Information System (PIS)
6-15
•
Basic Parts of the PIS
•
Product or Item Coding Standards
16
•
Category
o Adding / Category
16
•
Sub Category
o Adding / Editing Sub Category
16
•
Item (Product)
o Adding / Editing an Item
17
•
Product Brand
o Adding / Editing Brand
18
•
User Account Information
o Adding New User / Editing User Account
18
•
Image / Photo Display Templates
o Item Photo Display
o Featured Product Photo Display
o Best Selling Product Photo Display
19
20
21
Photo Uploads
o Item Display Photo Upload
o Featured Product Photo Upload
o Best Selling Product Photo Upload
22
22
22
•
Files, Folders & Templates
•
Original Backup Files (website files, database, images and icons)
LowDog Hobby User Manual Reference
23
2
IntroductIon
This User Manual Reference is a small book of which user (of proper level of access) log in to this system. This
will guide user or users accordingly. One of the best features in this web-based system is the Product
Information System (PIS). The PIS is a Content Management System (CMS) – like web-based system commonly
use to ensure of monitoring and storing of product and or items.
It is a system whereby user or users, with given proper level of access and privilege (usually given a certain
username and password), will be able to add / edit / delete particular item or items (like products, category,
brands and users) in this web-based system.
Terminologies
Terminology
Acronyms/Meaning
Usage
Browser
Electronic Mail
E-Mail
Electronic Mail
HTML
Hyper Text Mark-up Language
HTTP
Hyper Text Transfer Protocol
Hyperlink
It is a link to a new page.
Internet
Interconnected Networks
Login
Refer to sign in
Logout
Refer to sign out
A web browser (or, commonly referred to as a
browser) is actually a software application for
retrieving, presenting and traversing
information resources on the World Wide Web.
Examples are Firefox, Internet Explorer,
Netscape, Safari, Opera and so on.
Sends and receives messages through
electronically through the Internet connection.
It is the main markup language for creating web
pages and other information that can be
displayed in a web browser.
HTTP is an application protocol for distributed,
collaborative, hypermedia information systems.
HTTP is the foundation of data communication
for the World Wide Web.
It is often use to cross-reference from one file
to the other.
Internet is a global system of interconnected
computer networks that use the standard
Internet protocol suite (TCP/IP) to serve billions
of users worldwide.
A process of going in a restricted page for some
information, which requires username and
password in retrieving information from the
system or website.
It is reversely proportional to login.
TCP/IP
URL or Address
Transmission Control Protocol /
Internet Protocol
Uniform Resource Locator
It is the suite of communications protocols used
to connect hosts on the Internet.
It is an Internet address of a certain website.
WWW
World Wide Web
The World Wide Web (abbreviated as WWW or
W3, commonly known as the Web), is a system
of interlinked hypertext documents accessed
via the Internet.
LowDog Hobby User Manual Reference
3
Basic HTML Usage
Tag
Example
Output
<b></B>
<B>LowDogHobby.com</b>
LowDogHobby.com
<I></i>
<i>LowDogHobby.com</i>
LowDogHobby.com
<u></u>
<u>LowDogHobby.com</U>
LowDogHobby.com
<font></font>
<font face=”Times New
Roman”>LowDogHobby.com</font>
<font size=”3”>LowDogHobby.com</font>
LowDogHobby.com
<font
color=”green”>LowDogHobby.com</font>
<p>LowDogHobby.com is a great RC
Online.</p>
<p>It has a wide variety of RC
products that will suit your
budget.</p>
LowDogHobby.com
<p></p>
<br>
LowDogHobby.com is a great RC Online
supplier.
<br>
It has a wide variety of RC products
that will suit your budget.
<hr>
LowDogHobby.com is a great RC Online
supplier.
<hr>
It has a wide variety of RC products
that will suit your budget.
LowDogHobby.com
LowDogHobby.com is a great RC
Online.
It has a wide variety of RC
products that will suit your
budget.
LowDogHobby.com is a great RC
Online supplier.
It has a wide variety of RC
products that will suit your
budget.
LowDogHobby.com is a great RC
Online supplier.
It has a wide variety of RC
products that will suit your
budget.
LowDog Hobby User Manual Reference
4
Hosting Configuration & Administration
Web Hosting & Control Panel
Site Name
URL / Web Address
Remarks / Notes
LowDogHobby.Com
Website
http://www.lowdoghobby.com/
LowDogHobby.Com Admin
Website
http://www.lowdoghobby.com/thePIS/
Control Panel Hosting
Website for
LowDogHobby.Com
http://lowdoghobby.com:8880/
This is the official homepage of
LowDog Hobby Shop. We call it the
public site.
You will be prompted to sign in your
assigned username and password.
• Username: admin
• Password: admin
We call this a private site.
Likewise, you need to use the
following user login information:
• Username: lowdogho
• Password: password123
File Transfer Protocol (FTP) Configuration
Site Name
URL / Web Address
Remarks / Notes
FTP Account for
LowDogHobby.Com
66.7.208.190 or
ftp.lowdoghobby.com
Use a third party freeware FTP program
like CuteFTP program
Email Account Configuration
Description
Explanation
Remarks / Notes
Setting-Up Computer.
Mobile or any other
gadgets (that is with EMail capable)
Setting up your mobile phone EMail configurations as shown in
the next column of this table.
POP3 Mail Servers, please use the following
information:
• Incoming Server: lowdoghobby.com
• Outgoing Server: lowdoghobby.com
Then, use your entire E-Mail (For example;
[email protected])
as your username and enter your password
accordingly.
Logging in to your Email Account
Site Name
URL / Web Address
Remarks / Notes
LowDogHobby WebMail
http://webmail.lowdoghobby.com/
In the same way, you need to login
using the following information:
• Username: Log in to your
assigned E-Mail address
• Password: Enter your
assigned password
See list of E-Mail user accounts in the
later page.
List of Existing E-Mail Account (As of April of 2013))
E-Mail Account Description
E-Mail Address
Remarks / Notes
General Inquiry
[email protected]
Kerwin Lim
[email protected]
Active (use to receive information
about general inquiries)
Active
Webmaster
[email protected]
LowDog Hobby User Manual Reference
Active (use to received information
about the website comments)
5
The Product information System (PIS)
Basic Parts of the PIS
LowDog Hobby Admin Homepage
Below image is the actual captured homepage of LowDog Hobby Administration section. Product Information
System or the PIS is a Content Management System (CMS) – like web-based system commonly use to ensure of
monitoring and storing of product and or items.
Top admin user (admin) is the main user of which, it can access the entire entry or all of the information from
this PIS.
Image 1 – LowDog Hobby Admin Homepage
LowDog Hobby User Manual Reference
6
User IP Address Information
Below image shows the highlighted is actually the user IP address. This IP address will be recorded based from
whatever user do to the information of this PIS.
Image 2 – User IP Address
LowDog Hobby User Manual Reference
7
User Login Information
The highlighted image below is (a welcome) user login information.
Image 3 – User Login Information
LowDog Hobby User Manual Reference
8
Product Search Panel
The highlighted image below is the Product Search Panel, where user can search products or items. Product
search is an essential part of this web-based system.
Keywords maybe anything as long as no special characters involved. User may search the product or item code,
brand, description, and / or product or item name itself.
Image 4 – Product Search Panel
LowDog Hobby User Manual Reference
9
Icon Menus
The highlighted image below is the Icon Menus. Icon Menus are the main menus used for this web-based
system. User can jump from one main location to the other.
Image 5 – Icon Menus
Tab Menu
The image below is called the Tab Menu. Tab Menu is the main sub menu used for this web-based system.
User can jump from one main location to the other.
Image 6 – Tab Menu
LowDog Hobby User Manual Reference
10
Location Guide
The highlighted image below is the Location Guide. Furthermore, this feature is for the user to locate himself
from where his current location in the system maybe.
Image 7 – Location Guide
LowDog Hobby User Manual Reference
11
Sub Menus
The highlighted image below is the Sub Menus. Sub Menu is also one of the most essential parts of this webbased system. It tells user that it still has link under the main menu (icon menu).
Image 8 – Sub Menus
LowDog Hobby User Manual Reference
12
Product Menu
The highlighted image below is called the Product Menu. Product menu is an essential feature in this webbased system. It shows all the categories, sub categories (others under categories) and items. User will have
easy shortcut access from one item to the other.
Image 9 – Product Menu
LowDog Hobby User Manual Reference
13
Product Table
The highlighted image below is called the Product Table. Unlike Product Menu, Product Table has no selection
of drop-down of any of the items to be shown. It only show certain item of which selected from the Product
Menu. In short, it only a link view preference of every anchored link.
Image 10 – Product Table
LowDog Hobby User Manual Reference
14
Total Product Information
Last but not the least, the highlighted image below is the Total Product Information. Obviously, from its word,
the function of this is only to show user the total number of items shown from that category or sub category.
Image 11 – Total Product Information
LowDog Hobby User Manual Reference
15
Product or Item Coding Standards
Product or item can be identified by its own unique item code. Item code has a very significant role in the
Product Information System (PIS). Product code is divided into three (3) main sections, namely, the category,
sub category and the sequential numbers.
• Category (CC) – is the first two-digit code that represents the category.
rd
th
• Sub Category (SS) – is the second (3 & 4 ) digit code that represents the sub category.
th
th
th
• Sequence Numbers – is the last (5 , 6 and 7 ) digit code that represents item in sequenced number.
For example: An entry to a product with an item code of MU02001 is actually a Multi Rotor Kit product.
Whereby “MU” is represents the category for “Multi Rotor”; “02” represents the sub category; and “XXX”
represents the sequence number. Item code or product code act as a significant role in this web-based system.
NOTE: Item code (or product code) is the unique file name of the item or product picture.
Adding Category (in PIS)
After you login, you will be redirected to LowDog Hobby admin homepage. In
the homepage, under the “Sub Menus”, just below the “Tab Menus”, click the
link that says “ADD NEW CATEGORY”. And do the following:
1.
2.
3.
4.
5.
Photo 1 – Add Category
To edit category, go to homepage and all categories are displayed, by default.
Click on the icon . You will be directed the edit mode preference.
6.
Enter category name in
the “Category” field
and then.
Enter description in the
“Description” field.
Enter a unique code for
the category.
Select “Yes” or “No”
from the “Active” drop
down list to activate
immediately.
Enter “Yes” if this
category will have sub
category in it.
Otherwise, select “No”.
Then, finally, click the
“add” button to save.
Adding Sub Category (in PIS)
In the same way, after you login, you will be redirected to the LowDog Hobby
admin homepage. In the homepage, under the “Sub Menus”, this time click the
link that says “ADD SUB CATEGORY”. And do the following:
1.
2.
3.
4.
5.
Photo 2 – Add Sub Category
6.
To edit sub category, go to homepage. Select a category and then, click on the
icon
of your desired sub category. You will be directed to the edit mode.
LowDog Hobby User Manual Reference
Select category from
the drop down list.
Then, click the “add”
button to continue.
Enter the desired sub
category name.
Enter description in
the “Description” field.
Enter a unique code
for the sub category.
Select “Yes” or “No”
from the “Active” drop
down list to activate
immediately.
Then, click the “add”
button to save.
16
Adding new item or product (in PIS)
In the homepage, under the “Sub Menus”, click the link that says “ADD ITEM”. In
this option, you are adding item from the start.
And do the following:
To edit product or item, go to homepage. Select a category. Select the desired
sub category and then, click on the icon
of your desired sub category. Or,
search that item/ In the search page, click the desired item. You will be directed
to the edit mode.
LowDog Hobby User Manual Reference
1.
Select category from
the drop down list.
Then, click the
“continue” button.
2. Select sub category
from the drop down
list. Then, click the
“continue” button.
3. Select brand from the
drop down list. Then,
click the “continue”
button.
4. Select code entry
mode from the drop
down list. Then, click
the “continue” button.
5. Enter product name in
the product field.
Then, click the
“continue” button.
6. Enter description in
the “Description” field.
Then, click the
“continue” button.
7. Enter price (if
applicable). Then, click
the “continue” button.
8. Select from “Yes” or
“No” drop down
menus (Enable,
Featured Item,
Popular, Best Seller,
New Item, Ready
Stock). Then, click the
“continue” button.
9. Keywords will be
automatically created
in the keywords field.
10. Click the “upload product
/ item photo here”. A
pop-up window will
appear. Male sure
pop-up is not blocked.
In the upload window,
click browse button to
select photo. Then,
click “Upload” button.
Once finished, click
“Done” button. An
Upload window will be
closed. Then, click the
“continue” button.
11. Then, click the “add”
button to save.
17
Adding brand (in PIS)
In the homepage, click the link that says “ADD NEW BRAND“. And you will be
redirected to Add New Brand page. And do the following:
1.
2.
3.
4.
5.
6.
To edit brand, in the homepage, click the “Brand” tab menu (just below the Icon
menu). A list of brands will be opened. Select the desired brand to edit by
clicking on the icon . You will be directed to the edit mode.
7.
8.
Enter username.
Enter password.
Enter full name.
Enter E-Mail address
(if applicable).
In the “Detailed
Access Rights” table,
please specify the
read and write access
accordingly.
Enable user account
by selecting “Yes” in
the drop down menu.
Enter, if necessary the
fields that follows.
Then, click the “add”
button to save.
Adding new user account (in PIS)
In the homepage, under the “Icon Menu”, click the icon called “USERS”. Then,
click the “Add User” in the tab menu.
And do the following:
1.
2.
3.
4.
5.
6.
7.
8.
LowDog Hobby User Manual Reference
Enter username.
Enter password.
Enter full name.
Enter E-Mail address
(if applicable).
In the “Detailed
Access Rights” table,
please specify the
read and write access
accordingly.
Enable user account
by selecting “Yes” in
the drop down menu.
Enter, if necessary the
fields that follows.
Then, click the “add”
button to save.
18
Image / Photo Display
Item Photo Display Templates
Open your Photoshop. Click file menu,
then, select and click new. A dialogue
box will appear (as show in Figure 1).
Set all preference to the following:
•
•
•
•
Figure 1 –Photoshop: Creating new document image
Width:
Height:
Resolution:
Color Mode:
600 pixels
600 pixels
300
at least 8 bit
Or, you can see sample figure shown
in figure 1, for your reference. A new
blank document will be created.
Drag any image from a cropped file of
an item to this newly created image
document. And align it in the center.
NOTE: You have to save (Ctrl + S) the
file or the document first as PSD
format. So, you will still be able to
drag from one layer to the other,
accordingly.
To save file for web using JPEG format,
press or key in “Ctrl + Shift + Alt + S”. A
“Save for Web” dialogue box will
appear, as shown in figure 1A.
Make sure you have selected “JPEG”
from the “Preset” drop.
Figure 1A –Photoshop: Save for Web dialogue box
LowDog Hobby User Manual Reference
Then, click the “Save” button.
19
Featured Product Photo Display Templates
Open your Photoshop. Click file menu,
then, select and click new. A dialogue
box will appear (as show in Figure 2).
Set all preference to the following:
•
•
•
•
Figure 2 –Photoshop: Creating new document image
Width:
Height:
Resolution:
Color Mode:
500 pixels
250 pixels
300
at least 8 bit
Drag any image from a cropped file of
an item to this newly created image
document. And align it accordingly.
NOTE:
•
•
You have to save (Ctrl + S) the
file or the document first as
PSD format. So, you will still
be able to drag from one
layer to the other,
accordingly.
Filename must be the item
code.
To save file for web using JPEG format,
press or key in “Ctrl + Shift + Alt + S”. A
“Save for Web” dialogue box will
appear, as shown in figure 2A.
Make sure you have selected “JPEG”
from the “Preset” drop.
Then, click the “Save” button.
Figure 2A –Photoshop: Save for Web dialogue box
LowDog Hobby User Manual Reference
20
Best Selling Product Photo Display Templates
Open your Photoshop. Click file menu,
then, select and click new. A dialogue
box will appear (as show in Figure 2).
Set all preference to the following:
•
•
•
•
Figure 3 –Photoshop: Creating new document image
Width:
Height:
Resolution:
Color Mode:
210 pixels
250 pixels
300
at least 8 bit
Drag any image from a cropped file of
an item to this newly created image
document. And align it accordingly.
NOTE: You have to save (Ctrl + S) the
file or the document first as PSD
format. So, you will still be able to drag
from one layer to the other,
accordingly.
To save file for web using JPEG format,
press or key in “Ctrl + Shift + Alt + S”. A
“Save for Web” dialogue box will
appear, as shown in figure 3A.
Make sure you have selected “JPEG”
from the “Preset” drop.
Then, click the “Save” button.
Figure 3A –Photoshop: Save for Web dialogue box
LowDog Hobby User Manual Reference
21
Photo Upload
Item Display Photo Upload
In the “Add New Product or
Item” page, after filling-up all the
field through the “Ready Stock”
field, click on the link that says
“upload product/item photo here”, as
show in the Figure 5, highlighted
in green box.
A pop-up window will appear
(Please ensure that your browser
is not blocking any pop-ups.).
From that pop-up window, click
browse and then, click upload.
Once finish, please click “Done”
button.
Figure 4A – Add New Product or Item Page
To change existing item photo,
on the right column from the edit
mode, you will see the “Item
Display Photo of…”. Click the link
that says “please click here” as
shown in green highlight in the
said figure 5A.
Figure 4B – Upload item photo in edit mode
LowDog Hobby User Manual Reference
22
Best Selling Product Photo Upload
Select any item and it will direct
you to an edit mode page. In the
right column, just bottom of so
called “Item Display Photo of…”,
you will see a portion called “Best
Selling Photo”. Click on the link
that says “Upload photo here”, as
highlighted in green color in
figure 5C.
A pop-up window will appear
(Please ensure that your browser
is not blocking any pop-ups.).
From that pop-up window, click
browse and then, click upload.
Once finish, please click “Done”
button.
Figure 4C – Upload featured product photo in edit mode
Make sure to select “Yes” in the
Best Seller drop-down list, as
highlighted in red in figure 5C.
Featured Product Photo Upload
Select any item and it will direct
you to an edit mode page. In the
right column, just below “Item
Display Photo of…”, you will see a
portion called “Featured Photo”.
Click on the link that says “Upload
photo here”, as highlighted in green
color in figure 5C.
A pop-up window will appear
(Please ensure that your browser
is not blocking any pop-ups.).
From that pop-up window, click
browse and then, click upload.
Once finish, please click “Done”
button.
Figure 4D – Upload featured product photo in edit mode
LowDog Hobby User Manual Reference
Make sure to select “Yes” in the
Best Seller drop-down list, as
highlighted in red in figure 5C.
23
FILES, FOLDERS & TEMPLATES
Original Back-up Files
Original and backed-up files are located in the CD, as
shown in the Figure 4 - CD Folders.
When inserting the back-up CD, you will see a main folder
called “LowDog Files”. Clicking and opening this folder
will show two (2) sub folders called the “Backup Files” &
the “Website” folders, respectively.
Browsing through the sub folder “Backup Files”, you will
see another four (4) sub folders namely;
•
•
•
•
Figure 5 – CD Folders
Item Display Photo
o All the products or items templates are
saved in this folder.
Best Selling Product Photos (210 x 250)
o Bestselling products templates are all saved
in this folder.
Featured Product Photos (500 x 250)
o Featured products templates are all saved in
this folder.
User Manual Guide & Reference
o For PIS concerns and help, please use this
User Manual for your reference.
Aside from the sub folder “Backup Files”, the second sub
folder is called the “Website” sub folder.
You can locate all files concerning the LowDog website;
webpages, images and database used.
LowDog Hobby User Manual Reference
24