1
Using This Manual
1
Basic Operations
2
Call
3
Messaging
4
Internet
5
TV
6
Camera/Picture
7
Editing
Media Player/S! Appli 8
Tools
9
Communication
10
Services
Security
11
File Transfer/Backup 12
Customization
13
Appendix
14
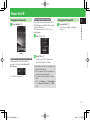
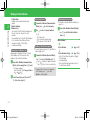
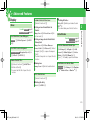
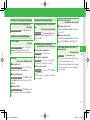
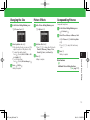
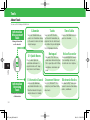
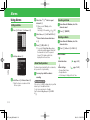
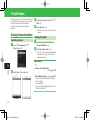
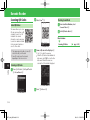
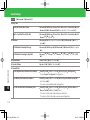
Getting Started
Function & Service
Search
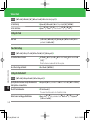
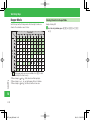
Contents ......................................................................→
Index: Try searching by various terms.............................→
Page vi
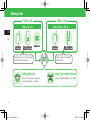
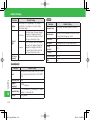
Objective Search
Objective Search...........................................................→
Index ...........................................................................→
Page ii
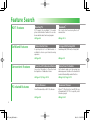
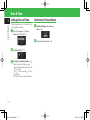
Function Search
Feature Search .............................................................→
Contents ......................................................................→
Page iv
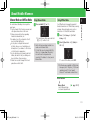
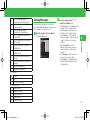
Display Indicators
Display Indicators .........................................................→
Menu Operations .........................................................→
Page 1-5
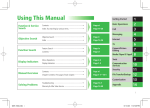
Manual Overview
Contents ......................................................................→
Chapter Contents: First page of each chapter ................→
Page vi
Solving Problems
Troubleshooting ...........................................................→
Warranty & After Sales Service ......................................→
Page 14-7
Page 14-26
Page 14-26
Page vi
Page 2-2
Page 1-1∼14-1
Page 14-40
i
921T_web_0802.indb i
08.3.23 1:56:50 PM
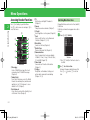
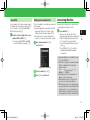
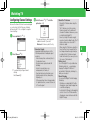
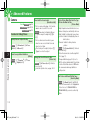
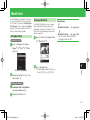
Objective Search
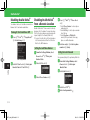
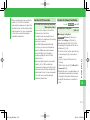
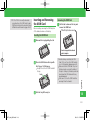
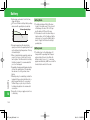
Checking Handset Number
Using Handset Phone
Number/Mail Address
Customizing handset address can help reduce
spam.
Checking Your Phone Number
⇒ Page 3-3
Customizing Handset Address
⇒ Page 4-3
Ringtone
Customizing Handset
Downloading Chaku-Uta®
Select a music file, movie file or Chaku-Uta ®
from ringtone settings.
Download your favorite songs from the ChakuUta® site.
Ringtone ⇒ Page 13-11
Obtaining Music and Videos
⇒ Page 8-3
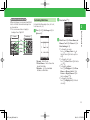
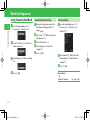
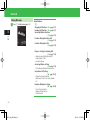
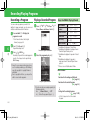
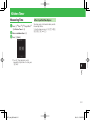
Basic Operations
Making Calls
Using keys and accessing functions.
Make voice/video calls. Use call functions such as
Speed Dial or Answering Machine.
Softkeys and Multi Selector ⇒ Page xi
Menu Operations ⇒ Page 2-2
Voice Call ⇒ Page 3-4
Video Call ⇒ Page 3-7
Understanding Basics
Watching TV
Using Advanced
Features
Customizing Mail Address
Check your phone number on the handset.
Listening to Music
Watch One Seg Digital TV on handset. No
additional fees required.
Use Media Player to listen to downloaded music.
TV ⇒ Page 6-2
Media Player ⇒ Page 8-2
ii
921T_web_0802.indb ii
08.3.23 1:56:51 PM
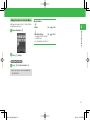
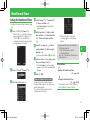
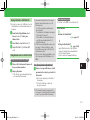
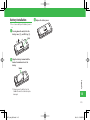
Saving Address to Handset
Sharing Address with Friends
Sharing Address via Infrared
Saving your new address to My Details is
convenient for exchanging information with
others.
Share your new address by sending a message to
multiple addresses simultaneously.
Share your e-mail address by infrared transfer.
Save your e-mail address prior to transfer.
My Details ⇒ Page 3-12
Sending Messages ⇒ Page 4-4, Page 4-6
Adding Recipients ⇒ Page 4-13
Infrared ⇒ Page 12-14
Standby Display
Changing Font Size
Set images captured with handset camera as
wallpaper.
Change font size for menus and web pages. Font
color pattern can also be changed.
Wallpaper ⇒ Page 2-6
Picture Editing ⇒ Page 7-8
Setting the Font Size
⇒ Page 13-5, Page 13-21
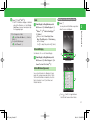
Text Entry
S! Mail/SMS
Accessing the Mobile Internet
Enter text when creating Phone Book entries or
messages.
Select S! Mail or SMS according to your purpose.
Use Yahoo! Keitai to access Mobile Internet sites
tailored for SoftBank customers.
Text Entry ⇒ Page 2-9
S! Mail ⇒ Page 4-4
SMS ⇒ Page 4-6
Yahoo! Keitai ⇒ Page 5-3
Digital Camera/Digital Video
Using Handset as a Gaming Device
Using Handset as a Wallet
Shoot pictures and videos with handset camera.
Play preinstalled S! Appli games or download
games from Yahoo! Keitai.
Payments are quick and easy without needing
small change. Just hold the handset up to a
reader/writer at checkout counters.
Taking Pictures ⇒ Page 7-3
Recording Videos ⇒ Page 7-5
S! Appli ⇒ Page 8-8
Osaifu-Keitai® ⇒ Page 9-10
Calculator ⇒ Page 9-20
iii
921T_web_00.indd iii
08.3.24 5:31:52 PM
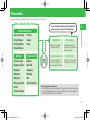
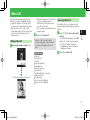
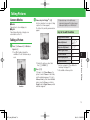
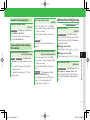
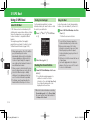
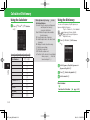
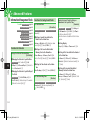
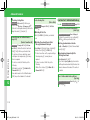
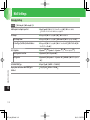
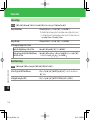
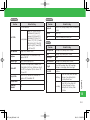
Feature Search
921T Features
SoftBank Features
Convenient Features
PC-related Features
One Seg TV
Bluetooth®
921T supports One Seg Digital TV for mobile
phones and information terminals. You can also
browse data broadcast and record programs.
Files can be transferred using Bluetooth ®
communication.
➡Page 6-2
➡Page 12-5
Yahoo! Keitai Sites
A special portal site for SoftBank handsets is
available to enhance your Internet browsing
experience.
➡Page 5-3
Phone Book/S! Addressbook Back-up
Arrange Mail/Feeling Mail
Send Arrange Mail (HTML mail) or Feeling Mail.
➡Page 4-5
Alarm/Event Schedule
Save contact information to Phone Book and
back up data on S! Addressbook Server.
Use the alarm to wake you in the morning. Save
and manage event schedule on the calendar that
can be interfaced with phone/mail functions.
➡Page 2-15, Page 12-12
➡Page 9-4, Page 9-18
PC Site Browser
Document Viewer
View PC-based websites with PC Site Browser.
Microsoft® Office Word, Excel and PDF files are
all viewable with 921T. This is especially useful
for business people.
➡Page 5-4
➡Page 9-24
iv
921T_web_0802.indb iv
08.3.23 1:56:51 PM
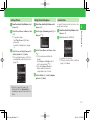
3.24 Megapixel Camera
MicroSD Memory Card
Electronic Books
921T is equipped with a 3.24 megapixel camera.
921T supports compact high-capacity microSD
memory cards. This makes exchanging files with
a PC quick and easy.
Use BookSurfing® and e-Book Viewer to read
e-books.
➡Page 7-2
➡Page 2-23
➡Page 9-25
S! Town/S! Loop/S! Information Channel
S! Friend's Status/S! Circle Talk
These SoftBank-only communication services allow you to
enjoy strolling in a virtual community, exchange information
with friends or subscribe to various information services.
These two functions facilitate communication.
Send your mood/availability to your friends and
check their statuses, or talk to a group of people.
Use the GPS function to check your position on a
map. This function can also guide you to your
destination.
➡Page 9-23, Page 10-2
➡Page 10-3, Page 10-6
➡Page 9-14
Barcode Reader
Voice Recorder
S! GPS Navi
Optional Services
Access a variety of information such as e-mail
addresses and URLs using QR codes.
Use 921T as a recorder. Save recordings to
microSD memory card.
A complete line of services, including Call
Forward and Voice Mail meet your phone needs.
➡Page 9-26
➡Page 9-9
➡Page 3-10
Card Reader Mode
for use with PC
Transferring Music
for use with PC
Use the enclosed USB cable to connect handset
to a PC and access microSD memory card from
the PC.
Use the music software BeatJam 2008 for 921T to
transfer music stored on a PC to your handset. The
handset can now be used as a portable music player.
➡Page 12-9
➡Page 12-8
➡BeatJam 2008 for 921T Guide Book
v
921T_web_0802.indb v
08.3.23 1:56:52 PM
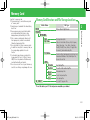
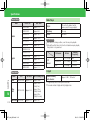
Contents
Introduction .........................................viii
Package Contents ................................. ix
Using This Manual .................................. x
Safety Precautions ................................ xii
General Notes .....................................xxv
End User License Agreement............... xxix
Trademarks and Patents ..................... xxxi
SAR ................................................. xxxiv
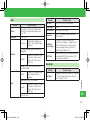
1 Getting Started
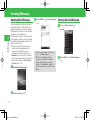
Handset Parts & Functions .................. 1-2
Display Indicators ............................... 1-5
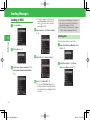
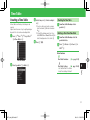
Charging the Battery .......................... 1-8
Power On/Off ................................... 1-11
Date & Time ..................................... 1-12
About Mobile Manners..................... 1-13
Codes .............................................. 1-14
2 Basic Operations
Menu Operations ............................... 2-2
Wallpaper/Active Window................... 2-6
Text Entry ........................................... 2-9
Word List (Japanese) ........................ 2-14
Phone Book ..................................... 2-15
Data Folder ...................................... 2-20
Memory Card ................................... 2-23
Advanced Features ........................... 2-25
Recording/Playing Programs ............... 6-6
View/Record Timer.............................. 6-7
Making Calls ...................................... 3-2 Advanced Features ............................. 6-8
Voice Call........................................... 3-4
Video Call .......................................... 3-7 7 Camera/Picture Editing
Call Log ............................................. 3-9 Camera .............................................. 7-2
Optional Services.............................. 3-10 Taking Pictures ................................... 7-3
Advanced Features ........................... 3-12 Recording Videos................................ 7-5
3 Call
Camera Functions .............................. 7-7
Picture Editing .................................... 7-8
Messaging ......................................... 4-2 Advanced Features ........................... 7-10
Sending Messages.............................. 4-4
Incoming Messages ............................ 4-8 8 Media Player/S! Appli
Organizing/Using Messages.............. 4-10 Playing Music and Videos ................... 8-2
Advanced Features ........................... 4-13 Playlists.............................................. 8-7
S! Appli.............................................. 8-8
5 Internet
Advanced Features ........................... 8-10
Internet .............................................. 5-2
Yahoo! Keitai ..................................... 5-3 9 Tools
PC Site Browser.................................. 5-4 Tools .................................................. 9-2
Web Page Operations ......................... 5-5 Calendar/Tasks ................................... 9-4
Bookmarks/Saved Pages ..................... 5-6 Time Table .......................................... 9-7
Advanced Features ............................. 5-7 Notepad ............................................ 9-8
Voice Recorder ................................... 9-9
6 TV
Osaifu-Keitai® .................................. 9-10
TV...................................................... 6-2 S! GPS Navi ..................................... 9-14
Watching TV....................................... 6-3 Idokoro Mail .................................... 9-16
4 Messaging
vi
921T_web_0802.indb vi
08.3.23 1:56:52 PM
Alarms ............................................. 9-18
World Clock ..................................... 9-19
Calculator/Dictionary ........................ 9-20
Kitchen Timer ................................... 9-21
S! Quick News ................................. 9-22
S! Information Channel .................... 9-23
Document Viewer ............................. 9-24
Electronic Books ............................... 9-25
Barcode Reader ................................ 9-26
Ku-man's Room (Japanese)............... 9-27
Advanced Features ........................... 9-28
10 Communication Services
S! Town (Japanese)/S! Loop (Japanese) .. 10-2
S! Friend's Status ............................. 10-3
S! Circle Talk .................................... 10-6
Advanced Features ........................... 10-9
11 Security
Changing Handset Code................... 11-2
Prohibiting/Limiting Use ................... 11-3
Advanced Features ........................... 11-5
Memory Card Backup ..................... 12-10 Specifications ................................. 14-11
S! Addressbook Back-up................. 12-12 Default Settings.............................. 14-17
Advanced Features ......................... 12-14 Glossary ......................................... 14-25
Index ............................................. 14-26
13 Customization
Warranty & After Sales Service ........ 14-40
Display Settings ................................ 13-2 Customer Service............................ 14-41
Incoming Event Settings ................... 13-9
Sound Settings ............................... 13-11
Mail Settings .................................. 13-14
Internet Settings ............................. 13-19
Call Settings ................................... 13-22
Camera Settings ............................. 13-25
TV Settings..................................... 13-28
Media Player Settings ..................... 13-31
S! Appli Settings............................. 13-32
Reset ............................................. 13-33
Text Entry/Phone Book ................... 13-34
File Transfer .................................... 13-36
Various Tools .................................. 13-38
Communications ............................ 13-44
14 Appendix
USIM Card ....................................... 14-2
Battery ............................................. 14-4
Infrared ............................................ 12-2 Software Update .............................. 14-6
Bluetooth® ....................................... 12-4 Troubleshooting ............................... 14-7
PC Connection ................................. 12-8 Text Entry Keys ................................. 14-9
12 File Transfer/Backup
vii
921T_web_0802.indb vii
08.3.23 1:56:53 PM
Introduction
Thank you for purchasing the SoftBank 921T handset.
7 To ensure proper usage, read this manual thoroughly before using the SoftBank 921T handset.
7 After reading this manual, retain it for later reference.
7 If this manual is lost or damaged, contact SoftBank General Information (page 14-41).
7 Accessible services may be limited because of contract conditions.
SoftBank 921T handset is compatible with the 3G system.
Caution
・ Unauthorized copying of any part of this manual is prohibited.
・ The contents of this manual are subject to change without prior notice.
・ Steps have been taken to ensure the accuracy of descriptions in this manual. If you find inaccurate or missing information, contact SoftBank Customer Center,
General Information (page 14-41).
The User Guide (Japanese) and Start Book (Japanese) included in the package are also available online from the SOFTBANK MOBILE Corp. Website:
http://www.softbank.jp/mb/r/support/921t/
viii
921T_web_0802.indb viii
08.3.23 1:56:53 PM
Package Contents
7Handset
7Battery (TSBAR1)
7Battery Cover
7USB Cable*
7Start Book (Japanese)
7User Guide (Japanese)
7First Step Guide
7BeatJam 2008 for 921T Guide Book (Japanese) 7Utility Software for 921T (CD-ROM)* *
1
1 2
7Stereo Earphone Conversion Cable (TSLAU2)
*1 Complimentary sample not available for purchase.
*2 Utility Software updates/upgrades may become available via SOFTBANK MOBILE Corp. Website (http://www.softbank.jp) without prior notification.
Please check for the newest versions of Utility Software and download as required.
7 Use only SoftBank specified AC Charger (sold separately) to charge battery.
7 For information about AC Charger and other accessories, contact SoftBank Customer Center, General Information (page 14-41).
7 Battery is available for separate purchase.
7 921T accepts microSD Memory Card (not included). Purchase microSD Memory Card to use related functions.
7 microSD Memory Card is referred to as "memory card" in this manual.
ix
921T_web_0802.indb ix
08.3.23 1:56:53 PM
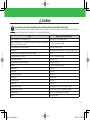
Using This Manual
In this manual, SoftBank 921T is referred to as "handset."
Chapters
Chapter 1 "Getting Started": Basic handset information.
Chapter 2 "Basic Operations": Basic handset operations.
Chapters 3 to 12: Handset functions. Each chapter starts with basic operation descriptions, followed by advanced operation descriptions.
Chapter 13: Handset settings.
Chapter 14 "Appendix": Default settings, Index, etc.
More Features
Creating Messages
(Epage 4-13)
Messaging Settings
(Epage 13-14)
• Add Recipients to Simple Input List
Advanced features are listed under this icon. Refer to the indicated page to access "Advanced
Features" at the end of the chapter.
Available settings are listed here. Go to indicated page in Chapter 13 (Customization) for
description.
Symbols
➡ , ➡ and E navigate you to the next action/item.
Press Center Key [ to confirm your selection. Some operations are described in an abbreviated format.
Screenshots and Keys
Screenshots and key graphics are simplified to facilitate explanation. Actual appearance may differ.
Japanese Functions & Services
When "(Japanese)" appears in a title, Japanese ability is required to use full range of function and service.
x
921T_web_0802.indb x
08.3.23 1:56:54 PM
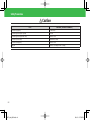
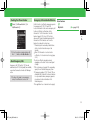
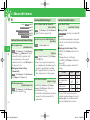
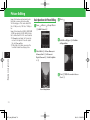
Display Position
Multi Selector
Unless otherwise noted, descriptions in this manual are described in
Clamshell Open position (page 1-4).
Softkeys
Use Softkeys to perform operations indicated at the bottom of the Display.
OK
Menu
The following notations are used to indicate Multi Selector operations.
Notation/Operation
A
Press up
B
Press down
D
Press left
C
Press right
• Press J to select OK.
• Press K to access Option menu.
• Softkey operations vary by the current function.
• In this manual, Softkey operations are described as below.
➡jJ (OK) / ➡jjJ/ ➡kK
[
Press center
Function
Enables Active Window operations*
Increases volume
Moves cursor up
Accesses Phone Book*
Decreases volume
Moves cursor down
Accesses Dialed*
Moves cursor left
Accesses Received*
Moves cursor right
Accesses Main Menu
Confirms the selected item or performs
the selected operation
Acts as the camera shutter-release
* Functions accessible from Standby can be changed by modifying the
Navigation Keys settings (page 2-4).
xi
921T_web_0802.indb xi
08.3.23 1:56:54 PM
Safety Precautions
• To ensure proper usage, be sure to read the Safety Precautions
thoroughly before using your handset. Always keep this manual
available for future reference.
• Be sure to follow the safety information contained in the
instruction manuals and indicated on the product to prevent
injury to the user and other persons, as well as damage to
property.
• When a child uses the handset, it is recommended that a parent
or guardian reads the instruction manuals thoroughly and
provides proper instructions to the child.
• The following describes the meaning of safety symbols and
signal words. Be sure to understand their meanings before
proceeding to read this manual.
Pictographs
Pictograph
Meaning
Danger
Indicates an imminently hazardous operation that could
result in death or serious injury1 of the user.
Warning
Indicates a potentially hazardous operation that could
result in death or serious injury1 of the user.
2 Injury includes wounds, burns and electric shock not requiring
hospitalization or long-term medical treatment.
3 Damage to property includes extensive damage to homes and
household property, as well as livestock and pets.
Symbols
Symbol
Meaning
indicates a prohibited action. The prohibited action is
indicated graphically or described in text in or near the
symbol.
indicates a compulsory action that must be carried
out. The compulsory action is indicated graphically or
described in text in or near the symbol.
Indicates a potentially hazardous operation that could
Caution result in minor or moderate injury2 to the user or damage
to property3.
1 Serious injury includes loss of sight, wounds, high temperature
burns, low temperature burns (burns causing reddish areas,
blistering and other damage to the skin as a result of heat
exceeding the body temperature contacting your skin for a
prolonged time), electric shock, fractures and poisoning
requiring hospitalization or long-term medical treatment.
xii
921T_web_0802.indb xii
08.3.23 1:56:54 PM
Limitation of Liability
• SoftBank and Toshiba accept no liability whatsoever for any
damages arising from natural disasters such as earthquakes,
lightning, storms and floods, as well as fires through no fault
of SoftBank and Toshiba, acts by third parties, other accidents,
improper use by the user, whether intentionally or negligently,
or use under other abnormal conditions.
• SoftBank and Toshiba accept no liability whatsoever for
incidental damages arising out of the use or inability to use
the product, including, but not limited to, corruption or loss
of data, lost business revenue or suspension of business
operations.
• SoftBank and Toshiba accept no liability whatsoever for any
damages arising from improper use not conforming to the
instructions in the instruction manuals.
• SoftBank and Toshiba accept no liability whatsoever for any
damages arising from malfunctions caused by use in
combination with connection equipment or software that is
not authorized for use by SoftBank and Toshiba.
• Image data recorded with the camera, downloaded data and
other data may be corrupted or lost due to malfunction,
repair or other improper handling of the product. SoftBank
and Toshiba accept no liability whatsoever for the restoration
of corrupted or lost data, as well as any damages or lost
revenue and profits.
• SoftBank and Toshiba accept no liability whatsoever for
corruption or loss of stored data resulting from failures or
malfunctions of the product, regardless of the cause. Be sure
to keep a separate memo of important data to limit damage
caused by data corruption or loss to a minimum.
Danger
Do not disassemble, modify or repair the handset,
battery, charger (sold separately) or Stereo EarphoneMicrophone (sold separately)
Doing so may cause overheating, rupturing, fire, electric shock,
injury or malfunction. Modification of the handset is prohibited
by Japanese Radio Law. For repair, contact your nearest SoftBank
Shop or SoftBank Customer Assistance (page 14-41).
Do not dispose of the handset, battery, charger (sold
separately) and Stereo Earphone-Microphone (sold
separately) in a fire or expose them to heat
If they are exposed to water, do not dry them artificially
in heating equipment (microwave oven, etc.)
Doing so may cause overheating, rupturing, fire or malfunction.
Do not charge, use or leave the handset, battery,
charger (sold separately) or Stereo EarphoneMicrophone (sold separately) in hot places such as
near a fire or heater
Doing so may cause overheating, rupturing, fire or malfunction.
xiii
921T_web_0802.indb xiii
08.3.23 1:56:55 PM
Safety Precautions
Danger
Do not expose the handset, battery, charger (sold
separately) and Stereo Earphone-Microphone (sold
separately) to fluids such as water, perspiration or
seawater
Do not leave them outdoors, in a bathroom or
wherever water or any other fluid is used
Do not place them near cups, vases or other
containers of fluids
Doing so may cause overheating, rupturing, fire, electric shock
or malfunction. If the handset is dropped accidentally in water or
any other fluid, immediately turn off the handset and remove the
battery. If the handset, battery or charger is exposed to fluids such
as water during charging, remove the power plug from the outlet
immediately. Do not charge the wet battery. If the battery gets
wet, contact your nearest SoftBank Shop or SoftBank Customer
Assistance (page 14-41).
Do not use excessive force when inserting the battery into
the handset or connecting the handset to the charger (sold
separately)
Do not connect any cords with reverse polarity
Doing so may cause the battery to leak, rupture, overheat or catch
fire, as well as cause electric shock or malfunction.
Do not use a battery other than one supplied with or
designated for the handset
Do not use the battery for any other handset
Doing so may cause overheating, rupturing, fire or malfunction.
Use the charger (sold separately) designated for the
handset to charge the battery
Use the charger (sold separately) only for charging the
handset's battery
Failing to do so may cause overheating, rupturing, fire or
malfunction.
If electrolyte fluid leaking from the battery comes into
contact with your skin or clothes, wash it immediately with
clean water as this may hurt your body
And if it gets into your eyes, do not rub them, and have
them immediately treated by an ophthalmologist after
washing them with clean water
If the fluid sticks to the equipment, wipe it out without
touching it directly
If the fluid is left as it is, your skin may get irritated or there may
be fear of losing your sight.
Do not touch the battery terminal (metal parts) with
any metal objects (necklace, hairpin, etc.)
Doing so may cause the battery to overheat, rupture or catch fire,
as well as the metal object to overheat.
xiv
921T_web_0802.indb xiv
08.3.23 1:56:56 PM
Warning
Do not use the handset while driving
Do not make or receive a call and do not use other
functions (messaging, game, camera, TV, video, music,
Mobile Light, etc.)
Doing so may cause a traffic accident. Use of the handset while
driving is prohibited by law. Before using the handset, stop the
vehicle in a safe area where parking is permitted.
Be sure to turn off your SoftBank handset before
entering places such as gas stations where flammable
gases may be produced
Also do not charge the handset in those places
The gases may be ignited.
Be sure to turn off the handset before using Osaifu-Keitai®
compatible reader/writer within gas stations, etc. (When the IC
Card Lock is set, turn off the handset after unlocking the setting.)
Do not swing the handset by its strap, TV Antenna,
USB cable, Stereo Earphone Conversion Cable or
Stereo Earphone-Microphone (sold separately)
Doing so may cause an injury, accident or damage.
Turn off the handset while you are near any precision
electronic equipment
Radio waves may adversely affect the operation of electronic
equipment. Examples of such equipment: medical electronic
equipment such as cardiac pacemakers and hearing aids or fire
alarms and automatic doors. If you use medical electronic
equipment, consult with the equipment manufacturer or distributor
about the influence of radio waves.
Remove the power plug from the outlet if the AC
Charger (sold separately) is not to be used for a long
period of time or before cleaning
Failing to do so may cause an electric shock, fire or malfunction.
Turn off the handset wherever its use is prohibited
such as on an aircraft
Failing to do so may adversely affect the operation of electronic
equipment and cause an accident.
Use of the handset on an aircraft is prohibited by law.
Check your surroundings to confirm that it is safe
to make/receive calls, send/receive messages, take
pictures, record videos or watch TV
Failing to do so may cause you to trip over or cause a traffic
accident.
xv
921T_web_0802.indb xv
08.3.23 1:56:56 PM
Safety Precautions
Warning
Do not use the handset with any power voltage other
than the specified voltage
Doing so may cause a fire. The power voltages are 100 to 240 V
AC for the AC Charger (sold separately) and 12 or 24 V DC (for a
negative ground car only) for the In-Car Charger (sold separately).
Wipe away any dust on the plug of the AC Charger
(sold separately) with a dry cloth after removing the
plug from the outlet
Dust on the plug or outlet may cause a fire.
Follow the instructions below when installing and
wiring in-vehicle devices
・Make sure that devices do not interfere with
driving and safety equipment such as airbags
・Make sure that wires are not caught in seatbelt
buckles, doors or other moving parts
Any wire caught around a foot, brake pedal, accelerator pedal,
etc. may interfere with driving and cause a traffic accident. If any
part of an in-vehicle device drops onto the floor, it may startle you
into abrupt braking or steering, leading to a traffic accident.
When thunder is heard outside, stop using the
handset immediately
Turn off the handset and do not touch it
Failing to do so may attract lightning and cause electric shock.
When thunder is heard, stop using the handset and move to a
safe place such as inside a building.
If the battery fails to charge in the specified time,
stop charging immediately
Failing to do so may cause overheating, rupturing or fire. Contact
your nearest SoftBank Shop or SoftBank Customer Assistance (page
14-41).
When inserting the plug of the AC Charger (sold
separately) into an AC household outlet, make sure
that a metal strap or any other metal object does not
touch the plug
Failing to do so may cause electric shock, short circuit or fire.
xvi
921T_web_0802.indb xvi
08.3.23 1:56:57 PM
Warning
If something unusual happens to the handset, battery
or charger (sold separately); for example, it emits
smoke or an unusual odor or is damaged, perform the
following steps immediately
1. If the battery is charging, unplug the AC Charger (sold
separately) from the AC household outlet or unplug the In-Car
Charger (sold separately) from the cigarette lighter socket.
2. Make sure that the handset is not hot, then turn it off and
remove the battery.
Failing to do so and continuing use (charging) may cause the
battery to overheat, rupture or catch fire or the handset to
overheat. If something unusual happens, contact your nearest
SoftBank Shop or SoftBank Customer Assistance (page 14-41).
Do not drop the handset or battery or subject it to
excessive shock
Doing so may cause overheating, rupturing, fire or malfunction.
Do not sit down with the handset in your trousers
pocket
Excess weight may damage the Display, battery or other parts
resulting in overheating, fire or injury.
If the handset is used near an implanted cardiac
pacemaker, defibrillator or other electronic medical
equipment, radio waves may interfere with such a
device or equipment
Observe the following guidelines
1. If you have an implanted cardiac pacemaker or defibrillator,
carry and use the handset at a distance of at least 22
centimeters away from the implanted device.
2. Turn off the handset in crowded places such as packed trains
because a person with an implanted cardiac pacemaker or
defibrillator may be nearby. Radio waves can interfere with the
operation of a cardiac pacemaker or other medical device.
3. Follow the precautions below in medical institutions.
・Do not bring the handset into an operating room, intensive
care unit or coronary care unit.
・Turn off the handset in a hospital ward.
・Turn off the handset in a lobby or other location close to
medical equipment.
・Observe the instructions of individual medical institutions
and do not use the handset in or bring it into prohibited
areas.
xvii
921T_web_0802.indb xvii
08.3.23 1:56:57 PM
Safety Precautions
Warning
4. When using electronic medical devices other than an implanted
cardiac pacemaker or defibrillator outside of medical institutions
(such as at home), consult with the individual medical device
manufacturer about the possible influence of radio waves.
The above information conforms to "The Guidelines on Use of
Mobile Phones and Other Devices to Prevent Electromagnetic
Wave Interference with Electronic Medical Equipment"
(Electromagnetic Compatibility Conference Japan), as well as
refers to "The Investigative Research Report on the Influence of
Electromagnetic Waves on Medical Equipment" (Association of
Radio Industries and Businesses, March 2001).
Do not use the AC Charger (sold separately) with any
power supply other than a 100 to 240 V AC household
power supply
Doing so may result in a fire, as well as cause the charger to
overheat, catch fire or malfunction.
xviii
921T_web_0802.indb xviii
08.3.23 1:56:58 PM
Caution
Do not use or leave the handset or battery in places
where it will be exposed to direct sunlight or in hot
places such as inside a car in the sun
Doing so may cause overheating, fire or malfunction.
Keep the handset, battery and charger (sold
separately) away from infants and small children
Failing to do so may result in the battery or memory card being
accidentally swallowed or cause an injury.
Make sure that the terminals (metal parts) of the
charger (sold separately) do not come into contact
with wires or other metal objects
Failing to do so may cause overheating or burns.
Do not pull the cord when unplugging the AC Charger
(sold separately) or In-Car Charger (sold separately)
from an AC household outlet or socket
Damage to the cord may cause electric shock, overheating or fire.
Hold the plug when unplugging the AC Charger (sold separately)
or In-Car Charger (sold separately).
Do not pull, bend with excessive force or twist the
cords of the AC Charger (sold separately) and In-Car
Charger
Do not damage or modify them
Do not place objects on them
Do not apply heat and keep them away from heaters
Damage to a cord may cause electric shock, overheating or fire.
Do not plug or unplug the AC Charger (sold
separately) with wet hands
Doing so may cause electric shock or malfunction.
Keep magnetic cards away from the handset and
make sure that a magnetic card is not trapped when
closing the handset
Failing to do so may cause the magnetic data on a cash card,
credit card, telephone card or floppy disk to be lost.
Do not use the handset in a vehicle if it affects invehicle electronic devices
Use of the handset in some types of vehicles may, in some rare
cases, affect in-vehicle electronic devices and interfere with safe
driving.
xix
921T_web_0802.indb xix
08.3.23 1:56:58 PM
Safety Precautions
Caution
Do not place the handset on an unstable or unlevel
surface
Doing so may result in the handset falling and causing injury or
malfunction. Be particularly careful when vibration is set.
Do not dispose of the used battery with ordinary
garbage
Insulate the terminal with tape and then dispose of the used
battery separately from ordinary garbage or take it to your nearest
SoftBank Shop. Be sure to observe local regulations on the
separate collection of used batteries, wherever applicable.
If the fuse for the In-Car Charger (sold separately)
blows, replace it with a designated fuse
Replacing the fuse with other than a designated fuse may cause
overheating and fire.
For details on replacing the fuse, refer to the instruction manual of
the In-Car Charger (sold separately).
Use the handset in well-lighted places and with an
appropriate distance between your eyes and its
screen when you watch TV
Failing to do so may cause decreased vision.
Do not touch the handset with sweaty hands or place
it into a pocket of sweaty clothes
Sweat and humidity may erode the internal components of the
handset and cause overheating or malfunction.
Do not leave the TV Antenna extended except when
using TV
Talking on the handset without retracting the TV Antenna may
cause injury.
Do not use the In-Car Charger (sold separately) when
the car engine is not running
Doing so may result in a flat battery.
Do not remove the polyester film from Display and
External Display
Using the handset without the polyester film to protect against
shattering of the reinforced glass may result in an injury if Display
or External Display is damaged.
xx
921T_web_0802.indb xx
08.3.23 1:56:59 PM
Caution
If your skin becomes irritated, immediately stop using the handset and consult with a dermatologist
The following materials and surface treatments have been used for the handset. Some of these materials may cause itching, irritation, eczema, etc. in
some rare cases depending on the individual's constitution and physical condition.
Part
Material (Surface Treatment)
Outer housing (front face of Display section)
Magnesium alloy (acrylic baking coating)
Outer housing (lateral faces of Display section, hinge part on back face, keypad side,
PC resin (UV cured acrylic coating)
battery cover side, hinge cover part)
Acrylic
resin (in-mold UV foil)
Outer housing (back face of Display section)
Display panel
Tempered glass with polyester film (UV cured acrylic processing)
Screw covers (above Display panel, bottom side of Display)
PET film
Screw covers (battery cover side)
PC resin (UV cured acrylic coating)
Hinge clearance retainer
Polyurethane resin
Keypad (including clearance retainer part)
UV cured acrylic resin
Side keys
PC resin (UV cured acrylic coating)
Camera panel
Acrylic resin
Mobile Light
Acrylic resin
Camera/Video Indicator
Acrylic resin
Corner caps
Elastomer resin
Charging Indicator
Acrylic resin
Infrared Port
Acrylic resin
Memory Card Slot cover
Elastomer resin, PC resin (UV cured acrylic coating)
External Device Port cover
Elastomer resin, PC resin (UV cured acrylic coating)
Charging Terminal
Stainless steel (gold plating, nickel undercoat)
Screws
Steel (nickel coating)
xxi
921T_web_0802.indb xxi
08.3.23 1:57:00 PM
Safety Precautions
Caution
Part
TV Antenna (top part)
TV Antenna (pullout part, top side)
TV Antenna (pullout part, base side)
TV Antenna (sleeve side)
TV Antenna (hinge part)
Strap pin
Material (Surface Treatment)
PC/ABS resin
PA resin
Stainless steel
Cadmium-less brass
Stainless steel
Stainless steel (bright nickel coating)
xxii
921T_web_0802.indb xxii
08.3.23 1:57:00 PM
Caution
Before using the handset, make sure that no metal
objects (such as pins) are stuck to the Earpiece or
Stereo Speakers
Failing to do so may result in a metal object causing an ear or hand
injury, etc.
If you have a weak heart, be careful with the call
vibration and ringtone volume settings
Failing to do so may startle you and may be harmful to your heart.
Do not use the Mobile Light for purposes other than
taking pictures, recording videos or lighting
Doing so may harm the eyes and cause impaired vision or other
injury.
Make sure things like paper, cloth and bedding are
not placed on the handset during a video call or while
charging using a USB connection, In-Car Charger (sold
separately), AC Charger (sold separately), etc.
Failing to do so may cause overheating, fire, burns or malfunction.
Do not turn the volume up too high while using Stereo
Earphone-Microphone (sold separately)
Do not use Stereo Earphone-Microphone (sold
separately) continuously for long periods of time
Exposure to high sound levels may impair hearing and prolonged
use may cause hearing defect regardless of the volume level.
Sound leakage may annoy other people and surrounding sounds
may not be heard clearly resulting in an accident.
Do not insert objects other than the memory card
into the Memory Card Slot
Doing so may cause overheating, electric shock or malfunction.
Cover the slot with the cover at times other than when you are
inserting or removing the memory card.
Keep your face away from the Memory Card Slot
when inserting or removing the memory card
Keep the memory card out of the reach of small
children
If the memory card is let go of suddenly, it may fly out and hit your
face resulting in injury.
Do not subject the memory card to vibration or shock
or remove it from the slot or turn off the handset
while data is being written to or read from the
memory card
Doing so may cause data loss or malfunction.
xxiii
921T_web_0802.indb xxiii
08.3.23 1:57:00 PM
Safety Precautions
Caution
Use only the memory card supported by the handset
Failing to do so may cause data loss or malfunction.
The handset supports memory cards with a storage capacity of up
to 2 GB (as of January 2008).
Do not let children use cables such as USB cable,
Stereo Earphone Conversion Cable and Stereo
Earphone-Microphone (sold separately) unsupervised
and keep cables out of infant's reach
An injury may be caused if, for instance, the cable is wrapped
around a neck.
Use only a USIM Card designated for the handset
Failing to do so may cause data loss or malfunction.
Do not bend the TV Antenna with excessive force
Doing so may result in damage or distortion of the TV Antenna
and cause injury.
Be careful not to trap your fingers or objects when
closing the handset and not to trap your fingers in
the hinge when opening the handset
Failing to do so may cause injury or damage to the OLED Display.
Do not point the infrared beam at anyone’s eye
during infrared communication
Doing so may cause eye damage.
Do not use the Mobile Light close to eyes
Doing so may cause eye damage. Be especially careful not to take
pictures or record videos with the Mobile Light too close to the
eyes of infants.
Do not use excessive force when inserting or
removing the USIM Card
Doing so may cause a malfunction. Be careful not to injure a hand
or finger when removing the card.
xxiv
921T_web_0802.indb xxiv
08.3.23 1:57:01 PM
General Notes
Using Your Handset
• The handset employs radio waves. Signals may be disrupted
even within service areas if you are indoors, underground,
inside a tunnel or inside a vehicle. If you move to a location
with poor signal reception, a call or the TV image/sound may be
suddenly cut off.
• When using the handset in public places, take care not to
annoy other people around you. Use of the handset is
prohibited in some public places such as in theaters or on buses
and trains.
• The handset is a radio transceiver under Japanese Radio Law.
You may be requested to submit the handset for inspection
based on this law.
• Use of the handset near a landline phone, TV or radio may
affect the image and sound quality of the equipment.
• The handset employs a digital system to maintain a high level of
communication quality even at very low signal levels. However,
calls may be suddenly cut off when the signal strength becomes
too weak.
• The digital system provides a high level of privacy protection.
However, the possibility of someone eavesdropping on your
conversation cannot be ruled out as long as radio waves are
used.
• The handset is exclusively for use in Japan. It cannot be used
outside Japan.
• Data stored on the handset may be corrupted or lost on the
following occasions.
・The handset is used improperly.
・The handset is exposed to static electricity or electric noise.
・The handset is turned off during operation.
・The battery is completely discharged.
・The handset malfunctions or is sent for repairs.
SoftBank and Toshiba accept no liability whatsoever for the
corruption or loss of stored data. Be sure to keep a separate
memo of important data to limit damage caused by data
corruption or loss to a minimum.
• Be sure to charge the battery before using the handset for the
first time or if the handset has not been used for a long time.
When the battery is stored for a long time, it discharges over
time even if it is not used.
• Before using a memory card, read the instruction manual of the
memory card thoroughly to ensure safe and proper operation.
• When the handset is used for extended periods of time,
especially in high temperature conditions, the handset surface
could become hot. Please use caution when touching the
handset under such conditions.
• When certain items are taken out of the country, documentation
may be required to certify that the export of the items is not
controlled, prohibited, or restricted by the Export Trade Control
Order and Foreign Exchange Order. Basically, no such
documentation is required if you take the handset out of the
country and bring it back for the purpose of personal use when
going on vacations or short business trips. In some cases,
however, an export permit may be required if the handset is to
be used by or transferred to anyone else.
Furthermore, a US government export permit may be required
when taking the handset to countries for which the US
government has imposed export restrictions (Cuba, North
Korea, Iran, Sudan, Syria).
For details on export laws, regulations and procedures, refer to
the Web page of the Security Export Control Policy Division of
the Ministry of Economy, Trade and Industry.
• If you use a hearing aid, handset usage may interfere with
hearing aid performance. If there is any interference, consult
with the manufacturer or distributor of the hearing aid.
xxv
921T_web_0802.indb xxv
08.3.23 1:57:02 PM
General Notes
Inside Vehicles
• Do not use the handset while driving. Use of the handset while
driving is prohibited by law.
Talking on the handset using Stereo Earphone-Microphone (sold
separately) while driving may be subject to penalties in some
prefectures.
• Before using the handset, stop the vehicle in a safe area where
parking or stopping is permitted.
Aboard Aircraft
• Do not use the handset on an aircraft. Do not turn the handset
on while you are on the aircraft. Use of the handset on an
aircraft is prohibited by law.
Handling Basics
• Do not use the handset in extreme temperatures, direct sunlight
and humid or dusty places.
• Do not drop the handset or subject it to excessive shock.
• To clean the handset, wipe it with a dry soft cloth. Do not use
xxvi
alcohol, thinner, benzene or other solvents. Doing so may cause
discoloration and remove the printed logo.
• Avoid exposing the handset to rain, snow or high humidity. The
handset, battery, charger (sold separately), Stereo EarphoneMicrophone (sold separately) and other optional accessories are
not waterproof.
• Do not remove the battery while handset power is on to avoid
malfunction.
• If the battery has been removed from the handset or the
handset has not been charged for a long time, stored data and
settings may be lost or altered. SoftBank and Toshiba accept no
liability whatsoever for any damage or loss resulting from such
negligence.
921T_web_0802.indb xxvi
• The
battery is a consumable item employing lithium ions.
Replace the battery with a new one if the operation time
becomes extremely short after it is fully charged. Buy a new
battery designated for the handset.
• Do not dispose of batteries with municipal
waste. Insulate the terminal with tape or place
the battery in a plastic bag and take it to the
nearest SoftBank Shop or recycling center. Be
sure to observe local regulations on battery
disposal.
• Some handset display pixels may be missing or remain lit. This is
not a defect or malfunction. If the Display is left on for a long
period of time, pictures may be permanently burned into it.
• Make sure Stereo Earphone Conversion Cable or Stereo
Earphone-Microphone (sold separately) is securely plugged into
Earphone Microphone Jack. Failing to do so may generate noise
on the other party's phone during calls.
• Do not turn the volume up too high while using Stereo
Earphone-Microphone (sold separately). Exposure to high sound
levels may impair hearing and prolonged use may cause hearing
damage regardless of the volume level. Sound leakage may
annoy other people and surrounding sounds may not be heard
clearly when walking, resulting in an accident.
• When Earphone Microphone Jack, External Device Port and
Memory Card Slot are not in use, make sure to replace the
covers. Otherwise dust or water may enter the handset causing
handset malfunction.
• Hold the plug and do not pull the cord when unplugging Stereo
Earphone Conversion Cable or Stereo Earphone-Microphone
(sold separately). Pulling the cord may cause damage or
malfunction.
08.3.23 1:57:02 PM
• The communication antenna of the handset is built into the
body and does not protrude. Signal sensitivity may be reduced
by touching/covering Internal Antenna area (page 1-3). Do not
cover this area by affixing stickers, or any other items. Doing so
may prevent you from making/receiving calls, sending/receiving
messages or accessing the Web.
• When you replace the handset or send it for repair, messages
and other data stored in the handset cannot be transferred to
another handset.
• Do not drop the USIM Card or subject it to excessive shock.
Doing so may cause a malfunction.
• Do not bend the USIM Card or place a heavy object on it. Doing
so may cause a malfunction.
• Do not allow the USIM Card to get wet or leave it in places of
high humidity. Doing so may cause a malfunction.
• Do not use or leave the USIM Card in hot places such as near a
fire or heater. Doing so may cause a malfunction.
• Avoid storing the USIM Card in direct sunlight or hot and humid
places. Failing to do so may cause a malfunction.
• Keep the USIM Card out of infants' reach. Failing to do so may
result in the USIM Card being accidentally swallowed or cause
an injury.
• Before using the USIM Card, read the instruction manual of the
USIM Card thoroughly to ensure safe and proper operation.
• Do not put the handset into a bag or pocket without retracting
the TV Antenna. Doing so may apply excessive force on the TV
Antenna and result in damage.
OLED Display
• The
handset uses an OLED (Organic Light Emitting Diode)
display. The OLED display may develop dark areas or the colors
may change if the same image is displayed for a long time, if
the lighting is set brighter than necessary, or after it has been
used for an excessively long time. However, these are
characteristics of OLED displays and are not malfunctions.
• The OLED display is made with extremely advanced technology,
but a very small number of pixels may remain dark or always
lighted. Also, depending on the angle of view, the display may
show a diagonal pattern of color, brightness distortion or color
change. However, these are caused by the way OLED displays
are made and are not malfunctions.
• Leaving the OLED display exposed to direct sunlight may
damage it. Be careful when placing the handset outside or near
windows.
• Icons at the top of Display turn off after the Display has been
on for a certain period of time.
Functional Limitations
• After
handset upgrade or subscription cancellation, the
following functions become unavailable on the handset:
・Camera
・Digital TV
・Media Player
・S! Appli
• Above functions may become unavailable after long periods of
not using the handset. Contact your nearest SoftBank Shop or
contact SoftBank General Information (page 14-41).
xxvii
921T_web_0802.indb xxvii
08.3.23 1:57:02 PM
General Notes
Mobile Camera
Copyrights
• Be sure to observe proper etiquette when using the camera.
• Copyrighted materials, such as music, images, computer
programs and databases, and their respective holders are
• Do not expose the camera lens to direct sunlight. Concentrated
sunlight through the lens may cause the handset to
malfunction.
• Be sure to try taking and previewing pictures before using the
camera on important occasions like wedding ceremonies.
• Do not commercially use or transfer pictures taken with the
camera without the permission of the copyright holder
(photographer), except for personal use.
• Do not use the camera in locations where taking photos and
recording videos are prohibited.
• Do not block the lens and brightness sensor with your fingers,
strap or TV Antenna when shooting pictures or videos. Stow
the TV Antenna in the handset when using the camera.
Mobile Light
• Do not use the Mobile Light in hot, cold or humid places. Doing
so may shorten its life.
• The Mobile Light has a limited life. Repeated use will decrease
the light intensity.
About the Speaker
• Since
protected by copyright laws. Duplication of copyrighted
materials is permitted only for individual or home use. Making
copies (including data conversion), modifications, transfers or
network distributions of copies for purposes other than stated
above without proper authorization constitutes an infringement
of copyrights and moral rights, potentially resulting in claims for
reparations or criminal punishment. If you use the handset to
make copies, observe the copyright laws. Furthermore,
recording materials using the camera is also subject to the same
laws.
Right of Portrait
• Portrait
right is the right of an individual to refuse to be
photographed by others and protects from the unauthorized
publication or use of an individual's photograph by others.
Right of personality is a portrait right applicable to all citizens
and right of publicity is a portrait right (property right) designed
to protect celebrities' interests. Be careful when taking pictures
with the handset camera. Photographing, publicizing and
distributing photographs of citizens and celebrities without
permission are illegal.
the earpiece and speaker of this handset are close
together, loud noise from the speaker may enter you ear directly
during playback or call reception. You may suffer aural damage
if your ears are subjected to loud noise. Be careful to hold the
handset away from your ear during use.
xxviii
921T_web_0802.indb xxviii
08.3.23 1:57:03 PM
End User License Agreement
TOSHIBA CORPORATION
IMPORTANT NOTE: PLEASE READ BEFORE USING YOUR HANDSET
BY ATTEMPTING TO USE ANY SOFTWARE ON THE SUPPLIED
HANDSET THIS CONSTITUTES YOUR ACCEPTANCE OF THESE EULA
TERMS. IF YOU REJECT OR DO NOT AGREE WITH ALL THE TERMS
OF THIS EULA, PLEASE DO NOT ATTEMPT TO ACCESS OR USE THE
SUPPLIED SOFTWARE.
End User License Agreement
This End User License Agreement ("EULA") is a legal agreement
between you (as the user) and TOSHIBA CORPORATION
("Toshiba") with regard to the copyrighted software as installed in
a Toshiba 3G handset supplied to you (the "Handset").
Use or disposal of any software installed in the Handset and
related documentations (the "Software") will constitute your
acceptance of these terms, unless separate terms are provided
by the Software supplier on the Handset, in which case certain
additional or different terms may apply. If you do not agree with
the terms of this EULA, do not use or dispose the Software.
1. License Grant. Toshiba grants to you a personal, nontransferable and non-exclusive right to use the Software
as set out in this EULA. Modifying, adapting, translating,
renting, copying, making available, transferring or assigning
all or part of the Software, or any rights granted hereunder,
to any other persons and removing any proprietary notices,
labels or marks from the Software is strictly prohibited,
except as expressly permitted in this EULA. Furthermore, you
hereby agree not to create derivative works based on the
Software.
2. Copyright. The Software is licensed, not sold. You
acknowledge that no title to the intellectual property in
the Software is or will be transferred to you. You further
acknowledge that title and full ownership rights to the
Software will remain the exclusive property of Toshiba,
Toshiba's affiliates, and/or their suppliers, and you will not
acquire any rights to the Software, except as expressly set
out in this EULA. You may keep a back-up copy of the
Software only so far as necessary for its lawful use. All copies
of the Software must contain the same proprietary notices
as contained in or on the Software and are subject to the
terms of this EULA. All rights not expressly granted under this
EULA are reserved to Toshiba, Toshiba's affiliates and/or their
suppliers.
3. Reverse Engineering. You agree that you will not attempt,
and if you are a business organization, you will use your best
efforts to prevent your employees, servants and contractors
from attempting to reverse engineer, decompile, modify,
translate or disassemble the Software in whole or in part
except to the extent that such actions cannot be excluded by
mandatory applicable law and only if those actions are taken
in accordance with such applicable law. Any failure to comply
with the above or any other terms and conditions contained
herein will result in the automatic termination of this license
and the reversion of the rights granted hereunder to Toshiba.
4. DISCLAIMER OF WARRANTY. The Software is provided "AS
IS" without warranty of any kind. TOSHIBA, TOSHIBA'S
AFFILIATES, AND THEIR SUPPLIERS DISCLAIM ALL
WARRANTIES, CONDITIONS OR OTHER TERMS (WHETHER
xxix
921T_web_0802.indb xxix
08.3.23 1:57:03 PM
End User License Agreement
xxx
EXPRESS OR IMPLIED), INCLUDING BUT NOT LIMITED TO
WARRANTIES, CONDITIONS AND TERMS OF SATISFACTORY
QUALITY, MERCHANTABILITY, FITNESS FOR A PARTICULAR
PURPOSE AND NON-INFRINGEMENT OF THIRD-PARTY
RIGHTS; AND THE ENTIRE RISK AS TO THE QUALITY
AND PERFORMANCE OF THE SOFTWARE IS WITH YOU.
YOU ACCEPT THAT SOFTWARE MAY NOT MEET YOUR
REQUIREMENTS AND NO WARRANTY CAN BE GIVEN THAT
OPERATION OF THE SOFTWARE WILL BE UNINTERRUPTED
OR ERROR-FREE.
5. LIMITATION OF LIABILITY. TO THE FULLEST EXTENT LEGALLY
PERMITTED, IN NO EVENT SHALL TOSHIBA, TOSHIBA'S
AFFILIATES OR THEIR SUPPLIERS BE LIABLE TO YOU FOR
ANY DAMAGES FOR (A) LOST BUSINESS OR REVENUE,
BUSINESS INTERRUPTION, LOSS OF BUSINESS DATA; OR
(B) CONSEQUENTIAL, SPECIAL, INCIDENTAL OR INDIRECT
DAMAGES OF ANY KIND (WHETHER UNDER CONTRACT,
TORT OR OTHERWISE) ARISING OUT OF: (I) THE USE OR
INABILITY TO USE THE SOFTWARE, EVEN IF TOSHIBA,
TOSHIBA'S AFFILIATES OR THEIR SUPPLIER HAS BEEN
ADVISED OF THE POSSIBILITY OF SUCH DAMAGES; OR (II)
ANY CLAIM BY A THIRD PARTY. SAVE AS SET OUT IN THIS
SECTION, TOSHIBA'S ENTIRE LIABILITY UNDER THIS EULA
SHALL NOT EXCEED THE PRICE PAID FOR THE SOFTWARE, IF
ANY.
PLEASE MAKE AND RETAIN A COPY OF ALL DATA YOU HAVE INSERTED
INTO YOUR PRODUCT, FOR EXAMPLE NAMES, ADDRESSES, PHONE
NUMBERS, PICTURES, RINGTONES ETC, BEFORE SUBMITTING YOUR
PRODUCT FOR A WARRANTY SERVICE, AS SUCH DATA MAY BE
DELETED OR ERASED AS PART OF THE REPAIR OR SERVICE PROCESS.
921T_web_0802.indb xxx
6. Laws. This EULA will be governed by the laws of Japan.
All disputes arising out of this EULA shall be subject to the
exclusive jurisdiction of the Tokyo District Court.
7. Export Laws. Any use, duplication or disposal of the
Software involves products and/or technical data that may be
controlled under the export laws of applicable countries or
region and may be subject to the approval of the applicable
governmental authorities prior to export. Any export, directly
or indirectly, in contravention of the export laws of applicable
countries or region is prohibited.
8. Third Party Beneficiary. You agree that certain suppliers
of the Software to Toshiba have a right as a third party
beneficiary to enforce the terms of this EULA against you as
a user.
08.3.23 1:57:03 PM
Trademarks and Patents
Licensed by QUALCOMM Incorporated under one or more the following
United States Patents and/or their counterparts in other nations :
4,901,307
5,504,773
5,109,390
5,535,239
5,267,262
5,600,754
5,416,797
5,778,338
5,490,165
5,101,501
5,511,073
5,267,261
5,568,483
5,414,796
5,659,569
5,056,109
5,506,865
5,228,054
5,544,196
5,337,338
5,657,420
5,710,784
Java and all Java-based trademarks and logos are trademarks
or registered trademarks of Sun Microsystems, Inc. in the
United States and other countries.
microSD Logo is a trademark.
Powered by Mascot Capsule®/Micro3D EditionTM Mascot Capsule® is a
registered trademark of HI Corporation © 2002-2003 HI Corporation. All
Rights Reserved.
The Bluetooth word mark and logo are owned
by the Bluetooth SIG, Inc. and any use of such
marks by TOSHIBA is under license.
THIS PRODUCT IS LICENSED UNDER THE MPEG-4 VISUAL
PATENT PORTFOLIO LICENSE FOR THE PERSONAL AND
NON-COMMERCIAL USE OF A CONSUMER FOR (i) ENCODING
VIDEO IN COMPLIANCE WITH THE MPEG-4 VISUAL STANDARD
("MPEG-4 VIDEO") AND/OR (ii) DECODING MPEG-4 VIDEO
THAT WAS ENCODED BY A CONSUMER ENGAGED IN
A PERSONAL AND NON-COMMERCIAL ACTIVITY AND/OR
WAS OBTAINED FROM A VIDEO PROVIDER LICENSED BY
MPEG-LA TO PROVIDE MPEG-4 VIDEO. NO LICENSE IS
GRANTED OR SHALL BE IMPLIED FOR ANY OTHER USE.
ADDITIONAL INFORMATION INCLUDING THAT RELATING TO
PROMOTIONAL, INTERNAL AND COMMERCIAL USES AND
LICENSING MAY BE OBTAINED FROM MPEG LA, LLC.
SEE HTTP://WWW.MPEGLA.COM.
T9 Text Input is covered by Japan Pat.No. 特許
3532780,3492981 and other patents pending.
xxxi
921T_web_0802.indb xxxi
08.3.23 1:57:04 PM
Trademarks and Patents
Chaku-Uta®, Chaku-Uta Full® is a registered trademark of Sony Music
Entertainment (Japan) Inc.
Copyright © 1998-2003 The OpenSSL Project. All rights reserved.
Copyright © 1995-1998 Eric Young ([email protected]) All rights
reserved.
THIS SOFTWARE IS PROVIDED BY THE OpenSSL PROJECT AND/OR BY
ERIC YOUNG "AS IS" AND ANY EXPRESSED OR IMPLIED WARRANTIES,
INCLUDING, BUT NOT LIMITED TO, THE IMPLIED WARRANTIES OF
MERCHANTABILITY AND FITNESS FOR A PARTICULAR PURPOSE ARE
DISCLAIMED. IN NO EVENT SHALL THE OpenSSL PROJECT, ERIC YOUNG
OR ITS CONTRIBUTORS BE LIABLE FOR ANY DIRECT, INDIRECT,
INCIDENTAL, SPECIAL, EXEMPLARY, OR CONSEQUENTIAL DAMAGES
(INCLUDING, BUT NOT LIMITED TO, PROCUREMENT OF SUBSTITUTE
GOODS OR SERVICES; LOSS OF USE, DATA, OR PROFITS; OR BUSINESS
INTERRUPTION) HOWEVER CAUSED AND ON ANY THEORY OF LIABILITY,
WHETHER IN CONTRACT, STRICT LIABILITY, OR TORT (INCLUDING
NEGLIGENCE OR OTHERWISE) ARISING IN ANY WAY OUT OF THE USE OF
THIS SOFTWARE, EVEN IF ADVISED OF THE POSSIBILITY OF SUCH
DAMAGE.
QR Code is a registered trademark of Denso wave Incorporated.
FeliCa is a contactless IC card technology developed by Sony Corporation.
FeliCa is a trademark of Sony Corporation.
is a registered trademark of FeliCa Networks, Inc.
Edy is a brand name of the prepaid-type electronic money service
managed by bitWallet, Inc.
Sky Mail, S! Mail, S! Appli, S! GPS Navi, S! Information Channel,
S! Addressbook Back-up, S! Friend's Status, S! Circle Talk, PC Site Browser,
Sha-mail, Movie Sha-mail, Navi appli, S! Quick News, S! Town, S! Loop,
Arrange Mail, Feeling Mail and Secure Remote Lock are registered
trademarks or trademarks of SOFTBANK MOBILE Corp.
Copyright © 1995-2006 Adobe Systems Incorporated. All rights reserved.
Macromedia, Flash, Macromedia Flash, and Macromedia Flash Lite are
trademarks or registered trademarks of Adobe Systems Incorporated in the
United States and other countries.
BookSurfing® is a registered trademark of CELSYS, Inc., Voyager Japan,
Inc. and INFOCITY, Inc.
xxxii
921T_web_0802.indb xxxii
08.3.23 1:57:04 PM
"SOFTBANK" SOFTBANK's equivalent in Japanese, and the SOFTBANK
logo are trademarks or registered trademarks of SOFTBANK CORP. in
Japan and in other countries.
Microsoft, PowerPoint, Excel are either registered trademarks or
trademarks of Microsoft Corporation in the United States and/or other
countries.
This product contains NetFront Mobile Client Suite of ACCESS CO.,LTD.
ACCESS and NetFront are trademarks or registered trademarks of ACCESS
CO., LTD. in Japan and other countries.
© 2008 ACCESS CO., LTD. All rights reserved.
This software is based in part on the work of the Independent JPEG Group.
Osaifu-Keitai is a registered trademark of NTT DoCoMo, Inc.
All other company names and trademarks are the property of their respective
owners.
This product uses OKAO ™ Vision of OMRON
Corporation.
"OKAO" and "OKAO Vision" are registered
trademarks of OMRON Corporation in Japan.
Yahoo! and the Yahoo!/Y! logos are trademarks and/or registered
trademarks of Yahoo! Inc.
xxxiii
921T_web_0802.indb xxxiii
08.3.23 1:57:05 PM
SAR
This 921T mobile phone complies with the technical standards for the
absorption of radio frequency (RF) energy as set by the Japanese government.
These technical standards, based upon scientific evidence, were established to
ensure that RF energy from wireless mobile devices used next to the head do
not have a serious effect on human health. The maximum Specific Absorption
Rate (SAR), which measures the average radio wave energy absorbed by the
human head, set by the Japanese government is 2 W/kg*. This allowed value
includes a substantial safety margin designed to assure the safety of all
persons, regardless of age and stature. The value corresponds with the
international guidelines prescribed by the International Commission on NonIonizing Radiation Protection (ICNIRP) in cooperation with the World Health
Organization (WHO).
All models of mobile phones are required to comply with the technical
standards of Japan set forth in the Radio Law before being released for sale.
The 921T has received construction design certification under the Radio Law
with a SAR value of 0.139 W/kg. This maximum SAR value was determined by
TÜV Rheinland Japan, Ltd. (registered certification agency) and the Telecom
Engineering Center (measurement agency) at the maximum transmission
power of this handset with measurement carried out conforming to the
guidelines set by the Japanese government. Depending on the product, there
may be minute differences in the SAR. However, they are within the allowed
limits. During calling, the actual SAR is lower as the handset is designed to
use the minimum transmission power necessary to communicate with the
mobile network.
xxxiv
921T_web_0802.indb xxxiv
Additional information about SAR can be found at the website listed below.
----------------------------------------------------------------------------------------------Ministry of Internal Affairs and Communications website:
http://www.tele.soumu.go.jp/j/ele/index.htm
Association of Radio Industries and Businesses (ARIB) website:
http://www.arib-emf.org/initiation/sar.html
SoftBank website:
http://www.softbankmobile.co.jp/corporate/legal/emf/emf03.html
Toshiba Mobile Phone website:
http://www.toshiba.co.jp/product/etsg/cmt/
* The technical guidelines are stipulated in the Ministerial Ordinance Related
to the Radio Law (Wireless Equipment Regulations, Article 14-2).
----------------------------------------------------------------------------------------------About SoftBank's Body SAR Policy
* Body SAR: Refers to the SAR of the maximum transmission power when
continuously calling with the handset attached to the body and using an
earphone.
** Specific Absorption Rate (SAR): Measured value of continuous calling at
6 minute intervals.
Our technical standards for body SAR include the U.S. Federal
Communications Commission (FCC) standards and information from
Europe. For more information see the sections on "FCC RF Exposure
Information" and "European RF Exposure Information."
*** Placement on the body: Measurements were taken with the rear of the
phone facing the body at a distance of 1.5 cm as the normal position of
the handset. In order to maintain compliance with radio frequency (RF)
exposure requirements, use accessories that maintain a 1.5 cm
separation distance between the body and the back of the handset.
Choose accessories, such as belt clips and holsters, that do not contain
metallic components.
08.3.23 1:57:05 PM
FCC RF Exposure Information
The guidelines established by the FCC are based on standards that were
developed by independent scientific organizations through periodic and
thorough evaluation of scientific studies. The standards include a substantial
safety margin designed to assure the safety of all persons, regardless of age
and health.
The exposure standard for wireless handsets employs a unit of measurement
known as the Specific Absorption Rate (SAR). The SAR limit set by the FCC is
1.6 W/kg.
The tests are performed according to FCC standards for each model and the
maximum SAR value for this model handset, when tested next to the body as
described in this user guide, is 0.856 W/kg.
Placement on the body: Measurements for the 921T were taken with the
normal position as the rear of the phone facing the body at a distance of
1.5 cm. In order to maintain compliance with FCC RF exposure requirements,
use accessories that maintain a 1.5 cm separation distance between the body
and the back of the handset. Choose accessories, such as belt clips and
holsters, that do not contain metallic components.
The use of accessories that do not satisfy these requirements may not comply
with FCC RF exposure requirements, and should be avoided. Additional
information on Specific Absorption Rates (SAR) can be found on the
homepage listed below:
Cellular Telecommunications & Internet Association (CTIA) website:
http://www.phonefacts.net
European RF Exposure Information
Your mobile device is a radio transmitter and receiver. It is designed not to
exceed limits recommended by international guidelines for exposure to radio
waves. These guidelines were developed by the independent scientific
organization International Commission on Non-Ionizing Radiation Protection
(ICNIRP) and include safety margins designed to assure the protection of all
persons, regardless of age and health.
The exposure standard for wireless handsets employs a unit of measurement
known as the Specific Absorption Rate (SAR). The SAR limit for mobile devices
is 2 W/kg and the highest SAR value for this device when positioned near the
body is 0.531 W/kg*.
As SAR is measured utilizing the device's highest transmitting power the
actual SAR of this device during operation is typically below that indicated
above. This is because the handset was designed to use the minimum level of
transmission power necessary to communicate with the mobile network. The
World Health Organization (WHO) has stated that present scientific
information does not indicate the need for any special precautions for the use
of mobile devices. They note that if you want to reduce your exposure then
you can do so by limiting the length of calls or using a "hands-free" device to
keep the mobile phone away from the head and body. Additional information
about SAR can be found at the WHO homepage listed below.
http://www.who.int/emf
* These tests for wearing the mobile device on the body are carried out in
accordance with FCC standards and the values are based on European
requirements.
xxxv
921T_web_0802.indb xxxv
08.3.23 1:57:06 PM
xxxvi
921T_web_0802.indb xxxvi
08.3.23 1:57:06 PM
1
921T_web_0802.indb 1-1
Getting Started
Handset Parts & Functions ・・・・・・・・・・・・・・・・・・・・・・・・・・・・・・・・・・・・・・・・・・・・・・・・・・・・・・・・・・・ 1-2
Display Indicators ・・・・・・・・・・・・・・・・・・・・・・・・・・・・・・・・・・・・・・・・・・・・・・・・・・・・・・・・・・・・・・・・・・・ 1-5
Display ・・・・・・・・・・・・・・・・・・・・・・・・・・・・・・・・・・・・・・・・・・・・・・・・・・・・・・・・・・・・・・・・・・・・・・・・・・・・ 1-5
External Display ・・・・・・・・・・・・・・・・・・・・・・・・・・・・・・・・・・・・・・・・・・・・・・・・・・・・・・・・・・・・・・・・・・・・・ 1-6
Information Prompt ・・・・・・・・・・・・・・・・・・・・・・・・・・・・・・・・・・・・・・・・・・・・・・・・・・・・・・・・・・・・・・・・・・ 1-7
Charging the Battery ・・・・・・・・・・・・・・・・・・・・・・・・・・・・・・・・・・・・・・・・・・・・・・・・・・・・・・・・・・・・・・・・ 1-8
Power On/Off ・・・・・・・・・・・・・・・・・・・・・・・・・・・・・・・・・・・・・・・・・・・・・・・・・・・・・・・・・・・・・・・・・・・・・・ 1-11
Date & Time ・・・・・・・・・・・・・・・・・・・・・・・・・・・・・・・・・・・・・・・・・・・・・・・・・・・・・・・・・・・・・・・・・・・・・・・ 1-12
Setting Date and Time ・・・・・・・・・・・・・・・・・・・・・・・・・・・・・・・・・・・・・・・・・・・・・・・・・・・・・・・・・・・・・・・ 1-12
Clock Format (12-hour/24-hour) ・・・・・・・・・・・・・・・・・・・・・・・・・・・・・・・・・・・・・・・・・・・・・・・・・・・・・・・ 1-12
About Mobile Manners ・・・・・・・・・・・・・・・・・・・・・・・・・・・・・・・・・・・・・・・・・・・・・・・・・・・・・・・・・・・・・ 1-13
Manner Mode and Offline Mode ・・・・・・・・・・・・・・・・・・・・・・・・・・・・・・・・・・・・・・・・・・・・・・・・・・・・・・・ 1-13
Codes ・・・・・・・・・・・・・・・・・・・・・・・・・・・・・・・・・・・・・・・・・・・・・・・・・・・・・・・・・・・・・・・・・・・・・・・・・・・・・ 1-14
About Codes ・・・・・・・・・・・・・・・・・・・・・・・・・・・・・・・・・・・・・・・・・・・・・・・・・・・・・・・・・・・・・・・・・・・・・・ 1-14
08.3.23 1:57:06 PM
Handset Parts & Functions
1
Getting Started
1
2
10
16
3
17
18
19
27
29
21
30
22
25
4
5
6
7
31
11
12
13
14
20
32
33
23
26
28
8
9
15
24
1-2
921T_web_0802.indb 1-2
08.3.23 1:57:06 PM
5
6
7
8
9
10
11
12
13
14
15
16
17
18
19
20
21
22
23
24
25
26
Brightness Sensor
Earpiece
Display
Multi Selector E: Move cursor.
Center Key [: Access Main Menu or confirm operations.
Mail Key (Left Softkey) J: Access the Messaging Menu.
Media Player Key H: Access the Audio Menu or use to make/answer
video calls.
Send Key N: Make and answer voice calls.
Keypad: Enter phone numbers, characters, etc.
*: Turn on/off Mobile Light when using the camera.
# (Press and hold): Set or cancel Manner Mode.
Infrared Port
Speaker
Yahoo! Keitai Key (Right Softkey) K: Access Yahoo! Keitai.
Shortcut Key S: Access the Shortcuts Menu.
Clear/Memo Key L: Delete characters and return to the previous
operation.
L (Press and hold): Set or cancel Answering Machine.
End/Power Key O: End calls/operations.
O (Press and hold): Power handset on/off.
Microphone
External Light
External Display
Handstrap Hole
TV Antenna
Camera
Mobile Light
Camera/Video Indicator
Logo
Internal Antenna
Charger Terminal
Memory Card Slot
27 Charging Indicator: Lights during charging and goes out when
charging is complete.
28 Earphone Microphone Jack/External Device Port
29 S! Circle Talk Key (Upper Side Key) P: Access S! Circle Talk
Members List.
P (Press and hold): Send a Simple Notice of your location, turn the
torch (penlight) on, display My Status, or check the balance of e-money
for Lifestyle-Appli (it can be set for any one of these functions (page
2-4)).
30 TV Key (Lower Side Key) Q (Press and hold): Watch TV.
31 Hold Key M: Toggle the External Display view (only available while
your handset is closed).
M (Press and hold): Set or cancel Hold (only available while your
handset is closed).
32 Manner Key T: Toggle the External Display view (only available
while your handset is closed).
T (Press and hold): Set or cancel Manner Mode.
33 Camera Key R: Toggle the External Display view* or activate the
camera and shutter.
* Only available while your handset is closed.
1
Getting Started
1
2
3
4
• Signal sensitivity may be reduced by touching/covering Internal Antenna
area. Do not cover this area by affixing stickers, or any other items.
• AC Charger and Earphone-Microphone cannot be used simultaneously.
1-3
921T_web_0802.indb 1-3
08.3.23 1:57:07 PM
Handset Parts & Functions
1
Display Positions
Getting Started
The following Display positions are available.
Clamshell Open Position
Basic position, used for
most operations
described in this manual.
Open the handset.
Hold the top portion and
rotate the Display as
indicated by the arrow.
Viewer Position
Close the handset.
Convenient for taking pictures,
recording videos and watching TV.
Self-portrait Position
Closed Position
Turn over the handset.
• When rotating the Display, hold the top portion and do not force it in the wrong direction. Doing so may damage the handset.
• Do not carry your handset in Viewer position. Doing so may damage the Display.
• Do not close the handset when the Display is partially rotated. Doing so may damage the Multi Selector, etc.
1-4
921T_web_0802.indb 1-4
08.3.23 1:57:07 PM
Display Indicators
⑤
Display
12:30
⑫⑬⑭⑮⑯⑰⑱
⑥
①
②
③
④
Signal Strength
Strong
Moderate
Weak
Faint
Out of Range
Offline Mode On
/ Voice/Video Call
Dial-up Connection
Positioning
Packet Transmission
Displaying Picture File with Location
Information
My Status Online
Packet Transmission Ready
Packet Network Range
3G Network Unavailable
IC Card Lock Active
⑦
⑧
921T_web_0802.indb 1-5
Missed Call(s)
Manner Mode (Silent)
Manner Mode (Alarms)
Manner Mode (Drive)
/ / Manner Mode (Original 1 to 3)
⑩
Battery Level
Sufficiently Charged Low Very Low
Charge Immediately
Charging
⑪ Time
⑫
Keypad Lock Active
Password Lock Active
⑬ Alarm Set
⑭ Answering Machine On (No Messages)
/ / / / Answering Machine On
(Message(s) Recorded)
/ / / / Answering Machine Off
(Message(s) Recorded)
⑮
Missed Call(s) (Message(s) Recorded at
Voice Mail Center)
Call Forwarding (Ringer Off for Voice Call)
Call Forwarding (Ringer Off for Video Call)
Call Forwarding (Ringer Off for Voice and
Video Calls)
⑯
Information Prompt Redisplay
⑰
S! Friend's Status Notification (Invitation)
⑱
Show Secret
⑨
1
Getting Started
①②③④⑤⑥⑦⑧⑨⑩ ⑪
S! Information Channel Updated
Reception of Rights Object
Indicates the reception of a content key
during operation.
Message Box Full
Message Delivery Failed
New Messages
Delivery Report
New S! Mail/SMS and Delivery Report
Password Lock Active (displays when timer
viewing or recording TV.)
PC Site Connected
S! Quick News Updated
Memory Card Inserted
Web SSL
Indicates a connection to a web page with
security protection.
/ Bluetooth® Connection Established/
Connection Standby
Bluetooth® Connection Established (SCMS-T
Device Supported)
Some Bluetooth® Connections Lost
Bluetooth® Connection(s) Lost
Infrared Communication
USB Connection
Card Reader Mode
Software Update
External Connection for Data Synchronization
TV Recording in Progress
/ S! Appli Activated/Paused
Playing Music File
Music File Playback Paused
Playing Video File
Streaming
TV Timer Set
1-5
08.3.23 1:57:07 PM
Display Indicators
1
External Display
Getting Started
① ② ③ ④ ⑤
⑥
①
②
③
Signal Strength
Strong
Moderate
Weak
Faint
Out of Range
Offline Mode On
Battery Level
Sufficiently Charged
Low Very Low
Charge Immediately
Charging
Message Box Full
Message Delivery Failed
New Messages
Delivery Report
New S! Mail/SMS and Delivery Report
Hold Active
Keypad Lock Active
Password Lock Active
IC Card Lock Active
Cannot Start Music Player
/ Bluetooth® Connection Established/
Connection Standby
Bluetooth® Connection Established (SCMS-T
Device Supported)
Some Bluetooth® Connections Lost
Bluetooth® Connection(s) Lost
Missed Call(s)
Manner Mode (Silent)
Manner Mode (Alarms)
Manner Mode (Drive)
/ / Manner Mode (Original 1 to 3)
⑤
Message(s) Recorded at Voice Mail Center
Answering Machine On (No Messages)
/ / / / Answering Machine On
(Message(s) Recorded)
/ / / / Answering Machine Off
(Message(s) Recorded)
⑥ Time
④
Toggle External Display view by pressing M,
T or R while the handset is closed.
• See page 2-7 for setting External Display view.
12:30
Icon & Clock Display
Clock Display
Icon Display
Track0
Music Player
1-6
921T_web_0802.indb 1-6
08.3.23 1:57:10 PM
Information Prompt
q Information Prompt appears
w Select an item➡[
Missed Calls: Missed call(s)
Missed Calls: New Voice Mail message(s) at Voice Mail Center
Ans Machine: New message(s) recorded
New Messages: Unread S! Mail/SMS
Unsent Messages: Unsent S! Mail/SMS
Partly Sent: Unsent S! Mail for some recipients
Delivered: Unread delivery report(s)
Missed CT: Missed S! Circle Talk call(s)
Notification: New S! Friend's Status notification(s)
Info Channel: Content update(s) available
Info Channel: S! Information Channel update failed
Weather Updated: Weather report update available
Update Failed: S! Quick News update failed
Stop Snooze: Cancel snooze
Timer Results: TV view/record timer results
Resume S! Appli: S! Appli paused
IC Card Request: Request from Reader/Writer
Software Update: Software updated
Content Key Memory Full: Content key cannot be saved any more
1
Getting Started
Information Prompt appears to inform you of missed calls, new messages and
other information.
Information Prompt Items
1-7
921T_web_0802.indb 1-7
08.3.23 1:57:13 PM
Charging the Battery
1
• Charging at low temperatures may be ineffective. Charge battery between
Getting Started
5°
C - 35°
C.
• Battery must be installed in handset before charging. Use only specified AC
Charger (sold separately), Desktop Cradle (sold separately) and In-Car
Charger (sold separately).
• Regularly clean the charger terminals, battery terminal and External Device
Port with a dry cotton swab to avoid contact failure.
• If Please check connection with your charger appears on Display,
clean charger terminals, battery terminal and External Device Port with a
dry cotton swab and try again.
When the message still does not disappear, stop charging immediately, and
take the battery to your nearest SoftBank Shop or contact SoftBank
General Information (page 14-41).
• Do not charge the battery in humid places.
• Charging is possible while your handset is turned on, but takes longer than
while your handset is turned off.
• When charging while your handset is turned on, appears on the display
and turns to when charging is complete.
• The handset and AC Charger may warm during charging. However, if it
overheats, stop using immediately. There may be some defect.
• If a call arrives during charging, ringtone sounds/handset vibrates and
External Light flashes.
Using AC Charger
Use only specified AC Charger (sold separately).
AC Outlet
921T
Connector
Release
Buttons
Plug
Charging
Indicator
AC Charger
External
Device Port
q Connect AC Charger connector to handset
• Inscription on connector should face down.
w Insert the plug into an AC outlet
Charging Indicator illuminates red while charging;
may take up to approximately 120 minutes.
e Unplug AC Charger, then disconnect handset
• Press and hold Release Buttons to remove AC Charger connector from
handset.
• AC Charger and Desktop Cradle support a power supply of 100 to
240 V AC.
• AC Charger is exclusively for use in Japan.
• Because AC Charger and Earphone-Microphone use the same External
Device Port, they cannot be used simultaneously.
1-8
921T_web_0802.indb 1-8
08.3.23 1:57:14 PM
Using Desktop Cradle
Using In-Car Charger
Charging Indicator
921T
1
Use only specified In-Car Charger (sold separately).
Plug
Plug
Release Buttons
AC Charger
921T
AC Outlet
Connector
Desktop Cradle
Connector
Release
Buttons
Cigarette Lighter Socket
Charging
Indicator
Getting Started
Use only specified AC Charger (sold separately) and Desktop Cradle (sold
separately).
In-Car Charger
External Device Port
Charging Indicator Window
q Attach AC Charger connector to Desktop Cradle
• Inscription on connector should face up.
w Insert the plug into an AC outlet
e Slide handset into Desktop Cradle until it clicks
Charging Indicator illuminates red while charging*;
may take up to approximately 120 minutes.
* Charging Indicator glows through Charging Indicator Window.
q Connect Charger connector to handset
• Inscription on connector should face down.
w Insert Charger into cigarette lighter socket
Charging Indicator illuminates red while charging;
may take up to approximately 120 minutes.
e Unplug In-Car Charger, then disconnect handset
• Press and hold Release Buttons to remove Charger connector from
handset.
r Remove handset from Desktop Cradle, then unplug AC Charger
• In Viewer position, Charging Indicator illuminates but is not visible
through Charging Indicator Window.
1-9
921T_web_0802.indb 1-9
08.3.23 1:57:15 PM
Charging the Battery
1
• Do not use In-Car Charger when the car engine is off. Doing so may
Getting Started
• Unplug In-Car Charger when leaving your car. If Charging Indicator
drain the car battery.
remains on after removing car key, In-Car Charger may drain car battery.
• Use of the handset while driving is prohibited by law. Before using the
handset, stop the vehicle in a safe area where parking is permitted.
• Because In-Car Charger and Earphone-Microphone use the same
External Device Port, they cannot be used simultaneously.
More Features
Charging In Progress Image (Slideshow)
(E page 13-7)
1-10
921T_web_0802.indb 1-10
08.3.23 1:57:15 PM
Power On/Off
Turning Handset Power On
q Press [/J/K
Turning Handset Power Off
q
1
Press and hold O
Power-off screen appears and handset
powers off.
Getting Started
q
Press and hold O
Retrieving Network Information
Before using network-related services (Yahoo!
Keitai, Messaging or S! Appli), retrieve network
connection information.
The first time you press [, J or K, a
prompt appears.
Standby
When Handset Powers On for the First Time
Following appears the first time handset is
powered on or after performing Reset All or
Reset Setting.
w Select YES➡[
Handset connects to the network and
Network Information is retrieved.
• If Network Information is not acquired, some
features will be limited.
• After you replace the USIM Card, make sure
• Set Date & Time (page 1-12).
you retrieve network information.
• To retrieve network information from Main
Menu:
Press a[➡Settings➡a[➡Connectivity
➡a[➡Retrieve NW Info➡a[➡YES
➡[
a
1-11
921T_web_0802.indb 1-11
08.3.23 1:57:15 PM
Date & Time
1
Getting Started
Setting Date and Time
Clock Format (12-hour/24-hour)
• The date and time are set for the Main City set
q From Clock Window, select 12hour/
in the World Clock settings.
q Press [➡Settings➡[➡Phone
24hour ➡[
Settings➡[➡Clock➡[
w Select 12 hour or 24 hour ➡[
Clock Window
w Select Date&Time ➡[
e Enter the year, month, day and time ➡[
• Enter the year, month, day, hour and
minute (two digits each). Enter time in the
24-hour system.
• Use F to move cursor and G to select
the numbers.
• The day of the week is set automatically.
1-12
921T_web_0802.indb 1-12
08.3.23 1:57:16 PM
About Mobile Manners
Manner Mode and Offline Mode
q
Press and hold # or T
• To cancel Manner Mode, press and hold
# or T while it is set.
• Shutter click and recording start/end tone
sound even in Manner Mode.
• S! Circle Talk connects automatically if My
Status is set to Auto Join. Other party's
voice will sound from speaker when
connected, if the handset is closed, even in
Manner Mode.
Using Offline Mode
1
Use Offline Mode to temporarily suspend all
handset transmissions. In Offline Mode, incoming/
outgoing calls and network services, such as
transmission of S! Mail/SMS are blocked.
q Press [➡ Settings ➡[➡ Call
Settings ➡[
Getting Started
Be careful about disturbing others in public or
quiet areas.
• Turn the handset off in theaters, museums and
other places where silence is the norm.
• Observe signs and instructions regarding
handset use aboard trains, etc.
• In airplanes, turn off your handset so that it
does not disturb flight safety.
• In such places as hospitals and research
institutes, where no use of mobile phones is
allowed, turn off your handset so that it does
not affect precision apparatuses.
• In such quite places as restaurants and hotel
lobbies, be careful so that your talking voice
does not bother others around you.
• Refrain from use that interrupts the flow of
pedestrian or vehicle traffic.
Using Manner Mode
w Select Offline Mode ➡[ (twice) ➡
ON ➡[
• To cancel Offline Mode, select OFF.
• The following are unavailable in Offline Mode.
・Emergency calls: 110 (police), 119 (fire and
ambulance) and 118 (coast guard)
・Bluetooth® and infrared communications
More Features
Manner Mode
(E page 13-11)
• Switch Manner Modes
• Customize Original Mode
1-13
921T_web_0802.indb 1-13
08.3.23 1:57:16 PM
Codes
1
About Codes
Getting Started
Your Handset Code, Center Access Code, Call
Barring Service Code and Internet Security Code
are required for some functions and settings.
• Write down those codes. If they are lost, contact
SoftBank General Information (page 14-41).
• Do not reveal your codes. SoftBank is not liable
for misuse or damages.
Handset Code
Handset Code is a four-digit number. It is required
to use various handset functions. Your Handset
Code can be changed (page 11-2).
• The default setting is "9999".
Call Barring Service Code
Call Barring Service Code is a four-digit number
assigned at initial subscription. It is required to set
Call Barring. The code can be changed (page
3-18).
If the code is incorrectly entered three times, Call
Barring settings lock. If this happens, Call Barring
Service Code and Center Access Code must be
changed. For details, contact SoftBank General
Information (page 14-41).
Internet Security Code
Internet Security Code is required to set Internet
security. The code can be changed (page 11-5).
Center Access Code
Center Access Code is a four-digit number
assigned at initial subscription. It is required to
perform Optional Service operations via landlines
or to subscribe to fee-based content on the
Internet.
1-14
921T_web_0802.indb 1-14
08.3.23 1:57:16 PM
2
921T_web_0802.indb 2-1
Basic Operations
Menu Operations ・・・・・・・・・・・・・・・・・・・・・・・・・・・・・・・・・・・・・・・・・・・・・・・・・・・・・・・・・・・・・・・・・・・・ 2-2
Accessing Handset Functions ・・・・・・・・・・・・・・・・・・・・・・・・・・・・・・・・・・・・・・・・・・・・・・・・・・・・・・・・・・ 2-2
Wallpaper/Active Window ・・・・・・・・・・・・・・・・・・・・・・・・・・・・・・・・・・・・・・・・・・・・・・・・・・・・・・・・・・・・ 2-6
Standby ・・・・・・・・・・・・・・・・・・・・・・・・・・・・・・・・・・・・・・・・・・・・・・・・・・・・・・・・・・・・・・・・・・・・・・・・・・・ 2-6
Text Entry ・・・・・・・・・・・・・・・・・・・・・・・・・・・・・・・・・・・・・・・・・・・・・・・・・・・・・・・・・・・・・・・・・・・・・・・・・・ 2-9
About Text Entry ・・・・・・・・・・・・・・・・・・・・・・・・・・・・・・・・・・・・・・・・・・・・・・・・・・・・・・・・・・・・・・・・・・・・ 2-9
Entering Characters ・・・・・・・・・・・・・・・・・・・・・・・・・・・・・・・・・・・・・・・・・・・・・・・・・・・・・・・・・・・・・・・・・・ 2-9
Editing Text ・・・・・・・・・・・・・・・・・・・・・・・・・・・・・・・・・・・・・・・・・・・・・・・・・・・・・・・・・・・・・・・・・・・・・・・ 2-12
Word List (Japanese) ・・・・・・・・・・・・・・・・・・・・・・・・・・・・・・・・・・・・・・・・・・・・・・・・・・・・・・・・・・・・・・・・ 2-14
Saving Frequently Used Words ・・・・・・・・・・・・・・・・・・・・・・・・・・・・・・・・・・・・・・・・・・・・・・・・・・・・・・・・ 2-14
Phone Book・・・・・・・・・・・・・・・・・・・・・・・・・・・・・・・・・・・・・・・・・・・・・・・・・・・・・・・・・・・・・・・・・・・・・・・・ 2-15
Creating New Entries・・・・・・・・・・・・・・・・・・・・・・・・・・・・・・・・・・・・・・・・・・・・・・・・・・・・・・・・・・・・・・・・ 2-16
Using Phone Book ・・・・・・・・・・・・・・・・・・・・・・・・・・・・・・・・・・・・・・・・・・・・・・・・・・・・・・・・・・・・・・・・・・ 2-18
Data Folder ・・・・・・・・・・・・・・・・・・・・・・・・・・・・・・・・・・・・・・・・・・・・・・・・・・・・・・・・・・・・・・・・・・・・・・・・ 2-20
Data Folder Structure ・・・・・・・・・・・・・・・・・・・・・・・・・・・・・・・・・・・・・・・・・・・・・・・・・・・・・・・・・・・・・・・・ 2-20
Opening Files ・・・・・・・・・・・・・・・・・・・・・・・・・・・・・・・・・・・・・・・・・・・・・・・・・・・・・・・・・・・・・・・・・・・・・・ 2-21
Managing Files and Folders ・・・・・・・・・・・・・・・・・・・・・・・・・・・・・・・・・・・・・・・・・・・・・・・・・・・・・・・・・・・ 2-21
Memory Card ・・・・・・・・・・・・・・・・・・・・・・・・・・・・・・・・・・・・・・・・・・・・・・・・・・・・・・・・・・・・・・・・・・・・・・ 2-23
Advanced Features ・・・・・・・・・・・・・・・・・・・・・・・・・・・・・・・・・・・・・・・・・・・・・・・・・・・・・・・・・・・・・・・・・ 2-25
08.3.23 1:57:17 PM
Menu Operations
Accessing Handset Functions
2
Press [ in Standby to open Main Menu.
Use E to select a menu icon and press [ to
access that menu.
Basic Operations
②
①
③
④
⑤
⑥
⑦
⑧
⑨
⑪
⑩
⑫
Main Menu
①Messaging
Create S! Mail/SMS messages. Also check
received and sent S! Mail/SMS messages
(Chapter 4).
②Yahoo! Keitai
From Yahoo! Keitai menu, access the Mobile
Internet to download pictures, melodies and
applications. Use PC Site Browser to access
websites for PCs (Chapter 5).
③Entertainment
Access latest news, launch BookSurfing® and
visit Ku-man's Room (Chapter 9).
④TV
Watch and record Digital TV broadcasts
(Chapter 6).
⑤Camera
Take pictures and record videos (Chapter 7).
⑥S! Appli
Access applications such as games (Chapter 8).
⑦Tools
Access useful functions such as Alarms and
Calculator (Chapters 9, 13, 14).
⑧Data Folder
Save/access files here (Chapter 2).
⑨Media Player
Play music and video files (Chapter 8).
⑩Communications
Access Communication Services provided by
SoftBank (S! Town, S! Loop, S! Friend's Status,
S! Circle Talk) (Chapter 10).
⑪Phone Book
Save and access Phone Book information
(Chapter 2).
⑫Settings
Modify and confirm handset settings, and
perform data communication and backup
(Chapters 12, 13).
Switching Main Menu View
Change Main Menu view from Icon View (default)
to Tab View.
In Tab View, sub menu items appear when a tab is
selected.
q Press [➡J (Switch)
Tab View
• Press J (Switch) in Tab View to return to
Icon View.
w
Use G to select an item
Sub menu list appears below the menu title.
Press C or [ and use G to select an
item.
2-2
921T_web_0802.indb 2-2
08.3.23 1:57:17 PM
Portrait
Customizing Main Menu
w Select an item➡K
Customize Main Menu design (icons, font color,
focus frame color, etc.).
q
2
Press [➡K➡Set Images➡[➡
Options➡[
Landscape
e Select Icons➡[➡Phone Memory or
Up
Memory Card ➡[➡Pictures➡[➡
Select an image➡[
• To change the icon order:
Press K➡ Change Order ➡[➡
Select an item➡[➡Select a position
Right
Left
Down
Basic Operations
Operations in Landscape View
Differences between cursor movement with Multi
Selector in Portrait View and in Landscape View
are shown below.
• This cursor movement does not apply to
Landscape View of Digital TV.
➡[
• Original - Default theme.
• Phone Memory - Select a theme from
handset Data Folder.
• Keitaideco - Sets the downloaded
Keitaideco as Main Menu.
• To change the font color:
Press K➡Font Color ➡[➡Select a
color➡[
• To change the wallpaper:
Press K➡Wallpaper ➡[➡Phone
Memory or Memory Card ➡[➡
Pictures or Digital Camera➡[➡
Select a wallpaper➡[
• To change the focus frame:
Press K➡Highlight ➡[➡Select a
color➡[
2-3
921T_web_0802.indb 2-3
08.3.23 1:57:18 PM
Menu Operations
2
Selecting Menu Items Using Keypad
Changing Multi Selector Shortcuts
Enter the menu item number on handset keypad
(0 to 9, *, #) for direct access to
that menu item.
By default, a shortcut is assigned to each Multi
Selector key. Switch the assigned shortcuts.
Basic Operations
q Press [➡Settings➡[➡Phone
Settings➡[
Setting Upper Side Key Function
Set a function to Upper Side Key. Choose from
SimpleNotice, Torch, My Status or Balance.
Press and hold P in Standby to access the set
function.
q From Phone Settings Window, select
Side Key➡[➡Select the function to
set➡[
Sub Menu View
Numbers correspond to the keypad.
Phone Settings Window
w Select Navigation Keys➡[
Sub Menu View appears at top of sub menus
(press K (Menu) for sub menu access). When
multiple sub menu items are available, the two
most recently selected items appear in Sub Menu
View.
q From Phone Settings Window, select
Sub Menu View➡[
w Select Show or Hide➡[
• This setting is disabled for S! Circle Talk,
e Press [➡Select the function you
S! Circle Talk Call Log and S! Friend's Status.
want to assign to A➡[➡Select the
function you want to assign to B➡
[➡Select the function you want to
assign to D➡[
• The remaining function is assigned
automatically to C.
2-4
921T_web_0802.indb 2-4
08.3.23 1:57:18 PM
Adding Functions to Shortcuts Menu
Add frequently used functions to Shortcuts Menu
for quick and easy access.
Menus
(E page 2-25)
Open a function➡S
Mini Tool Settings
(E page 13-3)
• Configure Mini Tool Settings
• Set Wide View
• Set an Animation for Mini Tool
2
Basic Operations
q
More Features
w Press J (Assign)
Using Shortcuts Menu
q Press S➡Select a function➡[
• Up to two functions can be called up from
Shortcuts Menu.
2-5
921T_web_0802.indb 2-5
08.3.23 1:57:19 PM
Wallpaper/Active Window
Standby
e Select Phone Memory or Memory Card
➡[➡Select a folder➡[➡Select an
2
Wallpaper
Basic Operations
q Press [➡Settings➡[➡Display
➡[
image➡[
r Use E to compose the image
• To adjust the width or height:
Press J (Resize)➡Fit to Width or Fit
to Length➡[
• To rotate the image:
Press J (Resize)➡Rotate Image➡[
Display Setting Window
w Select Idle Screen➡[➡Main Display
➡[➡Wallpaper ➡[➡Picture➡[
Animation
A series of images appear as an animation in
Standby. Set animation effect and image order.
q From Display Setting Window, select
Idle Screen➡[➡Main Display➡[
➡Wallpaper ➡[➡Animation➡[
t Press K (Cut)➡[
y Select OK➡[
• Flash® or Animation wallpaper is disabled
when Active Window is on. Select Notify
Only Once to prevent warning message
from appearing again.
• To set the default image:
In e, select Preset ➡a[ (twice)
• To set Keitaideco:
In e, select Keitaideco*➡a[ (twice)
* Keitaideco must be set in advance (page
2-30).
w Select Image➡[➡Images List➡
[➡Select a list➡[
• Save images to Images List first:
Press J (Edit)➡Select an entry➡[➡
Phone Memory or Memory Card ➡[
➡Pictures➡[➡Select an image➡[
(twice)➡J (Set)
e Select Design➡[➡Select an
animation effect➡[ (twice)
r Select Order➡[➡Select an image
order➡[
2-6
921T_web_02.indd 2-6
08.3.24 5:32:52 PM
t Press J (Set)➡OK➡[
• Flash® or Animation wallpaper is disabled
• To set images in a folder:
In w, select Select Folder➡a[➡Select a
folder➡a[
• To set preinstalled images:
In w, select Preset➡a[
q From Display Setting Window, select
Idle Screen➡[➡Main Display ➡[
➡Others➡[➡Select a clock type➡
[ (twice)
• When you select 1-line Digit, 2-line
Digit, World-Digital, or World-Analog,
do the following.
Use E to adjust the position➡[ (twice)
Enabling Active Window Operations
q Press A
You can perform Active Window operations
when the cursor is displayed.
2
Basic Operations
when Active Window is on. Select Notify
Only Once to prevent warning message
from appearing again.
Clock
External Display
Set Indicators off or on for External Display.
q From Display Setting Window, select
Idle Screen➡[➡Ext. Display➡[➡
Icon+Clock or Clock Only➡[
①
②
Shortcut Mode
Active Window (Japanese)
Save contact information to Members List and
make calls, send messages and initiate S! Circle
Talk from Active Window. In addition, check the
latest information from S! Quick News and
Weather Indicator.
③
Communication Mode
• Press J (Switch) to toggle between
Shortcut and Communication Modes.
2-7
921T_web_02.indd 2-7
08.3.24 5:32:53 PM
Wallpaper/Active Window
①S! Quick News
2
Contacting Members
Basic Operations
Displays newly received information and
images.
②Weather Indicator
③Members List
Your current status (My Status) is displayed on
the top. Set an icon or a photo for each
member.
Save members from S! Friend's Status Members
List to view their status. Make calls, send
messages or initiate S! Circle Talk in
Communication Mode.
q
Saving People to Members List
Add members to Members List from S! Friend's
Status Members List or Phone Book. View
member's status from Active Window.
• You must register contents of S! Quick News in
q From Active Window (Communication
Mode), select an empty item➡[ (Save)
• To change members:
Select an entry➡K➡ Change Member
➡[➡YES➡[
w Select Friend Status or Phone Book➡
From Active Window (Communication
Mode), use G to select a member
w Use F to select a contact method
➡[
To make a call
To create and send a message
To make an S! Circle Talk call
Checking S! Quick News Updates
advance (page 9-22).
q From Active Window (Shortcut Mode),
use G to select S! Quick News➡[
• Press J (Update) to update information.
Press K (Access) to access selected site.
Checking Weather Forecast
• For details on using the Weather Indicator, see
page 9-23.
q From Active Window (Shortcut Mode),
use G to select Weather Indicator
icons➡[
More Features
Active Window
(E page 2-25)
Active Window Settings (E page 13-8)
• Select S! Quick News Information to Display
• Set Ticker Speed
• Set Image Display
• Restore Settings and Registered Contents of
S! Quick News to Default
• If update fails, Information Prompt appears.
In List Window, press kK then select
Update to initiate update.
[➡Select an entry➡[
2-8
921T_web_0802.indb 2-8
08.3.23 1:57:20 PM
Text Entry
About Text Entry
Switching Text Input Modes
q In a text entry window, press H
• Unavailable text input modes are not
displayed.
• For text entry key assignments, see page 14-9.
Example: Entering 須々木
q In a text entry window, enter すずき
• Press 3 (three times)➡C➡
3 (three times)➡*➡2 (twice)
About Text Entry Window
②
The text input mode is switched.
①
③
w Select a text input mode➡[
2
Basic Operations
There are four kinds of input methods: Standard
mode, Beeper mode, T9 mode and Multi-tap
mode. Unless otherwise noted, text entry
operations are described using Standard mode.
For details on entering text in Beeper mode, see
page 14-10.
Entering Characters
④
①Number of characters entered/Maximum
number of characters allowed is displayed. The
maximum number of characters allowed varies
depending on the function.
②Indicates the current input mode.
③Selects the range of text.
By pressing [ when a text range is selected,
you can perform operations such as copying or
saving the selected text to the Word List.
④By pressing K, you can perform operations
such as editing text and arranging message
text.
Text Input Mode Icons
Kanji (hiragana)
Single-bye katakana
Double-byte alphanumerics (upper case)
Double-byte alphanumerics (lower case)
Single-byte alphanumerics (upper case)
Single-byte alphanumerics (lower case)
Double-byte numbers
Single-byte numbers
URL: Enter e-mail address and URL extensions
from the address library.
Pict: Enter pictographs.
(^−^): Enter emoticons.
My Pict: Enter pictographs in My Pictograms folder.
w Press B
• To exit the suggestion list and enter
characters after すずき , press L.
2-9
921T_web_0802.indb 2-9
08.3.23 1:57:21 PM
Text Entry
e Use E to select 須々木 ➡[
須々木 is determined.
2
• To finish text entry, press [ after
determining entered text.
Basic Operations
Lower Case (a, っ, etc.)
In all the input modes except Numeric, you can
change the case of a character selected by the cursor
(unconverted character) (compatible characters only).
Example: Changing あ to lower case
q In a text entry window, press 1
w Press #➡[
ぁ is determined.
Adding ゛or ゜
In Kanji (hiragana) input mode and Single-byte
katakana input mode, you can add "゛" (dakuten)
and " ゜" (handakuten) to a character selected by
the cursor (unconverted character) (compatible
characters only).
Example: Entering が
q
w Press *➡[
In a text entry window, press 2
が is determined.
• With characters like は to which both "゛"
Hiragana to Alphanumerics/Katakana
Conversion
Enter alphanumerics and katakana in Kanji
(hiragana) input mode.
Example: Entering TOM (single-byte) in Kanji
(hiragana) input mode
q
In a text entry window, press the key
to which the character is assigned
• Press 8 (once)➡6 (three times)➡
C➡6 (once)
やふは is entered.
w Press J (Kana)
Displaying Characters in Reverse Order
In all the input modes except Numeric, you can
display unconverted characters on the cursor in
the reverse order from the one on the Key
assignments chart by pressing H.
Example: Entering the characters assigned to 2
Press 2
Press H after pressing 2
か き く け こ
⇒
か こ け く き
Symbols
q In a text entry window, press #
The double-byte symbol list window appears.
A suggestion list of roman characters and
katakana appears.
• Press J (Kana)/K (Num.) to switch
between roman character/katakana
conversion and number conversion.
e Press B➡E to select TOM (singlebyte)➡[
TOM (single-byte) is determined.
w Select a symbol➡[
The selected symbol is entered and the
symbol list window disappears.
• To enter symbols continuously from the
symbol list window, press H after
selecting each symbol.
(dakuten) and "゜" (handakuten) can be
added, you can switch between "゛" and
"゜" by pressing *.
2-10
921T_web_0802.indb 2-10
08.3.23 1:57:22 PM
Alphanumerics
q In a text entry window, press # (twice)
w Select a number or letter➡[
• Repeat this step to enter another number
or letter.
q In a text entry window, press *
The pictograph list window appears.
• You may be unable to enter pictographs
depending on the function.
w Select a pictograph➡[
The selected pictograph is entered and the
pictograph list window disappears.
• To enter pictographs continuously from the
pictograph list window, press H after
selecting each pictograph.
Emoticons
q In a text entry window, press * (twice)
The emoticon list window appears.
• The number of times * is pressed
differs depending on the function.
2
Basic Operations
The double-byte alphanumeric list window
appears.
• The number of times # is pressed
differs depending on the function.
Pictographs
w Select an emoticon➡[
The selected emoticon is entered and the
emoticon list window disappears.
• To enter emoticons continuously from the
emoticon list window, press H after
selecting each emoticon.
2-11
921T_web_0802.indb 2-11
08.3.23 1:57:22 PM
Text Entry
E-mail Address and URL Extensions
2
Example: Entering .co.jp (part of an e-mail address)
q
Basic Operations
In a text entry window, press H➡
URL ➡[
The address library is displayed.
Editing Text
Correcting Entered Text
q In a text entry window, move cursor to
the left of the character to delete➡L
The character to the right of the cursor is
deleted.
• To delete all the characters to the right of
the cursor, press and hold L.
• When the cursor is at the end of text, press
and hold L to delete all the characters.
w Enter correct characters
w Select .co.jp ➡[
Copy/Cut/Paste
q In a text entry window, move cursor to
the first character of the text range to
copy/cut➡J (Range・paste)
w Select Start ➡[➡Move cursor to the
last character➡[
e Select Cut or Copy ➡[
The selected range of text is stored on the
clipboard.
r Position the cursor
Deleting Multiple Characters
q In a text entry window, move cursor to
the first character of the text range to
delete➡J (Range・paste)
w
t Press J (Range・paste)➡Paste➡[
Select Start ➡[➡Move cursor to the
last character➡[
e Select Delete ➡[
2-12
921T_web_0802.indb 2-12
08.3.23 1:57:23 PM
y Select the text to paste➡[
Undoing Last Operation
q
In a text entry window, press K➡
Undo➡[
unavailable.
Text Entry
Text Entry Functions
(E page 2-26)
(E page 2-27)
Text Entry Settings
(E page 13-34)
• Change the Input Method
• Do Not Predict Words from Previously Entered
Text Strings
• Do Not Predict Next Phrase from Previously
Entered Phrases
• Set the Custom Window
• Set the Text Deletion Method
• Reset the Prediction Dictionary/Conversion
Dictionary
2
Basic Operations
• Once text is reconverted or replaced, undo is
More Features
2-13
921T_web_0802.indb 2-13
08.3.23 1:57:23 PM
Word List (Japanese)
Saving Frequently Used Words
2
q In a text entry window, press K➡
Customize➡[➡Word List ➡[
Save Words During Text Entry
q During text entry, move cursor to the
Basic Operations
first character of target word➡J
(Range・paste)
Edit Saved Entries
q In a text entry window, press K➡
Customize➡[➡Word List ➡[➡
Edit Word➡[
w Select Start ➡[➡Move cursor to the
last character➡[
w Select To Word List ➡[➡Word ➡[
➡Enter a word➡[
e Select To Word List ➡[
r Select Reading ➡[➡Enter the
reading➡[
t Press K (OK)
e Select Reading ➡[➡Enter a reading
➡[
w Select a word➡J (Edit)➡Select the
word/reading➡[➡Edit the word/
reading➡[
e Press K (OK)
r Press K (OK)
More Features
Word List Functions
(E page 2-28)
2-14
921T_web_0802.indb 2-14
08.3.23 1:57:23 PM
Phone Book
Save phone numbers, e-mail address and other contact information to Phone Book.
Phone Book Entry Items
Name and Reading
Entry Number
Phone Number
E-mail Address
Picture
Group
Note
Some Features
Speed Dial
Make calls to people in
Phone Book quickly.
Options
Personal Info
S! Addressbook Back-up
External Light
Ringtone Volume
Ringtone
Vibration
Ring Time
Message Folder
Secret
External Display
Address
Job Title
Company
Birthday
URL
Location Information
Back up Phone Book to
server. Sync updates to
back up new information.
Messaging
Specify addresses from
Phone Book quickly when
writing messages.
Basic Operations
Basic Information
2
Access Phone Book information while making calls,
writing messages, creating S! Circle Talk groups.
Reject Calls
Reject calls from numbers
not saved in Phone Book.
• Back Up Important Information
When the battery is exhausted or removed for long periods, Phone Book entries may
be lost. Handset damage may also affect handset information recovery. SoftBank is
not liable for damages from lost or altered data.
2-15
921T_web_0802.indb 2-15
08.3.23 1:57:24 PM
Phone Book
r Select Email ➡[➡Enter an e-mail
Creating New Entries
2
address➡[➡Select a category➡[
Example: Saving a name, phone number and
e-mail address, and specifying a group.
Basic Operations
q Press [➡Phone Book ➡[➡New
Entry➡[
e Select Phone Number ➡[➡Enter a
phone number➡[➡Select a category
➡[
• To enter a hyphen "-" or a pause "P"
(page 3-14), press K and then select
Manual Hyphen or Pause (P).
t Select No Group ➡[➡Select a group
➡[
Phone Book Entry Window
w Select Name ➡[➡Last Name or First
Name ➡[➡Enter a last name/first
name➡[➡J (OK)
• Characters entered for name (reading for
kanji) appear.
• To correct the reading, select a reading
field (last name or first name) and edit the
information.
• When you save to USIM Phone Book,
enter both the first name and last name in
the Name field.
y Press J (OK)
2-16
921T_web_0802.indb 2-16
08.3.23 1:57:24 PM
Setting a Picture
q From Phone Book Entry Window, select
Picture➡[
Setting Personal Ringtones
q From Phone Book Entry Window, select
Options ➡[
Secret Entries
Set specific Phone Book entries as Secret so other
people cannot see them.
➡[
Ringtone ➡[
• To capture an image:
Select Take Picture➡[➡Take a
picture➡[
For details on taking pictures, see page
7-3.
e Select Pictures or Digital Camera➡[
➡Select a picture➡[ (twice)
• If the selected picture does not fit in the
prescribed frame, adjust the picture size
(page 7-9).
w Select Secret ➡[➡ON➡[
2
Basic Operations
w Select Phone Memory or Memory Card w Select a type of incoming event➡[➡ q
From Phone Book Entry Window, select
Options ➡[
e Select Phone Memory or Memory Card
➡[
• To set a ringtone preinstalled in the
handset:
Select Patterns or Melodies➡[➡
Select a ringtone pattern➡[
• If you select Same as Phone, the
ringtone will be the same as the
corresponding setting of Sounds.
• indicates a Secret entry.
• To view Secret entries, switch Secret Mode
(page 11-4) to Show.
r Select a folder➡[➡Select a ringtone
pattern➡[ (twice)
• If Details of a picture file (page 2-30)
indicate that the file is Unavailable for
forwarding, the picture file cannot be set as
Picture.
2-17
921T_web_0802.indb 2-17
08.3.23 1:57:25 PM
Phone Book
Saving Numbers from Call Log
2
q
Press D/C
Using Phone Book
Calling from Phone Book
Basic Operations
q Press B
• In Standby, press and hold a number key
(¢1 to ª9) to access the corresponding
index tab. Alternatively, enter the first
character(s) of the name in the search
window.
• To switch between Dialed and Received,
press D/C.
w
Select a phone number➡K➡To
Phone Book ➡[➡Add New ➡[
• To add the phone number to an existing
Phone Book entry, select Add and select
the entry.
• Press D or C to access the previous or
next index tab.
w Select an entry➡[
• Press D or C to scroll entries within
the same index tab.
e Select a phone number➡N
2-18
921T_web_0802.indb 2-18
08.3.23 1:57:25 PM
Changing Search Mode
q Press B➡K➡Search Mode➡[
* 2タッチ検索 (By 2-Touch), if 言語選択 (Language)
is set to 日本語 (Japanese). In By 2-Touch
search, select the first character of a
reading (Press any of 0 to 9, *,
and #➡Press any of 1 to 5).
w Select a search mode➡[
• Select from the following search modes.
Tab/Reading (default):
Enter reading (or partial reading) to
search entries or select tab to scroll
through entries.
List View:
Select tab then scroll through entries.
By 1-Touch*:
Search entries by the first letter of
names. Press corresponding number
key (1 to 9).
By Reading:
Enter reading (or partial reading) to
search entries.
By Memory No.:
Search by entry number (Memory
Number). Enter target entry number.
By Phone No.:
Search by entering a phone number.
Group Filter:
Search entries by Group.
Phone Book Entry Functions
(E page 2-28)
Customizing by Entry
(E page 2-28)
Managing Phone Book (E page 2-29)
Basic Operations
More Features
2
Phone Book Settings
(E page 13-35)
• Change the Default Storage Location
• Prohibit Use of Phone Book
Settings for Phone Book Groups
(E page 13-35)
• Edit a Group Name/Group Icon
2-19
921T_web_0802.indb 2-19
08.3.23 1:57:26 PM
Data Folder
Data Folder Structure
2
Use Data Folder to save and manage files on handset. Files are saved to folders by file format.
Folders
Basic Operations
Pictures
Digital Camera*1
Ring Song・Tone
Picture files including those
taken with the camera/My
Pictograms folder
Pictures taken in Digital
mode
Sound files such as
melodies, sounds recorded
with Voice Recorder
Videos
TV
Lifestyle-Appli*2
Books
Lifestyle-Appli for using
Osaifu-Keitai®
Electronic comic books,
photo albums, etc.
Gamendeco
Keitaideco
Video files including
those recorded with the
camera
Flash(R)
Flash® image files/
Flash(R) Tones folder
Recorded TV program
files
Main Menu*2
Image files for Main
Menu
Other Documents
Files other than those listed
above, such as vObjects,
document files, etc.
Icon/image files for
screen decoration
S! Appli
Downloaded S! Appli
Keitaideco files
Music
Downloaded music files,
Chaku-Uta Full®
Templates
Mail templates
Mini Tool*2
Mini Tool image
files/Mini Photo folder
• Files saved to the handset may be altered or lost by improper use, accidents, or
•
mechanical failure. We recommend that you make backups of your important files.
indicates files requiring content usage rights. Press kK and select Buy Key
to obtain a content key.
*1 Shown only in the memory card Data Folder.
*2 Shown only in the handset Data Folder.
2-20
921T_web_0802.indb 2-20
08.3.23 1:57:26 PM
Opening Files
q Press [➡Data Folder ➡[
w Select a folder➡[
e Select a file➡[
Using Download Links
Some folders contain a link to Yahoo! Keitai. Use
links to access Yahoo! Keitai and download
content.
q Open Data Folder➡Pictures➡[
w Select a file➡K➡Change View➡[
e Select Slideshow➡[
• To end slideshow, press L or O.
Managing Files and Folders
Creating a Folder
2
Folders can be created in the Pictures, Ring
Song・Tone, Music, Videos, TV, Books,
Flash(R), Main Menu, Gamendeco, Mini
Tool and Other Documents folders.
q Open Data Folder➡Select a folder
➡[
w Press K➡Create Folder ➡[
Basic Operations
Data Folder Window
Slideshow
e Enter a folder name➡[
• Folders cannot be created within the TV
folder on a memory card.
2-21
921T_web_0802.indb 2-21
08.3.23 1:57:26 PM
Data Folder
Moving Files
2
q
Open Data Folder➡Select a folder
➡[
Basic Operations
w Select a file➡K➡Move➡[
e Select One➡[
• To move multiple files:
Setting Folder Security
Set Security Lock ON to require Handset Code
entry when accessing files in the folder.
q Open Data Folder➡Select a folder you
created➡K➡Security Lock➡[
w
More Features
Checking Files
Using Files
Managing Files/Folders
(E page 2-30)
(E page 2-30)
(E page 2-31)
Enter your Handset Code➡ON➡[
Select Select Multi ➡[➡Select files➡
[➡J (Move)
• To move all files:
Select All➡[➡Enter your Handset
Code
r Select Phone Memory or Memory Card
➡[
t
Select the destination folder➡[
• To move files to a new folder:
Press J (Create)➡Enter a folder name
➡[
• When you move a still picture file taken in
Digital mode to the memory card, or a music
file in MPEG-4 format (.3GP, .MP4 and
.M4A) to another folder, select the fixed
folder first and then select the destination
folder.
2-22
921T_web_0802.indb 2-22
08.3.23 1:57:27 PM
Memory Card
Memory Card Structure and File Storage Locations
Folder Name
DCIM
PRIVATE
MYFOLDER
Mail
My Items
TS_Folder
Utility
Calendar
Contacts
Memo
Rights
Tasks
SD_VIDEO*
File Type
2
Pictures taken in Digital mode
Message backup files
Folders in Data Folder (Pictures, My Pictograms,
Videos, Ring Song・Tone, Music, Templates,
Flash(R), Flash(R) Tones, Books, S! Appli, Other
Documents), bookmark backup files
Basic Operations
Save files to a memory card.
• This manual refers to a microSD memory card
as "memory card".
• Handset may not read/write files when battery
level is low.
• Never remove memory card or battery while
accessing/formatting files. Doing so may
damage memory card resulting in lost files.
• Files on memory cards may be altered or lost
from improper use, accidents or mechanical
failure. Back up important files.
• Do not put labels or stickers on memory cards.
• For details on saving files to a memory card, see
the corresponding explanation for each
function.
• Your handset supports memory cards with a
storage capacity of up to 2 GB (as of January
2008). There is no guarantee that all memory
cards will work with your handset.
• Do not use excessive force to open the memory
card slot cover. Doing so may damage the cover.
Handset settings (backed up by Relocate function),
Gamendeco/Keitaideco files, Media Player files,
Ku-man's Room files
Event backup files
Phone Book data and backup files
Notepad backup files
Content key backup files
Tasks backup files
Recorded TV program files
* Do not alter data on your PC. Files may become unreadable on your handset.
2-23
921T_web_0802.indb 2-23
08.3.23 1:57:27 PM
Memory Card
Inserting Memory Card
2
Formatting a Memory Card
Insert a memory card after turning off the handset.
Otherwise, files on the memory card may be lost.
Basic Operations
①
②
③
q Open the memory card slot cover (①)
w Insert memory card until it locks into
Formatting memory card deletes all data on the
memory card.
• If a memory card is formatted on another
device, it may not work properly with your
handset.
Opening Memory Card Data
q Press [➡Data Folder ➡[➡C
q Press [➡Settings➡[➡Memory
➡[
w Select a folder➡[
position (gold terminal should face
down) (②)
e Close the memory card slot cover (③)
Removing Memory Card
Turn handset off and open the memory card slot.
Gently push to eject card. Slide card out gently.
• The memory card may pop out abruptly
when removing it from your handset. Be
cautious when ejecting the memory card.
w Select Format Card ➡[➡Enter your
Handset Code➡YES➡[
e Select a file➡[
More Features
Checking Files
(E page 2-30)
2-24
921T_web_0802.indb 2-24
08.3.23 1:57:28 PM
Advanced Features
Display
Menus
Customize Shortcuts Menu Icons
■Deleting All Entries
S➡Select a function➡K
Delete All➡[➡Enter your Handset Code➡
YES➡[
• You cannot delete preset Shortcut functions.
■Setting an Icon Preinstalled in the
Reset Main Menu (Icons/Wallpaper)
Handset
Change Icon ➡[➡Preset Icons ➡[➡
Select an icon➡[
Main Menu K➡Reset Options ➡[➡YES
■Setting an Image Saved in Data Folder/
➡[
Memory Card
Change Icon ➡[➡Phone Memory or
Memory Card ➡[➡Pictures➡[➡Select
an image➡[➡E to compose the image➡
Reset Multi Selector Assignment
Phone Settings Window Navigation Keys ➡[➡
K➡Reset➡[➡YES➡[
Rename Shortcut Titles
S➡Select a function➡K➡Edit Title➡
[➡Enter a title➡[
• You cannot edit the titles of preset Shortcut
functions.
K➡[
• You cannot change the icons of preset Shortcut
functions.
Active Window
From ➡ Shortcut Mode page 2-7
Communication Mode page 2-7
Set Active Window to Manual Open
[➡Settings➡[➡Display ➡[➡Idle
Screen➡[➡Main Display ➡[➡Active
Window➡[➡ ON (Manual) ➡[
• Press A in Standby to open Active Window.
■Moving Icons
View Members in Shortcut Mode
Arrange Icons ➡[➡Select a destination➡
Shortcut Mode K➡Settings➡[➡Templates
➡[➡Member/News or Member ➡[
[
2
Basic Operations
From ➡ Main Menu page 2-2
Phone Settings Window page 2-4
Delete Shortcut Icons
S➡Select a function➡K
■Deleting One Entry
Delete➡[➡YES➡[
2-25
921T_web_0802.indb 2-25
08.3.23 1:57:28 PM
Advanced Features
Edit Members List
2
Communication Mode K➡Edit List ➡[➡
Select a member➡[➡YES➡[➡Friend
Status or Phone Book ➡[➡Select an entry
Basic Operations
➡[
• To add a new member, select Edit List, then
Not Registered, and press [.
Change Members List Icons
Communication Mode Select a member➡K➡
Change Icon➡[➡Phone Book or Icon➡
[➡Select an icon➡[
Toggle My Status Display On/Off
Communication Mode K➡Edit List ➡[➡My
Status ON or My Status OFF➡[ (ON/OFF)
Check Member Status
Communication Mode G to select a member➡
K➡View➡[
Text Entry
Insert a Line Break
In a text entry window, enter text and convert➡
B to insert a line break
• When the input method is Standard or Beeper,
you can also enter a line break by pressing and
holding #.
• To insert a line break to the left of the text that
has been determined, access line break from
the symbol list window (page 2-10).
• Line break is unavailable in some text entry
windows.
Insert a Space
In a text entry window, C
• To insert a space to the left of the text that has
been determined, select a space from the
symbol list window (page 2-10).
Use Single Kanji Conversion
Example: Entering 鱸 (すずき)
In a text entry window, enter すずき ➡S (twice)
➡Select 鱸 from the suggestion list➡[
• When 単漢候補 (Single Kanji Conversion List) is
not displayed in a text entry window, the
entered characters cannot be converted with
Single Kanji conversion.
Convert a Name One Character at a Time
Example: Entering 亜香梨 (あかり)
In a text entry window, enter あかり ➡A➡E to
select 名前変換 (Name Conversion)➡[➡Select 亜 ➡
[➡Select 香 ➡[➡Select 梨 ➡[ (twice)
Conversion Prediction/Phrase Prediction
The handset is equipped with MobileRUPOTM,
Toshiba's kana-kanji conversion engine.
* MobileRUPOTM is a
trademark of Toshiba
Corporation.
■Using Conversion Prediction
Example: Entering お父さん
In a text entry window, 1 (five times)➡4
(five times)➡B➡E to select お父さん ➡[
2-26
921T_web_0802.indb 2-26
08.3.23 1:57:29 PM
Save Original Emoticons
In a text entry window, H➡(^−^)➡[➡
User Created ➡[➡Select an empty item➡
J➡Create an emoticon➡[ (twice)
Text Entry Functions
Font Size
In a text entry window, K➡Customize➡[
➡Font Size➡[➡Select a font size➡[
Save Text to Notepad
Reconvert Determined Text
Scroll to beginning of text range➡J➡Start➡
[➡Move cursor to end of text➡[➡To
Notepad ➡[➡Select an entry➡[
• Used entries will be overwritten.
Scroll to beginning of text range➡J➡Start
➡[➡Move cursor to end of text➡[➡
Convert ➡[
Save Numbers/E-mail Addresses to Phone
Book
Scroll to beginning of text range➡J➡Start
➡[➡Move cursor to end of text➡[➡To
Phone Book ➡[➡Add New or Add ➡[
• See "Creating New Entries" (page 2-16) for
entering other items.
• If selected item contains characters or symbols
not savable to Phone Book, the entry is not
saved.
■Converting Hiragana to Kanji
Kana/Kanji ➡[➡Select a word from the
suggestion list➡[
■Converting All into Full/Half Width
Full Width or Half Width➡[
2
Basic Operations
■Using Phase Prediction
Example: Entering the same phrase 渋谷でライブ that
you have entered before
In a text entry window, enter し ➡B➡E to
select 渋谷 ➡[➡B➡E to select で ➡[➡
B➡E to select ライブ ➡[
■Converting All Roman Characters into
Upper/Lower Case
Upper Case or Lower Case➡[
Replace Text with Clipboard Entry
Scroll to beginning of text range➡J➡Start
➡[➡Move cursor to end of text➡[➡
Replace➡[➡Select text from clipboard➡[
Insert Phone Book Information
In a text entry window, K➡Insert➡[
■Inserting Phone Book Information
Phone Book➡[➡Select a Phone Book entry
➡[➡Select an item➡[
■Inserting Other Information
My Details, Phrases, Emoticon, Signature,
Notepad, Message Box or URL History ➡[
2-27
921T_web_02.indd 2-27
08.3.24 5:33:27 PM
Advanced Features
2
Word List Functions
■Note
Check Number of Entries
Delete All Entries
Phone Book Entry Window Note➡[➡Enter a
reminder➡[
[➡Phone Book ➡[➡Memory Status➡
[
• Press K (Count) /K (Rate) to switch
Basic Operations
In a text entry window, K➡ Customize➡[
➡Word List ➡[➡Delete All ➡[➡Enter
your Handset Code➡YES➡[
Phone Book
Phone Book Entry Functions
From ➡ Phone Book Entry Window page 2-16
■Memory Number (Entry Number)
Phone Book Entry Window Select the current entry
number➡[➡Enter a new entry number➡[
Set Location Information
Phone Book Entry Window Personal Info.➡[➡
No Location ➡[
■Setting Your Current Position
between the number of entries and the usage
rate.
• When Secret Mode is set to Hide, the number
of entries other than Secret entries is
displayed.
Customizing by Entry
Save Other Information
Position ➡[➡Perform positioning➡[➡
Ringtone Volume
■Address/Job Title/Company
J
Phone Book Entry Window Options➡[➡Voice
Call, Video Call, Message, Circle Talk or
Notification ➡[➡Ringtone Vol.➡[➡
Options or Same as Phone ➡[➡Adjust the
volume➡[
• In Clamshell Open or Viewer position, the
actual ringtone volume is fixed at level 3 even
if it is set higher than level 3; and the
maximum volume is level 3 if the ringtone
volume is set to Ascending Volume or
Descending Volume.
Phone Book Entry Window Personal Info.➡[➡
Select an item➡[➡Enter an item➡[➡J
■Birthday
Phone Book Entry Window Personal Info.➡[➡
Birthday ➡[➡Enter a birthday➡[➡J
• Enter four digits for the year and if the month
or date is a single digit, prefix it with a 0.
■URL
Phone Book Entry Window Personal Info.➡[➡
URL➡[➡Enter a URL➡[➡Select a type
■Setting from Location Logs/My Locations
Location Logs or My Locations➡[➡
Select location information➡[➡J
■Setting from Picture File
My Pictures➡[➡Select a file➡[➡J
➡[➡J
2-28
921T_web_0802.indb 2-28
08.3.23 1:57:30 PM
External Light/Vibration
Phone Book Entry Window Options➡[➡Voice
Call, Video Call, Message, Circle Talk or
Notification➡[
ExternalLight ➡[➡Select a color, OFF or
Same as Phone ➡[
■Vibration
Vibration➡[➡Select a pattern, OFF or
Same as Phone➡[
Phone Book Entry Window Options➡[➡Ext.
Display ➡[➡ON, OFF or Same as Phone
Copy/Move Entries
Customize Incoming Event Alerts by Group
[➡Phone Book ➡[➡Group ➡[➡
Select a group➡[➡ Options ➡[
• See "Setting Personal Ringtones" (page 2-17)
for operations.
Managing Phone Book
Phone Book Entry Window Options➡[➡
Message or Notification➡[➡Duration➡
[➡Set Duration, 1 Cycle or Same as
Phone➡[➡Enter a ring time➡[
Switch Phone Book (USIM/Handset/
Memory Card)
Phone Book Entry Window Options➡[➡
Message➡[➡MessageFolder➡[➡
Select a folder or None➡[
B➡Select a Phone Book entry➡[➡Select
an item➡[➡Edit the item➡[➡J➡
Save or Save as New ➡[
➡[
Ring Time for New Message/Notification
Ringtone
Filter Messages
Edit Entries
B➡K➡ Change View ➡[➡Select a
storage location➡[
• The handset Phone Book
, USIM Phone Book
, and memory card Phone Book are
displayed.
Sort Entries
■Copying/Moving One Entry
B➡Select a Phone Book entry➡K➡ Copy
or Move ➡[➡ One ➡[➡Phone
Memory, USIM or Memory Card ➡[
2
Basic Operations
■External Light
Display Caller/Sender Name (External
Display)
■Copying/Moving Multiple Entries
B➡K➡ Copy or Move ➡[➡Select
Multi ➡[➡Select Phone Book entries➡[
➡J (Copy)/J (Move)➡Phone Memory,
USIM or Memory Card ➡[
■Copying/Moving All Entries
B➡K➡ Copy or Move ➡[➡All➡[
➡Phone Memory, USIM or Memory Card
➡[
• The items you can save to Phone Book differ
depending on the handset, USIM or memory
card Phone Book.
B➡K➡Sort by ➡[➡Alphabet or
Birthday ➡[
• Available when Search Mode (page 2-19) is
set to List View, By 1-Touch or 2タッチ検索 (By
2-Touch).
2-29
921T_web_02.indd 2-29
08.3.26 3:59:43 PM
Advanced Features
2
Basic Operations
Delete Entries
File Properties
Melody/Music/Video and Flash® Files
■Deleting One Entry
Data Folder Window Select a folder➡[➡Select a
file➡K➡Details➡[
Using Files
Access Data Folder from each function*➡Ring
Song・Tone, Music, Videos, Flash(R) or
Flash(R) Tones ➡[➡Select a file➡[ (twice)
* See the following: Main Menu image settings
(page 2-3), sound settings (page 13-11),
Wallpaper settings (page 2-6), Event/Task/
Reminder alarm tone settings (page 9-28),
alarm tone settings (page 9-33), setting a
different ringtone for each Phone Book entry
(page 2-17).
Picture Files
Customize User Interface (Keitaideco)
Access Data Folder from each function*➡
Pictures➡[➡Select a file➡[➡E to
compose the image➡K➡[
* See the following: Wallpaper settings (page
2-6), incoming call/message image settings
(page 13-2), video call settings (page 13-23),
Phone Book picture settings (page 2-17).
• For adjusting the picture size, see page 7-9.
• If a GIF animation is selected, only the first
image (still image) is displayed.
Data Folder Window Keitaideco➡[➡Select a
file➡[➡YES➡[
• Wide View is switched to ON in Standby.
B➡Select a Phone Book entry➡K➡Delete
➡[➡One➡[➡YES➡[
■Deleting Multiple Entries
B➡K➡Delete➡[➡Select Multi ➡[
➡Select Phone Book entries➡[➡J➡YES
➡[
■Deleting All Entries
B➡K➡Delete➡[➡All ➡[➡Enter
your Handset Code➡YES➡[
Data Management
From ➡ Data Folder Window page 2-21
Checking Files
Change Data Folder View
Data Folder Window Pictures, My Pictograms,
Digital Camera, Videos, TV, Books, Main
Menu, Mini Tool or Mini Photo ➡[➡K
➡ Change View ➡[➡View Type ➡[➡
Select the view type➡[
Check Available Memory (Data Folder/
Memory Card)
Data Folder Window Memory Status ➡[
• Press J to toggle between the handset and
memory card status.
2-30
921T_web_02.indd 2-30
08.3.26 3:59:44 PM
■Creating a vObject
• By converting data such as Phone Book entries,
Calendar events and Task data into vObject file
format, you can exchange those data with
other vObject compatible SoftBank handsets
and PCs.
• vObject compatible software is required to use
vObjects on a PC or other device.
• When a vObject includes many characters,
some of the data may not be able to be sent or
received.
• Depending on the software used, vObjects may
not be displayed properly.
Display Phone Book (page 2-15)/Calendar (page
9-4)/Tasks (page 9-5)/Message (page 4-2)/
Bookmark (page 5-6)/Notepad (page 9-8)➡
Select a file to be saved as vObject➡K➡
Export➡[➡One➡[➡Phone Memory,
Data Folder or Memory Card ➡[➡Select
a folder➡[
• To save multiple files, do the following.
While selecting files to be saved, K➡
Export➡[➡Select Multi ➡[➡Select
files➡[➡J (Save)/J (Export)
• To save all files, do the following.
While selecting files to be saved, K➡
Export ➡[➡All ➡[
■Importing a vObject into a Function
Data Folder Window Other Documents ➡[➡
Select a vObject➡K➡To Phone Book, To
Cal./Tasks, To Message, To Bookmarks or
To Notepad ➡[➡ One ➡[
• To import multiple vObjects, do the following.
Select Multi ➡[➡Select vObjects➡[➡
J
Managing Files/Folders
Change Folder and File Names
2
■Changing Folder Name
Data Folder Window Select the folder you created➡
K➡Rename Folder ➡[➡Enter a folder
name➡[
• If Security Lock is set to the folder, Handset
Code entry is required after selecting Rename
Folder.
Basic Operations
vObjects
■Changing File Name
Data Folder Window Select a file➡K➡Rename
➡[➡Enter a file name➡[
• If you change the file name for a music or
movie file, the title will not be changed.
Change File Order
Data Folder Window Select a folder➡[➡Select a
file➡K➡ Change View ➡[➡Sort by ➡
[➡Select the sort criteria➡[
• Files in the memory card cannot be sorted by
titles.
2-31
921T_web_0802.indb 2-31
08.3.23 1:57:32 PM
Advanced Features
2
Basic Operations
Move a Folder
■Copying Multiple Files
Delete Folders and Files
Data Folder Window Select the folder you created➡
K➡Move Folder ➡[➡Enter your
Handset Code
• When moving a folder created in Ring Song・
Tone or Music, do the following.
Phone Memory or Memory Card ➡[➡
Ring Song・Tone or Music➡[
Data Folder Window Select a folder➡[➡K➡
Copy ➡[➡Select Multi ➡[➡Select files
➡[➡J➡Phone Memory or Memory
Card➡[➡Select the destination folder➡[
■Deleting a Folder
K➡Delete Folder ➡[➡Enter your
Handset Code➡YES➡[
■Copying All Files
■Deleting One File
Data Folder Window Select a folder➡[➡K➡
Copy ➡[➡All➡[➡Enter your Handset
Code➡Phone Memory or Memory Card ➡
[➡Select the destination folder➡[
• To copy files to a new folder, do the following.
While selecting the destination folder, J➡
Enter a folder name➡[
• If Details indicate that the file is Unavailable
for forwarding, the file cannot be copied.
However, some files in My Pictograms folder
may be able to be copied even if Details
indicate that they are Unavailable for
forwarding.
• When you copy a still picture file taken in
Digital mode to the memory card, or a file in
MPEG-4 format (.3GP and .MP4) to another
folder, select the fixed folder first and then
select the destination folder.
Data Folder Window Select a folder➡[➡Select a
file➡K➡Delete ➡[➡One ➡[➡YES
Copy Folders and Files
■Copying a Folder
Data Folder Window Select the folder you created➡
K➡ Copy Folder ➡[➡Enter your
Handset Code➡Phone Memory or Memory
Card ➡[
• When copying a folder created in Ring Song・
Tone or Music, select the destination folder
from Ring Song・Tone or Music.
■Copying One File
Data Folder Window Select a folder➡[➡Select a
file➡K➡ Copy ➡[➡ One ➡[➡Phone
Memory or Memory Card ➡[➡Select the
destination folder➡[
Data Folder Window Select the folder you created➡
➡[
■Deleting Multiple Files
Data Folder Window Select a folder➡[➡K➡
Delete➡[➡Select Multi ➡[➡Select files
➡[➡J➡YES➡[
■Deleting All Files
Data Folder Window Select a folder➡[➡K➡
Delete➡[➡All➡[➡Enter your Handset
Code➡YES➡[
2-32
921T_web_0802.indb 2-32
08.3.23 1:57:32 PM
3
Call
Making Calls ・・・・・・・・・・・・・・・・・・・・・・・・・・・・・・・・・・・・・・・・・・・・・・・・・・・・・・・・・・・・・・・・・・・・・・・・ 3-2
Voice Call・・・・・・・・・・・・・・・・・・・・・・・・・・・・・・・・・・・・・・・・・・・・・・・・・・・・・・・・・・・・・・・・・・・・・・・・・・・ 3-4
Answering Machine ・・・・・・・・・・・・・・・・・・・・・・・・・・・・・・・・・・・・・・・・・・・・・・・・・・・・・・・・・・・・・・・・・・ 3-5
Video Call ・・・・・・・・・・・・・・・・・・・・・・・・・・・・・・・・・・・・・・・・・・・・・・・・・・・・・・・・・・・・・・・・・・・・・・・・・・ 3-7
Call Log ・・・・・・・・・・・・・・・・・・・・・・・・・・・・・・・・・・・・・・・・・・・・・・・・・・・・・・・・・・・・・・・・・・・・・・・・・・・・ 3-9
Viewing Dialed Numbers and Received Calls ・・・・・・・・・・・・・・・・・・・・・・・・・・・・・・・・・・・・・・・・・・・・・・ 3-9
Optional Services ・・・・・・・・・・・・・・・・・・・・・・・・・・・・・・・・・・・・・・・・・・・・・・・・・・・・・・・・・・・・・・・・・・ 3-10
Overview ・・・・・・・・・・・・・・・・・・・・・・・・・・・・・・・・・・・・・・・・・・・・・・・・・・・・・・・・・・・・・・・・・・・・・・・・・ 3-10
Advanced Features ・・・・・・・・・・・・・・・・・・・・・・・・・・・・・・・・・・・・・・・・・・・・・・・・・・・・・・・・・・・・・・・・・ 3-12
921T_web_0802.indb 3-1
08.3.23 1:57:33 PM
Making Calls
Voice Call
Video Call
Make Calls to:
Make Video Calls to:
3
Call
SoftBank
Handsets
Non-SoftBank
Mobile Phones
Landlines
Optional Services such as Call Forward
and Voice Mail are available.
International Calling Abroad
Make and receive voice and video calls
Call
(a separate application is required).
SoftBank
Handsets
Non-SoftBank
Mobile Phones
Only with video call compatible
mobile phones
International Using Your Handset Abroad
Handset is not Global Roaming service eligible.
Roaming
3-2
921T_web_0802.indb 3-2
08.3.23 1:57:33 PM
Checking Your Phone Number
q
Press [➡Phone Book➡[➡
My Details➡[
Press kK during a call➡My Details➡a[
About Emergency Calls
Emergency calls (110 (police), 119 (fire and
ambulance) and 118 (coast guard)) are available,
even when Password Lock and/or Call Barring is
active.
• If a video call is made to an emergency
service, the call becomes a voice call.
Caller's location is notified to emergency agencies
for emergency calls (110, 119 and 118).
Location information to be sent as emergency call
location notification is either base station
information* or GPS information. Since this
handset supports GPS, it uses GPS functions
wherever GPS signal is available and sends GPS
information. GPS information sent from the
handset is recorded in Location Logs.
* If handset signal is received by a distant base
station, location information may not be
accurate.
• When GPS information is sent as location
notification, it is stored in Location Logs (page
9-32).
• Location notification may be inaccurate,
depending on the caller's location and signal
strength.
• This system may not operate if the responding
agency has not installed the proper system.
• If emergency numbers (110, 118 and 119) are
dialed with the 184 prefix, location information
is not provided. However, emergency agencies
may retrieve location information in lifethreatening cases.
• No application fees or transmission fees apply.
More Features
My Details
(E page 3-12)
3
Call
• To check your phone number during a call:
Emergency Call Location Notification
3-3
921T_web_0802.indb 3-3
08.3.23 1:57:34 PM
Voice Call
Making a Voice Call
w Press N
This section explains how to make a voice call in
Japan.
3
The handset notifies you of incoming voice calls by
incoming image, External Light, ringtone and/or
vibration.
q Enter a phone number
q Press N/[ when a call is received
Call
• Include the area code for all numbers.
• Press O or press and hold L to
• Use G or press P/Q to adjust the
delete the entire number and return to
Standby. Press L to delete the last
number entered.
• For details on making a call from Phone
Book, see page 2-18.
Voice Call Window
• Use G or press P/Q during a call to
adjust the earpiece volume.
e
Press O to end the call
• Antenna is built into the handset. Signal
Dial Window
Answering a Voice Call
sensitivity may be reduced by touching/
covering Internal Antenna area (page 1-3).
Do not cover this area by affixing stickers, or
any other items. Doing so may prevent you
from making/receiving calls, sending/
receiving messages or accessing the Web.
• The TV Antenna is only for receiving
television signals. Retract the antenna when
TV is not activated.
• The orientation and location of the handset
may affect signal strength.
• When Cost Limit is set and the limit is
reached, outgoing voice calls are blocked. If
the limit is reached during a call, the call
ends.
ringtone volume while receiving an
incoming call.
• To stop the ringtone while receiving an
incoming call, press and hold R.
w Press O to end the call
• Since the earpiece and speaker are close to
each other, loud sound from the speaker may
directly enter your ear at audio playback or
when receiving incoming calls, which may
adversely affect your hearing. Be careful
about the handset position towards your ear
so that loud sound does not directly enter
your ear.
• In Clamshell Open or Viewer position, the
actual ringtone volume is fixed at level 3
even if it is set higher than level 3; and the
maximum volume is level 3 if the ringtone
volume is set to Ascending Volume or
Descending Volume.
3-4
921T_web_0802.indb 3-4
08.3.23 1:57:34 PM
Speed Dial
You can make a call to a phone number saved in
the handset Phone Book by pressing just the last
one or two digits of the entry number 0000 to
0099 and then pressing N.
number 0010 to 0099➡N
• For entry numbers 0000 through 0009,
enter the last digit only and press N.
This section explains how to make an international
call from Japan.
• A separate application is required for using the
international call service. For details, contact
SoftBank General Information (page 14-41).
• The handset does not support international
roaming, so it cannot be used outside of Japan.
q Enter a phone number➡K➡
Intl. Calls➡[
Answering Machine
Record a caller's message to your handset when
you are unable to answer a voice call.
q Press and hold L
When you cannot answer the call, the
outgoing message plays and recording starts.
• When recording capacity becomes full or
the call ends, it stops automatically.
• To cancel Answering Machine, press and
hold L.
• Press and hold L or [ to activate
Answering Machine while receiving an
incoming call.
3
Call
q Enter the last two digits of the entry
Making an International Call
• Answering Machine is not available for video
calls and Call Waiting.
• When five messages are recorded, Answering
Country Number List Window
w Select a country➡[➡N
e Press O to end the call
Machine is disabled. Do the following to
delete messages.
➡Select a message➡kK➡
Press L
l
Delete➡a[➡YES➡a[
• Messages may not be recorded when an S!
Appli is set as the Screensaver.
• When Manner Mode is set in Drive Mode,
you cannot cancel Answering Machine.
• When Manner Mode is set in Original Mode,
Answering Machine setting in Original Mode
is given priority. To set or cancel Answering
Machine while in Original Mode, change the
Answering Machine setting in Original Mode.
3-5
921T_web_0802.indb 3-5
08.3.23 1:57:34 PM
Voice Call
Playing Messages
q
More Features
Press L➡Select a message➡[
3
Call
Outgoing Call Functions (E page 3-12)
Incoming Call Functions (E page 3-13)
Answering Machine Functions
(E page 3-13)
Functions During Voice/Video Calls
(E page 3-13)
Functions During Voice Calls
(E page 3-14)
Response Settings for Incoming Calls
(E page 13-9)
• Answer Incoming Calls by Opening the
Handset (Open to Talk)
• Set Any Key Answer
Answering Machine Settings
(E page 13-9)
• Set the Answering Machine Response Time
International Call Settings
(E page 13-22)
• Change the International Code
• Add Country Codes to the Country Number
List
Earphone-Microphone Settings
(E page 13-24)
• Save a Phone Number for
Earphone-Microphone Call
• Set Auto Answer
3-6
921T_web_0802.indb 3-6
08.3.23 1:57:35 PM
Video Call
Making a Video Call
q Enter a phone number and press H
The other party answers your video call.
• When Self-view (page 13-23) is set to ON,
confirm your camera image to be
transferred to the other party, and then
press [ to make a call.
• Use G during a call to adjust the speaker
(earpiece) volume.
w Press O to end the call
• When Cost Limit is set and the limit is
reached, outgoing video calls are blocked. If
the limit is reached during a call, the call
ends.
Video Call Icons
Video Call
Mute My Voice
Mute All
Faster Moving Mode
Standard Mode
Better Picture Mode
Handsfree ON
Handsfree (Bluetooth® connection)
Image Transfer OFF
Sending Picture
Voice Connection Established
Video Connection Established
Answering a Video Call
The handset notifies you of incoming video calls
by incoming image, External Light, ringtone and/or
vibration.
q Press N/H/[ when a video call is
received
A confirmation window appears. Select YES
and press [ to send out your live image.
• Press J ( ) while the handset is
ringing/vibrating to view yourself before
sending your live image.
3
Call
Make video calls with another party. The other
party must use a video call compatible handset.
• Change the handset into Self-portrait position
to transfer your live image taken by the camera.
• When the other's voice is output from the
speaker during a video call, the volume is fixed
at level 3, even if the speaker volume is set
higher than level 3.
w Press O to end the call
Video Call Window
3-7
921T_web_0802.indb 3-7
08.3.23 1:57:35 PM
Video Call
More Features
3
Call
Outgoing Call Functions (E page 3-12)
Incoming Call Functions (E page 3-13)
Incoming Video Call Functions
(E page 3-13)
Functions During Voice/Video Calls
(E page 3-13)
Functions During Video Calls
(E Page 3-15)
Video Call Settings
(E page 13-23)
• Set Alternative Picture
• Set Self-view Confirmation
• Set Incoming Image Quality
• Add a Phone Number to Auto Answer List
• Set Mute
• Set Audio Output
• Set Hold Image
3-8
921T_web_0802.indb 3-8
08.3.23 1:57:36 PM
Call Log
Viewing Dialed Numbers
and Received Calls
q Press D/C
More Features
Call Log Functions
(E page 3-15)
Functions for Call Time and Cost
(E page 3-16)
Call
Call Cost Settings
(E page 13-22)
• Set Cost Display Currency
• Display Call Cost After Each Call
• Set Cost Limit
3
Call Log Window
• Press D/C to switch between Dialed
(outgoing call log) and Received (incoming
call log).
• Press J ( / ) to switch between
outgoing S! Circle Talk call log and voice/
video call log.
• Press J ( / ) to switch between
incoming S! Circle Talk call log and voice/
video call log.
3-9
921T_web_0802.indb 3-9
08.3.23 1:57:36 PM
Optional Services
Overview
• For details, contact SoftBank General
3
Information (page 14-41).
• Operations are unavailable when out of range.
Activating Call Forward
q Press [➡Settings➡[➡Call Settings
➡[➡Call Services➡[
Call
Call
Forward
Forward calls to a preset
phone number.
Voice Mail
Transfer calls to Voice Mail
Center when handset is out of
range or line is busy. Access
messages from handset or
touchtone phones (page 3-11).
Call
Waiting*
Place a call on hold to receive
another incoming call (page
3-17).
Multiparty
Call*
Make or receive a call during a
call and talk to multiple parties
simultaneously (page 3-17).
e
Call
Barring
Restrict outgoing/incoming
calls and SMS (page 3-17).
r Select All Calls or No Answer ➡[➡
Caller ID
Show or hide your number
when making calls (page
3-12).
*Separate application required. For details, contact
SoftBank General Information (page 14-41).
Call Services Setting Window
t Select Phone Book, Phone Number or
Call Log➡[➡Select or enter phone
number➡[ (twice)
• Phone Book: Search from Phone Book.
Phone Number: Enter number directly.
Call Log: Select number from Call Log.
y Connect to the network
w Select VM/Call Fwd➡[
VM/Call Fwd Window
Select Call Fwd ON➡[➡Select a
type of call➡[
u Press [
Set response time (skip this step for
All Calls)➡[
• All Calls: Forwards calls immediately.
No Answer: Forwards calls after set ring
time elapses.
3-10
921T_web_03.indd 3-10
08.3.24 5:34:11 PM
Activating Voice Mail
q From VM/Call Fwd Window, select Voice
Mail ON➡[
Set response time (skip this step for
All Calls)➡[
• All Calls: Forwards calls to Voice Mail
Center immediately.
No Answer: Forwards calls to Voice Mail
Center after set ring time elapses.
e Connect to the network
simultaneously. If one service is activated,
the other will be deactivated (Voice Mail is
available with Call Forward for Video Calls).
• Receiving Calls After Activating Call
Forward/Voice Mail
Press lN while the ringtone is sounding to
talk to the caller. If you set All Calls, the
handset does not receive calls, but they are
forwarded to the preset phone number or
Voice Mail Center.
• Voice Mail Service Options
Access the Personal Options menu from
Voice Mail Center to set/customize outgoing
message. For details, contact SoftBank
General Information (page 14-41).
Missed Call Notification
Information Prompt notifies you about the calls
that the handset could not receive because it was
out of the service area or the power was off while
Voice Mail was set. If Voice Mail Center receives a
message while you are on another line, the
handset receives a notification.
Deactivating Call Forward/Voice Mail
q From VM/Call Fwd Window, select
DeactivateAll➡[
Call Forward and Voice Mail are deactivated.
• If Call Forward/Voice Mail is not activated,
perform the following to forward an
incoming call.
・Voice Call: Press jJ (Divert) while
handset is ringing/vibrating
・Video Call: Press kK➡Divert while
handset is ringing/vibrating
3
Call
w Select All Calls or No Answer➡[➡
• Call Forward and Voice Mail cannot be set
More Features
Functions for Optional Services
(E page 3-16)
q Enter 1414➡N
• Follow the voice prompts.
Checking Messages
r Press [
q From VM/Call Fwd Window, select
Listen VM➡[
3-11
921T_web_03.indd 3-11
08.3.24 5:34:12 PM
Advanced Features
Making Calls
3
Outgoing Call Functions
Set Caller ID On/Off
[Show My Number]
From ➡ Dial Window page 3-4
Voice Call Window page 3-4
Video Call Window page 3-7
My Details
Call
Save Information to My Details
[Save My Details]
[➡Phone Book➡[➡My Details➡[
➡Select an item➡K➡Edit➡[➡Enter
information➡[➡J
■Entering a Name
[➡Phone Book➡[➡My Details➡[
➡Name➡[➡Select an item➡K➡Edit➡
[➡Enter a name➡[➡J (twice)
Use Location Information
[Personal Info.]
[➡Phone Book➡[➡My Details➡[➡
Personal Info.➡[➡Location Exist➡K
➡Open Map, Location Mail, Add Location
or Delete➡[
• To save a location, select Personal Info. and
then do the following.
No Location➡K➡Add Location➡[
Redial
[Dialed Numbers]
D➡Select an entry➡N➡O to end the
call
• To make a video call, select an entry and then
press H.
• To make an S! Circle Talk call, press and hold
P when My Status is Online (page 10-4).
Call from Received Calls
[Received Calls]
C➡Select an entry➡N➡O to end the
[➡Settings➡[➡Call Settings➡[➡
Show My Number ➡[➡Select Show My
ID, Hide My ID or OFF➡[
• If you select OFF, the settings you chose
when you subscribed to Caller ID service apply.
• Caller ID setting has the following options, and
they are given priority in the order of ① to ③
if they are all set or operated.
① Dial Window K➡Hide My ID or Show
My ID➡[
② Setting for Show My Number
③ Application for Caller ID service
call
• To make a video call, select an entry and then
press H.
Send/Hide Caller ID
[Show My ID]
Dial Window K➡Hide My ID or Show My
ID➡[
Set Earpiece Volume
[Earpiece Volume]
[➡Settings➡[➡Sounds➡[➡
Earpiece Vol.➡[➡Adjust the volume➡[
3-12
921T_web_0802.indb 3-12
08.3.23 1:57:38 PM
Make Voice Calls Using EarphoneMicrophone
[Earphone-Microphone Call]
• Make one-touch calls from Earphone-
placed on hold, the call is connected without
the confirmation window asking whether to
send the camera image.
Answer Calls with Earphone-Microphone
[Earphone-Microphone Answer]
Insert Earphone-Microphone plug into earphone
jack➡Press and hold the microphone switch
when a call is received➡Press and hold the
microphone switch to end the call
• Press O to end the call.
Answering Machine Functions
Incoming Call Functions
Delete Recorded Messages
Reject an Incoming Call
[Reject Calls]
K when a call is received
• To reject an incoming video call, press K and
select Reject Call.
[➡Settings➡[➡Call Settings➡[➡
Ans Machine➡[➡Recordings➡[➡
Select a message➡K➡Delete➡[➡YES
➡[
Incoming Video Call Functions
Answer Incoming Video Calls
Automatically
[Auto Answer]
• When Auto Answer is set to ON, video calls
received from phone numbers on the Auto
Answer List are answered automatically
without having to press a key, if the handset is
open.
• Regardless of Manner Mode setting, the
speaker will beep and the video call is
automatically connected.
[➡Settings➡[➡Call Settings➡[➡
Video Call➡[➡Auto Answer➡[➡ON/
OFF➡[ (twice)➡ON➡[
3
Call
Microphone. Before making a call, save a phone
number to Earphone-Microphone (page 13-24).
Insert Earphone-Microphone plug into earphone
jack➡Press and hold the microphone switch to
dial the set phone number➡Press and hold the
microphone switch to end the call
• Press and hold the switch again to cancel
dialing.
• Press O to end the call.
• When you answer a video call that has been
Functions During Voice/Video Calls
Mute Audio During a Call
[Mute]
■Voice Calls
Place Incoming Call on Hold
[Hold Answer]
Voice Call Window K➡Mute My Voice or
Mute All➡[
O when a voice or video call is received
■Video Calls
• The caller is charged for the call while placed
Video Call Window K➡Mute➡[➡Mute My
Voice or Mute All➡[
• Press [ to cancel the mute during a call.
on hold.
• Pressing O while the caller is on hold
terminates the call.
3-13
921T_web_0802.indb 3-13
08.3.23 1:57:38 PM
Advanced Features
Place Call in Progress on Hold
[Hold Call]
Voice Call Window / Video Call Window K➡Hold
➡[
3
• Subscription to Call Waiting (page 3-17) or
Call
Multiparty Call (page 3-17) is required to use
the Hold feature for voice calls. For details,
contact SoftBank General Information (page
14-41).
Functions During Voice Calls
Record the Other Party's Voice During a
Call
[Record Voice Memo]
Voice Call Window K➡Voice Record➡[
• Recording stops when the maximum time is
reached or the call ends. To stop recording
manually, press [.
• To play a recording, do the following.
[➡Tools➡[➡Useful Tools➡[➡
Voice Recorder ➡[➡Recordings➡[
➡Phone Memory or Memory Card ➡[
➡Select a file➡[
Save Number Memo During a Call
[Save Number Memo]
■Sending Touch Tones Sequentially
Voice Call Window Press the keys on the keypad
• After the call ends, the number memo is
automatically saved.
• You can enter the following numbers and
symbols.
0 to 9, *, #, +, -, P
• To check a number memo, do the following.
[➡Tools➡[➡Useful Tools➡[➡
Number Memo➡[➡Select a number
memo➡[
touch tones (page 2-16) for remotely operating
your home answering machine and other
devices.
Voice Call Window K➡Phone Book➡[➡
Select a Phone Book entry➡[➡Select a touch
tone sequence (phone number) ➡K➡Send
Tone➡[
Use Handsfree Call
[Handsfree Call]
Voice Call Window J
• To cancel handsfree, press J ( ).
Send Touch Tones During a Call
[Send Touch Tones]
■Sending Individual Touch Tones
Voice Call Window Press any of 0 to 9, *
and #
• Phone Book is useful for storing sequences of
■Using Pause (P) in Touch Tone Sequences
• The pause "P" allows you to send sequences
of touch tones, each separated with a pause
"P". It is convenient if you register multiple
touch tones such as remote operation numbers
of your home phone.
Example: To store 03123XXXX3 (phone number),
#7777 (answering machine access
code), and #1 (answering machine
playback command), enter the
following in the Phone Number field.
03123XXXX3P#7777P#1
Open a Phone Book entry containing the touch
tones➡N (A call is made to the phone
number before the first "P") ➡[ (The
sequence of touch tones before the next "P" is
sent)
• Repeat this step until all the touch tones have
been sent.
3-14
921T_web_0802.indb 3-14
08.3.23 1:57:39 PM
Functions During Video Calls
Set a Still Picture as the Outgoing Image
[Send Picture]
Toggle Audio Output (Earpiece/Speaker)
[Switch Audio]
Video Call Window J ( / )
Video Call Window K➡Send Picture➡[➡
Send Pic. ON➡[➡Phone Memory or
Memory Card ➡[➡Select a picture➡[
Call Log Functions
From ➡ Call Log Window page 3-9
Delete Call Log Records
[Delete/Delete All]
■Deleting a Record
Change Alternative Picture
[Alternative Picture]
Video Call Window F
• Zoom is unavailable when a still picture is set
for outgoing image.
Call Log Window Select a record➡K➡Delete➡
[➡Delete➡[➡YES➡[
Video Call Window K➡Alt. Picture➡[➡Alt.
Pic. ON➡[
■Deleting All Records
■Selecting the Image Preinstalled in the
Call Log Window K➡Delete➡[➡Delete
All ➡[➡Enter your Handset Code➡YES➡[
Switch Outgoing Image During a Video Call
[Switch Outgoing Images]
Handset
Preset➡[
Lock Call Log
[Zoom]
Video Call Window [ (Switch)
• Press [ to toggle between the alternative
picture and camera image.
Switch Outgoing/Incoming Image
Windows
[Switch Windows]
Video Call Window K➡Screen Set.➡[➡
Switch➡[➡In. Prior, Incoming Only,
Out. Prior or Outgoing Only➡[
■Selecting an Image from Data Folder/
Memory Card
Phone Memory or Memory Card➡[➡
Select an image➡[
• Handset automatically adjusts the picture size.
Call
Zoom Outgoing Image
3
[Call Log Lock]
Call Log Window K➡Call Log Lock➡[➡
Enter your Handset Code➡Lock➡[
• To cancel the lock, select Unlock.
Change Incoming Image Quality
[Image Quality]
Video Call Window K➡Screen Set.➡[➡
Image Quality➡[➡Select the image output
format➡[
3-15
921T_web_0802.indb 3-15
08.3.23 1:57:39 PM
Advanced Features
Functions for Call Time and Cost
View Call Time and Cost
[Call Time & Cost]
3
Call
[➡Settings➡[➡Call Settings➡[➡
Call Time&Cost ➡[➡All Calls or Last
Call ➡[➡Time or Cost ➡[
• The displayed call time/cost serves as a guide
only. The actual call cost billed may be
different.
• The total call time does not include mail
communications, Web browsing, and S! Circle
Talk connection and talk time.
• Up to 277 hours 46 minutes and 39 seconds
can be displayed for the total call time.
• Sum of charges appears for Multiparty Call
(page 3-17).
• The total call cost does not include mail
communication and Web browsing charges,
and the charge for the number of remarks
made during S! Circle Talk.
• When you make an international call, the call
cost is not displayed.
• Call Cost may be unavailable depending on
your subscription. In that case, the total cost
display and cost limit settings are not available.
Reset Total Call Time
[➡Settings➡[➡Call Settings➡[➡
Call Time&Cost ➡[➡All Calls➡[➡
Time➡[➡K➡Reset ➡[➡Enter your
Handset Code➡YES➡[
Reset Total Call Cost
[➡Settings➡[➡Call Settings➡[➡
Call Time&Cost ➡[➡All Calls➡[➡
Cost ➡[➡K➡Reset ➡[➡Enter your
PIN2 (page 14-2) ➡[➡YES➡[
Functions for Optional Services
From ➡ Voice Call Window page 3-4
Call Services Setting Window page 3-10
VM/Call Fwd Window page 3-10
Optional Service Setting Status
Check Optional Service Setting Status
[Status]
■Checking Call Forward/Voice Mail Status
VM/Call Fwd Window Status ➡[
■Checking Call Waiting Status
Call Services Setting Window Call Waiting➡[➡
Status➡[
■Checking Call Barring Status
Call Services Setting Window Call Barring➡[➡
Status➡[➡Select a type of restriction➡[
3-16
921T_web_0802.indb 3-16
08.3.23 1:57:40 PM
Call Waiting
Multiparty Call
Set Call Waiting
• To talk to just one person during a multiparty
Call Another Party
[Call Waiting On/Off]
Call Services Setting Window Call Waiting➡[➡
ON or OFF➡[
During a call, the Call Waiting tone is heard➡
K➡Answer➡[
Switch Between Two Callers
[Switch Parties]
During Call Waiting➡2N
• Press 2N to switch between parties.
• If a caller terminates a call during Call Waiting,
a ringtone sounds and Holding. is displayed.
Press N to start talking with the other
person on hold.
Voice Call Window Enter a phone number➡N
• Alternatively, press K and select an entry
from Phone Book (page 2-18) or Call Log
(page 3-9).
Switch Between Parties
[Switch Parties]
Voice Call Window Enter a phone number➡N➡
When the other party answers, 2N
• Press 2N to switch between parties.
• If a caller terminates a call during a call, a
ringtone sounds and Holding. is displayed.
Press N to start talking with another person
on hold.
Talk to Multiple Parties
[Multiparty Call]
Voice Call Window Enter a phone number➡N➡
When the other party answers, K➡Multiparty
➡[➡Multiparty➡[
• During a multiparty call, press O to end the
call with all parties simultaneously.
• If one person ends the call during a multiparty
call, the other parties remain connected.
call:
Select a party to talk with➡K➡Multiparty
➡[➡Private➡[
3
Call Barring
Restrict Outgoing and Incoming Voice/
Video Calls and SMS Messages
[Call Barring]
Call
Answer an Incoming Call During a Call
[Call Waiting]
[Call During a Call]
Call Services Setting Window Call Barring➡[
■Restricting Outgoing Calls and SMS
Outgoing Call ➡[➡All Outgoings, All
Out-Intl. or Out-Intl.*➡[➡Enter your Call
Barring Service Code (page 1-14) ➡Connect to
the network automatically➡[
■Restricting Incoming Calls and SMS
Incoming Call ➡[➡All Incomings or All
If Roamed*➡[➡Enter your Call Barring
Service Code➡Connect to the network
automatically➡[
* The handset does not support international
roaming, but settings are saved to the service
center.
■Deactivating Call Barring
Cancel All➡[➡Enter your Call Barring
Service Code➡Connect to the network
automatically➡[
3-17
921T_web_0802.indb 3-17
08.3.23 1:57:40 PM
Advanced Features
• After connecting to the network, a setting
3
Call
completed window appears. If the window
does not appear, follow the procedure again.
• You can still make emergency calls (110
(police), 119 (fire and ambulance) and 118
(coast guard)) when Call Barring is activated.
• You cannot use All Outgoings and All
Incomings if you have started using the Call
Forward or Voice Mail service.
• If Call Barring Service Code is incorrectly
entered three consecutive times, Call Barring
settings are locked. Change Call Barring
Service Code and Center Access Code (page
1-14). For details, contact SoftBank General
Information (page 14-41).
Change Call Barring Service Code
[Call Barring Service Code]
Call Services Setting Window Call Barring➡[➡
Security Code➡[➡Enter your current Call
Barring Service Code➡Enter your new Call
Barring Service Code➡[➡Re-enter your new
Call Barring Service Code for confirmation➡[
• After connecting to the network, a setting
completed window appears. If the window
does not appear, follow the procedure again.
3-18
921T_web_0802.indb 3-18
08.3.23 1:57:41 PM
4
921T_web_0802.indb 4-1
Messaging
Messaging ・・・・・・・・・・・・・・・・・・・・・・・・・・・・・・・・・・・・・・・・・・・・・・・・・・・・・・・・・・・・・・・・・・・・・・・・・・ 4-2
Message Types ・・・・・・・・・・・・・・・・・・・・・・・・・・・・・・・・・・・・・・・・・・・・・・・・・・・・・・・・・・・・・・・・・・・・・・ 4-2
Customizing Handset Address ・・・・・・・・・・・・・・・・・・・・・・・・・・・・・・・・・・・・・・・・・・・・・・・・・・・・・・・・・・ 4-3
Sending Messages・・・・・・・・・・・・・・・・・・・・・・・・・・・・・・・・・・・・・・・・・・・・・・・・・・・・・・・・・・・・・・・・・・・ 4-4
Sending S! Mail ・・・・・・・・・・・・・・・・・・・・・・・・・・・・・・・・・・・・・・・・・・・・・・・・・・・・・・・・・・・・・・・・・・・・・ 4-4
Sending SMS ・・・・・・・・・・・・・・・・・・・・・・・・・・・・・・・・・・・・・・・・・・・・・・・・・・・・・・・・・・・・・・・・・・・・・・・ 4-6
Incoming Messages・・・・・・・・・・・・・・・・・・・・・・・・・・・・・・・・・・・・・・・・・・・・・・・・・・・・・・・・・・・・・・・・・・ 4-8
Opening New Messages ・・・・・・・・・・・・・・・・・・・・・・・・・・・・・・・・・・・・・・・・・・・・・・・・・・・・・・・・・・・・・・ 4-8
Checking Received Messages ・・・・・・・・・・・・・・・・・・・・・・・・・・・・・・・・・・・・・・・・・・・・・・・・・・・・・・・・・・ 4-8
Replying to Messages ・・・・・・・・・・・・・・・・・・・・・・・・・・・・・・・・・・・・・・・・・・・・・・・・・・・・・・・・・・・・・・・・ 4-9
Organizing/Using Messages ・・・・・・・・・・・・・・・・・・・・・・・・・・・・・・・・・・・・・・・・・・・・・・・・・・・・・・・・・ 4-10
Sorting Messages ・・・・・・・・・・・・・・・・・・・・・・・・・・・・・・・・・・・・・・・・・・・・・・・・・・・・・・・・・・・・・・・・・・ 4-11
Advanced Features ・・・・・・・・・・・・・・・・・・・・・・・・・・・・・・・・・・・・・・・・・・・・・・・・・・・・・・・・・・・・・・・・・ 4-13
08.3.23 1:57:41 PM
Messaging
Message Types
Handset supports S! Mail (MMS) and SMS.
Available Messaging Services
4
Send messages to phone numbers
or e-mail addresses!
SMS
Messaging
SoftBank
Handsets
Server
Handset
Non-SoftBank
Mobile Phones
Server
If recipient is out of the service area, the message
is stored on the server. Once recipient's signal
becomes available, message is resent.
PCs
S! Mail
(separate
contract
required)
Use Short Message Service (SMS) to
exchange short text messages with
other SoftBank handsets.
Exchange long text messages, pictures,
sounds, etc. with S! Mail compatible
SoftBank handsets, non-SoftBank mobile
phones and PCs that support e-mail.
S! Mail is better than ever.
Arrange Mail
Change text size, text color, background color and
insert images and pictograms.
Feeling Mail
Set your mood when sending messages to compatible
SoftBank handsets. Recipient's handset shows your
mood accordingly.
4-2
921T_web_0802.indb 4-2
08.3.23 1:57:41 PM
Customizing Handset Address
Applications)➡[➡各種変更手続き (Changing
Applications)➡[
4
Messaging
Change the account name (part before @) of your
handset e-mail address.
□□□□□□□□□□□@softbank.ne.jp
• For details, contact SoftBank General
Information (page 14-41).
• This operation uses Yahoo! Keitai access.
• Before using Messaging service, retrieve
network connection information (page 1-11).
• A random alphanumeric text string is assigned
at the time of contract. Composing a long
e-mail address using single-byte alphanumerics
and available symbols is an effective way for
preventing spam.
q Press K➡設定・申込 (Settings/
w Select メール各種設定(オリジナルメール設定)(Mail
Settings/Original Mail)➡[
• Follow the onscreen instructions.
4-3
921T_web_0802.indb 4-3
08.3.23 1:57:42 PM
Sending Messages
Sending S! Mail
q Press and hold J
• To select an address from Phone Book:
Select Phone Book ➡[➡Select an
entry➡[➡Select a phone number/
e-mail address➡[
r Select Subject ➡[➡Enter a subject
• If you enter an e-mail address or input text
that cannot be sent by SMS, the mail type
automatically changes to S! Mail.
• If the other party's handset doesn't support
S! Mail, it might be displayed differently.
➡[
Attaching Files
4
Messaging
Attach an image or melody to an S! Mail.
q From Create Message Window, select
Create Message Window
Files➡[
w Select Address ➡[
t Select Text ➡[➡Enter text➡[
e
Attachments Window
w Select Data Folder ➡[➡Phone
Set Address Window
Memory or Memory Card ➡[
Select Phone Number or Email ➡[➡
Enter a phone number/e-mail address
➡[
y Press J (Send)➡OK➡[
• If you select Notify Only Once in the
sending confirmation/completed window,
the window will not be displayed from the
next time.
4-4
921T_web_0802.indb 4-4
08.3.23 1:57:42 PM
e Select a folder➡[➡Select a file➡[
Feeling Mail
Feeling Mail can notify the recipient of arrival of a
message by special graphics expressing the
sender's mood that appear in the Information
Prompt, as well as by ringtone, vibration and
External Light.
• Reception operations of incoming Feeling Mail
vary according to the recipient's handset.
a message. To find out whether a certain file
can be attached or not, check Details of the
file (page 2-30).
q From Create Message Window, select
Feeling ➡[
This function allows you to make your message
more visually appealing by changing the size and
color of text, background color, assigning actions
to text, and inserting lines or images into text.
Example: Changing the font size and background
color, and inserting a picture
q
From Create Message Window, select
Text ➡[
w Press K➡Arrange➡[
4
Messaging
• Some files may not be able to be attached to
Arrange Mail
w Select a pictograph➡[
Arrange Window
• To decorate text using a mail template:
• If you send a message with Feeling Mail
graphics to a handset that doesn't support
Feeling Mail, the graphics will be displayed
as a regular pictograph in the subject field.
Press K➡Templates➡[➡Phone
Memory or Memory Card➡[➡
Select a template➡[➡YES➡[➡
Edit text➡[
4-5
921T_web_0802.indb 4-5
08.3.23 1:57:43 PM
Sending Messages
e Select Font Size➡[
y Select a background color➡[
Sending SMS
Send short text messages to other SoftBank
handsets using phone numbers as address.
q Press and hold J
4
Messaging
r Select a font size➡[➡Input text
u Press K➡Arrange➡[➡Picture➡
[➡Phone Memory or Memory Card
➡[
t Press K➡Arrange ➡[➡
ScreenColor➡[
i Select a folder➡[➡Select an image
➡[
Create Message Window
w Select Text ➡[➡Enter text➡[
e Select Address ➡[
Set Address Window
4-6
921T_web_0802.indb 4-6
08.3.23 1:57:43 PM
r Select Phone Number ➡[➡Enter a
phone number➡[
More Features
Creating Messages
(E page 4-13)
Attaching Files
(E page 4-14)
Arrange Mail Functions (E page 4-15)
Outgoing Message Functions
(E page 4-15)
Book:
Select Phone Book➡[➡Select an
entry➡[➡Select a phone number➡[
t Press J (Send)➡OK➡[
• If you select Notify Only Once in the
sending confirmation/completed window,
the window will not be displayed from the
next time.
Messaging Settings
(E page 13-14)
• Add Recipients to Simple Input List
• Set Groups
• Set a Signature
• Set Default Mail Type
• Display/Hide Notification When Mail Type is
Switched
Outgoing Messages
(E page 13-15)
• Set the Sending Confirmation Window
• Set the Vibration When Sending is Confirmed
• Check Whether Sent Messages were Delivered
to Recipients
• Set the Length of Time Sent Messages are
Stored on Server
• Set Message Priority
• Specify a Time Before Delivering Messages to
Recipients
• Save a Reply Address
• Edit the SMS Center Number (+819066519300)
Messaging
• To select a phone number from Phone
4
4-7
921T_web_0802.indb 4-7
08.3.23 1:57:44 PM
Incoming Messages
Opening New Messages
4
Messaging
When a message arrives, ringtone sounds and
animation plays. When a "Feeling Mail" arrives,
graphics indicating the sender's mood appears in
the background of Information Prompt. Incoming
messages are saved to Received.
Check Information Prompt to confirm any unread
messages. When you have more than one unread
Feeling Mail, background graphics will be that of
the most recent message.
• When you receive an S! Mail message, the
reception method varies depending on the
message size or whether there are any
attachments. The reception method is set to
Immediate at time of purchase so that all the
data is downloaded automatically. The reception
method can be changed to Phone # Only or
Deferred (page 13-16).
q Information Prompt appears
e Select a folder➡[➡Select a message Checking Received Messages
➡[
q Press J➡Message Box ➡[➡
Received
• To retrieve new messages from the server:
Press jJ➡Retrieve New ➡a[
• If Priority is set to Pause, incoming
messages are notified by a confirmation
window during handset use (except in
Standby). Select Read Now or Later. To
delete a message without reading it, select
Delete.
w Select a folder➡[➡Select a message
➡[
w Select New Messages ➡[
4-8
921T_web_0802.indb 4-8
08.3.23 1:57:44 PM
• If Retrieve Mode is set to Deferred, the
Replying to Messages
The Create Message Window opens and the
recipient's address is automatically set.
• When replying to an S! Mail, the subject to
which Re: is prefixed is automatically inserted
in the subject field.
Example: Replying by creating new text
q Press J➡Message Box ➡[➡Received
w Select a folder➡[➡Select a message
➡[➡J (Reply)
e Select Blank➡[
More Features
Receiving Messages
Server Operations
(E page 4-16)
(E page 4-16)
Display Settings
(E page 13-15)
• Set the Font Size
• Set the Scroll Unit
• Display/Hide Address and Subject When
Sending/Receiving Messages
Incoming Messages
(E page 13-16)
• Set New Message Retrieve Mode
• Set Automatic Display of Picture Files
• Set Automatic Playback of Sound Files
• Set Spam Filter
3D Pictograms
(E page 13-16)
• Set the Criteria for Displaying Received
Messages with 3D Pictograms
• Set the Font and Background Colors for 3D
Pictograms
4
Messaging
initial portion of text is delivered as an
S! Mail notification and complete message is
stored on the server if:
・Text exceeds 284 single-byte characters
(284 bytes)
・Files are attached
・Message is sent to multiple addresses
・Subject field contains 41 or more singlebyte characters
・Sender's address contains 61 or more
single-byte characters
• If you receive the rest of the message,
transmission fees may be charged on the
recipient's side. For details, contact SoftBank
General Information (page 14-41).
• It may be impossible to display/play a file
until you obtain a content key (content
license) depending on the file.
• Messages exceeding 300 KB cannot be fully
retrieved, part of them is deleted.
• To reply to the sender of a message with
multiple addresses, select To Sender or
To All.
• To reply by quoting the received message
text, select With Text; to reply by referring
to the received text, select Refer.
921T_web_0802.indb 4-9
4-9
08.3.23 1:57:45 PM
Organizing/Using Messages
Received and sent messages are saved to the
Received and Sent message folders respectively.
Created messages that have not been sent are
saved to Drafts, and messages that have failed
to be sent are saved to Unsent.
q Press J➡Message Box ➡[
• About Auto-delete
4
Messaging
If Message Box memory is full, the oldest
message is deleted when receiving/sending
a new message. Set Protect (page 4-17) to
save important messages. Alternatively, set
Auto-delete (page 13-17) to Do not Set.
However, when memory is full, a warning
appears and
appears on the display.
Delete unnecessary messages to receive new
messages (page 4-18).
• When unable to receive S! Mail notifications
due to insufficient memory, delete
unnecessary messages. Once memory space
becomes available, S! Mail notifications are
redelivered by Retry function. Alternatively,
retrieve Mail List (page 4-16) to receive the
notifications. For details on redelivery of
S! Mail notifications, contact SoftBank
General Information (page 14-41).
Message Box Window
w Select Received or Sent ➡Select a
folder➡[
①
②
③
Message List Window
①Message Status
Unread Message with Attachment(s)
Unread Message without Attachments
Read Message with Attachment(s)
Read Message without Attachments
Unread S! Mail Notification
Read S! Mail Notification
Sent Message with Attachment(s)/Read
Delivery Report
Sent Message without Attachments/Read
Delivery Report
Sent Message with Attachment(s)/
Unread Delivery Report
Sent Message without Attachments/
Unread Delivery Report
Sent Message with Attachment(s)/
Confirming Delivery
Sent Message without Attachments/
Confirming Delivery
Sent Message with Attachment(s)/No
Delivery Confirmation
Sent Message without Attachments/No
Delivery Confirmation
Partly Sent Message with Attachment(s)
Partly Sent Message without Attachments
Partly Sent Message with Attachment(s)/
Read Delivery Report
Partly Sent Message without
Attachments/Read Delivery Report
Partly Sent Message with Attachment(s)/
Unread Delivery Report
4-10
921T_web_0802.indb 4-10
08.3.23 1:57:45 PM
Sorting Messages
Received and sent messages can be sorted into
folders under Received and Sent of the Message
Box according to the conditions you set.
q Open Message Box➡Select a folder➡
K➡Sort Setting➡[
w Select the sorting criteria➡[➡
Specify the conditions➡[
• Select Person to set an individual entry in
Phone Book as the sorting condition.
• Select Group to set a Group entry in
Phone Book as the sorting condition.
• Select Address to set the specified
addresses, regardless of whether they are
saved to Phone Book, as the sorting
condition.
• Select Phone Book to set those
addresses that are either saved or not
saved to Phone Book as the sorting
condition.
• Select Ku-man to set messages from
Ku-man as the sorting condition.
• Select Idokoro to set Departure Mail,
Arrival Mail, and Simple Notice as the
sorting condition.
4
Messaging
Partly Sent Message without
Attachments/Unread Delivery Report
Partly Sent Message with Attachment(s)/
Confirming Delivery
Partly Sent Message without
Attachments/Confirming Delivery
Unsent Message with Attachment(s)/
Delivery Failed
Unsent Message without Attachments/
Delivery Failed
Unsent Message with Attachment(s)/
Waiting Delivery
Unsent Message without Attachments/
Waiting Delivery
Unsent Message with Attachment(s)/
Sending
Unsent Message without Attachments/
Sending
Draft with Attachment(s)
Draft without Attachments
②S! Mail/SMS
S! Mail
SMS
SMS on the USIM Card
③Priority/Protection
High/Protected
High/Not Protected
Normal/Protected
Low/Protected
Low/Not Protected
921T_web_0802.indb 4-11
4-11
08.3.23 1:57:46 PM
Organizing/Using Messages
More Features
Organizing Messages
Using Messages
4
(E page 4-17)
(E page 4-18)
Messaging
Message Box Settings (E page 13-17)
• Do Not Auto-delete Old Messages
• Switch Between Folder View and All Message
View
• Switch Between Mixed View and Separate View
Message List Display Settings
(E page 13-17)
• Switch the Message List Display Mode
• Split the Message List Window
Message List Window Settings
(E page 13-18)
• Display Messages According to the Specified
Criteria
• Create a New Phone Book Entry with a Phone
Number/E-mail Address
• Add a Phone Number/E-mail Address to a
Phone Book Entry
• Switch Between Unread and Read
• Switch All Messages in a Folder Between
Unread and Read
Mini Tool Setting in the Message List
Window
(E page 13-18)
• Set Mini Tool in the Message List Window
4-12
921T_web_0802.indb 4-12
08.3.23 1:57:47 PM
Advanced Features
Sending Messages
Insert Your Name and Other Information
Automatically
[Insert]
Creating Messages
From ➡ Create Message Window page 4-4
Set Address Window page 4-4
Specify Recipients Quickly
[Simple Input]
Create Message Window Text ➡[➡K➡
Insert ➡[➡Phone Book, My Details,
Phrases, Emoticon, Signature, Notepad,
Message Box or URL History ➡[➡Do the
respective operations
to Simple Input list (page 13-14) and enter
them.
Set Address Window Simple Input ➡[➡Select
an entry➡[
Add Recipients
[Add Address]
Create Message Window Select the address field➡
K➡Add Address➡[➡Select an address
➡[➡J
Select an Address from Sent Log/Received
Log to Send a Message
[Sent Log/Received Log]
• For details on how to enter addresses, see
Set Address Window Sent Log or Received Log➡
Delete Recipients
[Delete/Delete All/Select Multi]
[➡Select an entry➡[
page 4-4.
■Deleting One Entry
Send a Message to a Group
[Group]
• You can select addresses that you have saved
Create Message Window Select the address field➡
[➡Select an address➡K➡Delete➡[➡
One➡[
to a Group (page 13-14) and enter them.
Set Address Window Group➡[➡Select a group
■Deleting All Entries
➡[
K➡Delete All ➡[
Create Message Window Select the address field➡
Create Message Window Select the address field➡
[➡K➡Delete➡[➡Select Multi ➡[
➡Select addresses➡[➡J
Save a Recipient's Address to Phone Book
[To Phone Book]
Create Message Window Select the address field➡
[➡Select an address➡K➡Save
Sender ➡[➡Add New or Add ➡[
• See "Creating New Entries" (page 2-16) for
entering other items.
4
Messaging
• You can select addresses that you have saved
■Deleting Multiple Entries
Switch To/Cc/Bcc for an Address
[To/Cc/Bcc]
Create Message Window Select the address field➡
[➡Select an address➡K➡To/Cc/Bcc➡
[➡To, Cc or Bcc➡[➡J
To: The recipient's address.
Cc: Select this option to send copies of the
message sent to the address in the To field to
other addresses. Addresses entered in the Cc
(carbon copy) field are also displayed to the
other recipients.
Bcc: Addresses entered in the Bcc (blind carbon
copy) field are not displayed to the other
recipients.
4-13
921T_web_0802.indb 4-13
08.3.23 1:57:47 PM
Advanced Features
• If the text exceeds the maximum number of
Save All Addresses to a Group
[To Group]
Create Message Window Select the address field➡
K➡To Group ➡[ (twice)➡Select a group
➡[➡Enter a group name➡[
4
Edit Text
Messaging
Create Message Window Select the text➡[➡Edit
the text➡[
[Edit Text]
characters allowed in SMS, a confirmation
window appears. If you select Cut to Fit
SMS after selecting Change, the maximum
amount of text from the beginning is remained
and the excess is deleted.
• If you change the mail type to SMS, the
following items are deleted.
E-mail address, Cc and Bcc setting, Subject,
Attached file, Mail template and Arrange
settings, Feeling Mail setting
■Switching to S! Mail
Delete Text
[Clear Text]
Create Message Window Select the text➡K➡
Clear Field ➡[
Change Mail Type
[Mail Type]
■Switching to SMS
Create Message Window Type➡[➡SMS➡[
• If a message contains something that cannot
be sent by SMS, a confirmation window
appears. The contents which cannot be sent
will be deleted if you select Change.
Create Message Window Type➡[➡S! Mail ➡
[
• By performing the following operations, you can
also change the mail type from SMS to S! Mail
automatically. If these items are deleted, the
mail type will be reset to SMS automatically.
Add an e-mail address, Set Cc/Bcc setting,
Enter Subject, Attach a file, Set Feeling Mail
setting
• If you press K and select Templates or
Arrange while entering text, or if you enter
text that exceeds the maximum number of
characters allowed in SMS and press [, a
confirmation window explaining the message
cannot be sent as SMS appears. Select
Change to S!Mail, Cut to Fit SMS, or
Edit Message.
Attaching Files
From ➡ Create Message Window page 4-4
Attachments Window page 4-4
Shoot Picture or Video Attachment
[Take Picture/Record Video]
■Picture
Attachments Window Take Picture➡[➡Take a
picture➡[
■Video
Attachments Window Record Video ➡[➡
Record a video➡[
Set Attachments to Open Automatically
(Recipient's Handset)
[Auto Play]
• If there are more than one file, you can set just
one to play back.
Create Message Window Attachments➡[➡
Select an attached file➡K➡Auto Play ➡[
➡ON/OFF➡[➡ON➡[➡Display or
Do not Display ➡[➡Enter a caption for the
attached file to play ➡[
• To put a caption to the attached file, select
Display and enter text for the file.
4-14
921T_web_0802.indb 4-14
08.3.23 1:57:48 PM
Arrange Mail Functions
From ➡ Create Message Window page 4-4
Arrange Window page 4-5
Other Decorations
[Arrange]
■Changing a Font Color
■Blinking/Scrolling/Swinging a Text
Arrange Window Blink, Telop or Swing➡[➡
Enter text
■Aligning a Text
Arrange Window LineUp ➡[➡Select a
character position➡[➡Enter text
■Inserting a Line in Text
Arrange Window Partition ➡[
■Inserting Sounds
Arrange Window Sound ➡[➡Phone Memory
or Memory Card ➡[➡Select a sound➡[
■Inserting My Pictograms
Arrange Window MyPictograms➡[➡Select a
pictogram➡[
921T_web_0802.indb 4-15
Outgoing Message Functions
Arrange Window Cancel ➡[➡Delete by Each
➡[➡Select the decoration to delete➡[➡
Save without Sending
J
■Deleting All Decorations
Arrange Window Cancel ➡[➡Delete All ➡
[➡YES➡[
Change the Decorations
[Change/Delete Arrange Settings]
Create Message Window Select text➡[➡Enter
text➡J➡Start ➡[➡Select the end➡
[➡Arrange➡[➡Set/delete decoration
Insert a Mail Template
[Switch Templates]
Create Message Window Select text➡K➡Switch
Templ.➡[➡Switch➡[➡Phone
Memory or Memory Card ➡[➡Select a
template➡[➡Edit text➡[
Save Templates
[Save Template]
Create Message Window Select text➡K➡Save
Template➡[➡Edit a title➡[➡Phone
Memory or Memory Card ➡[
• Templates can only be saved when the text has
been decorated with Arrange settings.
[Save to Drafts]
Create Message Window K➡To Drafts ➡[➡
Save➡[
Check the Content Before Sending a
Message
[Preview]
Create Message Window H or K➡Preview➡
[
4
Messaging
Arrange Window Font Color ➡[➡Select a
color ➡[➡Enter text
■Deleting Decorations Individually from Text
Specify the Length of Time a Sent Message
is Stored on Server
[Expiry Time]
Create Message Window Options➡[➡Expiry
➡[➡Select an expiry time➡[
Check Delivery of a Message
[Delivery Check]
Create Message Window Options➡[➡
DeliveryCheck ➡[➡ON➡[
Specify a Time Before Delivering a
Message to Recipients
[Delivery Time]
Create Message Window Options➡[➡Delivery
Time➡[➡Select a delivery time➡[
• This function can only be set with S! Mail.
4-15
08.3.23 1:57:48 PM
Advanced Features
Set Message Priority Before Sending
[Priority]
Create Message Window Options➡[➡Priority
➡[➡Select the priority➡[
• This function can only be set with S! Mail.
4
Incoming Messages
Receiving Messages
Manually Retrieve Complete S! Mail
[Retrieve Mail]
Messaging
Activate the Reply to Function Before
Sending
[Reply to]
Select S! Mail notification➡[➡Retrieve
Mail➡[
Create Message Window Options➡[➡Reply to
Forward the Continuation of S! Mail
[Forward Mail]
➡[➡Activate ➡[
• Save a Reply address in advance (page 13-15).
• This function can only be set with S! Mail.
Delete a Sent Message Checked on the
Recipient's Side Automatically
[Self-delete]
Create Message Window Options➡[➡
Self-delete➡[➡ON➡[
• This function can only be set with S! Mail.
Select S! Mail notification➡K➡Divert ➡
[➡Server Mail ➡[➡Keep or Do not
Keep ➡[➡Enter an address➡J
• For details on how to enter addresses, see
page 4-4.
Server Operations
Use the Mail List
[Update Mail List/Retrieve Mail]
J➡Server Mail ➡[
■Retrieving and Updating the Mail List
J➡Update➡[
■Retrieving Messages
Select a message➡K➡Retrieve➡[➡
One, Select Multi or All ➡[
■Retrieving Multiple Messages at Once
K➡Retrieve➡[➡Select Multi ➡[➡
Select messages➡[➡J
Forward Server Messages
[Forward Server Mail]
J➡Server Mail ➡[➡Select a message➡
K➡Divert ➡[➡Keep or Do not Keep ➡
[➡Enter an address➡J
• When Do not Keep is selected, the forwarded
message is deleted from the server.
• For details on how to enter addresses, see
page 4-4.
4-16
921T_web_0802.indb 4-16
08.3.23 1:57:49 PM
Delete Server Messages
[Delete/Select Multi/Delete All]
J➡Server Mail ➡[
■Deleting One Message
Select a message➡K➡Delete➡[➡One➡
[➡Server Mail or Notif./Server ➡[➡
YES➡[
K➡Delete➡[➡Select Multi ➡[➡
Server Mail or Notif./Server ➡[➡Select
messages➡[➡J➡YES➡[
■Deleting All Messages
K➡Delete➡[➡All Read Mail or All ➡
[➡Server Mail or Notif./Server ➡[➡
Enter your Handset Code➡YES➡[
From ➡ Message Box Window page 4-10
Message List Window page 4-10
[Mailbox Volume]
J➡Server Mail ➡[➡K➡Mailbox
Vol.➡[
• To update the amount of server space, press
J (Update).
• If the server usage exceeds 80%, a warning
window appears. Retrieve messages stored on
the server (page 4-16) or delete them.
[Rename Folder]
Message Box Window Select a folder➡K➡
Rename Folder ➡[➡Enter a folder name➡
Organizing Messages
[
Set Security for Message Box
[Security Lock]
Protect Messages
[Protect/Select Multi/Protect All]
J➡Message Box ➡K➡Security Lock ➡
[➡Enter your Handset Code➡Lock ➡[
■Protecting One Message
• To check the content of messages, do the
following.
J➡Message Box ➡[➡Enter your
Handset Code➡Select a folder➡[➡Select a
message➡[
Set Security for Folders
Message List Window Select a message➡K➡
Protect ➡[➡ One➡[➡Protect ➡[
■Protecting Multiple Messages
4
Message List Window K➡Protect ➡[➡
Select Multi ➡[➡Protect ➡[➡Select
messages➡[➡J
■Protecting All Messages
[Security Lock]
Check Server Status
Edit a Folder Name
Messaging
■Deleting Multiple Messages
Organizing/Using Messages
• You can set the handset so that it asks for
Message List Window K➡Protect ➡[➡All ➡
[➡Protect ➡[ (twice)
entering your Handset Code in order to view
the messages in the selected folder. However,
folder security cannot be set to General
folder.
Message Box Window Select a folder➡K➡
Security Lock ➡[➡Enter your Handset
Code➡Lock ➡[
4-17
921T_web_0802.indb 4-17
08.3.23 1:57:50 PM
Advanced Features
Delete Messages
[Delete/Select Multi/All in Folder/Delete
All]
■Deleting One Message
Message List Window Select a message➡K➡
Delete➡[➡ One➡[➡YES➡[
4
■Deleting Multiple Messages
Messaging
Message List Window K➡Delete➡[➡Select
Multi ➡[➡Select messages➡[➡J➡
YES➡[
Using Messages
■Making a Call to the Selected Phone
Forward Messages
[Forward Mail]
• When forwarding an S! Mail, the subject to
which Fw: is prefixed is automatically inserted
in the subject field.
Message List Window Select a message➡K➡
Divert ➡[
Number
Voice Call ➡[➡N
■Making a Video Call to the Selected
Phone Number
Voice Call ➡[➡K➡Video Call➡[
■Making an S! Circle Talk Call to the
Selected Phone Number
Voice Call ➡[➡K➡Circle Talk➡[➡
Call Sender/Recipient
[Call Sender/Call Address]
J
■Deleting All Messages in a Folder
Message Box Window K➡Delete➡[➡All in
Folder ➡[➡Enter your Handset Code➡YES
Message List Window Select a message➡K➡
Call Sender or Call Address➡[➡N
Phone Number/E-mail Address
Create Mail ➡[➡ Create➡[➡The
Create Message Window opens
➡[
■Deleting All Received/Sent Messages
Message Box Window K➡Delete➡[➡All ➡
[➡Enter your Handset Code➡YES➡[
Check Delivery Report
[Check Delivery Report]
Message List Window Select a message that has the
delivery check icon ➡[
Use Linked Information
[Call/Create Message/Save Sender/
Start Navi Appli/Access URL]
Message List Window Open a message that has a
link➡Select a link➡[
• The available linked information is displayed in
blue characters.
■Sending a Message to the Selected
■Adding the Selected Phone Number/
E-mail Address to Phone Book
Save Sender ➡[➡Add New or Add ➡[
➡The Phone Book Entry Window opens
• See "Creating New Entries" (page 2-16) for
entering other items.
■Starting the Navi Appli from Location
Information
Navi Appli ➡[➡Launch ➡[
■Saving the Selected Location
Information to the My Locations
To Locations ➡[
4-18
921T_web_0802.indb 4-18
08.3.23 1:57:50 PM
■Connecting to the Selected URL
By Yahoo! Keitai or By PC Browser ➡[
Save Attached Files
[Save Attachments]
[Text Copy]
Message List Window Open a message➡K➡
Text Copy ➡[➡Move cursor to one end of
the text range to copy➡[➡Specify the range
➡[
Move SMS Messages to the USIM Card or
Handset
[Move]
Message List Window Open a message➡K➡
Move➡[➡To Folder, To Phone or To
USIM➡[
Move Messages to Another Folder
[Move Folder]
■Moving One Message
Message List Window Select a message➡K➡
Move Folder ➡[➡ One➡[➡Select the
destination folder➡[
4
■Moving Multiple Messages
Message List Window K➡Move Folder ➡[
➡Select Multi ➡[➡Select messages➡
[➡J➡Select the destination folder➡[
■Moving All Messages in the Folder
Messaging
Message List Window Open a message that has an
attachment➡Select a file➡[➡Save➡[➡
Enter a file name➡[➡Phone Memory or
Memory Card ➡[➡Select a folder➡[
• Some files cannot be saved depending on the
file type.
• To display/play the attached file, open the file
and select View or Play. Some data may not
be displayed/played properly on your handset.
• When a received message has more than 20
attached files, all the files after the 20th file
are not displayed/played.
Copy Text
Message List Window K➡Move Folder ➡[
➡All ➡[➡Select the destination folder➡[
Check Message Details
[View Details]
Message List Window Open a message➡K➡
View➡[➡View Details➡[
Edit and Send Unsent Messages
[Edit Unsent Messages]
J➡Unsent ➡[➡Select a message➡[
➡Select an item➡[➡Edit the item➡[➡
J➡OK➡[
• Press J (OK) after editing the address.
Change the Order of Messages
[Sort by]
Message List Window K➡Sort by ➡[➡Select
the criteria for changing order➡[
4-19
921T_web_0802.indb 4-19
08.3.23 1:57:51 PM
4
Messaging
4-20
921T_web_0802.indb 4-20
08.3.23 1:57:51 PM
5
Internet
Internet ・・・・・・・・・・・・・・・・・・・・・・・・・・・・・・・・・・・・・・・・・・・・・・・・・・・・・・・・・・・・・・・・・・・・・・・・・・・・ 5-2
About the Internet ・・・・・・・・・・・・・・・・・・・・・・・・・・・・・・・・・・・・・・・・・・・・・・・・・・・・・・・・・・・・・・・・・・・ 5-2
Yahoo! Keitai ・・・・・・・・・・・・・・・・・・・・・・・・・・・・・・・・・・・・・・・・・・・・・・・・・・・・・・・・・・・・・・・・・・・・・・・ 5-3
Accessing Yahoo! Keitai・・・・・・・・・・・・・・・・・・・・・・・・・・・・・・・・・・・・・・・・・・・・・・・・・・・・・・・・・・・・・・・ 5-3
PC Site Browser ・・・・・・・・・・・・・・・・・・・・・・・・・・・・・・・・・・・・・・・・・・・・・・・・・・・・・・・・・・・・・・・・・・・・・ 5-4
Accessing PC Sites ・・・・・・・・・・・・・・・・・・・・・・・・・・・・・・・・・・・・・・・・・・・・・・・・・・・・・・・・・・・・・・・・・・・ 5-4
Web Page Operations ・・・・・・・・・・・・・・・・・・・・・・・・・・・・・・・・・・・・・・・・・・・・・・・・・・・・・・・・・・・・・・・・ 5-5
Bookmarks/Saved Pages ・・・・・・・・・・・・・・・・・・・・・・・・・・・・・・・・・・・・・・・・・・・・・・・・・・・・・・・・・・・・・ 5-6
Using Bookmarks・・・・・・・・・・・・・・・・・・・・・・・・・・・・・・・・・・・・・・・・・・・・・・・・・・・・・・・・・・・・・・・・・・・・ 5-6
Using Saved Pages・・・・・・・・・・・・・・・・・・・・・・・・・・・・・・・・・・・・・・・・・・・・・・・・・・・・・・・・・・・・・・・・・・・ 5-6
Advanced Features ・・・・・・・・・・・・・・・・・・・・・・・・・・・・・・・・・・・・・・・・・・・・・・・・・・・・・・・・・・・・・・・・・・ 5-7
921T_web_0802.indb 5-1
08.3.23 1:57:52 PM
Internet
About the Internet
More Features
Use your handset to access the Mobile Internet via Yahoo! Keitai (SoftBank's mobile portal site). Also
browse the Internet using PC Site Browser.
Internet
5
Internet
Yahoo! Keitai
PC Site Browser
Access Mobile
Internet Sites
Access PC Sites
Security Settings
(E page 13-19)
• Send/Block Manufacture Number
• Configure Send Referer Setting
• Enable/Disable Cookies
• Configure Script Settings
• Check Root Certificates
• Set Authentication
• Set SSL Communication
• About Security
This handset uses SSL/TLS (a protocol for sending encrypted data) to protect against dangers on the
Internet such as eavesdropping, tampering and spoofing. Root certificates necessary for SSL/TLS are
saved on the handset.
• When a security notice appears, subscribers must decide for themselves whether or not to open the
page. Opening secure pages constitutes agreement to the terms of SSL/TLS usage.
• SOFTBANK MOBILE Corp., VeriSign Japan K.K., Cybertrust Japan Co., Ltd., Entrust Japan Co., Ltd.,
GlobalSign K.K., RSA Security Japan Ltd. and Secom Trust Systems Co., Ltd. cannot be held liable
for any damages associated with the use of SSL/TLS.
• In an HSDPA (High Speed Downlink Packet Access) area, you can receive at a maximum speed of
3.6 Mbps and send at a maximum speed of 384 kbps. Note that transfers of large files may result
in high transmission fees.
5-2
921T_web_0802.indb 5-2
08.3.23 1:57:52 PM
Yahoo! Keitai
Accessing Yahoo! Keitai
Accessing a Web Page from History
q
q Press K
More Features
Press and hold K➡History➡[
Connecting/Browsing
• To disconnect during communication, press
(E page 5-7)
K (Cancel).
History Window
w
Select a title ➡[
q Press and hold K➡Enter URL➡[
Web Page
w Select an item ➡[
e To stop viewing the web page, press
5
Internet
Accessing a Web Page by Entering the Address
Universal Settings for Yahoo! Keitai and
PC Site Browser
(E page 13-20)
• Delete Cache Memory
• Delete All Cookies
• Clear Authentication Info
• Return Browser Settings, Bookmarks, and
Saved Pages to Default
• Restore Settings and Stored Information to
Default
Yahoo! Keitai Settings (E page 13-20)
• Set the Storage Location for Downloaded
Contents
L/O➡YES➡[
URL Window
w Select Direct Entry➡[➡Enter a URL
➡[
(twice)
5-3
921T_web_0802.indb 5-3
08.3.23 1:57:52 PM
PC Site Browser
Accessing PC Sites
q Press and hold K➡J(
Accessing a Web Page from History
)
q
Connecting/Browsing
PC Site Browser
➡[
History Window
w Select a title ➡[➡Always Ask or Ask
5
Once Only➡[
Internet
PC Browser Menu
w
Select Homepage➡[➡Always Ask or
Ask Once Only➡[
• If you select Ask Once Only, the
confirmation window about display and
transmission fees will not be displayed
from the next time.
More Features
From PC Browser Menu, select History
Accessing a Web Page by Entering the URL
q From PC Browser Menu, select Enter
URL➡[
(E page 5-7)
(E page 5-7)
Universal Settings for Yahoo! Keitai and
PC Site Browser
(E page 13-20)
• Delete Cache Memory
• Delete All Cookies
• Clear Authentication Info
• Return Browser Settings, Bookmarks, and
Saved Pages to Default
• Restore Settings and Stored Information to
Default
PC Site Browser Settings (E page 13-20)
• Do Not Display a Warning Window When
Switching Browsers
URL Window
w
Web Page
Select Direct Entry➡[➡Enter a URL
➡[(twice)➡Always Ask or Ask Once
Only➡[
• Some websites may not be displayed
correctly or it may take time to open the site
depending on the site.
5-4
921T_web_0802.indb 5-4
08.3.23 1:57:53 PM
Web Page Operations
Scrolling Pages
When the whole page is not displayed on the
browser screen, the scroll bar appears on the right
or bottom of the screen. View the remaining part
using G/F to scroll the screen. When viewing
PC sites in Viewer position, press T/M to
scroll the screen up and down, and Q/P to
scroll right and left.
Moving Cursor
Returning to Previous Page/Next Page
Websites you have retrieved are temporarily
stored. Press J (Back) to return to the previous
page. If you press K and select Forward, it
takes you to the next page.
When there are entry fields and selectable items
on the screen, operate as follows.
①
② ①Text Entry Field
You can enter text
お名前 年齢
directly. Select □
10代
and press [. The text
性別
entry window opens.
男 女
Enter text and press
[.
資料請求
②Menu List
送信 キャンセル
Select □ and press
[ to display the menu
list. Select an item and
press [.
③
④⑤
③Command Button
Select operations such
as sending or canceling
what you put in the entry fields. Select
and
press [ to execute the indicated command.
④Checkbox
and press [. The checkbox changes to
Select
, indicating that the item is selected.
⑤Radio Button
and
Select one of a range of items. Select
press [. The radio button changes to ,
indicating that the item is selected.
• One on the left is a screen image. The actual
screen may look different.
More Features
Using Web Pages
(E page 5-7)
Web Page Settings
(E page 13-21)
• Change the Font Size
• Change the Scroll Unit
• Change the Text Encoding Type
• Adjust Sound Playback Volume
• Do Not Download Images and Melodies from
Web Pages
• Set Security Lock
5
Internet
To select items, use G/F to move cursor. When
viewing PC sites in Viewer position, press T/
M to move cursor up and down, and Q/
P to move right and left.
Text Entry & Item Selection
5-5
921T_web_0802.indb 5-5
08.3.23 1:57:53 PM
Bookmarks/Saved Pages
Using Bookmarks
If you bookmark frequently accessed pages, you
will be able to access them quickly and easily.
Saving a Bookmark
q Display a page➡K➡Bookmarks
Opening Bookmarks
q
Press and hold K➡Bookmarks➡[
• To access a web page from a PC site
bookmark:
Press and hold K➡J( )➡
Bookmarks➡[
w Select Save➡[
Internet
e Press J (Edit) ➡Select the title field
➡[➡Edit the title➡[
r Press J (OK) ➡[
• Select a folder when adding the bookmark
to one of the folders you created.
page already saved in Saved Pages, it is
saved as a different page.
Viewing Saved Pages
• To view saved pages of PC sites:
• If you don't edit the title or URL, press
[ (Save).
copyright restrictions, etc.
• If you save a page with the same URL as a
q Press and hold K➡Saved Pages➡[
➡[
5
• Some pages may not be saved because of
Bookmarks List Window
Press and hold K➡J (
Pages➡[
) ➡Saved
w Select the title of a page ➡[
Using Saved Pages
If you save frequently accessed information
(pages) to Saved Pages, the information can be
viewed without accessing the Internet later.
Saving Displayed Pages to Saved Pages
q Display a page ➡K➡Saved Pages
➡[
Saved Pages List Window
w Select the title of a saved page ➡[
More Features
Bookmarks and Saved Pages
(E page 5-9)
w Select Save➡[➡Enter a title➡[
5-6
921T_web_0802.indb 5-6
08.3.23 1:57:54 PM
Advanced Features
Internet
Using Web Pages
Switch Browser
Connecting/Browsing
Web Page K➡Change View➡[➡Current
Page or Linked Page➡[➡Always Ask or Ask
Once Only➡[
• If you select Ask Once Only, the confirmation
window will not be displayed from the next time.
Delete URL History
[Delete/Select Multi/Delete All]
PC Site Browser
From ➡ History Window page 5-3, 5-4
URL Window page 5-3, 5-4
Web Page page 5-3, 5-4
Switch the Screen
[PC Screen/Small Screen]
■Deleting Multiple Entries
History Window K➡Delete➡[➡Select
Multi➡[➡Select recorded titles➡[➡J
➡YES➡[
Web Page K➡Tool➡[➡PC Screen or
Small Screen➡[
Enlarge/Reduce a Page
History Window K➡Delete➡[➡All➡[➡
Enter your Handset Code➡YES➡[
Web Page K➡Tool➡[➡Zoom➡[➡
Select magnification/shrinkage percentage ➡[
Use URL History
View Pages in Landscape or Portrait
[Landscape/Portrait]
[URL History]
URL Window URL History➡[➡Select a URL
➡[ (twice)
Copy Text
Web Page K➡Text Copy➡[➡Move cursor
to one end of the text range to copy➡[➡
Specify the range➡[
• Only characters and pictographs can be copied.
5
Send URL Link via Mail
[Send URL]
Web Page K➡Tool➡[➡Send URL➡[
[Zoom]
■Deleting All Entries
Web Page K➡Reload Page➡[
Internet
History Window K➡Delete➡[➡One➡[
➡YES➡[
[Reload Page]
[Text Copy]
From ➡ Web Page page 5-4
■Deleting One Entry
Refresh
Web Page K➡Tool ➡[➡Landscape or
Portrait ➡[
• When the handset is in Viewer position,
Portrait View is unavailable.
Search Text in Web Pages
[Page Search]
Web Page K➡Tool➡[➡Page Search➡
[➡Enter text➡[➡Select a search method
➡[➡Up or Down, or ON or OFF➡[➡
J
5-7
921T_web_0802.indb 5-7
08.3.23 1:57:55 PM
Advanced Features
Use Files
[File Playback/Save File/File Details]
Display a page that has a file ➡K➡Saving
Mode➡[➡Select a file➡[
5
■Opening Files
Play/View ➡[
• Some files may not be played/displayed
properly on your handset.
■Download
Internet
Save ➡[➡Phone Memory or Memory
Card➡[➡Select a folder➡[
• Some files may not be saved because of
copyright restrictions, etc.
■File Properties
File Details ➡[
Use Files from Links in Web Pages
[File Playback/Save File/File Details/
Set Ringtone/Set Wallpaper]
Display a page that has a file ➡Select a link ➡[
■Playing or Displaying the File
Play/View ➡[
• Some files may not be played/displayed
properly on your handset.
■Saving the File
■Sending a Message/Adding to Phone
Save➡[
• Some files may not be saved because of
copyright restrictions, etc.
Book
Web Page Select a link ➡[➡As Mail or To
Phone Book➡[
■Displaying the File Properties
■Accessing a Website
File Details ➡[
Web Page Select a link ➡[
■Saving and Setting the File as Ringtone
Set Ringtone➡[➡Ring Song・Tone or
Music➡[➡Select a type of incoming event➡
[ (twice)
■Saving and Setting the File as Wallpaper
Set Wallpaper➡[ (twice)
• Flash® or Animation wallpaper is disabled
when Active Window is on. Select Notify
Only Once to prevent warning message from
appearing again.
Use Text Strings in Web Pages
[Use Phone Number/E-mail Address/URL]
• Available only when the phone number, e-mail
address or URL is underlined.
■Making a Call/Adding to Phone Book
Web Page Select a link➡[➡Call or To Phone
Book➡[
Save a Page to Event
[To Event]
Web Page K➡Tool➡[➡To Event➡[➡
Save the event (page 9-4)
Save a Page to My Locations
[To Locations]
Web Page K➡Tool➡[➡To Locations➡
[➡Save the location information (page 9-32)
View Page Properties
[Page Details]
Web Page K➡Tool➡[➡Details➡[➡
Page Details➡[
View the Server Certificate for the Web
Page
[Session Info.]
Web Page K➡Tool➡[➡Details➡[➡
Session Info.➡[
5-8
921T_web_05.indd 5-8
08.3.24 5:35:00 PM
Jump to the Top or End of the Web Page
[Jump]
Web Page K➡Tool➡[➡Jump➡[➡To
Top or To End➡[
Search for a Page by Entering a Keyword
[Web Search]
Bookmarks and Saved Pages
From ➡ Bookmarks List Window page 5-6
Saved Pages List Window page 5-6
Delete Bookmarks and Saved Pages
[Delete/Select Multi/Delete All]
■Deleting One Entry
Create a Folder to Organize Bookmarks
[Create Folder]
Bookmarks List Window K➡Create Folder ➡
[➡Enter a folder name ➡[
Move Bookmarks to a Specified Folder
[Move]
Bookmarks List Window / Saved Pages List Window
Select a title ➡K➡Delete➡[➡One➡[
➡YES➡[
■Moving One Bookmark
Display a Selected Frame in the Whole
Screen
[Frame In]
■Deleting Multiple Entries
■Moving Multiple Bookmarks
Bookmarks List Window / Saved Pages List Window
K➡Delete➡[➡Select Multi➡[➡
Select titles➡[➡J➡YES➡[
Bookmarks List Window K➡Move➡[➡Select
Multi➡[➡Select bookmarks➡[➡J➡
Select a folder➡[
■Deleting All Entries
■Moving All Bookmarks
Bookmarks List Window / Saved Pages List Window
K➡Delete➡[ ➡All➡[➡Enter your
Handset Code➡YES➡[
[➡Select a folder➡[
Web Page Select a frame ➡K➡Tool➡[➡
Frame In➡[
■Returning to the All-Frames Screen
K➡Tool➡[➡Frame Out➡[
Bookmarks List Window Select a bookmark➡K➡
Move➡[➡One➡[➡Select a folder➡[
5
Internet
Web Page K➡Tool➡[➡Web Search➡[
➡Enter a keyword➡[ (twice)
Bookmarks List Window K➡Move➡[➡All➡
Send a Bookmark via Mail
Change Titles
[Edit Title]
■Changing a Bookmark Title
[As Mail]
Bookmarks List Window Select a bookmark➡K➡
As Mail➡[
Bookmarks List Window Select a bookmark ➡K➡
Edit➡[➡Select the title field➡[➡Edit the
title➡[➡J
■Changing the Title of a Saved Page
Saved Pages List Window Select a saved page ➡K
➡Rename➡[➡Edit the title➡[
921T_web_0802.indb 5-9
5-9
08.3.23 1:57:56 PM
5
Internet
5-10
921T_web_0802.indb 5-10
08.3.23 1:57:57 PM
6
TV
TV ・・・・・・・・・・・・・・・・・・・・・・・・・・・・・・・・・・・・・・・・・・・・・・・・・・・・・・・・・・・・・・・・・・・・・・・・・・・・・・・・・ 6-2
About TV ・・・・・・・・・・・・・・・・・・・・・・・・・・・・・・・・・・・・・・・・・・・・・・・・・・・・・・・・・・・・・・・・・・・・・・・・・・ 6-2
Watching TV ・・・・・・・・・・・・・・・・・・・・・・・・・・・・・・・・・・・・・・・・・・・・・・・・・・・・・・・・・・・・・・・・・・・・・・・・ 6-3
Configuring Channel Settings ・・・・・・・・・・・・・・・・・・・・・・・・・・・・・・・・・・・・・・・・・・・・・・・・・・・・・・・・・・ 6-3
Watching TV ・・・・・・・・・・・・・・・・・・・・・・・・・・・・・・・・・・・・・・・・・・・・・・・・・・・・・・・・・・・・・・・・・・・・・・・ 6-4
Recording/Playing Programs ・・・・・・・・・・・・・・・・・・・・・・・・・・・・・・・・・・・・・・・・・・・・・・・・・・・・・・・・・・ 6-6
Recording a Program ・・・・・・・・・・・・・・・・・・・・・・・・・・・・・・・・・・・・・・・・・・・・・・・・・・・・・・・・・・・・・・・・・ 6-6
Playing a Recorded Program ・・・・・・・・・・・・・・・・・・・・・・・・・・・・・・・・・・・・・・・・・・・・・・・・・・・・・・・・・・・ 6-6
View/Record Timer ・・・・・・・・・・・・・・・・・・・・・・・・・・・・・・・・・・・・・・・・・・・・・・・・・・・・・・・・・・・・・・・・・・ 6-7
Setting the View/Record Timer ・・・・・・・・・・・・・・・・・・・・・・・・・・・・・・・・・・・・・・・・・・・・・・・・・・・・・・・・・・ 6-7
Advanced Features ・・・・・・・・・・・・・・・・・・・・・・・・・・・・・・・・・・・・・・・・・・・・・・・・・・・・・・・・・・・・・・・・・・ 6-8
921T_web_0802.indb 6-1
08.3.23 1:57:57 PM
TV
About TV
Precautions
This handset supports One Seg Digital TV for cellular phones and information terminals.
For more information on One Seg services, visit the Association for Promotion of Digital Broadcasting
Website:
http://www.dpa.or.jp (PC)
http://www.dpa.or.jp/1seg/k/ (Mobile Site) (Japanese)
• Digital TV supports reception in Japan only. Other countries use different broadcast systems and
frequencies, and so Digital TV reception is not possible outside of Japan.
One Seg
6
TV
One Seg is a digital TV broadcasting
service for mobile devices. It uses one
segment of the terrestrial digital band to
allow you to watch TV and data broadcasts
you enjoy at home on your handset.
Data Broadcasts
Enjoy data broadcasts along with watching
your favorite program. You can access related
information and even participate in the
program.
Recording Programs
Record a program to the handset or memory card
while you watch it and enjoy later.
View/Record Timer
Use the timer to view or record programs.
Using the Program Guide makes timer setting
even easier.
Enjoy watching TV in
widescreen.
• Never use the Digital TV while riding a bicycle
or motorcycle, or while driving a car. Doing so
can make it difficult to hear sounds around you,
or the image or audio can distract you and
create the risk of accident. Even while walking,
pay attention to the traffic around you when
using the Digital TV. Be especially careful in the
vicinity of railway crossings and pedestrian
crosswalks.
• Digital TV images and/or audio can be affected
if mail is received while you are using the
Digital TV.
• Note that SoftBank assumes no responsibility
for any loss or corruption of data stored or
settings configured by you due to an accident,
malfunction, or repair of handset. Also note that
Digital TV information (data recorded from the
Digital TV, TV links, etc.) saved on the handset
cannot be transferred to another handset when
replacing the current handset, including
changing to another model and repair.
• You will not be able to watch Digital TV
broadcasts if your handset does not have a
USIM Card installed or if your contract with
SoftBank expires.
• Channels allocated by Set Channels settings are
based on information available as of December
2007. Whenever there is a change in the
regional broadcasting channels, use Scan to
update the channel settings.
6-2
921T_web_0802.indb 6-2
08.3.23 1:57:57 PM
Watching TV
Configuring Channel Settings
Because the channels that can be received depend
on your location, the first thing you should do
before using the TV is to configure its reception
channel settings.
q Press and hold Q➡[
e Select the area ➡[➡ Select the
prefecture ➡[
Digital TV.
• For some prefectures, select a regional
• Broadcast Signals
settings:
Select Scan➡[
Image/audio quality may be poor in the
following areas due to inadequate signal
reception.
・Areas far away from or extremely close to
the broadcast source
・Mountain areas or places beside tall
buildings
・Inside of a moving train or car,
underground, in a tunnel, etc.
・Near high-tension electrical wires, neon
lighting, wireless stations, railway lines,
highways, etc.
・Other areas where there is a large number
of signal obstructions, or areas that are cut
off from the signal
television signals. You should leave it
stowed in the handset whenever you are
not watching the Digital TV.
・Never try to adjust the angle or apply
excessive force by holding the tip of the TV
Antenna. Doing so can cause the TV
Antenna to bend.
・When using the TV Antenna, extend it as
far as it will go. Note, however, that the
best image and audio reception may be
possible with the TV Antenna stowed
inside the handset if you are very close to
the source of the broadcast.
• Battery Level
Use of the Digital TV is not possible when
the battery level is at , except during
charging. The Digital TV will turn off
automatically if the battery level drops to
while you are using it.
• About Charging
You can use the Digital TV while charging
the battery.
・Watching or recording Digital TV while
charging can cause longer charging time
or unfinished charging.
・Locating the AC Charger (sold separately)
cord too close to the TV Antenna while
charging can cause interference with the
Digital TV image.
6
TV
• To automatically configure channel
・Extend the TV Antenna when using the
・The TV Antenna is only for receiving
subdivision as well. If you select
Hokkaido for the area, select the city.
w Select Manual ➡[
• About the TV Antenna
6-3
921T_web_0802.indb 6-3
08.3.23 1:57:57 PM
Watching TV
Watching TV
q Press and hold Q
• Do not remove the battery while the Digital
TV is in operation. Doing so can cause the
Set Channels settings, broadcast memory,
TV links, and other data to become corrupted
or deleted.
Using the Data Broadcast Mode
Digital TV starts up in Data Broadcast Mode. In
the Data Broadcast area you can access a variety
of information relating to the program.
Keys for Using Digital TV
6
TV
TV Screen
• Digital TV is displayed in full screen view
when started from Viewer position (page
6-5).
w Select channels using the keypad
• Select channel 10 by pressing *,
channel 11 by 0, and channel 12 by
#.
Direct channel selection cannot be used
when keypad operations are used by the
data broadcaster while viewing in Data
Broadcast Mode.
• To change channels one by one, press D/
C or T/M. To automatically
search for receivable channels, press and
hold D/C.
e To end Digital TV, press O➡YES➡[
Adjust
Volume
*1
A/B or P/Q
Toggle View
Screens
H or R
Display
Channel
Information
S (press and hold)
Subtitles
On/Off
R (press and hold)
End TV
*3
L /O
*2
Data Broadcast Mode
• In the Data Broadcast area, press A/B
to move cursor and scroll the page.
*2
*1 Moves cursor in Data Broadcast Mode.
*2 Not available during full screen display of a
data broadcast.
*3 You cannot end TV in Data Broadcast Mode.
• Press and hold H while in Data
Broadcast Mode to display a data
broadcast in full screen. To return to the
previous view, press and hold H again.
• Press J (To TV) to switch to Image
Mode. Press J (ToData) again in Image
Mode to return to Data Broadcast Mode.
• Receiving data broadcasts does not incur
transmission fees. However, you will be
charged if you utilize a service that uses the
Internet.
• Data broadcasts cannot be displayed in
Landscape View.
6-4
921T_web_0802.indb 6-4
08.3.23 1:57:58 PM
Using the Program Guide
Image Mode View Screens
Press H or R to switch view screens.
The Electronic Program Guide (EPG) S! Appli lets
you select a program and activate the Digital TV.
q Press [➡TV➡[➡Program Guide
➡[
④
①
②
③
The program guide appears. For details
about the procedure, see the program guide
help.
More Features
Functions for Area and Channel Settings
(E page 6-8)
Functions While Watching TV
(E page 6-8)
Functions for Data Broadcast
(E page 6-8)
⑤
⑥
④
Landscape View
④
Full Screen View
① Station Name
③ Channel Number
⑤ Volume
② Program Title
④ Subtitle Area
⑥ Key Guide
6
TV
Image Mode in Portrait View
Settings for Watching TV (E page 13-28)
• Channel List Name
• Auto-off Timer
Image and Sound
(E page 13-28)
• Set TV Screen Brightness
• Set TV Image Quality
• Set TV Image Sharpness
• Set Economy Mode
• Set Subtitles
• Select the Audio Output While Watching TV
Data Broadcast
(E page 13-29)
• Set Data Communication Confirmation
Window
• Set Secure Connection Confirmation Window
• Set Memory Access Confirmation Window
• Delete Broadcast Data
• Set Location Information Send Setting
• Set Whether or Not to Send the Manufacture
Number
• Set the Content Storage Location
6-5
921T_web_0802.indb 6-5
08.3.23 1:57:58 PM
Recording/Playing Programs
Recording a Program
Playing a Recorded Program
Keys Used While Playing/Paused
You can record a program as you watch it. In
addition to images and audio, you also can record
subtitles and data broadcast information.
q Press [➡TV➡[➡TV Player ➡[➡
Fast Forward
*1
*1
*2
C , M or T
Rewind
*1
*1
*2
D , T or M
Frame Advance
*3
*3
*4
C , M or T
Frame Back
*3
*3
*4
D , T or M
Pause/Play
[ or R
Adjust Volume
*5
A/B or P/Q
Phone Memory or Memory Card➡[
q Press and hold Q➡Display the
program to record
• For information about selecting the
channel, see page 6-4.
6
w
Press K➡Record➡[
Program recording starts.
TV
e Press [/R➡YES➡[
Recording stops and the recorded program is
saved to the storage location specified by
File Storage.
Recorded Program List Window
w Select the program to play ➡[
• Except for your own personal enjoyment, any
use of recordings made by you that infringes
upon the copyrights of copyright holders is
prohibited.
• Due to copyright restrictions, you may not be
able to record certain programs.
*1 Available while playing in Portrait View
*2 Available while playing in Landscape View in
Clamshell Open/Viewer position
*3 Available when playback is paused in Portrait
View
*4 Available when playback is paused in
Landscape View in Clamshell Open/Viewer
position
*5 Moves cursor in Data Broadcast Mode.
More Features
Program Playback Window
Functions for Recording and Playback
(E page 6-9)
Functions for Recorded Programs
(E page 6-9)
• You also can play a recorded program by the
following operation.
Press a[➡Data Folder➡a[➡TV
➡a[➡Select the program to play ➡a[
Settings for Recording Programs
(E page 13-30)
• Set the Storage Location for Recorded
Programs
6-6
921T_web_0802.indb 6-6
08.3.23 1:57:59 PM
View/Record Timer
Setting the View/Record Timer r Select Channel➡[➡Channel List➡
[➡Select a station ➡[
• Configure the channel settings in advance (page
• Select Direct Input to directly input a
6-3).
q Press [➡TV➡[➡Timer➡[
• The first time you use the timer, a warning
appears regarding the TV timer. Press B
to select OK. If you select NO in the
confirmation window, the warning will not
be displayed from the next time.
channel number.
t
Select Start Date➡[➡Enter a start
date and time ➡[➡Select End Date
➡[➡Enter an end date and time
➡[
y Select Do not Repeat➡[➡Select a
u Select As Setting➡[➡As Setting, Phone
Memory or Memory Card➡[
• Select As Setting to save the recorded
program to the location specified by File
Storage.
Timer List Window
w Press J(Create)➡Manual➡[
e Select View or Record➡[
i
Press J (OK)
When the View/Record Time is Near
Five minutes before the View/Record Timer is
activated, a window appears*, an alarm sounds,
and the handset vibrates.
*The actual notification window may look
different from the following.
notification appears on the External
Display.
• View/Record Timer cannot be activated in
the following situations.
・If the handset power is turned off
・In Card Reader Mode
Also, turn off any other functions before the
view/record time.
6
TV
repeat method➡[➡Enter a repeat
duration ➡[
If you have selected View in e, skip to i.
• When the handset is closed, timer
More Features
Functions for View/Record Timer
(E page 6-9)
Settings for View/Record Timer
(E page 13-30)
• Set the Alarm Volume for Timer Notification
• Set the Vibration for Timer Notification
6-7
921T_web_0802.indb 6-7
08.3.23 1:57:59 PM
Advanced Features
TV
From ➡ TV Screen
Data Broadcast Mode
Recorded Program List Window
Program Playback Window
Timer List Window
6
page 6-4
page 6-4
page 6-6
page 6-6
page 6-7
Functions While Watching TV
Functions for Data Broadcast
Select a Channel from the Channel List
[Select Station]
Save or Check TV Links
[Save/Check TV Links]
TV Screen K➡Settings➡[➡Set Channels
➡[➡J➡Select a channel ➡[
■Saving a TV Link
Functions for Area and Channel Settings
Check the Keys for Use While Watching TV
[Key Guide]
Add a Reception Area
TV Screen K➡Key Guide➡[
[Add Channel List]
TV
TV Screen K➡Settings➡[➡Set Channels
➡[➡Empty➡[➡Manual➡[➡Select
the area➡[➡Select the prefecture ➡[
• For some prefectures, select a regional
subdivision as well. If you select Hokkaido for
the area, select a city.
■Configuring Channel Settings
Automatically
TV Screen K➡Settings➡[➡Set Channels
➡[➡Empty➡[➡Scan➡[
Switch Reception Areas
[Switch Channel Lists]
TV Screen K➡Settings➡[➡Set Channels
➡[➡Select a channel list➡[
6-8
921T_web_0802.indb 6-8
Data Broadcast Mode Select items such as Save TV
Links➡[
• The actual procedure depends on the program.
For details, see the information within the data
broadcast.
■Displaying a Website from a TV Link
Capture a Picture
[Capture]
TV Screen Display the program ➡K➡Capture
➡[➡YES➡[
• Except for your own personal enjoyment, any
use of captured pictures that infringes upon the
copyrights of copyright holders is prohibited.
• Due to copyright restrictions, you may not be
able to capture pictures of certain programs.
[➡TV➡[➡TV Links➡[➡Select a TV
link ➡[
• To display a Memo, do the following.
[➡TV➡[➡TV Links➡[➡Select a
Memo ➡J
• The following icons appear to indicate the TV
link type.
TV Links
Valid
Expired
Memo
Use a Wireless Earphone
[Output Settings]
[➡TV➡[➡Settings➡[➡Output
Settings➡[➡Wireless➡[➡Select a
paired wireless device ➡[
• For information about pairing a wireless device,
see page 12-5 and the user manual of the
wireless device.
Link communication
contents
Mobile contents
PC contents
• For some TV links, an Internet connection
confirmation window will appear. If you select
Ask Once Only, the confirmation window
will not be displayed from the next time.
08.3.23 1:58:00 PM
Functions for Recording and Playback
Functions for View/Record Timer
Check the Keys for Use During Playback
[Key Guide]
Use Program Information to Set View/Record
Timer
[Set Timer by Program Guide]
Program Playback Window K➡Key Guide➡[
Functions for Recorded Programs
Timer List Window J➡Program Guide➡[➡
S! Appli starts ➡Select a program ➡Set the
View/Record Timer
Edit a File Name
[Rename]
Check/Edit/Delete Timer Information
[Check/Edit/Delete Timer Information]
■Checking Timer Information
Timer List Window Select an entry ➡[
■Editing Timer Information
Delete Files
[Delete/Select Multi/Delete All]
■Deleting One File
Recorded Program List Window Select a file ➡K➡
Delete➡[➡One➡[➡YES➡[
■Deleting Multiple Files
Recorded Program List Window K➡Delete➡[➡
Select Multi➡[➡Select files➡[➡J➡
YES➡[
Timer List Window Select an entry ➡[➡J➡
Select an item ➡[➡Edit the item➡J
■Deleting a Timer Entry
Timer List Window Select an entry ➡K➡Delete
■Checking a Timer Result
[➡TV➡[➡Timer Results➡[➡Select
an entry ➡[
■Deleting a Timer Result
[➡TV➡[➡Timer Results➡[➡Select
an entry ➡K➡Delete➡[➡YES➡[
View Available Memory on the Handset
and Memory Card
[Remaining Time]
Timer List Window K➡Remaining➡[
• Press J to switch between available memory
on the handset and memory card.
• The remaining time displayed serves as a guide
only. The actual time you can record depends
on the program.
6
TV
Recorded Program List Window Select a file➡K➡
Rename➡[➡Edit the file name ➡[
• You cannot edit files saved to a memory card.
Check/Delete Timer Results
[Check/Delete Timer Results]
➡[➡YES➡[
• When the timer is set to repeat, a confirmation
window appears.
■Deleting All Files
Recorded Program List Window K➡Delete➡[➡
All➡[➡Enter your Handset Code➡YES➡
[
6-9
921T_web_0802.indb 6-9
08.3.23 1:58:01 PM
6
TV
6-10
921T_web_0802.indb 6-10
08.3.23 1:58:02 PM
7
921T_web_0802.indb 7-1
Camera/Picture Editing
Camera・・・・・・・・・・・・・・・・・・・・・・・・・・・・・・・・・・・・・・・・・・・・・・・・・・・・・・・・・・・・・・・・・・・・・・・・・・・・・ 7-2
Basics ・・・・・・・・・・・・・・・・・・・・・・・・・・・・・・・・・・・・・・・・・・・・・・・・・・・・・・・・・・・・・・・・・・・・・・・・・・・・・ 7-2
Taking Pictures ・・・・・・・・・・・・・・・・・・・・・・・・・・・・・・・・・・・・・・・・・・・・・・・・・・・・・・・・・・・・・・・・・・・・・・ 7-3
Camera Modes ・・・・・・・・・・・・・・・・・・・・・・・・・・・・・・・・・・・・・・・・・・・・・・・・・・・・・・・・・・・・・・・・・・・・・ 7-3
Taking a Picture ・・・・・・・・・・・・・・・・・・・・・・・・・・・・・・・・・・・・・・・・・・・・・・・・・・・・・・・・・・・・・・・・・・・・・ 7-3
Recording Videos ・・・・・・・・・・・・・・・・・・・・・・・・・・・・・・・・・・・・・・・・・・・・・・・・・・・・・・・・・・・・・・・・・・・・ 7-5
Video Modes ・・・・・・・・・・・・・・・・・・・・・・・・・・・・・・・・・・・・・・・・・・・・・・・・・・・・・・・・・・・・・・・・・・・・・・・ 7-5
Recording a Video ・・・・・・・・・・・・・・・・・・・・・・・・・・・・・・・・・・・・・・・・・・・・・・・・・・・・・・・・・・・・・・・・・・・ 7-5
Camera Functions ・・・・・・・・・・・・・・・・・・・・・・・・・・・・・・・・・・・・・・・・・・・・・・・・・・・・・・・・・・・・・・・・・・・ 7-7
Delay Timer ・・・・・・・・・・・・・・・・・・・・・・・・・・・・・・・・・・・・・・・・・・・・・・・・・・・・・・・・・・・・・・・・・・・・・・・・ 7-7
Frame Setting (Still Picture) ・・・・・・・・・・・・・・・・・・・・・・・・・・・・・・・・・・・・・・・・・・・・・・・・・・・・・・・・・・・・ 7-7
Multi Shots (Still Picture) ・・・・・・・・・・・・・・・・・・・・・・・・・・・・・・・・・・・・・・・・・・・・・・・・・・・・・・・・・・・・・・ 7-7
Picture Editing ・・・・・・・・・・・・・・・・・・・・・・・・・・・・・・・・・・・・・・・・・・・・・・・・・・・・・・・・・・・・・・・・・・・・・・ 7-8
Basic Operations for Picture Editing ・・・・・・・・・・・・・・・・・・・・・・・・・・・・・・・・・・・・・・・・・・・・・・・・・・・・・ 7-8
Changing the Size ・・・・・・・・・・・・・・・・・・・・・・・・・・・・・・・・・・・・・・・・・・・・・・・・・・・・・・・・・・・・・・・・・・・ 7-9
Picture Effects ・・・・・・・・・・・・・・・・・・・・・・・・・・・・・・・・・・・・・・・・・・・・・・・・・・・・・・・・・・・・・・・・・・・・・・ 7-9
Compounding Pictures ・・・・・・・・・・・・・・・・・・・・・・・・・・・・・・・・・・・・・・・・・・・・・・・・・・・・・・・・・・・・・・・ 7-9
Advanced Features ・・・・・・・・・・・・・・・・・・・・・・・・・・・・・・・・・・・・・・・・・・・・・・・・・・・・・・・・・・・・・・・・・ 7-10
08.3.23 1:58:02 PM
Camera
7
Basics
• Pictures are saved in JPEG format, and
Use the camera to take pictures and record videos.
• Operations are described in Clamshell Open position unless otherwise noted.
• To avoid camera shake, hold the handset
Image Sizes
Shooting Modes
Select from a variety of sizes, from
handy-size pictures or videos perfect for
Sha-mail or Movie Sha-mail to high
resolution images, to fit your needs.
Use the delay timer, take pictures with
frames or other effects, or take
continuous shots.
Camera/Picture Editing
Auto Focus
Picture Editing
When you press the shutter key, the
camera automatically detects the distance
to the subject and focuses. Image
stabilization function is also included.
Compose and edit images by adding
stamps or text to pictures you have
taken.
Shoot Pictures/
Videos
Send with Sha-mail/
Movie Sha-mail
videos in MPEG-4 format.
firmly, or set the image stabilizer function
(page 13-26) to ON.
• Fingerprints or grime may affect focus. Wipe
the lens with a soft cloth.
• Do not block the lens or brightness sensor
with your finger or strap when shooting
pictures/videos.
Display Positions
Use the display position suited for each Camera
mode or Video mode. See page 1-4 for changing
the display position.
Clamshell Open Position
Use this position when shooting in Mobile, Video
Mail or Short Video mode.
Viewer Position
Use this position when shooting in Digital or Video
mode.
Self-portrait Position
Use this position for Self-view mode. Shoot either
in portrait or landscape orientation according to
the Camera/Video mode to be used.
Non-SoftBank
Mobile Phones
SoftBank
Handsets
PCs
7-2
921T_web_0802.indb 7-2
08.3.23 1:58:02 PM
Taking Pictures
Camera Modes
■Mobile
Take a picture to set as wallpaper, etc.
■Digital
Take a high-quality picture to display on an
external device such as PC.
w Frame subject in Display➡[/R
Autofocus adjustment occurs prior to taking
a picture (focus frame appears).
The shutter clicks, and the preview window
appears.
Taking a Picture
compromise image quality. Capture images
in adequate lighting or use Mobile Light.
Keys for Use with Viewfinder
Toggle Camera Modes
2
Zoom Adjustment
A/B* or
2
P/Q*
Exposure Adjustment
D/C*
Mobile Light On/Off
*
Self-view On/Off
#
Icons Display On/Off
0
Key Guide On/Off
1
1
q Press [➡Camera➡[➡Mobile or
Digital➡[
• Press R in Standby to display the
viewfinder of the last Camera mode you
used.
Press L➡YES➡[
e Press [/R
If Storage is set to Phone Memory, the
picture is saved to Pictures in Data Folder,
and the viewfinder reappears. If it is set to
Memory Card, a picture taken in Mobile
mode is saved to Pictures, one taken in
Digital mode to Digital Camera, and the
viewfinder reappears.
1
7
*1 Functions assigned to E are different in
Landscape View (page 2-3).
*2 Also available in Viewer position.
Camera/Picture Editing
Preview Window
• To delete the picture you have taken:
Viewfinder
• Capturing images in low-lighting may
7-3
921T_web_0802.indb 7-3
08.3.23 1:58:02 PM
Taking Pictures
More Features
Functions for Taking Pictures
(E page 7-10)
Common Functions After Shooting
Pictures/Videos
(E page 7-11)
7
Camera/Picture Editing
Settings for Shooting Pictures/Videos
(E page 13-25)
• Save Pictures/Videos Automatically
• Change Storage Location
• Set Image Quality
• Set White Balance
• Adjust Color Control
• Set Picture/Video Effects
• Adjust Flicker
• Set Shortcuts While Shooting Pictures/Videos
• Set the File Name
Settings for Taking Pictures
(E page 13-26)
• Set Focus Mode
• Use Image Stabilization
• Change the Shutter Sound
• Add Date Stamp
• Set Picture Guidelines
• Take a Picture for Phone Book Entry
7-4
921T_web_0802.indb 7-4
08.3.23 1:58:03 PM
Recording Videos
Video Modes
Recording a Video
■Video
Record long videos.
■Video Mail
Shoot videos to send as attachments.
■Short Video
Shoot MPEG-4 videos and send to MPEG-4
compatible SoftBank handsets (PDC).
Recorded videos are automatically saved to the
Videos folder in handset or a memory card.
w Frame subject in Display➡[/R
The start sound is heard and recording
begins.
q Press [➡Camera➡[➡Video, Video
Mail or Short Video➡[
• Press and hold R in Standby to display the
video viewfinder of the last Video mode
you used.
• In Video mode, press J (Pause) to
Video Viewfinder
7
Camera/Picture Editing
pause, then J (Record) to resume
recording.
7-5
921T_web_0802.indb 7-5
08.3.23 1:58:03 PM
Recording Videos
e Press [/R
End tone sounds, and the first frame of the
recording appears.
Keys for Use with Video Viewfinder
Toggle Video Modes
3
Zoom Adjustment
A/B* or
2
P/Q*
Exposure Adjustment
D/C*
Mobile Light On/Off
*
Self-view On/Off
#
Icons Display On/Off
0
Key Guide On/Off
1
1
7
Preview Window
• To delete the video you have recorded in
Camera/Picture Editing
Video Mail or Short Video mode:
Press L➡YES➡[
• Videos recorded in Video mode are
automatically saved. To delete the
recording:
Press K➡Delete➡[➡YES➡[
r Press [/R
Files are saved in the location specified in
Storage and the video viewfinder
reappears.
1
*1 Functions assigned to E are different in
Landscape View (page 2-3).
*2 Also available in Viewer position.
More Features
Functions for Recording Videos
(E page 7-11)
Common Functions After Shooting
Pictures/Videos
(E page 7-11)
Settings for Shooting Pictures/Videos
(E page 13-25)
• Save Pictures/Videos Automatically
• Change Storage Location
• Set Image Quality
• Set White Balance
• Adjust Color Control
• Set Picture/Video Effects
• Adjust Flicker
• Set Shortcuts While Shooting Pictures/Videos
• Set the File Name
Settings for Recording Videos
(E page 13-27)
• Do Not Record Sound
• Enlarge the Video Viewfinder
• Change the Start/End Sound
• Set the Preview Display
• Set the Recorded Video as a Ringtone Pattern
7-6
921T_web_0802.indb 7-6
08.3.23 1:58:04 PM
Camera Functions
Delay Timer
Frame Setting (Still Picture) Multi Shots (Still Picture)
This feature allows you to take a picture or start
recording after [/R is pressed and a specified
time elapses.
q Activate the Viewfinder➡K➡Add
q Activate the Viewfinder/Video
w Select Phone Memory or Memory Card
Frame➡[
Viewfinder➡K➡Picture or Movie
➡[
➡[
• To cancel the frame, select OFF.
w Select Delay Timer➡[
e Select Pictures➡[
r Select a frame➡[ (twice)
• When the Camera mode is set to Digital,
you cannot use Add Frame.
• Zoom is unavailable when the delay timer is
activated.
q Activate the Viewfinder➡K➡Multi
Shots➡[
w Select a speed➡[
• When the Camera mode is set to Digital,
you cannot use Multi Shots.
• Picture Modes are not available when using
Multi Shots.
7
Camera/Picture Editing
e Select seconds➡[
Take nine pictures in succession.
7-7
921T_web_0802.indb 7-7
08.3.23 1:58:04 PM
Picture Editing
Images that have been captured and stored in
Data Folder or memory card can be edited.
The following types of files can be edited: JPEG
files of 2 Mbytes or less, PNG files of 1 Mbyte or
less.
Images that are larger than W240×H400 (W400
×H240) are reduced to W240×H400. A picture
that is smaller than W16×H16 cannot be edited.
• If Overwrite is performed, the file cannot be
restored to the original. To leave the original
file, select Save as New.
• If Data Folder is full, delete unnecessary files
from Data Folder before editing a picture.
7
Basic Operations for Picture Editing
e Press K
q Press [➡Tools➡[➡Useful Tools➡
[➡Edit Picture➡[
r Select the edit type➡[➡Perform
edit operations
w Select Edit➡[➡Phone Memory or
Memory Card➡[➡Pictures or
Digital Camera➡[➡Select a picture
Camera/Picture Editing
➡[
t Press J(OK)➡Overwrite or Save as
New➡[
Picture Editing Window
7-8
921T_web_0802.indb 7-8
08.3.23 1:58:04 PM
Changing the Size
Picture Effects
Compounding Pictures
q In the Picture Editing Window, press
q In the Picture Editing Window, press
Compound two pictures.
K➡Picture Size➡[
K➡Effects➡[
q In the Picture Editing Window, press
K➡Overlay➡[
w Select Phone Memory or Memory Card
➡[➡Pictures➡[➡Select a picture
w Select a picture size ➡[
• After selecting the size, you can use E to
e Press K (Cut)➡[
Editing is complete.
• Press D/C to adjust the translucency
• Press D/C to change the effect level in
Twinkle, Whitening, Change Color,
Shade Off, Pinch, and Brush Up.
e
Press [
Editing is complete.
rate.
e
Press [
Editing is complete.
7
More Features
Additional Picture Editing Functions
(E page 7-11)
Camera/Picture Editing
adjust the position of the picture to clip.
• To adjust the width or height:
Press J (Resize)➡Fit to Width or Fit
to Length➡[
• To rotate the picture:
Press J (Resize)➡Rotate Image➡[
➡[
w Select an effect ➡[
7-9
921T_web_0802.indb 7-9
08.3.23 1:58:05 PM
Advanced Features
Camera
Shoot with the Focus Locked
[Auto Focus Lock]
From ➡ Viewfinder page 7-3
Preview Window page 7-3, 7-6
Video Viewfinder page 7-5
Functions for Taking Pictures
Quickly Focus on Subjects Nearby
[Macro]
Viewfinder K➡Function➡[➡Focus
Mode➡[➡Macro➡[
7
Shoot Scenery without Autofocus
Camera/Picture Editing
Viewfinder K➡Function➡[➡Focus
Mode➡[➡Infinity➡[
[Infinity]
• The focus mode setting (page 13-26) must be
Auto in order to use Auto Focus Lock.
Viewfinder Frame subject in Display➡Half press
H/R➡Re-compose the image➡[/R➡
[/R
• The focus frame turns from white to green
when focus was successful and it turns red
when focus has failed.
• After focusing on the subject, half press H/
R again to re-focus the subject.
Change the Size of Pictures to Take
[Picture Size]
Viewfinder K➡Picture Size➡[➡Select a
picture size➡[
• For details on picture sizes, see page 14-14.
Select a Picture Mode That Suits the Type
of Picture You Want to Take
[Picture Mode]
• Bright: Emphasizes beautiful white skin tones.
• Redness: Take pictures with healthy skin tones.
• Night: Suitable for taking night scene pictures.
• Sensitive: Suitable for taking bright pictures in
dark locations.
• Character: Suitable for taking character
pictures.
Viewfinder K➡Picture Mode➡[➡Select a
Picture Mode➡[
• Picture Mode cannot be set while using Multi
Shots (page 7-7).
• If image stabilization (page 13-26) is set to
ON, the setting is disabled while Picture Mode
is active. Picture Mode returns to OFF when
the camera ends and image stabilization
setting returns.
Take Pictures with Beautiful Skin Tones
[Brush Up Mode]
Viewfinder K➡Brush Up➡[➡ON➡[
• When the Camera mode is set to Digital and
Picture Size is set to W2048×H1536 or
W2048×H1232, you cannot use Brush Up
Mode.
7-10
921T_web_0802.indb 7-10
08.3.23 1:58:05 PM
Functions for Recording Videos
Send a Picture/Video via Mail
[As Mail]
Change the Format of Videos
[Encode]
Video Viewfinder K➡Movie➡[➡Encode➡
[➡MPEG4 or H.263➡[
• The format of videos can only be changed
while in Video Mail mode.
Common Functions After Shooting
Pictures/Videos
picture or video can be sent immediately after
it is taken or recorded.
• Videos recorded in Video mode cannot be
sent.
Preview Window J
• For details on creating S! Mail messages, see
page 4-4.
Viewfinder / Video Viewfinder K➡Data Folder
or My Videos➡[➡Select a picture or video➡
• If Auto Save (page 13-25) is set to OFF, a
viewing the picture.
• To display the key guide, press 1 while
playing a video.
picture or video can be sent immediately after
it is taken or recorded.
• Videos recorded in Video mode cannot be
sent.
Preview Window K➡Send via➡[➡Via
Infrared or Via Bluetooth➡[
• For sending by infrared communication, see
page 12-2. For sending by Bluetooth®
communication, see page 12-6.
Add Text to a Picture
[Add Text]
Picture Editing Window K➡Add Text➡[➡
Select a font size ➡[➡Enter text ➡[➡E
to adjust the position➡[➡J➡Overwrite
or Save as New➡[
■Changing the Font Color
While selecting a position, J➡A/B➡[
■Changing the Frame Color
While selecting a position, J➡D/C➡[
Add a Frame to a Picture
[Add Frame]
Picture Editing Window K➡Add Frame➡[➡
Phone Memory or Memory Card➡[➡
Select a frame➡[➡E to adjust the position
➡[➡J➡Overwrite or Save as New➡
[
7
Camera/Picture Editing
Send a Picture/Video to Another Handset
[Via Infrared/Via Bluetooth®]
• To use the full screen, press J (Full) while
From ➡ Picture Editing Window page 7-8
• If Auto Save (page 13-25) is set to OFF, a
View a Picture/Video in Data Folder
[View Picture/Video]
[
Additional Picture Editing Functions
7-11
921T_web_0802.indb 7-11
08.3.23 1:58:06 PM
Advanced Features
Add a Stamp to a Picture
[Add Stamp]
Picture Editing Window K➡Add Stamp➡[➡
Phone Memory or Memory Card➡[➡
Select a stamp➡[➡E to adjust the position
➡[➡J
(twice)
➡Overwrite or Save as
New➡[
• If the size of a stamp is larger than that of the
picture, the stamp cannot be added.
Mix Pictures to Create Wallpaper
[Wallpaper]
[➡Tools➡[➡Useful Tools➡[➡Edit
Picture➡[➡Wallpaper➡[➡Select [1]➡
[➡Phone Memory or Memory Card➡[
➡Select a picture➡[➡E to compose the
image➡[➡Select [2] to [4] and repeat the
operations➡J➡Phone Memory or
Memory Card➡[
• To unset a picture, press K (Delete).
Rotate a Picture
[Rotate Image]
7
Camera/Picture Editing
Picture Editing Window K➡Rotate Image➡[
➡J (
)/K (
) ➡[➡J➡
Overwrite or Save as New➡[
Apply a Mosaic to Part of a Picture
[Mosaic]
Picture Editing Window K➡Mosaic➡[➡E
to adjust the position➡[➡F to change the
texture➡[➡J➡Overwrite or Save as
New➡[
Brighten Dark Areas of a Picture
[Change Bright]
[➡Tools➡[➡Useful Tools➡[➡Edit
Picture➡[➡Change Bright➡[➡
Phone Memory or Memory Card➡[➡
Select a picture➡[➡F to adjust the
brightness➡[➡Overwrite or Save as New
➡[
• A picture cannot be saved if its brightness is
set to 0 %.
7-12
921T_web_0802.indb 7-12
08.3.23 1:58:06 PM
8
921T_web_0802.indb 8-1
Media Player/S! Appli
Playing Music and Videos ・・・・・・・・・・・・・・・・・・・・・・・・・・・・・・・・・・・・・・・・・・・・・・・・・・・・・・・・・・・・ 8-2
About Music/Video Playback ・・・・・・・・・・・・・・・・・・・・・・・・・・・・・・・・・・・・・・・・・・・・・・・・・・・・・・・・・・・ 8-2
Obtaining Music and Videos ・・・・・・・・・・・・・・・・・・・・・・・・・・・・・・・・・・・・・・・・・・・・・・・・・・・・・・・・・・・ 8-3
Playing Music・・・・・・・・・・・・・・・・・・・・・・・・・・・・・・・・・・・・・・・・・・・・・・・・・・・・・・・・・・・・・・・・・・・・・・・ 8-4
Playing Music with Music Player ・・・・・・・・・・・・・・・・・・・・・・・・・・・・・・・・・・・・・・・・・・・・・・・・・・・・・・・・ 8-5
Playing Videos ・・・・・・・・・・・・・・・・・・・・・・・・・・・・・・・・・・・・・・・・・・・・・・・・・・・・・・・・・・・・・・・・・・・・・・ 8-5
Playlists ・・・・・・・・・・・・・・・・・・・・・・・・・・・・・・・・・・・・・・・・・・・・・・・・・・・・・・・・・・・・・・・・・・・・・・・・・・・・ 8-7
Using Playlists ・・・・・・・・・・・・・・・・・・・・・・・・・・・・・・・・・・・・・・・・・・・・・・・・・・・・・・・・・・・・・・・・・・・・・・ 8-7
S! Appli ・・・・・・・・・・・・・・・・・・・・・・・・・・・・・・・・・・・・・・・・・・・・・・・・・・・・・・・・・・・・・・・・・・・・・・・・・・・・ 8-8
Using S! Appli ・・・・・・・・・・・・・・・・・・・・・・・・・・・・・・・・・・・・・・・・・・・・・・・・・・・・・・・・・・・・・・・・・・・・・・ 8-8
Downloading S! Appli ・・・・・・・・・・・・・・・・・・・・・・・・・・・・・・・・・・・・・・・・・・・・・・・・・・・・・・・・・・・・・・・・ 8-8
Starting S! Appli ・・・・・・・・・・・・・・・・・・・・・・・・・・・・・・・・・・・・・・・・・・・・・・・・・・・・・・・・・・・・・・・・・・・・ 8-8
Advanced Features ・・・・・・・・・・・・・・・・・・・・・・・・・・・・・・・・・・・・・・・・・・・・・・・・・・・・・・・・・・・・・・・・・ 8-10
08.3.23 1:58:07 PM
Playing Music and Videos
About Music/Video Playback
Music and videos stored on the handset are played and managed with Media Player.
• Access Web pages to get music/video files.
• See page 14-14 for a list of file types that can be played with Media Player.
• Use the Earphone-Microphone and a wireless device to play music files with Media Player via a wireless connection.
Play/Manage Music and Video Files
Yahoo! Keitai
Download
Play Music Files
Transfer music files
8
Media Player/S! Appli
PC
Create your own
playlists by artist and
album.
Record videos
Play Video Files
Handset
• Media Player cannot be used when battery power is low. Charge the battery to use Media Player.
8-2
921T_web_0802.indb 8-2
08.3.23 1:58:07 PM
Obtaining Music and Videos
Download music and video files from Yahoo!
Keitai, etc.
• You can connect your handset to your PC with
the USB cable and transfer music files to your
handset. For details on transferring music files,
see page 12-8.
q Press [➡Media Player➡[
Streaming
Access Web pages for streaming music/video files.
• Packet transmission fees apply even if playback
is paused because the handset continues
network communication.
q Press [➡Media Player➡[
w Select Streaming➡[➡Enter URL➡
Streaming from Links in Messages and Web Pages
Stream content by selecting a link.
q Select a link in S! Mail/SMS➡[➡By
Yahoo! Keitai or By PC Browser➡[
• To stream data from the Internet:
Select a link➡[
• Operations may vary depending on the
website.
[➡Enter a URL➡[
Streaming from Bookmarked Pages
Access the bookmarked Web pages for streaming.
q Press [➡Media Player➡[
w Select Streaming➡[➡Bookmarks
Videos➡[➡YES➡[
• Follow the onscreen instructions.
➡[
e Select a Bookmark➡[
Streaming from Recent URLs
q Press [➡Media Player➡[
w Select Streaming➡[➡Recent➡[
e Select a title➡[
8
Media Player/S! Appli
w Select Audio or Videos➡[
e Select Download Music or Download
8-3
921T_web_0802.indb 8-3
08.3.23 1:58:07 PM
Playing Music and Videos
Playing Music
• When you close the handset while playing
music with Media Player, Music Player is
displayed on the External Display.
q Press H
e Select a music file➡[
• If a music file includes a jacket photo, the
jacket photo appears when the file is
selected in the list window. Press 8
during playback to switch the jacket photo.
• To end Media Player, press O.
Music File Playback Window
①
②
③
④
⑤
⑫
⑬
⑭
⑥ ⑦ ⑧⑨ ⑩ ⑪
Music File Playback Window
Audio Menu Window
8
w
Select All Music➡[
Media Player/S! Appli
All Music List Window
• Select Disc Search to display all music
files by artist and album.
• Select Artist, Album or Folder to display
music files by artist, album or folder,
respectively.
①Title
②Artist Name/Album Name
③Playback Image
④Play Mode
All
Repeat
Repeat All
Random
Current Only
⑤File Number/Total Number of Files
⑥Help Guidance
⑦Web Link
⑧Playback Volume
⑨Voice Cancel
⑩Surround
⑪Equalizer
⑫Playback Status
Play
Fast Forward
Pause
Rewind
Buffering
Stop
⑬Elapsed Playback Time/Total Playback Time
⑭Progress Bar
8-4
921T_web_0802.indb 8-4
08.3.23 1:58:08 PM
Operations While Playing/Paused
Playing Music with Music Player
Playing Videos
Return to the
Beginning of a File/
Skip to Previous File
*/D
If you close the handset while playing music with
Media Player, Music Player will be activated
automatically to continue playback.
q Press [➡Media Player➡[➡Videos
Skip to Next File
#/C
Fast Forward
Press and hold
C
Press and hold
Rewind
D
Adjust Volume
G
Key Guide
1
➡[
Activating Music Player
q Close the handset while playing music
files with Media Player
• When battery level is low, Music Player
Video Menu Window
won't launch.
• Press pP/qQ to adjust the volume while
Music Player is playing.
w Select Videos➡[➡Phone Memory or
Memory Card➡[
8
Music Player Playback Window
③
Track0
Music Player Playback Window
① Play mode
② Playback status
③ Title, artist name and album name run in a
Video List Window
e
Select a video file➡[
Media Player/S! Appli
① ②
ticker from right to left.
8-5
921T_web_0802.indb 8-5
08.3.23 1:58:09 PM
Playing Music and Videos
Video File Playback Window
①
②
Operations While Playing/Paused
Skip to Previous File
D while
playing/*
Skip to Next File
C while
playing/#
Fast Forward
⑦
⑧
⑨
③
④ ⑤⑥
Video File Playback Window
8
Media Player/S! Appli
①File Name/Artist Name
②Video
③File Number/Total Number of Files
④Help Guidance
⑤Web Link
⑥Playback Volume
⑦Playback Status
Play
Fast Forward
Pause
Rewind
Buffering
Slow Playback
Stop
⑧Elapsed Playback Time/Total Playback Time
⑨Progress Bar
Rewind
Press and hold
C while playing
Press and hold
D while playing
Frame Back
D while paused
Frame Advance
C while paused
Slow Playback
Press and hold
C while paused
Adjust Volume
G
Key Guide
1
More Features
Functions for Music/Video Playback
(E page 8-10)
Playback Features(Music)
(E page 8-10)
Playback Features(Video)
(E page 8-10)
Functions for Music/Video Files
(E page 8-10)
Settings for Playing Music
(E page 13-31)
• Set Audio Output
• Set the Wallpaper Displayed During Playback
8-6
921T_web_0802.indb 8-6
08.3.23 1:58:10 PM
Playlists
Using Playlists
Using playlists, you will be able to create a list of
your favorite songs and play them as a set. Add
music files to playlists by all tracks at once, by
artist, or by album.
t Select a music file➡[
• To select multiple files, repeat this step.
Adding Songs to a Playlist
q Press H➡Playlist➡[
w Press K➡New Playlist➡[➡Phone
Memory or Memory Card➡[
e Enter a playlist name ➡[➡YES➡[
y Press J (Create)
Select Artist or Album➡[➡Select an
artist or album➡[
Functions for Playlists
(E page 8-11)
Playing a Playlist
q Press H➡Playlist➡[
Playlist Window
w Select a playlist ➡J (Play)
8
Media Player/S! Appli
• To select music files by artist or by album:
q Press H➡Playlist➡[
w Select a playlist➡K➡Rename➡[
e Edit the playlist name ➡[
More Features
Playlist Creation Window
r Select All Music➡[
Changing the Name of a Playlist
8-7
921T_web_0802.indb 8-7
08.3.23 1:58:11 PM
S! Appli
Using S! Appli
Downloading S! Appli
Starting S! Appli
Download an S! Appli from Web pages providing
S! Appli on the Internet. Downloading incurs the
same amount of transmission fees as when you
use the Internet.
• For details, contact SoftBank General
Information (page 14-41).
• You can download and use only S! Appli that
are specially designed for SoftBank handsets.
q Press [➡S! Appli➡[➡Library
q Press [➡S! Appli➡[➡Library
➡[
➡[
• To change the Library view from the
handset to the memory card, press
J ( ).
w Select an S! Appli➡[
• When you use a Network S! Appli, a
S! Appli Library
w Select More S! Appli➡[➡YES➡
[➡Select an S! Appli➡Download
8
➡[
Media Player/S! Appli
e
Select Phone Memory or Memory Card
➡[
Downloading begins.
• A confirmation window appears when the
download is completed.
transmission fee is charged each time the
application connects to the network.
• When using a Network S! Appli while
Access under Security is set to Blanket, the
handset is automatically connected to the
network without displaying the alert.
Suspending/Resuming/Ending S! Appli
q While an S! Appli is running, press O
w Select Pause, Resume or End➡[
• If battery level is low, the application may
not be completely downloaded.
• If you replace the USIM Card, downloaded
applications will no longer be available.
8-8
921T_web_0802.indb 8-8
08.3.23 1:58:11 PM
Resuming/Ending Suspended S! Appli
q
More Features
Press [➡S! Appli➡[➡Library
➡[
w Select Resume or Exit➡[
• Since the earpiece and speaker are close to
each other, loud sound from the speaker may
directly enter your ear at audio playback,
which may adversely affect your hearing. Be
careful about the handset position towards
your ear so that loud sound does not directly
enter your ear.
S! Appli
(E page 8-12)
8
Media Player/S! Appli
Settings for Operations While Running S!
Appli
(E page 13-32)
• Change Sound Effect Volume
• Set Brightness of Illumination
• Set Blinking of Illumination
• Set Vibration
• Set Priority While Running S! Appli
Other S! Appli Settings (E page 13-32)
• Set Confirmation Window for Making Calls or
Network Connection
• Update S! Appli Information on the Memory
Card
• View S! Appli License Information
• Confirm S! Appli Root Certificates
8-9
921T_web_0802.indb 8-9
08.3.23 1:58:11 PM
Advanced Features
Media Player
From ➡ All Music List Window
Music File Playback Window
Video Menu Window
Video List Window
Video File Playback Window
Playlist Window
8
page 8-4
page 8-4
page 8-5
page 8-5
page 8-6
page 8-7
Playback Features (Music)
Playback Features (Video)
Replay the Last Played Song
[Play Last Song]
Window Size
Press and hold H
Video File Playback Window While a file is playing/
paused➡K➡Normal Screen or Full
Screen➡[
Play Songs in Random Order
[Random Play]
[Normal Screen/Full Screen]
Functions for Music/Video Playback
Music File Playback Window While a file is playing/
paused➡K➡Play Mode➡[➡Random➡
Specify a Point to Start Playback
[Search Time]
[
Sort Music/Video Files
Music File Playback Window / Video File Playback Window
While a file is playing/paused➡K➡Search
Time➡[➡Enter the start position (time)➡
Repeat
■Music Files
[
[Sort by]
[Repeat Play]
Media Player/S! Appli
Music File Playback Window While a file is playing/
paused➡K➡Play Mode➡[➡Repeat or
Repeat All➡[
Access Recently Played Files
[Recent]
Playlist Window / Video Menu Window Recent➡[
➡Select a file➡[
Functions for Music/Video Files
Change Sound Quality
[Surround/Equalizer/Voice Cancel]
All Music List Window Select a file➡K➡Sort by
➡[➡Select the sort criteria ➡[
■Video Files
Video List Window Select a file➡K➡Change
View➡[➡Sort by➡[➡Select the sort
criteria➡[
Music File Playback Window While a file is playing/
paused➡K➡Surround, Equalizer or Voice
Cancel➡[➡Select a sound effect, ON or
OFF➡[
Run Media Player in Background
[Multitask]
Music File Playback Window While a file is playing/
paused➡J
8-10
921T_web_0802.indb 8-10
08.3.23 1:58:12 PM
Send Music/Video Files to Another Handset
[Send File]
[➡Data Folder➡[➡Ring Song・Tone,
Music or Videos➡[➡Select a music or video
file➡K➡Send➡[➡Select the transmission
method➡[
• For sending by infrared communication, see
page 12-2. For sending by Bluetooth®
communication, see page 12-6.
Functions for Playlists
From ➡ Music File Playback Window page 8-4
Playlist Window page 8-7
Add a Song Being Played to a Playlist
[To Playlist]
Music File Playback Window While a file is playing/
paused➡K➡To Playlist➡[➡Select a
playlist➡[
Change the Playing Order of a Playlist
[Change Order]
Playlist Window Select a playlist➡[➡Select a
file➡J➡Select a location➡[
Delete a Song from a Playlist
[Remove Tracks]
Playlist Window Select a playlist➡[➡K➡
Remove Tracks➡[➡One➡[➡YES➡
[
View Music/Video File Properties
[Details]
All Music List Window / Video List Window Select a file
➡K➡Details➡[
Add a Song Being Played to My Library
[To My Library]
Music File Playback Window While a file is playing/
paused➡Press and hold H
• To delete multiple music files, select Select
Multi, select files you want to delete, and
press J.
• If you delete all files on a playlist, the playlist
will be deleted, too.
Add Songs to a Playlist
Copy a Playlist
[Copy Playlist]
Playlist Window Select a playlist➡K➡Copy➡
[➡Phone Memory or Memory Card➡[
Delete a Playlist
[Delete Playlist]
Media Player/S! Appli
[Add Tracks]
Playlist Window Select a playlist ➡[➡K➡
Add Tracks➡[➡All Music➡[➡Select a
music file➡[➡J
• To select music files by artist or album, select
Artist or Album and select an artist or album,
respectively.
8
Playlist Window Select a playlist ➡K➡Delete➡
[➡YES➡[
8-11
921T_web_0802.indb 8-11
08.3.23 1:58:12 PM
Advanced Features
S! Appli
Move S! Appli
[Move/Select Multi/Move All]
From ➡ S! Appli Library page 8-8
■Moving One Application
■Deleting One Application
Set an S! Appli as Screensaver
[S! Appli Screensaver Settings]
S! Appli Library Select an application➡K➡
Move➡[➡One➡[➡YES➡[
S! Appli Library Select an application➡K➡
Delete➡[➡One➡[➡YES➡[
[➡S! Appli➡[➡Settings➡[➡
Screensaver➡[
■Moving Multiple Applications
■Deleting Multiple Applications
S! Appli Library K➡Move➡[➡Select Multi
➡[➡Select applications➡[➡J➡YES
Screensavers➡[➡Select an S! Appli➡[
➡YES➡[
➡[
S! Appli Library K➡Delete➡[➡Select
Multi➡[➡Select applications➡[➡J➡
YES➡[
■Moving All Applications
■Deleting All Applications
■Setting the S! Appli Start Time
S! Appli Library K➡Move➡[➡All➡[➡
Enter your Handset Code➡YES➡[
• Screensaver settings will be canceled if the
S! Appli set as Screensaver is moved to the
memory card.
• There are some cases when an S! Appli cannot
be moved anywhere according to the type of
the preinstalled S! Appli. There are also some
cases when an S! Appli cannot be moved to
the memory card according to the type of
S! Appli.
• If there is the same S! Appli on the handset or
on the memory card, the S! Appli will be
overwritten.
S! Appli Library K➡Delete➡[➡All➡[➡
Enter your Handset Code➡YES➡[
• If a preinstalled S! Appli is deleted, Reset All
does not restore the application.
■Selecting an S! Appli
K➡Start Time➡[➡Enter the time until
start➡[
8
Delete S! Appli
[Delete/Select Multi/Delete All]
• Even if there is an incoming call, Answering
Media Player/S! Appli
Machine will not operate when an S! Appli is
set as the Screensaver or when the Voice Call
of Calls&Alarms (page 13-32) is set as
Continue Apps.
• According to the type of application, there are
some cases when a Screensaver application
may pause if the time specified for Power
Saving (page 13-5) is over.
View S! Appli Properties
[Details]
S! Appli Library Select an S! Appli➡K➡Details
➡[
8-12
921T_web_0802.indb 8-12
08.3.23 1:58:13 PM
921T_web_0802.indb 9-1
9
Tools
Tools ・・・・・・・・・・・・・・・・・・・・・・・・・・・・・・・・・・・・・・・・・・・・・・・・・・・・・・・・・・・・・・・・・・・・・・・・・・・・・・・ 9-2
About Tools ・・・・・・・・・・・・・・・・・・・・・・・・・・・・・・・・・・・・・・・・・・・・・・・・・・・・・・・・・・・・・・・・・・・・・・・・ 9-2
Calendar/Tasks ・・・・・・・・・・・・・・・・・・・・・・・・・・・・・・・・・・・・・・・・・・・・・・・・・・・・・・・・・・・・・・・・・・・・・・ 9-4
Saving Events・・・・・・・・・・・・・・・・・・・・・・・・・・・・・・・・・・・・・・・・・・・・・・・・・・・・・・・・・・・・・・・・・・・・・・・ 9-4
Time Table ・・・・・・・・・・・・・・・・・・・・・・・・・・・・・・・・・・・・・・・・・・・・・・・・・・・・・・・・・・・・・・・・・・・・・・・・・・ 9-7
Creating a Time Table ・・・・・・・・・・・・・・・・・・・・・・・・・・・・・・・・・・・・・・・・・・・・・・・・・・・・・・・・・・・・・・・・ 9-7
Notepad ・・・・・・・・・・・・・・・・・・・・・・・・・・・・・・・・・・・・・・・・・・・・・・・・・・・・・・・・・・・・・・・・・・・・・・・・・・・・ 9-8
Using Notepad・・・・・・・・・・・・・・・・・・・・・・・・・・・・・・・・・・・・・・・・・・・・・・・・・・・・・・・・・・・・・・・・・・・・・・ 9-8
Voice Recorder ・・・・・・・・・・・・・・・・・・・・・・・・・・・・・・・・・・・・・・・・・・・・・・・・・・・・・・・・・・・・・・・・・・・・・・ 9-9
Osaifu-Keitai® ・・・・・・・・・・・・・・・・・・・・・・・・・・・・・・・・・・・・・・・・・・・・・・・・・・・・・・・・・・・・・・・・・・・・・・ 9-10
About Osaifu-Keitai® ・・・・・・・・・・・・・・・・・・・・・・・・・・・・・・・・・・・・・・・・・・・・・・・・・・・・・・・・・・・・・・・・ 9-10
Using Osaifu-Keitai® ・・・・・・・・・・・・・・・・・・・・・・・・・・・・・・・・・・・・・・・・・・・・・・・・・・・・・・・・・・・・・・・・ 9-10
Disabling Osaifu-Keitai® ・・・・・・・・・・・・・・・・・・・・・・・・・・・・・・・・・・・・・・・・・・・・・・・・・・・・・・・・・・・・・ 9-12
Disabling Osaifu-Keitai® from a Remote Location ・・・・・・・・・・・・・・・・・・・・・・・・・・・・・・・・・・・・・・・・・・ 9-12
S! GPS Navi ・・・・・・・・・・・・・・・・・・・・・・・・・・・・・・・・・・・・・・・・・・・・・・・・・・・・・・・・・・・・・・・・・・・・・・・・ 9-14
Using S! GPS Navi ・・・・・・・・・・・・・・・・・・・・・・・・・・・・・・・・・・・・・・・・・・・・・・・・・・・・・・・・・・・・・・・・・・ 9-14
Idokoro Mail ・・・・・・・・・・・・・・・・・・・・・・・・・・・・・・・・・・・・・・・・・・・・・・・・・・・・・・・・・・・・・・・・・・・・・・・ 9-16
Using Idokoro Mail ・・・・・・・・・・・・・・・・・・・・・・・・・・・・・・・・・・・・・・・・・・・・・・・・・・・・・・・・・・・・・・・・・ 9-16
Alarms ・・・・・・・・・・・・・・・・・・・・・・・・・・・・・・・・・・・・・・・・・・・・・・・・・・・・・・・・・・・・・・・・・・・・・・・・・・・・ 9-18
Using Alarms ・・・・・・・・・・・・・・・・・・・・・・・・・・・・・・・・・・・・・・・・・・・・・・・・・・・・・・・・・・・・・・・・・・・・・・ 9-18
World Clock ・・・・・・・・・・・・・・・・・・・・・・・・・・・・・・・・・・・・・・・・・・・・・・・・・・・・・・・・・・・・・・・・・・・・・・・ 9-19
Calculator/Dictionary ・・・・・・・・・・・・・・・・・・・・・・・・・・・・・・・・・・・・・・・・・・・・・・・・・・・・・・・・・・・・・・・ 9-20
Using the Calculator ・・・・・・・・・・・・・・・・・・・・・・・・・・・・・・・・・・・・・・・・・・・・・・・・・・・・・・・・・・・・・・・・ 9-20
Using the Dictionary ・・・・・・・・・・・・・・・・・・・・・・・・・・・・・・・・・・・・・・・・・・・・・・・・・・・・・・・・・・・・・・・・ 9-20
Kitchen Timer ・・・・・・・・・・・・・・・・・・・・・・・・・・・・・・・・・・・・・・・・・・・・・・・・・・・・・・・・・・・・・・・・・・・・・・ 9-21
Measuring Time ・・・・・・・・・・・・・・・・・・・・・・・・・・・・・・・・・・・・・・・・・・・・・・・・・・・・・・・・・・・・・・・・・・・・ 9-21
S! Quick News ・・・・・・・・・・・・・・・・・・・・・・・・・・・・・・・・・・・・・・・・・・・・・・・・・・・・・・・・・・・・・・・・・・・・・ 9-22
Checking for Information Updates ・・・・・・・・・・・・・・・・・・・・・・・・・・・・・・・・・・・・・・・・・・・・・・・・・・・・・ 9-22
S! Information Channel ・・・・・・・・・・・・・・・・・・・・・・・・・・・・・・・・・・・・・・・・・・・・・・・・・・・・・・・・・・・・・ 9-23
Browsing Updated Information ・・・・・・・・・・・・・・・・・・・・・・・・・・・・・・・・・・・・・・・・・・・・・・・・・・・・・・・・ 9-23
Document Viewer ・・・・・・・・・・・・・・・・・・・・・・・・・・・・・・・・・・・・・・・・・・・・・・・・・・・・・・・・・・・・・・・・・・ 9-24
Viewing PC Files ・・・・・・・・・・・・・・・・・・・・・・・・・・・・・・・・・・・・・・・・・・・・・・・・・・・・・・・・・・・・・・・・・・・ 9-24
Electronic Books ・・・・・・・・・・・・・・・・・・・・・・・・・・・・・・・・・・・・・・・・・・・・・・・・・・・・・・・・・・・・・・・・・・・ 9-25
Using BookSurfing®/e-Book Viewer ・・・・・・・・・・・・・・・・・・・・・・・・・・・・・・・・・・・・・・・・・・・・・・・・・・・・・ 9-25
Barcode Reader ・・・・・・・・・・・・・・・・・・・・・・・・・・・・・・・・・・・・・・・・・・・・・・・・・・・・・・・・・・・・・・・・・・・・ 9-26
Scanning QR Codes ・・・・・・・・・・・・・・・・・・・・・・・・・・・・・・・・・・・・・・・・・・・・・・・・・・・・・・・・・・・・・・・・・ 9-26
Ku-man's Room (Japanese) ・・・・・・・・・・・・・・・・・・・・・・・・・・・・・・・・・・・・・・・・・・・・・・・・・・・・・・・・・・ 9-27
Opening Ku-man's Room・・・・・・・・・・・・・・・・・・・・・・・・・・・・・・・・・・・・・・・・・・・・・・・・・・・・・・・・・・・・・ 9-27
Advanced Features ・・・・・・・・・・・・・・・・・・・・・・・・・・・・・・・・・・・・・・・・・・・・・・・・・・・・・・・・・・・・・・・・・ 9-28
08.3.23 1:58:13 PM
Tools
About Tools
You can use the following useful functions.
Information
Management
Tools
Manage information
on the handset.
Calendar
View the Calendar and save
events. Use information stored
in the events to make calls and
create messages.
S! Quick News
Check various pieces of
information delivered at a
regular interval and S! Loop
items from Active Window.
9
Tools
S! Information Channel
Information
Browsing
Tools
View and check all kinds
of information.
Automatically download
subscribed information. Use
Weather Indicator that posts
weather forecast in Standby.
Tasks
Time Table
Save tasks with time limit.
Set the alarm for deadline, or
organize tasks to check based
on whether they are Completed,
Not Completed or Overdue.
Notepad
Create a time table and check
your class schedule.
Voice Recorder
Save notes. You can access
saved notes while entering text.
This is especially useful if oftenused phrases and memos are
saved.
Record and play back sounds.
The recordings can be sent
via mail and set as ringtone.
Document Viewer
Electronic Books
®
View PDF, Microsoft Office
Word, Excel, and Power Point®
documents.
Use BookSurfing® and e-Book
Viewer to view electronic books,
comics, and albums.
9-2
921T_web_0802.indb 9-2
08.3.23 1:58:14 PM
Lifestyle
Support
Tools
Other Tools
Barcode Reader
Ku-man's Room (Japanese)
Scan QR codes with the camera, Visit Ku-man's Room to change
and view and use scanned
his outfit or receive messages
information.
from him.
These tools support
everyday life.
Osaifu-Keitai®
S! GPS Navi
Idokoro Mail
Alarms
Hold this IC device up to
a reader at a store to pay with
electronic money. Also use it as
a ticket for public transportation
or as a point card.
Uses positioning information
to show your location on a
map or the best route to your
destination.
Sends messages to inform
others when you have entered
or left a specific area.
An alarm sounds at a specified
time. You can set the alarm to
sound only on a specific day of
the week and set the snooze
function.
Calculator
Includes a wide array of useful
functions, such as basic arithmetic
operations, percentages, and memory.
You can also calculate currency
conversions.
Dictionary
The handset includes three
useful dictionaries: Japanese,
English-Japanese, and
Japanese-English.
Kitchen Timer
Set an alarm to sound after
a specific time expires.
Tools
World Clock
View dates and times of cities
around the world. Display
the date and time of the city
(or country) where you live and
of another city in Standby.
9
9-3
921T_web_0802.indb 9-3
08.3.23 1:58:14 PM
Calendar/Tasks
Saving Events
Opening Calendar
q Press and hold A
Saving an Event
q From Calendar Window, select the date
y Select Alarm➡[➡ON➡[
to save an event➡J (Create)
Event Alarm Setting Window
u Select Time➡[➡Enter a date and
Create Event Window
Calendar Window
•"
9
", the start time, event title and/or
stamp icon are displayed on the date that
an event is saved.
• Press * or # to switch between the
previous and next window.
Tools
w Press H to select a calendar view
format
• You can switch the calendar view between
Monthly View, Monthly & Event View,
Weekly View, 4-Month View and All View.
Jumping to the Specified Date
q In the Calendar Window, press K➡
Jump➡[
w Enter a date➡[
w Select Title➡[➡Enter a title➡[
e Select the start date and time field➡
[➡Date&Time or Date Only ➡[➡
Enter a date and time➡[
• Enter the time in accordance with the
24-hour system.
• Enter only the date, when you select Date
Only.
r Select End Date➡[➡Enter a date
and time➡[
• Enter the time in accordance with the
24-hour system.
• If Date Only has been selected for the
start date and time, this field cannot be
entered.
time➡[➡J(OK)
• Enter the time in accordance with the
24-hour system.
i Press J (OK)➡OK➡[
• If you select Notify Only Once when a
confirmation window appears telling that
the alarm will not start if the power is
turned off, this window will not be
displayed from the next time.
Alarm Time Operations
The alarm stops automatically after a set duration,
but you can also stop it manually.
q Press any key while the alarm is
sounding
• To view the event details, press J (View)
after stopping the alarm.
t Select Contents➡[➡Enter details of
the event➡[
9-4
921T_web_0802.indb 9-4
08.3.23 1:58:14 PM
Checking an Event
Deleting an Event
q From Calendar Window, select the date q From Daily View Window, select the
to check➡[
• To delete all events for the day:
Select For this Day➡[➡YES➡[
Deleting All Previous Events
w
Select an event➡[
• From All View Window, select an event and
press [ to display the Event Details
Window.
and time➡[
event to delete
w Press K➡Delete➡[
e Select One➡[➡YES➡[
Daily View Window
e Select Title➡[➡Enter a title➡[
r Select Deadline➡[➡Enter a date
• Enter the time in accordance with the
24-hour system.
t Select Contents➡[➡Enter details of
the task➡[
y Select Alarm➡[➡ON➡[
q From Calendar Window, select the next
day of the event to delete
w Press K➡Delete➡[➡Before Today
➡[➡YES➡[
Task Alarm Setting Window
Saving Tasks
time➡[➡J(OK)
• Enter the time in accordance with the
24-hour system.
i
Event Details Window
9
Tools
q Press [➡Tools➡[➡Tasks➡[
w Press K➡Create New➡[
u Select Time➡[➡Enter a date and
Press J (OK)➡OK➡[
• If you select Notify Only Once when a
confirmation window appears telling that
the alarm will not start if the power is
turned off, this window will not be
displayed from the next time.
New Task Window
9-5
921T_web_0802.indb 9-5
08.3.23 1:58:15 PM
Calendar/Tasks
Alarm Time Operations
The alarm stops automatically after a set duration,
but you can also stop it manually.
q Press any key while the alarm is
sounding
• To view the task details, press J (View)
after stopping the alarm.
Checking Tasks
q Press [➡Tools➡[➡Tasks➡[
9
Tasks Window
Tools
• To change the view format:
Press K➡Change View➡[➡Select
a view format➡[
• To change the status of a task:
Select a task➡J (Status)➡Select the
status➡[
Deleting a Task
q From Tasks Window, select the task to
delete
w Press K➡Delete➡[➡One➡[➡
YES➡[
More Features
Functions for Calendar (E page 9-28)
Functions for Saving Events/Tasks
(E page 9-28)
Functions for Saving Events
(E page 9-29)
Functions for Saving Tasks
(E page 9-29)
Functions for Checking/Managing Events
(E page 9-29)
Functions for Checking/Managing Tasks
(E page 9-30)
• Set a Link to a Related Message/Web Page/
Image
• Set a Location
Settings for Calendar (E page 13-39)
• Set the View Format When Opening Calendar
• Change the Font Color of Events
• Lock Calendar
Settings for Saving Tasks (E page 13-39)
• Change Alarm Volume
• Change Vibration
• Set the Image to Display at the Set Time
• Set the Stamp Icon
• Set Task Priority
• Set the Task Status
Settings for Tasks
(E page 13-40)
• Lock Tasks
Settings for Saving Events
(E page 13-38)
• Change Alarm Volume
• Change Vibration
• Set the Image to Display at the Set Time
• Set the Stamp Icon
• Set Category of the Event
• Set a Phone Number/E-mail Address/URL
9-6
921T_web_0802.indb 9-6
08.3.23 1:58:16 PM
Time Table
Creating a Time Table
A time table from Monday to Saturday can be
created.
Subjects and classrooms of up to eight periods per
day, and font colors can be entered/specified.
q Press [➡Tools➡[➡Useful Tools➡
[➡Time Table➡[
e Select Subject➡[➡Enter a subject
➡[
• To enter a classroom, teacher or memo:
Select an item➡[➡Enter information
➡[
• To specify the background or font color:
Select BG Color or Font Color ➡[➡
Select a background or font color➡[
r Press J (OK)
Checking the Time Table
q From Time Table Window, select a
period➡[
Deleting a Class from Time Table
q From Time Table Window, select the
period to delete
w Press K➡Delete➡[➡One➡[➡
YES➡[
More Features
Time Table Window
w Select a period➡K➡Edit ➡[
Time Table Functions
(E page 9-30)
9
Tools
Time Table Settings
(E page 13-40)
• Set Start/End Time of a Period
• Reset Time Settings to Default
9-7
921T_web_0802.indb 9-7
08.3.23 1:58:16 PM
Notepad
Using Notepad
q Press [➡Tools➡[➡Notepad ➡[
Deleting a Notepad
q From Notepad List Window, select a
notepad
w Press K➡Delete➡[➡One➡[➡
YES➡[
More Features
Notepad List Window
Notepad Functions
(E page 9-30)
w Select a blank notepad➡[
e Enter contents➡[
Setting Category
9
q From Notepad List Window, select the
Tools
notepad to set an icon for➡K➡Set
Category➡[
w Select a category➡[
The icon of the selected category is
displayed.
Viewing Notepad
q From Notepad List Window, select a
notepad➡[
9-8
921T_web_0802.indb 9-8
08.3.23 1:58:17 PM
Voice Recorder
• Use the Voice Recorder exercising common
morals and manners.
• Note that recording of some concerts and
shows is not allowed even for personal use.
• If the handset receives a call while you are
recording, the recording stops and is
automatically saved in order to give priority to
the call. If you don't want to receive calls while
you are recording, set the handset to Offline
Mode.
q
Press [➡Tools➡[➡Useful Tools➡
[➡Voice Recorder ➡[
• You record through a microphone
(mouthpiece).
• Press J (Pause) to pause recording. To
resume recording, press [. To save the
recording data, press J (Save).
• When the remaining time available for
recording is less than 10 seconds,
flashes.
e Press [
Sounds recorded with Voice Recorder are
automatically saved in the Ring Song・
Tone folder.
Playing Recordings
q From Voice Recorder Window, select
Recordings➡[
w Select Phone Memory or Memory
Card ➡[
e Select a file➡[
• Use G during playback to adjust the
volume.
More Features
Voice Recorder Functions (E page 9-31)
Voice Recorder Window
Tools
w Select Record➡[ (twice)
9
Voice Recorder Recording Window
9-9
921T_web_0802.indb 9-9
08.3.23 1:58:17 PM
Osaifu-Keitai®
About Osaifu-Keitai®
Osaifu-Keitai® is a service used by mobile phones
with built-in contactless IC card (FeliCa chip)
technology. The mark
on the back of the
handset can be held up to a reader/writer for such
tasks as shopping with e-money, using a
member's card or a point card. Osaifu-Keitai® can
be used even while the handset is turned off.
Note, however, that Osaifu-Keitai® cannot be used
while the battery is removed.
• For more information about Osaifu-Keitai®,
contact SoftBank General Information (page
14-41).
Getting Started
9
Tools
■IC card
The term "IC card" means an IC chip built in an
Osaifu-Keitai® compatible terminal.
■Lifestyle-Appli
This is an S! Appli for using Osaifu-Keitai®.
• Your handset comes with a preinstalled
e-money Lifestyle-Appli called "Edy".
"Edy" is the brand name of a prepaid e-money
service managed by bitWallet, Inc.
Precautions
IC card can be misused if your
• The data on the
®
Osaifu-Keitai compatible handset is lost or
stolen. Note that SoftBank assumes no
responsibility for any losses suffered by you if
this happens.
• Before deciding whether to use an Osaifu-Keitai®
service, be sure to contact the service provider
about the terms, conditions, and other rules
governing its use.
• Transmission fees may be incurred when
downloading a Lifestyle-Appli or when using a
Lifestyle-Appli that requires network
connection.
• Do not remove the stickers from the back of the
battery cover or from the handset in the area
around the battery, and do not remove the
battery cover. Doing so may make it impossible
to use Osaifu-Keitai®.
• Certain types of service and usage conditions
may cause data to be stored on the IC card. The
procedure for deleting such data from the IC
card depends on the Lifestyle-Appli. For details,
contact the Osaifu-Keitai® service provider.
• Note that SoftBank assumes no responsibility
for any loss or corruption of data or settings on
the IC card due to malfunction or repair.
• Be sure to keep separate records of the security
code, contact information, and other
information for each service so you do not
forget them.
Using Osaifu-Keitai®
Downloading Lifestyle-Appli
q Press [➡Data Folder ➡[➡
Lifestyle-Appli➡[
w Select Download➡[➡YES➡[➡
Download a Lifestyle-Appli from the
Web Page
• Lifestyle-Appli are stored in the LifestyleAppli folder of Data Folder.
• Downloading may not end normally if
battery level is low.
• A downloaded Lifestyle-Appli cannot be
used if you replace the USIM Card.
9-10
921T_web_0802.indb 9-10
08.3.23 1:58:17 PM
Subscribing to an Osaifu-Keitai®
Service and Configuring Settings
q Press [➡Tools➡[➡Osaifu-Keitai➡
[➡Lifestyle➡[
w
Select the Lifestyle-Appli to subscribe
and set up➡[
• You must subscribe to an Osaifu-Keitai®
service (hereafter "service") and configure
a number of settings.
• The subscription method and the settings
depend on the Lifestyle-Appli. Follow the
onscreen instructions.
Using Osaifu-Keitai®
The e-money example below shows how to use a
reader/writer to read IC card data.
• Before performing this procedure, you must
subscribe to a service, configure its settings, and
make a deposit in your e-money account.
• There is no need to activate Lifestyle-Appli to
perform this procedure.
• Osaifu-Keitai® can be used even while the
handset is turned off. Note, however, that a
Lifestyle-Appli will not activate while the
handset is turned off.
q Hold the
• Data may not be read if there is a metal
object or other obstruction between the
mark and the reader/writer.
• Osaifu-Keitai® cannot be used when battery
power is low. Charge the battery to use
Osaifu-Keitai®.
mark up to the reader/
writer
9
Tools
• Whenever there is difficulty reading the
data, try moving the handset back and
forth, left and right.
w Check the reader/writer display to
confirm that the read was performed
9-11
921T_web_0802.indb 9-11
08.3.23 1:58:18 PM
Osaifu-Keitai®
Disabling Osaifu-Keitai®
Your handset can be set to disable communication
between the IC card and a reader/writer.
Turning IC Card Lock On or Off
q
Press [➡Tools➡[➡Osaifu-Keitai➡
[➡Card Settings ➡[
Disabling Osaifu-Keitai®
from a Remote Location
Disable Osaifu-Keitai® from a remote location by
placing a call to the handset from another phone
(Call Lock) or by sending an e-mail message with
a preset subject to the handset (Mail Lock).
• You must set either the Lock Phone Number or
Lock Password, and set either the Call Lock or
Mail Lock to ON in advance.
Setting the Lock Phone Number
q From Card Settings Window, select
Card Settings Window
9
w
Select IC Card Lock➡[➡Enter your
Handset Code➡ON or OFF➡[
Remote Lock➡[➡Enter your
Handset Code
w Select Call Lock➡[
r Press K➡Add➡[➡Phone Book
➡[
• Select Phone Number to enter a phone
number directly.
• Select Call Log to select a phone number
from Call Log.
• Select Payphone or Withheld to
remotely lock your handset from a pay
phone or a withheld number.
t Select an entry➡[➡Select a phone
number➡[ (twice)
Setting the Lock Password
Set a password (subject) for performing Mail Lock.
q From Card Settings Window, select
Remote Lock➡[➡Enter your
Handset Code
Tools
w Select Mail Lock➡[
e Select Phone Numbers ➡[
e Select Lock PW➡[
r Enter a lock password➡[
9-12
921T_web_0802.indb 9-12
08.3.23 1:58:18 PM
Turning Call Lock or Mail Lock On
• Note that you cannot set to ON unless the Lock
Phone Number or Lock Password has been set
in advance.
q From Card Settings Window, select
Remote Lock➡[➡Enter your
Handset Code
w Select Mail Lock or Call Lock➡[
e Select ON/OFF➡[➡ON or OFF
➡[
Using Remote Lock to Lock the IC Card
Using Call Lock to Lock the IC Card
q Place a call to the handset from one of
the preset phone numbers
• The calls must go unanswered three times
in a row within three minutes.
(becomes zero) whenever any one of the
following occurs.
・If a call is received from another preset
phone number
・If a call placed to the handset is answered
・If the handset is turned off
・If the number of incoming calls does not
reach the preset number (default is 3)
within three minutes
• If Call Lock is performed while a video call is
in progress, IC Card Lock will turn on but
there will be no message to tell that the IC
card has been locked.
• Call Lock cannot be performed while a voice
call is in progress and Call Waiting is set to
OFF.
Using Mail Lock to Lock the IC Card
q Create a message with the preset lock
password as the subject, and send it to
the handset
• Do not enter anything for other fields of
the message.
• IC Card Lock will turn on when the
message is received.
Canceling Remote Lock
Set IC Card Lock to OFF to cancel Remote Lock.
More Features
Functions for Osaifu-Keitai®
(E page 9-31)
Settings for Osaifu-Keitai®
(E page 13-40)
• Specify Whether Functions Start Up When
Handset is Held Up Before a Reader/Writer
• Check IC Card Information
• Do Not Send a Lock Engaged Notification
9
Tools
w Hang up the phone
• The current incoming call count is cleared
• If the handset is unable to receive mail for
some reason, IC Card Lock will not be turned
on even if you send a Mail Lock message.
9-13
921T_web_0802.indb 9-13
08.3.23 1:58:19 PM
S! GPS Navi
Using S! GPS Navi
About S! GPS Navi
S! GPS Navi uses location information by GPS
satellite and by communication with base stations.
View on the map where you are, and send your
location information to compatible SoftBank
handsets.
The navigation application (Navi appli) is
preinstalled in your handset. For details, contact
SoftBank General Information (page 14-41).
Starting the Navi Appli
Use the navigation application to retrieve
information about your current location or check
the route to your destination.
q Press [➡Tools➡[➡S! GPS Navi
➡[
9
Locate other people or locate the approximate
location of your own handset if you have lost it.
q From S! GPS Navi Window, select Ichi
Navi➡[
• Follow the onscreen instructions.
• To use Ichi Navi, the person requesting
location information must join the service.
• Before receiving a request for location
• When signal reception of the GPS satellite is
Tools
poor, the handset position can be
determined by the base station information.
However, depending on the base station's
location or signal strength, the margin of
error could vary from hundreds of meters to
several kilometers in radius.
• When you cannot confirm the right location,
move to a place where you can see the sky.
• Note that SoftBank accepts no liability
whatsoever for any damages arising from
use of the location information provided.
• Positioning cannot be performed by the
handset while Positioning Lock is in use.
Using Ichi Navi
S! GPS Navi Window
w Select Navi Appli ➡[
Checking Your Current Position
q From S! GPS Navi Window, select Locate
information, you need to sign up on Yahoo!
Keitai the people you allow to request
location information (people you inform of
your location).
• Ichi Navi is not effective in areas that are out
of signal range.
• You need to apply and do the settings in
advance so that you can use a PC to search
for a lost or stolen handset.
Me➡[
• A confirmation window appears as to
whether to send out the location
information. If you select Ask Once Only,
the confirmation window will not be
displayed from the next time.
• When the location information send setting
(LocationProperty) is set to Do not Send,
the current position cannot be checked. Set
to Always Ask or Send.
9-14
921T_web_0802.indb 9-14
08.3.23 1:58:19 PM
More Features
Functions for S! GPS Navi (E page 9-32)
Settings for S! GPS Navi (E page 13-41)
• Save a Map URL
• Edit the Map URL Display Name
• Edit the Map URL
• Delete a Map URL
• Set the Map URL
• Select the Navi Appli
• Lock Positioning
• Set Location Information Send Setting
9
Tools
9-15
921T_web_0802.indb 9-15
08.3.23 1:58:19 PM
Idokoro Mail
Using Idokoro Mail
Inform other people of your arrival or departure by
mail notification when you leave or arrive in a
specified area (Departure or Arrival Mail), and
send your location information by a simple
operation (Simple Notice).
Saving People to Recipients List
q Press [➡Tools➡[➡Useful Tools➡
[➡Idokoro Mail➡[➡Enter your
Handset Code
9
q From Idokoro Mail Window, select
Areas List ➡[
• If the Recipients List has no entry, a
message window appears. Save addresses
to the Recipients List to use Idokoro Mail.
w Select an area list➡[
• When signal reception from the GPS satellite
Tools
is poor, handset position is determined by
base station information. However, the
margin of error may vary from a few hundred
meters to several kilometers in radius,
depending on the base station's location/
signal strength.
• When you cannot confirm the right location,
move to a place where you can see the sky.
• Note that SoftBank accepts no liability
whatsoever for any damages arising from
use of the location information provided.
• Positioning cannot be performed by the
handset while Positioning Lock is in use.
• Transmission fees apply for sending
Departure Mail/Arrival Mail/Simple Notice
and using positioning service.
Saving Locations to Areas List
Idokoro Mail Window
w Select Recipients List ➡[➡Select a
list➡[
Area Settings Window
e Select Area Name➡[➡Enter an area
name➡[
r Select Set Location➡[➡Current➡
[➡Start positioning
Recipient Window
e Select Recipient ➡[➡Select an entry
from Phone Book➡[➡Select a phone
number or e-mail address➡[
r Select each mail notification➡[➡Yes
or No➡[➡J (OK)
• To specify from Location Logs or My
Locations:
Select Location Logs or My Locations
➡[➡Select location information➡[
• To specify from Phone Book:
Select Phone Book➡[➡Select a
Phone Book entry that has location
information➡[
9-16
921T_web_0802.indb 9-16
08.3.23 1:58:20 PM
t Select Launch Setting➡[➡Select
Date➡[➡Date➡[➡Enter a date➡
[➡Arrivals Time or Departures Time
➡[➡ON➡[➡Enter the start time
and duration➡[➡J (OK)
• To specify a day of the week:
Select Weekly ➡[➡Select Arrive or
Depart for the day you want to specify➡
[➡ON➡[➡Enter the start time and
duration➡[➡J (OK)
y Press J (OK)
Mail Notifications
Automatically Sending Notifications
When the specified time has been reached, your
current position is obtained using GPS and it is
compared with location information of the saved
area. When your departure or arrival is confirmed,
a mail notification is sent. When your departure or
arrival cannot be confirmed during the specified
time period or positioning cannot be performed
because you are out of range, a mail notification
is automatically sent.
Manually Sending Notifications (Simple Notice)
Send Simple Notice to preset recipients (Recipients
must be set to Yes in Recipient Window).
• The Side Key must be set to SimpleNotice in
advance (page 2-4).
q Press and hold P
Tools
More Features
9
Functions for Idokoro Mail (Epage 9-32)
9-17
921T_web_0802.indb 9-17
08.3.23 1:58:20 PM
Alarms
Using Alarms
r Select Once➡[➡Select a repeat
interval➡[
• When you select Weekly, do the
following.
Select day(s) of the week➡[➡J (OK)
Setting an Alarm
q Press [➡Tools➡[➡Alarms➡[
t Select Snooze➡[➡ON or OFF➡[
➡Enter a time between alarm tones
➡[
y
Alarm List Window
w Select an alarm➡[
Press J (OK)➡OK➡[
• If you select Notify Only Once when a
confirmation window appears telling that
the alarm will not start if the power is
turned off, this window will not be
displayed from the next time.
Alarm Time Operations
9
Tools
The alarm stops automatically after a set duration,
but you can also stop it manually.
Set Alarm Window
e Select Time➡[➡Enter a time➡[
• Enter the time in accordance with the
24-hour system.
q Press any key while the alarm is
sounding
Canceling an Alarm
q From Alarm List Window, select the
alarm to cancel
w Press J (ON/OFF)
Deleting an Alarm
q From Alarm List Window, select the
alarm to delete
w Press K➡Reset ➡[➡YES➡[
More Features
Alarm Functions
(Epage 9-33)
Alarm Settings
(E page 13-42)
• Change Alarm Volume
• Change Vibration
• Set the Image to Display at the Set Time
When Snooze is Set
If Snooze is set to ON, the alarm plays in specified
intervals up to five additional times.
To stop Snooze and return to Standby:
Stop the alarm➡Stop Snooze➡[➡YES
➡[
9-18
921T_web_0802.indb 9-18
08.3.23 1:58:21 PM
World Clock
The time displayed on the handset is the time for
the city you set as Main City. If you set the time
for City 1 and City 2, and select World-Digital or
World-Analog in the clock type setting (Others)
(page 2-7), then the time and date of both City 1
and City 2 are displayed in Standby.
Setting World Clock
Setting City 1/City 2
q
Displaying World Clock
In the World Clock Window, you can view dates,
time, and time difference by moving a cursor
(yellow line) on the map. City 1 and City 2 of the
World Clock settings are displayed in green and
red lines respectively.
q Press [➡Tools➡[➡Useful Tools➡
[➡World Clock➡[
More Features
World Clock Functions
(E page 9-33)
World Clock Settings
(E page 13-42)
• Set the City by the GMT Time Difference
• Set Daylight Saving Time (DST)
Press [➡Settings➡[➡Phone
Settings➡[➡Clock➡[➡World
Clock➡[
World Clock Window
w Use F to select a city
w
Select City 1 or City 2➡[➡F to
select a city➡[
off, press J (DSTon) or J (DSToff).
9
Tools
World Clock Setting Window
• To switch Daylight Saving Time (DST) on or
Switching the Main City
q From World Clock Setting Window,
select Set as Main City ➡[
w Select City 1 or City 2➡[
9-19
921T_web_0802.indb 9-19
08.3.23 1:58:21 PM
Calculator/Dictionary
Using the Calculator
q Press [➡Tools➡[➡Calculator
➡[
Calculator Window
Operations in the Calculator Window
Enter Numbers
9
0∼9
Tools
+
A
−
B
×
D
÷
C
=
[
± (Switch +/−)
N
Tax
J
C (Clear)
L
. (Decimal)
H
EXIT
O
• Other Options by Pressing kK in the
Calculator Window
Converter: Enter the currency exchange rate
and then perform currency
conversion calculations.
Clear All: Delete the input value and data
stored in memory.
MS: Save the input value to memory.
M+: Add the input value to the value stored
in memory.
MR: Display the value stored in memory.
%: Calculate a percentage.
1/X: Calculate a reciprocal.
SQRT: Calculate a square root.
Set Tax Rate: Set the tax rate to be calculated
when you press jJ. Enter the
tax rate and press {[.
Using the Dictionary
You can use the Japanese, English-Japanese, or
Japanese-English dictionaries.
"Jispa" of Gakken Co., Ltd. is bundled
as Japanese dictionary, EnglishJapanese dictionary and JapaneseEnglish dictionary.
q Press [➡Tools➡[➡Dictionary
➡[
w Select Japanese, English-Japanese or
Japanese-English➡[
e Press H➡Enter a keyword➡[
r Select a word➡[
More Features
Functions for Calculator (E page 9-33)
9-20
921T_web_0802.indb 9-20
08.3.23 1:58:22 PM
Kitchen Timer
Measuring Time
q Press [➡Tools➡[➡Useful Tools➡
[➡Kitchen Timer ➡[
w Enter a countdown time➡[
e Press [ (Start)
After a Specified Time Elapses
The alarm sounds or the handset vibrates, and the
External Light flashes.
To stop the alarm, press any of [, 0 to 9,
*, #, O, and L.
• Press [ (Stop) during the count to
temporarily stop the timer. To restart, press
[ (Start).
9
Tools
9-21
921T_web_0802.indb 9-21
08.3.23 1:58:22 PM
S! Quick News
Confirm various pieces of the latest news delivered
by information service providers and S! Loop items
from Active Window by automatic updates
recurring every period of time as you have
specified.
Checking for Information Updates
Registering Contents
q Press [➡Entertainment➡[➡
S! Quick News➡[
e Select Contents List or S! Loop➡[➡
YES➡[
r
Select contents ➡[
• Follow the onscreen instructions to register
contents.
Checking for Updates
q Select contents from List Window or
S! Loop List Window ➡[
w
Select the item to check ➡[
• Press J to check the previously updated
information and K to check the next
updated information.
More Features
9
S! Quick News Window
Tools
w
Select List or S! Loop List➡[
Functions for S! Quick News
(E page 9-33)
Active Window Settings (E page 13-8)
• Select S! Quick News Information to Display
• Set Ticker Speed
• Set Image Display
• Restore Settings and Registered Contents of S!
Quick News to Default
List Window
S! Loop List Window
9-22
921T_web_0802.indb 9-22
08.3.23 1:58:22 PM
S! Information Channel
Browsing Updated Information
Subscribe to contents and receive automatic
updates. Content updates are received during the
night.
• Packet transmission fees apply to use
S! Information Channel.
Subscribing/Canceling Subscription
Connect your handset to a special site to register
or cancel transmission information and select
programs.
• Transmission fees apply while you are connected
to the Web.
q Press [➡Entertainment ➡[➡
Info Channel ➡[
Checking Content Updates
q
From Info Channel Window, select
What's new?➡[
Checking the Latest Information from Information Prompt
q When Information Prompt appears➡
Info Channel ➡[
Using Weather Indicator
More Features
S! Information Channel
(E page 9-34)
S! Information Channel Settings
(E page 13-43)
• Do Not Display Weather Indicator Icons in
Standby
• Set Notification of Weather Forecast Updates
Weather Indicator shows the weather forecast for
the current local area with icons in Standby. The
displayed icons are updated automatically.
• A separate subscription is required to use
Weather Indicator.
Checking Weather Forecast
Weather ➡[
9
Tools
q From Info Channel Window, select
Info Channel Window
w Select Reg./Cancel ➡[➡YES➡[
• Follow the onscreen instructions.
Weather Indicator Window
w Select Weather ➡[
• You can view the weather forecast by
selecting Weather Indicator icons and
pressing [ from Active Window (page
2-8).
9-23
921T_web_0802.indb 9-23
08.3.23 1:58:23 PM
Document Viewer
Viewing PC Files
Operations While Files are Displayed
®
Your handset can display Microsoft Office Word,
Excel, PowerPoint®, and PDF document files.
formats (extensions) is
• Display of the following
supported: Microsoft® Word (.doc), Microsoft®
®
Excel (.xls), Microsoft PowerPoint® (.ppt), and
PDF (pdf).
q Press [➡Tools ➡[➡Doc Viewer ➡
[➡Phone Memory or Memory Card
➡[
Scroll up, down, left, right
[
Reduce page
J
Display actual size
1
Display entire page*
2
Rotate 90 degrees right
3
Go to previous page/sheet/
slide
4
*
9
Tools
w Select a file➡[
E
Enlarge page
Show bookmarks
5
Go to next page/sheet/slide
6
Go to first page/sheet/slide
7
Search
8
Go to last page/sheet/slide
9
Go to specific page/sheet/
slide
0
*Available only when viewing PDF files.
• Some document file contents may look
different from how they appear on your PC.
• Some document files may take a long time
to appear.
9-24
921T_web_0802.indb 9-24
08.3.23 1:58:23 PM
Electronic Books
Using BookSurfing®/e-Book Viewer
®
BookSurfing and e-Book Viewer are viewers to
view electronic comic books, electronic photo
albums, electronic publications (novels, etc.), and
other electronic books.
You can enlarge or reduce images, scroll the
window with simple operations, and use sound,
vibration, and other effects to enhance your
reading experience.
• Some electronic books may require a content
key for viewing.
q Press [➡Entertainment ➡[
w Select BookSurfing or e-Book Viewer
➡[
operations, see
• For the following
®
BookSurfing or e-Book Viewer help.
Supported File Formats
BookSurfing®
CCF (.CCF)
e-Book Viewer
XMDF (.ZBK, .ZBF, .ZBS)
• Titles of unsupported file formats are not
displayed.
• The viewer that starts up depends upon the file
9
Tools
format. To find out the file format, see Details
of the file (page 2-30).
• e-Book Viewer may not be able to display some
PC contents.
9-25
921T_web_0802.indb 9-25
08.3.23 1:58:24 PM
Barcode Reader
Scanning QR Codes
w Select Scan➡[
About QR Codes
The camera allows you to scan
QR codes and save them as QR
code data. Connect to a URL
included in the scanned
information, create a message
to send to an address included
in the scanned information or
save it to Phone Book.
• The camera may not be able to scan a QR
code that is dirty or in the dark.
• Some QR codes cannot be scanned
depending on the size or version.
9
Scanning a QR Code
Checking Saved Data
q From Scan Data Window, select
Scanned Data➡[
w Select QR code data➡[
More Features
Scanning QR Codes
(E page 9-34)
Scanning Window
e Frame a QR code in the Display➡[
• Use F to adjust the exposure.
• When the QR code has been divided into
data areas, select YES to scan the other
data areas. When all the areas are
scanned, the QR code data is displayed.
Tools
q Press [➡Tools➡[➡Useful Tools➡
[➡Scan Data➡[
Scan Results Window
Scan Data Window
r Press K➡Save➡[
9-26
921T_web_0802.indb 9-26
08.3.23 1:58:24 PM
Ku-man's Room (Japanese)
Opening Ku-man's Room
q Press [➡ エンタテイメント (Entertainment)➡
[➡くーまんの部屋 (Ku-man's Room)➡[
w Select 起動する (Open)➡[➡YES or NO
➡[
• You cannot visit Ku-man's Room if the
language setting is set to English. Set 言語
選択 (Language) to 日本語 (Japanese).
About Ku-man's Room
④
⑤
①
②
⑥
⑦
⑧
Ku-man's Room
© Dora communications
You can change posters.
②Change Cloths
Contains Ku-man's clothes.
③Treasure Chest
Contains Ku-man's treasures.
④Closet
It is decorated with many different types of
trophies.
⑤Take Pictures
You can take pictures of Ku-man or yourself.
⑥Album
Albums with pictures of Ku-man.
⑦Change!
Standby Ku-man changes his outfit by putting
on a plush toy.
⑧Ku-man
Ku-man is a foot-loose and fancy free baby star
bear. He sometimes goes off on journeys.
Playing with Ku-man
Look in Ku-man's Treasure Chest, change the
outfit of Ku-man in Standby or take photos.
Example: Changing the outfit of Ku-man in
Standby
q In Ku-man's Room, press [
Now you can operate Ku-man's Room.
w Press J(前へ (Previous))/K(次へ
(Next))to select へんし∼ん! (Change!)➡[
e
Select an outfit➡[
• Ku-man in his room wears the clothes from
before the change.
Checking Messages from Ku-man
Ku-man sends mail after you open his room for
the first time, when he goes on trips and other
times.
Sometimes there are presents attached to
messages from Ku-man.
q In Ku-man's Room, press K➡くーまんメール
(Ku-man Mail)➡[
w Select a message➡[
9
More Features
Ku-man's Room (Japanese)
(E page 9-34)
Tools
③
①Poster
Setting Ku-man for Standby (Japanese)
(E page 13-43)
• Set Ku-man to be Displayed in Standby
9-27
921T_web_0802.indb 9-27
08.3.23 1:58:25 PM
Advanced Features
Information Management Tools
From ➡ Calendar Window
Create Event Window
Event Alarm Setting Window
Daily View Window
Event Details Window
New Task Window
Task Alarm Setting Window
Tasks Window
page 9-4
page 9-4
page 9-4
page 9-5
page 9-5
page 9-5
page 9-5
page 9-6
Functions for Saving Events/Tasks
Set the Alarm Tone
[Alarm Tone]
Display the Events/Tasks for Today or
Tomorrow at the Specified Time
[Reminder]
Calendar Window / Tasks Window K➡Settings➡
Event Alarm Setting Window / Task Alarm Setting Window
Tone➡[
[➡Reminder ➡[➡ON➡[➡Time➡
[➡Enter a time➡[➡J
■Setting a Sound Preinstalled in the
• Enter the time in accordance with the 24-hour
Handset as the Alarm Tone
Patterns or Melodies ➡[➡Select an alarm
tone➡[➡J (twice)➡OK➡[
■Setting Display
Functions for Calendar
■Setting a File Saved in Data Folder/
J
Change the Color of Calendar Dates
[Set Holiday]
Memory Card as the Alarm Tone
Phone Memory or Memory Card➡[➡
Select a file➡[ (twice)➡J (twice)➡OK➡
■Setting a File Preinstalled in the Handset
■Changing the Color of a Specified Date
9
Calendar Window Select a date➡K➡Set
Holiday ➡[➡Current Day➡[➡Select a
color or Deactivate ➡[
Tools
■Changing the Color of a Specified Day of
the Week
Calendar Window K➡Set Holiday ➡[➡
Select Week➡[➡Select a day of the week➡
[➡Select a color➡[➡J
[
■Setting the Time Reader as the Alarm
Tone
Time Reading➡[➡J (twice)➡OK➡[
Set the Alarm Ring Time
[Duration]
system.
Today➡[➡Today or Tomorrow➡[➡
as the Alarm Tone
Set Alarm➡[➡Tone➡[➡Patterns or
Melodies➡[➡Select an alarm tone➡[➡
J (twice)
■Setting a File Saved in Data Folder/
Memory Card as the Alarm Tone
Set Alarm➡[➡Tone➡[➡Phone
Memory or Memory Card➡[➡Select a file
➡[ (twice)➡J (twice)
Event Alarm Setting Window / Task Alarm Setting Window
Duration➡[➡Enter a ring time➡[➡
J (twice)➡OK➡[
9-28
921T_web_0802.indb 9-28
08.3.23 1:58:25 PM
■Setting the Alarm Volume
Set Alarm➡[➡Volume➡[➡Adjust the
volume➡[➡J (twice)
• In Clamshell Open or Viewer position, the
actual alarm volume is fixed at level 3 even if it
is set higher than level 3; and the maximum
volume is level 3 if the alarm volume is set to
Ascending Volume or Descending
Volume.
■Setting Vibration
Set Alarm➡[➡Vibration➡[➡Select a
vibration pattern➡[➡J (twice)
■Setting the Alarm Ring Time
Set Alarm➡[➡Duration➡[➡Enter a
ring time➡[➡J (twice)
■Setting Alarm Repeats
Once➡[➡Select an item➡[➡J
[Hide]
Create Event Window / New Task Window Options➡
[➡Show/Hide➡[➡Hide➡[
Edit a Saved Event
[Edit Event]
Save Periodic Events
[Repeat Setting]
Create Event Window Options➡[➡Repeat for
➡[➡Daily, Weekly, Monthly, Yearly or
End of Month➡[➡Enter a repeat duration
➡[
• If you set the start date to the last day of the
month, you can set Repeat for to End of
Month.
• To repeat infinitely, enter "00".
• If you set Monthly for the 30th or 31st, the
repetition is only set for months that include
that date.
• If an event set to repeat daily, weekly, etc. is
deleted, a message asks if you wish to cancel
repeat features. Select Do not Repeat to
delete the event for that day only.
• Canceling a single date of a repeated event
may not be effective if the event is sent as
vObject (page 2-31) and received by another
device.
Daily View Window Select an event➡K➡Edit ➡
[➡Select an item➡[➡Edit the item➡[
➡J➡Overwrite or Save as New➡[➡
OK➡[
Functions for Saving Tasks
Edit a Saved Task
[Edit Task]
Tasks Window Select a task➡K➡Edit➡[➡
Select an item➡[➡Edit the item➡[➡J
➡Overwrite or Save as New➡[➡OK➡
[
Functions for Checking/Managing Events
Use Information Stored in the Event
[Call/Create Message/Access URL]
9
Tools
Hide Special Events/Tasks
Functions for Saving Events
■Calling or Sending a Message to the
Stored Phone Number
Event Details Window Select the phone number ➡
[ (twice)➡Voice Call or Create Mail➡[
• When you select Voice Call, do the following.
K➡Voice Call or Video Call➡[
9-29
921T_web_0802.indb 9-29
08.3.23 1:58:26 PM
Advanced Features
■Sending a Message to the Stored E-mail
Address
Event Details Window Select the e-mail address➡
[ (twice)
■Connecting to the Stored URL
Event Details Window Select the URL➡[ (twice)
[Delete All]
Calendar Window K➡Delete➡[➡All➡[
➡Enter your Handset Code➡YES➡[
Functions for Checking/Managing Tasks
➡YES➡[
Use Information Stored in the Task
[Call/Create Message/Save Sender/Access URL]
Use Related Information Stored in the Event
[To Messages/To Saved Pages/To Pictures]
Tasks Window Select a task➡[➡Select the
Contents field➡[➡Select the information➡
[➡Voice Call, Create Mail, Save Sender,
By Yahoo! Keitai or By PC Browser ➡[
Event Details Window To Messages, To Saved
Pages or To Pictures➡[
9
Time Table Functions
Delete All Events
From ➡ Time Table Window page 9-7
Copy a Class on Time Table
[Copy]
Time Table Window Select a period➡K➡Copy➡
[➡Select the destination period➡[➡J
• To copy to multiple periods, repeat selecting a
destination period and pressing [ as many
times as required.
Delete All Classes from Time Table
[Delete All]
Time Table Window K➡Delete➡[➡All➡[
➡Enter your Handset Code➡YES➡[
Tools
Use Information Stored in Contents
[Call/Create Message/Save Sender/Access URL]
Delete Multiple Tasks
Event Details Window Select the Contents field➡
[➡Select the information➡[➡Voice Call,
Create Mail, Save Sender, By Yahoo! Keitai
or By PC Browser ➡[
Tasks Window K➡Delete➡[➡Select Multi
➡[➡Select tasks➡[➡J➡YES➡[
Notepad Functions
Delete All Tasks
Edit a Notepad
[Select Multi]
[Delete All]
Delete Multiple Events
[Select Multi]
Calendar Window H➡Switch to All View➡K
➡Delete➡[➡Select Multi➡[➡Select
events➡[➡J➡YES➡[
Tasks Window K➡Delete➡[➡All➡[➡
Enter your Handset Code➡YES➡[
• When Change View is set to other than All
View, you cannot delete all tasks.
From➡ Notepad List Window page 9-8
[Edit Notepad]
Notepad List Window Select a notepad with
contents stored➡J➡Edit the notepad➡[
➡YES➡[
Delete All Notepads
[Delete All]
Notepad List Window K➡Delete➡[➡All➡
[➡Enter your Handset Code➡YES➡[
9-30
921T_web_0802.indb 9-30
08.3.23 1:58:26 PM
Voice Recorder Functions
From ➡ Voice Recorder Window page 9-9
Change the Storage Location of
Recordings
[Select Storage]
Voice Recorder Window Record➡[➡K➡
SelectStorage ➡[➡Phone Memory or
Memory Card➡[
• A memory card must be inserted to configure
these settings.
Lifestyle Support Tools
Functions for Osaifu-Keitai®
From ➡ Card Settings Window page 9-12
Check the Balance of a Lifestyle-Appli on
the External Display
[Display Balance]
Card Settings Window Display Balance➡[➡
Enter your Handset Code➡ON/OFF➡[➡
ON➡[
Delete Lifestyle-Appli from Balance List
[Delete from Balance List]
Card Settings Window Display Balance➡[➡
Enter your Handset Code➡Balance List➡[
➡Select the Lifestyle-Appli
■Deleting One Entry
K➡Delete➡[➡YES➡[
■Deleting All Entries
K➡Delete All➡[➡Enter your Handset
Code➡YES➡[
■Adding a Lifestyle-Appli to Balance List
Card Settings Window Display Balance➡[➡
Enter your Handset Code➡Balance List➡[
➡Empty➡[➡Select the Lifestyle-Appli➡[
Change the Number of Calls to Set Call
Lock
[Missed Count]
■Checking the Balance
Card Settings Window Remote Lock➡[➡Enter
your Handset Code➡Call Lock➡[➡Missed
Count➡[➡Input the number of calls➡[
• The Side Key must be set to Balance in
Set a Reply Address to Send the Lock
Engaged Notification
[Address]
9
Tools
advance (page 2-4).
Press and hold P
• The balance is shown by each Lifestyle-Appli
saved on the Balance List. Pressing P
switches the balance display to the next
Lifestyle-Appli.
• Alternatively, select the Lifestyle-Appli on the
Balance List and press J to display the
balance.
Card Settings Window Remote Lock➡[➡Enter
your Handset Code➡Mail Lock➡[➡
Address➡[➡K➡Add➡[
■Setting the Mail Lock Address
To Sender ➡[
9-31
921T_web_0802.indb 9-31
08.3.23 1:58:27 PM
Advanced Features
■Setting an Address from Phone Book
Phone Book➡[➡Select an entry➡[➡
Select an address➡[
■Setting an Address from Sent Log or
Received Log
Sent Log or Received Log➡[➡Select an
entry➡[
Use Location Logs
[Open Map/Start Navi Appli/Send Message/
To Locations/To Phone Book]
Functions for Idokoro Mail
S! GPS Navi Window Location Logs➡[➡Select
a log➡K➡Open Map, Go to, Location
Mail, To Locations or To Phone Book➡[
Delete People from the Recipients List
[Delete/Delete All]
E-mail Address
Phone Number or Email➡[➡Enter a
phone number or e-mail address➡[ (twice)
Functions for S! GPS Navi
From ➡ S! GPS Navi Window page 9-14
9
Send Current Position by Mail
[Location Mail]
Tools
S! GPS Navi Window Location Mail➡[
Check Location Logs
[Location Logs]
S! GPS Navi Window Location Logs➡[➡Select
a log➡[
• If is shown to the left of the log, it means
the positioning was successful; means a
failure.
■Deleting One Entry
Idokoro Mail Window Recipients List ➡[➡
Select a list➡K➡Delete➡[➡YES➡[
Delete Location Logs
■Directly Entering a Phone Number or
From ➡ Idokoro Mail Window page 9-16
[Delete/Delete All]
S! GPS Navi Window Location Logs➡[➡Select
a log➡K➡Delete➡[
■Deleting One Entry
Delete➡[➡YES➡[
■Deleting All Entries
■Deleting All Entries
Idokoro Mail Window Recipients List ➡[➡K
➡Delete All➡[➡Enter your Handset Code
➡YES➡[
Delete an Area List
[Delete/Delete All]
Delete All➡[➡Enter your Handset Code➡
YES➡[
■Deleting One Entry
Save Location Information to My
Locations
[My Locations]
■Deleting All Entries
S! GPS Navi Window My Locations➡[➡Select
an unregistered item➡[➡Save the location
information➡[➡Enter a title➡[
Idokoro Mail Window Areas List ➡[➡Select an
area list➡K➡Delete➡[➡YES➡[
Idokoro Mail Window Areas List ➡[➡K➡
Delete All➡[➡Enter your Handset Code➡
YES➡[
9-32
921T_web_0802.indb 9-32
08.3.23 1:58:28 PM
Alarm Functions
Functions for Calculator
Change the Alarm Ring Time
From➡ Alarm List Window page 9-18
Set Alarm Window page 9-18
Change an Alarm Name
[Alarm Name]
[Duration]
Set Alarm Window Alarm Tone➡[➡Duration
➡[➡Enter a ring time➡[➡J (twice)➡
OK➡[
Set Alarm Window Select an alarm name➡[➡
Enter an alarm name➡[➡J➡OK➡[
Edit an Alarm
Change the Alarm Tone
Alarm List Window Select an alarm➡[➡Select
an item➡[➡Edit the item➡[➡J➡OK
[Alarm Tone]
Set Alarm Window Alarm Tone➡[➡Tone➡
[
[Edit Alarm]
➡[
[Reset All]
Alarm List Window K➡Reset All➡[➡Enter
your Handset Code➡YES➡[
■Setting a File Saved in Data Folder/
World Clock Functions
[
■Setting the Time Reader as the Alarm
Tone
Time Reading➡[➡J (twice) ➡OK➡[
[Converter]
Calculator Window K➡Converter ➡[➡
Exchange Rate➡[➡Main Currency or
Sub Currency ➡[➡Enter a rate➡[➡
L (three times)➡Enter an amount➡K➡
Converter ➡[➡To Main or To Sub ➡[
From ➡ S! Quick News Window page 9-22
List Window page 9-22
S! Loop List Window page 9-22
Update Lists Automatically
[Auto Refresh]
From ➡ World Clock Setting Window page 9-19
Edit a City Name
[Rename City]
World Clock Setting Window City 1 or City 2➡[
➡F to select a city➡K➡Rename City➡
[➡Enter a city name➡[
S! Quick News Window Settings ➡[➡Auto
Refresh➡[➡Flash News, News or S!
Loop ➡[
9
Tools
Handset as the Alarm Tone
Patterns or Melodies ➡[➡Select an alarm
tone➡[➡J (twice) ➡OK➡[
Memory Card as the Alarm Tone
Phone Memory or Memory Card➡[➡
Select a file➡[ (twice) ➡J (twice) ➡OK➡
Calculate Currency Conversion
Functions for S! Quick News
Delete All Alarms
■Setting a Sound Preinstalled in the
From ➡ Calculator Window page 9-20
■Setting Flash News to Update
Automatically
Select the time interval for the automatic update
➡[➡B➡[➡YES➡[
9-33
921T_web_0802.indb 9-33
08.3.23 1:58:28 PM
Advanced Features
■Setting News/S! Loop to Update
Automatically
Automatic ➡[➡B➡[➡YES➡[
• S! Quick News (Flash News) and S! Loop List
updates do not take place during late hours at
night.
• Automatic update may not occur if your
handset is outside the service area or signal
reception is poor.
• If automatic updates stop for some reason,
performing a manual update (page 2-8) can
restart the automatic updates.
Delete Registered Contents and Items
[Delete/Delete All]
■Deleting One Entry
9
Tools
List Window / S! Loop List Window K➡Delete➡
[➡One➡[➡YES➡[
S! Information Channel
From ➡ Info Channel Window page 9-23
Weather Indicator Window page 9-23
Download Unreceived Information
[Get Latest]
Info Channel Window Get Latest ➡[➡YES➡
[
A connection is established to the redelivery
page.
• You can download only the latest information.
Content cannot be downloaded on nondelivery days.
■Requesting Redelivery from Information
Prompt
Information Prompt appears➡Info Channel ➡
[➡YES➡[
Scanning QR Codes
From ➡ Scan Results Window page 9-26
Use Scan Results
[Call/Send Message/To Phone Book/
Access URL]
Scan Results Window Select the information➡[➡
Call, Send Message or To Phone Book➡[
• When a URL is scanned, select YES after
selecting the URL.
Paste Scan Results into Message Text
[To Message]
Scan Results Window K➡To Message➡[
Use Location Information
[Start Navi Appli/To Locations]
Scan Results Window K➡Go to or To Locations
➡[
■Deleting All Entries
Check Past Updates
List Window / S! Loop List Window K➡Delete➡
[➡All➡[➡Enter your Handset Code➡
YES➡[
Info Channel Window History➡[➡Select the
information➡[
[History]
Ku-man's Room (Japanese)
From ➡ Ku-man's Room page 9-27
Update Weather Forecast Manually
[Update Weather Forecast]
Check What You can Do in Ku-man's Room
[Help]
Weather Indicator Window Update➡[➡YES➡
Ku-man's Room K➡ヘルプ (Help)➡[
[
9-34
921T_web_0802.indb 9-34
08.3.23 1:58:29 PM
10
921T_web_0802.indb 10-1
Communication Services
S! Town (Japanese)/S! Loop (Japanese) ・・・・・・・・・・・・・・・・・・・・・・・・・・・・・・・・・・・・・・・・・・・・・・・ 10-2
S! Friend's Status ・・・・・・・・・・・・・・・・・・・・・・・・・・・・・・・・・・・・・・・・・・・・・・・・・・・・・・・・・・・・・・・・・・ 10-3
About S! Friend's Status ・・・・・・・・・・・・・・・・・・・・・・・・・・・・・・・・・・・・・・・・・・・・・・・・・・・・・・・・・・・・・ 10-3
Using S! Friend's Status・・・・・・・・・・・・・・・・・・・・・・・・・・・・・・・・・・・・・・・・・・・・・・・・・・・・・・・・・・・・・・ 10-4
S! Circle Talk ・・・・・・・・・・・・・・・・・・・・・・・・・・・・・・・・・・・・・・・・・・・・・・・・・・・・・・・・・・・・・・・・・・・・・・・ 10-6
About S! Circle Talk ・・・・・・・・・・・・・・・・・・・・・・・・・・・・・・・・・・・・・・・・・・・・・・・・・・・・・・・・・・・・・・・・・ 10-6
Using S! Circle Talk ・・・・・・・・・・・・・・・・・・・・・・・・・・・・・・・・・・・・・・・・・・・・・・・・・・・・・・・・・・・・・・・・・ 10-7
Advanced Features ・・・・・・・・・・・・・・・・・・・・・・・・・・・・・・・・・・・・・・・・・・・・・・・・・・・・・・・・・・・・・・・・・ 10-9
08.3.23 1:58:29 PM
S! Town (Japanese)/S! Loop (Japanese)
Using S! Town
Communication Services
10
S! Town is an online 3D virtual space. Go online to
chat, shop, etc.
• When you use S! Town for the first time, a user
registration (free) and profile registration are
required. Please read and agree to the terms of
service before the registration.
• Packet transmission fees apply to use S! Town.
The fees may be expensive.
• If you subscribe to Website access restrictions,
you cannot use S! Town.
Using S! Loop
Use S! Loop to keep a diary on the web or
exchange information via BBS.
q Press [➡Communications➡[
w Select S! Loop➡[➡YES➡[
q Press [➡Communications➡[
w Select S! Town➡[
• You can cancel the S! Town service by
selecting S!タウン (S! Town) from マイメニュー
(My Menu) of Yahoo! Keitai.
• Upgrade notification may appear when
you start S! Town. Follow the onscreen
instructions to upgrade S! Town.
• About the Library
Downloaded S! Appli that expand the
functions of S! Town are automatically
stored in the Library. To check S! Appli in the
Library:
Press a[➡Communications➡a[➡S!
Town➡J
(Libr.)
j
10-2
921T_web_0802.indb 10-2
08.3.23 1:58:30 PM
S! Friend's Status
About S! Friend's Status
S! Friend's Status is a function that lets you share your current mood and availability to receive incoming calls, messages or S! Circle Talk calls with your friends
that are on your S! Friend's Status Members List.
It is possible to check your S! Friend's Status from Standby by adding the members to Active Window.
• A separate subscription is required to use S! Friend's Status. A monthly fee is also required.
S! Friend's Status
View the mood or status of your friends.
Status of Ann
S! Friend's Status
compatible handset
Ask me
Calls ● Answer OK
● Replay OK
Mail
S! Circle Talk ● Join OK
S! Friend's Status
compatible handset
Communication Services
Update My Status
10
See you there!
Communications
S! Friend's Status
compatible handset
• S! Friend's Status is unavailable if IP Service is set to OFF.
10-3
921T_web_0802.indb 10-3
08.3.23 1:58:30 PM
S! Friend's Status
Using S! Friend's Status
r Select an Answer Status ➡[➡Select
an item➡[
• To change all your Answer Statuses at
once:
Press K (All) ➡Select an item➡[➡
Check the settings ➡[
• To customize All Answer Statuses Settings:
Press K (All) ➡Customize➡[➡
J (Edit) ➡Customize the settings➡
J (Save) ➡[
Setting Your Own Status (My Status)
q Press and hold *
Communication Services
10
t Select the Comment field➡[➡Enter
a comment➡[
My Status Window
w
➡[➡Online➡
Select
/
[➡YES➡[
• To go offline:
Select Offline➡[➡J (Update)
e Select a status such as ごきげん (Good
mood) or something➡[➡Select an
item➡[
y
Press J (Update)
• If you switch to offline, you and other people
cannot check each others' current condition.
Also, you will not be able to create S! Friend's
Status Members List or talk to people with S!
Circle Talk.
Adding Members
When you add a person to your S! Friend's Status
Members List, an invitation is sent.
• You can only add friends who have a SoftBank
handset that supports S! Friend's Status to your
S! Friend's Status Members List.
• To create an S! Friend's Status Members List,
set My Status to Online.
• When the person accepts your invitation, you
receive a Saving Completed notification, and
you and the person can check out each other's
status.
q Press [➡Communications➡[➡
Friend Status➡[
w Press J (Add) ➡Phone Book or
Direct Input➡[
• If you select Phone Book, you can search
Phone Book entries in the handset (not
those in the USIM Card or memory card).
e Select a member or enter a phone
number➡[
• To select a group:
Select ➡[➡Select a group➡[
r Press J (Save) ➡YES➡[
A Saving Request notification is sent to the
person, and Waiting is displayed in the
S! Friend's Status Members List window.
10-4
921T_web_0802.indb 10-4
08.3.23 1:58:30 PM
• A Saving Failed notification is sent when a
person's S! Friend's Status Members List
already contains 30 people.
Checking S! Friend's Status
q
Press [➡Communications➡[➡
Friend Status➡[
q Information Prompt appears➡
Notification➡[
w
Select a Saving Request notification➡
[➡YES➡[
• If you select NO, a Saving Failed
notification is returned to the other person
and the person is not saved to the S! Friend's
Status Members List.
S! Friend's Status Members List Window
w Select a group with F
e Select a member with G➡[
S! Friend's Status Functions
(E page 10-9)
Settings for S! Friend's Status
(E page 13-44)
• Edit Status Settings of My Status
• Save Members to Active Window
• Ignore Saving Requests from People Not in
Phone Book
• Ignore All Saving Requests
Settings for S! Friend's Status/S! Circle
Talk
(E page 13-44)
• Disable S! Friend's Status/S! Circle Talk
Communication Services
Adding a Member from Saving Request
If someone wants to add you to his/her S! Friend's
Status Members List, you will receive a Saving
Request notification. If you accept, the other
person is saved to the S! Friend's Status Members
List and you and the person can check out each
other's status.
More Features
10
• If you select NO and a Saving Failed
notification is returned to the other person, you
cannot send the person an invitation to the
S! Friend's Status Members List for 24 hours.
• Although you select NO and a Saving Failed
notification is returned to the other person, if
the other person does not receive the
notification because he/she is outside the
service area or offline for more than 24 hours,
you will receive another Saving Request
notification when the person comes online.
S! Friend's Status Details Window
10-5
921T_web_0802.indb 10-5
08.3.23 1:58:31 PM
S! Circle Talk
About S! Circle Talk
• S! Circle Talk is unavailable if IP Service is set
S! Circle Talk is a walkie-talkie style communication service. Talk one-on-one or with a group of people
(up to ten people) using S! Circle Talk compatible SoftBank handsets.
Press and hold the key to talk (one person at a time) and release the key when finished talking. Check
the S! Circle Talk window to check each participant's status and see who is currently talking.
• You must subscribe to S! Friend's Status to use S! Circle Talk. Transmission fees apply for using S!
Circle Talk.
to OFF.
• S! Circle Talk is unavailable if S! Friend's
Status is set to Offline. Switch to Online
(page 10-4) to use S! Circle Talk.
• S! Circle Talk is unavailable during voice or
video calls. Also, you cannot receive another
S! Circle Talk call during S! Circle Talk.
S! Circle Talk
Communication Services
Talk one-on-one or with a group of people using
S! Circle Talk compatible SoftBank handsets.
S! Circle Talk
compatible handset
10
Speak to
All Members
You can also hear other
members speak.
S! Circle Talk
compatible handset
S! Circle Talk
compatible handset
10-6
921T_web_0802.indb 10-6
08.3.23 1:58:31 PM
Using S! Circle Talk
Adding Members
Adding a Person
q Press [➡Communications➡[➡
Circle Talk➡[
• A confirmation window appears the first
time you start.
• If no one is on the S! Circle Talk Members
List, press J (Add).
q From Add Members Window, select
Group➡[➡Create New➡[
e Select Personal➡[➡Phone Book,
Friend Status or Direct Input➡[
• If you select Phone Book, you can search
Phone Book entries in the handset (not
those in the USIM Card or memory card).
r
Select a member or enter a phone
number➡[
q Enter a phone number, and then press
and hold P
• To make an S! Circle Talk call from the
S! Circle Talk Members List, press P in
Standby, select a person or group, and
then press J (CT).
w Select Empty➡[➡Phone Book,
Friend Status or Direct Input➡[
• If you select Phone Book, you can search
Phone Book entries in the handset (not
those in the USIM Card or memory card).
e Select a member or enter a phone
number➡[
Add Members Window
Initiating S! Circle Talk
• To save more members, repeat w and e.
• If you want to change a member's phone
w Press and hold P to talk
• Talk when Myself appears.
• Initiator can talk as soon as S! Circle Talk
is connected.
Myself disappears after 30 seconds
and the floor is released.
• Only one person can talk at a time.
•
number, select the member, press [
twice, and then enter the phone number.
r Press J (Add) ➡Enter a group name
Communication Services
w Press K➡Add Members➡[
Creating a Group
Organize entries by Group to make an S! Circle
Talk call to a group of people.
10
➡[
Adding a Group from S! Friend's Status Members List
q From Add Members Window, select
Group➡[➡Friend Status➡[
w Select a group ➡[
e To sign off, press O➡YES➡[
• When only one person remains, the
S! Circle Talk ends automatically.
10-7
921T_web_0802.indb 10-7
08.3.23 1:58:32 PM
S! Circle Talk
• When the other's voice is output from the
speaker during an S! Circle Talk, the volume
is fixed at level 3, even if the speaker volume
is set higher than level 3.
S! Circle Talk Operations
More Features
Calling Another Member
q During an S! Circle Talk, press K➡
S! Circle Talk Functions (E page 10-10)
w Select Members List➡[➡Select a
Settings for S! Friend's Status/S! Circle
Talk
(E page 13-44)
• Disable S! Friend's Status/S! Circle Talk
Add➡[
Joining S! Circle Talk
q Press [ (Answer) when S! Circle Talk
Communication Services
invitation arrives
S! Circle Talk is connected.
• To reject the connection, press
K (Reject).
• Alternatively, press P to answer.
10
member ➡[
• To call a person from the S! Friend's Status
Members List:
Select Friend Status➡[➡Select an
entry➡[
• To call a person from Phone Book:
Select Phone Book➡[➡Select an
entry➡[➡Select a phone number
➡[
• To enter a phone number directly:
Select Direct Input➡[➡Enter a
phone number➡[
Adjusting the Speaker (Earpiece) Volume
q During an S! Circle Talk, use G
Switching Between Earpiece & Speaker
q During an S! Circle Talk, press
J(
/
)
10-8
921T_web_0802.indb 10-8
08.3.23 1:58:32 PM
Advanced Features
Communications
• After a member is deleted from the S! Friend's
S! Friend's Status Functions
From ➡
S! Friend's Status Members List Window page 10-5
S! Friend's Status Details Window page 10-5
Add a Member
[Add Members]
Delete Members
[Deletion Request]
S! Friend's Status Members List Window Select a group
■Deleting One Member
Select a member➡K➡Delete➡[➡One➡
[➡YES➡[
■Deleting Multiple Members
Select a member other than yourself (My Status)
➡K➡Delete➡[➡Select Multi➡[➡
Select members➡[➡J➡YES➡[
S! Friend's Status Members List Window K➡
Settings➡[➡Status Update➡[
Move Members to a Different Group
[Change Group]
Check a Notification
S! Friend's Status Members List Window Select a group
S! Friend's Status Members List Window K➡
Notification➡[
■Moving One Member
Select a member ➡K➡Change Group➡
[➡One➡[➡Select a group➡[
[Notification]
■Moving Multiple Members
Contact a Member According to His/Her
Current Status
[Call/Send Mail]
Select a member other than yourself (My Status)
■Making a Voice Call/Video Call
➡K➡Change Group➡[➡Select Multi
➡[➡Select members➡[➡J➡Select a
group➡[
■Moving All Members
Select a member other than yourself (My Status)
➡K➡Change Group➡[➡All➡[➡
Select a group➡[
Edit a Group Name
[Rename]
■Deleting All Members
Select a member other than yourself (My Status)
➡K➡Delete➡[➡All➡[➡Enter your
Handset Code➡YES➡[
Update S! Friend's Status Manually
[Status Update]
S! Friend's Status Members List Window Select a group
➡K➡Rename➡[➡Edit the group name
S! Friend's Status Details Window Select the call
answer status➡[➡K➡Voice Call or
Video Call➡[
■Sending a Message
S! Friend's Status Details Window Select the mail
answer status➡[➡Create a message ➡J
• For details on creating messages, see pages
4-4 and 4-6.
Communication Services
S! Friend's Status Members List Window K➡Add
Members➡[
Status Members List, you cannot send/receive
a Saving Request notification to/from that
person for 24 hours.
10
■Initiating S! Circle Talk
S! Friend's Status Details Window Select the S! Circle
Talk answer status➡[
➡[
10-9
921T_web_0802.indb 10-9
08.3.23 1:58:33 PM
Advanced Features
S! Circle Talk Functions
Delete a Group or Person from S! Circle Talk
Members List
[Delete/Select Multi/Delete All]
Edit S! Circle Talk Members List
[Edit Group]
P➡Select a group from S! Circle Talk Members
List➡K➡Edit Group➡[
■Editing the Group Name
Rename➡[➡Edit the group name➡[
Communication Services
10
■Adding Members
Change Member➡[➡Empty➡[➡
Phone Book, Friend Status or Direct Input
➡[➡Select a member or enter a phone
number➡[➡J
■Deleting One Entry
P➡Select a member or a group ➡K➡
Delete➡[➡One➡[➡YES➡[
■Deleting Multiple Entries
P➡K➡Delete➡[➡Select Multi➡
[➡Select members or groups➡[➡J➡
YES➡[
■Deleting All Entries
P➡K➡Delete➡[➡All➡[➡Enter
your Handset Code➡YES➡[
■Changing a Member's Phone Number
Change Member➡[➡Select a member ➡
[ (twice)➡Enter a phone number➡[➡J
■Deleting a Member
Change Member➡[➡Select a member➡
K➡Delete➡[➡YES➡[➡J
■Deleting All Members
Change Member➡[➡K➡Delete All➡
[➡Enter your Handset Code➡YES➡[
10-10
921T_web_0802.indb 10-10
08.3.23 1:58:33 PM
11
Security
Changing Handset Code ・・・・・・・・・・・・・・・・・・・・・・・・・・・・・・・・・・・・・・・・・・・・・・・・・・・・・・・・・・・・ 11-2
Prohibiting/Limiting Use ・・・・・・・・・・・・・・・・・・・・・・・・・・・・・・・・・・・・・・・・・・・・・・・・・・・・・・・・・・・・ 11-3
Protecting Handset Information ・・・・・・・・・・・・・・・・・・・・・・・・・・・・・・・・・・・・・・・・・・・・・・・・・・・・・・・ 11-4
Advanced Features ・・・・・・・・・・・・・・・・・・・・・・・・・・・・・・・・・・・・・・・・・・・・・・・・・・・・・・・・・・・・・・・・・ 11-5
921T_web_0802.indb 11-1
08.3.23 1:58:34 PM
Changing Handset Code
• Do not forget your Handset Code and do not
reveal it to others. Write down your Handset
Code.
q Press [➡Settings➡[➡Security➡
[➡Change Password➡[
w Enter your current Handset Code
e Enter your new Handset Code
Security
11
r Re-enter your new Handset Code for
confirmation
11-2
921T_web_0802.indb 11-2
08.3.23 1:58:34 PM
Prohibiting/Limiting Use
Activating PIN Settings
Set whether you are requested to enter your PIN
to perform verification each time the power is
turned on when a USIM Card is inserted in the
handset.
q Press [➡Settings➡[➡Security
➡[
q From Security Setting Window, select
Password Lock➡[➡Enter your Handset
Code
• To cancel Keypad Lock, press and hold [
w Select an item to set➡[➡ON➡[
[➡ON➡[
e Enter your PIN➡[
Prohibiting Handset Use
Set Password Lock to prevent others from using
your handset. When Password Lock is activated,
your Handset Code is required to use the handset.
Phone Closed: Locks the handset when
you close it.
Power Saving: Locks the handset when the
Display is turned off for
Power Saving.
Power Off: Locks the handset when it is
turned on.
• To cancel Password Lock, enter your Handset
Code to release Password Lock temporarily,
and then set Password Lock to OFF.
• Phone Closed locks the handset when you
close it in Standby. Power Saving locks the
handset when the Display is turned off after
a certain amount of time (as set in the power
saving settings) has passed in Standby.
• You cannot make a one-touch call from the
Earphone-Microphone while the handset is
locked with Password Lock.
while it is set.
• Keypad Lock cannot be set when Bluetooth®/
infrared communication is activated.
• When Keypad Lock is set, Information
Prompt does not appear.
Hold
The hold function prevents unintentional
operations while your handset is closed. When
Hold is set, appears on the External Display.
q Press and hold M when your
handset is closed
• To cancel Hold, press and hold M
while it is set and the handset is closed.
Security
w Select PIN Settings➡[➡ON/OFF➡
Keypad Lock allows you to disable the keys to
prevent unintentional operations while your
handset is in your bag or pocket.
q Press and hold [
• The settings are shown below.
Security Setting Window
Keypad Lock
11
• When battery level is low, Hold may be
ineffective even when set.
11-3
921T_web_0802.indb 11-3
08.3.23 1:58:34 PM
Prohibiting/Limiting Use
Using Secure Remote Lock
By using the Secure Remote Lock service, if your
handset is lost or stolen, you can lock the
functions of the handset remotely by using a PC
or mobile phone.
Once the lock is set, all key operations are
disabled except for turning the power on, making
emergency calls and calling SoftBank Customer
Center (157). The IC Card Lock (page 9-12) will
also be turned on automatically.
For more information on conditions for using the
Secure Remote Lock, go to http://www.softbank.jp
or access My SoftBank from your handset.
Protecting Handset Information
Prohibiting Use of Phone Book and
Other Features
Set Function Lock to prevent unauthorized access
to Phone Book, Calendar, Tasks functions, Call Log
and Sent/Received Log. When Function Lock is set,
your Handset Code must be entered to access
these functions/features.
q From Security Setting Window, select
Function Lock➡[➡Enter your
Handset Code
Accessing My SoftBank from a Mobile Phone
Displaying Secret Data
Phone Book entries saved as secret (page 2-17)
can be displayed.
q From Security Setting Window, select
Secret Mode➡[➡Enter your Handset
Code
w Select Show ➡[
• Secret Mode is set to Hide when handset
power is turned off.
q Press K➡メニューリスト (Menu List)➡[➡
My SoftBank➡[
More Features
Security
w
Select a function ➡[➡Lock➡[
Functions for Prohibiting/Limiting Use
(E page 11-5)
11
11-4
921T_web_0802.indb 11-4
08.3.23 1:58:35 PM
Advanced Features
Security
Functions for Prohibiting/Limiting Use
From ➡ Security Setting Window page 11-3
Change PIN/PIN2
[Change PIN/PIN2]
• Set PIN Settings to ON before you change the
PIN.
• Do not forget your PIN and do not reveal it to
others. Write down your PIN.
Security Setting Window PIN Settings➡[➡
Change PIN or Change PIN2➡[➡Enter
current PIN/PIN2➡[➡Enter new PIN/PIN2➡
[➡Re-enter new PIN/PIN2 for confirmation➡
[
Restrict Access to the Internet by Inputting
URLs
[Web]
Security Setting Window Restricted Mode➡[➡
Web➡[➡Enter Internet Security Code (page
1-14) ➡[➡Set Regulation➡[➡ON➡
[
■When Internet Security Code is Not
Registered
Security Setting Window Restricted Mode➡[➡
Web➡[ (twice)➡Enter Internet Security Code
➡[➡Re-enter new Internet Security Code for
confirmation ➡[➡Do not Save➡[
• To register a clue to your Internet Security
Code, select Save and enter a clue.
Cancel PIN Lock
[Cancel PIN Lock]
While the PIN/PIN2 Lock is set, do an operation
that requires PIN/PIN2 entry➡Enter PUK/PUK2
➡[➡Enter new PIN/PIN2➡[➡Re-enter
new PIN/PIN2 for confirmation ➡[
• If the Personal Unblocking Key (PUK) code is
incorrectly entered ten times in a row, the
USIM Card is locked (USIM lock). If the USIM
lock is set, it cannot be canceled. Contact
SoftBank General Information (page 14-41).
Security Setting Window Restricted Mode➡[➡
Web➡[➡Enter Internet Security Code➡[
➡Change Password ➡[ (twice)➡Enter
new Internet Security Code➡[➡Re-enter new
Internet Security Code for confirmation ➡[➡
Do not Save➡[
• To register a clue to your Internet Security
Code, select Save and enter a clue.
Security
■Changing Internet Security Code
11
11-5
921T_web_0802.indb 11-5
08.3.23 1:58:35 PM
Security
11
11-6
921T_web_0802.indb 11-6
08.3.23 1:58:36 PM
12
921T_web_0802.indb 12-1
File Transfer/Backup
Infrared ・・・・・・・・・・・・・・・・・・・・・・・・・・・・・・・・・・・・・・・・・・・・・・・・・・・・・・・・・・・・・・・・・・・・・・・・・・・ 12-2
About Infrared ・・・・・・・・・・・・・・・・・・・・・・・・・・・・・・・・・・・・・・・・・・・・・・・・・・・・・・・・・・・・・・・・・・・・・ 12-2
Using Infrared ・・・・・・・・・・・・・・・・・・・・・・・・・・・・・・・・・・・・・・・・・・・・・・・・・・・・・・・・・・・・・・・・・・・・・ 12-2
Bluetooth® ・・・・・・・・・・・・・・・・・・・・・・・・・・・・・・・・・・・・・・・・・・・・・・・・・・・・・・・・・・・・・・・・・・・・・・・・ 12-4
About Bluetooth® ・・・・・・・・・・・・・・・・・・・・・・・・・・・・・・・・・・・・・・・・・・・・・・・・・・・・・・・・・・・・・・・・・・ 12-4
Using Bluetooth® ・・・・・・・・・・・・・・・・・・・・・・・・・・・・・・・・・・・・・・・・・・・・・・・・・・・・・・・・・・・・・・・・・・・ 12-5
PC Connection ・・・・・・・・・・・・・・・・・・・・・・・・・・・・・・・・・・・・・・・・・・・・・・・・・・・・・・・・・・・・・・・・・・・・・ 12-8
About PC Connection ・・・・・・・・・・・・・・・・・・・・・・・・・・・・・・・・・・・・・・・・・・・・・・・・・・・・・・・・・・・・・・・ 12-8
Memory Card Backup ・・・・・・・・・・・・・・・・・・・・・・・・・・・・・・・・・・・・・・・・・・・・・・・・・・・・・・・・・・・・・・12-10
About Memory Card Backup ・・・・・・・・・・・・・・・・・・・・・・・・・・・・・・・・・・・・・・・・・・・・・・・・・・・・・・・・・ 12-10
S! Addressbook Back-up ・・・・・・・・・・・・・・・・・・・・・・・・・・・・・・・・・・・・・・・・・・・・・・・・・・・・・・・・・・・12-12
About S! Addressbook Back-up・・・・・・・・・・・・・・・・・・・・・・・・・・・・・・・・・・・・・・・・・・・・・・・・・・・・・・・ 12-12
Using S! Addressbook Back-up ・・・・・・・・・・・・・・・・・・・・・・・・・・・・・・・・・・・・・・・・・・・・・・・・・・・・・・・ 12-13
Advanced Features ・・・・・・・・・・・・・・・・・・・・・・・・・・・・・・・・・・・・・・・・・・・・・・・・・・・・・・・・・・・・・・・・12-14
08.3.23 1:58:36 PM
Infrared
About Infrared
Exchange the Calendar data of your handset,
Phone Book entries of your handset, memory card
or USIM Card, pictures/videos taken or recorded
with the camera and Data Folder data that can be
forwarded with an infrared compatible device (PC,
handset).
• Bring the Infrared Port of your handset to within
20 cm of the Infrared Port of the destination
device and align both ports. Make sure no
objects are placed between them.
Using Infrared
Activating Infrared
Set the handset so that it is connected by other
compatible devices via infrared communication.
Within 20cm
q Press [➡Settings➡[➡Connectivity
➡[➡Infrared➡[
Precautions
• A dirty Infrared Port may cause an infrared
File Transfer/Backup
12
communication failure. If the Infrared Port is
dirty, gently wipe it with a soft cloth while
making sure not to scratch the port.
• Do not move the devices until the file transfer is
complete.
• Direct sunlight or fluorescent light may interfere
with infrared communication.
• If the handset receives a voice/video call while
it is sending or receiving files via infrared
communication, a fixed incoming image is
displayed and a fixed melody ringtone sounds.
If you answer the call, the data communication
is canceled.
• When sending/receiving vObjects, some
information may be altered or not received.
• You cannot use Bluetooth® communication or
USB functions other than the charge function
during infrared communication.
• S! Friend's Status and S! Circle Talk are
unavailable while transferring files even if IP
Service is set to ON.
Infrared Window
w
e Select ON➡[
Select ON/OFF➡[
Authentication Password
The authentication password (four digits) is for
sending and receiving all data by infrared
communication.
When sending or receiving all data, the same
authentication password needs to be entered for
both the sending and receiving devices.
• To cancel infrared communication, select
OFF.
• Infrared communication is unavailable when
Offline Mode is set to ON.
• If the handset does not communicate via
infrared communication in three minutes
after Infrared has been set to ON, the
infrared communication standby is canceled
automatically.
Transferring Files
Sending a File
q Access a function that supports
infrared
12-2
921T_web_0802.indb 12-2
08.3.23 1:58:36 PM
w Select a file➡K➡Send ➡[
• Select Send vCard to access from Phone
Book.
e
Select Via Infrared ➡[
• Files without transfer permission and files in
Saved Pages cannot be sent.
• Removal of the memory card during file
transfer from the memory card may result in
loss or damage of files on the memory card.
Receiving Files
The handset can receive files when the Infrared
setting is ON.
request from another infrared
compatible device
w Select YES➡[
• To reject the reception of files, select NO.
• When the handset receives a Phone Book
entry, event, task or notepad, select YES
to save it to your Phone Book, Event, Tasks
or Notepad.
e Select Phone Memory or Memory Card
➡[
q From Infrared Window, select Transfer
All ➡[
w Enter your Handset Code
e Select Phone Book or Cal./Tasks➡[
• When sending Phone Book entries, a
confirmation window appears asking if
you want to send images saved in Phone
Book. Select Without Image to send the
Phone Book entries without images.
• When sending events/tasks, a confirmation
window appears. Select Without Past to
send events/tasks without including past
events/tasks.
r Enter the authentication password
Receiving All Phone Book Entries/Calendar & Task Data
All the Phone Book entries, events on the
Calendar or tasks can be received from another
infrared compatible handset. Enter the same
authentication password on both the sending and
receiving devices.
The handset can receive files when the Infrared
setting is ON.
q In Standby, receive a connection
request from another infrared
compatible device
w Enter your Handset Code➡Enter the
authentication password
e
Select Add ➡[
• To overwrite all files:
Select Overwrite➡[➡YES➡[
• To cancel receiving files, select Discard.
• The handset cannot receive files other than
when in Standby.
More Features
File Transfer/Backup
q In Standby, receive a connection
Sending All Phone Book Entries/Calendar & Task Data
All the Phone Book entries in your handset, events
on the Calendar or tasks can be sent to another
infrared compatible handset. Enter the same
authentication password on both the sending and
receiving devices.
12
Functions for Infrared Communication
(E page 12-14)
• The handset cannot receive files other than
when in Standby.
12-3
921T_web_0802.indb 12-3
08.3.23 1:58:37 PM
Bluetooth®
About Bluetooth®
Transfer Phone Book, picture and other files
between your handset and another Bluetooth®
compatible device. Also use a handsfree
compatible device to make handsfree calls.
Frequency
File Transfer/Backup
12
The Bluetooth® system on the handset uses the
2.4 GHz spectrum ranging from 2.402 GHz to
2.480 GHz. Other wireless devices may be using
the same frequency. In order to avoid radio
interference, note the followings:
• The Bluetooth® system on the handset uses 2.4 GHz
spectrum. This spectrum is used by industrial,
scientific, and medical equipment (microwaves
etc.), other radio stations of the same kind,
premises radio stations for radio frequency
identification which require a license (used in
production lines etc.), license free specified low
power radio stations, and amateur radio
stations (hereafter "other radio stations").
1. Before using the handset, make sure there are
no other radio stations nearby.
2. If radio interference occurs between the
handset and other radio stations, change
locations to use the handset, or stop using the
handset (stop emitting radio waves) at once.
3. For details, contact SoftBank General
Information (page 14-41).
• Handset
2.4FH1
• You cannot use infrared communication and
This wireless device uses
2.4 GHz spectrum. It
employs FH-SS modulation,
and causes interference
within a 10-meter radius.
Precautions
• Communication ®tests have not been performed
for all Bluetooth compatible devices. There is
no guarantee of connection with all Bluetooth®
devices.
• The security function used for wireless
communication complies with the standard
specifications of Bluetooth®. However, take care
when using Bluetooth® for data communication
because, in some cases, security may be
inadequate depending on the operating
environment and configuration.
• SoftBank accepts no liability whatsoever for any
data generated or information leaked during
Bluetooth® communication.
• If the handset receives a voice/video call while
it is sending or receiving files via Bluetooth®
communication, a fixed incoming image is
displayed and a fixed melody ringtone sounds.
If you answer the call, the data communication
is canceled.
• When sending/receiving vObjects, some
information may be altered or not received.
USB functions other than the charge function
during Bluetooth® communication.
• S! Friend's Status and S! Circle Talk are
unavailable while transferring files even if IP
Service is set to ON.
Authentication PIN Code
Authentication PIN code (Bluetooth Passkey) is a
4 to 16 digit number required to connect to a
compatible device. Code must be entered by both
devices before connection is established.
• You can set a different authentication PIN code
on each device.
12-4
921T_web_0802.indb 12-4
08.3.23 1:58:37 PM
Using Bluetooth®
®
Use Bluetooth to connect the handset with other
Bluetooth compatible devices. Transfer files with
compatible devices and make dial-up connections.
Activating Bluetooth®
Set the handset so that it is connected by other
compatible devices via Bluetooth® communication.
q Press [➡Settings➡[➡Connectivity
➡[➡Bluetooth➡[
w Select ON/OFF➡[
e Select ON➡[
• To cancel the Bluetooth® communication
standby, select OFF.
• Bluetooth® communication is unavailable
when Offline Mode is set to ON.
Finding and Pairing with a Device
Before establishing a Bluetooth® connection, you
need to search for, find and then pair with a
Bluetooth® compatible device.
Connecting to a Paired Handsfree Device
q From Bluetooth Window, select Paired
Device➡[
q From Bluetooth Window, select Search
Device➡[
The handset starts searching for Bluetooth®
devices and then the names and icons of
devices you can connect to appear.
• The device type icons are as follows:
PC
Audio device
Mobile phone
Peripherals
LAN
Printer
Headset
Other device
Handsfree device
w Select a device➡[➡Enter an
authentication PIN code➡[➡YES or
NO➡[
When the handset is connected to another
Bluetooth® compatible device, the device is
registered in the paired device list.
• Enter the same authentication PIN code
(any 4 to 16 digits) on the handset and
Bluetooth® compatible device.
Paired Device List Window
w
Select a handsfree device➡K
• If a handsfree device is not registered,
press J (Search) and select a handsfree
device to register it to the paired device
list.
e Select Connect ➡[
File Transfer/Backup
Bluetooth Window
Connecting to Bluetooth® Devices
12
• An authentication PIN code needs to be
entered within approximately 30 seconds for
security reasons.
12-5
921T_web_0802.indb 12-5
08.3.23 1:58:37 PM
Bluetooth®
Transferring Files
Sending a File
q Access a function that supports
Bluetooth®
w Select a file➡K➡Send ➡[
• Select Send vCard to access from Phone
Book.
e Select Via Bluetooth➡[
r From Paired Device List Window, select
File Transfer/Backup
a device➡[
• If the receiving device is not registered,
select J (Search) and then select the
receiving device.
• Files without transfer permission and files in
Saved Pages cannot be sent.
• Removal of the memory card during file
transfer from the memory card may result in
loss or damage of files on the memory card.
12
Receiving Files
The handset can receive files when the Bluetooth
setting is ON.
q In Standby, receive a connection
request➡YES➡[
• If the device information of the handset is
not registered on the sending device, the
same authentication PIN code (any 4 to 16
digits) entry window appears. Enter the
same authentication PIN code on the
handset and Bluetooth® compatible
device.
w Select YES➡[
• To reject the reception of files, select NO.
• When the handset receives a Phone Book
entry, event, task or notepad, select YES
to save it to your Phone Book, Event, Tasks
or Notepad.
Sending All Phone Book Entries/Calendar & Task Data
All the Phone Book entries in your handset, events
on the Calendar or tasks can be sent to another
Bluetooth® compatible handset.
q From Bluetooth Window, select
Transfer All ➡[
w Enter your Handset Code
e Select Phone Book or Cal./Tasks➡[
• When sending Phone Book entries, a
confirmation window appears asking if
you want to send images saved in Phone
Book. Select Without Image to send the
Phone Book entries without images.
• When sending events/tasks, a confirmation
window appears. Select Without Past to
send events/tasks without including past
events/tasks.
the receiving device➡[
e Select Phone Memory or Memory Card r •Select
If the receiving device is not registered,
➡[
• The handset cannot receive files other than
when in Standby.
select J (Search) and then select the
receiving device.
• Enter the same authentication PIN code
(any 4 to 16 digits) on the handset and
Bluetooth® compatible device.
12-6
921T_web_0802.indb 12-6
08.3.23 1:58:38 PM
Receiving All Phone Book Entries/Calendar & Task Data
All the Phone Book entries, events on the
Calendar or tasks can be received from another
Bluetooth® compatible handset.
The handset can receive files when the Bluetooth
setting is ON.
q In Standby, receive a connection
request➡YES➡[
• If the device information of the handset is
not registered on the sending device, the
same authentication PIN code (any 4 to 16
digits) entry window appears. Enter the
same authentication PIN code on the
handset and Bluetooth® compatible
device.
• To overwrite all files:
Select Overwrite➡[➡Enter your
Handset Code➡YES➡[
• To cancel receiving files, select Discard.
• The handset cannot receive files other than
when in Standby.
Functions for Bluetooth® Communication
(E page 12-14)
Settings for Bluetooth® Communication
(E page 13-36)
• Display Details of a Paired Bluetooth®
Compatible Device
• Set a Bluetooth® Compatible Device as a
Trusted Device
• Display Details of the Handset
• Change the Name of the Handset
• Communicate Using a Handsfree Device
• Hide the Handset
File Transfer/Backup
w Select Add ➡[
More Features
12
12-7
921T_web_0802.indb 12-7
08.3.23 1:58:39 PM
PC Connection
About PC Connection
Use the USB cable to connect your handset to a
PC to transfer music files. You can also check the
Data Folder of the handset on your PC.
Getting Started
• Install the USB Host Driver and Phone Monitor
File Transfer/Backup
software before connecting the USB cable. For
details on the installation procedure, refer to
the USB Host Driver Installation Guide and
Phone Monitor Manual on the supplied Utility
Software (CD-ROM).
• For details on the PC operating environments
supported, refer to the Phone Monitor Manual
on the supplied Utility Software (CD-ROM).
• When using the USB cable to connect your
handset to a PC, be sure to directly insert the
plug of the USB cable into the USB port of the
PC.
• You cannot use USB functions other than ®the
charge function during infrared/Bluetooth
communication.
Configuring USB Connection Mode
Transferring Music from a PC to a Memory Card
Configure the mode for using the USB cable to
connect a PC to the handset in Standby. Select
Card Reader to transfer music from a PC and
Communication for a dial-up connection.
To transfer music files from a PC, use Card Reader
mode to establish a connection between the PC
and your handset.
• Offline Mode is set while your handset is in
Card Reader mode. When the handset is in
Offline Mode, it cannot make/receive calls,
send/receive messages, nor connect to Yahoo!
Keitai. In this mode, all the keys are disabled.
• Timer viewing/recording of digital TV will not
start in Card Reader mode.
• Music files cannot be played on the handset
unless they are transferred using music transfer
software.
• For details on transferring music files, refer to
the BeatJam 2008 for 921T Guide Book
(Japanese).
q Press [➡Settings➡[➡Connectivity
➡[➡USB➡[
w
Select Connection➡[➡
Communication, Card Reader or
Always Ask➡[
• Select Always Ask to choose the
connection mode whenever you connect
the USB cable in Standby.
• If the handset is not in Standby when
connecting the USB cable, the handset
changes to Communication mode even if
Connection has been set to Card Reader
or Always Ask.
12
12-8
921T_web_0802.indb 12-8
08.3.23 1:58:39 PM
Switching to Card Reader Mode by Connecting the
USB Cable
q
In Standby, connect the handset to a
PC with the USB cable
• Open the cover of External Device Port and
plug in the connector of the USB cable
with the inscription facing down.
• If the Connection is set to Always Ask,
select Card Reader.
Transferring Data
q Switch your handset to Card Reader
mode
w Follow the instructions on the PC
Canceling the Card Reader Mode
q Use the connected PC s function to
remove an external device
w Remove the USB cable from the
handset
More Features
the handset does not change to Card
Reader mode when connecting the USB
cable in Standby.
• If the handset is not in Standby when
connecting the USB cable, the handset
changes to Communication mode even if
Connection has been set to Card Reader
or Always Ask.
Functions for PC Connection
(E page 12-15)
Settings for PC Connection
(E page 13-37)
• Use the USB Cable for Charging
File Transfer/Backup
• If Connection is set to Communication,
12
12-9
921T_web_0802.indb 12-9
08.3.23 1:58:39 PM
Memory Card Backup
About Memory Card Backup
Back up Phone Book entries, events and other
information to a memory card, and restore as
required.
Precautions
• Some data cannot be transferred to the memory
card.
• Do not use a PC or other device to view or
File Transfer/Backup
change a backup file in a memory card. The file
may be damaged.
• Copyrighted data may not be transferred to the
memory card or restored to the handset, or may
be deleted from the memory card/handset after
the transfer.
• If the file name of data restored to the handset
is more than 32 characters, the characters that
exceed the limit are omitted when the file is
transferred.
• The security lock set on the handset Data Folder
will not be reflected in the transferred data.
• Files in the TV folder cannot be transferred to
the memory card/handset.
12
• About Backing Up Content Keys
・Since only a single content key backup file
can be saved to a memory card, backing
up another content key will overwrite the
previously saved backup file. If you want to
maintain the previously backed up content
key, import the backup file from the
memory card to the handset and then
perform the backup operation again.
・The file whose content key has been
moved to the memory card for backup will
no longer be available on the handset.
・Importing a content key into the handset
adds it to other content keys in the
handset. It does not overwrite the current
handset content keys.
Backing Up Data to a Memory Card
q Press [➡Settings➡[➡Backup
➡[
Backup Window
w Select Transfer All ➡[➡Backup
➡[
e Select the data to back up➡[
• To select other data, repeat this step.
• To select or unselect all the data:
Press K➡Mark All or Unmark All
➡[
12-10
921T_web_0802.indb 12-10
08.3.23 1:58:40 PM
r Press J (Trans.)➡B➡[➡Enter
your Handset Code
w Select the data to restore➡[
• When transferring Phone Book entries, a
confirmation window appears asking if
you want to include images saved in
Phone Book. Select NO to transfer the
Phone Book entries without images.
• When transferring events on the Calendar
or tasks, a confirmation window appears
asking if you want to transfer past events/
tasks. Select Futures Only to transfer
events/tasks without including past
events/tasks.
Restoring Data from the Memory Card
All ➡[➡Restore A or Restore B➡[
• If There are no data. is displayed, select
either Restore A or Restore B to restore
the data.
Functions for Memory Card Backup
(E page 12-15)
• To select other data, repeat this step.
• To select or unselect all the data:
Press K➡Mark All or Unmark All
➡[
e
Press J (Read)➡[➡Enter your
Handset Code
• To restore Phone Book/Events/Tasks/
Messages/Bookmarks/Notepad:
Select Add or Overwrite➡[ (twice)➡
Select data➡[
• If you select Add, you can add the data
without deleting data stored on the
handset.
File Transfer/Backup
q From Backup Window, select Transfer
More Features
12
12-11
921T_web_0802.indb 12-11
08.3.23 1:58:40 PM
S! Addressbook Back-up
About S! Addressbook Back-up
S! Addressbook Back-up is a service that allows you to back up the handset's Phone Book to a network server and synchronize the handset's Phone Book with
the data on the server. It is useful for recovering information if your handset is lost or damaged.
For details on S! Addressbook Back-up, access the following website.
http://www.softbank.jp/SAB
Precautions
• The following Phone Book items cannot be synchronized.
Be careful because the Phone Book settings on the handset are completely deleted when the data is read from the server.
Ringtones/External Light settings/Pictures/Secrets
• The Phone Book on the server is deleted when you end your S! Addressbook Back-up contract.
• Be careful about timing and synchronization type setting when you back up or read data on the server.
• If you synchronize Phone Book data with the synchronization type of Synchronize, From Client, or Backup after deleting all the Phone Book entries on
your handset, the Phone Book on the server is deleted.
File Transfer/Backup
12
• If you synchronize Phone Book data with the synchronization type of Synchronize, From Server, or Restore after deleting all the Phone Book entries on
the server, the Phone Book on the handset is deleted.
Back up to the server!
Restore to the handset when necessary
Handset
PC
Synchronize the handset's Phone Book
with the server when necessary
Export the server Phone Book
to a PC→Edit→Save
S! Addressbook
Back-up Server
Your Personal
Phone Book
Storage Area
Phone Book
12-12
921T_web_0802.indb 12-12
08.3.23 1:58:40 PM
Using S! Addressbook Back-up
Synchronizing Phone Book
Connect to the network server so that Phone Book
data on the handset and the server can be
complemented by each other.
• When synchronizing for the first time, the
Synchronize type is used regardless of the
synchronization type setting.
q Press [➡Phone Book ➡[➡Addr.
Setting Synchronization Type
Select from the following types.
From Client
Back up changes to the
information in the handset's
Phone Book.
From Server
Changes to the information
in the server's Phone Book
are reflected to the handset.
Backup
Delete the existing Phone
Book data on the server and
back up all Phone Book data
in the handset to the server.
Restore
Delete the existing Phone
Book data in the handset
and reflect all Phone Book
data on the server to the
handset.
Bkup➡[
S! Addressbook Back-up Window
w Select Start Sync➡[➡Start ➡[➡
Enter your Handset Code
• Follow the onscreen instructions.
• Upon starting synchronization, your handset
select Sync Settings➡[➡Select the
current Sync Type setting➡[
w Select a synchronization type➡[➡
J (Save)
More Features
Functions for S! Addressbook Back-up
(E page 12-16)
File Transfer/Backup
Synchronize
Back up changes in the
handset's Phone Book to the
server and download new
information in the server's
Phone Book to the handset
simultaneously.
q From S! Addressbook Back-up Window,
12
is connected to the Internet. Transmission
fees apply during Internet connections.
Ending synchronization terminates the
connection automatically.
12-13
921T_web_0802.indb 12-13
08.3.23 1:58:41 PM
Advanced Features
File Transfer/Backup
Functions for Infrared Communication
Send Information of My Details
[Send My Details]
[➡Phone Book ➡[➡My Details➡[
➡J➡Via Infrared ➡[
Use Infrared for Dial-up Connections
[Dial-up Connections]
File Transfer/Backup
12
In Standby, receive a connection request from
another infrared compatible device
• The handset can use dial-up connections when
the Infrared setting (page 12-2) is ON.
• The handset sends a message three times in
three minutes to the same device if the
receiving device does not respond.
• In an HSDPA (High Speed Downlink Packet
Access) area, you can receive at a maximum
speed of 3.6 Mbps and send at a maximum
speed of 384 kbps. Note that sending or
receiving very large files can result in high
transmission fees.
• When accessing the Internet by connecting the
handset to a PC or PDA (i.e. mobile data
communication), a large amount of data is often
transferred in a very short time resulting in high
packet transmission fees. You are recommended
to check the fees now and then during the
mobile data communication.
Functions for Bluetooth® Communication
From ➡ Paired Device List Window page 12-5
Change a Paired Device Name
[Device Name]
Paired Device List Window Select a device➡K➡
Device Name➡[➡Enter a device name➡
[
Delete a Paired Device
[Delete Device]
Paired Device List Window Select a device➡K➡
Delete➡[➡YES➡[
Cut Off Connection to a Handsfree Device
[Disconnect]
Paired Device List Window Select a handsfree device
Send Information of My Details
[Send My Details]
[➡Phone Book ➡[➡My Details➡
[➡J➡Via Bluetooth➡[➡Select a
device➡[
Use Bluetooth® for Dial-up Connections
[Dial-up Connections]
In Standby, receive a connection request from
another Bluetooth® compatible device➡YES➡
[➡Enter an authentication PIN code➡[
• The handset can use dial-up connections when
the Bluetooth setting (page 12-5) is ON.
• Enter the same authentication PIN code (any 4
to 16 digits) on the handset and Bluetooth®
compatible device to connect.
• The handset sends a message three times in
three minutes to the same device if the
receiving device does not respond.
• In an HSDPA (High Speed Downlink Packet
Access) area, you can receive at a maximum
speed of 3.6 Mbps and send at a maximum
speed of 384 kbps. Note that sending or
receiving very large files can result in high
transmission fees.
➡K➡Disconnect ➡[
12-14
921T_web_0802.indb 12-14
08.3.23 1:58:41 PM
• When accessing the Internet by connecting the
handset to a PC or PDA (i.e. mobile data
communication), a large amount of data is often
transferred in a very short time resulting in high
packet transmission fees. You are recommended
to check the fees now and then during the
mobile data communication.
Functions for PC Connection
Use the USB Cable for Dial-up Connections
[Dial-up Connections]
From ➡ Backup Window page 12-10
Back Up/Restore Setting Data
[Relocate]
■Backing Up Setting Data
Backup Window Relocate➡[➡Enter your
Handset Code➡Backup ➡[➡Select a
setting data item➡[➡J➡B➡[➡
Enter a backup file code➡Re-enter the code for
confirmation➡B➡[
• To select more than one item, repeat selecting
an item and pressing [ as many times as
required.
• To select or unselect all the items, do the
following.
While an item is selected, K➡Mark All or
Unmark All ➡[
• A backup file code is a four-digit number set at
each backup and required when restoring the
setting data to the handset. Write down your
backup file codes and do not reveal them to
others.
File Transfer/Backup
You can connect the handset to a PC with the
USB cable and access the Internet.
• The handset sends a message three times in
three minutes to the same device if the receiving
device does not respond.
• In an HSDPA (High Speed Downlink Packet
Access) area, you can receive at a maximum
speed of 3.6 Mbps and send at a maximum
speed of 384 kbps. Note that sending or
receiving very large files can result in high
transmission fees.
• When accessing the Internet by connecting the
handset to a PC or PDA (i.e. mobile data
communication), a large amount of data is often
transferred in a very short time resulting in high
packet transmission fees. You are recommended
to check the fees now and then during the
mobile data communication.
Functions for Memory Card Backup
12
12-15
921T_web_0802.indb 12-15
08.3.23 1:58:42 PM
Advanced Features
■Restoring Setting Data
Backup Window Relocate➡[➡Enter your
Handset Code➡Restore or From non-3G➡
[➡Select a setting data item➡[➡Enter the
backup file code➡B (twice)➡[
Restore Data on the SoftBank Handset
(except 3G)
[Transfer from Non-3G]
File Transfer/Backup
Backup Window Transfer All ➡[➡From
non-3G➡[➡Select the data to transfer➡
[➡J➡[➡Enter your Handset Code
• To select more than one data item, repeat
selecting an item and pressing [ as many
times as required.
• To select or unselect all the data, do the
following.
While data is selected, K➡Mark All or
Unmark All ➡[
• Some data created on the SoftBank handset
(PDC) may not be loaded into the handset.
12
Functions for S! Addressbook Back-up
Delete Backup Files
[Delete Data]
Backup Window Transfer All ➡[➡Delete
Data➡[
■Deleting All the Files
All ➡[➡YES➡[➡Enter your Handset
Code
■Deleting Phone Book/Events/Tasks/
Messages/Bookmarks/Notepad
Select Data➡[➡Select a type of data➡[
➡Select a file➡[➡J➡YES➡[
• To select more than one file, repeat selecting a
file and pressing [ as many times as
required.
• To select or unselect all the files, do the
following.
While a file is selected, K➡Mark All or
Unmark All ➡[
From ➡ S! Addressbook Back-up Window page 12-13
Synchronize Phone Book Automatically
[Auto Sync]
S! Addressbook Back-up Window Sync Settings➡
[➡Select the current Auto Sync setting➡[
➡ON➡[➡Enter your Handset Code
■Setting Synchronization Schedule
Weekly or Monthly ➡[➡Set the week/date/
time➡[➡J
■Synchronizing Automatically After
Editing Phone Book
After Updated ➡[➡J
• If you select After Updated, synchronization
will be performed automatically after about ten
minutes whenever the handset's Phone Book
is edited.
View S! Addressbook Back-up History
[Sync Log]
S! Addressbook Back-up Window Sync Log ➡[➡
Select a log➡[
12-16
921T_web_0802.indb 12-16
08.3.23 1:58:42 PM
13
921T_web_0802.indb 13-1
Customization
Display Settings ・・・・・・・・・・・・・・・・・・・・・・・・・・・・・・・・・・・・・・・・・・・・・・・・・・・・・・・・・・・・・・・・・・・・ 13-2
Incoming Event Settings ・・・・・・・・・・・・・・・・・・・・・・・・・・・・・・・・・・・・・・・・・・・・・・・・・・・・・・・・・・・・ 13-9
Sound Settings ・・・・・・・・・・・・・・・・・・・・・・・・・・・・・・・・・・・・・・・・・・・・・・・・・・・・・・・・・・・・・・・・・・・・13-11
Mail Settings ・・・・・・・・・・・・・・・・・・・・・・・・・・・・・・・・・・・・・・・・・・・・・・・・・・・・・・・・・・・・・・・・・・・・・13-14
Internet Settings ・・・・・・・・・・・・・・・・・・・・・・・・・・・・・・・・・・・・・・・・・・・・・・・・・・・・・・・・・・・・・・・・・・13-19
Call Settings ・・・・・・・・・・・・・・・・・・・・・・・・・・・・・・・・・・・・・・・・・・・・・・・・・・・・・・・・・・・・・・・・・・・・・・13-22
Camera Settings ・・・・・・・・・・・・・・・・・・・・・・・・・・・・・・・・・・・・・・・・・・・・・・・・・・・・・・・・・・・・・・・・・・13-25
TV Settings ・・・・・・・・・・・・・・・・・・・・・・・・・・・・・・・・・・・・・・・・・・・・・・・・・・・・・・・・・・・・・・・・・・・・・・・13-28
Media Player Settings ・・・・・・・・・・・・・・・・・・・・・・・・・・・・・・・・・・・・・・・・・・・・・・・・・・・・・・・・・・・・・13-31
S! Appli Settings ・・・・・・・・・・・・・・・・・・・・・・・・・・・・・・・・・・・・・・・・・・・・・・・・・・・・・・・・・・・・・・・・・・13-32
Reset ・・・・・・・・・・・・・・・・・・・・・・・・・・・・・・・・・・・・・・・・・・・・・・・・・・・・・・・・・・・・・・・・・・・・・・・・・・・・13-33
Text Entry/Phone Book ・・・・・・・・・・・・・・・・・・・・・・・・・・・・・・・・・・・・・・・・・・・・・・・・・・・・・・・・・・・・・13-34
File Transfer ・・・・・・・・・・・・・・・・・・・・・・・・・・・・・・・・・・・・・・・・・・・・・・・・・・・・・・・・・・・・・・・・・・・・・・13-36
Various Tools・・・・・・・・・・・・・・・・・・・・・・・・・・・・・・・・・・・・・・・・・・・・・・・・・・・・・・・・・・・・・・・・・・・・・・13-38
Communications ・・・・・・・・・・・・・・・・・・・・・・・・・・・・・・・・・・・・・・・・・・・・・・・・・・・・・・・・・・・・・・・・・・13-44
08.3.23 1:58:43 PM
Display Settings
Menus, Incoming Image Display, etc.
Start Here [➡Settings➡[➡Display ➡[➡Main Screens➡[E
Set Menu Icons/Images
Preinstalled Icons/Images
EDeco
Saved Icons/Images (Data Folder)
EDeco
Keitaideco
EDeco
or Deco
➡[➡Original or Ku-man➡[ (twice)
or Deco ➡[➡Phone Memory➡[➡ Gamendeco➡[➡Select a
Gamendeco➡[ (twice) ➡YES➡[
or Deco
➡[➡Keitaideco➡[ (twice) ➡YES➡[
Set Incoming Call Image
Preinstalled Image
EIn-Calls➡[➡Voice Call or Video Call➡[➡Original or Ku-man➡[ (twice)
Saved Image (Data Folder/Memory Card)
EIn-Calls➡[➡Voice Call or Video Call➡[➡Phone Memory or Memory Card
➡[➡Select an image➡[➡E to compose the image➡K➡[
Keitaideco
EIn-Calls➡[➡Voice Call➡[➡Keitaideco➡[ (twice)
Set Incoming Message Image
Customization
13
Preinstalled Image
EMessages➡[➡Receiving or DeliveryCheck➡[➡Original or Ku-man➡
[ (twice)
Saved Image (Data Folder/Memory Card)
EMessages➡[➡Receiving or DeliveryCheck➡[➡Phone Memory or Memory
Card➡[➡Select an image➡[➡E to compose the image➡K➡[
Keitaideco
EMessages➡[➡Receiving➡[➡Keitaideco➡[ (twice)
• To set Keitaideco for incoming call/message image, Keitaideco must be set in advance (page 2-30).
13-2
921T_web_0802.indb 13-2
08.3.23 1:58:43 PM
Start Here [➡Settings➡[➡Display➡[➡Main Screens➡[E
Set the Download/Power-on/Power-off Screens
EDownload, Power On or Power Off➡[➡Original or Ku-man➡[ (twice)
Set the Display Collectively
EJ➡Original or Ku-man➡[
• If you receive a call from a person whose picture is saved to Phone Book and Picture under Caller Details is set to ON, the picture is displayed
regardless of the incoming image settings. However, if you receive a call from a Phone Book entry with Secret set to ON when Secret Mode is set to
Hide, the incoming image is displayed.
• If a video file is set as a ringtone, the incoming image is not displayed.
Mini Tool Settings
Select Calendar, Notepad, Weather News, information about songs during playback, or other information to appear on Mini Tool during operations or in
Standby.
• To display Mini Tool, Wide View must be set to OFF.
Start Here [➡Settings➡[➡Display➡[➡Mini Tool➡[E
Configure Mini Tool Settings
EMini Tool➡[➡Preset ➡[ (twice)
EMini Tool➡[➡Phone Memory ➡[➡Select at item➡[ (twice)
Start Here [➡Settings➡[➡Display➡[➡Wide View➡[E
Set Wide View
ESelect a window you want to set➡[➡ON or OFF➡[
• If you change the IdleScreen setting, you also will need to reconfigure the wallpaper
setting.
Set Wide View Collectively
EJ➡Wide View ON or Wide View OFF➡[
Customization
Set the Default Content
Select a Content
13
13-3
921T_web_0802.indb 13-3
08.3.23 1:58:43 PM
Display Settings
Start Here [➡Settings➡[➡Display➡[➡Mini Tool➡[E
Set an Animation for Mini Tool
EMini Photo➡[➡Image➡[➡Images List➡[➡Select a list➡[➡J
• Images must be saved to Images List in advance.
Save Images to Images List
EMini Photo➡[➡Image➡[➡Images List➡[➡Select a list➡J➡Select an
entry➡[➡Phone Memory or Memory Card➡[➡Select an image➡[ (twice)
➡J (twice)
Select a Folder (Pictures)
EMini Photo➡[➡Image➡[➡Select Folder➡[➡Select a folder➡[➡J
Set Preinstalled Images
EMini Photo➡[➡Image➡[➡Preset➡[➡J
Incoming Caller Details
Start Here [➡Settings➡[➡Display➡[➡Caller Details➡[E
Set Caller Photo to Appear
EPicture➡[➡ON or OFF➡[
Set Caller Info to Appear in the External Display
EExt. Display➡[➡ON or OFF➡[
• When Picture is set to ON, incoming image does not appear. However, if you receive a call from a Phone Book entry with Secret set to ON when Secret
Customization
Mode is set to Hide, the caller photo is not displayed.
• If a video file is set as a ringtone, the caller photo is not displayed.
13
13-4
921T_web_0802.indb 13-4
08.3.23 1:58:44 PM
Font Settings
The font size and color on the Display can be changed.
Start Here [➡Settings➡[➡Display➡[➡Font Settings➡[E
Set the Font Size
EFont Size➡[➡Select the window you want to set➡[➡Select a font size➡[
Set the Font Color
EFont Color➡[➡Select a font color pattern➡[
Set the Font Size Collectively
EFont Size➡[➡J➡Select a font size➡[
Lighting Settings
Start Here [➡Settings➡[➡Display ➡[➡Lighting➡[E
Set Power Saving
EPower Saving➡[➡Select a time➡[
Set Keypad Lighting Time
EKeypad Light ➡[➡Enter a lighting time➡[
• Keypad Light turns on and off in conjunction with brightness of surrounding
environments. If it is bright, Keypad Light will not turn on.
Set the Display Lighting
• Select Automatic to adjust the brightness automatically according to surrounding
environments.
• Indicators on top of the Display turn off after the Display lights up and the time set
in Lighting Time elapses. Even if the lighting time is set to 5 seconds or less, the
indicators remain displayed for about 5 seconds.
Set Media Player Lighting (During Video Playback
and Streaming)
EMedia Player➡[➡Always Bright, Always Dim or Same as Phone➡[
Customization
EDisplays ➡[➡Lighting Time➡[➡Enter a lighting time (0 to 60 seconds) ➡[
➡Brightness➡[➡Select a level➡[
13
• Since surrounding brightness is detected by the brightness sensor (page 1-3), do not block it with your fingers.
13-5
921T_web_0802.indb 13-5
08.3.23 1:58:44 PM
Display Settings
External Light Settings
Start Here [➡Settings➡[➡Display ➡[➡External Light ➡[E
Set the External Light for Notifications
ENotification➡[➡Select a type of incoming event➡[➡Select a color or OFF➡[
Set the External Light for Incoming Events
EIncoming➡[➡Select a type of incoming event➡[➡Select a color or OFF➡[
Set the External Light for Incoming Messages
EIncoming➡[➡Message➡[➡Color ➡[➡Select a color or OFF➡[
Set the External Light for Incoming Feeling Mail
EIncoming➡[➡Message➡[➡Feeling➡[➡ON or OFF➡[
• Priority is given to Phone Book settings when External Light is set for each Phone Book entry.
Interface Language
Switch Language
[➡Settings➡[➡Phone Settings➡[➡言語選択 (Language)➡[➡Select a
language➡[
• If you select Automatic, the handset selects the language set in the USIM Card
automatically.
Customization
13
13-6
921T_web_0802.indb 13-6
08.3.23 1:58:45 PM
Charging In Progress Image (Slideshow)
Start Here [➡Tools➡[➡Photo Show ➡[E
Set Slideshow On/Off
EON/OFF➡[➡ON or OFF➡[➡Settings➡[➡Image➡[➡Images List ➡
[➡Select a list➡[
• Images must be saved to Images List in advance.
Save Images to Images List
EON/OFF➡[➡ON or OFF➡[➡Settings➡[➡Image➡[➡Images List➡
[➡Select a list➡J➡Select an entry➡[➡Phone Memory or Memory Card➡
[➡Select an image➡[ (twice) ➡J
Select a Folder (Pictures)
EON/OFF➡[➡ON or OFF➡[➡Settings➡[➡Image➡[➡Select Folder
➡[➡Select a folder ➡[
Set Preinstalled Images
EON/OFF➡[➡ON or OFF➡[➡Settings➡[➡Image➡[➡Preset ➡[
Set a Template
EON/OFF➡[➡ON or OFF➡[➡Settings➡[➡Templates➡[➡Select a
template➡[ (twice)
Set Duration
EON/OFF➡[➡ON or OFF➡[➡Settings➡[➡Duration➡[➡Enter time
➡[
Customization
13
13-7
921T_web_0802.indb 13-7
08.3.23 1:58:45 PM
Display Settings
Active Window Settings
Configure settings for S! Quick News displayed in Shortcut Mode (page 2-7).
Start Here A➡K➡Settings➡[➡Display➡[E
Select S! Quick News Information to Display
EUnread/Read➡[➡Unread Only or Show All➡[
Set Ticker Speed
EScreen Speed➡[➡Select a speed➡[
Start Here [➡Entertainment ➡[➡S! Quick News➡[➡Settings➡[E
Set Image Display
EImage➡[➡Show or Hide➡[
Restore Settings and Registered Contents of S!
Quick News to Default
EReset➡[➡Enter your Handset Code➡YES➡[
Customization
13
13-8
921T_web_0802.indb 13-8
08.3.23 1:58:45 PM
Incoming Event Settings
Response Settings for Incoming Calls
Start Here [➡Settings➡[➡Call Settings➡[➡Answer Type➡[E
Answer Incoming Calls by Opening the Handset
(Open to Talk)
EOpen to Talk➡[➡ON➡[
Set Any Key Answer
EAny Keys➡[➡ON or OFF➡[
• If Any Key Answer is set to ON, you can answer incoming voice/video calls and S! Circle Talk
calls with any of 0 to 9, * and #, besides N, [ and H (for video call).
Answering Machine Settings
Set the Answering Machine Response Time
[➡Settings➡[➡Call Settings➡[➡Ans Machine➡[➡Set Duration➡
[➡Enter the response time➡[
Reject Settings
Start Here [➡Settings➡[➡Call Settings➡[➡Reject Calls➡[➡Enter your Handset CodeE
ESelect calls to reject➡[➡ON➡[
Reject Calls from Specified Phone Numbers
ESpecific #s➡[➡ON/OFF➡[➡ON➡[
Use Reject List (Save Numbers to Reject List)
ESpecific #s➡[➡Reject List➡[➡J➡Phone Book➡[➡Select an entry➡
[➡Select a phone number➡[ (twice)
Enter a Number
ESpecific #s➡[➡Reject List➡[➡J➡Phone Number➡[➡Enter a phone
number➡[ (twice)
Select a Number from Call Log
ESpecific #s➡[➡Reject List➡[➡J➡Call Log➡[➡Select a phone number
➡[ (twice)
• If Call Barring (page 3-17) is set for incoming calls, Call Barring takes priority.
921T_web_0802.indb 13-9
Customization
Reject Specific Incoming Calls
13
13-9
08.3.23 1:58:45 PM
Incoming Event Settings
Priority Settings
Start Here [➡Settings➡[➡Priority➡[E
Set Priority
ESelect the function under operations➡[➡Select a type of incoming event➡[➡
Pause or Continue➡[
Set Priority While Media Player is Playing
EMedia Player ➡[➡Continue or Pause➡[
Set Priority While Running S! Appli
ES! Appli ➡[➡Select a type of incoming event➡[➡Pause Apps or Continue
Apps➡[
Set Priority During S! Circle Talk
ECircle Talk➡[➡Pause or Continue➡[
Set Priority While Using TV
ETV➡[➡Watching or Recording➡[➡Select a type of incoming event➡[➡
Pause or Continue➡[
• When Voice Call under Watching or Recording is set to Continue, Answering
Machine does not operate when there is an incoming voice call.
Customization
13
13-10
921T_web_0802.indb 13-10
08.3.23 1:58:46 PM
Sound Settings
Manner Mode
Start Here [➡Settings➡[➡Sounds➡[➡Manner Mode➡[E
Switch Manner Modes
ESwitch Mode➡[➡Select a mode➡[
Customize Original Mode
EOriginal Mode➡[➡Select an Original Mode you want to set➡[➡Select the item
to change➡[➡Set each item➡J
• For details on setting each item, see "Sound and Vibration".
Sound and Vibration
Start Here [➡Settings➡[➡Sounds➡[E
Set the Ringtone
Set a Sound Preinstalled in the Handset as the
Ringtone
EIncoming➡[➡Select a type of incoming event➡[➡Ringtone➡[➡Patterns or
Melodies➡[➡Select a ringtone➡[
Set a File Saved in Data Folder/Memory Card
EIncoming➡[➡Select a type of incoming event➡[➡Ringtone➡[➡Phone
Memory or Memory Card➡[➡Select a file➡[ (twice)
displayed correctly.
Set Downloaded Keitaideco Ringtone
EIncoming➡[➡Voice Call or Message➡[➡Ringtone➡[➡Keitaideco➡
[ (twice)
• Keitaideco must be set in advance (page 2-30).
Set Ringtone Volume
EIncoming➡[➡Select a type of incoming event➡[➡Ringtone Vol.➡[➡Adjust
the volume➡[
Customization
• If a play point is included in the selected file, select the play point after selecting the file.
• If you use SMAF data which includes an image as a ringtone, the image may not be
13
13-11
921T_web_0802.indb 13-11
08.3.23 1:58:46 PM
Sound Settings
Start Here [➡Settings➡[➡Sounds➡[E
Set Ring Time
Specify the Time by Direct Entry
EIncoming➡[➡Message, DeliveryCheck, Missed Call or Friend Status➡[➡
Duration➡[➡Set Duration➡[➡Enter a ring time (1 to 99 seconds) ➡[
Play the Specified File until the End
EIncoming➡[➡Message, DeliveryCheck, Missed Call or Friend Status➡[➡
Duration➡[➡1 Cycle➡[
Set Vibration
EIncoming➡[➡Select a type of incoming event➡[➡Vibration➡[➡Select a
pattern➡[
Set Vibration for Incoming Messages
EIncoming➡[➡Message➡[➡Vibration➡[➡Pattern➡[➡Select a pattern
➡[
Set Vibration for Incoming Feeling Mail
EIncoming➡[➡Message➡[➡Vibration➡[➡Feeling➡[➡ON or OFF
➡[
Set Sound Volume
ESound Vol.➡[➡Adjust the volume➡[
Set Speaker Volume
ESpeaker Vol.➡[➡Adjust the volume➡[
Set Sound Effects
Customization
13
Set the Original Tone Preinstalled in the Handset
ESound Effects➡[➡Select an item➡[➡Tone Type➡[➡Original➡[
Set a Melody Preinstalled in the Handset
ESound Effects➡[➡Select an item➡[➡Tone Type➡[➡Melodies➡[➡
Select a melody➡[
Set a File Saved in Data Folder/Memory Card
ESound Effects➡[➡Select an item➡[➡Tone Type➡[➡Phone Memory or
Memory Card➡[➡Select a file➡[ (twice)
• Select Original 1 and Original 2 for Keypad Tone.
• You cannot set preinstalled melodies as Keypad Tone.
• You cannot set files which include an image as sound effects.
• You cannot set files in Data Folder or memory card as Keypad Tone.
13-12
921T_web_0802.indb 13-12
08.3.23 1:58:46 PM
Start Here [➡Settings➡[➡Sounds➡[E
Set Sound Effects Volume
ESound Effects➡[➡Select an item➡[➡Tone Volume➡[➡Adjust the volume
➡[
Set Kacha-ble
Lets you know there are missed calls or new messages
by causing the handset to vibrate when you open it.
EKacha-ble➡[➡Select an item➡[➡ON or OFF➡[
Set Kacha-ble Collectively
EKacha-ble➡[➡J➡ON or OFF➡[
• In Clamshell Open or Viewer position, the actual ringtone volume, sound volume and speaker volume are fixed at level 3 even if those are set higher than
level 3; and the maximum volume is level 3 if the ringtone volume is set to Ascending Volume or Descending Volume.
Customization
13
13-13
921T_web_0802.indb 13-13
08.3.23 1:58:47 PM
Mail Settings
Messaging Settings
Start Here J➡Settings➡[➡Creating➡[E
Add Recipients to Simple Input List
ESimple Input➡[➡Select a list item with no entry➡[➡Enter an address
Set Groups
ECategory ➡[➡Select a group➡[➡J➡Enter addresses
• For details on how to enter addresses, see page 4-4.
Edit a Group Name
ECategory ➡[➡Select a group➡K➡Rename➡[➡Enter a group name➡[
Set Send Type (To/Cc/Bcc) for Each Address
ECategory ➡[➡Select a group➡[➡Select an address➡K➡To/Cc/Bcc➡[➡
Select To, Cc or Bcc➡[
Set a Signature
ESignature➡[➡Signature 1 or Signature 2➡[➡Enter a signature➡[
Cancel Signature Insertion
ESignature➡[➡No Signature➡[
Edit Signature
ESignature➡[➡Signature 1 or Signature 2➡K➡Edit➡[➡Edit the signature
➡[
Customization
Set Default Mail Type
EDefault Type➡[➡SMS or S! Mail➡[
Display/Hide Notification When Mail Type is
Switched
ENotify Type➡[➡Show or Hide ➡[
13
13-14
921T_web_0802.indb 13-14
08.3.23 1:58:47 PM
Outgoing Messages
Start Here J➡Settings➡[➡Sending➡[E
Set the Sending Confirmation Window
EConfirmation➡[➡Show or Hide➡[
Set the Vibration When Sending is Confirmed
EVibration➡[➡ON or OFF➡[
Check Whether Sent Messages were Delivered to
Recipients
EDeliveryCheck➡[➡Ask➡[
Set the Length of Time Sent Messages are Stored on
Server
EExpiry➡[➡SMS or S! Mail➡[➡Select an expiry time ➡[
Set Message Priority
EPriority➡[➡Select the priority➡[
Specify a Time Before Delivering Messages to
Recipients
EDelivery Time➡[➡Select a delivery time➡[
Save a Reply Address
EReply to➡[➡ON➡[➡Enter an address
• For details on how to enter addresses, see page 4-4.
Edit the SMS Center Number (+819066519300)
EMessage Ctr➡[ (three times)➡Input the SMS Center Number ➡[
Customization
• SMS may become unavailable after changing the SMS Center Number.
• Once SMS Center Number is changed, resetting the handset will not restore default number.
Display Settings
Start Here J➡Settings➡[➡Display➡[E
13
Set the Font Size
EFont Size➡[➡Select a font size➡[
Set the Scroll Unit
EScroll Unit➡[➡Select a scroll unit➡[
Display/Hide Address and Subject When Sending/
Receiving Messages
EShow Addresses➡[➡Enter your Handset Code➡Main Display or Ext. Display➡
[➡Select the viewing mode➡[
921T_web_0802.indb 13-15
13-15
08.3.23 1:58:47 PM
Mail Settings
Incoming Messages
Start Here J➡Settings➡[➡Receiving➡[E
Set New Message Retrieve Mode
ERetrieve Mode➡[➡Immediate, Phone # Only or Deferred➡[
Set Automatic Display of Picture Files
EAuto-extract➡[➡Picture➡[➡Show or Hide➡[
Set Automatic Playback of Sound Files
EAuto-extract➡[➡Sound➡[➡Unmute or Mute➡[
Set Spam Filter
EAnti-Spam➡[➡Enter your Handset Code➡Sort Messages➡[➡Sort or Do not
Sort➡[➡Select Folder➡[➡Select a folder➡[
3D Pictograms
3D Pictograms are a 3D animation display function compatible with words, pictographs and emoticons in the message text.
Start Here J➡Settings➡[➡3D Pictograms➡[E
Customization
Set the Criteria for Displaying Received Messages
with 3D Pictograms
EAuto Play➡[➡Select the criteria➡[
Set the Font and Background Colors for 3D
Pictograms
EColors➡[➡Select a color combination➡[
• 3D Pictograms are unavailable in S! Mail notifications, SMS with no text and Arrange Mail.
• Background playback of a music file will be paused if you use 3D Pictograms.
13
13-16
921T_web_0802.indb 13-16
08.3.23 1:58:48 PM
Message Box Settings
Do Not Auto-delete Old Messages
J➡Message Box➡[➡Select a folder➡K➡Auto-delete➡[➡Received or
Sent➡[➡Do not Set➡[
Switch Between Folder View and All Message View
J➡Message Box➡[➡K➡Display➡[➡Folder View➡[➡Folder
View or All Messages➡[
Switch Between Mixed View and Separate View
J➡Message Box➡[➡K➡Display➡[➡Received/Sent➡[➡Mixed
View or Separate View➡[
Message List Display Settings
Start Here J➡Message Box➡[➡Select a folder➡[➡K➡Display➡[E
Switch the Message List Display Mode
EDisplay Items➡[➡Subject or Addresses➡[
Split the Message List Window
EChange View➡[➡Preview or Text Only➡[
• If you select Preview, the Arrange settings at the beginning of message text are
displayed.
• When Subject is selected for Display Items, the preview window will show the other party's address. When Addresses is selected for Display Items, the
subject will be displayed.
Customization
• If you do not want to split the message list window, select List Only.
13
13-17
921T_web_0802.indb 13-17
08.3.23 1:58:48 PM
Mail Settings
Message List Window Settings
Start Here J➡Message Box➡[➡Select a folder➡[E
Display Messages According to the Specified Criteria
EK➡Filter➡[➡Select the criteria➡[
Create a New Phone Book Entry with a Phone
Number/E-mail Address
ESelect a message➡K➡Save Sender➡[➡Add New➡[➡Enter other items➡J
Add a Phone Number/E-mail Address to a Phone
Book Entry
ESelect a message➡K➡Save Sender➡[➡Add➡[➡Select a Phone Book
entry ➡[➡J
Switch Between Unread and Read
Switch One Message Between Unread and Read
ESelect a message➡K➡Unread/Read➡[➡One➡[➡To Unread or To Read
➡[
Switch Multiple Messages Between Unread and
Read
EK➡Unread/Read➡[➡Select Multi➡[➡To Unread or To Read➡[➡
Select messages➡[➡J
Switch All Messages in a Folder Between Unread and
Read
EK➡Unread/Read➡[➡All➡[➡To Unread or To Read➡[➡Change
➡[
Customization
• Only received messages can be switched between unread and read.
Mini Tool Setting in the Message List Window
Set Mini Tool in the Message List Window
13
J➡Message Box, Drafts or Unsent➡[➡K➡Display ➡[➡Wide View
ON or Wide View OFF➡[
• To display Mini Tool in the Message List Window, select Wide View OFF.
13-18
921T_web_0802.indb 13-18
08.3.23 1:58:48 PM
Internet Settings
Security Settings
Start Here for Yahoo! Keitai K (Press and hold)➡Settings➡[➡Security➡[E
Start Here for PC Site Browser K (Press and hold)➡J➡Settings➡[➡Security➡[E
Send/Block Manufacture Number
EManufacture #➡[➡Send or Do not Send➡[
Configure Send Referer Setting
ESend Referer➡[➡Send or Do not Send➡[
Enable/Disable Cookies
ECookie➡[➡Enable, Disable or Always Ask➡[
Configure Script Settings
EScript➡[➡Ask Once, Enable, Disable or Always Ask➡[
Check Root Certificates
ERoot Certif.➡[➡Select a root certificate➡[
Set Authentication
EAuthentica...➡[➡Retain Info, Per Session or Do not Retain➡[
Set SSL Communication
ESession Info.➡[➡Show or Hide➡[
Customization
13
13-19
921T_web_0802.indb 13-19
08.3.23 1:58:49 PM
Internet Settings
Universal Settings for Yahoo! Keitai and PC Site Browser
Start Here for Yahoo! Keitai K (Press and hold)➡Settings➡[E
Start Here for PC Site Browser K (Press and hold)➡J➡Settings➡[E
Delete Cache Memory
EMemory Mgr.➡[➡Enter your Handset Code➡Clear Cache➡[➡YES➡[
Delete All Cookies
EMemory Mgr.➡[➡Enter your Handset Code➡Clear Cookie➡[➡YES➡[
Clear Authentication Info
EMemory Mgr.➡[➡Enter your Handset Code➡Clear Auth...➡[➡YES➡[
Return Browser Settings, Bookmarks, and Saved
Pages to Default
EBrowser Reset➡[➡Enter your Handset Code➡YES➡[
Restore Settings and Stored Information to Default
EReset Setting➡[➡Enter your Handset Code➡YES➡[
Yahoo! Keitai Settings
Set the Storage Location for Downloaded Contents
K (Press and hold) ➡Settings➡[➡Storage➡[➡Phone Memory or Memory
Card➡[
Customization
PC Site Browser Settings
Do Not Display a Warning Window When Switching
Browsers
K (Press and hold) ➡J➡Settings➡[➡Warning➡[➡PC Browser or
Yahoo! Keitai➡[➡Hide➡[
13
13-20
921T_web_0802.indb 13-20
08.3.23 1:58:49 PM
Web Page Settings
Web Page ➡ (page 5-3, 5-4)
Change the Font Size
Web Page➡K➡Settings➡[➡Font Size➡[➡Select a size➡[
Change the Scroll Unit
Web Page➡K➡Settings➡[➡Scroll Unit➡[➡Select a scroll unit➡[
Change the Text Encoding Type
Web Page➡K➡Settings➡[➡Encoding Type➡[➡Select a text encoding type
➡[
Adjust Sound Playback Volume
Web Page➡K➡Settings➡[➡Sound Volume➡[➡Adjust the volume➡[
Do Not Download Images and Melodies from Web
Pages
Web Page➡K➡Settings➡[➡Downloads➡[➡Images or Sounds➡[➡Do
not Download➡[
Set Security Lock
K (Press and hold)➡Bookmarks, Saved Pages, Enter URL or History➡K➡
Security Lock➡[➡Enter your Handset Code➡Lock or Unlock➡[
K (Press and hold)➡Bookmarks➡[➡Select a folder➡K➡Security Lock➡
[➡Enter your Handset Code➡Lock or Unlock➡[
Set Security Lock for PC Sites
K (Press and hold)➡J➡Bookmarks, Saved Pages, Enter URL or History➡
K➡Security Lock➡[➡Enter your Handset Code➡Lock or Unlock➡[
Customization
Set Security Lock for a Bookmark Folder
13
13-21
921T_web_0802.indb 13-21
08.3.23 1:58:49 PM
Call Settings
International Call Settings
Start Here [➡Settings➡[➡Call Settings➡[➡Call Services➡[➡Intl. Calls➡[E
Change the International Code
EIntl. Code➡[➡Enter your Handset Code➡Enter a new code➡[
Add Country Codes to the Country Number List
ECountryNumber➡[➡K➡Add➡[➡Enter a country name➡[➡Enter a
country code➡[
Call Cost Settings
Start Here [➡Settings➡[➡Call Settings➡[➡Call Time&Cost➡[E
Set Cost Display Currency
ECost Unit➡[➡K➡Settings➡[➡Enter PIN2➡[➡Enter a currency (three
characters)➡[➡Enter the exchange rate➡[➡YES➡[
Display Call Cost After Each Call
ECost Display➡[➡ON➡[
Set Cost Limit
ECost Limit➡[➡K➡Set Max Limit➡[➡Enter PIN2➡[ (twice) ➡Enter the
maximum cost limit➡[
Customization
• You cannot make voice and video calls if the total cost reaches the specified maximum cost limit. If the limit is reached during a call, the call ends.
13
13-22
921T_web_0802.indb 13-22
08.3.23 1:58:50 PM
Video Call Settings
Start Here [➡Settings➡[➡Call Settings➡[➡Video Call➡[E
Set Alternative Picture
Set the Image Preinstalled in the Handset
EAlt. Picture➡[➡ON➡[➡Preset➡[ (twice)
Set an Image Saved in Data Folder/Memory Card
EAlt. Picture➡[➡ON➡[➡Phone Memory or Memory Card➡[➡Select an
image➡[ (twice)
Set Self-view Confirmation
ESelf-view➡[➡ON or OFF➡[
Set Incoming Image Quality
EImage Quality➡[➡Select the image output format➡[
Add a Phone Number to Auto Answer List
EAuto Answer➡[➡Answer List➡[➡J➡Enter your Handset Code➡Phone
Book➡[➡Select an entry➡[➡Select a phone number➡[ (twice)
Enter a Phone Number Directly
EAuto Answer➡[➡Answer List➡[➡J➡Enter your Handset Code➡Phone
Number➡[➡Enter a phone number➡[ (twice)
Select a Phone Number from Call Log
EAuto Answer➡[➡Answer List➡[➡J➡Enter your Handset Code➡Call Log
➡[➡Select an entry➡[ (twice)
Set Mute
EMute➡[➡Mute My Voice, Mute All or OFF➡[
Set Audio Output
ELoud Speaker➡[➡ON or OFF➡[
Set Hold Image
Set the Image Preinstalled in the Handset
EHold Setting➡[➡Hold on Call or Hold Answer➡[➡Preset➡[ (twice)
Set an Image Saved in Data Folder/Memory Card
EHold Setting➡[➡Hold on Call or Hold Answer➡[➡Phone Memory or
Memory Card➡[➡Select an image➡[ (twice)
Customization
Select a Phone Number from Phone Book
13
13-23
921T_web_0802.indb 13-23
08.3.23 1:58:50 PM
Call Settings
Earphone-Microphone Settings
Start Here [➡Settings➡[➡Call Settings➡[➡Earphone➡[E
Save a Phone Number for Earphone-Microphone Call
Select a Phone Number from Phone Book
EEarphone Call➡[➡ON/OFF➡[➡ON➡[➡Set Number➡[➡Phone
Book➡[➡Select an entry➡[➡Select a phone number➡[ (twice)
Enter a Phone Number Directly
EEarphone Call➡[➡ON/OFF➡[➡ON➡[➡Set Number ➡[➡Phone
Number➡[➡Enter a phone number➡[ (twice)
Set Auto Answer
Allows you to answer an incoming voice call without
pressing the switch when the Earphone-Microphone is
connected.
EAuto Answer➡[➡ON/OFF➡[➡ON➡[➡Set Duration➡[➡Enter the
response time➡[
• If you set Auto Answer and the Answering Machine, Answering Machine is given priority.
• If you set Auto Answer and Voice Mail, the one with shorter response time is given priority. If the response time is the same, Voice Mail is given priority.
External Device Settings
Customization
Set the Access Point Name (APN) to Perform Packet
Transmission from a PC
[➡Settings➡[➡Call Settings➡[➡External Device➡[➡Empty➡[➡
Enter the access point name (APN)➡[➡YES➡[
13
13-24
921T_web_0802.indb 13-24
08.3.23 1:58:50 PM
Camera Settings
Settings for Shooting Pictures/Videos
Viewfinder ➡ (page 7-3)/ Video Viewfinder ➡ (page 7-5)
Viewfinder/Video Viewfinder➡K➡Save Settings➡[➡Auto Save➡[➡ON➡[
Change Storage Location
Viewfinder/Video Viewfinder➡K➡Save Settings➡[➡Storage➡[➡Phone
Memory or Memory Card➡[➡Select a folder➡[
Set Image Quality
Viewfinder/Video Viewfinder➡K➡Picture or Movie➡[➡Quality➡[➡Select the
quality➡[
Set White Balance
Viewfinder/Video Viewfinder➡K➡Picture or Movie➡[➡White Balance➡[➡
Select an item➡[
Adjust Color Control
Viewfinder/Video Viewfinder➡K➡Picture or Movie➡[➡Color Control➡[➡
Select a color tone➡[
Set Picture/Video Effects
Viewfinder/Video Viewfinder➡K➡Picture or Movie➡[➡Effects➡[➡Select an
effect➡[
Adjust Flicker
E.g. under fluorescent light, you can set the frequency
(Automatic/50Hz/60Hz) to reduce flicker.
Viewfinder/Video Viewfinder➡K➡Function➡[➡Flicker➡[➡Automatic,
50 Hz or 60 Hz➡[
Set Shortcuts While Shooting Pictures/Videos
Viewfinder/Video Viewfinder➡K➡Function➡[➡Key Shortcut ➡[➡ON or OFF➡[
Set the File Name
Set the Name to the Date and Time
Viewfinder/Video Viewfinder➡K➡Save Settings➡[➡File Name➡[➡
Date&Time➡[
Set a Name to Your Choice
Viewfinder/Video Viewfinder➡K➡Save Settings➡[➡File Name➡[➡Define
➡[➡Enter a file name➡[
Customization
Save Pictures/Videos Automatically
13
• Auto Save setting cannot be set in Video mode.
13-25
921T_web_0802.indb 13-25
08.3.23 1:58:51 PM
Camera Settings
Settings for Taking Pictures
Viewfinder ➡ (page 7-3)/ Preview Window ➡ (page 7-3)
Set Focus Mode
Viewfinder➡K➡Function➡[➡Focus Mode➡[➡Select a focus mode➡[
Use Image Stabilization
Viewfinder➡K➡Resist Shake➡[➡ON➡[
• In Viewer position, press and hold M to set or cancel image stabilization.
Change the Shutter Sound
Viewfinder➡K➡Function➡[➡Shutter Sound➡[➡Pattern 1 or Pattern 2
➡[
Add Date Stamp
Viewfinder➡K➡Picture➡[➡Date Stamp➡[➡ON➡[➡Select a font color
➡[
Set Picture Guidelines
Viewfinder➡K➡Function➡[➡Grid➡[➡ON or OFF➡[
Take a Picture for Phone Book Entry
Customization
Create a New Phone Book Entry with a Picture
Preview Window➡K➡To Phone Book➡[➡Add New➡[➡Create a Phone
Book entry
• Set Camera mode to Mobile and Picture Size to W112×H112 in advance.
• For details on saving a Phone Book entry, see page 2-16.
Add a Picture to a Phone Book Entry
Preview Window➡K➡To Phone Book➡[➡Add➡[➡Select a Phone Book
entry➡[➡J
• If the selected Phone Book entry contains a picture, select YES and press J to change
the picture.
• Set Camera mode to Mobile and Picture Size to W112×H112 in advance.
13
13-26
921T_web_0802.indb 13-26
08.3.23 1:58:51 PM
• Image stabilization cannot be used while a Picture Mode is set.
• Image stabilization may not be effective if hand movement or subject movement is extreme.
• Taking a picture with image stabilization indoors or in other areas where lighting is insufficient can result in an overall graininess in the picture or a
picture that looks like it is low resolution.
• When Camera mode is set to Digital, or when it is set to Mobile with Picture Size set to W112×H112, you cannot enter a date stamp.
Settings for Recording Videos
Video Viewfinder ➡ (page 7-5)/ Preview Window ➡ (page 7-6)
Do Not Record Sound
Video Viewfinder ➡K➡Voice Record➡[➡OFF➡[
Enlarge the Video Viewfinder
Video Viewfinder ➡K➡ScreenDisplay➡[
• Cannot be set when Video mode is set to Video.
Change the Start/End Sound
Video Viewfinder ➡K➡Function➡[➡Start/End➡[➡Pattern 1 or Pattern 2
➡[
Set the Preview Display
Video Viewfinder➡K➡Function➡[➡Preview➡[➡ON or OFF➡[
• Can only be set when Video mode is set to Video.
Create a New Phone Book Entry with a Ringtone
Pattern
Preview Window➡K➡To Phone Book➡[➡Add New➡[➡Create a Phone
Book entry
• Cannot be set when Video mode is set to Video.
• For details on saving a Phone Book entry, see page 2-16.
Add a Ringtone Pattern to a Phone Book Entry
Preview Window➡K➡To Phone Book➡[➡Add➡[➡Select a Phone Book
entry➡[➡J
• If the selected Phone Book entry contains a ringtone pattern, select YES and press J
to change the ringtone pattern.
• Cannot be set when Video mode is set to Video.
Customization
Set the Recorded Video as a Ringtone Pattern
13
13-27
921T_web_0802.indb 13-27
08.3.23 1:58:52 PM
TV Settings
Settings for Watching TV
Start Here Q (Press and hold) ➡K➡Settings➡[E
Channel List Name
ESet Channels➡[➡Select a channel list➡K➡Rename➡[➡Enter a channel list
name➡[
Auto-off Timer
EOff-timer➡[➡30 minutes, 60 minutes, 120 minutes or OFF➡[
Image and Sound
Start Here Q (Press and hold)➡KE
Set TV Screen Brightness
ESettings➡[➡Screen Settings➡[➡Brightness➡[➡Select a level➡[
• Select Automatic to adjust the brightness automatically according to surrounding
environments.
Customization
Set TV Image Quality
ESettings➡[➡Screen Settings➡[➡Image Quality➡[➡Fine, Normal or
Cinema➡[
Set TV Image Sharpness
ESettings➡[➡Screen Settings➡[➡Sharpness➡[➡Sharp, Soft or OFF➡[
Set Economy Mode
ESettings➡[➡Screen Settings➡[➡Economy Mode➡[➡ON or OFF➡[
Set Subtitles
ESubtitles➡[➡ON or OFF➡[
Select the Audio Output While Watching TV
ESwitch Audio➡[➡Main or Sub➡[
• Since surrounding brightness is detected by the brightness sensor (page 1-3), do not block it with your fingers.
13
13-28
921T_web_0802.indb 13-28
08.3.23 1:58:52 PM
Data Broadcast
Start Here Q (Press and hold)➡K➡Settings➡[➡Datacasting➡[E
Set Data Communication Confirmation Window
EStart Comm.➡[➡Ask before or Do not Ask➡[
Set Secure Connection Confirmation Window
Specify whether a confirmation window appears
whenever data communication that uses encryption, a
digital signature, or some other security function is
performed over a secure connection (SSL).
EGo to Secured➡[➡Ask before or Do not Ask➡[
Set Memory Access Confirmation Window
EAccess Memory➡[➡Ask before or Do not Ask➡[
Delete Broadcast Data
EClear Memory➡[➡Select a station➡K➡Clear➡[➡YES➡[
EClear Memory➡[➡K➡Clear All➡[➡Enter your Handset Code➡YES➡[
Select Station and Delete by Entry
EClear Memory➡[➡Select a station➡[➡Select a memory➡K➡Clear➡[➡
YES➡[
Delete All Data of Station and Affiliated Stations
EClear Memory➡[➡Select a station➡[➡K➡Clear All➡[➡Enter your
Handset Code➡YES➡[
Set Location Information Send Setting
ESend Location➡[➡Always Ask, Send or Do not Send➡[
Set Whether or Not to Send the Manufacture Number
Specify whether your manufacture number (IMEI) is
sent automatically as a user ID when you use a data
broadcast or packet transmission.
EManufacture # ➡[➡Send or Do not Send➡[
Set the Content Storage Location
EStorage➡[➡Phone Memory or Memory Card➡[
Customization
Delete Data by Station
Delete All Data
13
13-29
921T_web_0802.indb 13-29
08.3.23 1:58:52 PM
TV Settings
• Positioning cannot be done when Positioning Lock is set. When sending location information, select OFF for the Positioning Lock.
• Even if Always Ask or Send is specified for location information send setting, location information is not sent if Do not Send is selected for S! GPS
Navi location information send setting (LocationProperty).
Settings for Recording Programs
Set the Storage Location for Recorded Programs
[➡TV➡[➡Settings➡[➡File Storage➡[➡Phone Memory or Memory
Card➡[
Settings for View/Record Timer
Start Here [➡TV➡[➡Settings➡[E
Set the Alarm Volume for Timer Notification
ENotification➡[➡Alarm Volume➡[➡Adjust the volume➡[
• In Clamshell Open or Viewer position, the actual alarm volume is fixed at level 3 even if
it is set higher than level 3.
Set the Vibration for Timer Notification
ENotification➡[➡Vibration➡[➡ON or OFF➡[
Customization
13
13-30
921T_web_0802.indb 13-30
08.3.23 1:58:53 PM
Media Player Settings
Settings for Playing Music
Set Audio Output
H➡Output Settings➡[➡Speaker/Earphone or Wireless➡[
• When you have selected Wireless, do the following.
Select a paired wireless device➡[
• For details on pairing a wireless device, see page 12-5 as well as the instruction manual
for the device.
Set the Wallpaper Displayed During Playback
H➡Player Image➡[➡Original or Ku-man➡[
Customization
13
13-31
921T_web_0802.indb 13-31
08.3.23 1:58:53 PM
S! Appli Settings
Settings for Operations While Running S! Appli
Start Here [➡S! Appli➡[➡Settings➡[E
Change Sound Effect Volume
EVolume➡[➡Adjust the volume➡[
Set Brightness of Illumination
ELighting➡[➡Brightness➡[➡Always Bright, Always Dim or Same as
Phone➡[
Set Blinking of Illumination
ELighting➡[➡Blink➡[➡ON or OFF➡[
Set Vibration
EVibration➡[➡ON or OFF➡[
Set Priority While Running S! Appli
Customization
13
Set Priority for When There is an Incoming
Voice/Video Call
ECalls&Alarms➡[➡Voice Call or Video Call➡[➡Pause Apps or Continue
Apps➡[
Set Priority for When There is an Incoming
Message
ECalls&Alarms➡[➡Message➡[➡Pause Apps or Continue Apps➡[
Set Priority for When the Alarm Plays
ECalls&Alarms➡[➡Alarm➡[➡Pause Apps or Continue Apps➡[
Other S! Appli Settings
Start Here [➡S! Appli➡[E
Set Confirmation Window for Making Calls or
Network Connection
ELibrary➡[➡Select an S! Appli➡K➡Security➡[➡Select a function➡[➡
Blanket, Session, Oneshot or No➡[
Update S! Appli Information on the Memory Card
ECard Sync➡[➡YES➡[
View S! Appli License Information
EInformation➡[
Confirm S! Appli Root Certificates
ECertification➡[➡Select a certificate➡[
13-32
921T_web_0802.indb 13-32
08.3.23 1:58:53 PM
Reset
Resetting the Handset to Its Default State
Start Here [➡Settings➡[➡Security➡[➡Reset➡[E
Return All Settings to Their Defaults and Delete All
Data Stored in the Handset
EReset All➡[➡Enter your Handset Code➡YES➡[
Reset Settings to Default
EReset Setting➡[➡Enter your Handset Code➡YES➡[
Delete All the Phone Book Entries, Data in Data
Folder, and Messages
EClear Memory➡[➡Enter your Handset Code➡YES➡[
Reset Confirmation Windows to Default
EConfirmation➡[➡Enter your Handset Code➡YES➡[
• Files or information saved in USIM Card and memory card are not restored after resetting the handset.
• Reset All and Clear Memory cannot be performed when there is data created by a Lifestyle-Appli on the IC card. Moreover, Reset All cannot be
performed when Web restriction under Restricted Mode is set to ON. Delete the data created by the Life-Style Appli and set Web restriction to OFF
before performing reset operations.
• Performing Reset All or Clear Memory deletes some preinstalled S! Appli and other contents, which cannot be restored to the same status as when
the handset was purchased.
Customization
13
13-33
921T_web_0802.indb 13-33
08.3.23 1:58:54 PM
Text Entry/Phone Book
Text Entry Settings
Start Here In a text entry window➡K➡Customize➡[E
Change the Input Method
EInput Method➡[➡Standard, Beeper, T9 or Multi-tap➡[
Do Not Predict Words from Previously Entered Text
Strings
EPrediction➡[➡Predict Text➡[➡OFF➡[
Do Not Predict Next Phrase from Previously Entered
Phrases
EPrediction➡[➡Phrase➡[➡OFF➡[
Set the Custom Window
ECustom Window➡[➡Add to Window➡[ (twice) ➡Enter symbols and pictographs
➡[
Set Display of the Custom Window
ECustom Window➡[➡Display➡[➡Display or Do not Display➡[
• When Display is set, Custom Window appears in text entry windows so that you can
quickly enter symbols and pictographs that are saved to Custom Window.
Set the Text Deletion Method
EClear Setting➡[➡Delete or Back Space➡[
• Selecting Delete deletes the text to the right of the cursor. Selecting Back Space
deletes text to the left of the cursor.
Customization
Reset the Prediction Dictionary/Conversion
Dictionary
EReset Learned➡[➡Prediction or Conversion➡[➡YES➡[
13
13-34
921T_web_0802.indb 13-34
08.3.23 1:58:54 PM
Phone Book Settings
Start Here [➡Phone Book➡[➡Settings➡[E
Change the Default Storage Location
ESelect Storage➡[➡Always Ask, Phone Memory, USIM or Memory Card➡[
Prohibit Use of Phone Book
EPhone Book Lock➡[➡Enter your Handset Code➡Lock➡[
• If you want to use Phone Book, enter your Handset Code to temporarily release Phone
Book Lock.
• If Phone Book Lock is set to Lock, speed dial function is unavailable for making calls.
Settings for Phone Book Groups
Edit a Group Name/Group Icon
[➡Phone Book➡[➡Group➡[➡Select a group➡[➡Select the group name
➡[➡Enter a group name➡[➡Select a group icon➡[➡J
• Press K and select To USIM or To Phone to switch between the handset and the
USIM Card.
Customization
13
13-35
921T_web_0802.indb 13-35
08.3.23 1:58:54 PM
File Transfer
Settings for Bluetooth® Communication
Start Here [➡Settings➡[➡Connectivity➡[➡Bluetooth➡[E
Display Details of a Paired Bluetooth® Compatible
Device
EPaired Device➡[➡Select a device➡[
Set a Bluetooth® Compatible Device as a Trusted
Device
If you set a paired Bluetooth® compatible device as a
trusted device, a confirmation window is not displayed
and a connection is established when a connection
request is received from that device.
EPaired Device➡[➡Select a device➡K➡Trust Device➡[➡ON➡[
Display Details of the Handset
ESettings➡[➡Details➡[
Change the Name of the Handset
ESettings➡[➡Device Name➡[➡Enter a device name➡[
Communicate Using a Handsfree Device
ESettings➡[➡Set Handsfree➡[➡Handsfree➡[
• To make and receive regular calls from your handset, select Private.
Hide the Handset
ESettings➡[➡Visibility➡[➡Hide➡[
Customization
• If the connection is initiated by a device, on which the authentication PIN code is entered and the handset registers the device to the paired device list, a
part of the device information is not displayed.
13
13-36
921T_web_0802.indb 13-36
08.3.23 1:58:54 PM
Settings for PC Connection
Use the USB Cable for Charging
[➡Settings➡[➡Connectivity➡[➡USB➡[➡Battery➡[➡ON➡[
• Charging is not possible while the PC or the handset is turned off.
• Charging may not be possible depending on the connection settings of the PC.
• If the handset and PC are connected with the USB cable, either the PC battery or handset Battery is consumed depending on the Battery setting,
regardless of whether they are communicating data.
ON: PC battery is used.
OFF: Handset battery is used.
Customization
13
13-37
921T_web_0802.indb 13-37
08.3.23 1:58:55 PM
Various Tools
Settings for Saving Events
Start Here [➡Tools➡[➡Calendar➡[➡J➡Enter basic items (page 9-4)E
Change Alarm Volume
EAlarm➡[➡ON➡[➡Volume➡[➡Adjust the volume➡[➡J (twice) ➡
OK➡[
• In Clamshell Open or Viewer position, the actual alarm volume is fixed at level 3 even if
it is set higher than level 3; and the maximum volume is level 3 if the alarm volume is set
to Ascending Volume or Descending Volume.
Change Vibration
EAlarm➡[➡ON➡[➡Vibration➡[➡Select a pattern➡[➡J (twice) ➡
OK➡[
Set the Image to Display at the Set Time
Display the Original Image at the Set Time
EAlarm➡[➡ON➡[➡Image➡[➡Original➡[➡J (twice) ➡OK➡[
Display an Image Saved in Data Folder/Memory
Card at the Set Time
EAlarm➡[➡ON➡[➡Image➡[➡Phone Memory or Memory Card➡[➡
Select an image➡[➡E to compose the image➡K➡[➡J (twice) ➡OK➡[
Set the Stamp Icon
Customization
13
EStamp Icon➡[➡Select a stamp➡[➡J➡OK➡[
Set Category of the Event
EOptions➡[➡Category ➡[➡Select a category➡[➡J➡OK➡[
Set a Phone Number/E-mail Address/URL
EPhone Number, Address or URL➡[➡Enter a phone number, e-mail address, or URL
➡[➡J➡OK➡[
Set a Link to a Related Message/Web Page/Image
EMessages, Saved Pages or Pictures➡[➡Select a message, web page, or image➡
[➡J➡OK➡[
Set a Location
ELocation➡[➡Enter a location➡[➡J➡OK➡[
13-38
921T_web_0802.indb 13-38
08.3.23 1:58:55 PM
Settings for Calendar
Start Here [➡Tools➡[➡Calendar➡[➡K➡Settings➡[E
Set the View Format When Opening Calendar
EFirst View➡[➡Select a calendar view format➡[
Change the Font Color of Events
EFont Color➡[➡Select a font color➡[
Lock Calendar
ECalendar Lock➡[➡Enter your Handset Code➡Lock➡[
• If you set Calendar Lock to Lock, the event title is not displayed when the event alarm is activated. The event details window cannot be viewed unless
your Handset Code is entered.
Settings for Saving Tasks
Start Here [➡Tools➡[➡Tasks➡[➡K➡Create New➡[➡Enter basic items (page 9-5)E
Change Alarm Volume
EAlarm➡[➡ON➡[➡Volume➡[➡Adjust the volume➡[➡J (twice)➡OK
➡[
• In Clamshell Open or Viewer position, the actual alarm volume is fixed at level 3 even if
Change Vibration
EAlarm➡[➡ON➡[➡Vibration➡[➡Select a pattern➡[➡J (twice)➡OK
➡[
Set the Image to Display at the Set Time
Display the Original Image at the Set Time
EAlarm➡[➡ON➡[➡Image➡[➡Original➡[➡J (twice) ➡OK➡[
Displaying an Image Saved in Data Folder/
Memory Card at the Set Time
EAlarm➡[➡ON➡[➡Image➡[➡Phone Memory or Memory Card➡[➡
Select an image➡[➡E to compose the image➡K➡[➡J (twice) ➡OK➡[
Set the Stamp Icon
Customization
it is set higher than level 3; and the maximum volume is level 3 if the alarm volume is set
to Ascending Volume or Descending Volume.
13
EStamp Icon➡[➡Select a stamp➡[➡J➡OK➡[
13-39
921T_web_0802.indb 13-39
08.3.23 1:58:55 PM
Various Tools
Start Here [➡Tools➡[➡Tasks➡[➡K➡Create New➡[➡Enter basic items (page 9-5)E
Set Task Priority
EOptions➡[➡Priority➡[➡Select the priority➡[➡J➡OK➡[
Set the Task Status
EOptions➡[➡Status➡[➡Select the status➡[➡J➡OK➡[
Settings for Tasks
Lock Tasks
[➡Tools➡[➡Tasks➡[➡K➡Settings➡[➡Tasks Lock➡[➡Enter
your Handset Code➡Lock➡[
Time Table Settings
Start Here [➡Tools➡[➡Useful Tools➡[➡Time Table➡[➡K➡Settings➡[E
Set Start/End Time of a Period
ESet Time➡[➡Select a period➡[➡Enter a start time➡[➡Enter an end time➡
[➡J
Reset Time Settings to Default
EReset Time➡[➡YES➡[
• Enter the time in accordance with the 24-hour system.
Customization
13
Settings for Osaifu-Keitai®
Start Here [➡Tools➡[➡Osaifu-Keitai➡[➡Card Settings➡[E
Specify Whether Functions Start Up When Handset is
Held Up Before a Reader/Writer
EInterface➡[➡Enter your Handset Code➡Select a function➡[➡ON or OFF➡[
Check IC Card Information
EIC Card Status➡[
Do Not Send a Lock Engaged Notification
ERemote Lock➡[➡Enter your Handset Code➡Mail Lock➡[➡Notification➡
[➡Do not Send➡[
• You cannot check the contents of an IC card that is locked.
13-40
921T_web_0802.indb 13-40
08.3.23 1:58:56 PM
Settings for S! GPS Navi
Start Here [➡Tools➡[➡S! GPS Navi➡[➡NAVI Settings➡[E
Save a Map URL
EMap URL Settings➡[➡Select an unregistered item➡K➡Edit URL➡[➡Enter
a URL➡[
Edit the Map URL Display Name
EMap URL Settings➡[➡Select a map URL➡K➡Rename➡[➡Edit the display
name➡[
Edit the Map URL
EMap URL Settings➡[➡Select a map URL➡K➡Edit URL➡[➡YES➡[➡
Edit the URL➡[
• The preset map URL cannot be edited.
Delete a Map URL
EMap URL Settings➡[➡Select a map URL➡K➡Delete➡[➡YES➡[
Set the Map URL
EMap URL Settings➡[➡Select the map URL you want to set➡[
Select the Navi Appli
ESet Navi Appli➡[➡Select the navigation application you want to set➡[
• The preset map URL cannot be deleted.
• When the application becomes unavailable due to USIM Card replacement, reset the
handset (Reset All) or clear entries/data (Clear Memory) (page 13-33).
EPositioning Lock➡[➡Enter your Handset Code➡ON➡[
Set Location Information Send Setting
ELocationProperty➡[➡B➡[➡Enter your Handset Code➡Always Ask, Send or
Do not Send➡[
Customization
Lock Positioning
13
13-41
921T_web_0802.indb 13-41
08.3.23 1:58:56 PM
Various Tools
Alarm Settings
Start Here [➡Tools➡[➡Alarms➡[➡Select an alarm➡[➡Enter basic items (page 9-18)➡Alarm Tone➡[E
Change Alarm Volume
EVolume➡[➡Adjust the volume➡[➡J (twice) ➡OK➡[
• In Clamshell Open or Viewer position, the actual alarm volume is fixed at level 3 even if
it is set higher than level 3; and the maximum volume is level 3 if the alarm volume is set
to Ascending Volume or Descending Volume.
Change Vibration
EVibration➡[➡Select a pattern➡[➡J (twice) ➡OK➡[
Set the Image to Display at the Set Time
Display the Original Image at the Set Time
EImage➡[➡Original➡[➡J (twice) ➡OK➡[
Display an Image Saved in Data Folder/Memory
Card at the Set Time
EImage➡[➡Phone Memory or Memory Card➡[➡Select an image➡[➡E
to compose the image➡K➡[➡J (twice) ➡OK➡[
World Clock Settings
Start Here [➡Settings➡[➡Phone Settings➡[➡Clock➡[➡World Clock➡[E
Customization
Set the City by the GMT Time Difference
ECity 1 or City 2➡[➡K➡GMT Offset➡[➡G to select the time difference
➡[ (twice)
Set Daylight Saving Time (DST)
ECity 1 or City 2➡[➡K➡DST ON/OFF➡[➡ON or OFF➡[
13
13-42
921T_web_0802.indb 13-42
08.3.23 1:58:56 PM
S! Information Channel Settings
Start Here [➡Entertainment➡[➡Info Channel➡[E
Do Not Display Weather Indicator Icons in Standby
EWeather➡[➡View Settings➡[➡Indicator➡[➡Hide➡[
Set Notification of Weather Forecast Updates
Set whether or not to notify of weather forecast
updates by the Information Prompt.
EWeather➡[➡View Settings➡[➡Prompt➡[➡Show or Hide➡[
Setting Ku-man for Standby (Japanese)
Setting 待受くーまん (Idle Screen) to ON displays Ku-man, a 3D animated character, in Standby. Ku-man communicates with you with the various outfits and
gestures depending on the season, time of the day, and other conditions.
Set Ku-man to be Displayed in Standby
[➡ 設定 (Settings)➡[➡ 待受くーまん (Idle Screen)➡[➡ON or OFF➡[
• If 言語選択 (Language) is set to English or a language other than Japanese is set for Automatic, or S! Quick News is selected to display new
information, Ku-man cannot be displayed in Standby.
© Dora communications
Customization
13
13-43
921T_web_0802.indb 13-43
08.3.23 1:58:57 PM
Communications
Settings for S! Friend's Status
Start Here [➡Communications➡[➡Friend Status➡[E
Edit Status Settings of My Status
Set All Answer Statuses Collectively
EK➡Settings➡[➡Status Setting➡[➡Select an item➡[➡Icon➡[➡
Select an icon➡[➡Label➡[➡Enter a label➡[➡J➡YES➡[
EK➡Settings➡[➡Status Setting➡[➡Select an item➡[➡Set All➡[➡
Select an item➡[➡J➡YES➡[
Save Members to Active Window
EF to select a group➡Gto select a member➡K➡Active Window➡[ (twice) ➡
Not Registered➡[
Ignore Saving Requests from People Not in Phone
Book
EK➡Settings➡[➡Request Reply➡[➡Known Only➡[
Ignore All Saving Requests
EK➡Settings➡[➡Request Reply➡[➡Do not Answer➡[
Settings for S! Friend's Status/S! Circle Talk
Disable S! Friend's Status/S! Circle Talk
[➡Settings➡[➡Security➡[➡IP Service➡[➡OFF➡[
Customization
• Before configuring the IP Service setting, you need to retrieve the network connection information (page 1-11).
13
13-44
921T_web_0802.indb 13-44
08.3.23 1:58:57 PM
921T_web_0802.indb 14-1
14
Appendix
USIM Card ・・・・・・・・・・・・・・・・・・・・・・・・・・・・・・・・・・・・・・・・・・・・・・・・・・・・・・・・・・・・・・・・・・・・・・・・・ 14-2
Handling the USIM Card ・・・・・・・・・・・・・・・・・・・・・・・・・・・・・・・・・・・・・・・・・・・・・・・・・・・・・・・・・・・・・ 14-2
USIM Codes (PIN/PIN2) ・・・・・・・・・・・・・・・・・・・・・・・・・・・・・・・・・・・・・・・・・・・・・・・・・・・・・・・・・・・・・・ 14-2
Inserting and Removing the USIM Card ・・・・・・・・・・・・・・・・・・・・・・・・・・・・・・・・・・・・・・・・・・・・・・・・・ 14-3
Battery ・・・・・・・・・・・・・・・・・・・・・・・・・・・・・・・・・・・・・・・・・・・・・・・・・・・・・・・・・・・・・・・・・・・・・・・・・・・・ 14-4
Battery Installation ・・・・・・・・・・・・・・・・・・・・・・・・・・・・・・・・・・・・・・・・・・・・・・・・・・・・・・・・・・・・・・・・・ 14-5
Software Update ・・・・・・・・・・・・・・・・・・・・・・・・・・・・・・・・・・・・・・・・・・・・・・・・・・・・・・・・・・・・・・・・・・・ 14-6
Updating Software・・・・・・・・・・・・・・・・・・・・・・・・・・・・・・・・・・・・・・・・・・・・・・・・・・・・・・・・・・・・・・・・・・ 14-6
Troubleshooting ・・・・・・・・・・・・・・・・・・・・・・・・・・・・・・・・・・・・・・・・・・・・・・・・・・・・・・・・・・・・・・・・・・・・ 14-7
Text Entry Keys・・・・・・・・・・・・・・・・・・・・・・・・・・・・・・・・・・・・・・・・・・・・・・・・・・・・・・・・・・・・・・・・・・・・・ 14-9
Standard Mode ・・・・・・・・・・・・・・・・・・・・・・・・・・・・・・・・・・・・・・・・・・・・・・・・・・・・・・・・・・・・・・・・・・・・ 14-9
Beeper Mode ・・・・・・・・・・・・・・・・・・・・・・・・・・・・・・・・・・・・・・・・・・・・・・・・・・・・・・・・・・・・・・・・・・・・・ 14-10
Specifications ・・・・・・・・・・・・・・・・・・・・・・・・・・・・・・・・・・・・・・・・・・・・・・・・・・・・・・・・・・・・・・・・・・・・・14-11
Main Specifications ・・・・・・・・・・・・・・・・・・・・・・・・・・・・・・・・・・・・・・・・・・・・・・・・・・・・・・・・・・・・・・・・ 14-11
Specifications by Function ・・・・・・・・・・・・・・・・・・・・・・・・・・・・・・・・・・・・・・・・・・・・・・・・・・・・・・・・・・・ 14-12
Default Settings ・・・・・・・・・・・・・・・・・・・・・・・・・・・・・・・・・・・・・・・・・・・・・・・・・・・・・・・・・・・・・・・・・・・14-17
Glossary ・・・・・・・・・・・・・・・・・・・・・・・・・・・・・・・・・・・・・・・・・・・・・・・・・・・・・・・・・・・・・・・・・・・・・・・・・・14-25
Index ・・・・・・・・・・・・・・・・・・・・・・・・・・・・・・・・・・・・・・・・・・・・・・・・・・・・・・・・・・・・・・・・・・・・・・・・・・・・14-26
Alphabetic Order ・・・・・・・・・・・・・・・・・・・・・・・・・・・・・・・・・・・・・・・・・・・・・・・・・・・・・・・・・・・・・・・・・・ 14-26
By User Action ・・・・・・・・・・・・・・・・・・・・・・・・・・・・・・・・・・・・・・・・・・・・・・・・・・・・・・・・・・・・・・・・・・・・ 14-35
Warranty & After Sales Service ・・・・・・・・・・・・・・・・・・・・・・・・・・・・・・・・・・・・・・・・・・・・・・・・・・・・・14-40
Warranty ・・・・・・・・・・・・・・・・・・・・・・・・・・・・・・・・・・・・・・・・・・・・・・・・・・・・・・・・・・・・・・・・・・・・・・・・ 14-40
After Sales Service ・・・・・・・・・・・・・・・・・・・・・・・・・・・・・・・・・・・・・・・・・・・・・・・・・・・・・・・・・・・・・・・・・ 14-40
Customer Service・・・・・・・・・・・・・・・・・・・・・・・・・・・・・・・・・・・・・・・・・・・・・・・・・・・・・・・・・・・・・・・・・・14-41
08.3.23 1:58:57 PM
USIM Card
Handling the USIM Card
Universal Subscriber Identity Module (USIM) Card
is an IC card containing customer and
authentication information, including handset
number, and limited storage for Phone Book
entries and SMS messages. USIM must be inserted
to use 921T or Network services (calling,
messaging, Web, etc.). Turn handset off before
inserting/removing USIM Card.
• Save Phone Book entries and SMS messages on
USIM Card (pages 4-19, 13-35).
• Insert into compatible SoftBank handsets to
access files.
• Do not insert the USIM Card into any other IC
card device. SoftBank is not liable for any
resulting damages.
• Keep the USIM Card IC chip clean.
• Use a dry, soft cloth to clean the USIM Card.
• Do not attach labels to the USIM Card. Doing
so may damage your handset.
• For details on the USIM Card, refer to the
instruction manual provided with the USIM
Card.
Appendix
IC
• USIM Cards are the property of SoftBank.
• USIM Cards will be reissued for a fee if lost
or damaged.
• Return USIM Cards to SoftBank upon
subscription termination.
• Returned USIM Cards are recycled.
• USIM Card specifications may change
without prior notice. Preinstalled S! Appli
may become unavailable if a different USIM
Card is inserted.
• Back up USIM Card information. SoftBank is
not liable for lost information.
• If your USIM Card or handset (with USIM
Card inserted) is lost or stolen, suspend your
service immediately. For details, contact your
nearest SoftBank Shop or SoftBank General
Information (page 14-41).
USIM Codes (PIN/PIN2)
For security, the USIM Card has two security
codes: PIN and PIN2. Do not forget these codes
and do not reveal them to others.
• PIN and PIN2 can be changed (page 11-5).
• The default setting is 9999 for both PIN and
PIN2.
PIN
This is a four to eight digit security code to prevent
others from using your handset. When PIN
Settings is set to ON, PIN is required each time
the handset is turned on.
PIN2
This is a four to eight digit security code required
for changing data stored on the USIM Card, such
as resetting Call Time&Cost.
PIN Lock & PUK Codes
PIN Lock or PIN2 Lock is activated when PIN or
PIN2 is incorrectly entered three times. PUK
(Personal Unblocking Key) codes are required to
cancel PIN Lock and PIN2 Lock. To obtain PUK and
PUK2, contact SoftBank General Information (page
14-41).
14
14-2
921T_web_0802.indb 14-2
08.3.23 1:58:58 PM
• If PUK or PUK2 is incorrectly entered ten
consecutive times, the USIM Card is locked.
USIM Card Lock cannot be canceled. Contact
SoftBank General Information (page 14-41).
Inserting and Removing
the USIM Card
Before inserting or removing the USIM Card, turn
off the handset and remove the battery.
Removing the USIM Card
q Pull the tab to draw out the tray and
remove the USIM Card
When the tray has been removed
Inserting the USIM Card
q Draw out the tray by pulling the tab
Tab
Line the tray up with the rails and
push it straight in.
w
• Avoid touching or scratching the USIM
Place the USIM Card on the tray with
the IC (page 14-2) facing up
• Line up the notch on the USIM Card with
the tray.
Notch
Appendix
e Push the tray all the way in
Card's IC. Do not force the USIM Card into
or out of the handset; damage may result.
• Make sure that the USIM Card's tray is not
sticking out when you insert the battery. If
the tray is sticking out, the battery cannot be
inserted and the USIM Card and the tray
may be damaged.
• Take care not to lose the USIM Card after
removing it from the handset.
14
14-3
921T_web_0802.indb 14-3
08.3.23 1:58:58 PM
Battery
• Before using your handset for the first time,
charge the battery.
• 921T uses a lithium ion battery. Battery voltage
decreases with operating time (see below).
Minimum Operating Voltage
Battery Voltage
Operating Time
• Extreme temperatures will reduce battery
Appendix
14
capacity and shorten the operating time. Do not
use the battery in high temperatures. This may
shorten battery life.
• When storing the battery separately, make sure
you put it in a case, etc. and store it in a dry
and cool place. This will avoid short-circuiting
the battery terminal. It is recommended that
you store it uncharged.
• Repeatedly charging and discharging a battery
shortens the operating time. If the operating
time becomes too short, purchase a new
battery.
• When disposing of a used battery, insulate the
terminal with tape or place the battery into a
plastic bag and then take it to your nearest
SoftBank Shop, a recycle shop or follow the
local disposal regulations for environmental
conservation.
• Be careful not to drop or apply excessive force
to the battery.
Battery Drain
• The battery discharges little by little when
stored for a long time even if it is not used. It
self-discharges at a rate of 10 to 20% per
month and about 50% per half a year.
• If the handset is used in a location with poor
signal reception or left in Standby outside the
service area, or if you use the Mobile Light or
launch S! Appli, it will shorten the battery's
operating time.
Battery Level
• The battery level on the display (page 1-5)
changes with the operating time. Charge or
replace it when the level is low. When the
battery is about to run out ( ), a message
appears and the battery alarm tone sounds. The
handset shuts down after 30 seconds.
14-4
921T_web_0802.indb 14-4
08.3.23 1:58:59 PM
e Replace the battery cover
Battery Installation
• Do not remove battery while handset power is
on.
q Pressing down the notch, slide the
battery cover (①), and lift it up (②)
Notch
②
①
w Align the battery terminal with the
handset terminal and insert the
battery
Tab ▲
tab ▲. Otherwise the terminals may be
damaged.
Appendix
• Always remove the battery from the
14
14-5
921T_web_0802.indb 14-5
08.3.23 1:58:59 PM
Software Update
Appendix
14
Check if software on the handset needs to be
updated, and update it through the network.
• Transmission fees do not apply to updates.
• There are two ways to update software:
Update now and Schedule update.
Update now: Update software now.
Schedule update: Set a date and time to update
software so that software is
updated automatically at the
time you have specified.
• Software updates may take a long time.
• Update software when the battery is fully
charged. Do not remove the battery while
updating.
• Please update software in a place where the
handset has a good reception, and do not
change locations while updating.
• You cannot use other functions during updates.
If a program is running, software update is not
available.
• You can update software without deleting
Phone Book entries, images and sounds saved
in the handset. However, data may be lost or
damaged if the handset is not in good condition
(broken, damaged, wet, etc.). We recommend
that you make backups of your important data.
• If the software update fails, you may not be
able to operate your handset. In this case,
contact SoftBank General Information (page
14-41).
Updating Software
q Press [➡Tools➡[➡Update➡[➡
YES➡[
w Select Agree➡[ (twice)➡Enter your
Center Access Code (page 1-14)➡[➡
J (OK)
• The check result is displayed. Follow the
onscreen instructions.
After Software is Updated
When software is updated, the handset restarts
automatically. After restarting, a confirmation
window appears showing update information.
Using Schedule Update
A confirmation window for software update
appears on the scheduled time. Press [ or leave
the handset for about ten seconds to start
automatic software update.
• If you are using another function on the
handset on the scheduled time, software is
not updated.
• If the handset indicates that it is out of the
service area on the scheduled time, software
is not updated.
14-6
921T_web_0802.indb 14-6
08.3.23 1:58:59 PM
Troubleshooting
Problem
Cannot turn the power on.
Displays Please check connection
with your charger. and cannot
charge the battery.
Possible Causes and Remedies
Is the battery inserted properly (page 14-5)?
Is the battery charged (page 14-4)?
Is there dust on the connections and contacts of the AC Charger, External Device Port or battery?
Clean the connections and contacts with a dry cotton swab, etc.
Does the PIN Entry window appear?
PIN Settings is set to ON, enter your PIN.
Cannot operate the handset
normally after turning it on.
Does or Password Lock appear on the display?
Password Lock is activated. Enter your Handset Code.
Does USIM not inserted. Power off the phone and insert USIM. appear on the display?
Turn the power off and make sure the USIM Card is inserted properly (page 14-3).
Cannot establish a connection for
voice and video calls or use mail
and Web functions.
Does appear on the display? Are you out of the service area or in a location where it is difficult to receive a
signal?
Move to a location where a signal can reach your handset and try again.
Is your hand or another object covering the internal antenna part (page 1-3) of your handset?
Does or Offline Mode appear on the display?
Cancel Offline Mode (page 1-13).
Did you dial the whole phone number starting from the area code?
Does Network busy. appear on the display?
The line is busy. Wait a while and try again.
Is Call Barring (page 3-17) set for outgoing calls?
Is Reject Calls (page 13-9) set?
Cannot receive voice and video
calls.
Is Call Forward (page 3-10) or Voice Mail (page 3-11) set to All Calls?
Is Call Barring (page 3-17) set for incoming calls?
Cannot send messages.
Appendix
Cannot make voice and video
calls.
14
Is Call Barring (page 3-17) set for outgoing calls?
14-7
921T_web_0802.indb 14-7
08.3.23 1:59:00 PM
Troubleshooting
Problem
Cannot receive messages.
Calls are interrupted or
disconnected.
The handset does not respond to
key presses.
Cannot use Osaifu-Keitai®.
Possible Causes and Remedies
Is Call Barring (page 3-17) set for incoming calls?
Does appear on the display? Are you in a location where it is difficult to receive a signal?
Move to a location where a signal can reach your handset.
Is your hand or another object covering the internal antenna part (page 1-3) of your handset?
Does or Password Lock appear on the display?
Password Lock is activated. Enter your Handset Code.
Does appear on the External Display when operating with your handset closed?
Hold is set. Press and hold M while your handset is closed to cancel Hold.
Does appear on the display?
Turn off IC Card Lock (page 9-12).
Is the brightness sensor (page 1-3) blocked with your fingers, hair, strap or TV Antenna?
Display brightens or dims by
itself.
Do your surroundings become bright or dark?
Change the brightness setting (page 13-5) for the Display or move to a place where surrounding brightness level
stays the same.
Appendix
14
14-8
921T_web_0802.indb 14-8
08.3.23 1:59:00 PM
Text Entry Keys
Standard Mode
Text Input
Mode
Kanji (hiragana)
(Double-byte)*
Single-byte
katakana
あいうえおぁぃぅぇぉ
かきくけこ
さしすせそ
たちつてとっ
なにぬねの
はひふへほ
まみむめも
やゆよゃゅょ
らりるれろ
わをんー、
。
アイウエオァィゥェォ
カキクケコ
サシスセソ
タチツテトッ
ナニヌネノ
ハヒフヘホ
マミムメモ
ヤユヨャュョ
ラリルレロ
ワヲンー、。
Custom, ゛(dakuten),
゜(handakuten),
ー(cho-on), 、(touten),
。(kuten)
Key
1
2
3
4
5
6
7
8
9
0
*
#
Custom, Pictographs,
Emoticons, ゛(dakuten),
゜(handakuten), ー(cho-on),
、(touten), 。(kuten)
Symbols, Alphanumerics, URL
Toggle case
E
Double-byte alphanumerics
(lower case)
Single-byte alphanumerics
(lower case)
.@−_1
abc2
def3
ghi4
jkl5
mno6
pqrs7
tuv8
wxyz9
∼/?! 0
Custom, Pictographs, Emoticons
Custom,
Pictographs,
Emoticons
Symbols, Alphanumerics, URL
Toggle case
Symbols, Alphanumerics,
URL
Determine entered text/finish text entry
Move cursor, Insert line
breaks with B, Move
up and down on the
suggestion list with G
L
H
Move cursor
Double-byte
numbers
Single-byte
numbers
1
2
3
4
5
6
7
8
9
0
Finish text entry
Move cursor, Insert line breaks with B
Delete entered characters
Display characters in opposite order
* While assigning a reading in hiragana to an entry in the Word List (page 2-14), you can enter only double-byte hiragana and "ー" (cho-on).
921T_web_0802.indb 14-9
Appendix
[
Symbols, Alphanumerics, URL
Toggle case
Double-byte alphanumerics
(upper case)
Single-byte alphanumerics
(upper case)
.@−_1
ABC2
DEF3
GHI4
JKL5
MNO6
PQRS7
TUV8
WXYZ9
∼/?! 0
14
̶
14-9
08.3.23 1:59:01 PM
Text Entry Keys
Beeper Mode
Entering Characters in Beeper Mode
Example: Entering よしお
Switch the input method to Beeper mode. Enter two digits to make one
character. The combinations are as follows:
q In a text entry window, press 85➡32➡15
➡[
Press next
¡1 ™2 £3 ¢4 ∞5 §6 ¶7 •8 ª9 º0
Press first
¡1
あ
い
う
え
お
A
B
C
D
™2
か
き
く
け
こ
F
G
H
I
J
£3
さ
し
す
せ
そ
K
L
M
N
O
¢4
た
ち
つ
て
と
P
Q
R
S
T
∞5
な
に
ぬ
ね
の
U
V
W
X
Y
§6
は
ひ
ふ
へ
ほ
Z
?
!
ー
/
¶7
ま
み
む
め
も
¥
&
•8
や
(
ゆ
)
よ
ª9
ら
り
る
れ
ろ
1
2
3
4
5
º0
わ
を
ん
゛
゜
6
7
8
9
0
E
Appendix
indicates upper and lower cases are available. Press # to switch
•
case immediately after character entry.
• When entering in and , all the characters will be single-byte.
• When entering in , , , and , hiragana will turn to katakana.
• When entering in and , the characters will be in lower case.
14
14-10
921T_web_0802.indb 14-10
08.3.23 1:59:01 PM
Specifications
Main Specifications
921T
Frequency Range
1920 to 2170 MHz
Continuous Talk Time
Approx. 180 min. (Video call: Approx. 90 min.)
Continuous Standby
Time
Approx. 440 hrs
Charging Time
Approx. 120 min.
Dimensions When
Closed (W×H×D)
Approx. 51×106×19.4 mm
Maximum Output
0.25 W
Weight
Approx. 132 g (with battery)
• The values above were calculated with the battery attached.
• The continuous talk time refers to the average length of time a signal can
received constantly. However, this time may be reduced to half or less if the
handset is used in a location where the signal is weak or the handset is left
in Standby when it is outside the service area. Repeated charging and
discharging a battery shortens the operating time. If the operating time
becomes too short, purchase a new battery.
• If the Mobile Light is used frequently for taking pictures and recording
videos or as a penlight, the continuous talk time and continuous standby
time become shorter.
• When an S! Appli is activated, the continuous talk time and continuous
standby time become significantly shorter.
• If the handset is used with the Display illuminated frequently (for Yahoo!
Keitai use, etc.), the continuous talk time and continuous standby time
become shorter.
• Note that the OLED display may have defective pixels (dead or stuck
pixels).
AC Charger (Sold Separately)
Input Voltage
100 to 240 V AC, 50/60 Hz
Charging Temperature
Range
5 to 35℃
Appendix
be received normally when the handset is in a stationary state and a new
fully charged battery is attached.
• The continuous standby time refers to the average length of time a signal
can be received normally when the handset is closed with the External
Display facing outward, the handset is in a stationary state, a new fully
charged battery is attached and there are no calls made/received or
operations performed. If the handset is in a location outside the service
area or where it is difficult to receive a signal (in a building, vehicle, bag,
etc.), this time may be reduced to half or less. This time may also be
affected by other factors such as the operating environment (battery state,
temperature, etc.).
• The operating time of the battery was calculated when a stable signal was
14
14-11
921T_web_0802.indb 14-11
08.3.23 1:59:02 PM
Specifications
Specifications by Function
Basic Operations
Text Entry
Word List
100 words (4 words with same reading),
word: 12 characters, reading: 8 characters
Clipboard
20 entries
Phone Book
Data Folder
Available Memory
Approx. 58 MB*1, 2,500 entries*2
File Name
32 characters
*1 Memory capacity when all files that can be deleted are deleted. Data
Folder shares its memory with S! Appli Library.
*2 This number does not include S! Appli and Lifestyle-Appli entries. Up to
approximately 100 S! Appli and Lifestyle-Appli items can be stored in Data
Folder.
Others
Appendix
Number of Entries
1,000 entries
Active Window
5 members on the Members List
Name
16 characters each for first and last names
Shortcuts Menu
40 entries (11 preset)
Reading
16 characters each for first and last names
Phone Number
5 numbers, 32 digits
Call
E-mail Address
5 addresses, 128 characters
Dialed, Received
20 entries each
Address
Postal code: 20 digits, country: 32 characters,
state/city/street/additional info: 64 characters
each
Answering Machine
5 messages, 30 seconds per
message
Job Title
32 characters
Voice Memo
60 seconds per memo
Company
32 characters
Number Memo
5 numbers, 32 digits
URL
128 characters
International Call
Service
Note
256 characters
Send Touch Tones
Group
20 groups, group name: 16 characters
Country
Number List
20 countries (17 preset)
32 digits
14
14-12
921T_web_0802.indb 14-12
08.3.23 1:59:02 PM
Messaging
TV
Received
Approx. 5 MB, 2,000 messages
Recording Time
10 hours per recording
Sent, Unsent
Approx. 1.5 MB, 600 messages
View/Record Timer
Total 5 entries
Drafts
Approx. 700 KB, 60 messages
TV Links
50 entries
Address
To/Cc/Bcc: total 20 entries, phone
number: 24 digits, e-mail address:
254 characters
Camera/Picture Editing
S! Mail Text
15,000 double-byte characters/
30,720 single-byte characters
Attachments
Approx. 300 KB (including Address,
Subject, Text)
SMS Text
70 double-byte characters/70
single-byte katakana/160 single-byte
alphanumerics
Message Box
20 folders each for Received and Sent
(General folder, Folder 1 to Folder 17,
Idokoro folder, Ku-man folder)
3D Pictograms
150 characters
Available
Memory
Data Transfer Speed
Maximum 3.6 Mbps receiving/
maximum 384 kbps sending (in
HSDPA area)
Bookmarks
50 entries
History (URL)
10 entries
3.24 million pixels
File Format
Still pictures: JPEG, videos: MPEG-4/
H.263
Picture
Editing
File Format
JPEG (2.0 MB or less), PNG (1.0 MB or
less)
Picture Size
W16×H16 to W240×H400
Appendix
Internet
Effective Pixels
14
14-13
921T_web_0802.indb 14-13
08.3.23 1:59:02 PM
Specifications
Camera Modes
Media Player
Mode
Picture Size
Mobile
Digital
Max. Zoom
Playlist
10 each for the handset and the
memory card, 50 songs per playlist
Approx. 6.4×
My Library
50 songs
Approx. 10.7×
Recent
20 entries
W240×H400
Approx. 5.1×
W240×H320
W144×H176
W120×H160
Approx. 12.8×
W112×H112
Approx. 12.8×
W96×H128
Approx. 16×
W2048×H1536
−
W2048×H1232
−
W1600×H1200
Approx. 1.3×
W1280×H960
Approx. 1.6×
W640×H480
Approx. 3.2×
W400×H240
Approx. 5.1×
Mode
Appendix
14
their operation is not guaranteed.
File Format
AMR
921T
Handset
Sampling
Frequency
Bit Rate
4.75 to 12.2 kbps 8 kHz
MPEG-4 AAC-LC
16 to 128 kbps 16 to 48 kHz
HE-AAC
32 to 64 kbps
32 to 48 kHz
S! Appli
Video Modes
Video
Playable Data
• Even under the following conditions, some files may not be playable.
• Although files with bit rates other than those listed below may be playable,
Size
Max. Zoom
W320×H240
Approx. 3.2×
Max. Recording Time
Approx. 20 min.
Video
Mail
W176×H144
Approx. 3.2×
Approx. 30 sec.
(Quality: Fine)
Approx. 50 sec.
(Quality: Normal)
Approx. 60 sec.
(Quality: Economy)
Short Video
W128×H96
Approx. 5.3×
Approx. 5 sec.
Available Memory
on the Handset
Approx. 58 MB *1, 100 entries*2
*1 S! Appli Library shares its memory with Data Folder.
*2 This number includes S! Appli and Lifestyle-Appli entries.
14-14
921T_web_0802.indb 14-14
08.3.23 1:59:03 PM
Tools
Communication Services
20 notepads, 256 characters per notepad
S! Friend's Status
Calendar
400 events (100 events per day), from January 2, 2000
to December 30, 2015
S! Friend's Status Members
30 entries, 10 people per group
List
Tasks
100 entries, from January 2, 2000 to December 30,
2015
S! Circle Talk
Time Table
8 periods per day, Monday to Saturday
Participants
11 people including yourself
30 seconds each time
Dictionary
Japanese dictionary with 40,000 words, EnglishJapanese dictionary with 40,000 words, JapaneseEnglish dictionary with 36,000 words
Talk Time
S! Circle Talk Members List
50 entries, 10 people per group
Voice Recorder
90 minutes per recording
Osaifu-Keitai
8 Lock phone numbers, 2 Mail Lock addresses,
8 entries on the Balance List
World Clock
2 cities, city name:13 characters
S! GPS Navi
20 location logs
Idokoro Mail
Recipients List: 5 entries, Areas List: 7 entries
S! Information
Channel
7 History entries, 3 MB
Document
Viewer
Microsoft® Word (.doc), Microsoft® Excel (.xls),
Microsoft® PowerPoint® (.ppt), PDF (.pdf)
Electronic
Books
BookSurfing®: CCF (.CCF),
e-Book Viewer: XMDF (.ZBK, .ZBF, .ZBS)
Barcode Reader QR code data: 10 entries
Appendix
Notepad
14
14-15
921T_web_0802.indb 14-15
08.3.23 1:59:03 PM
Specifications
File Transfer/Backup
Melody List
Infrared
Communication System IrMC1.1
Transmission Range
Approx. 20 cm
Bluetooth®
Communication System Bluetooth® specification Ver.1.2
Output
Bluetooth® Power Class 2
Transmission Range
Within approx. 10 m*1
Supported Bluetooth®
Profiles*2
HFP (Hands-Free Profile)
HSP (Headset Profile)
DUN (Dialup Networking Profile)
OPP (Object Push Profile)
FTP (File Transfer Profile)*3
A2DP (Advanced Audio Distribution Profile)
AVRCP (Audio/Visual Remote Control Profile)
Frequency Band
2.4 GHz (2.402 GHz to 2.480 GHz)
Searchable Devices
8 devices at a time
Paired Devices
20 devices
Appendix
*1 Varies depending on obstacles between the communication device and
the signal conditions.
*2 The specifications of Bluetooth® devices differ according to usage. There
are standards for Bluetooth®.
*3 Only the server function is supported.
14
The preinstalled (fixed) melodies are shown below.
• The fixed melodies cannot be set as Keypad Tone under the Sound Effects
setting.
Title
Bolero
Turandot
Habanera
Oborozukiyo
Aloha Oe
Traumerei
Grande Valse Brillante
Harp Concerto
Old Phone
Flash News
Electronic Sound 1
Electronic Sound 2
Electronic Sound 3
Electronic Sound 4
Voice 1
Voice 2
Voice 3
Voice 4
Alarm Clock
Pigeon
Composer
RAVEL MAURICE JOSEPH
PUCCINI GIACOMO
BIZET GEORGES
OKANO TEI-ICHI
Hawaiian ballad
SCHUMANN ROBERT ALEXANDER
CHOPIN FREDERIC FRANCOIS
HAENDEL GEORG FRIEDRICH
Produced by Toshiba
Produced by Toshiba
Produced by Toshiba
Produced by Toshiba
Produced by Toshiba
Produced by Toshiba
Produced by Toshiba
Produced by Toshiba
Produced by Toshiba
Produced by Toshiba
Produced by Toshiba
Produced by Toshiba
14-16
921T_web_0802.indb 14-16
08.3.23 1:59:03 PM
Default Settings
Messaging
Function
Yahoo! Keitai
Default Setting
Message Box
Folder View: Folder View, Received/Sent: Separate
View, Display Items: Addresses, Change View: List
Only, Wide View: Wide View ON, Sort Setting: None,
Security Lock: Unlock, Auto-delete (Received: Set,
Sent: Set)
Display
Font Size: Medium-Small, Scroll Unit: Line, Show
Address (Main Display: Show All, Ext. Display: Show
All)
Creating
Signature: No Signature, Default Type: SMS, Notify
Type: Show
Sending
Confirmation: Show, Vibration: ON, DeliveryCheck: Do
not Ask, Expiry (SMS: Not Specified, S! Mail: Not
Specified), Priority: Normal, Delivery Time: Immediate,
Reply to: OFF, Message Ctr: Number in the USIM Card
Receiving
Retrieve Mode: Immediate, Auto-extract (Picture:
Show, Sound: Mute), Anti-Spam (Sort Messages: Do
not Sort, Select Folder: Folder 17)
3D Pictograms
Auto Play: OFF, Colors: Color1
Function
Default Setting
Font Size: Medium-Small (Yahoo! Keitai)/Extra-Small
(PC Browser), Scroll Unit: 1 line, Downloads (Images:
Download, Sounds: Download), Warning (PC Browser:
Show, Yahoo! Keitai: Show)
Settings
Security
Manufacture #: Do not Send, Send
Referer: Send, Cookie: Enable, Script: Ask
Once (Yahoo! Keitai)/Enable (PC
Browser), Authentica...: Per Session,
Session Info.: Show
Storage: Phone Memory
Entertainment
Function
Default Setting
S! Quick News
Auto Refresh (Flash News: Manual, News: Manual, S!
Loop: Manual), Image: Show
Weather
Indicator: Show, Prompt: Show
Ku-man's Room
Ku-man Data: Thumbnail View
Appendix
14
14-17
921T_web_0802.indb 14-17
08.3.23 1:59:04 PM
Default Settings
TV
Function
Function
Default Setting
Subtitles: ON, Switch Audio: Main, Screen Settings:
(Brightness: Brightness 2, Image Quality: Normal,
Sharpness: Soft, Economy Mode: OFF), Datacasting
Watching/Playing (Start Comm.: Ask before, Go to Secured: Ask before,
TV Program
Access Memory: Do not Ask, Send Location: Always
Ask, Manufacture #: Do not Send, Storage: Phone
Memory), Off-timer: OFF, File Storage: Phone Memory,
Output Settings: Speaker/Earphone, Volume: VOL12
Camera
Function
Camera
Video
Appendix
Camera Mode: Mobile, Picture Size: (Mobile: W240×
H400, Digital: W2048×H1536), Brush Up (Mobile:
ON, Digital: OFF), Resist Shake: OFF, Self-view: OFF,
Picture Mode: OFF, Multi Shots: OFF, Add Frame: OFF,
Icons Display: Show, Storage: Phone Memory, File
Name: Date&Time, Auto Save: OFF, Quality: Fine,
Effects: OFF, Date Stamp: OFF, Date Stamp Color:
White w/Black, Mobile Light: OFF, White Balance:
Auto, Color Control: Neutral, Delay Timer: OFF, Focus
Mode: Auto, Grid: OFF, Flicker: Automatic, Shutter
Sound: Pattern 1, Key Shortcut: ON, Exposure: ±
0.0EV
Quality
Video: Normal, Video Mail: Normal, Short
Video: Economy (Fixed)
Effects: OFF, Mobile Light: OFF, White Balance: Auto,
Color Control: Neutral, Delay Timer: OFF, Encode:
MPEG4, Flicker: Automatic, Start/End: Pattern 1, Key
Shortcut: ON, Preview: ON, Exposure: ±0.0EV
Scan Data
Default Setting
Default Setting
Video Mode: Video Mail, Self-view: OFF,
ScreenDisplay: Normal screen, Icons Display: Show,
Voice Record: ON, Storage: Phone Memory, File
Name: Date&Time, Auto Save (Video: ON (Fixed),
Video Mail/Short Video: OFF)
Exposure: ±0.0EV
S! Appli
Function
Settings
Default Setting
Screensaver: OFF, Start Time: 3 sec, Calls&Alarms
(Voice Call: Pause Apps, Video Call: Pause Apps,
Message: Continue Apps, Alarm: Pause Apps),
Volume: Level 3, Lighting (Brightness: Same as Phone,
Blink: ON), Vibration: ON
14
14-18
921T_web_0802.indb 14-18
08.3.23 1:59:04 PM
Tools
Function
Function
Default Setting
Alarms
Tone: Pattern 1, Volume: Level 3, Vibration: OFF,
Duration: 60 sec, Image: Original, Repeat: Once,
Snooze: OFF
Calculator
Set Tax Rate: 5%
Create Event
Set Alarm: OFF, Show/Hide: Show,
Repeat for: Do not Repeat, Category:
No Category
BG Color: OFF, Font Color: White w/Black
Kitchen Timer
10 sec
Voice Recorder
SelectStorage: Phone Memory
Photo Show
ON/OFF: OFF, Templates: Bubble, Image: Preset,
Duration: 60 min
Osaifu-Keitai
(Card Settings)
IC Card Lock: OFF, Mail Lock (ON/OFF: OFF,
Notification: Send, Address: To Sender), Call Lock
(ON/OFF: OFF, Missed Count: 3 times), Interface
(Browser, Messaging, Vibration, Notification, S!
Appli): ON, Display Balance: OFF
S! GPS Navi
Map URL Settings: NAVITIME (http://map.navitime.jp/),
Set Navi Appli: NAVITIME, Positioning Lock: OFF,
LocationProperty: Always Ask
Set Holiday (Sunday: Red, Monday to Friday: Black,
Saturday: Blue)
Calendar
Reminder
Reminder: OFF, Schedule for: Today,
Tone: Pattern 1, Volume: Level 3,
Vibration: OFF, Duration: 60 sec,
Repeat: Once
Calendar Lock: Unlock, First View: Monthly, Font
Color: White w/Black
New Task
Set Alarm: OFF, Show/Hide: Show,
Priority: Normal, Status: Not
Completed
Reminder
Reminder: OFF, Schedule for: Today,
Tone: Pattern 1, Volume: Level 3,
Vibration: OFF, Duration: 60 sec,
Repeat: Once
Tasks Lock: Unlock
Data Folder
Function
Data Folder
Default Setting
Change View (View Type: Thumbnail 3×3/Thumbnail
5×5 (My Pictograms Folder only), Sort by: From
Latest), Security Lock: OFF
Appendix
Change View: All View, Sort by: Deadline
Tasks
Default Setting
Time Table
14
14-19
921T_web_0802.indb 14-19
08.3.23 1:59:04 PM
Default Settings
Media Player
Phone Book
Function
Audio
Videos
Default Setting
Sort by: (All Music: Title: A to Z, Artist: Title: A to Z,
Album: Track No., Folder: Title: A to Z), Output
Settings: Speaker/Earphone, Player Image: Original,
Play Mode: All, Surround: OFF, Equalizer: Flat, Voice
Cancel: OFF
Function
Search Mode: Tab/Reading
Options
ExternalLight: Same as Phone, Ringtone Vol.: Same as
Phone, Ringtone: Same as Phone, Vibration: Same as
Phone, Duration: Same as Phone, MessageFolder:
None, Secret: OFF, Ext. Display: Same as Phone
Options
(Group)
ExternalLight: Same as Phone, Ringtone Vol.: Same as
Phone, Ringtone: Same as Phone, Vibration: Same as
Phone, Duration: Same as Phone, MessageFolder:
None
Addr. Bkup
Auto Sync: OFF, Sync Type: Synchronize
Settings
Select Storage: Phone Memory, Phone Book Lock:
Unlock
Display Link: ON
Communications
Function
Default Setting
Friend Status
My Status: Offline, Request Reply: Always Answer,
Answer Status: (Calls: Answer OK, Mail: Reply OK,
S! Circle Talk: Join OK), Status Setting: ごきげん
(Good mood)
Circle Talk
Loud Speaker: ON
Default Setting
Phone Book
Appendix
14
14-20
921T_web_0802.indb 14-20
08.3.23 1:59:05 PM
Settings
Function
Sounds
Function
Kacha-ble
Default Setting
MissedCall: ON, Messaging: ON, Delivery: ON, Missed Call
Notification: ON, Missed CT: ON, Status: ON
Incoming
Normal
Mode
Ringtone: Pattern 1, Ringtone Vol.: Level 3,
Vibration (Pattern): OFF, Feeling: ON,
Duration: 5 sec
Sound Vol.: Level 3, Earpiece Vol.: Level 5, Speaker Vol.: Level 5,
Battery: ON
Sound Effects
Tone Type: Original (Keypad Tone: Original
1), Tone Volume: Level 1
Manner Mode: Unset, Switch Mode: Silent
Silent
Manner
Mode
Ringtone Vol. (Except alarm volume):
Silent, Vibration: Pattern 1, Alarms
(Alarms: Same as Normal Mode, Alarm
Volume: Same as Normal Mode, Vibration:
Same as Normal mode), Feeling: Same as
Normal Mode, Sound Effects: OFF, Battery:
OFF, Answering Machine: Same as Normal
Mode
Drive
Original
1 to 3
Ringtone Vol.: Silent, Vibration: Pattern 1,
Feeling: ON, Effects: OFF, Battery: OFF,
Answering Machine: ON
Display/Idle Screen (Ku-man)
Function
Default Setting
Idle Screen
Wallpaper: Preset (Picture), Others: 1-line Digit, Active
Window: ON (Always), Ext. Display: Icon+Clock
Main
Screens
Deco (Icons): Original, Deco (Windows): Original, In-Calls:
Original, Messages: Original, Download: Original, Power
On: Original, Power Off: Original
Mini Tool
Mini Tool: Preset
Caller
Details
Picture: ON, Ext. Display: ON
Wide View
IdleScreen: ON, Create Msg: ON, Msg Window: ON, Msg Lists:
ON
Font
Settings
Font Size (General: Medium, Messaging: Medium-Small,
Mobile Web: Medium-Small, PC Browser: Extra-Small, Text
Entry: Medium-Small), Font Color: Pattern 4
Appendix
Alarms
Ringtone Vol.: Silent, Vibration: Pattern 1,
Feeling: Same as Normal Mode, Sound
Effects: OFF, Battery: OFF, Answering
Machine: Same as Normal Mode
Manner
Mode
(Continued)
Default Setting
Ringtone Vol.: Silent, Vibration: OFF,
Feeling: OFF, Sound Effects: OFF, Battery:
OFF, Answering Machine: ON
14
14-21
921T_web_0802.indb 14-21
08.3.23 1:59:05 PM
Default Settings
Function
Lighting
Default Setting
Power Saving: 15 sec, Keypad Light: 5 sec, Displays
(Lighting Time: 5 sec, Brightness: Automatic), Media
Player: Always Bright
Notification
MissedCall: Garnet, Messages: Emerald,
DeliveryCheck: Sapphire, Missed Call
(Voice Mail service): Amethyst, Missed CT:
Blue Topaz, Friend Status: Citrine
Incoming
Voice Call: Garnet, Video Call: Emerald,
Message (Color: Sapphire, Feeling: ON),
DeliveryCheck: Amethyst, Missed Call
(Voice Mail service): Citrine, Circle Talk:
Blue Topaz, Friend Status: Citrine
External
Light
Idle Screen
(Ku-man)
OFF
Security
Function
Default Setting
Password Lock
Phone Closed: OFF, Power Saving: OFF, Power Off:
OFF
Function Lock
Phone Book: Unlock, Calendar: Unlock, Tasks: Unlock,
Call Log: Unlock, Message Log: Unlock
Secret Mode
Hide
Anti-Spam
Sort Messages: Do not Sort, Select Folder: Folder 17
Change
Password
9999
IP Service
ON
Restricted Mode
Web: OFF
Hold
Unset
Phone Settings
Function
Appendix
14
Default Setting
Clock
12hour/24hour: 24 hour, World Clock (City 1: Tokyo,
City 2: Tokyo, Set as Main City: City 1, DST ON/OFF:
OFF)
Sub Menu View
Show
言語選択
(Language)
日本語 (Japanese)
Navigation Keys
A: Active Window, B: Phone Book, D: Dialed
Numbers, C: Received Calls
Side Key
Torch (penlight)
14-22
921T_web_0802.indb 14-22
08.3.23 1:59:05 PM
Call Settings
Connectivity
Function
Default Setting
Intl. Code: 0046010
Intl. Calls
Japan (81), UK (44), Italy (39),
Switzerland (41), Spain (34),
Germany (49), Portugal (351),
Netherlands (31), France (33),
CountryNumber
Monaco (377), USA (1), Sweden
(46), Australia (61), China (86),
Hong Kong (852), Taiwan (886),
South Korea (82)
Function
Bluetooth
Default Setting
ON/OFF: OFF, Settings (Visibility: Show, Set Handsfree:
Private)
Infrared
ON/OFF: OFF
USB
Connection: Always Ask, Battery: ON
Priority
Function
Default Setting
Ans Machine
Setting: OFF, Set Duration: 18 sec
Mid-operation
Auto Answer (ON/OFF: OFF, Set Duration: 10 sec),
Earphone Call: OFF
Video
Message: Pause, DeliveryCheck: Continue
Earphone
Media Player
Pause
Answer Type
Open to Talk: OFF, Any Keys: OFF
Voice Recorder
Message: Pause, DeliveryCheck: Continue
S! Appli
Video Call
Alt. Picture: OFF, Image Quality: Standard, Hold
Setting (Hold on Call: Preset, Hold Answer: Preset),
Mute: OFF, Loud Speaker: ON, Auto Answer: OFF,
Self-view: OFF
Voice Call: Pause Apps, Video Call: Pause Apps,
Message: Continue Apps, Alarm: Pause Apps
Circle Talk
Continue
Specific #s: OFF, Unknown: OFF, Withheld: OFF,
Payphone: OFF, Unavailable: OFF
Offline Mode
OFF
Show My
Number
OFF
Watching
Voice Call: Pause, Video Call: Pause,
Message: Pause, DeliveryCheck:
Continue, Alarm: Pause
Recording
Voice Call: Continue, Video Call:
Continue, Message: Continue,
DeliveryCheck: Continue, Alarm:
Continue
TV
Appendix
Reject Calls
Message: Pause, DeliveryCheck: Continue
14
14-23
921T_web_0802.indb 14-23
08.3.23 1:59:06 PM
Default Settings
Text Entry
Function
Default Setting
Custom Window
Display: Display
Clear Setting
Delete
Input Method
Standard
Font Size
Medium-Small
Prediction
Predict Text: ON, Phrase: ON
Active Window
Function
Default Setting
ON/OFF
ON (Always)
Templates
News
Auto Refresh
Flash News: Manual, News: Manual, S! Loop: Manual
Unread/Read
Show All
Screen Speed
Neutral
Appendix
14
14-24
921T_web_0802.indb 14-24
08.3.23 1:59:06 PM
Glossary
Terminology
Description
Terminology
Description
A third generation (3G) mobile communication system.
Cache
USIM Card
Use the handset with this card inserted. The card stores
subscriber information such as your phone number and
handset data. You can also save Phone Book entries
and other data to the card. When you replace your
handset, use of the same USIM Card in the new
handset enables you to continue using the data stored
on the card.
The location in the handset for temporarily storing the
data of displayed Web pages, etc.
S! Appli
Applications including games and 3D images that can
be downloaded from the Web pages of S! Appli
providers. Some applications connect to the network to
obtain information in real time and some applications
can be activated as wallpaper.
USIM PIN
A number required for using the USIM Card with your
handset. This number allows you to prevent others from
using your handset in the event that your handset is
lost or stolen.
FeliCa
S! Mail
A service that allows long text messages with picture,
video and melody attachments to be exchanged.
Contactless IC card technology developed by Sony
Corporation. It allows data to be exchanged by simply
holding an IC card up to a reader device. The 921T
handset is capable of managing multiple types of data,
so it can be used for such things as e-money and a
membership card.
HSDPA
SMS
A service that allows short text messages to be
exchanged between handsets.
Short for High-Speed Downlink Packet Access, HSDPA is
a 3G mobile telephone communication protocol that
provides faster W-CDMA data communication speeds.
SSL
A communication method for transmitting data in an
encrypted form over the Internet. It enables data such
as information related to privacy and credit card
numbers to be sent and received safely and protects
against dangers on the Internet such as eavesdropping,
tampering and spoofing. SSL communication uses
server certificates.
Server
Certificate
A digital certificate for identifying that a site on a server
is trustworthy. The server certificate includes
information necessary for SSL communication
(encrypted communication), server information and a
digital signature of a Certificate Authority to verify that
the server is authentic.
Appendix
3G
14
14-25
921T_web_0802.indb 14-25
08.3.23 1:59:06 PM
Index
Alphabetic Order
Numeric
12hour/24hour ・・・・・・・・・・・・・・・・・・・・・ 1-12
3D Pictograms ・・・・・・・・・・・・・・・・・・・・ 13-16
A
Index
14
AC Charger ・・・・・・・・・・・・・・・・・・・ 1-8, 14-11
Access Memory ・・・・・・・・・・・・・・・・・・・ 13-29
Account Name ・・・・・・・・・・・・・・・・・・・・・・・4-3
Active Window ・・・・・・・・・・・・・・・・・・・・・・・2-7
Change Icon・・・・・・・・・・・・・・・・・・・・・・・・ 2-26
Check Member Status ・・・・・・・・・・・・・・・・ 2-26
Contact Members ・・・・・・・・・・・・・・・・・・・・ 2-8
Edit Members List ・・・・・・・・・・・・・・・・・・・ 2-26
My Status Display ・・・・・・・・・・・・・・・・・・・ 2-26
ON/OFF Settings ・・・・・・・・・・・・・・・・・・・・ 2-25
Save People to Members List ・・・・・・・・・・・・ 2-8
Templates ・・・・・・・・・・・・・・・・・・・・・・・・・ 2-25
Add Address ・・・・・・・・・・・・・・・・・・・・・・・ 4-13
Add Frame (Camera) ・・・・・・・・・・・・・・・・・・7-7
Add Frame (Edit Picture) ・・・・・・・・・・・・ 7-11
Add Stamp (Edit Picture) ・・・・・・・・・・・・ 7-12
Add Text (Edit Picture) ・・・・・・・・・・・・・・ 7-11
Address Library ・・・・・・・・・・・・・・・・・・・・ 2-12
Alarms ・・・・・・・・・・・・・・・・・・・・・・・ 9-18, 9-33
Alarm Tone・・・・・・・・・・・・・・・・・・・・・・・・ 13-42
Alphanumerics ・・・・・・・・・・・・・・・・・・・・・ 2-11
Alternative Picture ・・・・・・・・・・・ 3-15, 13-23
Animation ・・・・・・・・・・・・・・・・・・・・・・・・・・・2-6
Answer Type ・・・・・・・・・・・・・・・・・・・・・・・ 13-9
Answering Machine ・・・・・・・・・・・・・・・・・・3-5
Delete Recorded Messages ・・・・・・・・・・・・ 3-13
Response Time ・・・・・・・・・・・・・・・・・・・・・・ 13-9
Anti-Spam ・・・・・・・・・・・・・・・・・・・・・・・・ 13-16
Any Key Answer ・・・・・・・・・・・・・・・・・・・・ 13-9
Areas List・・・・・・・・・・・・・・・・・・・・・・・・・・ 9-16
Delete ・・・・・・・・・・・・・・・・・・・・・・・・・・・・ 9-32
Arrange ・・・・・・・・・・・・・・・・・・・・・・・ 4-5, 4-15
Attachments ・・・・・・・・・・・・・・・・・・・・・・・・・4-4
Save ・・・・・・・・・・・・・・・・・・・・・・・・・・・・・・ 4-19
Audio Output Setting (Video Call) ・・・ 13-23
Audio Output Switching (During Call)
S! Circle Talk ・・・・・・・・・・・・・・・・・・・・・・・ 10-8
Video Call ・・・・・・・・・・・・・・・・・・・・・・・・・ 3-15
Voice Call (Handsfree Call) ・・・・・・・・・・・・ 3-14
Authentication (Internet)・・・・・・・・・・・ 13-19
Authentication PIN Code (Bluetooth Passkey) ・・ 12-4
Auto Answer (Earphone-Microphone) ・・ 13-24
Auto Answer (Video Call)・・・・・・・・・・・・ 3-13
Auto Answer List (Video Call) ・・・・・・・ 13-23
Auto Focus Lock ・・・・・・・・・・・・・・・・・・・・ 7-10
Auto Play (Attachments) ・・・・・・・・・・・・ 4-14
Auto Save ・・・・・・・・・・・・・・・・・・・・・・・・ 13-25
Auto-delete・・・・・・・・・・・・・・・・・・ 4-10, 13-17
Auto-extract ・・・・・・・・・・・・・・・・・・・・・・ 13-16
Available Memory ・・・・・14-12, 14-13, 14-14
B
Background Play (Multitask)・・・・・・・・・ 8-10
Backup
Relocate ・・・・・・・・・・・・・・・・・・・・・・・・・・ 12-15
S! Addressbook Back-up ・・・・・・・・・・・・・ 12-12
Transfer All ・・・・・・・・・・・・・・・・・・・・・・・・ 12-10
Barcode Reader ・・・・・・・・・・・・・・・・・・・・ 9-26
Battery ・・・・・・・・・・・・・・・・・・・・・・・・ 1-8, 14-4
Charge ・・・・・・・・・・・・・・・・・・・・・・・ 1-8, 13-37
Installation ・・・・・・・・・・・・・・・・・・・・・・・・・ 14-5
Battery Level ・・・・・・・・・・・・・・ 1-5, 1-6, 14-4
Beeper Mode ・・・・・・・・・・・・・・・・・・・・・ 14-10
Bluetooth® ・・・・・・・・・・・・・・・・・・・・・・・・ 12-4
Delete Device ・・・・・・・・・・・・・・・・・・・・・・ 12-14
Details ・・・・・・・・・・・・・・・・・・・・・・・・・・・ 13-36
Device Name ・・・・・・・・・・・・・・・・ 12-14, 13-36
Dial-up Connections ・・・・・・・・・・・・・・・・ 12-14
Disconnect ・・・・・・・・・・・・・・・・・・・・・・・・ 12-14
ON/OFF ・・・・・・・・・・・・・・・・・・・・・・・・・・・ 12-5
Paired Device List ・・・・・・・・・・・・・・・・・・・・ 12-5
Search Device ・・・・・・・・・・・・・・・・・・・・・・ 12-5
Send a Picture/Video After Shooting ・・・・・ 7-11
Send My Details ・・・・・・・・・・・・・・・・・・・・ 12-14
Set Handsfree ・・・・・・・・・・・・・・・・・・・・・ 13-36
Transfer Files ・・・・・・・・・・・・・・・・・・・・・・・ 12-6
Trust Device ・・・・・・・・・・・・・・・・・・・・・・・ 13-36
Visibility ・・・・・・・・・・・・・・・・・・・・・・・・・・ 13-36
Bookmarks ・・・・・・・・・・・・・・・・・・・・・・・・・・5-6
Create Folder ・・・・・・・・・・・・・・・・・・・・・・・・ 5-9
Delete ・・・・・・・・・・・・・・・・・・・・・・・・・・・・・ 5-9
14-26
921T_web_0802.indb 14-26
08.3.23 1:59:06 PM
Edit ・・・・・・・・・・・・・・・・・・・・・・・・・・・・・・・ 5-9
Move ・・・・・・・・・・・・・・・・・・・・・・・・・・・・・・ 5-9
Send via Mail ・・・・・・・・・・・・・・・・・・・・・・・・ 5-9
BookSurfing® ・・・・・・・・・・・・・・・・・・・・・・ 9-25
Brightness ・・・・・・・・・・・・・・・・・・・ 13-5, 13-28
Brightness Sensor ・・・・・・・・ 1-3, 13-5, 13-28
Browser Reset ・・・・・・・・・・・・・・・・・・・・ 13-20
Browser Settings ・・・・・・・・・・・・・・・・・・ 13-19
Brush Up ・・・・・・・・・・・・・・・・・・・・・・・・・・ 7-10
C
Color Control ・・・・・・・・・・・・・・・・・・・・・ 13-25
Communication Mode (USB Connection) ・・ 12-8
Confirmation Window
Data Broadcast ・・・・・・・・・・・・・・・・・・・・ 13-29
Mail ・・・・・・・・・・・・・・・・・・・・・・・・・・・・・ 13-15
Reset ・・・・・・・・・・・・・・・・・・・・・・・・・・・・ 13-33
Content Key ・・・・・・・・・・・・・・・・・・・・・・・ 2-20
Backup ・・・・・・・・・・・・・・・・・・・・・・・・・・・ 12-10
Continuous Standby Time ・・・・・・・・・・ 14-11
Continuous Talk Time ・・・・・・・・・・・・・・ 14-11
Conversion Prediction ・・・・・・・・・・・・・・ 2-26
Converter ・・・・・・・・・・・・・・・・・・・・ 9-20, 9-33
Cookie ・・・・・・・・・・・・・・・・・・・・・ 13-19, 13-20
Copy (Characters) ・・・・・・・・・・・・・・・・・・ 2-12
Cost Limit ・・・・・・・・・・・・・・・・・・・・・・・・ 13-22
Country Number List・・・・・・・・・・・・・・・ 13-22
Custom Window ・・・・・・・・・・・・・・・・・・・ 13-34
Customize Handset Address ・・・・・・・・・・・4-3
Cut (Characters) ・・・・・・・・・・・・・・・・・・・・ 2-12
D
Dakuten (゛)/Handakuten ( ゜) ・・・・・・・ 2-10
Data Broadcast Mode ・・・・・・・・・・・・・・・・・6-4
Data Broadcasts・・・・・・・・・・・・・・・・・・・・・・6-2
Data Folder ・・・・・・・・・・・・・・・・・・・・・・・・ 2-20
Available Memory ・・・・・・・・・・・・・ 2-30, 14-12
Datacasting・・・・・・・・・・・・・・・・・・・・・・・ 13-29
Date & Time ・・・・・・・・・・・・・・・・・・・・・・・ 1-12
Date Stamp ・・・・・・・・・・・・・・・・・・・・・・・ 13-26
Daylight Saving Time ・・・・・・・・・ 9-19, 13-42
Index
Calculator ・・・・・・・・・・・・・・・・・・・・・・・・・ 9-20
Currency Conversion ・・・・・・・・・・・・・・・・・ 9-33
Calendar ・・・・・・・・・・・・・・・・・・・・・・・・・・・・9-4
Calendar Lock ・・・・・・・・・・・・・・・・・・・・・ 13-39
First View ・・・・・・・・・・・・・・・・・・・・・・・・・ 13-39
Set Holiday・・・・・・・・・・・・・・・・・・・・・・・・・ 9-28
Call ・・・・・・・・・・・・・・・・・・・・・・・・・・・・・・・・・3-2
Call Barring ・・・・・・・・・・・・・・・・・・・・・・・・ 3-17
Call Barring Service Code ・・・・・・・・・・・ 1-14
Change ・・・・・・・・・・・・・・・・・・・・・・・・・・・ 3-18
Call Forward ・・・・・・・・・・・・・・・・・・・・・・・ 3-10
Call Lock ・・・・・・・・・・・・・・・・・・・・・・・・・・ 9-12
Lock Phone Number ・・・・・・・・・・・・・・・・・ 9-12
Lock/Cancel ・・・・・・・・・・・・・・・・・・・・・・・・ 9-13
Missed Count・・・・・・・・・・・・・・・・・・・・・・・ 9-31
ON/OFF ・・・・・・・・・・・・・・・・・・・・・・・・・・・ 9-13
Call Log ・・・・・・・・・・・・・・・・・・・・・・・・・・・・・3-9
Call Log Lock ・・・・・・・・・・・・・・・・・・・・・・ 3-15
Call Time & Cost・・・・・・・・・・・・・・ 3-16, 13-22
Call Waiting・・・・・・・・・・・・・・・・・・・・・・・・ 3-17
Caller Details ・・・・・・・・・・・・・・・・・・・・・・ 13-4
Camera・・・・・・・・・・・・・・・・・・・・・・・・・ 1-3, 7-2
Settings ・・・・・・・・・・・・・・・・・・・・・・・・・・ 13-25
Camera Modes ・・・・・・・・・・・・・・・・・・・・・・・7-3
Camera/Video Indicator ・・・・・・・・・・・・・・・1-3
Capture (TV) ・・・・・・・・・・・・・・・・・・・・・・・・・6-8
Card Reader Mode ・・・・・・・・・・・・ 12-8, 12-9
Category ・・・・・・・・・・・・・・・・・・・・・・・・・ 13-14
Center Access Code・・・・・・・・・・・・・・・・・ 1-14
Change Bright (Edit Picture) ・・・・・・・・・ 7-12
Change View (Switch Browser) ・・・・・・・・・5-7
Channel Selection ・・・・・・・・・・・・・・・・・・・・6-4
Channel Settings ・・・・・・・・・・・・・・・・ 6-3, 6-8
Charge Battery ・・・・・・・・・・・・・・・・・・・・・・・1-8
AC Charger ・・・・・・・・・・・・・・・・・・・・・・・・・ 1-8
Desktop Cradle ・・・・・・・・・・・・・・・・・・・・・・ 1-9
In-Car Charger ・・・・・・・・・・・・・・・・・・・・・・・ 1-9
PC Connection ・・・・・・・・・・・・・・・・・・・・・ 13-37
Charger Terminal ・・・・・・・・・・・・・・・・・・・・・1-3
Charging In Progress Image ・・・・・・・・・ 13-7
Charging Indicator ・・・・・・・・・・・・・・・・・・・1-3
Charging Time ・・・・・・・・・・・・・・・・・・・・ 14-11
Clamshell Open Position ・・・・・・・・・ 1-4, 7-2
Clear Authentication ・・・・・・・・・・・・・・・ 13-20
Clear Cache ・・・・・・・・・・・・・・・・・・・・・・・ 13-20
Clear Field ・・・・・・・・・・・・・・・・・・・・・・・・・ 4-14
Clear Memory ・・・・・・・・・・・・・・・・・・・・・ 13-33
Clear Memory (Data Broadcast) ・・・・・ 13-29
Clear Setting・・・・・・・・・・・・・・・・・・・・・・ 13-34
Clock Type Setting ・・・・・・・・・・・・・・・・・・・・2-7
14
14-27
921T_web_0802.indb 14-27
08.3.23 1:59:07 PM
Index
Default Settings ・・・・・・・・・・・・・・・・・・・ 14-17
Delay Timer ・・・・・・・・・・・・・・・・・・・・・・・・・・7-7
Delete (Characters) ・・・・・・・・・・・・・・・・・ 2-12
Delete Messages ・・・・・・・・・・・・・・ 4-17, 4-18
Delivery Check ・・・・・・・・・・・・・・・ 4-15, 13-15
Delivery Report ・・・・・・・・・・・・・・・・・・・・ 4-18
Delivery Time ・・・・・・・・・・・・・・・・ 4-15, 13-15
Desktop Cradle ・・・・・・・・・・・・・・・・・・・・・・1-9
Dialed Numbers ・・・・・・・・・・・・・・・・・・・・・・3-9
Delete Call Log Records ・・・・・・・・・・・・・・・ 3-15
Redial ・・・・・・・・・・・・・・・・・・・・・・・・・・・・・ 3-12
Save to Phone Book・・・・・・・・・・・・・・・・・・ 2-18
Dial-up Connections ・・・・・・・・・ 12-14, 12-15
Dictionary ・・・・・・・・・・・・・・・・・・・・・・・・・ 9-20
Digital Mode・・・・・・・・・・・・・・・・・・・・・・・・・7-3
Display ・・・・・・・・・・・・・・・・・・・・・・・・・・・・・・1-5
Display Balance ・・・・・・・・・・・・・・・・・・・・ 9-31
Display Characters in Reverse Order・・ 2-10
Display Positions ・・・・・・・・・・・・・・・・・・・・・1-4
Display Settings ・・・・・・・・・・・ 2-6, 2-25, 13-2
Document Viewer ・・・・・・・・・・・・・・・・・・ 9-24
Drafts ・・・・・・・・・・・・・・・・・・・・・・・・・・・・・ 4-15
E
Index
14
Earphone Microphone Jack ・・・・・・・・・・・・1-3
Earphone-Microphone Answer ・・・・・・・ 3-13
Earphone-Microphone Call ・・・・・・・・・・ 3-13
Earphone-Microphone Settings ・・・・・ 13-24
Earpiece ・・・・・・・・・・・・・・・・・・・・・・・・・・・・・1-3
Earpiece Volume (During Call)
S! Circle Talk ・・・・・・・・・・・・・・・・・・・・・・・ 10-8
Video Call ・・・・・・・・・・・・・・・・・・・・・・・・・・ 3-7
Voice Call ・・・・・・・・・・・・・・・・・・・・・・・・・・・ 3-4
Earpiece Volume Setting ・・・・・・・・・・・・ 3-12
e-Book Viewer ・・・・・・・・・・・・・・・・・・・・・ 9-25
Economy Mode ・・・・・・・・・・・・・・・・・・・ 13-28
Edit Picture ・・・・・・・・・・・・・・・・・・・・・・・・・・7-8
Edit Text ・・・・・・・・・・・・・・・・・・・・・・・・・・・ 2-12
Message ・・・・・・・・・・・・・・・・・・・・・・・・・・ 4-14
Effects ・・・・・・・・・・・・・・・・・・・・・・・ 7-9, 13-25
Electronic Books ・・・・・・・・・・・・・・・・・・・ 9-25
E-mail Address/URL Extensions ・・・・・・ 2-12
Emergency Call Location Notification ・・3-3
Emergency Calls・・・・・・・・・・・・・・・・・・・・・・3-3
Emoticons ・・・・・・・・・・・・・・・・・・・・・・・・・ 2-11
Save Original Emoticons ・・・・・・・・・・・・・・ 2-27
Encode ・・・・・・・・・・・・・・・・・・・・・・・・・・・・ 7-11
Encoding Type ・・・・・・・・・・・・・・・・・・・・ 13-21
Equalizer ・・・・・・・・・・・・・・・・・・・・・・・・・・ 8-10
Events ・・・・・・・・・・・・・・・・・・・・・・・・・・・・・・9-4
Alarm ・・・・・・・・・・・・・・・・・・・・・・・・ 9-4, 13-38
Category ・・・・・・・・・・・・・・・・・・・・・・・・・ 13-38
Check ・・・・・・・・・・・・・・・・・・・・・・・・・・・・・・ 9-5
Delete ・・・・・・・・・・・・・・・・・・・・・・・・ 9-5, 9-30
Edit ・・・・・・・・・・・・・・・・・・・・・・・・・・・・・・ 9-29
Font Color ・・・・・・・・・・・・・・・・・・・・・・・・ 13-39
Reminder ・・・・・・・・・・・・・・・・・・・・・・・・・・ 9-28
Repeat for ・・・・・・・・・・・・・・・・・・・・・・・・・ 9-29
Set a Link to Related Information ・・・・・・ 13-38
Show/Hide ・・・・・・・・・・・・・・・・・・・・・・・・・ 9-29
Stamp Icon ・・・・・・・・・・・・・・・・・・・・・・・・ 13-38
Expiry ・・・・・・・・・・・・・・・・・・・・・・・ 4-15, 13-15
Exposure ・・・・・・・・・・・・・・・・・・・・・・・ 7-3, 7-6
External Device Port ・・・・・・・・・・・・・・・・・・1-3
External Device Settings ・・・・・・・・・・・ 13-24
External Display ・・・・・・・・・・・・・・・・・・・・・・1-6
External Light ・・・・・・・・・・・・・ 1-3, 2-29, 13-6
F
Feeling Mail ・・・・・・・・・・・・・・・・・・・・・・・・・4-5
File Name (Camera) ・・・・・・・・・・・・・・・ 13-25
Files
Attach ・・・・・・・・・・・・・・・・・・・・・・・・・・・・・ 4-4
Copy ・・・・・・・・・・・・・・・・・・・・・・・・・・・・・ 2-32
Delete ・・・・・・・・・・・・・・・・・・・・・・・・・・・・ 2-32
Details ・・・・・・・・・・・・・・・・・・・・・・・ 2-30, 8-11
Move ・・・・・・・・・・・・・・・・・・・・・・・・・・・・・ 2-22
Rename ・・・・・・・・・・・・・・・・・・・・・・・・・・・ 2-31
Sort by ・・・・・・・・・・・・・・・・・・・・・・・ 2-31, 8-10
Use・・・・・・・・・・・・・・・・・・・・・・・・・・・・・・・ 2-30
Filter (Mail) ・・・・・・・・・・・・・・・・・・・・・・・ 13-18
Flicker ・・・・・・・・・・・・・・・・・・・・・・・・・・・ 13-25
Focus Mode・・・・・・・・・・・・・・・・・・ 7-10, 13-26
Folders
Copy Folder ・・・・・・・・・・・・・・・・・・・・・・・・ 2-32
Create Folder ・・・・・・・・・・・・・・・・・・・ 2-21, 5-9
Delete Folder ・・・・・・・・・・・・・・・・・・・・・・・ 2-32
Move Folder ・・・・・・・・・・・・・・・・・・・ 2-32, 4-19
Rename Folder ・・・・・・・・・・・・・・・・・ 2-31, 4-17
Font Color ・・・・・・・・・・・・・・ 4-15, 13-5, 13-39
14-28
921T_web_0802.indb 14-28
08.3.23 1:59:08 PM
Font Settings ・・・・・・・・・・・・・・・・・・・・・・ 13-5
Font Size
Arrange Mail ・・・・・・・・・・・・・・・・・・・・・・・・ 4-5
Display Settings ・・・・・・・・・・・・・・・・・・・・・ 13-5
Internet ・・・・・・・・・・・・・・・・・・・・・・・・・・ 13-21
Mail ・・・・・・・・・・・・・・・・・・・・・・・・・・・・・ 13-15
Text Entry ・・・・・・・・・・・・・・・・・・・・・・・・・・ 2-27
Format Card ・・・・・・・・・・・・・・・・・・・・・・・ 2-24
Forward Mail ・・・・・・・・・・・・・・・・・ 4-16, 4-18
Function Lock ・・・・・・・・・・・・・・・・・・・・・・ 11-4
G
Gamendeco ・・・・・・・・・・・・・・・・・・・・・・・・ 13-2
GMT Offset ・・・・・・・・・・・・・・・・・・・・・・・ 13-42
Grid・・・・・・・・・・・・・・・・・・・・・・・・・・・・・・ 13-26
Group (Mail) ・・・・・・・・・・・・ 4-13, 4-14, 13-14
Group (Phone Book) ・・・・・ 2-16, 2-29, 13-35
H
I
IC ・・・・・・・・・・・・・・・・・・・・・・・・・・・・・・・・・ 14-2
IC Card ・・・・・・・・・・・・・・・・・・・・・・・・・・・・ 9-10
Card Settings ・・・・・・・・・・・・・・・・・ 9-12, 13-40
IC Card Lock ・・・・・・・・・・・・・・・・・・・・・・・ 9-12
Ichi Navi・・・・・・・・・・・・・・・・・・・・・・・・・・・ 9-14
Icons
Bluetooth® Compatible Devices ・・・・・・・・ 12-5
Display ・・・・・・・・・・・・・・・・・・・・・・・・・・・・・ 1-5
External Display ・・・・・・・・・・・・・・・・・・・・・・ 1-6
Message List ・・・・・・・・・・・・・・・・・・・・・・・ 4-10
Text Input Mode ・・・・・・・・・・・・・・・・・・・・・ 2-9
TV Links ・・・・・・・・・・・・・・・・・・・・・・・・・・・・ 6-8
Video Call ・・・・・・・・・・・・・・・・・・・・・・・・・・ 3-7
Idle Screen (Ku-man) ・・・・・・・・・・・・・・ 13-43
Idokoro Mail ・・・・・・・・・・・・・・・・・・・・・・・ 9-16
Image Mode ・・・・・・・・・・・・・・・・・・・・・・・・・6-5
Image Quality (Camera) ・・・・・・・・・・・・ 13-25
Image Quality (TV) ・・・・・・・・・・・・・・・・ 13-28
Image Quality (Video Call) ・・・・ 3-15, 13-23
Image Stabilization ・・・・・・・・・・・・・・・・ 13-26
In-Car Charger ・・・・・・・・・・・・・・・・・・・・・・・1-9
Incoming Call Image ・・・・・・・・・・・・・・・・ 13-2
Incoming Message Image ・・・・・・・・・・・ 13-2
Incoming Messages・・・・・・・・・・・・・・・・・・・4-8
Infinity ・・・・・・・・・・・・・・・・・・・・・・・・・・・・ 7-10
Information Prompt ・・・・・・・・・・・・・・・・・・1-7
Infrared ・・・・・・・・・・・・・・・・・・・・・・・・・・・ 12-2
Authentication Password ・・・・・・・・・・・・・・ 12-2
Dial-up Connections ・・・・・・・・・・・・・・・・ 12-14
ON/OFF ・・・・・・・・・・・・・・・・・・・・・・・・・・・ 12-2
Send a Picture/Video After Shooting ・・・・・ 7-11
Send My Details ・・・・・・・・・・・・・・・・・・・・ 12-14
Transfer Files ・・・・・・・・・・・・・・・・・・・・・・・ 12-2
Infrared Port ・・・・・・・・・・・・・・・・・・・ 1-3, 12-2
Input Method ・・・・・・・・・・・・・・・・・・・・・ 13-34
Insert ・・・・・・・・・・・・・・・・・・・・・・・・ 2-27, 4-13
Internal Antenna ・・・・・・・・・・・・・・・・・・・・・1-3
International Call・・・・・・・・・・・・・・・・・・・・・3-5
International Code ・・・・・・・・・・・・・・・・ 13-22
Internet ・・・・・・・・・・・・・・・・・・・・・・・・・・・・・5-2
Settings ・・・・・・・・・・・・・・・・・・・・・・・・・・ 13-19
Internet Security Code ・・・・・・・・・・・・・・ 1-14
Register/Change ・・・・・・・・・・・・・・・・・・・・ 11-5
IP Service・・・・・・・・・・・・・・・・・・・・・・・・・ 13-44
J
Jump ・・・・・・・・・・・・・・・・・・・・・・・・・・・・・・・・5-9
K
Kacha-ble ・・・・・・・・・・・・・・・・・・・・・・・・ 13-13
Keitaideco ・・・・・・ 2-3, 2-6, 2-30, 13-2, 13-11
Key Guide
Camera ・・・・・・・・・・・・・・・・・・・・・・・・ 7-3, 7-6
Media Player ・・・・・・・・・・・・・・・・・・・・ 8-5, 8-6
TV ・・・・・・・・・・・・・・・・・・・・・・・・・・・・ 6-8, 6-9
Index
Handset Code ・・・・・・・・・・・・・・・・・・・・・・ 1-14
Change ・・・・・・・・・・・・・・・・・・・・・・・・・・・ 11-2
Handset Parts & Functions・・・・・・・・・・・・・1-2
Handsfree (Bluetooth®) ・・・・・・・・・・・・ 13-36
Handsfree Call ・・・・・・・・・・・・・・・・・・・・・ 3-14
Handstrap Hole ・・・・・・・・・・・・・・・・・・・・・・1-3
Hiragana to Alphanumerics/Katakana Conversion ・・ 2-10
History (Internet) ・・・・・・・・・・・・・・・・ 5-3, 5-4
Delete ・・・・・・・・・・・・・・・・・・・・・・・・・・・・・ 5-7
Hold ・・・・・・・・・・・・・・・・・・・・・・・・・・ 1-3, 11-3
Hold Answer ・・・・・・・・・・・・・・・・・・・・・・・ 3-13
Hold Call ・・・・・・・・・・・・・・・・・・・・・・・・・・ 3-14
Hold Setting (Video Call) ・・・・・・・・・・・ 13-23
14
14-29
921T_web_0802.indb 14-29
08.3.23 1:59:08 PM
Index
Key Shortcut ・・・・・・・・・・・・・・・・・・・・・・ 13-25
Keypad ・・・・・・・・・・・・・・・・・・・・・ 1-3, 2-4, 6-4
Keypad Light・・・・・・・・・・・・・・・・・・・・・・・ 13-5
Keypad Lock ・・・・・・・・・・・・・・・・・・・・・・・ 11-3
Kitchen Timer ・・・・・・・・・・・・・・・・・・・・・・ 9-21
Ku-man Mail ・・・・・・・・・・・・・・・・・・・・・・・ 9-27
Ku-man's Room ・・・・・・・・・・・・・・・・・・・・ 9-27
L
Index
14
Landscape View Operations ・・・・・・・・・・・2-3
Language (言語選択) ・・・・・・・・・・・・・・・・ 13-6
License Information (S! Appli) ・・・・・・ 13-32
Lifestyle-Appli ・・・・・・・・・・・・・・・・・・・・・ 9-10
Display Balance ・・・・・・・・・・・・・・・・・・・・・ 9-31
Lighting ・・・・・・・・・・・・・・・・・・・・・ 13-5, 13-32
Lighting Time ・・・・・・・・・・・・・・・・・・・・・・ 13-5
Line Break ・・・・・・・・・・・・・・・・・・・・・・・・・ 2-26
Locate Me ・・・・・・・・・・・・・・・・・・・・・・・・・ 9-14
Location Information Send Setting・・ 13-29, 13-41
Location Logs ・・・・・・・・・・・・・・・・・・・・・・ 9-32
Location Mail ・・・・・・・・・・・・・・・・・・・・・・ 9-32
Lock Password ・・・・・・・・・・・・・・・・・・・・・ 9-12
Lock Phone Number ・・・・・・・・・・・・・・・・ 9-12
Loud Speaker (Video Call) ・・・・・・・・・・ 13-23
Lower Case ・・・・・・・・・・・・・・・・・・・・・・・・ 2-10
M
Macro ・・・・・・・・・・・・・・・・・・・・・・・・・・・・・ 7-10
Mail Settings ・・・・・・・・・・・・・・・・・・・・・ 13-14
Creating ・・・・・・・・・・・・・・・・・・・・・・・・・・ 13-14
Display ・・・・・・・・・・・・・・・・・・・・・・・・・・・ 13-15
Receiving ・・・・・・・・・・・・・・・・・・・・・・・・・ 13-16
Sending ・・・・・・・・・・・・・・・・・・・・・・・・・・ 13-15
Mail Lock ・・・・・・・・・・・・・・・・・・・・・・・・・・ 9-12
Address ・・・・・・・・・・・・・・・・・・・・・・・・・・・ 9-31
Lock Password ・・・・・・・・・・・・・・・・・・・・・・ 9-12
Lock/Cancel ・・・・・・・・・・・・・・・・・・・・・・・・ 9-13
Notification ・・・・・・・・・・・・・・・・・・・・・・・ 13-40
ON/OFF ・・・・・・・・・・・・・・・・・・・・・・・・・・・ 9-13
Mail Type ・・・・・・・・・・・・・・・・・・・・・・・・・・ 4-14
Default Type ・・・・・・・・・・・・・・・・・・・・・・・ 13-14
Mailbox Volume ・・・・・・・・・・・・・・・・・・・・ 4-17
Main Menu ・・・・・・・・・・・・・・・・・・・・・ 2-2, 2-3
Reset Options ・・・・・・・・・・・・・・・・・・・・・・ 2-25
Main Screens ・・・・・・・・・・・・・・・・・・・・・・ 13-2
Manner Mode ・・・・・・・・・・・・・・・・・・・・・・ 1-13
Customize Original Mode ・・・・・・・・・・・・ 13-11
Switch Mode ・・・・・・・・・・・・・・・・・・・・・・ 13-11
Manufacture # ・・・・・・・・・・・・・・ 13-19, 13-29
Map URL Settings ・・・・・・・・・・・・・・・・・ 13-41
Media Player・・・・・・・・・・・・・・・・・・・・・・・・・8-2
Lighting ・・・・・・・・・・・・・・・・・・・・・・・・・・・ 13-5
Priority ・・・・・・・・・・・・・・・・・・・・・・・・・・・ 13-10
Melody List ・・・・・・・・・・・・・・・・・・・・・・・ 14-16
Memory Card ・・・・・・・・・・・・・・・・・・・・・・ 2-23
Memory Card Backup ・・・・・・・・・・・・・・ 12-10
Relocate ・・・・・・・・・・・・・・・・・・・・・・・・・・ 12-15
Memory Card Slot ・・・・・・・・・・・・・・・・・・・・1-3
Memory Status・・・・・・・・・・・・・・・・ 2-28, 2-30
Message Box ・・・・・・・・・・・・・・・・・・・・・・ 4-10
Settings ・・・・・・・・・・・・・・・・・・・・・・・・・・ 13-17
Message Details ・・・・・・・・・・・・・・・・・・・ 4-19
Message Folder ・・・・・・・・・・・・・・・・・・・・ 2-29
Message List ・・・・・・・・・・・・・・・・・・・・・・・ 4-10
Settings ・・・・・・・・・・・・・・・・・・・・ 13-17, 13-18
Messaging ・・・・・・・・・・・・・・・・・・・・・・・・・・・4-2
Microphone・・・・・・・・・・・・・・・・・・・・・・・・・・1-3
Mini Photo ・・・・・・・・・・・・・・・・・・・・・・・・ 13-4
Mini Tool ・・・・・・・・・・・・・・・・・・・・ 13-3, 13-18
Missed Call Notification・・・・・・・・・・・・・ 3-11
Mobile Light ・・・・・・・・・・・・・・・・ 1-3, 7-3, 7-6
Mobile Mode ・・・・・・・・・・・・・・・・・・・・・・・・7-3
Mosaic (Edit Picture)・・・・・・・・・・・・・・・・ 7-12
Multi Selector・・・・・・・・・・・・・・・・・ xi, 1-3, 2-4
Reset ・・・・・・・・・・・・・・・・・・・・・・・・・・・・・ 2-25
Multi Shots ・・・・・・・・・・・・・・・・・・・・・・・・・・7-7
Multiparty Call ・・・・・・・・・・・・・・・・・・・・・ 3-17
Music File Playback Window ・・・・・・・・・・・8-4
Music Player ・・・・・・・・・・・・・・・・・・・・・・・・・8-5
Mute ・・・・・・・・・・・・・・・・・・・・・・・・ 3-13, 13-23
My Details ・・・・・・・・・・・・・・・ 3-3, 3-12, 12-14
My Library ・・・・・・・・・・・・・・・・・・・・・・・・・ 8-11
My Locations ・・・・・・・・・・・・・・・・・・・・・・ 9-32
My Status ・・・・・・・・・・・・・・・・・・・・・・・・・ 10-4
N
Name Conversion ・・・・・・・・・・・・・・・・・・ 2-26
Navi Appli ・・・・・・・・・・・・・・・・・・・ 9-14, 13-41
NAVI Settings ・・・・・・・・・・・・・・・・・・・・・ 13-41
Notepad・・・・・・・・・・・・・・・・・・・・・・・・・・・・・9-8
14-30
921T_web_0802.indb 14-30
08.3.23 1:59:09 PM
Delete ・・・・・・・・・・・・・・・・・・・・・・・・ 9-8, 9-30
Edit ・・・・・・・・・・・・・・・・・・・・・・・・・・・・・・ 9-30
Notification (S! Friend's Status) ・・ 10-5, 10-9
Number Memo ・・・・・・・・・・・・・・・・・・・・・ 3-14
O
Offline Mode ・・・・・・・・・・・・・・・・・・・・・・ 1-13
Off-timer ・・・・・・・・・・・・・・・・・・・・・・・・・ 13-28
One Seg ・・・・・・・・・・・・・・・・・・・・・・・・・・・・・6-2
Open to Talk ・・・・・・・・・・・・・・・・・・・・・・・ 13-9
Osaifu-Keitai® ・・・・・・・・・・・・・・・・・・・・・・ 9-10
Output Setting (Media Player) ・・・・・・ 13-31
Output Settings (TV) ・・・・・・・・・・・・・・・・・・6-8
Overlay (Edit Picture) ・・・・・・・・・・・・・・・・・7-9
P
Power Saving ・・・・・・・・・・・・・・・・・・・・・・ 13-5
Power-off Screen ・・・・・・・・・・・・・・ 1-11, 13-3
Power-on Screen ・・・・・・・・・・・・・・・・・・・ 13-3
Prediction ・・・・・・・・・・・・・・・・・・・ 2-26, 13-34
Preview ・・・・・・・・・・・・・・・・・・・・・・・・・・ 13-27
Priority (Mail) ・・・・・・・・・・・・・・・・ 4-16, 13-15
Priority Settings ・・・・・・・・・・・・・ 13-10, 13-32
Program Guide ・・・・・・・・・・・・・・・・・・・・・・・6-5
Protect (Mail) ・・・・・・・・・・・・・・・・・・・・・・ 4-17
PUK (Personal Unblocking Key) Code ・・ 11-5, 14-2
Q
QR Codes ・・・・・・・・・・・・・・・・・・・・・・・・・・ 9-26
R
Reader/Writer ・・・・・・・・・・・・・・・・・・・・・・ 9-11
Received Calls ・・・・・・・・・・・・・・・・・・・・・・・3-9
Call from ・・・・・・・・・・・・・・・・・・・・・・・・・・ 3-12
Delete Call Log Records ・・・・・・・・・・・・・・・ 3-15
Save to Phone Book・・・・・・・・・・・・・・・・・・ 2-18
Recent ・・・・・・・・・・・・・・・・・・・・・・・・・・・・ 8-10
Recipients List ・・・・・・・・・・・・・・・・・・・・・ 9-16
Delete ・・・・・・・・・・・・・・・・・・・・・・・・・・・・ 9-32
Reconvert ・・・・・・・・・・・・・・・・・・・・・・・・・ 2-27
Record Videos・・・・・・・・・・・・・・・・・・・・・・・・7-5
Settings ・・・・・・・・・・・・・・・・・・・・ 13-25, 13-27
Record/Play Programs (TV) ・・・・・・・・・・・・6-6
Recorded Programs (TV) ・・・・・・・・・・・・・・6-6
Delete ・・・・・・・・・・・・・・・・・・・・・・・・・・・・・ 6-9
Index
Page Details ・・・・・・・・・・・・・・・・・・・・・・・・・5-8
Page Search ・・・・・・・・・・・・・・・・・・・・・・・・・5-7
Password Lock ・・・・・・・・・・・・・・・・・・・・・ 11-3
Paste (Characters) ・・・・・・・・・・・・・・・・・・ 2-12
PC Connection (USB Connection) ・・・・・ 12-8
Charge Battery・・・・・・・・・・・・・・・・・・・・・ 13-37
Dial-up Connections ・・・・・・・・・・・・・・・・ 12-15
PC Files ・・・・・・・・・・・・・・・・・・・・・・・・・・・ 9-24
PC Site Browser ・・・・・・・・・・・・・・・・・・・・・・5-4
Phone Book・・・・・・・・・・・・・・・・・・・・・・・・ 2-15
Call from ・・・・・・・・・・・・・・・・・・・・・・・・・・ 2-18
Change View ・・・・・・・・・・・・・・・・・・・・・・・ 2-29
Copy ・・・・・・・・・・・・・・・・・・・・・・・・・・・・・ 2-29
Delete ・・・・・・・・・・・・・・・・・・・・・・・・・・・・ 2-30
Edit ・・・・・・・・・・・・・・・・・・・・・・・・・・・・・・ 2-29
Group・・・・・・・・・・・・・・・・・・・・・・・ 2-29, 13-35
Move ・・・・・・・・・・・・・・・・・・・・・・・・・・・・・ 2-29
New Entry ・・・・・・・・・・・・・・・・・・・・・・・・・ 2-16
Picture ・・・・・・・・・・・・・・・・・ 2-17, 13-4, 13-26
Search Mode ・・・・・・・・・・・・・・・・・・・・・・・ 2-19
Sort by ・・・・・・・・・・・・・・・・・・・・・・・・・・・・ 2-29
Phone Book Lock ・・・・・・・・・・・・・・・・・・ 13-35
Photo Show ・・・・・・・・・・・・・・・・・・・・・・・ 13-7
Phrase Prediction ・・・・・・・・・・・・ 2-27, 13-34
Pictographs ・・・・・・・・・・・・・・・・・・・・・・・・ 2-11
Picture Mode ・・・・・・・・・・・・・・・・・・・・・・ 7-10
Picture Size (Camera) ・・・・・・・・・ 7-10, 14-14
Picture Size (Edit Picture) ・・・・・・・・・・・・・7-9
PIN Lock・・・・・・・・・・・・・・・・・・・・・・ 11-5, 14-2
PIN Settings ・・・・・・・・・・・・・・・・・・・・・・・ 11-3
PIN/PIN2 ・・・・・・・・・・・・・・・・・・・・・・・・・・ 14-2
Change ・・・・・・・・・・・・・・・・・・・・・・・・・・・ 11-5
Play Mode ・・・・・・・・・・・・・・・・・・・・・・・・・ 8-10
Player Image・・・・・・・・・・・・・・・・・・・・・・ 13-31
Playlist ・・・・・・・・・・・・・・・・・・・・・・・・・・・・・・8-7
Add Tracks ・・・・・・・・・・・・・・・・・・・・・・・・・ 8-11
Change Order ・・・・・・・・・・・・・・・・・・・・・・ 8-11
Copy ・・・・・・・・・・・・・・・・・・・・・・・・・・・・・ 8-11
Create ・・・・・・・・・・・・・・・・・・・・・・・・・・・・・ 8-7
Delete ・・・・・・・・・・・・・・・・・・・・・・・・・・・・ 8-11
Play ・・・・・・・・・・・・・・・・・・・・・・・・・・・・・・・ 8-7
Remove Tracks ・・・・・・・・・・・・・・・・・・・・・・ 8-11
Rename ・・・・・・・・・・・・・・・・・・・・・・・・・・・・ 8-7
Positioning Lock ・・・・・・・・・・・・・・・・・・ 13-41
Power On ・・・・・・・・・・・・・・・・・・・・・・・・・・ 1-11
14
14-31
921T_web_0802.indb 14-31
08.3.23 1:59:09 PM
Index
File Storage ・・・・・・・・・・・・・・・・・・・・・・・ 13-30
Rename ・・・・・・・・・・・・・・・・・・・・・・・・・・・・ 6-9
Reject Calls ・・・・・・・・・・・・・・・・・・・ 3-13, 13-9
Reload Page ・・・・・・・・・・・・・・・・・・・・・・・・・5-7
Relocate・・・・・・・・・・・・・・・・・・・・・・・・・・ 12-15
Remaining Time (TV) ・・・・・・・・・・・・・・・・・・6-9
Reminder ・・・・・・・・・・・・・・・・・・・・・・・・・・ 9-28
Replace Text ・・・・・・・・・・・・・・・・・・・・・・・ 2-27
Reply to
Activate ・・・・・・・・・・・・・・・・・・・・・・・・・・・ 4-16
Messages ・・・・・・・・・・・・・・・・・・・・・・・・・・・ 4-9
Save an Address・・・・・・・・・・・・・・・・・・・・ 13-15
Reset All ・・・・・・・・・・・・・・・・・・・・・・・・・ 13-33
Reset Learned ・・・・・・・・・・・・・・・・・・・・ 13-34
Reset Setting ・・・・・・・・・・・・・・・・・・・・・ 13-33
Internet ・・・・・・・・・・・・・・・・・・・・・・・・・・ 13-20
Restricted Mode (Web) ・・・・・・・・・・・・・ 11-5
Retrieve Mail ・・・・・・・・・・・・・・・・・・・・・・ 4-16
Retrieve Mode ・・・・・・・・・・・・・・・・・・・・ 13-16
Retrieve Network Information ・・・・・・・ 1-11
Ring Time・・・・・・・・・・・・・・・・・・・・ 2-29, 13-12
Ringtone ・・・・・・・・・・・・・・・・・・・・ 2-17, 13-11
Ringtone Volume ・・・・・・・・・ 2-28, 3-4, 13-11
Root Certificates ・・・・・・・・・・・・ 13-19, 13-32
Rotate Image (Edit Picture) ・・・・・・・・・・ 7-12
Index
14
S
S! Addressbook Back-up ・・・・・・・・・・・ 12-12
Auto Sync・・・・・・・・・・・・・・・・・・・・・・・・・ 12-16
Sync Log・・・・・・・・・・・・・・・・・・・・・・・・・・ 12-16
Synchronization Type ・・・・・・・・・・・・・・・・ 12-13
S! Appli ・・・・・・・・・・・・・・・・・・・・・・・・・・・・・8-8
Delete ・・・・・・・・・・・・・・・・・・・・・・・・・・・・ 8-12
Details ・・・・・・・・・・・・・・・・・・・・・・・・・・・・ 8-12
Download ・・・・・・・・・・・・・・・・・・・・・・・・・・ 8-8
End・・・・・・・・・・・・・・・・・・・・・・・・・・・・ 8-8, 8-9
Move ・・・・・・・・・・・・・・・・・・・・・・・・・・・・・ 8-12
Pause ・・・・・・・・・・・・・・・・・・・・・・・・・・・・・・ 8-8
Resume ・・・・・・・・・・・・・・・・・・・・・・・・ 8-8, 8-9
Screensaver ・・・・・・・・・・・・・・・・・・・・・・・・ 8-12
Start ・・・・・・・・・・・・・・・・・・・・・・・・・・・・・・・ 8-8
S! Appli Root Certificates ・・・・・・・・・・ 13-32
S! Appli Settings ・・・・・・・・・・・・・・・・・・ 13-32
S! Circle Talk ・・・・・・・・・・・・・・・・・・・・・・・ 10-6
Add Members ・・・・・・・・・・・・・・・・・・・・・・ 10-7
Answer・・・・・・・・・・・・・・・・・・・・・・・・・・・・ 10-8
Call Another Member ・・・・・・・・・・・・・・・・ 10-8
Create a Group ・・・・・・・・・・・・・・・・・・・・・ 10-7
Delete ・・・・・・・・・・・・・・・・・・・・・・・・・・・ 10-10
Edit Group ・・・・・・・・・・・・・・・・・・・・・・・・ 10-10
Initiate ・・・・・・・・・・・・・・・・・・・・・・・・・・・・ 10-7
S! Friend's Status ・・・・・・・・・・・・・・・・・・ 10-3
Add Members ・・・・・・・・・・・・・・・・・ 10-4, 10-9
Call/Send Mail ・・・・・・・・・・・・・・・・・・・・・・ 10-9
Change Group ・・・・・・・・・・・・・・・・・・・・・・ 10-9
Check Member Status ・・・・・・・・・・・・・・・・ 10-5
Deletion Request ・・・・・・・・・・・・・・・・・・・・ 10-9
My Status ・・・・・・・・・・・・・・・・・・・・・・・・・・ 10-4
Notification ・・・・・・・・・・・・・・・・・・・ 10-5, 10-9
Rename ・・・・・・・・・・・・・・・・・・・・・・・・・・・ 10-9
Request Reply ・・・・・・・・・・・・・・・・・・・・・ 13-44
Save Members to Active Window ・・・・・・ 13-44
Saving Failed ・・・・・・・・・・・・・・・・・・・・・・・ 10-5
Saving Request ・・・・・・・・・・・・・・・・・・・・・ 10-5
Status Setting ・・・・・・・・・・・・・・・・・・・・・ 13-44
Status Update ・・・・・・・・・・・・・・・・・・・・・・ 10-9
S! GPS Navi ・・・・・・・・・・・・・・・・・・・・・・・・ 9-14
Location Logs・・・・・・・・・・・・・・・・・・・・・・・ 9-32
Location Mail ・・・・・・・・・・・・・・・・・・・・・・・ 9-32
My Locations ・・・・・・・・・・・・・・・・・・・・・・・ 9-32
S! Information Channel ・・・・・・・・・・・・・ 9-23
Get Latest ・・・・・・・・・・・・・・・・・・・・・・・・・ 9-34
History ・・・・・・・・・・・・・・・・・・・・・・・・・・・・ 9-34
Weather Indicator ・・・・・・・・・・・・・・・・・・・ 9-23
S! Loop・・・・・・・・・・・・・・・・・・・・・・・・・・・・ 10-2
S! Mail ・・・・・・・・・・・・・・・・・・・・・・・・・・・・・・4-4
S! Quick News ・・・・・・・・・・・・・・・・・・・・・ 9-22
Auto Refresh ・・・・・・・・・・・・・・・・・・・・・・・ 9-33
Check Updates・・・・・・・・・・・・・・・・・・・・・・・ 2-8
Delete ・・・・・・・・・・・・・・・・・・・・・・・・・・・・ 9-34
Image ・・・・・・・・・・・・・・・・・・・・・・・・・・・・・ 13-8
Reset ・・・・・・・・・・・・・・・・・・・・・・・・・・・・・ 13-8
Ticker Speed ・・・・・・・・・・・・・・・・・・・・・・・・ 13-8
Unread/Read ・・・・・・・・・・・・・・・・・・・・・・・ 13-8
S! Town ・・・・・・・・・・・・・・・・・・・・・・・・・・・ 10-2
Saved Pages ・・・・・・・・・・・・・・・・・・・・・・・・・5-6
Delete ・・・・・・・・・・・・・・・・・・・・・・・・・・・・・ 5-9
Rename ・・・・・・・・・・・・・・・・・・・・・・・・・・・・ 5-9
Scan Data ・・・・・・・・・・・・・・・・・・・・・・・・・ 9-26
Screen Display ・・・・・・・・・・・・・・・・・・・・ 13-27
Screen Settings (TV) ・・・・・・・・・・・・・・・ 13-28
Script ・・・・・・・・・・・・・・・・・・・・・・・・・・・・ 13-19
14-32
921T_web_0802.indb 14-32
08.3.23 1:59:10 PM
Single Kanji Conversion ・・・・・・・・・・・・・ 2-26
Slideshow ・・・・・・・・・・・・・・・・・・・・・・・・・ 2-21
SMS・・・・・・・・・・・・・・・・・・・・・・・・・・・・・・・・・4-6
Move ・・・・・・・・・・・・・・・・・・・・・・・・・・・・・ 4-19
SMS Center Number ・・・・・・・・・・・・・・・ 13-15
Snooze ・・・・・・・・・・・・・・・・・・・・・・・・・・・・ 9-18
Softkeys ・・・・・・・・・・・・・・・・・・・・・・・・・・ xi, 1-3
Software Update ・・・・・・・・・・・・・・・・・・・ 14-6
Sort by (Mail) ・・・・・・・・・・・・・・・・・・・・・・ 4-19
Sort Setting ・・・・・・・・・・・・・・・・・・・・・・・ 4-11
Sound Effects ・・・・・・・・・・・・・・・・・・・・・ 13-12
Sound Volume ・・・・・・・・・・・・・・ 13-12, 13-21
Sounds ・・・・・・・・・・・・・・・・・・・・・・・・・・・ 13-11
Space ・・・・・・・・・・・・・・・・・・・・・・・・・・・・・ 2-26
Speaker ・・・・・・・・・・・・・・・・・・・・・・・・・・・・・1-3
Speaker Volume ・・・・・・・・・・・・・・・・・・・ 13-12
Specifications ・・・・・・・・・・・・・・・・・・・・・ 14-11
Speed Dial ・・・・・・・・・・・・・・・・・・・・・・・・・・・3-5
SSL/TLS ・・・・・・・・・・・・・・・・・・・・・・・・・・・・・・5-2
Standby ・・・・・・・・・・・・・・・・・・・・・・・ 1-11, 2-6
Start/End Sound ・・・・・・・・・・・・・・・・・・・ 13-27
Storage Location
Camera ・・・・・・・・・・・・・・・・・・・・・・・・・・ 13-25
Data Broadcast ・・・・・・・・・・・・・・・・・・・・ 13-29
Internet ・・・・・・・・・・・・・・・・・・・・・・・・・・ 13-20
Phone Book ・・・・・・・・・・・・・・・・・・・・・・・ 13-35
Recorded Programs (TV) ・・・・・・・・・・・・・ 13-30
Voice Recorder ・・・・・・・・・・・・・・・・・・・・・・ 9-31
Streaming ・・・・・・・・・・・・・・・・・・・・・・・・・・・8-3
Sub Menu View ・・・・・・・・・・・・・・・・・・・・・・2-4
Subtitles ・・・・・・・・・・・・・・・・・・・・・ 6-4, 13-28
Surround ・・・・・・・・・・・・・・・・・・・・・・・・・・ 8-10
Switch Audio (TV) ・・・・・・・・・・・・・・・・・ 13-28
Switch Windows (Video Call) ・・・・・・・・ 3-15
Symbols ・・・・・・・・・・・・・・・・・・・・・・・・・・・ 2-10
T
Take Pictures ・・・・・・・・・・・・・・・・・・・・・・・・7-3
Settings ・・・・・・・・・・・・・・・・・・・・ 13-25, 13-26
Tasks ・・・・・・・・・・・・・・・・・・・・・・・・・・・・・・・・9-5
Alarm ・・・・・・・・・・・・・・・・・・・・・・・・ 9-5, 13-39
Check ・・・・・・・・・・・・・・・・・・・・・・・・・・・・・・ 9-6
Delete ・・・・・・・・・・・・・・・・・・・・・・・・ 9-6, 9-30
Edit ・・・・・・・・・・・・・・・・・・・・・・・・・・・・・・ 9-29
Priority ・・・・・・・・・・・・・・・・・・・・・・・・・・・ 13-40
Reminder ・・・・・・・・・・・・・・・・・・・・・・・・・・ 9-28
Show/Hide ・・・・・・・・・・・・・・・・・・・・・・・・・ 9-29
Stamp Icon ・・・・・・・・・・・・・・・・・・・・・・・・ 13-39
Status ・・・・・・・・・・・・・・・・・・・・・・・・・・・・ 13-40
Tasks Lock ・・・・・・・・・・・・・・・・・・・・・・・・ 13-40
Templates (Mail) ・・・・・・・・・・・・・・・・・・・・・4-5
Save ・・・・・・・・・・・・・・・・・・・・・・・・・・・・・・ 4-15
Switch ・・・・・・・・・・・・・・・・・・・・・・・・・・・・ 4-15
Text Copy・・・・・・・・・・・・・・・・・・・・・・ 4-19, 5-7
Text Entry ・・・・・・・・・・・・・・・・・・・・・ 2-9, 2-26
Beeper Mode ・・・・・・・・・・・・・・・・・・・・・・ 14-10
Settings ・・・・・・・・・・・・・・・・・・・・・・・・・・ 13-34
Text Entry Keys ・・・・・・・・・・・・・・・・・・・・・・ 14-9
Text Input Modes ・・・・・・・・・・・・・・・・・・・・・2-9
Time Table ・・・・・・・・・・・・・・・・・・・・・・・・・・・9-7
Copy ・・・・・・・・・・・・・・・・・・・・・・・・・・・・・ 9-30
Index
Scroll Unit ・・・・・・・・・・・・・・・・・・ 13-15, 13-21
Search Mode (Phone Book) ・・・・・・・・・・ 2-19
Search Time ・・・・・・・・・・・・・・・・・・・・・・・ 8-10
Secret ・・・・・・・・・・・・・・・・・・・・・・・・・・・・・ 2-17
Secret Mode ・・・・・・・・・・・・・・・・・・・・・・・ 11-4
Secure Remote Lock ・・・・・・・・・・・・・・・・ 11-4
Security ・・・・・・・・・・5-2, 13-19, 13-32, 13-33
Security Lock ・・・・・・・・・・・ 2-22, 4-17, 13-21
Self-delete・・・・・・・・・・・・・・・・・・・・・・・・・ 4-16
Self-portrait Position ・・・・・・・・・・・・ 1-4, 7-2
Self-view ・・・・・・・・・・・・・・・・・ 7-3, 7-6, 13-23
Send Picture (Video Call) ・・・・・・・・・・・・ 3-15
Send URL ・・・・・・・・・・・・・・・・・・・・・・・・・・・・5-7
Server Certificate ・・・・・・・・・・・・・・・・・・・・5-8
Server Operations ・・・・・・・・・・・・・・・・・・ 4-16
Set as Main City ・・・・・・・・・・・・・・・・・・・・ 9-19
Sharpness ・・・・・・・・・・・・・・・・・・・・・・・・ 13-28
Short Video Mode ・・・・・・・・・・・・・・・・・・・・7-5
Shortcuts Menu ・・・・・・・・・・・・・・・・・・・・・・2-5
Arrange Icons・・・・・・・・・・・・・・・・・・・・・・・ 2-25
Change Icon・・・・・・・・・・・・・・・・・・・・・・・・ 2-25
Delete ・・・・・・・・・・・・・・・・・・・・・・・・・・・・ 2-25
Edit Title ・・・・・・・・・・・・・・・・・・・・・・・・・・・ 2-25
Show My ID・・・・・・・・・・・・・・・・・・・・・・・・ 3-12
Show My Number ・・・・・・・・・・・・・・・・・・ 3-12
Shutter Sound ・・・・・・・・・・・・・・・・・・・・ 13-26
Side Key ・・・・・・・・・・・・・・・・・・・・・・・・・・・・・2-4
Signal Strength ・・・・・・・・・・・・・・・・・ 1-5, 1-6
Signature ・・・・・・・・・・・・・・・・・・・・・・・・・ 13-14
Simple Input ・・・・・・・・・・・・・・・・・ 4-13, 13-14
Simple Notice ・・・・・・・・・・・・・・・・・・・・・・ 9-17
14
14-33
921T_web_0802.indb 14-33
08.3.23 1:59:10 PM
Index
Delete ・・・・・・・・・・・・・・・・・・・・・・・・ 9-7, 9-30
Settings ・・・・・・・・・・・・・・・・・・・・・・・・・・ 13-40
Timer ・・・・・・・・・・・・・・・・・・・・・・・・・・・・・・・6-7
Check/Edit/Delete ・・・・・・・・・・・・・・・・・・・・ 6-9
Notification ・・・・・・・・・・・・・・・・・・・・・・・ 13-30
Program Guide・・・・・・・・・・・・・・・・・・・・・・・ 6-9
Timer Results ・・・・・・・・・・・・・・・・・・・・・・・・ 6-9
To Group ・・・・・・・・・・・・・・・・・・・・・・・・・・ 4-14
To Playlist ・・・・・・・・・・・・・・・・・・・・・・・・・ 8-11
To/Cc/Bcc ・・・・・・・・・・・・・・・・・・・・・・・・・・ 4-13
Touch Tones・・・・・・・・・・・・・・・・・・・・・・・・ 3-14
Troubleshooting ・・・・・・・・・・・・・・・・・・・・ 14-7
Trust Device ・・・・・・・・・・・・・・・・・・・・・・ 13-36
TV ・・・・・・・・・・・・・・・・・・・・・・・・・・・・・・・・・・6-2
Settings ・・・・・・・・・・・・・・・・・・・・・・・・・・ 13-28
TV Antenna ・・・・・・・・・・・・・・・・・・・・・ 1-3, 6-3
TV Links ・・・・・・・・・・・・・・・・・・・・・・・・・・・・・6-8
U
Index
14
Undo ・・・・・・・・・・・・・・・・・・・・・・・・・・・・・・ 2-13
Unread/Read (Mail) ・・・・・・・・・・・・・・・・ 13-18
Unsent Messages ・・・・・・・・・・・・・・・・・・・ 4-19
URL History ・・・・・・・・・・・・・・・・・・・・・・・・・・5-7
USB Connection (PC Connection) ・・・・・ 12-8
USIM Card ・・・・・・・・・・・・・・・・・・・・・・・・・ 14-2
USIM Lock ・・・・・・・・・・・・・・・・・・・・・・・・・ 11-5
V
Vibration ・・・・・・・ 2-29, 13-12, 13-15, 13-32
Video Call ・・・・・・・・・・・・・・・・・・・・・・・・・・・3-7
Video Call Settings ・・・・・・・・・・・・・・・・ 13-23
Video File Playback Window ・・・・・・・・・・・8-6
Video Mail Mode ・・・・・・・・・・・・・・・・・・・・・7-5
Video Modes・・・・・・・・・・・・・・・・・・・・・・・・・7-5
View Type (Data Folder) ・・・・・・・・・・・・・ 2-30
Viewer Position ・・・・・・・・・・・・・・・・・ 1-4, 7-2
Visibility・・・・・・・・・・・・・・・・・・・・・・・・・・ 13-36
vObjects・・・・・・・・・・・・・・・・・・・・・・・・・・・ 2-31
Voice Call・・・・・・・・・・・・・・・・・・・・・・・・・・・・3-4
Call from Phone Book ・・・・・・・・・・・・・・・・ 2-18
Voice Cancel ・・・・・・・・・・・・・・・・・・・・・・・ 8-10
Voice Mail ・・・・・・・・・・・・・・・・・・・・・・・・・ 3-11
Voice Memo ・・・・・・・・・・・・・・・・・・・・・・・ 3-14
Voice Record ・・・・・・・・・・・・・・・・・ 3-14, 13-27
Voice Recorder ・・・・・・・・・・・・・・・・・・・・・・・9-9
Storage Location ・・・・・・・・・・・・・・・・・・・・ 9-31
Volume (S! Appli)・・・・・・・・・・・・・・・・・・ 13-32
Word List ・・・・・・・・・・・・・・・・・・・・・・・・・・ 2-14
Delete All ・・・・・・・・・・・・・・・・・・・・・・・・・・ 2-28
World Clock ・・・・・・・・・・・・・・・・・・・・・・・ 9-19
Rename City ・・・・・・・・・・・・・・・・・・・・・・・ 9-33
Y
Yahoo! Keitai ・・・・・・・・・・・・・・・・・・・・・・・・5-3
Z
Zoom (Camera) ・・・・・・・・・・・ 7-3, 7-6, 14-14
Zoom (Video Call) ・・・・・・・・・・・・・・・・・・ 3-15
W
Wallpaper ・・・・・・・・・・・・・・・・・・・・・・・・・・・2-6
Wallpaper (Edit Picture) ・・・・・・・・・・・・・ 7-12
Warning ・・・・・・・・・・・・・・・・・・・・・・・・・・ 13-20
Watch TV ・・・・・・・・・・・・・・・・・・・・・・・・・・・・6-4
Weather Forecast・・・・・・・・・・・・・・・ 2-8, 9-23
Update ・・・・・・・・・・・・・・・・・・・・・・・・・・・・ 9-34
Weather Indicator ・・・・・・・・ 2-8, 9-23, 13-43
Web Page Operations ・・・・・・・・・・・・・・・・・5-5
Web Search ・・・・・・・・・・・・・・・・・・・・・・・・・・5-9
White Balance ・・・・・・・・・・・・・・・・・・・・ 13-25
Wide View ・・・・・・・・・・・・・・・・・・・ 13-3, 13-18
14-34
921T_web_0802.indb 14-34
08.3.23 1:59:11 PM
By User Action
A
B
Back Up
Data to a Memory Card (Transfer All) ・・・ 12-10
S! Addressbook Back-up ・・・・・・・・・・・・・ 12-13
Setting Data (Relocate) ・・・・・・・・・・・・・・ 12-15
C
Call
Call Waiting ・・・・・・・・・・・・・・・・・・・・・・・・ 3-17
Dialed Numbers ・・・・・・・・・・・・・・・・・・・・・ 3-12
Earphone-Microphone Call ・・・・・・・・・・・・ 3-13
Handsfree Call ・・・・・・・・・・・・・・・・・・・・・・ 3-14
International Call ・・・・・・・・・・・・・・・・・・・・・ 3-5
Multiparty Call ・・・・・・・・・・・・・・・・・・・・・・ 3-17
Received Calls ・・・・・・・・・・・・・・・・・・・・・・ 3-12
S! Circle Talk ・・・・・・・・・・・・・・・・・・ 10-7, 10-8
Speed Dial ・・・・・・・・・・・・・・・・・・・・・・・・・・ 3-5
Video Call ・・・・・・・・・・・・・・・・・・・・・・・・・・ 3-7
Voice Call ・・・・・・・・・・・・・・・・・・・・・・・・・・・ 3-4
Cancel
Alarm ・・・・・・・・・・・・・・・・・・・・・・・・・・・・・ 9-18
Answering Machine ・・・・・・・・・・・・・・・・・・・ 3-5
Card Reader Mode ・・・・・・・・・・・・・・・・・・ 12-9
Keypad Lock・・・・・・・・・・・・・・・・・・・・・・・・ 11-3
Manner Mode ・・・・・・・・・・・・・・・・・・・・・・ 1-13
Mute ・・・・・・・・・・・・・・・・・・・・・・・・・・・・・ 3-13
Offline Mode ・・・・・・・・・・・・・・・・・・・・・・・ 1-13
Password Lock ・・・・・・・・・・・・・・・・・・・・・・ 11-3
Phone Book Lock ・・・・・・・・・・・・・・・・・・・ 13-35
PIN Lock・・・・・・・・・・・・・・・・・・・・・・ 11-5, 14-2
Remote Lock ・・・・・・・・・・・・・・・・・・・・・・・ 9-13
S! Information Channel Subscription ・・・・・ 9-23
Change
Alternative Picture (Video Call) ・・・ 3-15, 13-23
Call Barring Service Code ・・・・・・・・・・・・・ 3-18
Color of a Date/Day of the Week ・・・・・・・・ 9-28
E-mail Address of the Handset ・・・・・・・・・・ 4-3
File Name・・・・・・・・・・・・・・・・・・・・・・・・・・ 2-31
Folder Name ・・・・・・・・・・・・・・・・・・ 2-31, 4-17
Font Size (Display) ・・・・・・・・・・・・・・・・・・・ 13-5
Font Size (Internet) ・・・・・・・・・・・・・・・・・ 13-21
Font Size (Mail) ・・・・・・・・・・・・・・・・・・・・ 13-15
Font Size (Text Entry Window) ・・・・・・・・・・ 2-27
Handset Code ・・・・・・・・・・・・・・・・・・・・・・ 11-2
Image Quality (Video Call) ・・・・・・・ 3-15, 13-23
Internet Security Code ・・・・・・・・・・・・・・・・ 11-5
Message Box View Format・・・・・・・・・・・・ 13-17
My Status ・・・・・・・・・・・・・・・・・・・・・・・・・・ 10-4
Picture Size ・・・・・・・・・・・・・・・・・・・・・・・・・ 7-9
PIN ・・・・・・・・・・・・・・・・・・・・・・・・・・・・・・・ 11-5
Playlist Name ・・・・・・・・・・・・・・・・・・・・・・・・ 8-7
Text Encoding Type (Internet) ・・・・・・・・・ 13-21
Text Input Modes ・・・・・・・・・・・・・・・・・・・・・ 2-9
Index
Access
Internet ・・・・・・・・・・・・・・・・・・・・・・・・ 5-3, 5-4
Activate
Barcode Reader ・・・・・・・・・・・・・・・・・・・・・ 9-26
Music Player・・・・・・・・・・・・・・・・・・・・・・・・・ 8-5
Add
Country Code to Country Number List ・・ 13-22
Functions to Shortcuts Menu ・・・・・・・・・・・・ 2-5
Lifestyle-Appli to Balance List ・・・・・・・・・・ 9-31
Members to S! Circle Talk Members List ・・ 10-7
Members to S! Friend's Status Members List ・・ 10-4, 10-5
Phone Number to Auto Answer List・・・・・ 13-23
Songs to a Playlist ・・・・・・・・・・・・・・・ 8-7, 8-11
Stamp ・・・・・・・・・・・・・・・・・・・・・・・・・・・・ 7-12
Text (Edit Picture)・・・・・・・・・・・・・・・・・・・・ 7-11
Adjust (Speaker/Earpiece Volume)
in S! Circle Talk ・・・・・・・・・・・・・・・・・・・・・ 10-8
in Video Call・・・・・・・・・・・・・・・・・・・・・・・・・ 3-7
in Voice Call ・・・・・・・・・・・・・・・・・・・・・・・・・ 3-4
Answer
Any Key Answer ・・・・・・・・・・・・・・・・・・・・・ 13-9
Auto Answer (Earphone-Microphone) ・・・ 13-24
Auto Answer (Video Call) ・・・・・・・・・・・・・ 3-13
Call Waiting ・・・・・・・・・・・・・・・・・・・・・・・・ 3-17
Earphone-Microphone Answer ・・・・・・・・・ 3-13
Open to Talk・・・・・・・・・・・・・・・・・・・・・・・・ 13-9
Response Time Setting (Answering Machine) ・・ 13-9
S! Circle Talk Call ・・・・・・・・・・・・・・・・・・・・ 10-8
Video Call ・・・・・・・・・・・・・・・・・・・・・・・・・・ 3-7
Voice Call ・・・・・・・・・・・・・・・・・・・・・・・・・・・ 3-4
Arrange
S! Mail Text ・・・・・・・・・・・・・・・・・・・・・・・・・ 4-5
Attach
Files ・・・・・・・・・・・・・・・・・・・・・・・・・・・・・・・ 4-4
14
14-35
921T_web_0802.indb 14-35
08.3.23 1:59:11 PM
Index
Index
14
Change Order
Files ・・・・・・・・・・・・・・・・・・・・・・・・・・・・・・ 2-31
Main Menu Icons ・・・・・・・・・・・・・・・・・・・・・ 2-3
Messages ・・・・・・・・・・・・・・・・・・・・・・・・・・ 4-19
Phone Book Entries ・・・・・・・・・・・・・・・・・・ 2-29
Charge (Battery)
by USB Connection ・・・・・・・・・・・・・・・・・ 13-37
with AC Charger ・・・・・・・・・・・・・・・・・・・・・ 1-8
with Desktop Cradle ・・・・・・・・・・・・・・・・・・ 1-9
with In-Car Charger ・・・・・・・・・・・・・・・・・・・ 1-9
Connect
Dial-up Connections ・・・・・・・・・・ 12-14, 12-15
Earphone-Microphone ・・・・・・・・・・・・・・・・ 3-13
Handsfree Device ・・・・・・・・・・・・・・・・・・・・ 12-5
PC ・・・・・・・・・・・・・・・・・・・ 12-8, 12-15, 13-37
USB Connection ・・・・・・・・・・・・・・・・・・・・・ 12-8
Convert (Characters)
by Single Kanji Conversion ・・・・・・・・・・・・ 2-26
Determined Text (Reconvert) ・・・・・・・・・・・ 2-27
Hiragana to Alphanumerics/Katakana ・・・・ 2-10
Name ・・・・・・・・・・・・・・・・・・・・・・・・・・・・・ 2-26
Copy
Characters ・・・・・・・・・・・・・・・・・・・・・・・・・ 2-12
Class on Time Table ・・・・・・・・・・・・・・・・・・ 9-30
Files ・・・・・・・・・・・・・・・・・・・・・・・・・・・・・・ 2-32
Folders ・・・・・・・・・・・・・・・・・・・・・・・・・・・・ 2-32
Message Text (Text Copy) ・・・・・・・・・・・・・ 4-19
Phone Book Entries ・・・・・・・・・・・・・・・・・・ 2-29
Playlist ・・・・・・・・・・・・・・・・・・・・・・・・・・・・ 8-11
Text String in Web Page ・・・・・・・・・・・・・・・・ 5-7
Create
Folder ・・・・・・・・・・・・・・・・・・・・・・・・・ 2-21, 5-9
Phone Book Entry ・・・・・・・・・・・・・・・・・・・ 2-16
Playlist ・・・・・・・・・・・・・・・・・・・・・・・・・・・・・ 8-7
S! Mail ・・・・・・・・・・・・・・・・・・・・・・・・・・・・・ 4-4
SMS ・・・・・・・・・・・・・・・・・・・・・・・・・・・・・・・ 4-6
Time Table ・・・・・・・・・・・・・・・・・・・・・・・・・・ 9-7
vObject・・・・・・・・・・・・・・・・・・・・・・・・・・・・ 2-31
Wallpaper ・・・・・・・・・・・・・・・・・・・・・・・・・ 7-12
Customize
E-mail Address of the Handset ・・・・・・・・・・ 4-3
Original Mode ・・・・・・・・・・・・・・・・・・・・・ 13-11
D
Delete
Alarms ・・・・・・・・・・・・・・・・・・・・・・・ 9-18, 9-33
Backup Data (Memory Card) ・・・・・・・・・・ 12-16
Bookmarks ・・・・・・・・・・・・・・・・・・・・・・・・・・ 5-9
Characters ・・・・・・・・・・・・・・・・・・・・・・・・・ 2-12
Classes from Time Table ・・・・・・・・・・・ 9-7, 9-30
Entries from Balance List ・・・・・・・・・・・・・・ 9-31
Entries from S! Circle Talk Members List ・・ 10-10
Events ・・・・・・・・・・・・・・・・・・・・・・・・ 9-5, 9-30
Folders/Files (Data Folder) ・・・・・・・・・・・・・ 2-32
Members from S! Friend's Status Members List・・ 10-9
Messages ・・・・・・・・・・・・・・・・・・・・・・・・・・ 4-18
Phone Book Entries ・・・・・・・・・・・・・・・・・・ 2-30
Playlist ・・・・・・・・・・・・・・・・・・・・・・・・・・・・ 8-11
Recorded Messages on Answering Machine ・・ 3-13
S! Appli ・・・・・・・・・・・・・・・・・・・・・・・・・・・ 8-12
Server Messages ・・・・・・・・・・・・・・・・・・・・ 4-17
Shortcut Icons ・・・・・・・・・・・・・・・・・・・・・・ 2-25
Tasks ・・・・・・・・・・・・・・・・・・・・・・・・・ 9-6, 9-30
Download
Lifestyle-Appli ・・・・・・・・・・・・・・・・・・・・・・ 9-10
Music and Video Files ・・・・・・・・・・・・・・・・・ 8-3
S! Appli ・・・・・・・・・・・・・・・・・・・・・・・・・・・・ 8-8
S! Information Channel ・・・・・・・・・・・・・・・ 9-34
Software Update ・・・・・・・・・・・・・・・・・・・・ 14-6
E
Edit
Active Window Members List ・・・・・・・・・・ 2-26
Bookmark Title ・・・・・・・・・・・・・・・・・・・・・・・ 5-9
City Name ・・・・・・・・・・・・・・・・・・・・・・・・・ 9-33
Entered Text ・・・・・・・・・・・・・・・・・・・・・・・・ 2-12
Event ・・・・・・・・・・・・・・・・・・・・・・・・・・・・・ 9-29
Phone Book ・・・・・・・・・・・・・・・・・・・・・・・・ 2-29
Picture ・・・・・・・・・・・・・・・・・・・・・・・・・・・・・ 7-8
S! Addressbook Back-up ・・・・・・・・・・・・・ 12-12
S! Circle Talk Members List ・・・・・・・・・・・ 10-10
S! Friend's Status Members List・・・・・・・・・ 10-9
Task ・・・・・・・・・・・・・・・・・・・・・・・・・・・・・・ 9-29
Enable
Active Window Operation ・・・・・・・・・・・・・・ 2-7
End
S! Appli ・・・・・・・・・・・・・・・・・・・・・・・・ 8-8, 8-9
14-36
921T_web_0802.indb 14-36
08.3.23 1:59:12 PM
F
Format
Memory Card ・・・・・・・・・・・・・・・・・・・・・・・ 2-24
Forward
Call Forward ・・・・・・・・・・・・・・・・・・・・・・・ 3-10
Messages ・・・・・・・・・・・・・・・・・・・・・・・・・・ 4-18
Server Message ・・・・・・・・・・・・・・・・・・・・・ 4-16
H
Hold
Hold Image (Video Call)・・・・・・・・・・・・・・ 13-23
Incoming Call ・・・・・・・・・・・・・・・・・・・・・・・ 3-13
I
Jump
to Specified date on Calendar ・・・・・・・・・・・ 9-4
L
Light (Flash)
Charging Indicator ・・・・・・・・・・・・・・・・・・・・ 1-3
External Light for Incoming Events ・・ 2-29, 13-6
External Light for Notifications ・・・・・・・・・ 13-6
Mobile Light・・・・・・・・・・・・・・・・・・・・・ 7-3, 7-6
Lighting ・・・・・・・・・・・・・・・・・・・・・・・・・・・ 13-5
Listen to
Voice Mail ・・・・・・・・・・・・・・・・・・・・・・・・・ 3-11
Lock
Calendar Lock ・・・・・・・・・・・・・・・・・・・・・ 13-39
Call Log Lock ・・・・・・・・・・・・・・・・・・・・・・・ 3-15
Function Lock・・・・・・・・・・・・・・・・・・・・・・・ 11-4
IC Card Lock ・・・・・・・・・・・・・・・・・・・・・・・ 9-12
Keypad Lock・・・・・・・・・・・・・・・・・・・・・・・・ 11-3
Password Lock ・・・・・・・・・・・・・・・・・・・・・・ 11-3
PIN Lock・・・・・・・・・・・・・・・・・・・・・・・・・・・ 14-2
Positioning Lock ・・・・・・・・・・・・・・・・・・・・ 13-41
Remote Lock ・・・・・・・・・・・・・・・・・・・・・・・ 9-13
Security Lock (Data Folder) ・・・・・・・・・・・・ 2-22
Security Lock (Internet) ・・・・・・・・・・・・・・ 13-21
Security Lock (Message Box) ・・・・・・・・・・・ 4-17
Tasks Lock ・・・・・・・・・・・・・・・・・・・・・・・・ 13-40
M
Move
Bookmarks ・・・・・・・・・・・・・・・・・・・・・・・・・・ 5-9
Files ・・・・・・・・・・・・・・・・・・・・・・・・・・・・・・ 2-22
Folders ・・・・・・・・・・・・・・・・・・・・・・・・・・・・ 2-32
Messages ・・・・・・・・・・・・・・・・・・・・・ 4-11, 4-19
Phone Book Entries ・・・・・・・・・・・・・・・・・・ 2-29
S! Appli ・・・・・・・・・・・・・・・・・・・・・・・・・・・ 8-12
Shortcuts Menu Icons ・・・・・・・・・・・・・・・・ 2-25
SMS ・・・・・・・・・・・・・・・・・・・・・・・・・・・・・・ 4-19
O
Open
Ku-man's Room ・・・・・・・・・・・・・・・・・・・・・ 9-27
P
Paste
Characters ・・・・・・・・・・・・・・・・・・・・・・・・・ 2-12
Play
Answering Machine ・・・・・・・・・・・・・・・・・・・ 3-6
Background Play (Multitask) ・・・・・・・・・・・ 8-10
Files (Data Folder) ・・・・・・・・・・・・・・・・・・・ 2-21
Music ・・・・・・・・・・・・・・・・・・・・・・・・・・・・・・ 8-4
Playlist ・・・・・・・・・・・・・・・・・・・・・・・・・・・・・ 8-7
Recorded TV Program ・・・・・・・・・・・・・・・・・ 6-6
Video ・・・・・・・・・・・・・・・・・・・・・・・・・ 7-11, 8-5
Voice Recorder ・・・・・・・・・・・・・・・・・・・・・・・ 9-9
Protect
Messages ・・・・・・・・・・・・・・・・・・・・・・・・・・ 4-17
Index
Input (Characters)
゛ or ゜ ・・・・・・・・・・・・・・・・・・・・・・・・・・・ 2-10
Alphanumerics ・・・・・・・・・・・・・・・・・・・・・・ 2-11
Beeper Mode ・・・・・・・・・・・・・・・・ 13-34, 14-10
E-mail Address/URL Extensions ・・・・・・・・・ 2-12
Emoticons ・・・・・・・・・・・・・・・・・・・・・・・・・ 2-11
Kanji・・・・・・・・・・・・・・・・・・・・・・・・・・・・・・・ 2-9
Line Break ・・・・・・・・・・・・・・・・・・・・・・・・・ 2-26
Lower Case ・・・・・・・・・・・・・・・・・・・・・・・・ 2-10
Pictographs ・・・・・・・・・・・・・・・・・・・・・・・・ 2-11
Space ・・・・・・・・・・・・・・・・・・・・・・・・・・・・・ 2-26
Symbols ・・・・・・・・・・・・・・・・・・・・・・・・・・・ 2-10
J
14
14-37
921T_web_0802.indb 14-37
08.3.23 1:59:12 PM
Index
R
Index
14
Receive
Messages ・・・・・・・・・・・・・・・・・・・・・・ 4-8, 4-16
S! Friend's Status Notification ・・・・・・・・・・ 10-5
via Bluetooth® Communication ・・・・ 12-6, 12-7
via Infrared・・・・・・・・・・・・・・・・・・・・・・・・・ 12-3
Record
Answering Machine ・・・・・・・・・・・・・・・・・・・ 3-5
Other Party's Voice (Voice Memo) ・・・・・・・ 3-14
TV Program ・・・・・・・・・・・・・・・・・・・・・・・・・ 6-6
Video ・・・・・・・・・・・・・・・・・・・・・・・・・・・・・・ 7-5
Voice Mail ・・・・・・・・・・・・・・・・・・・・・・・・・ 3-11
Voice Recorder ・・・・・・・・・・・・・・・・・・・・・・・ 9-9
Register
S! Quick News Contents ・・・・・・・・・・・・・・ 9-22
Reply
to Received Messages ・・・・・・・・・・・・・・・・・ 4-9
Reset
Browser Settings ・・・・・・・・・・・・・・・・・・・ 13-20
Handset ・・・・・・・・・・・・・・・・・・・・・・・・・・ 13-33
Multi Selector・・・・・・・・・・・・・・・・・・・・・・・ 2-25
Prediction/Conversion Dictionary ・・・・・・・ 13-34
S! Quick News ・・・・・・・・・・・・・・・・・・・・・・ 13-8
Total Call Cost ・・・・・・・・・・・・・・・・・・・・・・ 3-16
Total Call Time ・・・・・・・・・・・・・・・・・・・・・・ 3-16
Restrict
Access to the Internet by URL Entry・・・・・・ 11-5
Call Barring ・・・・・・・・・・・・・・・・・・・・・・・・ 3-17
Resume
S! Appli ・・・・・・・・・・・・・・・・・・・・・・・・・・・・ 8-8
S
Save
Attachments ・・・・・・・・・・・・・・・・・・・・・・・ 4-19
Bookmark ・・・・・・・・・・・・・・・・・・・・・・・・・・ 5-6
Drafts ・・・・・・・・・・・・・・・・・・・・・・・・・・・・・ 4-15
Events ・・・・・・・・・・・・・・・・・・・・・・・・・・・・・ 9-4
File in Web Pages・・・・・・・・・・・・・・・・・・・・・ 5-8
Locations to Areas List ・・・・・・・・・・・・・・・・ 9-16
My Details ・・・・・・・・・・・・・・・・・・・・・・・・・ 3-12
My Locations ・・・・・・・・・・・・・・・・・・・・・・・ 9-32
Number Memo・・・・・・・・・・・・・・・・・・・・・・ 3-14
Original Emoticons・・・・・・・・・・・・・・・・・・・ 2-27
People to Active Window Members List・・ 2-8, 13-44
People to Recipients List ・・・・・・・・・・・・・・ 9-16
Phone Book Entry ・・・・・・・・・・・・・・ 2-16, 2-28
Phone Number to Reject List ・・・・・・・・・・・ 13-9
Saved Pages ・・・・・・・・・・・・・・・・・・・・・・・・・ 5-6
Tasks ・・・・・・・・・・・・・・・・・・・・・・・・・・・・・・ 9-5
Words to Word List ・・・・・・・・・・・・・・・・・・ 2-14
Search
Phone Book ・・・・・・・・・・・・・・・・・・・・・・・・ 2-19
Text String on a Web Page ・・・・・・・・・・・・・・ 5-7
Send
Mail Notifications ・・・・・・・・・・・・・・・・・・・ 9-17
Music/Video Files ・・・・・・・・・・・・・・・・・・・・ 8-11
Picture/Video After Shooting ・・・・・・・・・・・ 7-11
S! Mail ・・・・・・・・・・・・・・・・・・・・・・・・・・・・・ 4-4
SMS Message ・・・・・・・・・・・・・・・・・・・・・・・ 4-6
Touch Tones ・・・・・・・・・・・・・・・・・・・・・・・・ 3-14
via Bluetooth® Communication ・・・・・・・・・ 12-6
via Infrared・・・・・・・・・・・・・・・・・・・・ 12-2, 12-3
Video Call Image ・・・・・・・・・・・・・・・・・・・・・ 3-7
Set
Alarm ・・・・・・・・・・・・・・・・・・・・・・・・・・・・・ 9-18
Start
Navi Appli ・・・・・・・・・・・・・・・・・・・・・・・・・ 9-14
S! Appli ・・・・・・・・・・・・・・・・・・・・・・・・・・・・ 8-8
Subscribe
S! Information Channel Service ・・・・・・・・・ 9-23
Suspend
S! Appli ・・・・・・・・・・・・・・・・・・・・・・・・・・・・ 8-8
T
Take
Picture ・・・・・・・・・・・・・・・・・・・・・・・・・・・・・ 7-3
Take Notes
on Notepad ・・・・・・・・・・・・・・・・・・・・・・・・・ 9-8
Transfer
by USB Connection ・・・・・・・・・・・・・・・・・・ 12-9
Setting Data (Relocate) ・・・・・・・・・・・・・・ 12-15
Transfer All (Memory Card) ・・・・・・・・・・・ 12-10
Turn off
Handset Power・・・・・・・・・・・・・・・・・・・・・・ 1-11
IC Card Lock ・・・・・・・・・・・・・・・・・・・・・・・ 9-13
Off-timer (TV)・・・・・・・・・・・・・・・・・・・・・・ 13-28
Prediction・・・・・・・・・・・・・・・・・・・・・・・・・ 13-34
Turn on
Handset Power・・・・・・・・・・・・・・・・・・・・・・ 1-11
IC Card Lock ・・・・・・・・・・・・・・・・・・・・・・・ 9-12
14-38
921T_web_0802.indb 14-38
08.3.23 1:59:13 PM
U
Update
Mail List ・・・・・・・・・・・・・・・・・・・・・・・・・・・ 4-16
S! Appli Information on Memory Card ・・ 13-32
S! Friend's Status ・・・・・・・・・・・・・・・・・・・・ 10-9
S! Quick News ・・・・・・・・・・・・・・・・・・・・・・・ 2-8
Software ・・・・・・・・・・・・・・・・・・・・・・・・・・ 14-6
Weather Forecast ・・・・・・・・・・・・・・・・・・・・ 9-34
Web Page ・・・・・・・・・・・・・・・・・・・・・・・・・・ 5-7
W
Watch
TV ・・・・・・・・・・・・・・・・・・・・・・・・・・・・・・・・ 6-4
Index
14
14-39
921T_web_0802.indb 14-39
08.3.23 1:59:13 PM
Warranty & After Sales Service
Warranty
After Sales Service
A warranty card is included with the handset.
Carefully read the card and check that the store
name and purchase date sections have been filled
in correctly. Then, store it in a safe place.
Be sure to refer to "Troubleshooting" (page 14-7)
before submitting your handset for repair.
If you are still having problems with your handset,
contact your nearest SoftBank Shop or contact
SoftBank General Information (page 14-41).
• SoftBank and Toshiba assume no
responsibility for damages to you or third
parties as a result of a failure, malfunction or
faulty operation of the product.
Repair within Warranty Period
Repair is carried out in accordance with the
conditions of the warranty.
Repair After Warranty Period
Repair is carried out if possible and the handset
owner is responsible for any repair costs.
• During repair, parts may be replaced with
used parts that meet our quality standards.
• Data and settings may be lost or altered as a
Appendix
14
result of failure or repair of your handset. It
is, therefore, recommended that you keep a
backup copy of important data such as
Phone Book data. SoftBank and Toshiba
assume no responsibility for any damages
due to the loss or alteration of handset data
(contents of Phone Book, Data Folder, etc.)
and settings as a result of failure or repair of
your handset.
• Disassembling or modifying the handset is in
violation of Radio Law. Your handset will not
be accepted for repairs if it has been
modified.
14-40
921T_web_0802.indb 14-40
08.3.23 1:59:14 PM
Customer Service
If you have any questions about SoftBank handsets or services, call General Information. For repairs, call Customer Assistance.
SoftBank Customer Centers
From a SoftBank handset, dial toll free at 157 for General
Information or 113 for Customer Assistance.
SoftBank Global Call Center
From outside Japan, dial
+81-3-5351-3491 (Please take care to dial the correct
number. International charges will apply to this call.)
Call These Numbers Toll Free from Landlines
Hokkaido, Aomori, Akita, Iwate, Yamagata, Miyagi, Fukushima, Niigata, Tokyo, Kanagawa, Chiba,
Saitama, Ibaraki, Tochigi, Gunma, Yamanashi, Nagano, Toyama, Ishikawa, Fukui
Aichi, Gifu, Mie, Shizuoka
Osaka, Hyogo, Kyoto, Nara, Shiga, Wakayama
Hiroshima, Okayama, Yamaguchi, Tottori, Shimane, Tokushima, Kagawa, Ehime, Kochi, Fukuoka,
Saga, Nagasaki, Oita, Kumamoto, Miyazaki, Kagoshima, Okinawa
General Information
0088-240-157
Customer Assistance
0088-240-113
General Information
0088-241-157
Customer Assistance
0088-241-113
General Information
0088-242-157
Customer Assistance
0088-242-113
General Information
0088-250-157
Customer Assistance
0088-250-113
Appendix
14
14-41
921T_web_0802.indb 14-41
08.3.23 1:59:14 PM
SoftBank 921T Instruction Manual
SOFTBANK MOBILE Corp.
* For additional information, please visit a SoftBank Shop.
Model: SoftBank 921T
Manufacturer:
Please help the mobile industry maintain high environmental standards. Recycle
your old handsets, batteries and charger units (all manufacturers and brands).
* Handsets, batteries and chargers submitted for recycling cannot be returned.
* Always erase all data recorded on old handsets (Phone Book entries, call records, mail, etc.) before recycling.
921T_web_0802.indb 14-42
08.3.23 1:59:14 PM