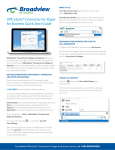
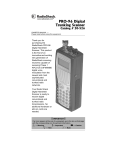
Download User Manual & Quick-Start Guide
Transcript
User Manual & Quick-Start Guide Version 2 © 2002-2008 – Promethean Software Corporation. All rights reserved. Table of Contents • • • • • • • • Introduction ................................................................................................. 5 Quick-Start Guide.......................................................................................... 5 o Installing TurboLaw ................................................................................... 5 o Configuring TurboLaw ................................................................................ 8 o Starting Your First Case.............................................................................. 9 Creating Your Case .................................................................... 9 Creating Your Case Documents ................................................ 11 Working on Your Existing Case Documents ................................ 13 Deleting Existing Case Documents ............................................ 13 o Editing Your Case .................................................................................... 14 o Hiding Your Case ..................................................................................... 14 o Deleting Your Case .................................................................................. 15 o Creating Blank Documents........................................................................ 16 o Registering TurboLaw .............................................................................. 18 o Tutorial Conclusion .................................................................................. 19 Keeping TurboLaw Up-To-Date .................................................................... 19 o Checking For Updates .............................................................................. 20 Update Options ....................................................................... 21 Using the Update Utility in Automatic Mode ............................... 22 Using the Update Utility in Manual Mode ................................... 23 Downloading Updates in Manual Mode ...................................... 24 o Automatically Checking For Updates .......................................................... 25 Update Options ....................................................................... 26 The Welcome Wizard .................................................................................. 26 o Attorney Names....................................................................................... 27 o Firm Information ..................................................................................... 28 o Automatic Updates .................................................................................. 29 Case Wizards .............................................................................................. 30 o Saving to “Alternate Case Folder Location” ................................................ 30 o Creating a Case Document Filing System ................................................... 32 Letterhead Options ..................................................................................... 33 o Configuring Letterhead Options................................................................. 34 Macros ....................................................................................................... 34 o Enabling Macros ...................................................................................... 35 Networking TurboLaw ................................................................................. 36 o Configuring the First Computer ................................................................. 36 o Configuring All Other Computers ............................................................... 39 Finalizing Network Setup.......................................................... 39 o Changing Your Network ........................................................................... 39 No Server ............................................................................... 39 With a Server .......................................................................... 40 2 • • • • • • Networking Two Existing TurboLaw Installations ........................ 41 Docking and Undocking ............................................................................... 41 o Undocking ............................................................................................... 41 o Docking .................................................................................................. 41 Protecting Your Data ................................................................................... 42 o Backing Up TurboLaw .............................................................................. 42 o Restoring from a Backup .......................................................................... 43 Working with Documents ............................................................................. 44 o Introduction to Document Editing ............................................................. 44 o Protected vs. Unprotected ........................................................................ 44 Protection: Editing all of the Document ..................................... 45 Displaying the TurboLaw Toolbar.............................................. 46 Adding Lines ........................................................................... 46 Finding Documents ..................................................................................... 46 o TurboLaw Document Search ..................................................................... 47 o Adding Your Own Forms........................................................................... 48 User Templates .......................................................................................... 49 o Creating Your Own Template .................................................................... 50 o Modifying Your Template.......................................................................... 52 o Deleting a Template................................................................................. 53 Troubleshooting .......................................................................................... 53 o Internet Resources .................................................................................. 53 o Frequently Asked Questions...................................................................... 54 How do I enable Macros? ......................................................... 54 How Do I Restore My TurboLaw Toolbar?.................................. 54 What do I do if my TurboLaw Toolbar is not available? ............... 55 What do I do when I get the message “ActiveX Component Can’t Create Object?” ....................................................................... 55 What do I do when I get a message saying that my version of OLEAUT32.OCX is out of date? ................................................. 56 How do I configure TurboLaw for use on a network?.................. 56 How can I include my Legal-Ease™ documents in TurboLaw? ..... 56 The computer on which TurboLaw is installed is not connected to the Internet; how can I update it? ............................................ 56 I know I need to enable macros, but I do not have that option in the Macro Alert window; how do I enable them? ....................... 56 What is the “Suggestions Box”? ................................................ 57 How do I change or edit “hard-entered” text in my document? ... 57 What if the Courts add or make changes to official forms? .......... 57 Why, when I launch a Financial Document, do I only get a blank Excel screen? .......................................................................... 57 What do I do if I have a question that isn’t answered here? ........ 57 o Advanced Troubleshooting ....................................................................... 58 Repair Utility ........................................................................... 58 3 o Register SCRRUN.DLL .............................................................. 58 Reporting Problems ................................................................................. 58 Email...................................................................................... 58 Telephone .............................................................................. 59 4 Introduction This manual will help you install, configure and use TurboLaw. Before you begin reading this manual, however, there are a few symbols with which you should first become familiar. These symbols are placed throughout the manual to alert you to important or helpful information. Information Warning Danger This icon will alert you to information that may be useful. Often you will find a reference to a different portion of the manual following this icon. This icon represents something you should be aware of and avoid if possible. Use extra caution when you see this icon. This icon will warn you of a potentially dangerous situation, or of something you should never do. You should never ignore the text that follows this icon. In addition to the icons listed above, this manual makes use of pictures (“screen shots”) of TurboLaw in order to help illustrate a point or to help you locate features. These screen shots are examples only, and when you are using TurboLaw on your computer, your screen may vary somewhat from those shown in this manual. Quick-Start Guide This Quick-Start Guide will walk you through the steps of installing, configuring and using TurboLaw. Just follow these simple instructions and you will be creating documents with TurboLaw in no time! Information If you have several computers connected via a local area network (LAN) and wish to use TurboLaw on more than one computer, you will still have to install TurboLaw onto each computer individually. Follow the instructions in this Quick-Start Guide on each computer that will be using TurboLaw. Installing TurboLaw To begin TurboLaw setup, simply insert the TurboLaw CD into the CD-ROM drive of your computer. In a moment the TurboLaw Install Wizard will appear. 5 Information If the Install Wizard does not appear after several seconds, you can begin the installation by clicking your Start menu and choosing “Run.” Then type in the following (where D:\ is the drive letter of your CD-ROM drive): D:\setup.exe Then click “OK.” If this does not work for you, your CD may be damaged or your computer may not be able to read certain types of CDs. Contact our TurboLaw Technical Support Department at (800) 518-8726. If necessary, a replacement CD will be sent to you. TurboLaw Setup License Agreement Screen You will be shown the TurboLaw License Agreement. Read the agreement, and then click the button which reads “I Agree.” If you do not agree, click “Cancel” and setup will close. On the next screen, you will be prompted for the directory in which to install TurboLaw. In most cases you can leave this as the default. If you wish to install TurboLaw on another drive or directory on your computer, you can select it by clicking “Browse” or by typing the path into the box. Once you have finished selecting a path, click “Next” to continue. 6 Warning When you select the installation folder for TurboLaw, do not select a folder that is not located on your computer. Most computers have only one “local” hard drive, which is typically called “C:\.” Your computer may have additional drives, some of which may be “network” drives (i.e., they represent data that is not physically stored on your computer, such as a folder on your server). You should install TurboLaw to your C:\ drive, and not to a network drive – even if you plan on using TurboLaw on your network. At this point, Setup is ready to install TurboLaw. Simply click “Next” and the files will be copied to your computer. After the files have been copied to your computer, setup will offer you the choice to check for updates. Setup is Finished In most cases, you will click “Yes.” It is always a good idea to check for updates regularly, as TurboLaw is updated often as new features and documents are added. Information Even if you have recently received your TurboLaw CD in the mail, you should still check for updates at this time. Often, new features, new documents and revisions to existing court forms are added after CDs are created and shipped. At this point, TurboLaw is completely installed on your computer. All that remains is to configure it to your liking, and then to begin entering case information. 7 Information If you are planning on using TurboLaw on your network, you should stop here and install TurboLaw on all of the other computers on your network. Then refer to the section entitled “Networking TurboLaw” later in this guide. Configuring TurboLaw After TurboLaw has been installed, simply double-click the TurboLaw icon on your desktop to begin TurboLaw. If this is the first time you have run TurboLaw, the Welcome Wizard will appear. The Welcome Wizard Follow the on-screen instructions to complete the information in the Welcome Wizard. (For more information on the Welcome Wizard, see the section “The Welcome Wizard” later in this document.) Information If you are installing TurboLaw onto a network, and have already entered this information once before, click “Cancel” to exit the Welcome Wizard. Then, click the “File” menu in TurboLaw and choose “Configure for Network.” After completing the Welcome Wizard, you may be prompted for your letterhead options. 8 Letterhead Options If you wish to configure your letterhead options now, see the section entitled “Letterhead Options” later in this document. Otherwise, simply click “Cancel” to start using TurboLaw right away. Starting Your First Case Before you can begin creating documents in TurboLaw, you must first enter information for your cases. After you have saved your case information, you will be able to create documents for that case. The documents you create will contain the information you entered into TurboLaw. Creating Your Case To create a case, click on the “My Cases” tab. (See next page.) 9 The “My Cases” Tab Information If you have just installed TurboLaw, you may also see the “Tip of the Day” screen. Simply click “OK” to close the Tip of the Day screen. You can un-check the option that says “Show Tips at Startup” if you do not want to see the tip screen again. On the left-hand side of the Navigator, you will see two drop-down boxes. The first one allows you to select the state for your case, and the second one allows you to select the area of practice. Make the appropriate selections, and then click “Start New Case.” The Case Interview Wizard for that area of practice will appear. Warning You will be unable to start the Case Interview Wizard if you have not entered a minimal amount of Firm information. You must have entered at least one attorney’s name (with ATTORNEY number), and the name of your firm. If you did not enter this information during the Welcome Wizard, simply click on the “My Firm” tab to enter the information now. 10 Case Interview Wizard - Example Since each area of practice has different requirements for information about the cases and parties involved, each Case Interview Wizard will be different. For example, in some cases you must enter the information for the Plaintiff and Defendant, while in others, you must enter the information for the Petitioner and Respondent. Each Case Interview Wizard consists of basic input fields, such as text boxes and calendars (for selecting dates). Simply follow the on-screen instructions to fill in the information for your case. Creating Your Case Documents Once you have finished the Case Interview Wizard, your case will appear in the list on the “My Cases” tab of the TurboLaw Navigator. To create a document for your case, simply double-click the case name in this list. A window will appear listing the documents that are available to be created for this case, along with the documents you have already created for this case. This window is called the “Case Document Window.” 11 Case Document Window If this is a new case, there will be no saved documents listed. To create a new document, first select its type from the drop-down list on the left. Once you have selected the document type, all the documents of that type will appear in the list on the left. Select the one you wish to create and then click the button labeled “Create New.” After a moment the document will appear and the information that you entered previously will be inserted automatically into the document. To close this window and return to TurboLaw, click the “X” in the upper right-hand corner, or choose “Close” from the File menu. When you do this, you will be returned to the “Case Document Window.” The document you just created will be listed on the right-hand side of the window. Its name will be appended with the current date, so you know when you created the document. 12 Working on Your Existing Case Documents If you need to work on a document you have already created, simply select its name from this list on the right-hand side and then click the button labeled “Edit.” Your document will be opened, and you will be able to edit or print your document. Deleting Existing Case Documents Sometimes you do not need a document anymore; or you would like to add a document to your case, but you created that document prior to installing TurboLaw. Or perhaps you would like to change the name of a document to something more meaningful to you and to your staff. To do any of these things, click on the button labeled “Open this Folder.” A standard Windows folder view will appear. The Open Case Folder Window 13 You can delete or rename files as you would with other files on your computer, using whatever method is most familiar to you (e.g. right-clicking, using the “File” menu, etc.). If you want to add additional files to your TurboLaw case file, you can copy them into this folder as you would with any other folder on your computer, using whatever method is most familiar to you (e.g. drag & drop, copy & paste, etc.). Editing Your Case Often, during the course of a case, some of the information may change; or you may not have had all the information when you created the case, and you would like subsequently to add that information. To do these things, you must edit your case information. To edit a case, simply select its name from the list on the “Cases” tab of the TurboLaw Navigator. Then click the button labeled “Edit Case Information.” The Case Interview Wizard for that case will appear, and you can make any changes you need. Once you have finished, click the button labeled “Finish” to save your changes and to return to the TurboLaw Navigator. Hiding Your Case If you are no longer actively working on a case, and you wish to “hide” it in the list of cases, you can make it “inactive,” in which case it will no longer be displayed in the list of cases. However, your case is still stored in TurboLaw, and TurboLaw can display “hidden” cases if you prefer. To “hide” a case, you must make it “inactive.” This can be done in either of two ways. The first way is to select the case you wish to hide, and then click “Edit Case Info.” The Case Interview Wizard for that case will be displayed. In the bottom left-hand corner, there will be a checkbox that says “Mark This Case as Active.” Simply un-check this box, and then click “Finish” to save your changes. Alternatively, you can right-click on a case, and choose “Case Information.” 14 Context Menu - Case Information Once you click “Case Information,” the Case Information screen will appear. This screen lets you view and edit basic information about your case, such as the name of the case, and the attorney associated with it. Case Information Screen From this screen, you can click the option that says “Inactive,” and then click “Save” to save your changes. Your case will be marked as “Inactive” and will not be shown in the case list. To show hidden cases, simply check the box labeled “Show Inactive Cases,” which is located below and to the right of the case list. Deleting Your Case In some cases, you may wish to delete a case you have entered. Perhaps you only entered it as a “sample” case while learning how to use TurboLaw. To delete a case, right-click the case name from the case list, and choose “Delete Case.” 15 Warning Deleting a case is a permanent action, and cannot be undone. Use caution when deleting a case, as the information cannot be recovered, even if you have an “undelete” utility installed. Delete Case You will be asked if you are certain that you wish to delete your case. In order to confirm your choice, you will be asked to type in the word “yes” before the case is deleted. If you are indeed certain that you wish to delete this case, type in “yes” and then click “OK.” Your case will be deleted permanently. Delete Case Confirmation Creating Blank Documents To create a document without first creating a case, click on the “Cases” tab of the TurboLaw Navigator. Then select the state and area of practice containing the document you would like to create. (These are the same drop-down windows that you use when creating a new case.) Next, click the button labeled “Create Blank/Empty Form.” You will be presented with a list of forms from that state and area of practice. 16 Create Blank/Empty Form To view a document, simply double-click its name, or select it from the list and click the button labeled “View.” Your document will be displayed. If you want to save this document, you MUST use the “Save As” command. If you only want to print the document, you may do so normally. If you want to have TurboLaw first copy the document to a location you specify before viewing it, right-click on the document to bring up the menu shown below. (See next page.) 17 Blank Document Context Menu From this menu you can open the document normally (as if you double-clicked it), or you can have TurboLaw save a copy of the document to a location you specify. You can also have TurboLaw save the document to a location you specify and then immediately open it. If this is your first time using this feature, TurboLaw defaults to your Desktop. However, you can save these documents anywhere you choose – including to your “My Documents” folder or to a network drive. Registering TurboLaw TurboLaw must be registered to confirm that you have purchased the program. After installing TurboLaw, you have 30 days to enter your registration code. If you have not entered a registration code after 30 days, TurboLaw will deny access to new cases and documents until a registration code is entered. To register TurboLaw, simply select the “Help” menu and choose “Register TurboLaw.” You will then see a screen similar to the one shown below. (See next page.) 18 The Registration Screen If you have an Internet connection on your computer, click the “Register On-Line” button to register TurboLaw. TurboLaw will obtain your registration code automatically – there is nothing else for you to do. Information You must have entered your firm's phone number into TurboLaw in order to register online. This phone number must also match the one that Promethean Software Corporation has on file for your firm. If you do not have an Internet connection, or if you cannot register online for any reason, simply click the “Register By Phone” button, and then call Promethean at 1-800518-8726 to register. Alternatively, you can email [email protected] with your key number to register by email. You must also provide your firm information when you call or email, so that your account can be referenced. Once you have entered the 18 digit registration code, click the “OK” button. Once your code has been validated, TurboLaw will respond by displaying a window which says "Thank you for registering TurboLaw!" If you made a mistake entering your code, you will receive an error. You should then double-check your code to verify that it was entered properly. A proper TurboLaw registration code will consist only of numbers (0 9) and letters (A - F). Tutorial Conclusion This concludes the TurboLaw Quick-Start guide. You should now be able to create cases and documents, as well as edit and print those documents. If you would like to learn more about how to use TurboLaw, continue reading for detailed information on the other features of TurboLaw. Keeping TurboLaw Up-To-Date 19 TurboLaw is constantly evolving. New features are added by request, forms are revised or added as necessary, and rare problems are discovered and corrected. Because it is so easy to communicate with TurboLaw support staff, new or revised documents, features requests and problem fixes are often implemented very quickly. Therefore, it is very important to check for updates regularly to ensure that you have the latest versions of TurboLaw and all the documents you use. TurboLaw can be kept up to date in one of two ways – either by checking manually for updates, or by having TurboLaw check automatically for updates. Checking For Updates To check for updates at any time, you must run the TurboLaw update utility. First, make certain that your computer is connected to the Internet. Running the TurboLaw update utility is accomplished in either of two ways: 1. On the Start menu, click on Programs -> TurboLaw -> Utilities -> Check for Updates 2. On the “Updates” menu at the top of the TurboLaw main window, choose “Check for Updates.” Either method will bring you to the TurboLaw update utility. Warning Be aware that if you have installed TurboLaw on your network, and have several computers running TurboLaw, you must run the update utility on each computer individually. Updates installed on one computer are not installed on other computers on the network. In addition, it is highly recommended that you keep all computers on your network updated together. If you update one computer but not others, you may receive error messages from the computers that have not been updated. (See next page.) 20 TurboLaw Update Utility – Automatic Mode Update Options By default, TurboLaw’s Update Utility will start in what is known as “automatic” mode. It is called “automatic” mode because once you click “Start,” TurboLaw will begin checking for and downloading any available updates. If you would like more control over what is updated, you can switch to “manual” mode by clicking the “Options” button. Update Utility Options 21 Select the mode you would like to use, and then click “OK.” If you do not want to change your current update mode, click “Cancel.” Using the Update Utility in Automatic Mode Using the update utility is as easy as clicking “Start.” Simply click “Start” and the utility will compare the currently installed version of TurboLaw and documents against those available. If newer versions are available, they will be automatically downloaded. When the update process is finished, click “Finish” to close the Update Utility. Information When using “automatic” mode, the update utility will download all available updates. If you are connected to the Internet via a dial-up modem, this process could take some time. Be prepared to wait while the updates complete. Alternatively, you may wish to run the update utility at the end of the day, so that it can download the files overnight. TurboLaw Update Utility – Automatic Mode The automatic update will display its progress in the middle of the screen, in a “textonly” mode. You will see a percentage display for each individual file; however, there will be no overall percentage display. If there is an update to TurboLaw’s program file or other system files, a setup screen may appear at the end of the update. You must click “Next” on this new screen to ensure that the update is completely installed. You may have to restart your computer 22 after applying this type of update; if you are prompted to restart, save your work and restart your computer. Using the Update Utility in Manual Mode Using the update utility in Manual Mode is as easy as clicking “Next.” Simply click “Next” and the utility will compare the currently installed version of TurboLaw and documents against those available. If newer versions are available, they will be automatically selected for download. Once the check is complete, you will have the option to review the files that TurboLaw Update has selected. To do this, click the “Display Files” button. Finished Checking For Updates in Manual Mode (See next page.) 23 The List of Files Selected TurboLaw will display all of the files which need to be updated. If you don’t want to download some of the files, you can un-check the check box next to each file’s name. The un-checked files will not be updated. If you would like the Update utility to show you ALL of TurboLaw’s files, choose the “All Files” option at the bottom of the screen. TurboLaw will display all files, and you can command TurboLaw to update any file by checking its check box. You can also use the “Deselect All” and “Select All” buttons to deselect all of the files or select all of the files, respectively. If you decide you want to restore the original selections made by TurboLaw (discarding any check box changes you have made), click the “Restore Default Selection” button. Downloading Updates in Manual Mode After TurboLaw has determined what updates are available, simply click “Next” to begin downloading the updated file(s). (See next page.) 24 Downloading Updates – Manual Mode Once the download process is complete, the Update Utility will display a dialog box informing you that the updates were completed. Click “Finish” to close the Update Utility. If there is an update to TurboLaw’s program file or other system files, a setup screen may appear at the end of the update. You must click “Next” on this new screen to ensure that the update is completely installed. You may have to restart your computer after applying this type of update; if you are prompted to restart, save your work and restart your computer. Automatically Checking For Updates TurboLaw can, if an active Internet connection is available, check for updates automatically each time it is started. This feature is called “Automatic Updates” and can be enabled through the “Update” menu in TurboLaw. 25 Update Options In TurboLaw, clicking on the “Update” menu, then selecting “Update Options” will display the Automatic Update Options window. Here you can choose either to enable or disable automatic updates. Simply select the preferred choice, and then click “OK.” Update Options Window If automatic updates are enabled, TurboLaw will run the update utility in “silent” mode each time TurboLaw is started. The update utility will silently (without prompting you, the user) download all available updates and then exit. Information You should not enable automatic updates unless you have a constant, high-speed connection to the Internet on your computer (such as DSL, cable or T1/LAN). The Welcome Wizard When starting TurboLaw for the first time, the Welcome Wizard helps you fill in important information to get started using TurboLaw right away. However, you can run the Welcome Wizard at any time and it is an easy way to make sure you have configured the most important options in TurboLaw. To start the Welcome Wizard from TurboLaw, click the “View” menu, and then choose “Welcome Wizard.” The Welcome Wizard will be displayed. Information All of the information that is entered into the Welcome Wizard can be entered later into TurboLaw. Most of this information can be found on the “My Firm” tab of the TurboLaw Navigator. Other information can be found by clicking the “Update” menu and choosing “Update Options.” (See next page.) 26 The Welcome Wizard Attorney Names The second screen of the Welcome Wizard allows you to enter the names and ATTORNEY numbers of attorneys in your firm. Simply type in the boxes where indicated the name as you would like it to appear on documents – e.g., John W. Smith, Esq., or Attorney Judith B. Goode – and the ATTORNEY number of each attorney to be included, then click the button labeled “Add Attorney.” (See Next Page.) 27 Attorney Names If you need to remove an attorney from the list, just click the name to select it and then click the button labeled “Remove Attorney.” Information You can also add and remove attorneys from the “My Firm” tab of the TurboLaw Navigator. Firm Information The third screen in the Welcome Wizard allows you to enter your firm information, including your firm name, address and telephone number. Information You can also change firm information from the “My Firm” tab of the TurboLaw Navigator. 28 Firm Information Automatic Updates The fourth screen of the Welcome Wizard allows you to select whether or not automatic updates will be enabled. Simply click your choice to enable or disable automatic updates. Information You can also enable or disable automatic updates by clicking on the “Updates” menu and then choosing “Update Options.” (See next page.) 29 Automatic Updates Selection Case Wizards The Case Wizards help you to enter the information for a case. Each Case Wizard is custom-tailored to a particular state and area of practice, and is designed to guide you through the steps of entering all the information necessary to create documents for your case. Since each Case Wizard is different, you should click the button labeled “Help” if you need additional instructions on using a particular Case Wizard. Saving to “Alternate Case Folder Location” In the “Case Name” window of the TurboLaw Case Wizard you have the option to save documents you create in TurboLaw to an alternate case folder location. (See Next Page.) 30 Case Name Window To save files to another folder – e.g., saving the “Smith v. Smith” TurboLaw divorce case documents to the “Smith, John W.” folder on your system’s hard drive or on your network’s server – check the box marked “Alternate Case Folder Location.” A file path window will appear, allowing you to browse to the location of the desired folder – in this example, the “Smith, John W.” folder. Warning You should always select a separate folder for each case. If you have previously selected the same folder for two or more cases, you will receive a warning. You will then have to select a new folder and sort out which files belong to each case yourself. Selecting the same folder for more than one case prevents TurboLaw from tracking which documents belong to each case. (See next page.) 31 Selecting An Alternate Case Folder Danger When selecting an alternate case folder, DO NOT select a folder by browsing through your “My Network Places” or “Network Neighborhood” icon. You must select a folder that begins with a drive letter, such as C:\ or T:\. If you are not sure if your selection meets this requirement, click “OK” and look at the information entered into the text box. If it begins with a double-backslash (“\\”), then you cannot use that folder. Click “Browse” and select a different folder, preferably one using a mapped network drive. If you are unsure as to how to do this, or if you do not know what a mapped network drive is, contact your network administrator or TurboLaw technical support. Thereafter, all documents created in TurboLaw for this case will automatically save to that location, and it will not be necessary to open TurboLaw to access them – simply browse to the folder and double-click the document, as you would an ordinary document file. Word or Excel, depending on the document type, will open and you can edit, print and save changes just as you would with any other file. Creating a Case Document Filing System Many firms do not have a formal document management system. Think of the following model as an electronic metaphor for your filing cabinet. To access a document, you open the cabinet, select the case folder and retrieve the document. Follow these simple steps to set up your own intuitive, easy-to-use case document filing system – your own electronic filing cabinet: 32 • • • • • • In the “My Documents” folder (on either your local drive or network server), go to File -> New -> Folder to create a new folder called CLIENTS. This will create your electronic “filing cabinet.” On the menu bar at the top of the window, click on View > List. This will provide you with the most efficient view of your client folder list. On the menu bar at the top of the window, depending on your operating system, click on either View -> Folder Options or Tools -> Folder Options. In the window that opens, click on the View tab. Next, click on the button labeled “Like current folder” or “Apply view to all folders” and then click OK. This will apply the “List” view to all windows that you open for easier, more efficient navigation. Open the new CLIENTS folder you have just created and then create new folders for your existing clients using the naming method you use in your paper filing cabinet, e.g., “Smith, John W.” or “Doe, Jane M.”, etc. (After you have created folders for your clients, you should cut and paste documents you may have stored elsewhere into those respective clients’ folders.) Return to the “My Documents” folder and right-click on the CLIENTS folder you have created, then select Send to -> Desktop (create shortcut). In a network environment, do the same for each workstation so that all shortcuts point to the common CLIENTS folder on the server. Close the “My Documents” folder and return to your desktop. Locate and rightclick on the shortcut icon for CLIENTS, then select Rename. Delete the text, “Shortcut to” from the name so that the shortcut is now named CLIENTS. Now, whenever you wish to open a document, simply double-click on the CLIENTS shortcut, double-click on the particular client’s folder, and double-click on the file itself. This is just like opening the file drawer and removing the client’s folder for review. The document will then open in the application that created it and you will be able to edit, print and save changes to it. As more and more documents collect in a client’s folder, you may wish to create sub-folders such as “Pleadings,” “Correspondence,” etc., to organize the documents – just like your paper filing cabinet. Information Note that you are not required to use this model if you do not wish to do so. If you have your own filing system in place, then feel free to continue to use that model. Also, documents in your case folders will always be available from within TurboLaw. Simply double-click your case to display the documents (and other files) for that case. Letterhead Options Correspondence is a common type of document found in virtually every area of practice. In order to make printing correspondence easier, TurboLaw allows you to use your firm’s own pre-printed letterhead or to create it in TurboLaw for use with included documents. 33 Configuring Letterhead Options To begin configuring letterhead options, click the “View” menu in TurboLaw and then click “Letterhead Options.” The letterhead options window will appear. Letterhead Options Screen If you do not wish to use any letterhead, choose the first option. If you wish to use your own pre-printed letterhead, choose the second option. You will be prompted to enter how many inches are required for your letterhead (as measured from the top of the page). If you would like to create your letterhead now, choose the third option. When you click “OK” you will be shown a blank letterhead template. Feel free to customize this letterhead as much as you want, even copy and paste from existing documents. Then simply save this letterhead file as you would any other document, and when you create correspondence, this letterhead will automatically be inserted at the top of the document. Macros Macros are a critical part of TurboLaw’s functionality. They allow TurboLaw to manipulate documents and to insert data where required. If macros are not enabled in 34 Microsoft Word or Excel, then the TurboLaw documents based on those programs will not work properly. Enabling Macros To enable macros, follow these steps: • • • • • Click on your Start menu, then click on Programs -> TurboLaw -> TurboLaw Readme When this document opens, you may be prompted with a window which will say something similar to “This document contains macros …” (The exact language of this message will depend on your version of Word.) There will be a checkbox for “Always Trust Macros from This Source.” Check it, and then click “Enable Macros.” The document will open with a dialog box that says “Thank you for enabling macros!” Your macros are now enabled. Because of restrictions of the digital certificate technology used with Microsoft Word, and because some versions of Microsoft Word (i.e. Word 2000) have flaws which remove the digital certificates, some documents created with TurboLaw may not have a valid digital certificate after they have been created. Because the digital certificate is no longer valid, Microsoft Word will (by default) disable all of the macros in the document which shuts off important functions for your TurboLaw document. To correct this problem, you must change your macro security setting in Microsoft Word to "medium." This will give you the option to either enable or disable macros in documents that do not have a valid certificate - so that you can enable macros for TurboLaw documents. Follow these steps to change your macro security settings: • • • Start Microsoft Word. Click on Tools -> Macro -> Security. In the dialog box which appears, select “Medium,” then click “OK.” Information You must close Microsoft Word for these changes to take effect. You must also close Microsoft Outlook, as this program uses Word for editing email, and Word will not truly be closed until both Word and Outlook are both closed. Your macro security is now set to medium, which will allow you to choose whether to enable or disable macros. (Choosing “High” as your macro security level automatically 35 disables most macros.) Remember to always enable macros when opening TurboLaw documents - if macros are disabled, then problems may occur. For more information on macros, see the Troubleshooting section later in this document. Networking TurboLaw As a database-driven document preparation system, TurboLaw fits naturally into an office network environment. The TurboLaw database (data entered into the Case Wizard) can be shared, added and revised by many users, and the documents created by TurboLaw can also be shared, added and revised. Installing TurboLaw on your network begins with installing TurboLaw on each workstation. You do not have to enter any attorney, firm or case information once TurboLaw is installed on the workstations. However, you should check for updates on each workstation, to ensure that you have the latest version of TurboLaw on all your computers. Configuring the First Computer Once TurboLaw has been installed on all your workstations, you must choose a location on your network for the TurboLaw database and cases. It is often easiest simply to create a folder called “TurboLaw” on your shared network drive. Once this is done, click the “File” menu in TurboLaw (from any workstation), then click “Configure for Network.” The Network Setup Assistant will appear. (See next page.) 36 The Network Setup Assistant To configure TurboLaw for use on your network, select the second option (“I am using TurboLaw on a network”). Then, click “Next.” (See next page.) 37 Network Setup Assistant - Options Network Setup Assistant – Specifying the Network Folder 38 On this screen, click “Browse” to select a folder on your network where you would like to keep the TurboLaw database and files. Danger When selecting this folder, DO NOT select a folder by browsing through your “My Network Places” or “Network Neighborhood” icon. You MUST select a folder that begins with a drive letter, such as C:\ or T:\. If you are not sure if your selection meets this requirement, click “OK” and look at the information entered into the text box. If it begins with a double-backslash (“\\”), then you cannot use that folder. Click “Browse” and select a different folder, preferably one using a mapped network drive. If you are unsure as to how to do this, or if you do not know what a mapped network drive is, contact your network administrator or TurboLaw Technical Support. Once you have selected a folder, click “Finish” to save your settings. (If no database is found in the folder you selected, TurboLaw will ask you if you want to copy a blank database to that folder. This is desirable when you are setting up a new network.) You can now configure your other workstations in the same way. If you are changing your TurboLaw configuration from a single-computer installation to a multi-computer network, see the section entitled “Changing Your Network.” Configuring All Other Computers Once you have configured the first computer, you can begin configuring all the other computers on your network. Simply go to each workstation, start TurboLaw, click the “File” menu, then click “Configure for Network.” Finalizing Network Setup Once you have configured all of your workstations to use TurboLaw, you can begin entering firm and attorney information. You may wish to run the Welcome Wizard, and you may do so by clicking the “View” menu in the main TurboLaw window, then selecting the “Welcome Wizard” option. Double-check all of your workstations to see that the firm and attorney information you entered appears. If it does not, see the Troubleshooting section later in this guide. Changing Your Network If you have TurboLaw installed on one computer, but decide to add computers with TurboLaw to your network, you will need to adjust your configuration. No Server If your network does not have a dedicated server, then you will simply need to “share” your computer’s TurboLaw folder, effectively making your computer the “server.” You 39 can do this manually using Windows Explorer; if you need help, please contact your network administrator. After you have shared your TurboLaw folder, you will need to configure each additional workstation after you have installed TurboLaw. Choose “Option 2 – Manual Configuration” and “browse” for the folder you shared. This folder should be mapped to a drive letter (preferably the same drive letter for all workstations), so that it appears in your “My Computer” window. Such drives have names in the format of “[shared folder name] on [computer name] (X:)”, where “X” is the drive letter you chose. Many offices use “T” (for TurboLaw), but the choice of drive letter is up to you. You can use any letter that is not already in use; most computers already have drives assigned to letters A, B, C, and D. With a Server If your network does have a dedicated file server, then you will need to create a folder for this server that can be accessed by all users who will be using TurboLaw. This can be done manually through Windows Explorer, or it can be done from within TurboLaw. If you have a server, you will first need to re-configure your existing TurboLaw installation. To do this, first open the Network Setup Assistant by clicking the “File” menu, and choosing “Configure for Network.” You will need to choose the “I am using TurboLaw on a Network” option, and you will also need to choose the “I am a workstation, but I would like to configure TurboLaw manually” option. Once you have done this, click “Next.” On the next screen, click the “Browse” button to select a folder in which to store TurboLaw’s database. If a folder does not already exist, you can create one by clicking the “New Folder” button. Be sure to select a location that can be accessed by all workstations. Once you have selected a folder, you will need to tell TurboLaw to copy the TurboLaw database to that folder. To do this, click the “Advanced Options” button, and then check off the first check box, which is labeled “I would like TurboLaw to copy all of my cases and documents to the network folder I specified on the previous screen.” Then, click the “OK” button, and then click the “Finish” button. TurboLaw will copy all of the cases from this computer to the network folder, where they will become available to other workstations. When you configure the new workstations, you will repeat these steps, excluding the creation of a new folder and the “Advanced Options” steps above. 40 Networking Two Existing TurboLaw Installations If you have TurboLaw installed on two computers which are not networked, and later you network the two computers together and want to share TurboLaw data, you will need to consider the effects of having entered cases on both computers. Since TurboLaw databases cannot be merged, if you have entered cases on both computers, you will not be able to network the two computers and still keep the cases from both. One computer’s database will be shared, and both computers will see only the cases from this one computer. The other database will not be accessible (although it will not be erased, and if necessary, you can switch back and forth between “networked” and “not networked” to access these cases – NOT recommended). Thus, it is HIGHLY recommended that multiple users of TurboLaw network their program from the very beginning. Docking and Undocking Once you are connected to a network and TurboLaw is configured for use on your network, you have the option to “undock” from the network and continue to use TurboLaw locally. This option is intended for use with laptop computers which may be connected to the office network, but may also be disconnected from the network (for example, when you take your laptop home at night or on weekends). In these cases, you may wish to continue using TurboLaw, even though you are no longer connected to your network. In TurboLaw, this is accomplished by “undocking” from your network, and then “docking” to your network when you return. Undocking Before you disconnect your laptop from your network, select the “Database” menu from TurboLaw, and choose “Undock.” TurboLaw will copy your data to your laptop’s hard drive, and synchronize the database and files (as needed). When this process is done, you will see a dialog box informing you that it is now safe to unplug your laptop from the network. At this point, you can disconnect your laptop from your network. Warning You should not stay “undocked” from your network for more than thirty days. If you do, you will be unable to synchronize your changes with the data on the network, and any changes or additions you have made will be lost. To avoid this, always “dock” back to your network within thirty days of undocking. Docking 41 When you return to your office after undocking, first plug your laptop back into the network. Information You should check to ensure that you are correctly connected to your network before attempting to dock TurboLaw. Check your mapped drives, network folders, email and other applications to ensure that you have successfully reconnected to your network before proceeding. Once you have reconnected to your network, start TurboLaw and select “Dock” from the “Database” menu. TurboLaw will synchronize any changes you have made while you were away, as well as any changes your office staff may have made. In the event that there is a conflict (e.g., the same file was modified or the same record was changed), a screen will appear asking you what you want to do. You can select which record to keep or you can attempt to reconcile the differences manually. Information Conflicts such as these are rare. If you encounter a conflict that TurboLaw cannot resolve on its own, use the “Conflict Manager” by clicking on your Start menu and choosing Programs -> TurboLaw -> Utilities -> Conflict Manager. Protecting Your Data It is a fact of life that computer failures occur. When a computer failure occurs and data is lost, hundreds (if not thousands) of valuable man-hours worth of work can be lost in an instant. To protect against these types of disasters, it is always a good policy to back up your data to a secondary medium. Then, if a computer failure occurs, you can restore your data from the most recent back up – saving you the time, money, and effort of re-entering all your data. Backing Up TurboLaw TurboLaw, like many other programs, allows you to make a back up of all your case data. Information Warning Note that TurboLaw cannot back up your data if you are currently “undocked” from the network. Also, TurboLaw cannot back up data to certain types of media – such as a floppy disk, a CD-R, or a tape drive. You must take the extra step of copying TurboLaw’s backup files to such media on your own. If you have any cases in TurboLaw which use the Alternate Case Folder option, these cases cannot be backed up by TurboLaw. You will receive a warning message, which lists the affected cases. You will have to back up the files for these cases on your own – TurboLaw cannot do it for you. 42 To back up TurboLaw’s data, simply select “Back Up TurboLaw” from the “File” menu. You will be prompted for a folder in which to save the backup files. Once you have selected a folder, TurboLaw will back up your database and all of the documents you have created with TurboLaw to that folder. Note that the backup may take a few minutes, especially if your data is located on a network drive. Information TurboLaw’s backup files are regular “zip” files, and can be read by any “zip” compatible program, such as PK Zip® or WinZip®. The TurboLaw backup makes 2 files – one which contains the database, and one which contains all of the case documents. If you are copying your TurboLaw backup files to a different media (such as CD-R), remember to copy both of these files. If you are performing regular backups (by default, TurboLaw reminds you to back up your data every 7 days), you can store all of the backup files in the same folder. The backup files will be named with the date on which the backup occurred, so you can later select to restore from a specific date. Restoring from a Backup If you need to restore your TurboLaw data from a previous backup, simply select “Restore TurboLaw” from the “File” menu. You will be prompted for the location of your TurboLaw backup files. Simply select the folder that contains your files and click “OK.” Warning Although TurboLaw’s backup files are stored as regular “zip” files, you should NOT try to open or extract these files yourself. TurboLaw organizes the backup files in a special way so that the necessary data files can be restored properly by TurboLaw itself. If you attempt to extract the files on your own, the necessary data files may not be placed in the proper locations and TurboLaw may not function properly. After selecting a folder, TurboLaw will display a list of backups that were found in that folder. The backups will be labeled by date. In most cases, you will choose the most recent backup date; however there may be circumstances where you wish to restore from an older data set. Once you have selected the backup date you wish to use, click “OK.” The final step in restoring TurboLaw is choosing the drive on which to save the restored data. TurboLaw does not allow you to choose a folder for the restored data – when the data is restored, the original folder names present at the time the backup was made will be used. For example, if you backed up TurboLaw from your C: drive previously, you should select your C: drive again. In most cases, the folder used will be C:\Program Files\TurboLaw, and this is where the data will be restored. If your TurboLaw data was previously stored on a network drive, you should select that network drive (or a similar network drive) when restoring. For example, if your data was previously located in T:\Office Data Files\TurboLaw Data, then you should choose 43 the “T:” drive when restoring. TurboLaw will place your restored files back in the same folder (if the folders do not exist, they will be re-created). Information Note that when restoring to a network drive, you do not necessarily have to use the exact same drive letter. When setting up a network drive, the choice of drive letter is completely arbitrary – you can select whatever letter you want. However, for consistency, it is recommended that you try to use the same drive letters. This will result in less confusion later on. Once you have selected the restore drive, TurboLaw will extract the files and data from the backup and restore them to the selected drive, creating any folders that are needed. If existing documents exist in the location you selected, they will only be overwritten if the documents from the backup are “newer.” Note that the restore process may take a few minutes, especially if you are restoring to a network drive. Once the restore process is complete, TurboLaw will be configured to open the newly restored database, and your restored cases will be available. If you are restoring to a network, and have restored to the same network drive, any other workstations that have TurboLaw installed should not need any additional configuration – this is because you have restored the data to its original location. If you have not chosen the same network drive, then you will have to use the Network Setup Assistant to configure your other workstations. (See: Networking TurboLaw.) Working with Documents This section will discuss some of the basic skills you will need to use from time to time in order to modify TurboLaw documents to suit your needs. Introduction to Document Editing Since most TurboLaw documents are displayed in Microsoft Word, this section will focus on editing these types of documents. However, some documents in TurboLaw (most notably the Financial Forms) are displayed using Microsoft Excel, which allows them to execute the complex mathematical calculations required by these types of forms. These Excel-based documents will be discussed later in this section. Protected vs. Unprotected In order to comply with court rules regarding the computer-based reproduction of official forms, TurboLaw documents must precisely match the original court-issued documents. To achieve this, TurboLaw documents are “protected” by default. A protected document only allows you to type into the gray “form fields” that you see scattered through the document. Simply click on one of these fields and begin typing. To move to the next field, click the TAB key on your keyboard. Some of the fields are 44 formatted to accept only certain types of text, such as a date or a number – these fields will give you a warning if you type something that is not allowed, and will not allow you to move to another field until you change what is wrong. For example, a field which only allows numbers would not allow you to type “12 or 13,” because this is not a real number. If you need to type text where a field does not allow it, you will have to unprotect the document for editing, which is explained in the next section. Some fields can help you save time by auto-formatting the text; for example, fields that require a date can recognize many common date formats. Thus, if you were to type “413” into a date field, Word would automatically re-format the date to either “4-13-2004” (using the current year) or “April 13, 2004” (depending on the needs of the document). Thus, you can save time when typing dates by using a “shorthand” date format, and letting Word fill in the other information. In some number fields, Word will automatically format numbers with the correct number of decimal places, and may also add a dollar sign to the beginning of the number (if the number is meant to represent a dollar amount). In the case of dollar amounts, if you attempt to enter the dollar sign yourself when it is not needed, Word will report an error and not allow you to continue until you remove the dollar sign. Protection: Editing all of the Document Sometimes, it may be necessary for you to change some of the default, or “hardentered,” text of the document. This text will not be enclosed in a gray form field, and therefore, by default you will be unable to edit it. However, editing this text is very simple with TurboLaw. Switching from a protected to an unprotected document is as easy as clicking a single button. The TurboLaw toolbar is added to Word when TurboLaw is installed, and appears (generally) in the upper left-hand corner of your screen. The TurboLaw toolbar also contains some useful buttons from Word that are not usually displayed by default, but that may be useful to users of TurboLaw (such as the strikethrough buttons). The TurboLaw Toolbar The “Edit Document” button allows you to protect and unprotect a TurboLaw document at will. The button acts like a toggle switch; each click (“press”) of the button changes the document from protected to unprotected, and vice versa. The other buttons on the toolbar are (from left to right): Save As, Check Spelling, Print, Page Setup, Show Paragraph Marks, Normal View, Print Layout View, Show Table Gridlines, Strikethrough and Double Strikethrough. 45 Only some of these buttons require additional explanation, as the others are so commonly used that their function will be obvious. The Page Setup button allows you to change the margins on a document, as well as the page orientation and other printrelated options. The Show Paragraph Marks button is another “toggle” switch, which will display (or hide) the paragraph marks in the document. The two “view” buttons switch between two of the possible views of the document; some users prefer one view over the other. The two strikethrough buttons allow you to put strikethrough marks over selected text; this can be useful when an official court form expressly so instructs. The “Check Spelling” button functions slightly differently from the standard Word “Check Spelling” button, in that it will check the spelling of text entered into the gray form fields. Displaying the TurboLaw Toolbar Sometimes, the TurboLaw toolbar is not visible in a document. In that case, simply right-click on any of the toolbar buttons at the top of the screen, then click on “TurboLaw” from the list which appears. The TurboLaw toolbar should now be visible. If you have trouble with your TurboLaw toolbar, especially with the “Edit Document” button, see the Troubleshooting section later in this document. Adding Lines Sometimes, when filling out a form, there will not be enough space for you to add the necessary information. If you are unable to add an extra line by using the unprotect button, the document may be using “tables” – a feature of Word that allows for exact text placement. In these cases, adding an additional line may be accomplished by adding another “row” to the table. To do this, first make sure your document is unprotected (see: Protection). Then, place your cursor at the end of the line, and click the “Table” menu at the top of the screen. Then, point to “Insert,” and then click on “Rows Below” (or above). Word will insert a new row below the current one. When adding lines to documents, be careful to review your documents carefully – adding lines can often “push” text down onto a second or third page, distorting the original format of the document. Warning Note that computer-generated forms are regulated by specific rules. These forms must conform to the original design of the court form; if you change the form by adding lines, the court may reject your form. Finding Documents 46 TurboLaw contains so many documents that at times it may be difficult to locate the document you need. Documents in TurboLaw are listed alphabetically, by form name, which often includes the form number (such as “A.C. 110”). If you do not know the form number of the document you are trying to locate, you may not be able to find the document easily. Fortunately, TurboLaw includes an advanced “search” feature to help you locate documents. This will allow you to locate documents quickly, based on just a portion of the document’s name. TurboLaw Document Search By using the Document Search Window, you can search for documents within TurboLaw and you can open documents directly from the search window. Opening the search window can be accomplished either by clicking the “Database” menu and choosing “Search Documents,” or by clicking the “Search Docs” button in either the Create Blank/Empty Form window or the Case Document window. The TurboLaw Document Search Window When the search window first appears, it will list all of the documents contained in TurboLaw, sorted alphabetically by name. To search, simply start typing in the text box at the top of the window. As you type, the search results will be narrowed. The state, area of law, and category will also be displayed, so that you can find the document 47 later without having to search. Note that document searches within the TurboLaw program are NOT case sensitive. If you would like to open a document, simply double-click on its name. A blank version of the document will be displayed, which you can print, save or edit as needed. If you have a case currently open in a window, your document will be automatically saved into that case. If you do not have a case open, the document will be saved in a temporary folder, and you must save it somewhere permanent – otherwise, the document will be lost when the temporary folder is emptied. Information Documents opened in the search window are opened in the same way as the “Blank/Empty Form” window – that is, they are not filled in with any case information. If you need a form to be filled in with case information, make note of the document you need (which category it is in), and then locate the document in the normal way to create a document with case information. To start your search over, simply click the “Clear Search” button. Your search terms will be erased, and the full list of documents will be restored. Adding Your Own Forms It is possible to add your own forms to TurboLaw’s list of forms. This can be useful if you have a particular document that you like to use, especially if a similar document is not included in TurboLaw. Information Documents that you add to TurboLaw in this way will not be filled in automatically with your case information. Only official TurboLaw documents can be filled in automatically by TurboLaw; however you can still open your own documents easily from within TurboLaw and edit them as you normally do. To add your own forms to TurboLaw, you can either select “Add Documents to TurboLaw” from the Database menu, or you can click the “Add Docs” button on the Open Blank/Empty Forms window. In either case, you will be presented with the following screen. 48 The “Add Your Own Documents” Screen Simply select the state, area of practice and category for your document, and then click “Add Document.” You can then browse for your document, and upon selecting it, it will be added to the list of documents for that category. Once a document has been added to TurboLaw, you can open it easily from the “Create Blank/Empty Forms” window. Information Removing one of your documents from TurboLaw is accomplished via the “Create Blank/Empty Forms” window. Simply right-click on your document name to remove it from the list. User Templates It is possible to modify any of the “template” forms provided with TurboLaw to suit your own needs. These modified templates are known as “user templates.” This option can be used to create your own derivative forms, or to create entirely new forms that do not currently exist in TurboLaw. You can also modify documents that you use frequently; for example, if you make a certain edit to a form every time you use it, you could make that edit part of a new template, and then you would not have to make that edit each time you created the form. 49 Creating Your Own Template To create your own template, simply click on the “File” menu in TurboLaw, and choose “Manage User Templates.” You will see a screen similar to the one shown below. The “Manage User Templates” Screen This screen displays all of the templates you have created. To create your own template, click on “New Template.” You will see a screen similar to the one shown below. 50 The “Create User Template” Screen From this screen, you can select the TurboLaw document on which you would like to base your custom template. You can choose the appropriate state, area of practice, and category by using the drop-down boxes at the top of the list. Then, simply click on the template you would like to modify. You must give your custom template a different name from any other document in the same category. Warning You must give your template a name that is different from any other template in that category. TurboLaw will not allow you to create a template that has the same name as another template. In addition, you cannot change the name of your template once it has been created, so you are advised to name your template carefully. Once you have named your template, you can click “Create User Template.” If you have checked “Show Instructions” (which is “on” by default), you will be shown these instructions before your template is created. 51 Template Instructions It is important to remember these instructions when you are creating your template. Once your template has been created, it will be opened in either Microsoft Word or Excel (as appropriate). You can then edit the TurboLaw template as needed, to make your own “derivative” template. Simply use the “Edit Document” button to “un-lock” the document, and make any changes you need. Then, lock the document again by clicking the “Edit Document” button again before you save the form. Warning Use caution when deleting the gray form fields in your template. These fields are often “linked” (also known as “referenced”) by later portions of the document. If you delete the “source” (the gray form field), the links later on will display the text “Error: Reference source not found!” (the error may not appear until you print your document). To prevent this from happening, use caution when deleting form fields, and always print a draft copy of your template to check for these errors. Information Warning Always remember to “lock” your template by using the “Edit Document” button before you save it. Many TurboLaw documents will not fill in properly if they are not in the “locked” mode. Editing templates requires some advanced word processing skills. If you are not familiar with Word’s “table” feature, you may find working with templates difficult. We recommend consulting the on-line help for Microsoft Word, or you may find one of the many Word guidebooks helpful. Most are available at your local bookstore. Modifying Your Template You can modify any template you have created by double-clicking on its name from the list of user templates. Once your template is open, the rules for editing it are the same as when you first created it. 52 Deleting a Template If you have created a template which you do not need anymore, you can delete it by selecting the template name from the list of templates and clicking the “Delete Template” button. Click the “Delete Template” button to remove the selected template Troubleshooting This section contains information on issues commonly encountered while installing, configuring and using TurboLaw. Internet Resources The easiest and fastest way to get help with TurboLaw is through the Internet. You can search through our database of issues and errors, submit a question and find an online version of this user manual. To access these resources, simply log on to http://support.turbolaw.com. From this page, you can search for answers to your questions and look up errors you may be experiencing. Articles in the Help Center contain detailed instructions to help you resolve issues quickly, and may be more up-to-date than this manual. Alternatively, you can search the TurboLaw Help Center by typing your search terms in the text box at the top of the TurboLaw Navigator. After you have typed your search terms, simply press the “Enter” button on your keyboard, and TurboLaw will open your web browser to display the search results. 53 The TurboLaw Help Center Search Frequently Asked Questions How do I enable Macros? A. To enable macros, follow these steps: • • • On your Start menu, click Programs -> TurboLaw -> TurboLaw Readme. This will cause Microsoft Word to open. Before the document appears, you will be prompted to enable macros. Depending on your security settings, you may be able to check a box that says “Always trust macros from this source.” If so, be sure to check this box! Once this box is checked, you may click the button that reads “Enable Macros.” You will now see a dialog box that says “Thank you for enabling macros.” After enabling macros, you may wish to change your macro security settings, or, if you did not receive the messages listed above, you may need to change your macro security settings in order to enable macros. Follow these steps to change your macro security settings: • • • • Start Microsoft Word. Click on Tools -> Macro -> Security. In the dialog box that appears, select “Medium,” then click “OK.” Your macro security is now set to medium, which will allow you to choose whether to enable or disable macros. This will not change the effective level of security; it will simply allow you to enable macros when prompted. (Choosing “High” as your macro security level automatically disables most macros.) How Do I Restore My TurboLaw Toolbar? A. If your TurboLaw toolbar is not visible, simply right-click on ANY toolbar button at the top of the screen. This will display a list of all toolbars; this list normally begins with “Standard” and “Formatting,” which will usually have check marks next to them. Near the end of the list, TurboLaw should appear. If it does not have a check mark next to its name, simply click on it to make it appear. If it does have a check mark next to it, it is already visible somewhere on your screen – sometimes toolbars 54 can appear in unexpected places or your settings may have all toolbars appearing in a single row. What do I do if my TurboLaw Toolbar is not available? A. If your TurboLaw toolbar is not available in Word at all (in the list of available toolbars), you can try to re-install the toolbar by following these steps. • • • Click your Start menu, and choose Programs (or All Programs), TurboLaw, Utilities, TurboLaw Repair Utility. Once the repair utility has started, click on the item “tbinst.exe” and then click the “Run” button. A screen will flash up briefly, and then you will be returned to the repair utility. Exit the repair utility, and open Microsoft Word to check to see if the TurboLaw toolbar is visible. If this does not restore your TurboLaw toolbar, try the following steps. • • • Open Microsoft Word. Click the “Tools” menu, and choose “Templates and Add-ins.” Under the heading “Global Templates and Add-ins,” make sure that “turbolaw.dot” has a check mark next to it. If this does not restore your TurboLaw toolbar, you may be able to use Word’s built in button, which can also protect and unprotect your document. However, this option should only be used if you have Microsoft Word XP (2002) or 2003. To check your version of Word, click the “Help” menu in Word, and choose “About Microsoft Word.” The version will be displayed at the top of the window. Word XP (2002) has a version number of 10. To use the built-in Word button, simply right-click on any toolbar at the top of the screen. From the list which appears, choose “Forms.” A group of buttons will appear; the right-most of these buttons will look like a padlock. This button will serve the same purpose as the TurboLaw “Edit Document” button. What do I do when I get the message “ActiveX Component Can’t Create Object?” A. There is probably a problem with your installation of either MDAC or Jet files. On the TurboLaw CD, you will find a folder called “Data.” In this folder will be the files 55 “mdac_typ.exe” and “jet40sp3.exe.” Double-click the MDAC file first, and then the Jet file second. This will re-install MDAC and Jet. You may also download these items directly from Microsoft at http://www.microsoft.com/data/. Alternatively, this may be a missing or corrupted DLL or OCX library file. Check for updates using the TurboLaw Update Utility to resolve missing file problems, or simply re-install TurboLaw. What do I do when I get a message saying that my version of OLEAUT32.OCX is out of date? A. Installing the VB 6 run-time files will correct this problem. These files are located on the TurboLaw CD-ROM in the folder “VB6UPD.” Simply double-click the file vbrun60.exe to install these files. How do I configure TurboLaw for use on a network? A. Use the “Configure for Network” option on the File menu. See the section “Networking TurboLaw” for more information. How can I include my Legal-Ease™ documents in TurboLaw? A. Add your existing Legal-Ease™ documents to each case’s folder by using the Add/Remove/Rename button in the Case Document List window. (You can access this window by double-clicking on a case name.) The computer on which TurboLaw is installed is not connected to the Internet; how can I update it? A. Unfortunately, as of Version 2 of TurboLaw, updates are now only available through TurboLaw’s built-in Update Utility. If you require updates and have purchased updates & support, you can request an update CD by calling (800) 518-8726. I know I need to enable macros, but I do not have that option in the Macro Alert window; how do I enable them? A. Close TurboLaw and open a blank Word document. Click on Tools -> Macro -> Security. Change the security level setting to Medium. (This will not affect your level of security; it will, however, allow you to enable macros when you are confident of their source, such as with TurboLaw’s digitally signed macros.) Close Word and reopen your TurboLaw document. 56 What is the “Suggestions Box”? A. The Suggestions Box menu item allows you to email us directly from within TurboLaw with ideas for features and documents you would like to see in an upcoming version or future update of TurboLaw. You can submit your ideas to us using this link. How do I change or edit “hard-entered” text in my document? A. TurboLaw documents open “protected” by default. This restricts your access to those parts of the document to which you can <Tab> (<Shift + Tab> takes you back). Click the “Edit” button on the TurboLaw toolbar (it is the enlarged button on the far left of the TurboLaw toolbar with the padlock and pencil) to “unprotect” your document. You may then change any text, reformat fonts, adjust margins, etc. Then, re-protect the document to return to “<Tab> & Type” mode. NOTE: For ease of use and full functionality, you should keep the document in its “protected” mode at ALL times except when making “hard” edits, reprotecting it immediately after completing the edit. Information Note: In Excel spreadsheets (Financial Forms), the spreadsheet will automatically reprotect itself each time you change cells (fields). You must therefore click the “Edit” button each time you move to a new field if you are changing “hard-entered” text. What if the Courts add or make changes to official forms? A. We are in frequent communication with court personnel and attorneys throughout the Commonwealth. We also rely on word from our customers as to any anticipated changes. Check http://docs.turbolaw.com for the status of all our documents (including ones that are not yet part of TurboLaw). If you do not see the document you are looking for, you can contact us directly by phone at (800) 518-8726 or by fax at (978) 428-6123. We invite you to fax any new or modified form to us. Additions and revisions to official forms will be made available to our subscribers via TurboLaw updates. Why, when I launch a Financial Document, do I only get a blank Excel screen? A. This is a known issue with Microsoft Excel. The Microsoft knowledge base article 211494 addresses this issue. What do I do if I have a question that isn’t answered here? 57 A. You can either visit http://support.turbolaw.com to search for recent answers to your question, or you can call TurboLaw technical support by dialing (800) 5188726, option 3. Advanced Troubleshooting This section lists tips and advice for advanced users. Repair Utility If you have an error during setup or during an update that prevents other updates from running, you can see a list of update utilities (mini-programs) by running the TurboLaw Repair Utility. (The Repair Utility is also mentioned in many of the online Help Center articles.) The TurboLaw Repair Utility can be found on the Start Menu, under TurboLaw -> Utilities. Some common programs you may need to run using this utility: • • • • • tbinst.exe (installs TurboLaw toolbar to Word) XLTB.exe (installs TurboLaw toolbar to Excel) xxxInstall.exe (installs module xxx, such as dma for Divorce in Massachusetts) fixScrrun.exe (registers SCRRUN.DLL file, if it exists) install-ocx.exe (installs common support files that are used by TurboLaw, if they are missing for any reason) Register SCRRUN.DLL Many unusual problems in TurboLaw (and other programs) can be caused by this important DLL file being incorrectly registered. To register it, click your Start menu and choose “Run,” and then type the following: regsvr32 scrrun.dll and press <Enter>. (Note the space between “regsvr32” and “scrrun.dll.”) Reporting Problems To report a problem, make a suggestion or ask a question about TurboLaw, use one of these methods: Email 58 By clicking the “Contact Us” menu in TurboLaw, and selecting “Email Tech Support,” you can describe your situation to a TurboLaw technician who can reply directly to your message. This is an excellent way to notify us of issues after business hours. Telephone Call (800) 518-8726 to contact a support representative. (Business hours are Monday – Friday, 9:00 am to 5:00 pm, Eastern Time.) 59


