1
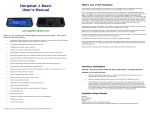
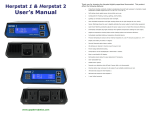
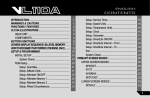
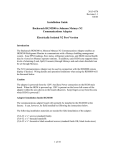
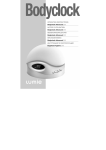
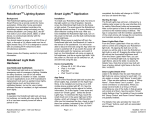
WARRANTY FORM
™
CHARCOAL SUNRISE CLOCK
Model 88630 – 082010
Your SunRise Clock warranty expressly covers any defect in
manufacture for 12 months from the date of purchase. In order for
the warranty to be valid, please fill out and return a copy of this
warranty form with a copy of your receipt.
NAME:
____________________________________________________
Instructions for
the BioBrite
SunRise Alarm Clock™
(Charcoal Programmable Model)
ADDRESS:
____________________________________________________
____________________________________________________
PHONE #:
____________________________________________________
PLACE PURCHASED:
____________________________________________________
DATE PURCHASED:
____________________________________________________
COMMENTS:
____________________________________________________
BioBrite, Inc.
4330 East-West Highway, Suite 310
Bethesda, MD 20814
(301) 961-5940
BioBrite, Inc.
4330 East-West Highway, Suite 310
Bethesda, MD 20814
(301) 961-5940
E-mail: [email protected]
Website: www.BioBrite.com
E-mail: [email protected]
Website: www.BioBrite.com
The SunRise Clock is a great way to wake up feeling more refreshed and ready
to go. Humans are naturally adapted to wake to the rising sun and sleep at
sunset. So waking up to a simulated sunrise can give your body a gentle and
natural boost in the morning. Please take a few moments to read the directions
to ensure you get off to a good start with your SunRise Clock.
Setting Up the SunRise Clock:
For best results: Set the clock near your bed on a nightstand or bedside table
close to pillow level; plug the clock into a wall outlet; do not use surge
protectors, or long extension cords unless they have 3 prongs in the plug and are
heavy duty. NOTE: Until time has been set, or after a prolonged power outage,
the digits on the clock will flash on and off.
Before doing anything, you should familiarize yourself with the clock control
buttons. The PROGRAM button (labeled P), is used to change all the settings.
The words below the time display will show you what setting you are changing
and what the current setting is. To adjust any setting, make sure the ALARM
button (A) is pressed IN (off) so that the symbol for the sun is not lit. Press the
PROGRAM button a number of times then, within the next few seconds, change
the setting by pressing the + or – button. After you have programmed all the
settings the way you want them, simply wait for 12 seconds, and the display will
return to the time mode.
Button Reference Guide
P
–
+
A
PROGRAM button. Programs time and other settings.
MINUS button. Dims light and changes settings.
PLUS button. Brightens light and changes settings.
ALARM button. Activates alarm on or off.
Display Reference Guide
☼ ALARM SET sun symbol
BEEP ON sound symbol
) ))
PM
After midday symbol
IMPORTANT SAFETY
INSTRUCTIONS
• The clock has a polarized plug (one prong is wider than the other) which
will fit in a polarized outlet only one way. If the plug does not fit fully in
the outlet, reverse the plug. Most uninterruptable power supplies and
some surge protectors will not work with the clock. If an extension cord
must be used, it should have 3 prongs and be heavy duty. Do not alter
the plug.
• Never remove the glass globe while the lamp is, or has recently been,
operating. The bulb and globe can be extremely hot!
• As with any electrical product, do not immerse the clock/wire in water.
• Never use a bulb with greater than 60 Watts maximum.
• There are no user-serviceable parts. Please do not open the case.
Service:
If your SunRise Clock is not operating properly, contact BioBrite directly for
customer service, warranty repairs, and out-of-warranty repairs by e-mail at
[email protected] or calling (301) 961-5940. Please contact us before sending
anything in because many times problems can be solved by Customer Service.
Replacing the Bulb:
Your BioBrite clock uses a standard 60-Watt bulb with a Candelabra (E12) base.
Special bulbs that produce more light are available through BioBrite. To replace
the bulb:
1) Unplug the clock from the wall.
2) Remove the glass globe from the clock by pulling firmly upward. Remove
the globe by holding the base with one hand, and pulling up on the glass
globe with the other hand.
3) Unscrew the bulb. *Caution: If the bulb was recently in use, it will be hot let the lamp cool before removing the bulb.
4) Screw in the new bulb completely. Carefully put the globe back on by
lowering over the bulb and making sure it catches on the latches in the base.
5) Plug in the SunRise clock, re-set the time, and re-set your preferences.
NOTE: If the display is too dim to see easily, press the ALARM button IN and
the display will become bright.
1
6
READING LAMP
Using the Adjustable Reading Light:
Again, make sure the ALARM (A) button is pressed IN (off), then press the +
button to turn on the lamp and to increase brightness. To reduce the light level,
press the - button. Holding in either button adjusts the light level rapidly.
ADDITIONAL FEATURES
Activating the Security Mode:
This mode is useful when you are away on vacation, or your house is empty, and
you wish to give the appearance that someone is there. To turn on the Security
Mode, press the PROGRAM button 9 times so the display reads SECURITY
OFF. Press the + or - button and the display will switch to SECURITY ON
indicating that the security mode is activated. During the security mode, the
clock will come on and off randomly between 4 p.m. and 11 p.m. When this
function is set, and you’ve exited the programming mode, the main display will
read SECURITY. To exit the security mode upon your return, push any button
and SECURITY should no longer be displayed.
Using the Demonstration Mode:
To set or cancel the Demo Mode, see the section headed, “Setting the Speed of
the SunRise Wake-Up.” Once activated, the display should read DEMO
MODE. This sets the clock into high speed demonstration mode, so you can
show it to a friend without having to wait 30 minutes for the full cycle. To
create a speedy sunrise to occur over the next 100 seconds push the ALARM
button OUT (on), then hold the PROGRAM button in while pressing the +
button. Likewise, if you have the light on, and would like to demonstrate the
sunset feature, press the ALARM button IN (off) then press it OUT (on). The
clock will dim out over the next 100 seconds.
Troubleshooting:
Problem: The light will not come on, but the clock still works.
Solution: The bulb may be burned out. Look at the bulb and see if the filament
is broken. If it is, replace the bulb. Also, check to be sure the bulb is fully
screwed into the socket.
Programming the Clock:
Press the PROGRAM (P) button to enter the clock’s menu and change any of
the clock settings. NOTE: The menu is not accessible if the ALARM (☼)
button is up (on), so always make sure the ALARM button is IN (off) when you
want to program the clock. The text display below the time digits will show the
setting you are changing and what the current status is. Change the setting using
the PLUS button (+) and MINUS button (-). Once you have completed a
setting, you can press the PROGRAM (P) button again to adjust another setting,
or simply wait for approximately 12 seconds and the clock will exit the menu
automatically and go back to displaying the time.
Programming Table
P Button
Presses
DISPLAY RESULT
(First setting in bold is the default)
1
ALARM TIME > 7:00 A.M.
2
TIME > 1:00 P.M.
3
12 HOUR > 24 HOUR
4
BEEP ON > BEEP OFF
5
DISPLAY AUTO > DISPLAY HIGH
6
FADEUP 30 > 60 > 90 > DEMO > 15
7
FADEDOWN 30 > 60 > 90 > 15
8
NITELITE OFF > NITELITE ON
9
SECURITY OFF > SECURITY ON
10
(reverts to normal operation)
*Programming settings are memorized by the clock, so if the power goes out or
the clock is unplugged for a few minutes, you will not need to reset the clock.
Problem: Neither the light nor the clock works.
Solution: Unplug the clock from the wall for several seconds and re-plug it in
while holding in the PROGRAM button. Doing this will reset the clock and
have all the default settings restored. Sometimes the clock’s computer chip
picks up static charges of electricity and unplugging it removes the static.
Setting the Wake-Up Alarm Time:
Press the PROGRAM (P) button once, so the display reads ALARM TIME.
Then adjust the alarm time with + and - buttons until desired time is set.
Holding in the + or - button will cause the time to change rapidly.
5
2
Setting the Time:
Press the PROGRAM (P) button twice. The display should read TIME. Then
use the + and - buttons to adjust the time. The time moves rapidly if the + or button is held in.
Setting a 12- or 24-Hour Display Mode:
The clock is defaulted to a 12-hour display. To change to a 24-hour display
mode, press the PROGRAM button 3 times. Then press the + or - button. The
display will alternate between 24 HOUR and 12 HOUR. The PM symbol on
the time display is only present in the 12-hour mode.
Enabling or Disabling the Beeper:
The beeper, shown as the symbol ))) is set ON at the factory. To disable the
audible beeper that sounds at the end of the wake-up sequence, press the
PROGRAM button 4 times until the display reads BEEP ON or BEEP OFF.
Then press the + or - button to alternate between the two. When you program
BEEP ON, the beep will sound twice and the ))) symbol will show in the display.
When you program BEEP OFF, the unit will beep once and the ))) symbol will
no longer be displayed.
Adjusting the Brightness of the Clock Display:
Press the PROGRAM button 5 times and the display reads DISPLAY AUTO,
the default setting. Press the + or – buttons to change between DISPLAY
AUTO and DISPLAY HIGH. In DISPLAY AUTO mode, the brightness of
the display is automatically at a high level during the day, but will switch to a
lower level at nighttime so it does not disturb you while sleeping. The display
will dim in this mode as the light dims down when either the alarm has been set
and the ALARM button is OUT (on), or you have activated the sunset mode,
both indicating you are preparing to go to sleep. When DISPLAY HIGH is
selected, the display will always remain in the bright mode.
Activating the Alarm:
After you have set the time you wish the alarm to go off the next morning, push
ALARM button so it is OUT (on). The display will show the Alarm Set sun
symbol (☼) and the Alarm Time you chose will be displayed for a few seconds.
If the light is on when you enable the alarm, it will slowly fade out, or you can
turn it off right away by pressing and holding the – button until the light is out.
Setting the Speed of the SunRise Wake-Up:
The SunRise Clock is preset for a 30-minute wake-up sequence, i.e., the light
will reach full brightness gradually over 30 minutes. If you wish to change the
SunRise time, you can choose between 15, 30, 60, and 90 minutes. Press the P
button 6 times until the display reads FADEUP followed by a number. Press
the + or – button to alternate between FADEUP DEMO (see “Additional
Features”), FADEUP 30 (30 minute sunrise; this is the default), FADEUP 60
(60 minutes), FADEUP 90 (90 minutes), and FADEUP 15 (15 minutes).
Using the Snooze Feature:
To temporarily “snooze” the alarm, press the minus button while the alarm is
beeping. The beeper will stop sounding and go off again in 9 minutes. If you
would also like the sunrise to begin again, then continue pressing the minus
button until the light has gone all the way off. Over the next 9 minutes, the light
will gradually brighten (this will occur at a quicker rate than the originally
programmed SunRise time) and finally the beeper will sound again.
Turning off the Alarm Once Awoken:
After you wake up, if you want to turn off the alarm, push the ALARM button
IN (off). The beeping will stop but the light will remain illuminated until you
shut it off. If the alarm is not turned off manually, the beeper and light will both
automatically shut off after about fifteen minutes.
SUNSET SEQUENCE
Activating the Sunset Sequence:
Manually turn the light on to the intensity from which you wish the sunset to
start. If the Alarm button is pushed IN (off) push it again so that it is OUT (on).
This will begin the sunset. (NOTE: If you wish to activate the sunset without
activating the sunrise for the following morning, then make sure the ALARM
button is IN (off). Then press both the + and - buttons simultaneously to begin
the sunset.)
WAKE-UP SEQUENCE
Setting the Speed of the Sunset Sequence:
Press the P button 7 times until the display reads FADEDOWN followed by a
number. Press the + or – button to alternate between FADEDOWN15 (15minute sunset), FADEDOWN30 (30 minutes; this is the default),
FADEDOWN60 (60 minutes), and FADEDOWN90 (90 minutes). Once the
desired sunrise length is displayed, do not push any buttons, and the clock will
return to its time setting in 12 seconds.
The SunRise Wake-Up Sequence:
The light will gradually begin to illuminate before your set wake-up time. Once
the light has fully illuminated, and the SunRise wake-up time has been reached,
the audible alarm will sound. The audible alarm begins with a quiet beep, and
gradually intensifies to full volume over 30 seconds.
Setting the Sunset Sequence to End as Nightlight:
In the sunset mode, you can have the light stop dimming when it reaches
approximately 5% intensity, for use as a nightlight. Press the PROGRAM
button 8 times until the display reads NITELITE OFF or NITELITE ON.
Then press the + or - buttons to activate or deactivate the nightlight.
3
4