1
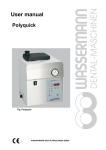
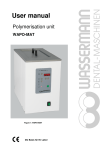
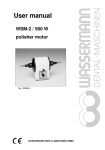
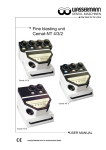
User manual
Polyquick
Fig. Polyquick
WASSERMANN DENTAL-MASCHINEN GMBH
-1-
Dear customer,
Thank you for choosing a product from the Wassermann range. Wassermann
dental equipment incorporates the highest standards of quality and the latest
technology. In order to enjoy maximum performance and years of trouble-free
operation from the equipment, please read this user manual carefully before you
start work, and operate the unit according to the recommended guidelines.
Please ensure that all persons operating the equipment have read and understood
this user manual.
Keep this user manual on hand for ready reference.
Company address:
Wassermann Dental-Maschinen GmbH
Rudorffweg 15-17
D-21031 Hamburg
Germany
Tel.: +49 (0)40/ 730 926 - 0 Fax.: +49 (0)40/ 730 37 24
e-mail: [email protected]
URL: http// www.wassermann-dental.com
Erstellt von: Ap
Erstellt: 10.09.2005
Version: 2
-2-
Contents
CONTENTS ...................................................................................................................... 2
1
FEATURES....................................................................................................... 3
2
FOR YOUR SAFETY ........................................................................................ 3
2.1
2.2
2.3
YOUR USER MANUAL ........................................................................................... 3
SAFETY GUIDELINES............................................................................................ 4
RESPONSIBILITY FOR OPERATION AND DAMAGE .................................................... 4
3
APPLICATION.................................................................................................. 5
4
BEFORE YOU START...................................................................................... 5
4.1
4.2
UNPACKING / TRANSPORT ................................................................................... 5
SET-UP/STORAGE ............................................................................................... 5
5
START-UP........................................................................................................ 6
5.1
SETTING THE CORRECT PRESSURE ...................................................................... 6
6
USE .................................................................................................................. 7
6.1
6.2
6.3
6.4
FILLING AND SWITCHING ON ................................................................................. 8
PROGRAMMING ................................................................................................... 9
OPERATION: ....................................................................................................... 9
DRAINING THE WATER ....................................................................................... 11
7
TROUBLESHOOTING / CORRECTING ERRORS ......................................... 12
8
MAINTENANCE ............................................................................................. 12
8.1
8.2
CLEANING ........................................................................................................ 12
SERVICING ....................................................................................................... 13
9
WARRANTY ................................................................................................... 13
10
SPARE PARTS AND ACCESSORIES ........................................................... 14
10.1
REPAIRS .......................................................................................................... 15
11
TECHNICAL DATA ........................................................................................ 15
11.1
170999 POLYQUICK ...................................................................................... 15
12
EC CONFORMITY CERTIFICATE.................................................................. 16
-3-
1 Features
Depending on your requirements, you can set the polymerisation time manually to
the maximum or automatically to a shorter period. All functions are available in
both cases.
The polymerisation time is adjustable up to 59 hours and 40 minutes. The
maximum pressure is 6 bar, and this is maintained by a non-return valve. The
required polymerisation temperature can be set in 5 stages up to 95°C. The heater
cuts off automatically when the set temperature is reached, so overheating is not
possible. The unit has a dry-run safety device, which prevents it overheating, and
a door safety switch, which releases the compressed air only when the door is fully
closed.
2 For your safety
2.1 Your user manual
Configuring and operating this equipment requires precise knowledge and
observance of the instructions in this user manual. The equipment is designed
only for its intended application.
Very important features are indicated as follows in this manual:
Warning!
This is a warning of risk situations and dangers. Failure to observe
!
this warning could be life-threatening. These warnings must be
observed.
Information!
i
This symbol draws your attention to specific features, which should
be noted.
-4-
2.2 Safety guidelines
The equipment is designed for a mains voltage of 230V / 50Hz.
!
Make sure that the unit is connected to the correct mains voltage.
Always
disconnect
the
mains
plug
before
carrying
out
maintenance or cleaning work.
The safety valve on the pressure vessel opens automatically if the
operating pressure exceeds 7 bar.
The pressure is switched on only after the door is fully closed,
thanks to a safety contact and an orange monitor light.
Dry-run protection switches off at 112°C (brown knob, left side of
unit)
2.3 Responsibility for operation and damage
The responsibility for operating the unit lies exclusively with the owner or user if
the said unit is incorrectly serviced, maintained or altered by persons not
employed by an accredited dealer or if the unit is used in a manner contrary to its
specified purpose.
The unit must be maintained and operated in accordance with this user manual.
Wassermann Dental-Maschinen GmbH is not responsible for damage arising from
the non-observance of these instructions.
Guarantee and responsibility provisions contained in the sales and supply
conditions of Wassermann Dental-Maschinen GmbH are not extended by these
instructions.
i
Ensure that this user manual is accessible at all times and has
been read and understood.
-5-
3 Applications
The Polyquick is a pressure polymerisation unit for the hot and cold polymerisation
of plastics.
It can be set to a maximum temperature of 95°C and a maximum polymerisation
pressure of 6 bar. For automatic operation, you can select a polymerisation time
between 2 minutes and 59 hours 40 minutes; in manual mode, the polymerisation
time is the maximum time.
4 Before you start
4.1 Unpacking / Transport
•
Open the cartons, remove the packing materials, and carefully lift out the
instrument and accessories. Check the accessories are correct (see 10).
•
When transporting the unit, use appropriate packing materials to avoid
accidental damage.
4.2 Set-up/Storage
•
Set the unit up on a flat surface.
•
Always ensure that the work area is sufficiently large (take the unit’s
dimensions into account). Do not set it up out of doors.
•
If the unit is to be stored for an extended period, protect it from moisture
and dust.
•
Make the following connections before starting the unit:
1. Insert the mains plug in the socket, making sure that the mains and
the unit operate on the same voltage.
2. Connect up a compressed-air supply of at least 3.5 bar. If using a
long hose, make sure its ID is at least 6 mm. Provide each
compressed-air hose with a maintenance unit and use a regulator to
set the pressure to a constant level.
-6-
5 Start-up
Important!
Make sure the unit has reached room temperature before you start it.
Never operate the unit without water as the heater climbs immediately
to 50°C as soon as the power comes on.
5.1 Setting the correct pressure
Before filling the container, you should remove the accessory and set the correct
polymerisation pressure. To do so:
1. Turn on the main switch (green rocker switch).
2. Close the cover and check the door contact (6) control light is on.
3. Turn off the heater switch (1); the red LED in the switch will go out.
4. Switch on the pressure (2) and the Start/Stop switch (10) containing the red
LED. The pressure is preset to 6 bar at the factory.
5. If the pressure is too low (min. 3.5 bar), increase it using the black control
at the rear of the unit (max. 6 bar). You have to pull the control out to
change it and then push it in again.
6. If the pressure is too high, turn off pressure switch (2) and let the pressure
reduce. The pressure regulator at the rear of the unit must be turned
several times in the “minus“ direction. Then, put the chamber under
pressure. The desired pressure, (max. 6 bar), is set by turning the regulator
in the “plus“ direction.
7. Use the Start/Stop switch (10) to turn the unit off.
-7-
6 Use
i
All instructions for using the unit, whether verbal, written or in
the form of practical guidance, are based on individual
experience and experimentation and can only be regarded as
guidelines. Because of the thermodynamic processes involved,
and depending on the duration of the heating phase, there can
be variations between the set temperature and the water
temperature of up to 2°C or so.
i
Factory settings:
Heating
50°C
Time
10 min.
Pressure
6 bar
Turning on the main switch sets the pre-programmed heater temperature to
50°C. This temperature is independent of any previously set temperature.
When the set temperature button (8) is pressed, the heater temperature is
overridden and the unit increases to the last set temperature.
Before starting the timer, allow a warm-up period of about 30 minutes.
-8-
Heater On / Off 1
7 Digital display
Pressure On / Off 2
8 Set / Plus
Time 3
Temperature 4
9 Default / Minus
10 Start / Stop
Heater monitor 5
Door safety control 6
6.1 Filling and switching on
1. Open the lid.
2. Insert the filled container, fill with water until all polymerisation components are
covered (max. up to the indent in the container), then close the lid fully.
3. Turn on the main switch; the unit heats automatically to 50°C.
-9-
6.2 Programming
Time:
•
Press Time (3) and Set / + (8).
•
Keep Time (3) pressed and set the value using Set / + (8) and Default / (9).
Temperature:
•
Press Temperature (4) and Set / + (8).
•
Keep Temperature (4) pressed and set the value using Set / + (8) and
Default / - (9).
The values are stored automatically when you start the program with
Start/Stop (10).
Time ranges:
up to 30 min = 2nd step
!
up to 120 min = 5th step
above 120 min = 20th step
Temperature ranges:
from 0°C to 95°C in 5 steps
from 95°C the program reverts to
20°C.
6.3 Operation:
The polymerisation period must be set and either hot or cold and/or pressure
polymerisation chosen.
- 10 -
6.3.1 Automatic operation:
•
Set the program to the desired polymerisation time and temperature (see
6.2).
•
For hot polymerisation, press Heater (1); the yellow LED (lower) comes on
while the unit heats up.
•
For pressure polymerisation, press Pressure (2).
•
After the unit has reached the selected temperature, press Start/Stop (10)
to start the program.
•
When the program has finished, you will hear a 10-second tone to tell you
that the unit must be switched off by pressing Start/Stop (10).
•
The pressure is released when you press Start/Stop (10), but Heater
(1) must be pressed to turn off the heating.
•
The lid can only be opened when the pressure gauge reads 0.
Warning: Scalding risk with hot polymerisation.
!
Open the lid slowly!
6.3.2 Manual operation:
•
Set the program to max. time and the desired temperature (see 6.2).
•
For hot polymerisation, press Heater (1); the yellow LED (lower) comes on
while the unit heats up.
•
For pressure polymerisation, press Pressure (2).
•
After the unit has reached the selected temperature, press Start/Stop (10)
to start the program.
•
Polymerisation can be stopped at any time by pressing Start/Stop (10).
There is no audible signal.
•
The pressure is released when you press Start/Stop (10), but Heater
(1) must be pressed to turn off the heating.
•
The lid can only be opened when the pressure gauge reads 0.
- 11 -
Warning: Scalding risk with hot polymerisation.
!
Open the lid slowly!
If the pressure in the compressed-air supply line drops during the
i
process, a non-return valve will maintain the current pressure.
The pressure chamber can only be opened once the pressure has
i
dropped completely to 0.
The heater has a temperature safety device, which switches the
heater off automatically at about 112°C. It can only be started
i
again once the unit has cooled down. To do so, press the reddishbrown rubber knob on the left-hand side of the housing – you’ll
hear it click into place. The program contains a safety command
inserted at the factory, which switches the heater off automatically
when the temperature exceeds 99°C.
6.4 Draining the water
Warning: Before you drain the water, check that the drain hose ends in a bucket
or washbasin. For your own safety, it should be fixed in place.
!
Darin the water carefully as it can be very hot!
Procedure:
-
Close the lid completely; LED (6) must go out.
-
Turn on main switch (green) and turn off Heater (1).
-
Pressurise the chamber by pressing Pressure (2) and Start/Stop (10).
-
Open the drain valve (black knob, lower left side) slowly.
-
After draining the water, press Start/Stop (10) and close the drain valve.
-
Turn the mains switch to "0"
- 12 -
7 Troubleshooting / Correcting errors
Fault
Pressure does not
increase in chamber
Likely cause
Lid seal O-ring faulty
Likely solution
Check O-ring and replace if
necessary
Pressure regulator set to 0 Check pressure and adjust
(pressure gauge).
if necessary
Door not fully closed
Close door against safety
contact or contact faulty
Heater not switched on
Switch heater on
Temperature monitor
switched off or faulty
Press in safety knob (left
side of unit) and/or replace
knob
Repair (Service Workshop)
Faulty heater
Repair (Service Workshop)
Display blank
Temperature monitor off
or faulty
Press in safety knob (left
side of unit) and/or replace
knob
Repair (Service Workshop)
Unit does nothing
Blown fuse
Replace fuse at rear of unit
Chamber does not get
hot
i
If the above recommendations do not solve the problem, contact
your dental depot or our Service department.
8 Maintenance
8.1 Cleaning
The unit should be rinsed out at least once per week to ensure problem-free
operation. After rinsing, remove and clean the sieve in the base of the chamber.
Solvents must not be used to clean the mounting plate!
The model plate must always be legible and should not be removed.
- 13 -
8.2 Servicing
Check the door seal (Item no. 380032) regularly for damage. To do so, remove the
ring (red silicone ring) from its groove using a round-ended pair of tweezers. The
seal groove must always be clean.
The seal must be inserted in the groove using Vaseline or oil.
The door safety switch should be checked by opening and closing the door several
times; you should hear a slight click each time. The seal should be replaced every
18 months.
9 Warranty
The warranty period for our instruments is 12 months. If faults occur within the
warranty period, contact your dental depot or get in touch directly with our Service
department.
Your Polyquick should only be operated in perfect condition. If faults occur which
could harm operators or third parties, the unit should not be used until it has been
fixed.
This warranty does not cover damage caused by improper use, external
mechanical causes, transport damage or interference with the unit by
unauthorized persons.
- 14 -
10 Spare parts and accessories
Spare parts
Item number
170532
170005
170575
170590
170561
170568
291009
310005
310009
310065
320023
328008
380032
392008
392026
511087
511091
511118
510011
Accessories
Item number
170508
170517
320026
320038
582013
Description
Control valve
Network board, new
Switch cover, sticky-backed
Board controller
Filter
Drain, compl.
"BND Model" knob
Sticker – Risk of scalding
Sticker – Pull mains plug
Directional arrow, left, white
PA hose 2.6 x 0.8 Wd. natural
Pressure gauge
O-ring D 166,4 x 3,8
Rubber foot 32 x 32 H6 b/w self-sticking
Elastic damper D 8-H 1.6 self-sticking
Temperature limiter 112°C
Rocker switch, green
Protective cap for rocker switch
Micro-switch, positive opening
Qty
1
1
2m
2m
2
Description
Denture stirrup mount
Denture holder
PVC hose D 8 x 6 woven (blue)
PVC hose D 6 x 3 (1/4") woven
Fuse 6.3 A / 250 V MT D 5 x 20
- 15 -
10.1 Repairs
Servicing or repairs to the unit must only be carried out by trained technicians.
Only original spares are to be used.
Responsibility for the product is voided if altered by unauthorized persons or if
inappropriate components are installed.
11 Technical data
11.1
170999 POLYQUICK
Voltage:
Power consumption:
Output:
Comp. air supply:
Pressure chamber:
Versions:
Operating pressure:
Overall size:
Weight:
230 V / 50 Hz
4,2 A
1000 W
min. 4 bar
Ø 150 mm, depth 285 mm
3 dentures or
2 resin dentures or
3 underbite mounts and/or
6 regulators
max.6 bar
Width 340 mm
Height 435 mm
Depth 355 mm
21 kg
Noise emission ≤70 dB(A)
i
We reserve the right to make technical changes.
- 16 -
12 EC CONFORMITY CERTIFICATE
in accordance with 73/23/EWG (low-voltage guidelines) modified by 93/68/EWG and
89/336/EWG (EMV guidelines) and 89/392/EWG (Machinery guidelines), with
modifications
Manufacturer:
Model:
WASSERMANN
Product description:
Dental-Maschinen GmbH
Rudorffweg 15 - 17
D-21031 Hamburg
Polyquick
Applicable standards:
Pressure
polymerisation unit
for dental
applications
(170999)
EN 61010-1:1993 + A2:1995
EN 50081-1 + EN 50082-1
Pressure vessel ordinance
DIN 45635 Pt.1
Hiermit wird bestätigt, dass die oben bezeichnete Maschine den genannten EG-Richtlinien
entspricht. Diese Erklärung wird ungültig, falls die Maschine ohne unsere Zustimmung
verändert wird.
This is to confirm that the above mentioned machine complies with the described EC rules.
This declaration becomes invalid if the machine is modified without our approval.
Cette machine est conforme aux normes en vigueur de la Communité Européene. Cet avis
est nul et non avenant si cette machine est modifiée sans notre accord.
Esta máquina, anteriormente mencionada, cumple con los limites requeridos por el
reglamento EC. Ahora bien, esta declaración quedará invalidada en caso de realizar
modificaciones al aparato sin nuestra aprobación.
Hiermee wordt bevestigd dat bovengenoemde machine voldoet aan de voorgeschreven EU
normen. Deze verklaring verliest geldigheid als er zonder onze uitdrukkelijke toestemming
wijzigen aan de machine worden aangebracht.
Place, date: Hamburg, 10 Sept 2003
Signed: ________________________
Wilfried Wassermann
(Managing Director)
Company stamp:
- 17 -
- 18 -
WASSERMANN Dental-Maschinen GmbH
Rudorffweg 15 – 17,
D-21031 Hamburg
Tel.: + 49 (0)40 / 730 926 – 0
Fax: +49 (0)40 / 730 37 24
e-mail: [email protected]
Internet: http://www.wassermann-dental.com