1
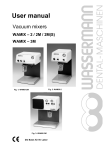
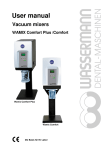
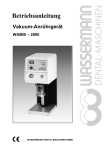
Vacuum mixers
Wamix-Classic / Wamix-Injector (V.-IV)
Wamix-Classic (V.-IV)
Wamix-Injector (V.-IV)
USER MANUAL
Dear customer,
Thank you for choosing a product from the Wassermann range. Wassermann DentalMaschinen incorporates the highest standards of quality and the latest technology.
In order to enjoy maximum performance and years of trouble-free operation, please read
this instruction manual carefully before you connect this device and start work, and
operate the device according to the recommended guidelines. The operation safety and
the functionality of this device can only be guaranteed if you follow both the general safety
guidelines and the applying laws to prevent accidents as well as the precautions given in
this instruction manual. We are not liable for any damages which occur due to
inappropriate usage or faulty operation of this device.
Make sure that anyone using this device has read and understood this instruction
manual.
Keep this instruction manual in a safe place where it can be referred to as required
at any time.
Company address:
Wassermann Dental-Maschinen GmbH
Rudorffweg 15-17
D-21031 Hamburg, Germany
Phone. : +49 (0)40 / 730 926 – 0 Fax.: +49 (0)40 / 730 37 24
E-mail: [email protected]
URL: http//www.wassermann-dental.com
.
Erstellt: 26.03.13 /sk
Version: 1
Wamix-Classic/Injector: 171979/171978
Index
1 Features.............................................................................................................................4
2 Safety guidelines................................................................................................................5
2.1 Safety symbols used in this manual............................................................................5
2.2 Safety guidelines.........................................................................................................5
2.3 Responsibility for operation or damage.......................................................................6
3 Application..........................................................................................................................6
4 Before starting....................................................................................................................7
4.1 Transport.....................................................................................................................7
4.2 Installation...................................................................................................................7
4.3 Storage........................................................................................................................7
4.4 Mounting instruction fastening set for wall mounting..................................................8
5 Start-up / Installation .......................................................................................................11
6 Operation.........................................................................................................................13
6.1 General operating instructions..................................................................................13
6.2 VACUUM MIXING with the Wamix...........................................................................14
7 Troubleshooting...............................................................................................................15
8 Care and maintenance.....................................................................................................16
8.1 Cleaning....................................................................................................................16
8.2 Wartung.....................................................................................................................17
8.2.1 Changing the filter...............................................................................................17
8.3 Warranty ...................................................................................................................17
8.4 Spare parts................................................................................................................17
8.5 Scope of delivery / Accessories................................................................................18
8.6 Repairs......................................................................................................................18
9 Technical data..................................................................................................................19
10 EC Conformity Certificate..............................................................................................20
1
Features
Wamix is a manufacturer of vacuum mixers used not only for mixing all kinds of plasters,
embedding media and silicones, but also designed for specialised dental procedures and
for vacuum-rinsing of prostheses.
When mixing silicones, make sure that the beaker is only filled to the max. height for
silicone. Otherwise, silicone could penetrate the interior of the unit itself.
Units have separate drives for vacuum generation and for the mixing mechanism. The
mixer in the Wamix-Classic and -Injector versions can be switched on and off at any time
by pressing a button, without interruption of vacuum.
Until changed, the current preset mixing time (up to 999 sec.) becomes the default for
subsequent use. An audible signal (approx. 5 sec.) indicates the end of the mixing
process, time display flashes.
The vacuum is guaranteed because the beaker on the Wamix-Classic and -Injector is
held to the flange by the vacuum. Mixers are supplied as wall units, but can be converted
for tabletop use at any time. (For accessories, see 8.5)
•
compact vacuum stirrers with powerful, maintenance-free motors
•
perfect mixing of all kinds of plaster, embedding materials and silicone
•
press-button start; automatic mixing when beaker is applied
•
audible signal at programme end, time display flashes
•
mixing time adjustable up to 999 seconds
•
Speed: 200-600 rpm
•
beaker vented only after ON/OFF switch is activated
•
separate motor and pump drive, the mixing mechanism can be switched on and off
at any time without interruption of vacuum
•
low-maintenance
•
simple cleaning thanks to stay-clean surfaces
•
350 ml beaker and wall bracket supplied, table stand and other beaker sizes
available as extras
4
2
2.1
Safety guidelines
Safety symbols used in this manual
Warning!
This is a warning of risk situations and dangers.
Failure to observe this warning could be life-threatening. These warnings has to
be observed.
Information!
This symbol draws your attention to specific features that has to be observed.
2.2
Safety guidelines
Configuring and operating this equipment requires precise knowledge and observance
of the instructions in this user manual. The equipment is designed only for its intended
application.
WARNING:
Servicing and repairs should be carried out only by authorised specialists.
This equipment is designed to operate at 220-240V / 50/60 Hz.
Make sure it is always connected to the appropriate power supply.
Always remove the plug from the power socket before undertaking maintenance
or cleaning work.
A locking hook underneath each unit prevents it coming loose once it has
been mounted in the bracket.
Allow the condensers to discharge before opening the unit.
5
2.3
Responsibility for operation or damage
The responsibility for operating the device lies exclusively with the owner or user if said
device is incorrectly serviced, maintained or altered by persons not employed by an
authorised dealer or if the device is used in a manner contrary to its specified purpose.
The unit has to be maintained and operated in accordance with this user manual.
Wassermann Dental-Maschinen GmbH is not responsible for damage arising from the
nonobservance of these instructions.
Warranty and responsibility provisions contained in the sales and supply conditions of
Wassermann Dental-Maschinen GmbH are not extended by these instructions.
3
Application
Wamix equipment is used for mixing all kinds of plasters, embedding media and silicones
under vacuum.
The vacuum can be as high as approx. 900 - 950 mbar.
This unit is also suitable for vacuum rinsing of models for special dental procedures. The
insulating layer between the model and the prosthesis cannot separate prematurely
because the model remains moister in the pressure-embedding unit than when water is
used.
Only use the device for this type of application.
6
4
4.1
Before starting
Transport
Before transporting the unit, ensure that it has been unplugged from the power socket.
Make sure that it is packed correctly in order to avoid accidental damage.
Be sure to check for any transport damage when unpacking the goods. Note down
any damage if found.
4.2
Installation
Open the box, remove the packing materials, and carefully lift out the device and
accessories. Check the included accessories.
The device must stand on a steady and level surface or use the supplied bracket to mount
it on the wall.
If mounting on a wall, ensure that the wall is strong enough to support the unit. For
drawing a drilling scheme to drill the dowel holes please see page 8. Leave at least 3035 cm free space beneath the unit.
Install the device in a place where it will not block the working area and the
functionality (take the dimensions into account). Make sure that there are about
10 cm of free space on each side to guarantee air circulation (heat dissipation).
Do not install the unit outdoors or in places without proper ventilation.
Before start-up, be sure the device reaches room temperature.
4.3
Storage
If the unit is to be stored for an extended period, protect it from moisture and dust.
7
4.4
Mounting instruction fastening set for wall mounting
Please check the included accessories:
Incl. in delivery item.-no. 174358 fastening set
Quantity Name
1
Securing bracket
1
Phillips head screw M 4x8
1
Washer Ø 4,3
1
Serrated washer Ø 4,3
1
Slotted screw 4 x 16
2
Slotted screw 6 x 50
2
Screw anchor S8
1
Screw anchor S5
Mounting instruction:
Please drill the holes as indicated in the following drilling template. Please make sure
before that the wall is really suitable for mounting a device (aerated concrete walls and
drywall are problematic).
Drilling template
drilling
deep
drilling
8
deep
Secure the enclosed screw anchors as shown in Figure 1. Screw the 6x50 screws into the
two upper holes; keep a distance of 6-7 mm to the wall! (Figure 2)
fig. 1
fig. 2
9
Screw the securing bracket to the Wamix as shown in Figure 3.
Do not yet fully tighten the Phillips head screw, however – you still need to be able to
move the securing bracket.
fig.3
Washer
Serrated washer
Phillips head srew
Securing angle
Screw 4x16
„control window“
Carefully hook in the device. Check, whether the device hangs loosely (i.e. moving back
and forth on the screws). If this is the case tighten the 6x50 screws until the device hangs
securely. Finally tighten the securing bracket. First at the wall, then tighten the screw on
the device itself (Figure 3).
10
5
Start-up / Installation
Check that the mains voltage and the voltage requirements of the mixer are the
same, then plug in the power cable.
Only for Wamix-Injector:
Install a compressed air line in accordance with the technical data. Be sure to use the
correct hose size if the line is long (inside diameter min. 6 mm). Provide a servicing unit for
each line and use a pressure regulator to maintain a constant pressure.
Accidental mixing is not possible because the motor cannot start until the
beaker is held to the rim by the vacuum. The mixing time also needs to be set.
Before you start your vacuum mixer, make sure that the safety hook (under
the unit) has been turned through 180º (should fit in behind the wall
mount). Pull the hook forwards using the slot, then retighten the screw on
the hook to prevent it coming loose.
Warning: Use only beakers with the new curved seal (171708).
When using the 115 V version you have to install the power pack
Order no. 171976. Therefore you plug in the conductor of the
Wamix into the socket (Pos.1) of the power pack. The conductor
of the power pack ( Pos.2) has to be pluged into the house socket.
In order to mount the power pack at the table stand please use the
enclosed screws M6.
Pos. 2
Pos. 1
11
Start-up / Installation
− Switch on green master switch (1) (vacuum mixing).
Only for Wamix-Injector:
Open compressed air valve
When the device is used for the first time, the vacuum first needs to be adjusted at the
throttle valve (for the vacuum generator) using a screwdriver. The recommended input
pressure is a minimum 5 bar. The throttle valve (see fig. 4) is located on the front lower
right of the chassis (remove the black cover). Slowly open the valve from its zero position
(to the left = +, to the right = -), until the needle is in the green zone. The best vacuum
will not be obtained if the valve is fully open - a middle setting is best. This should be
adjusted later if the pressure changes.
Remove the black cover –
the spindle of the throttle
valve for the vacuum is
located behind it.
fig. 4
Wamix-Injector: If the needle does not reach the big end of the green zone on the
pressure gauge during the setting, there is too little flow to the unit. Check the
compressed-air supply.
If the equipment will not be used for an extended period, switch off the compressedair supply and the vacuum mixer.
12
6
6.1
Operation
General operating instructions
All instructions for using the unit, whether in verbal or written form, are based
on our own experience and experimentation and can only be regarded as
guidelines.
Fill the beaker to the Max marking. The vacuum will draw any excess material
into the system.
The beaker will come away automatically once the vacuum is removed. To
avoid damaging the seal, never remove the beaker by force.
The sealing surfaces between the beaker and the plate has to be clean likewise the rotor fastenings and the beaker lid - to ensure trouble-free
operation.
13
6.2
VACUUM MIXING with the Wamix
By default, the timer is set to 60 seconds.
6.2.1 Wamix-Classic
1
6
5
4
7
2
fig. 5
1. Set the mixing time on the timer (1) (up to 999 sec.) using the buttons (4 and 5).
A: Automatic mixing = turning knob (7) you can make a free choice of 200 rpm until 600
rpm. – mixing time is stored until a new time is set.
B: For manual mixing = set the turning knob (7) to “0”, and switch the mixer on once
vacuum is created, turning knob (7) to the position which you need.
Please note: The timer (total time) starts counting down as soon as sufficient
vacuum is achieved (beaker securely attached to the device). As this therefore
corresponds to the mixing time, the mixer can be switched on and off any number of
times (e.g. for pre- and post-vacuum). The beginning and end of the mixing time can
be read on the timer display (6).
2. Place the mixing materials in the beaker and mix by hand until the powder is well mixed
with the liquid.
3. Seal the beaker with a lid.
14
4. Insert the beaker in the unit from below; the vacuum will be released automatically.
Hold the beaker until the vacuum builds.
5. The mixer switches on automatically (depending on the settings – see point 1) for the set
period of time. At the end of this period, an alert signal sounds for 5 seconds, after
which the timer display (6) flashes until the main switch (2) is switched off.
6. Take hold of the beaker before you switch off the master switch (1) (vacuum).
After the vacuum in the beaker drops, the beaker will no longer be clamped to the unit.
6.2.2 Wamix-Injector
6
1
5
2
4
3
fig. 6
1. Set the mixing time on the timer (1) (up to 999 sec.) using the buttons (4 and 5).
A: Automatic mixing = set switch (3) to “I”) – mixing time is stored until a new time is set.
B: For manual mixing = set the switch (3) to “0”, and switch the mixer on once vacuum is
created (set switch (3) to “I”).
Please note: The timer (total time) starts counting down as soon as sufficient
vacuum is achieved (beaker securely attached to the device). As this therefore
corresponds to the mixing time, the mixer can be switched on and off any number of
times (e.g. for pre- and post-vacuum). The beginning and end of the mixing time can
be read on the timer display (6).
15
2. Place the mixing materials in the beaker and mix by hand until the powder is well mixed
with the liquid.
3. Seal the beaker with a lid.
4. Insert the beaker in the unit from below; the vacuum will be released automatically.
Hold the beaker until the vacuum builds.
5. The mixer switches on automatically (depending on the settings – see point 1) for the set
period of time. At the end of this period, an alert signal sounds for 5 seconds, after
which the timer display (6) flashes until the main switch (2) is switched off.
6. Take hold of the beaker before you switch off the master switch (1) (vacuum).
After the vacuum in the beaker drops, the beaker will no longer be clamped to the unit.
16
7
Troubleshooting
Fault
Cause
Remedy
Mixer does not start
Blown fuse */**
Replace fuse and determine cause;
otherwise, call Service Center
Set timer to "0“ */**
Set mixing time
Turning knob (7) to “0” Adjust the rpm
Vacuum too low
Switch (3) to “0”
Put the Switch (3) on
Filter (vacuum)
Check filter – clean and/or change (see
blocked */**
8.2)
Leaking seal on
Replace seal
vacuum flange for
mixing beaker */**
No vacuum
Beaker filled above
Clean system, i.e., maintenance by
Max. mark, i.e., mixing Service Center
ingredients in
system/”control
window” */**
Faulty vacuum pump * Maintenance by Service Center
Set pressure regulator Check and set pressure if necessary.
to "0" (pressure
(see page 12)
gauge).**
Flow of airpressure too Check airpressure / adjust
low **
Beaker falls out
Faulty seal
Replace seal (171708)
Wamix-Classic * / Wamix-Injector **
If the above recommendations do not solve the problem, contact your dental
depot or our service department.
17
8
8.1
Care and maintenance
Cleaning
Disconnect the power plug before starting any maintenance work.
The identification plate has always to be kept in easily legible condition and has
not to be removed.
Remove external dirt from time to time with some form of cold cleaner.
Use only cold cleaners to avoid damaging the paintwork or removing the lettering.
The equipment should be cleaned at regular intervals to ensure trouble-free operation.
It requires only normal cleaning (sponge, damp cloth, mild detergent) and no further
chemical additives.
Solvents must not be used to clean the front panel!
Keep the beaker clean. When not in use, fill with water to just below the mixer.
Cleaning mixing beakers in an ultrasonic bath, especially if plaster solvents are
also used in the beaker, will inevitably result in changes to the structure of the
beaker material and will therefore damage the mixing beaker.
18
8.2
Wartung
Allow the condensers to discharge before you open the mixer.
Our vacuum mixers do not require servicing. Make sure the unit is kept clean and
that the rim seal for the beaker (vacuum seal) is not damaged.
8.2.1
Changing the filter
1
Remove screw (1) (on the left, near the mixer mechanism on the rim under the unit). The
filter swings loose at the forward end of the screw. After changing the filter, do up the
screw finger-tight (do not forget the O-ring).
19
8.3
Warranty
The warranty period for our equipment is 12 months. If faults occur within the
warranty period, contact your dental depot or get in touch directly with our service
department.
Your equipment should only be operated in perfect condition. If faults occur which
could harm operators or third parties, the unit should not be used until it has been
fixed.
This warranty does not cover damage caused by improper use, external mechanical
causes, transport damage or interference with the unit by unauthorized persons.
8.4
Spare parts
If necessary please contact our service hotline phone:
0049 (0)40 / 730 92 6-0
20
8.5
Scope of delivery / Accessories
Wamix-Classic (V - IV)
Item no.: 171979
Wamix-Injector (V - IV)
Item no.: 171978*
Incl. in delivery
Item no.:
Beaker, medium cpl. 350 ml
Mounting set
PVC hose Ø 8 x 6 textile (blue) 2 m*
171283
174358
320026
Accessories
Item no.:
Table stand (W 219 x H 467 x D 308 mm)
Beaker, extra small cpl. 75 ml
Beaker, small cpl. 200 ml
Beaker, medium cpl. 350 ml
Beaker, large cpl. 600 ml
Beaker, extra large cpl. 1000 ml
PVC hose Ø 8x6 textile (blue) per meter*
Vacuum washing beaker 600 ml
171777
171295
171230
171283
171237
171269
320026
171275
8.6
Repairs
Servicing or repairs to the unit has only to be carried out by qualified technicians.
Only original spare parts are to be used. Responsibility for the product is voided
if unauthorised persons alter it or if inappropriate components are installed.
21
9
Technical data
Wamix-Classic (V - IV)
Item no.: 171979
Wamix-Injector (V - IV)
Item no.: 171978*
Voltage
Power consumption
Output
WxHxD
Weight
Sound level
Speed
Vacuum
Mixing time
Safety class
Compressed air connection*
220–240 V / 50/60 Hz
2,4 A (Si 4,0 A), 1,8 A (Si 4,0 A)*
220 W, 120 W*
205 x 370 x 245 mm
9,5 kg, 8,3 kg*
≤ 70 dB(A)
200-600 min-1 , 380 min-1 *
approx. 900 mbar, approx. 950 mbar*
up to 999 sec., adjustable
IP 22
min. 5 bar*
Other voltages upon enquiry.
The noise level of the unit amounts to ≤ 70 dB(A).
The technical data are subject to change without prior notice.
22
10
EC Conformity Certificate
in accordance with 2006/95/EG (low-voltage guidelines) and 2004/108/EG (EMV
guidelines) and 2006/42/EG (machinery guidelines)
Manufacturer:
WASSERMANN
Dental-Maschinen GmbH
Rudorffweg 15 - 17
D-21031 Hamburg
Model:
Wamix-Classic (V - IV)
Wamix-Injector (V - IV)
Applicable
standards:
DIN EN 61010-1
DIN EN 61000-6-3
DIN EN 61000-6-1
DIN 45635-1
DIN EN 60335-1
Product description:
Vacuum mixers
for dental
application
Item no.: 171979
Item no.: 171978
Hiermit wird bestätigt, dass die oben bezeichnete Maschine den genannten EG-Richtlinien
entspricht. Diese Erklärung wird ungültig, falls die Maschine ohne unsere Zustimmung
verändert wird.
This is to confirm that the above mentioned machine complies with the described EC
rules. This declaration becomes invalid if the machine is modified without our approval.
Cette machine est conforme aux normes en vigueur de la Communité Européene. Cet
avis est nul et non avenant si cette machine est modifiée sans notre accord.
Esta máquina, anteriormente mencionada, cumple con los limites requeridos por el
reglamento EC. Ahora bien, esta declaración quedará invalidada en caso de realizar
modificaciones al aparato sin nuestra aprobación.
Hiermee wordt bevestigd dat bovengenoemde machine voldoet aan de voorgeschreven
EU normen. Deze verklaring verliest geldigheid als er zonder onze uitdrukkelijke
toestemming wijzigen aan de machine worden aangebracht.
Company stamp :
Place, date: Hamburg, 26.03.2013
Signature : ________________________
Wilfried Wassermann
(Managing director)
23
Notes:
24
Notes:
25
Notes:
26
Notes:
27