1
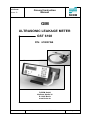
Equipment P/N: 610007AB Issue: G Ground Instruction Manual GIM ULTRASONIC LEAKAGE METER GST 6108 P/N: 610007AB FLEXIM GmbH Wolfener Straße 36 D-12681 Berlin www.flexim.de 17/12/2014 ULTRASONIC LEAKAGE METER GST 6108 Page 1 of 61 Equipment P/N: 610007AB Issue: G Ground Instruction Manual 17/12/2014 ULTRASONIC LEAKAGE METER GST 6108 Page 2 of 61 Equipment P/N: 610007AB Ground Instruction Manual Issue: G Issue F Date 22/08/2012 Page affected 7 10 G 17/12/2014 Reason for Revision Updated “Table of contents”. 17 Changed caption. Changed letter (→t Changed picture. 55 Changed part number. 61 Updated “Index”. 10 34 Added table. Added table. 47 Added paragraph. 48 Added table. 51 Added table. 55 Added part number. List of Effective Pages 17/12/2014 Page Issue Rev.-Date 1 2 3 4 5 6 7 8 9 10 11 12 13 14 15 16 17 18 19 20 21 22 23 24 25 26 27 28 29 A A A A A A F E E G A A D A A A F A A A C A A A A A A B A 10/01/2007 10/01/2007 10/01/2007 10/01/2007 10/01/2007 10/01/2007 22/08/2012 16/11/2010 16/11/2010 17/12/2014 10/01/2007 10/01/2007 18/05/2010 10/01/2007 10/01/2007 10/01/2007 22/08/2012 10/01/2007 10/01/2007 10/01/2007 23/09/2008 10/01/2007 10/01/2007 10/01/2007 10/01/2007 10/01/2007 10/01/2007 04/04/2007 10/01/2007 ULTRASONIC LEAKAGE METER GST 6108 Page 4 of 61 Equipment P/N: 610007AB Ground Instruction Manual Issue: G 17/12/2014 Page Issue Rev.-Date 30 31 32 33 34 35 36 37 38 39 40 41 42 43 44 45 46 47 48 49 50 51 52 53 54 55 56 57 58 59 60 61 A A A B G B A A B A A A A A C B B G G B A G A C A G A A A B A F 10/01/2007 10/01/2007 10/01/2007 04/04/2007 17/12/2014 04/04/2007 10/01/2007 10/01/2007 04/04/2007 10/01/2007 10/01/2007 10/01/2007 10/01/2007 10/01/2007 23/09/2008 04/04/2007 04/04/2007 17/12/2014 17/12/2014 04/04/2007 10/01/2007 17/12/2014 10/01/2007 23/09/2008 10/01/2007 17/12/2014 10/01/2007 10/01/2007 10/01/2007 04/04/2007 10/01/2007 22/08/2012 ULTRASONIC LEAKAGE METER GST 6108 Page 5 of 61 Equipment P/N: 610007AB Issue: G Ground Instruction Manual 17/12/2014 ULTRASONIC LEAKAGE METER GST 6108 Page 6 of 61 Equipment P/N: 610007AB Issue: G Ground Instruction Manual Table of Contents 1 GENERAL ....................................................................................................................................................... 9 1.1 Terms and Abbreviations ......................................................................................................................... 9 1.2 Aircraft Maintenance Manual ................................................................................................................... 9 1.3 Measuring Principle of the LEAKAGE METER GST 6108 ..................................................................... 10 2 HANDLING .................................................................................................................................................... 11 2.1 Scope of Delivery................................................................................................................................... 11 2.2 Type and Serial Number ........................................................................................................................ 12 2.3 Transport ............................................................................................................................................... 12 2.4 Storage Conditions ................................................................................................................................ 13 2.5 Maintenance .......................................................................................................................................... 13 3 SPECIFICATIONS ......................................................................................................................................... 15 4 DESCRIPTION OF THE LEAKAGE METER GST 6108................................................................................ 17 4.1 The Transmitter ..................................................................................................................................... 17 4.2 The LEAKAGE Transducer .................................................................................................................... 18 5 INSTALLATION OF THE LEAKAGE METER GST 6108............................................................................... 21 5.1 Inspection at Reception ......................................................................................................................... 21 5.2 Mounting the LEAKAGE meter .............................................................................................................. 21 5.3 Interface LEAKAGE Transducer Airplane (Hydraulic System) ...................................................... 21 6 STARTING UP .............................................................................................................................................. 23 6.1 General Precautions .............................................................................................................................. 23 6.2 The Keypad ........................................................................................................................................... 23 6.3 The Display ............................................................................................................................................ 26 6.4 Battery LED ........................................................................................................................................... 27 6.5 Signal LED ............................................................................................................................................. 27 6.6 Status LED ............................................................................................................................................ 27 6.7 Power Supply ........................................................................................................................................ 27 7 PREPARATION OF THE MEASUREMENT .................................................................................................. 29 7.1 Connection of the LEAKAGE Transducer to the Transmitter ................................................................. 29 7.2 Mounting of the LEAKAGE Transducer on the Pipe .............................................................................. 29 8 MEASUREMENT ........................................................................................................................................... 33 8.1 Switching the LEAKAGE meter On ........................................................................................................ 33 8.2 Parameter Input ..................................................................................................................................... 33 8.3 Start of Measurement ............................................................................................................................ 35 8.4 Result of the Measurement .................................................................................................................... 37 8.5 Output of the Measured Values to a PC ................................................................................................ 38 8.6 Deleting Measured Values..................................................................................................................... 39 8.7 Charging the Battery .............................................................................................................................. 39 9 SETTINGS..................................................................................................................................................... 41 9.1 Setting the Date and the Time ............................................................................................................... 41 9.2 Setting the Contrast ............................................................................................................................... 42 9.3 Format of the Output.............................................................................................................................. 42 9.4 Input Mode for the Measuring Point Designation ................................................................................... 43 9.5 Selection of the Units ............................................................................................................................. 43 9.6 Instrument Information ........................................................................................................................... 44 10 TROUBLESHOOTER MODE ........................................................................................................................ 45 10.1 Switching between the permanent Troubleshooter Mode and the permanent LEAKAGE Mode .......... 45 10.2 Switching the Troubleshooter Mode temporarily ON ............................................................................. 46 10.3 Switching the LEAKAGE Mode temporarily ON ..................................................................................... 47 10.4 Troubleshooting Measurement .............................................................................................................. 47 17/12/2014 ULTRASONIC LEAKAGE METER GST 6108 Page 7 of 61 Equipment P/N: 610007AB Issue: G Ground Instruction Manual 11 OPERATOR MISUSE .................................................................................................................................... 51 12 GSE HANDLING IN ACCORDANCE TO THE AMM ..................................................................................... 51 13 TROUBLESHOOTING................................................................................................................................... 53 14 SPARE PARTS ............................................................................................................................................. 55 17/12/2014 ULTRASONIC LEAKAGE METER GST 6108 Page 8 of 61 Equipment P/N: 610007AB Issue: G Ground Instruction Manual 1 General 1.1 Terms and Abbreviations AC A/C Acc. AMM Approx. ASCII CRLF Cont’d Deg. e.g. Fig. GIM GSE i.e. Incl. LCD LED Meas. Max. R&D Read. RTS/CTS P/N WxHxD Alternating Current Aircraft According Aircraft Maintenance Manual Approximately American Standard Code for Information Interchange Carriage Return / Line Feed Continued Degree For example Figure Ground Instruction Manual Ground Support Equipment That is Including Liquid Crystal Display Light Emitting Diode Measuring Maximum Research and Development Reading Ready To Send / Clear To Send Part Number Width x Height x Depth 1.2 Aircraft Maintenance Manual A320 family Maintenance Task: 29-00-00-280-001, Check of the Internal Leakage of the Green Hydraulic System 29-00-00-280-002, Check of the Internal Leakage of the Blue Hydraulic System 29-00-00-280-003, Check of the Internal Leakage of the Yellow Hydraulic System A330/A340 family Maintenance Task: 29-19-00-720-801, Check of the Internal Leakage of the Blue and Yellow Hydraulic Systems 29-19-00-720-802, Check of the Internal Leakage of the Green Hydraulic System 17/12/2014 ULTRASONIC LEAKAGE METER GST 6108 Page 9 of 61 Equipment P/N: 610007AB Issue: G Ground Instruction Manual A350-900 Maintenance Task: 29-10-00-500-0009-0001, Functional Test to Monitor Internal Leak Rate of the Green Hydraulic System 29-10-00-500-0010-0001, Functional Test to Monitor Internal Leak Rate of the Yellow Hydraulic System 1.3 Measuring Principle of the LEAKAGE METER GST 6108 The LEAKAGE meter measures the leak rate in hydraulic systems according to the ultrasonic transit time difference principle. The measurement is non invasive, absolutely no intrusion in the pipe system is needed. Fig. 1.1: Transit of the ultrasonic signal through the medium t0 t1 t2 t Fig. 1.2: Transit time difference Ultrasonic signals are sent by the transducer into the pipe, reflected on the inner pipe wall of the opposite side and come back to the transducer. These signals are emitted alternatively in the direction of flow and against it. Because the medium in which the signals propagate is flowing, the transit time of the sound signals propagating in the direction of flow is shorter than the transit time of the signal propagating against the direction of flow. The transit time difference t is measured and allows the determination of the average flow velocity on the propagation path of the ultrasonic signals. A profile correction is then performed to obtain the average flow velocity on the cross-section of the pipe, which is proportional to the volume flow rate. The LEAKAGE meter tests with its special electronics the incoming ultrasonic signals for their usefulness for the measurement and evaluates the plausibility of the measured values. The integrated microprocessors control the complete measuring cycle, eliminating disturbance signals by statistical signal processing techniques. 17/12/2014 ULTRASONIC LEAKAGE METER GST 6108 Page 10 of 61 Equipment P/N: 610007AB Ground Instruction Manual Issue: G 2 Handling 2.1 Scope of Delivery The standard scope of delivery (P/N: 610007AB) comprises: Item Description Quantity 001 Data transfer kit 1 002 Power supply and battery charging unit, 110 V AC – 220 V AC (without power cord) 1 003 Power cord Europe incl. universal adapter 1 004 Coupling compound tube 1 005 User’s manual English 1 006 Transmitter GST 6108 1 007 LEAKAGE transducer FS3N7 1 008 Carrying case 1 001 005 002 006 003 004 007 Fig. 2.1: Carrying case (008) with measuring instrument and accessories 17/12/2014 ULTRASONIC LEAKAGE METER GST 6108 Page 11 of 61 Equipment P/N: 610007AB Issue: G Ground Instruction Manual 2.2 Type and Serial Number Type designation and serial number of the LEAKAGE meter are given on the data plate of the rear panel of the transmitter (see Fig. 2.2) and on the side face of the transducers (see Fig. 2.3). Fig. 2.2: Data plate, transmitter Fig. 2.3: Data plate, transducer 2.3 Transport Protect the instrument from shocks during transport. Always stow the instrument and its accessories in the corresponding compartments of the carrying case. Avoid excessive cable bends especially when closing the top cover of the carrying case. In order to avoid scratches on the enclosure caused by the instrument handle during transport, tilt the handle to the front of the LEAKAGE meter. To do this, you must first pull the handle to the side to unlock it (see arrow in Fig. 2.4). Fig. 2.4: Handle with anchoring 17/12/2014 ULTRASONIC LEAKAGE METER GST 6108 Page 12 of 61 Equipment P/N: 610007AB Ground Instruction Manual Issue: G 2.4 Storage Conditions Always store the LEAKAGE meter at an adequate ambient temperature. The temperature should lie between - 40 °C and 65 °C (- 40 °F and 149 °F). The relative humidity of the storage room should lie between 5 % and 95 % without condensation. 2.5 Maintenance No maintenance work is necessary. If the LEAKAGE meter is installed correctly, in an appropriate location and as recommended, used cautiously and taken care of conscientiously, no troubles should appear. 2.5.1 Cleaning Clean the instrument with a soft cloth. Do not use detergents. Remove traces of acoustic coupling compound from the transducers with a paper tissue. 2.5.2 Calibration The LEAKAGE meter is a very reliable instrument. It is manufactured under strict quality control, using modern production techniques. The instrument has been calibrated at the factory. FLEXIM recommends to calibrate the LEAKAGE meter once a year or according to local guidelines. The operator is responsible for following this recommendation, at own discretion. The LEAKAGE meter has to be calibrated at the FLEXIM factory. We recommend calibration if the transducers were used at temperatures outside of the specified temperature range. 17/12/2014 ULTRASONIC LEAKAGE METER GST 6108 Page 13 of 61 Equipment P/N: 610007AB Issue: G Ground Instruction Manual 17/12/2014 ULTRASONIC LEAKAGE METER GST 6108 Page 14 of 61 Equipment P/N: 610007AB Ground Instruction Manual Issue: G 3 Specifications Specifications are subject to modifications without prior notice. Measurement Measuring principle: Ultrasonic time difference correlation principle Display: (0.01 ... 25) m/s [(0.03 … 82) ft/s] 2 x 16 characters, dot matrix, backlit Flow velocity: Resolution: Operating temperature: 0.025 cm/s [0.0008 ft/s] -10 °C ... 60 °C [14 °F … 140 °F] Power consumption: < 15 W (100 ... 1000) Hz (1 channel) Repeatability: 0.15% of reading 0.01 m/s [0.15% of read. 0.03 ft/s] Measuring cycle: Accuracy (for fully developed, rotationally symmetrical flow profile) Measuring functions - Volume flow: 1% ... 3% of read. 0.01 m/s [ 1% ... 3% of read. 0.03 ft/s] depending on application 0.5% of reading 0.01 m/s [ 0.5 % of read. 0.03 ft/s] with process calibration -Path velocity: 0.5 % of read. 0.01 m/s [ 0.5 % of read. 0.03 ft/s] Accuracy at the defined test points for a LEAKAGE measurement (flow profile not rotationally symmetrical ) - Volume flow: < 7% of read. 0.01 m/s [< 7% of read. 0.03 ft/s] for T = 10 °C … 60 °C [for T = 50 °F … 140 °F] Meas. quantity: Volume flow Meas. units: l/min or gal/min Data logger Loggable values: all measured values Capacity: Meas. values: >100 000 Meas. series: 99 Communication Interface: RS232 Data: actual meas. value, logged data, parameter records Software FluxData (optional) Function: Downloading meas. data/ parameter records, graphical presentation, conversion to other formats (see section 8.5) Operating systems: Windows versions ** (newer than Windows 98) Transmitter Enclosure ) TM ) -Weight: approx. 3.9 kg * [approx. 8.6 lb] -Deg. of protection: IP54 acc. to EN60529 [NEMA 3S] LEAKAGE transducer (9 ... 25.4) mm rated (possible) -Material: aluminium, epoxy coated diameter range: [(3/8 ... 1) in] -Dimensions (W x H x D): (276 x 118 x 317) mm [(10.87 x 4.64 x 12.48) in] (with handle) Dimensions (W x H x D): (75 x 41 x 43) mm [(2.95 x 1.61 x 1.69) in] (without fastening strap) Material: Enclosure: stainless steel Contact surface: PEI Operating temperature: -30°C ... 130°C [-22°F ... 266°F] Deg. of protection: IP65 acc. to EN60529 [NEMA 4X] Measuring channels: 1 Power supply: Rechargeable battery (6 V/4 Ah) or external power supply (100-240) V AC Operating time with battery: >10 h Charge time for max. capacity: 15 h 17/12/2014 ) * Avoirdupois pound: 1 lb = 0.45359237 kg ) ** Windows is a protected trademark of Microsoft Corporation. ULTRASONIC LEAKAGE METER GST 6108 Page 15 of 61 Equipment P/N: 610007AB Issue: G Ground Instruction Manual 17/12/2014 ULTRASONIC LEAKAGE METER GST 6108 Page 16 of 61 Equipment P/N: 610007AB Ground Instruction Manual Issue: G 4 Description of the LEAKAGE METER GST 6108 4.1 The Transmitter 4.1.1 Front Panel 2 x 16 digits LCD display, backlit Connection port for LEAKAGE transducer LEDs Keypad Fig. 4.1: Front panel of the transmitter 4.1.2 Rear Panel Serial interface LAST CALIBRATION 2012 1 2 3 4 5 6 7 8 9 10 11 12 FLEXIM GERMANY P/N 61007010-01 Firmware for A320 family ULTRASONIC LEAKAGE METER Model : GST 6108 Ser.No. : 06100100 Built : 2012 Battery compartment FLEXIM GmbH D-12681 Berlin Made in Germany Connection socket for power supply and battery charging unit Fig. 4.2: Rear panel of the transmitter 17/12/2014 ULTRASONIC LEAKAGE METER GST 6108 Page 17 of 61 Equipment P/N: 610007AB Ground Instruction Manual Issue: G 4.1.3 Outer Dimensions of the Transmitter The transmitter weighs 3.9 kg (8.6 lb). Fig. 4.3 and Fig. 4.4 show the outer dimensions of the transmitter. 12.48 in / 317 mm 4.64 in / 118 mm 10.87 in / 276 mm Fig. 4.3: Top view Fig. 4.4: Front view 4.2 The LEAKAGE Transducer The LEAKAGE transducer (see Fig. 4.5) can be used on pipes of nominal diameter ranging from 9 mm to 25.4 mm (3/8 in to 1 in) and at temperatures between - 30 °C and 130 °C (- 22 °F and 266 °F). Transducer cable Fly nut Strap clamp Threading element Fastening strap Fig. 4.5: LEAKAGE transducer 17/12/2014 ULTRASONIC LEAKAGE METER GST 6108 Page 18 of 61 Equipment P/N: 610007AB Ground Instruction Manual Issue: G Ultrasonic signals are emitted by one measuring head (see Fig. 4.6), reflected on the inner wall of the opposite side and received by the other head. Transducer measuring heads Fig. 4.6: Measuring heads of the LEAKAGE transducer The transducer is factory calibrated. The calibration data and the transducer parameters are saved in a transducer internal non-volatile memory and are automatically sent to the transmitter upon connection of the transducers to facilitate the operation of the LEAKAGE meter. 4.2.1 Outer Dimensions of the LEAKAGE Transducer The LEAKAGE transducer weighs 0.5 kg (1.1 lb). The transducer housing and the transducer cable conduit are made of stainless steel. Fig. 4.7 and Fig. 4.8 show the outer dimensions of the LEAKAGE transducer. 1.61 in / 41 mm 2.44 in / 62 mm 2.95 in / 75 mm Fig. 4.7: Side view 17/12/2014 ULTRASONIC LEAKAGE METER GST 6108 Page 19 of 61 Equipment P/N: 610007AB Ground Instruction Manual Issue: G 43 mm Threading element 17.5 mm = 0.69 in 27.4 mm = 1.08 in 43.0 mm = 1.69 in 17.5 mm 27.4 mm Fig. 4.8: Front view 4.2.2 Temperature Probe The LEAKAGE transducer is equipped with a temperature probe. The latter is in contact with the surface of the pipe and measures the temperature of the medium (see Fig. 4.9). Temperature probe Fig. 4.9: LEAKAGE transducer with temperature probe 17/12/2014 ULTRASONIC LEAKAGE METER GST 6108 Page 20 of 61 Equipment P/N: 610007AB Issue: G Ground Instruction Manual 5 Installation of the LEAKAGE METER GST 6108 5.1 Inspection at Reception This instrument has already been tested thoroughly and has left the works in a flawless state. When the instrument is delivered, please proceed to a visual control of the LEAKAGE meter to make sure that no damage has occurred during transportation. Please make sure that the specifications of the instrument and of the transducer that were delivered correspond to the specifications given on the purchase order. In order to answer any inquiries, FLEXIM needs the type and the serial number of the instrument as well as the part number of the firmware. Note: Type designation and serial number of the LEAKAGE meter are given on the data plate of the rear panel of the transmitter and on the side face of the transducers (see Fig. 2.2 and Fig. 2.3 ). 5.2 Mounting the LEAKAGE meter The LEAKAGE meter is already operational when delivered. 5.3 Interface LEAKAGE Transducer Airplane (Hydraulic System) The LEAKAGE transducer is attached to the pipe by means of a fastening strap. The threading element at the end of the strap makes installation easier (see Fig. 5.1). Threading element Fig. 5.1: LEAKAGE transducer mounted on a pipe 17/12/2014 ULTRASONIC LEAKAGE METER GST 6108 Page 21 of 61 Equipment P/N: 610007AB Issue: G Ground Instruction Manual 17/12/2014 ULTRASONIC LEAKAGE METER GST 6108 Page 22 of 61 Equipment P/N: 610007AB Ground Instruction Manual Issue: G 6 Starting Up The LEAKAGE meter must always be operated according to the instructions given in the present User's Manual. 6.1 General Precautions The LEAKAGE meter is a precision measuring instrument and it must be handled with care. To obtain reliable measurement results and in order not to damage the instrument, it is important that great attention is paid to the instructions given in this User's Manual. Note: Always respect the handling precautions and the instructions given in this manual. Always respect the following instructions: Protect the instrument from excessive shock. Do not open the housing without authorization. Take the degree of protection into account (see chapter 3). Keep the transducers clean. Manipulate the transducer cables cautiously. Avoid excessive cable bend. Handle the charging unit and the battery correctly. The power supply and battery charging unit is not moisture-proof. Use it only in dry rooms. Make sure to work under correct ambient conditions. Use a correct external power supply when not using the battery. Caution! Never replace a component of the LEAKAGE meter by a component that was not authorized by FLEXIM. 6.2 The Keypad The keypad of the LEAKAGE meter features three function keys and 12 keys for numerical data input. NEXT In INPUT mode, they can be used for the input of numbers and characters. DISP O- Several keys have double functions. They can be used for INPUT as well as for SELECTION. In SELECTION mode, for example, the arrow-shaped numerical keys operate as cursor keys. OON O+ MUX O OFF DISP LF LIGHT 3x OFF BRK ON ENTER INIT RESET Fig. 6.1: Keypad 17/12/2014 ULTRASONIC LEAKAGE METER GST 6108 Page 23 of 61 Equipment P/N: 610007AB Ground Instruction Manual Issue: G Table 6.1: General functions ON Press this key to switch the LEAKAGE meter ON. Switches the background lighting ON/OFF. LIGHT 3xOFF BRK ON E NT ER IN IT RESET 3xOFF BRK RESET: Press these keys simultaneously to recover from an error. This has the same effect as restarting the unit. The stored data will not be affected. INIT (cold start): To initialize the LEAKAGE meter, press these keys simultaneously while switching the LEAKAGE meter ON and hold them down until the main menu appears. ON IN IT Most parameters and settings are reset to the factory default values. The memory will not be cleared. 3xOFF BRK Press 3 times BRK to switch the LEAKAGE meter OFF. 3xOFF BRK Interrupts the measurement and calls the main menu. Caution! Be careful not to interrupt an ongoing measurement by inadvertently pressing BRK Table 6.2: Menu selections 3xOFF Press BRK to call the main menu. BRK O- Selecting the menu entry at the left or at the right of the currently highlighted one. O+ OON OOFF ENTER 17/12/2014 Scrolling upwards or downwards through the menus. Confirmation of the selected entry. The corresponding program branch appears. ULTRASONIC LEAKAGE METER GST 6108 Page 24 of 61 Equipment P/N: 610007AB Ground Instruction Manual Issue: G Table 6.3: Input of numerical values ... Input of the numerical value shown on the key DISP LF Sign for the input of negative data Decimal point LIGHT ON Deletion of data. After the deletion of data, the previous value will be displayed. Confirmation of input. ENTER Table 6.4: Input of text O- O+ DISP Selection of the position of the character to be input. Changes the currently selected character to an 'A'. Changes the currently selected character to a 'Z'. DISP Changes between small and capital letters. OON OOFF Moving to the next/previous ASCII character. Deleting the character currently shown and inserts a blank space. NEXT MUX ENTER 17/12/2014 To automatically scroll upwards/downwards through the selected restricted ASCII character set. The character changes every second. The scrolling can be interrupted by pressing any other key. Finishes editing. ULTRASONIC LEAKAGE METER GST 6108 Page 25 of 61 Equipment P/N: 610007AB Ground Instruction Manual Issue: G 6.3 The Display 6.3.1 The Main Menu After switching on and initialization, the main menu appears on the first line of the display. >MEASURING< sf Leakage measure The main menu has two entries: MEAS (Measuring) and SF (Special Functions), corresponding to the two different program branches. The actually selected program branch is displayed in capital letters between arrows. Use keys + and to select a program branch. O- O 6.3.2 The Program Branches The program branch MEASURING leads you through the different steps of the measuring process. The program branch SPECIAL FUNCTIONS contains all functions that are not directly related with the basic measurement. Special Funct. SETUP:Date/Time If a vertical arrow () is displayed beside a menu option, this menu option contains a scroll list. This list is displayed on the second line. OON and , to scroll through the Use the arrow keys list, then confirm your selection by pressing ENTER. OOFF TIME >OK< 11:11 new The LEAKAGE meter sometimes requests a selection on the second line. The actually selected option is displayed in capital letters and between arrows. and Use the arrow keys selection by pressing ENTER. O O+ , then confirm your Note: You can return to the main menu at any time by pressing key BRK. Note: In this manual, all program entries and keys will appear in capital letters. Program entries are in typewriter characters (PARAMETER). Submenus are separated from the main menu entry by a backslash. 17/12/2014 ULTRASONIC LEAKAGE METER GST 6108 Page 26 of 61 Equipment P/N: 610007AB Ground Instruction Manual Issue: G 6.4 Battery LED Table 6.5: Function of the "Battery" LED LED off: The LEAKAGE meter works under normal operating conditions (battery or external power supply). LED on: Battery is being charged. LED flashes (long intervals): Battery voltage is insufficient. Measurements are impossible. Battery must be charged or changed. LED flashes (short intervals): Error during battery charging, e.g. no external voltage present. 6.5 Signal LED Table 6.6: Function of the "Signal" LED LED off: The LEAKAGE meter works offline. LED on (green): The signal received by the channel is sufficient for measurements. LED on (red): The signal received by the channel is insufficient for measurements. 6.6 Status LED Table 6.7: Function of the "Status" LED LED off: The measurement is taking place. LED on (green): The measured value lies within the specified range. LED on (red): The measured value lies outside the specified range. 6.7 Power Supply The chargeable NiCd batteries guarantee an operating time of at least 10 hours. The instrument can also be operated from an external power supply of (100 to 240) V AC using the provided power supply and battery charging unit. Caution! The power supply and battery charging unit is not moisture-proof. Use it only in dry rooms. Note: The battery can be recharged as described in section 8.7. 17/12/2014 ULTRASONIC LEAKAGE METER GST 6108 Page 27 of 61 Equipment P/N: 610007AB Ground Instruction Manual Issue: G 6.7.1 Battery Handling Taking the following precautions will prolong the battery's life expectancy: For longer periods of storage, batteries should be kept at low temperatures (0 °C to 10 °C (32 °F to 50 °F)). Storage in cool conditions will lower the self-discharging by a factor of 1/10. Store the battery set only in charged condition. To avoid the so-called Memory Effect (the charging of the batteries in ever shorter times with a low charging capacity), discharge the batteries fully in a smooth and continuous manner before a new charging cycle is being started. Caution! Use only the battery set authorized by FLEXIM. This battery set can be ordered from FLEXIM or an authorized dealer. The use of non-rechargeable batteries is prohibited. Take care to plug correctly the connector which prevents from reversing the polarity. Before recharging, discharge the battery set as far as possible in order to avoid overcharging. The LEAKAGE meter signalizes that the battery is discharged as follows: LOW BATTERY ! 6.7.2 If the LOW BATTERY! message appears on the display, there is one hour of battery life left. Battery Replacement To replace the battery: Unscrew the two cap nuts (5.5 mm) of the battery compartment cover and remove the cover. Make sure not to lose the screws! Unplug the connector. Remove the battery pack by pulling the black strap. Insert the new battery pack in the instrument with the connector free end first. Plug the connector again. Take care to plug the connector correctly, it prevents to reverse the polarity. Screw the battery compartment cover back on the instrument. Caution! 17/12/2014 Use only the battery set authorized by FLEXIM. This battery set can be ordered from FLEXIM or an authorized dealer. The protective degree IP54 of the LEAKAGE meter is given only if the battery compartment cover is screwed on the housing. ULTRASONIC LEAKAGE METER GST 6108 Page 28 of 61 Equipment P/N: 610007AB Issue: G Ground Instruction Manual 7 Preparation of the Measurement 7.1 Connection of the LEAKAGE Transducer to the Transmitter Connect the LEAKAGE transducer with the transmitter as follows: Pull up the socket cover of transducer socket. Insert the connector of the transducer cable in the socket. Fig. 7.1: Connection of the transducer Note: The red point on the connector should face the red marking on the socket. 7.2 Mounting of the LEAKAGE Transducer on the Pipe Mount the transducer on the pipe as follows: Apply a thin film of acoustic coupling compound on the contact surfaces of the transducer heads (see Fig. 7.2). Note: You will obtain the correct film thickness by stroking over the contact surface with a finger. Fig. 7.2: Applying the coupling compound 17/12/2014 ULTRASONIC LEAKAGE METER GST 6108 Page 29 of 61 Equipment P/N: 610007AB Issue: G Ground Instruction Manual Fig. 7.3: Caution! Do not apply too much coupling compound. Fig. 7.4: Caution! Apply a thin film of coupling compound over the complete surface of the transducer measuring heads. 17/12/2014 ULTRASONIC LEAKAGE METER GST 6108 Page 30 of 61 Equipment P/N: 610007AB Ground Instruction Manual Issue: G Place the transducer on the pipe and press the fly nut firmly (see Fig. 7.5). Put the fastening strap around the pipe. Use the threading element at the end of the strap as threading aid. When you place the fastening strap around the pipe, you have to press the fly nut down as far as possible. Threading element Fig. 7.5: Attaching the fastening strap to the pipe First guide the fastening strap through the upper slot of the strap clamp, and then through the lower one (see Fig. 7.6). Make sure that the strap is tensioned properly and that the fly nut has been pressed in up to the stop. Fly nut Lower Slot Upper slot Fig. 7.6: Threading the fastening strap Fasten the transducer and the fastening strap by tightening the fly nut. Note: 17/12/2014 A stop limits the deflection of the spring. The fly nut can not be turned past this stop. ULTRASONIC LEAKAGE METER GST 6108 Page 31 of 61 Equipment P/N: 610007AB Issue: G Ground Instruction Manual 17/12/2014 ULTRASONIC LEAKAGE METER GST 6108 Page 32 of 61 Equipment P/N: 610007AB Ground Instruction Manual Issue: G 8 Measurement Caution! Always wait until thermal equilibrium between the outer surface of the pipe wall and the temperature probe has been reached before you start the measurement. 8.1 Switching the LEAKAGE meter On Press key to switch the transmitter on. FLEXIM GST 6108-06100106 After the LEAKAGE meter has been switched on, the serial number of the instrument is displayed for a second or two. FREE: 99 Sets 30000 Values The memory still available for data storage is displayed. Here: 99 data sets (SETS) or 30 000 measured values (VALUES) can still be stored. After that, the main menu appears. The main menu has two entries: >MEASURING< sf Leakage measure MEAS (Measuring) and SF (Special Functions). Note: If the display Trouble shooter appears, the Troubleshooter mode is activated. To deactivate this mode, see chapter 10. Note: The display Leakage measure appears only if the LEAKAGE transducer is connected with the transmitter. If the transducer is not connected, the following display appears after the transmitter has been switched on: >MEASURING< sf CONNECT SENSOR ! Connect the transducer to the transmitter. The measurement can only be started when the transducer is connected and the transmitter has detected it. *LEAKAGE SENSOR* The transducer has now been detected. The program branch MEASURING can now be selected. * DETECTED * 8.2 Parameter Input >MEASURING< sf Leakage measure 17/12/2014 In the main menu, select the program branch MEASURING and press ENTER. ULTRASONIC LEAKAGE METER GST 6108 Page 33 of 61 Equipment P/N: 610007AB Ground Instruction Manual Issue: G The LEAKAGE meter then asks you to enter the serial number of the airplane. Aircraft –No.: 12345678 Here you can enter the serial number of the airplane. The serial number is saved with the measured values, and appears in the documentation. The number has no influence on the measurement. Enter the number and confirm your entry with ENTER. The input can take place in numerical mode or in text mode. Note: To change the input mode, select the option SETUP:A/C-NO. in the program branch SPECIAL FUNCTIONS (see section 9.4). INPUT LOCATION CODE: -------- The LEAKAGE meter asks for the checkpoint code. Refer to the Aircraft Maintenance Manual (AMM). A320 family Maintenance Task: 29-00-00-280-001, Check of the Internal Leakage of the Green Hydraulic System 29-00-00-280-002, Check of the Internal Leakage of the Blue Hydraulic System 29-00-00-280-003, Check of the Internal Leakage of the Yellow Hydraulic System A330/A340 family Maintenance Task: 29-19-00-720-801, Check of the Internal Leakage of the Blue and Yellow Hydraulic Systems 29-19-00-720-802, Check of the Internal Leakage of the Green Hydraulic System A350-900 Maintenance Task: 29-10-00-500-0009-0001, Functional Test to Monitor Internal Leak Rate of the Green Hydraulic System 29-10-00-500-0010-0001, Functional Test to Monitor Internal Leak Rate of the Yellow Hydraulic System If the entered code is wrong the following error message appears: INVALID CODE Please try again Invalid code! Enter the correct checkpoint code. When the entered code is correct, the name of the checkpoint is displayed. LOCATION Gr comp -10 In the opposite display, the name Gr comp -10. Press any key to go on. of the checkpoint is: Before starting the measurement, the LEAKAGE meter checks if there is still place for the measured values in the data logger. 17/12/2014 ULTRASONIC LEAKAGE METER GST 6108 Page 34 of 61 Equipment P/N: 610007AB Ground Instruction Manual Issue: G DATA MEMORY OVERFLOW If the data logger is full, delete the logged values in the program branch SPECIAL FUNCTION / DELETE MEAS.VAL. (see section 8.6). The LEAKAGE meter now displays information about the quality of the coupling between the transducer and the pipe (C = coupling quality) and about the signal amplitude (S). DISP Press key to scroll on the upper line between the display of the bar graph of the signal amplitude (S), the bar graph of the quality of the signal (Q) and the display of the transit time (time) in microseconds. C: S: If the signal received is sufficient for measurement, the SIGNAL LED shows green. Confirm with ENTER to start the measurement. If the signal received is NOT sufficient for measurement, the SIGNAL LED shows red. In this case: make sure that you have applied enough coupling compound on the transducer and that there is no dirt between the transducer and the pipe. If the SIGNAL LED still shows red after that, refer to chapter 13. 8.3 Start of Measurement PLEASE WAIT ...! *** PASSED *** FLOW= 2.55 l/m The measurement takes place. The bar graph on the second line of the display shows the progress of the measurement. The measurement lasts approximately 1 min. During this time, a value is measured and saved every second. The result of the measurement is displayed on the first line: PASSED means that the measurement was successful (see section 8.4). The average measured value is displayed on the second line of the display. If the temperature sensor has not yet reached the fluid temperature, the following message is displayed: PLEASE WAIT ...! Temp.adaption... The start of measurement will be delayed until the temperature measurement values are sufficiently constant. As the measurement takes place, you can let the LEAKAGE meter display special measured values: a) By scrolling on the second line of the display with key 16.04 l/min * 163.40 17/12/2014 cm/s DISP , following values will be displayed: the actual flow, the actual flow velocity and ULTRASONIC LEAKAGE METER GST 6108 Page 35 of 61 Equipment P/N: 610007AB Ground Instruction Manual Issue: G c = 1304,4 m/s b) the actual sound speed. By scrolling on the first line of the display with key dTf= 0.1 °C/s DISP following values will be displayed: the variation of the fluid temperature per time unit, C= the bar graph of the quality of the coupling between the transducer and the pipe C (coupling quality), Volume flow the actual measurement quantity (here the flow), the temperature of the fluid, the date and the time left until the data logger is full, the status line, which gives you information about the quality and the precision of the actual measurement (see Table 8.1). Tf= 43.5 C FULL=24.11/14:15 S8 Q5 c ? RT F ? Table 8.1: Signification of the elements of the status line Values S Signification Signal amplitude: 0 ... 9 Q < 5% ... >= 90% Signal quality: 0 ... 9 < 5% ... >= 90% Sound speed: Comparison of the measured and expected sound speed in the fluid. The expected sound velocity is calculated by the instrument based on the fluid data. c ↑ greater than 20% of the expected value √ ok, corresponds to the expected value ↓ smaller than 20% of the expected value ? unknown, can not be measured 17/12/2014 ULTRASONIC LEAKAGE METER GST 6108 Page 36 of 61 Equipment P/N: 610007AB Ground Instruction Manual Issue: G Table 8.1 (cont'd): Values Signification Flow profile: Information about the flow profile basing on the value of the Reynold's number. R T fully turbulent profile ↕ the flow is in the transition range between laminar and turbulent flow L fully laminar flow ? unknown, can not be calculated Flow velocity: Comparison of the measured flow velocity with the flow limits of the system. F ↑ the flow velocity is higher than the actual limit ↓ the flow velocity is lower than the actual cut-off flow (even if it is not subsequently set to zero) 0 the flow velocity is in the offset range of the measuring method √ ok, flow velocity is not in a critical range ? unknown, can not be measured Table 8.2: Example Status line: S8 Q5 c√ RT F↓ S8 Signal amplitude is 80% Q5 Signal quality is 50% c√ The measured sound velocity is in the expected range. RT Fully turbulent flow F↓ Flow velocity smaller than the actual cut-off flow 8.4 Result of the Measurement When the measurement is finished, the flow is displayed in the second line of the display. *** PASSED *** FLOW= 2.55 l/m The result of the measurement is displayed on the first line. PASSED means that the measurement was successful and that the measured value lies within the specified range. The valid range for measured values is specified in the Aircraft Maintenance Manual (AMM). You can now press ENTER to start the same measurement again. Note: In the program branch SPECIAL FUNCTIONS/SETUP:ENG.UNITS, you can select the units used to display the flow (l/min or gal/min). See section 9.5. If the measured value does not lie within the specified range, one of the following error messages is displayed: FAIL: Flow > Max FLOW= 12.04 l/m The flow is greater than the specified upper limit. FAIL: Flow < Min FLOW= 0.21 l/m The flow is smaller than the specified lower limit. 17/12/2014 ULTRASONIC LEAKAGE METER GST 6108 Page 37 of 61 Equipment P/N: 610007AB Ground Instruction Manual Issue: G FAIL: Disturbed FLOW= 2.21 l/m The scattering of the measured values is too high. Control the fastening of the transducer on the pipe and the quality (C) of the measurement signal. FAIL: undefined FLOW= undef l/m The measurement was interrupted because not enough values could be measured. If the measured value is not within the specified range, consult the AMM. You are supported by the Troubleshooter mode to detect the cause of problems. To start the Troubleshooter mode see chapter 10. To display the lower and upper limit of the flow for the selected checkpoint, scroll with key the second line of the display. DISP on *** PASSED *** Max= 9.00 l/m Press the key once to have the upper limit of the flow (MAX=) displayed. *** PASSED *** Min= 1.50 l/m Press the key once to have the lower limit of the flow (MIN=) displayed. When the measurement is finished, return to the main menu by pressing key BRK. You can start a new measurement as described in sections 8.2, 8.3 and 8.4. 8.5 Output of the Measured Values to a PC The measured values stored in the data logger can be transmitted as ASCII-file to a terminal program (e.g. HyperTerminal under Windows). The transmission parameters are as follows: RS232 with 9600 bits per second, 8 data bits, even parity, 2 stop bits, hardware handshaking (RTS/CTS). The LEAKAGE meter sends CRLF-terminated ASCII. Maximal line length: 255 characters. Note: The PC Software FluxData can be used for greater user-friendliness. Select the program branch SPECIAL FUNCTIONS. Confirm by pressing ENTER. O ON Special Funct. Print Meas.Val. Note: 17/12/2014 through the menu until the option PRINT Scroll with key MEAS.VAL. is displayed. Confirm by pressing ENTER. The format of the serial output can be set in the program branch SPECIAL FUNCTIONS\ SETUP:SERIAL (see section 9.3). ULTRASONIC LEAKAGE METER GST 6108 Page 38 of 61 Equipment P/N: 610007AB Ground Instruction Manual Issue: G Connect the LEAKAGE meter to a PC equipped with a serial interface. Press ENTER to start the output of the stored measured values. Send header 01 The display indicates that the measured values are being transmitted. The measurement series 01 is transmitted first. Send header 02 The series 02 is transmitted afterward, and so on until all measurement series are transmitted. The main menu is then displayed. NO VALUES ! Print Meas.Val. If no measured values are logged, the opposite error message is displayed. 8.6 Deleting Measured Values Select the program branch SPECIAL FUNCTIONS. Confirm by pressing ENTER. O ON Special Funct. Delete Meas.Val. Scroll with key through the menu until the option DELETE MEAS.VAL. is displayed. Confirm by pressing ENTER. Really Delete? >NO< yes To avoid accidental deletion of data, the LEAKAGE meter asks for confirmation to make sure you really want to delete the stored measured values. Confirm your selection by pressing ENTER. 8.7 Charging the Battery Select the program branch SPECIAL FUNCTIONS. Confirm by pressing ENTER. O ON Special Funct. Charge Battery NO EXTERN. POWER Charg.Impossible Charge Time Batt 15.0 h Note: 17/12/2014 through the menu until the option CHARGE Scroll with key BATTERY is displayed. Confirm by pressing ENTER. The opposite error message appears if you have activated the battery charging process although the LEAKAGE meter is not connected to an external power supply. Confirm by pressing ENTER. Enter the desired charging time for the battery (maximum: 15 h). Confirm by pressing ENTER. The time necessary for full recharging of the battery is 15h. The charging current is 400 mA. ULTRASONIC LEAKAGE METER GST 6108 Page 39 of 61 Equipment P/N: 610007AB Ground Instruction Manual Issue: G Battery Charging (15:00) 12:30 * BATTERY The selected charging time is displayed in parenthesis on the left of the display. The remaining charging time is displayed on the right. A * is displayed every second to signal that the charging process is running. Press ENTER. During battery charging, the battery LED is lighted. The charging process continues in background mode and the opposite display appears. Stop Charging no >YES< Select YES and confirm by pressing ENTER to stop the battery charging process. The main menu will appear. Select NO and ENTER to continue the battery charging process in the background. The main menu will appear. **Batt. Charg.** ** Done ** A message will appear when the battery charging process is completed, provided it did not run in background mode. If the external power supply is disconnected during the charging process, the following error message will appear: NO EXTERN.POWER (15:00) 11:00 - The LEAKAGE meter stops the battery charging process. The remaining charging time will be saved (for example 11 hours). When the external power supply is reconnected, the charging will continue for the remaining time. BATTERY Caution! 17/12/2014 If there is a battery charging error, i.e. there is no external power supply, the battery LED flashes (0.5 Hz). Use only the battery set authorized by FLEXIM. This battery set can be ordered from FLEXIM or an authorized dealer. The use of non-rechargeable batteries is prohibited. Take care to plug correctly the connector which prevents from reversing the polarity. ULTRASONIC LEAKAGE METER GST 6108 Page 40 of 61 Equipment P/N: 610007AB Ground Instruction Manual Issue: G 9 Settings 9.1 Setting the Date and the Time Select the program branch SPECIAL FUNCTIONS. Confirm by pressing ENTER. O ON Scroll with key through the menu until the option SETUP:DATE/TIME is displayed. Confirm by pressing ENTER. Special Funct. SETUP:Date/Time The LEAKAGE meter features a battery buffered clock. During measurement, the data are automatically stamped with date and time. 9.1.1 Setting the Time O ON through the menu until the Scroll with key SET CLOCK is displayed. Confirm by pressing ENTER. SYSTEM settings Set Clock option The actual time is displayed. TIME 11:00 ok >NEW< Select OK to confirm or NEW to set the time. Confirm by pressing ENTER. Use keys TIME Set Time TIME >OK< 9.1.2 11:0 0 ! O- and O+ to select the digit to be edited. O ON Use keys and O to edit the selected digit. Confirm your setting by pressing ENTER. OFF The next display shows the newly set time. 11:11 new Select OK to confirm or NEW to set the time again. Confirm by pressing ENTER. Setting the Date After the time has been set, the DATE display appears. Select OK to confirm or NEW to set the date. DATE ok 25.01.2002 >NEW< DATE 25.01.2002 Set Date ! Confirm by pressing ENTER. Use keys Use keys O- O ON and and O+ O OFF to select the digit to be edited. to edit the selected digit. Confirm your setting by pressing ENTER. 17/12/2014 ULTRASONIC LEAKAGE METER GST 6108 Page 41 of 61 Equipment P/N: 610007AB Ground Instruction Manual Issue: G DATE >OK< 26.01.2002 new The next display shows the newly set date and asks for confirmation. Select OK to confirm or NEW to set the date again. Confirm by pressing ENTER. 9.2 Setting the Contrast Select the program branch SPECIAL FUNCTIONS. Confirm by pressing ENTER. Special Funct. SETUP:Contrast O ON Scroll with key through the menu until the option SETUP:CONTRAST is displayed. Confirm by pressing ENTER. Set the contrast of the display using the following keys: O+ increases contrast decreases contrast O- SETUP DISPLAY < CONTRAST > OOFF = minimum contrast = medium contrast OON = maximum contrast 9.3 Format of the Output Select the program branch SPECIAL FUNCTIONS. Confirm by pressing ENTER. O ON Special Funct. SETUP:Serial through the menu until the option SETUP:SERIAL Scroll with key is displayed. Confirm by pressing ENTER. SER:kill spaces off >ON< Select ON if you don`t want to have the space characters transmitted. In this way, the file size and thus the transmission time can be considerably reduced. SER:decimalpoint '.' >','< Select the decimal separation to be used for floating point variables: point or comma. SER:col-separat. ';' >'TAB'< Select the characters to be used for separating columns: semicolon or tabulator. This setting depends on the requirements of the PC program. 17/12/2014 ULTRASONIC LEAKAGE METER GST 6108 Page 42 of 61 Equipment P/N: 610007AB Issue: G Ground Instruction Manual 9.4 Input Mode for the Measuring Point Designation Select the program branch SPECIAL FUNCTIONS. Confirm by pressing ENTER. In numerical mode, only numbers, point and dash can be input. O ON Special Funct. SETUP:A/C-No. Scroll with key NO. is displayed. through the menu until the option SETUP:A/C- Confirm by pressing ENTER. Input A/C-No. >(1234)< Select (1234), if you wish to identify the measuring points using only numbers, point and dash. Select () if you wish to enter the measuring point designations using the ASCII-editor. Confirm by pressing ENTER. 9.5 Selection of the Units Select the program branch SPECIAL FUNCTIONS. Confirm by pressing ENTER. Special Funct. SETUP:Eng.units O ON Scroll with key through the menu until the option SETUP:ENG.UNITS is displayed. Confirm by pressing ENTER. Select with key Volume in l/min O ON the units of the volume flow: l/min or gal/min. Confirm by pressing ENTER. Select with key Velocity in cm/s O ON the units of the flow velocity: cm/s or ft/s. Confirm by pressing ENTER. Temperature >[°C]< [F] 17/12/2014 Select with key O + the units of the temperature: °C or °F. Confirm by pressing ENTER. ULTRASONIC LEAKAGE METER GST 6108 Page 43 of 61 Equipment P/N: 610007AB Issue: G Ground Instruction Manual 9.6 Instrument Information Select the program branch SPECIAL FUNCTIONS. Confirm by pressing ENTER. O ON Special Funct. Instrum.Inform. through the menu until the option Scroll with key INSTRUM.INFORM is displayed. Confirm by pressing ENTER. FREE: 99 Sets 30000 Values The memory still available for data storage is displayed on the first line. Here: 99 measuring series or 30 000 measured values can still be stored. Confirm the displayed information by pressing ENTER. GST6108-06100100 PartNo: 6100110 Firmware PN6100 A320: 7010-01 The serial number of the instrument is displayed on the first line. The part number of the instrument is displayed on the second line. Confirm by pressing ENTER. The part number of the firmware for the supported aircraft is displayed. O ON through the list of supported aircraft models. Scroll with key Confirm by pressing ENTER. 17/12/2014 ULTRASONIC LEAKAGE METER GST 6108 Page 44 of 61 Equipment P/N: 610007AB Issue: G Ground Instruction Manual 10 Troubleshooter Mode The LEAKAGE meter can be operated in two modes: in the LEAKAGE mode and in the Troubleshooter mode. The default mode is the LEAKAGE mode. If it is activated, the leak rate can be measured. The Troubleshooter mode is an additional mode. If it is activated, it is possible to use the LEAKAGE meter as a flowmeter. Thus the volume flow can be measured on each measuring point in the hydraulic system, also on measuring points that are not calibrated. Note: The estimated error can be up to 20% when the volume flow is measured with the Troubleshooter mode. By measuring the volume flow on different measuring points, conclusions can be drawn, how the hydraulic system works. By this means cause of problems can be detected. A rough indication of a problem is, when there is a high difference between measured values and normal operating data. Note: If a problem is indicated, refer to the AMM for further steps. Note the following points, when the Troubleshooter mode is used: Only the volume flow can be measured in the Troubleshooter mode. The leak rate can not be measured. The estimated error can be up to 20%. The measured results can not be stored and not be evaluated. Only the pipe type has to be selected. The Troubleshooter mode can be activated permanently or temporarily. That also applies to the LEAKAGE mode. If the Troubleshooter mode is permanent, the LEAKAGE mode can be activated temporarily. If the LEAKAGE mode is permanent, the Troubleshooter mode can be activated temporarily. To switch between the Troubleshooter mode and the LEAKAGE mode, a HotCode has to be entered. 10.1 Switching between the permanent Troubleshooter Mode and the permanent LEAKAGE Mode To activate or deactivate the Troubleshooter mode permanently, enter HotCode 0 6 6 7 4 7 immediately after switching the transmitter ON. The following display appears: Trouble shooter. off >ON< Select ON to activate the Troubleshooter mode permanently or OFF to deactivate it and activate the LEAKAGE mode. Confirm by pressing ENTER. If you select ON the following display appears: Trouble shooter. Up to 20% error! 17/12/2014 The display indicates that the estimated error could be up to 20%. Confirm by pressing ENTER. ULTRASONIC LEAKAGE METER GST 6108 Page 45 of 61 Equipment P/N: 610007AB Ground Instruction Manual Issue: G >MEASURING< sf Trouble shooter The main menu of the Troubleshooter mode is displayed. The Troubleshooting measurement can now be started (see section 10.4). Note: This display appears only if the LEAKAGE transducer is connected with the transmitter. If the Troubleshooter mode is activated permanently, it will not be deactivated when the transmitter is switched OFF. If you select OFF the following display appears. FREE: 99 Sets 30000 Values >MEASURING< sf Leakage measure Note: The memory still available for data storage is displayed. Here: 99 data sets (SETS) or 30 000 measured values (VALUES) can still be stored. The main menu of the LEAKAGE mode is displayed (see chapter 8). The LEAKAGE mode is activated. Note: This display appears only if the LEAKAGE transducer is connected with the transmitter. If the following message appears after input of the HotCode to change into LEAKAGE mode, the LEAKAGE meter does not support any aircrafts: * ONLY * Trouble shooter! Only the volume flow can be measured in the Troubleshooter mode. No measurement of the leak rate is possible. If you want to use the LEAKAGE mode to measure the leak rate in hydraulic systems, consult FLEXIM. If the LEAKAGE mode is activated permanently, it will not be deactivated when the transmitter is switched OFF. 10.2 Switching the Troubleshooter Mode temporarily ON If the LEAKAGE mode is activated permanently, the Troubleshooter mode can be activated temporarily by entering HotCode 0 6 5 3 8 0 immediately after switching the transmitter ON. The following display appears: Trouble shooter. Up to 20% error! >MEASURING< sf Trouble shooter The display indicates that the estimated error could be up to 20%. Confirm by pressing ENTER. The main menu of the Troubleshooter mode is displayed. The Troubleshooting measurement can be started (see section 10.4). Note: This display appears only if the LEAKAGE transducer is connected with the transmitter. If the Troubleshooter mode is activated temporarily, it will not be activated when the transmitter is switched OFF and ON again. 17/12/2014 ULTRASONIC LEAKAGE METER GST 6108 Page 46 of 61 Equipment P/N: 610007AB Ground Instruction Manual Issue: G 10.3 Switching the LEAKAGE Mode temporarily ON If the Troubleshooter mode is activated permanently, the LEAKAGE mode can be activated temporarily by entering HotCode 0 6 5 3 8 0 immediately after switching the transmitter ON. The following display appears: The main menu of the LEAKAGE mode is displayed (see chapter 8). The LEAKAGE mode is activated. >MEASURING< sf Leakage measure Note: Note: This display appears only if the LEAKAGE transducer is connected with the transmitter. If the following message appears after input of the HotCode to change into LEAKAGE mode, the LEAKAGE meter does not support any aircrafts: * ONLY * Trouble shooter! Only the volume flow can be measured in the Troubleshooter mode. No measurement of the leak rate is possible. If you want to use the LEAKAGE mode to measure the leak rate in hydraulic systems, consult FLEXIM. If the LEAKAGE mode is activated temporarily, it will not be activated when the transmitter is switched OFF and ON again. 10.4 Troubleshooting Measurement >MEASURING< sf Trouble shooter Note: The main menu shows that the device is in Troubleshooter mode. The Troubleshooting measurement can be started. Select the program branch MEASURING and press ENTER. The main menu appears only if the LEAKAGE transducer is connected with the transmitter. If the transducer is not connected, the following display appears after the transmitter has been switched on: >MEASURING< sf CONNECT SENSOR ! Connect the transducer to the transmitter. The measurement can only be started when the transducer is connected and the transmitter has been detected. *LEAKAGE SENSOR* The transducer has now been detected. The Troubleshooter mode can now be activated. * DETECTED * When the LEAKAGE transducer is detected, press ENTER. 5000psi aircraft >NO< yes 17/12/2014 Select NO to display the pipe selection list for the 3000 psi (200 bar) hydraulic system. Select YES to display the pipe selection list for the 5000 psi (350 bar) hydraulic system. ULTRASONIC LEAKAGE METER GST 6108 Page 47 of 61 Equipment P/N: 610007AB Ground Instruction Manual Issue: G The pipe selection list will be displayed. Select the pipe type for measurement. Select pipe -10 (15.9x0.86)T The following pipe types are available in the selection lists: pipe selection list for the 3000 psi hydraulic system pipe selection list for the 5000 psi hydraulic system -4 (6.35x0.41)T -4 (6.35x0.64)T -6 (9.53x0.48)T -6 (9.53x0.76)T -8 (12.7x0.66)T -8 (12.7x1.02)T -10 (15.9x0.86)T -10 (15.9x1.27)T -12 (19.0x0.99)T -12 (19.0x1.50)T -16 (25.4x1.29)T -16 (25.4x2.01)T -6B (9.53x0.89)T -10B (15.9x1.36)T Confirm by pressing ENTER. Information about the quality of the coupling between the LEAKAGE transducer and the pipe (C) and about the signal amplitude (S) is displayed. DISP C: S: to scroll on the upper line between the display of Press key the bar graph of the signal amplitude (S), the bar graph of the quality of the signal (Q) and the display of the transit time (time) in microseconds. If the signal is sufficient for measurement, the SIGNAL LED shows green. Confirm with ENTER to start the measurement. If the signal is NOT sufficient for measurement, the SIGNAL LED shows red. In this case make sure that: enough coupling compound has been applied on the transducer there is no dirt between the transducer and the pipe. If the SIGNAL LED still shows red, see chapter 13. Trouble shooter 10.25 l/min 17/12/2014 The measurement has been started. The measured volume flow is displayed. ULTRASONIC LEAKAGE METER GST 6108 Page 48 of 61 Equipment P/N: 610007AB Ground Instruction Manual Issue: G During measurement, various measured values can be displayed on the LEKAGE meter. a) By scrolling on the second line of the display with key displayed: * 127.56 cm/s *U 133.38 cm/s c = 1234.5 b) m/s DISP , the following values will be the flow velocity, the flow velocitiy without profile correction, the sound speed of the fluid. By scrolling on the first line of the display with key DISP , the following values will be displayed: Up to 20% error a warning message that the estimated error could be up to 20%, Tf = 20.00 C the temperature, the variation of the fluid temperature per time unit, the bar graph C for the quality of the coupling between the transducer and the pipe, the status line with information about the quality and the precision of the actual measurement (see Table 8.1). dtF = 1.3 °C/s C= S8 Q5 c ? RT F ? Press BRK to stop the measurement and return to the main menu. 17/12/2014 ULTRASONIC LEAKAGE METER GST 6108 Page 49 of 61 Equipment P/N: 610007AB Issue: G Ground Instruction Manual 17/12/2014 ULTRASONIC LEAKAGE METER GST 6108 Page 50 of 61 Equipment P/N: 610007AB Ground Instruction Manual Issue: G 11 Operator Misuse This GSE / Tool is only designed for operating (e.g. Removal / Installation) in accordance with the AMM Task. Refer to the Aircraft Maintenance Manual (AMM): A320 family Maintenance Task: 29-00-00-280-001, Check of the Internal Leakage of the Green Hydraulic System 29-00-00-280-002, Check of the Internal Leakage of the Blue Hydraulic System 29-00-00-280-003, Check of the Internal Leakage of the Yellow Hydraulic System A330/A340 family Maintenance Task: 29-19-00-720-801, Check of the Internal Leakage of the Blue and Yellow Hydraulic Systems 29-19-00-720-802, Check of the Internal Leakage of the Green Hydraulic System A350-900 Maintenance Task: 29-10-00-500-0009-0001, Functional Test to Monitor Internal Leak Rate of the Green Hydraulic System 29-10-00-500-0010-0001, Functional Test to Monitor Internal Leak Rate of the Yellow Hydraulic System 12 GSE Handling in Accordance to the AMM Any handling procedure with the GSE at A/C must be in accordance with the AMM Task. Refer to the Aircraft Maintenance Manual (AMM): A320 family Maintenance Task: 29-00-00-280-001, Check of the Internal Leakage of the Green Hydraulic System 29-00-00-280-002, Check of the Internal Leakage of the Blue Hydraulic System 29-00-00-280-003, Check of the Internal Leakage of the Yellow Hydraulic System A330/A340 family Maintenance Task: 29-19-00-720-801, Check of the Internal Leakage of the Blue and Yellow Hydraulic Systems 29-19-00-720-802, Check of the Internal Leakage of the Green Hydraulic System A350-900 Maintenance Task: 29-10-00-500-0009-0001, Functional Test to Monitor Internal Leak Rate of the Green Hydraulic System 29-10-00-500-0010-0001, Functional Test to Monitor Internal Leak Rate of the Yellow Hydraulic System 17/12/2014 ULTRASONIC LEAKAGE METER GST 6108 Page 51 of 61 Equipment P/N: 610007AB Issue: G Ground Instruction Manual 17/12/2014 ULTRASONIC LEAKAGE METER GST 6108 Page 52 of 61 Equipment P/N: 610007AB Ground Instruction Manual Issue: G 13 Troubleshooting Which of the followings describes the best your problem? a) Problems with the measurement: The display does not work at all or always goes out. Make sure that the correct voltage is available at the terminals of the instrument. The necessary voltage is indicated on the metal plate under the terminal strip where the power supply is connected. If the power supply is ok, the transducers or an internal component of the transmitter are defective. Consult FLEXIM. b) The signal amplitude (S) is insufficient. Measurement is impossible. Remove the transducer from the pipe and mount it on the pipe again. c) The coupling quality (C) is insufficient. Bad coupling. Check the correct position of the transducer on the pipe according to the AMM. Check correct mounting and coupling compound as described in section 7.2. If the “Signal” LED shows green, a measurement is possible. d) The error message "System Error" is displayed: Press BRK to call the main menu. If this happens several times, note the code displayed on the lower line of the display, write down in which situation the error occurred and contact FLEXIM. e) The backlight of the display does not light on, but everything else works: If no external power is connected switch on the light by pressing key LIGHT . The backlight is defective. Send the instrument to FLEXIM for repair. This problem has no influence on the other functions of the display. f) The date and time displayed are wrong and measured values are deleted when the LEAKAGE meter is switched off: The data backup battery must be replaced. Send the instrument to FLEXIM. g) Measuring values substantially differ from the expected values. Wrong checkpoint code. Make sure that the entered checkpoint code is correct. Refer to AMM. If any problem appears which cannot be solved with the help of this chapter, please contact FLEXIM, giving a precise description of the problem. Contact: FLEXIM GmbH Wolfener Straße 36 D-12681 Berlin Phone: +49 (30) 93 66 76 60 Fax: +49 (30) 93 66 76 80 E-Mail: [email protected] www.flexim.de Do not forget to specify the type, serial number and part number of your instrument. 17/12/2014 ULTRASONIC LEAKAGE METER GST 6108 Page 53 of 61 Equipment P/N: 610007AB Issue: G Ground Instruction Manual 17/12/2014 ULTRASONIC LEAKAGE METER GST 6108 Page 54 of 61 Equipment P/N: 610007AB Ground Instruction Manual Issue: G 14 Spare Parts Spare part Part number Firmware for A320 family 61007010-01 Firmware for A330/A340 family 61007030-01 Firmware for A350-900 61007040-01 Transmitter GST 6108 6100110 Power cord Europe incl. universal adapter 6106220 Power supply and battery charging unit, 110-220 V AC without power cord 6106221 User’s manual English 61076044 Fastening strap 6110387 Leakage transducer FS3N7 6110481 Coupling compound tube, 100 g 6120501 Set of rechargeable batteries, 6 V / 4 Ah 6120601 Carrying case 6120701 Data transfer kit 6122447 Spare part Part number Training course on site, one day, max 4 persons (travelling costs and accommodation are billed separatly) 610080 Training course in Berlin, one day, max 4 persons 610081 Calibration and adjusting of a LEAKAGE transducer with GST 6108 610090 17/12/2014 ULTRASONIC LEAKAGE METER GST 6108 Page 55 of 61 Equipment P/N: 610007AB Issue: G Ground Instruction Manual 17/12/2014 ULTRASONIC LEAKAGE METER GST 6108 Page 56 of 61 Equipment P/N: 610007AB Issue: G Ground Instruction Manual Certificate 17/12/2014 ULTRASONIC LEAKAGE METER GST 6108 Page 57 of 61 Equipment P/N: 610007AB Issue: G Ground Instruction Manual 17/12/2014 ULTRASONIC LEAKAGE METER GST 6108 Page 58 of 61 Equipment P/N: 610007AB Issue: G Ground Instruction Manual 17/12/2014 ULTRASONIC LEAKAGE METER GST 6108 Page 60 of 61 Equipment P/N: 610007AB Issue: G Ground Instruction Manual Index Battery ........................................... 27, 28, 39 Charging the battery ................................ 39 Handling .................................................. 28 Replacement ........................................... 28 Main menu ................................................ Program branches .................................. Maintenance ............................................. Measuring principle .................................. Mounting ................................................... Calibration ................................................. 13 Recalibration............................................ 13 Carrying case ............................................ 11 Greet and accessories ............................ 11 Cleaning .................................................... 13 Contrast ..................................................... 42 Output format ........................................... 42 Output of the measured values ................ 38 Permanent Troubleshooter Mode ............ 45 Scope of delivery ...................................... 11 Serial number ........................................... 44 Specifications ........................................... 15 Storage conditions.................................... 13 Date ........................................................... 41 Deleting measured values ........................ 39 Display ...................................................... 26 Main menu ............................................... 26 Temperature probe ................................... 20 LEAKAGE transducer ............................. 20 Temporary Troubleshooter Mode ....... 46, 47 Time .......................................................... 41 Transmitter ....................... 17, 18, 23, 26, 33 Assembly ................................................ 17 Display .................................................... 26 Keypad .................................................... 23 Outer dimensions .................................... 18 Switching on ........................................... 33 Transport conditions ................................. 12 Troubleshooter Mode ............................... 45 Permanently ............................................ 45 Temporarily ....................................... 46, 47 Troubleshooting Measurement 47 Input .......................................................... 33 Parameter ................................................ 33 Input mode ................................................ 43 Instrument information .............................. 44 Keypad ...................................................... 23 LEAKAGE transducer ................... 18, 19, 29 Connection of the LEAKAGE transducer to the transmitter ...................................... 29 Mounting of the LEAKAGE transducer on the pipe ............................................... 29 Outer dimensions .................................... 19 LED ........................................................... 27 Battery ..................................................... 27 Signal ....................................................... 27 Status ...................................................... 27 17/12/2014 26 26 13 10 21 Units ......................................................... 43 Selection ................................................. 43 ULTRASONIC LEAKAGE METER GST 6108 Page 61 of 61