1
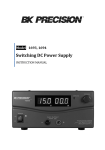
1550
1 - 36V, 0-3A DC Power Supply
User Manual
Safety Summary
The following safety precautions apply to both operating and maintenance personnel and must be followed during
all phases of operation, service, and repair of this instrument.
Before applying power to this instrument:
• Read and understand the safety and operational information in this manual.
• Apply all the listed safety precautions.
• Verify that the voltage selector at the line power cord input is set to the correct line voltage. Operating the
instrument at an incorrect line voltage will void the warranty.
• Make all connections to the instrument before applying power.
• Do not operate the instrument in ways not specified by this manual or by B&K Precision.
Failure to comply with these precautions or with warnings elsewhere in this manual violates the safety standards
of design, manufacture, and intended use of the instrument. B&K Precision assumes no liability for a customer’s
failure to comply with these requirements.
Category rating
The IEC 61010 standard defines safety category ratings that specify the amount of electrical energy available and
the voltage impulses that may occur on electrical conductors associated with these category ratings. The category
rating is a Roman numeral of I, II, III, or IV. This rating is also accompanied by a maximum voltage of the circuit to
be tested, which defines the voltage impulses expected and required insulation clearances. These categories are:
Category I (CAT I): Measurement instruments whose measurement inputs are not intended to be connected to the
mains supply. The voltages in the environment are typically derived from a limited-energy transformer or a battery.
Category II (CAT II): Measurement instruments whose measurement inputs are meant to be connected to the
mains supply at a standard wall outlet or similar sources. Example measurement environments are portable tools
and household appliances.
Category III (CAT III): Measurement instruments whose measurement inputs are meant to be connected to the
mains installation of a building. Examples are measurements inside a building’s circuit breaker panel or the wiring
of permanently-installed motors.
Category IV (CAT IV): Measurement instruments whose measurement inputs are meant to be connected to the
primary power entering a building or other outdoor wiring.
Do not use this instrument in an electrical environment with a higher category rating than what is specified in
this manual for this instrument.
i
SAFETY SUMMARY
ii
You must ensure that each accessory you use with this instrument has a category rating equal to or higher than
the instrument’s category rating to maintain the instrument’s category rating. Failure to do so will lower the
category rating of the measuring system.
Electrical Power
This instrument is intended to be powered from a CATEGORY II mains power environment. The mains power
should be 115 V RMS or 230 V RMS. Use only the power cord supplied with the instrument and ensure it is
appropriate for your country of use.
Ground the Instrument
To minimize shock hazard, the instrument chassis and cabinet must be connected to an electrical safety ground.
This instrument is grounded through the ground conductor of the supplied, three-conductor AC line power cable.
The power cable must be plugged into an approved three-conductor electrical outlet. The power jack and mating
plug of the power cable meet IEC safety standards.
Do not alter or defeat the ground connection. Without the safety ground connection, all accessible conductive
parts (including control knobs) may provide an electric shock. Failure to use a properly-grounded approved outlet
and the recommended three-conductor AC line power cable may result in injury or death.
Unless otherwise stated, a ground connection on the instrument’s front or rear panel is for a reference of potential
only and is not to be used as a safety ground. Do not operate in an explosive or flammable atmosphere.
Do not operate the instrument in the presence of flammable gases or vapors, fumes, or finely-divided particulates.
The instrument is designed to be used in office-type indoor environments. Do not operate the instrument
• In the presence of noxious, corrosive, or flammable fumes, gases, vapors, chemicals, or finely-divided
particulates.
• In relative humidity conditions outside the instrument’s specifications.
• In environments where there is a danger of any liquid being spilled on the instrument or where any liquid
can condense on the instrument.
• In air temperatures exceeding the specified operating temperatures.
• In atmospheric pressures outside the specified altitude limits or where the surrounding gas is not air.
• In environments with restricted cooling air flow, even if the air temperatures are within specifications.
• In direct sunlight.
SAFETY SUMMARY
iii
This instrument is intended to be used in an indoor pollution degree 2 environment. The operating temperature
range is 0◦ C to 40◦ C and 20% to 80% relative humidity, with no condensation allowed. Measurements made by
this instrument may be outside specifications if the instrument is used in non-office-type environments. Such
environments may include rapid temperature or humidity changes, sunlight, vibration and/or mechanical shocks,
acoustic noise, electrical noise, strong electric fields, or strong magnetic fields.
Do not operate instrument if damaged
If the instrument is damaged, appears to be damaged, or if any liquid, chemical, or other material gets on or inside
the instrument, remove the instrument’s power cord, remove the instrument from service, label it as not to be
operated, and return the instrument to B&K Precision for repair. Notify B&K Precision of the nature of any
contamination of the instrument.
Clean the instrument only as instructed
Do not clean the instrument, its switches, or its terminals with contact cleaners, abrasives, lubricants, solvents,
acids/bases, or other such chemicals. Clean the instrument only with a clean dry lint-free cloth or as instructed in
this manual. Not for critical applications
This instrument is not authorized for use in contact with the human body or for use as a component in a
life-support device or system.
Do not touch live circuits
Instrument covers must not be removed by operating personnel. Component replacement and internal
adjustments must be made by qualified service-trained maintenance personnel who are aware of the hazards
involved when the instrument’s covers and shields are removed. Under certain conditions, even with the power
cord removed, dangerous voltages may exist when the covers are removed. To avoid injuries, always disconnect
the power cord from the instrument, disconnect all other connections (for example, test leads, computer interface
cables, etc.), discharge all circuits, and verify there are no hazardous voltages present on any conductors by
measurements with a properly-operating voltage-sensing device before touching any internal parts. Verify the
voltage-sensing device is working properly before and after making the measurements by testing with
known-operating voltage sources and test for both DC and AC voltages. Do not attempt any service or adjustment
unless another person capable of rendering first aid and resuscitation is present.
Do not insert any object into an instrument’s ventilation openings or other openings.
Hazardous voltages may be present in unexpected locations in circuitry being tested when a fault condition in the
circuit exists. Fuse replacement
Fuse replacement must be done by qualified service-trained maintenance personnel who are aware of the
SAFETY SUMMARY
iv
instrument’s fuse requirements and safe replacement procedures. Disconnect the instrument from the power line
before replacing fuses. Replace fuses only with new fuses of the fuse types, voltage ratings, and current ratings
specified in this manual or on the back of the instrument. Failure to do so may damage the instrument, lead to a
safety hazard, or cause a fire. Failure to use the specified fuses will void the warranty. Servicing
Do not substitute parts that are not approved by B&K Precision or modify this instrument. Return the instrument
to B&K Precision for service and repair to ensure that safety and performance features are maintained.
For continued safe use of the instrument
• Do not place heavy objects on the instrument.
• Do not obstruct cooling air flow to the instrument.
• Do not place a hot soldering iron on the instrument.
• Do not pull the instrument with the power cord, connected probe, or connected test lead.
• Do not move the instrument when a probe is connected to a circuit being tested.
v
SAFETY SUMMARY
Safety Symbols
Refer to the user manual for warning information to avoid hazard or
personal injury and prevent damage to instrument.
Electric Shock hazard
Alternating current (AC)
Chassis (earth ground) symbol.
Ground terminal
On (Power). This is the In position of the power switch when instrument is ON.
Off (Power). This is the Out position of the power switch when instrument is OFF.
CAUTION indicates a hazardous situation which, if not avoided, will
result in minor or moderate injury
WARNING indicates a hazardous situation which, if not avoided,
could result in death or serious injury
DANGER indicates a hazardous situation which, if not avoided, will
result in death or serious injury.
NOTICE is used to address practices not related to physical injury.
Contents
Safety Summary
Safety Symbols . . . . . . . . . . . . . . . . . . . . . . . . . . . . . . . . . . . . . . . . . . . . . . . . . . . .
Contents
i
v
vi
1 INTRODUCTIONS
1
2 Controls and Indicators
2
3 Operations
3.1 Ground Connection . . . . . . . . . . . . . . . . . . . . . . . . . . . . .
3.2 Basic Mode of Operation . . . . . . . . . . . . . . . . . . . . . . . . . .
3.3 Constant Voltage (CV), Automatic crossover & Constant Current (CC)
3.4 Presetting Current Limiting Value (CC) . . . . . . . . . . . . . . . . . .
3.5 Connection and Operation Procedure . . . . . . . . . . . . . . . . . . .
3.6 Tracking Output Over Voltage Protection (OVP) . . . . . . . . . . . . .
3.7 Over Temperature Protection . . . . . . . . . . . . . . . . . . . . . . . .
.
.
.
.
.
.
.
.
.
.
.
.
.
.
.
.
.
.
.
.
.
.
.
.
.
.
.
.
.
.
.
.
.
.
.
.
.
.
.
.
.
.
.
.
.
.
.
.
.
.
.
.
.
.
.
.
.
.
.
.
.
.
.
.
.
.
.
.
.
.
.
.
.
.
.
.
.
.
.
.
.
.
.
.
.
.
.
.
.
.
.
.
.
.
.
.
.
.
.
.
.
.
.
.
.
.
.
.
.
.
.
.
.
.
.
.
.
.
.
3
3
3
3
4
4
4
4
4 Specifications
5
5 Service Information
7
6 LIMITED ONE-YEAR WARRANTY
8
vi
Chapter 1
INTRODUCTIONS
1. Using the 1550 switching mode power supply
The unit is a Micro-controller based DC power supply with a total supply capability of 108W. By using a
digital + / - keypad operation control, you can set the output voltage and current easily. It is a clean supply
with quiet operation making it ideal for laboratory, work shop or educational applications where work
bench space is limited. The 1550 has a USB charger output, constant current operation, tracking OVP,
floating ground design, small footprint, output on/off push button and a small form factor.
2. Using the USB power output
The USB output is made to the USB power standard of 5VDC and 0.4A. You can power up or charge your
portables such as an I-Pod, MP3 Player or Cell Phone1 which have USB power connectors for getting dc
power from a PC (Personal Computer).
1 NOT ALL THE CELL PHONE CAN BE CHARGED BY THE USB. SOME NEW MODELS REQUIRE HIGHER VOLTAGE THAN THE 5V USB.
PLEASE REFFERENCE THE MANUFACTURES DOCUMENTATION OF THE DEVICE TO BE CONNECTED FOR COMPATABILITY ISSUES.
1
Chapter 2
Controls and Indicators
Figure 2.1: Front Panel
1. Power Switch:
Turns the power supply on-off, when it is on the
front display lights up
8. Output On/Off push button.
9. USB Output Socket
Standard USB DC power 5V, 400mA
To charge or to power portables and cell phones
2. AC Input Socket with Fuse
10. Output Terminal Positive (+) Red color
3. Concealed Fuse box ( please open the cover to get
to the fuse)
11. GND Terminal (:) Green color
Chassis ground terminal, normally this is to be
short to (+) or (-) as required by user
4. V: Output Voltage Setting keypad
5. A: Output Current Setting keypad
12. Output Terminal Negative (-) Black color
6. “+” ascend Setting keypad.
Press to ascend the numerical values
13. LCD Display panel showing:
3 digit voltage, current meter, (CV) constant
voltage mode, (CC) constant current mode,
Output Terminal on/off state
7. “-” descend Setting keypad.
Press to descend the numerical values
2
Chapter 3
Operations
3.1
Ground Connection
Depending on the application, the power supply output terminals can be grounded in any one of the following
grounding conditions:
Negative ground black (-) negative terminal is shorted with green GND terminal.
Positive ground red (+) positive terminal is shorted with green GND terminal.
Floating ground green terminal is not shorted with any of the output terminals.
Remarks:
When operating this power supply as a floating ground, high impedance leakage can exist between the power
supply circuitry and the chassis ground.
3.2
Basic Mode of Operation
This power supply is designed to operate as a constant voltage source or as a constant current source. Automatic
crossover to either mode of operation occurs when the load condition changes as following:
Voltage value setting: at first, you must press the (4) keypad, then you can adjust the voltage value to your
desired value by (6) and (7) keypad.
Current value setting: at first, you must press the (5) keypad, then you can adjust the current value to your
desired value by (6) and (7) keypad.
3.3
Constant Voltage (CV), Automatic crossover & Constant Current (CC)
The power supply functions as a constant voltage source (CV) as long as the load current is less than the preset
current limiting value. When the load current is equal to or greater than the preset current limiting value, the
power supply will automatically cross over to the constant current mode, voltage will drop, (CC) will show on the
LCD display panel and it will operate as a constant current source.
When the load current drops below the preset current limiting value, the supply returns to constant voltage (CV)
mode.
3
CHAPTER 3. OPERATIONS
3.4
4
Presetting Current Limiting Value (CC)
Switch on the power supply, adjust the output voltage to about 3V, turn off the output terminal with push button
(8), icon becomes
. Short the black and red output terminals and turn on the output terminal by (8), icon
becomes
, adjust the current limiting value to your desired value say x Amp by (6) and (7) keypad. Turn
off the output terminal and take out the shorting connection.
The current limiting of power supply has been preset to x Amp for the whole range of output voltage.
3.5
Connection and Operation Procedure
1. After checking with the rating label plug in to AC mains.
2. Switch on the power supply and the LCD display should be on at the same time.
3. The (CV) icon should be shown on the display.
4. Set the current value to maximum by press (6) keypad if you do not require lower Current limiting value,
otherwise do the preset the (CC) limiting procedure.
5. Set your desired output voltage and then turn off the output terminal by push button (8) .
6. Connect to your load positive to positive and negative to negative.
7. Turn on the output terminal again and check if display shows (CV).
8. If display shows (CC), either your preset current limiting value is too low or your load requires more voltage
and current. You need to re-access the voltage and current requirement of your load and increase the
voltage or current accordingly until (CV) appears.
3.6
Tracking Output Over Voltage Protection (OVP)
This is to protect the connected load in the event that the output voltage control circuit malfunctions, the
maximum output voltage will not exceed 40% of the adjusted voltage value at the time of the operation.
3.7
Over Temperature Protection
When the temperature inside the power supply becomes higher than a pre-determined value, the output voltage
and current of the power supply will automatically decrease to zero to prevent damage to power supply. When the
temperature inside the power supply returns to about 65C then the power supply will automatically return to
operation again.
Chapter 4
Specifications
AC Input
100-120 Vac, 60Hz*
Full Load Input Current at 120Vac
1.8 A ±10%
MAIN OUTPUT:
Output Voltage Adjustable Range
1 - 36VDC
Output Current Adjustable Range
0 - 3A
Voltage Regulation
Load from 10% to 100%
±50mV
Line from min to max
±20mV
Ripple (rms)
±5mV
Noise (Peak to Peak)
±50mV
Current Regulation
Load from 10% to 100%
±20mA
Line from min to max
±20mA
Switching Operation Frequency
80kHz to 120kHz
Efficiency at Max Power
83% (±10%
Voltmeter and Ammeter Display
3 Digit
Voltmeter Accuracy
±1% + 5rdg
Ammeter Accuracy
±1% + 5rdg
USB OUTPUT:
Output Voltage
5V (+10%)
Output Current
400mA (+10%)
Load Voltage Regulation
80mV (+10%)
Ripple & Noise (no load rms)
8mV (+10%)
*Note: For 220V input, order model number 1550-220V
5
6
CHAPTER 4. SPECIFICATIONS
General:
LCD Indication
CC, CV, Amp, Volt, Output ON-OFF
Protection
Short Circuit, Overload, Over Temperature, Tracking OVP
Cooling
System Natural Convection
Dimensions (WxHxD)
2.8 x 6.0 x 9.8 (70 x 150 x 250mm)
Weight
4.4lbs. (2Kgs)
Chapter 5
Service Information
Warranty Service: Please go to the support and service section on our website at bkprecision.com to obtain a RMA
#. Return the product in the original packaging with proof of purchase to the address below. Clearly state on the
RMA the performance problem and return any leads, probes, connectors and accessories that you are using with
the device. Non-Warranty Service: Please go to the support and service section on our website at bkprecision.com
to obtain a RMA #. Return the product in the original packaging to the address below. Clearly state on the RMA
the performance problem and return any leads, probes, connectors and accessories that you are using with the
device. Customers not on an open account must include payment in the form of a money order or credit card. For
the most current repair charges please refer to the service and support section on our website. Return all
merchandise to B&K Precision Corp. with prepaid shipping. The flat-rate repair charge for Non-Warranty Service
does not include return shipping. Return shipping to locations in North America is included for Warranty Service.
For overnight shipments and non-North American shipping fees please contact B&K Precision Corp.
B&K Precision Corp.
22820 Savi Ranch Parkway
Yorba Linda, CA 92887
bkprecision.com
714-921-9095
Include with the returned instrument your complete return shipping address, contact name, phone number and
description of problem.
Version – 2017-10-26
7
Chapter 6
LIMITED ONE-YEAR WARRANTY
B&K Precision Corp. warrants to the original purchaser that its products and the component parts thereof, will be
free from defects in workmanship and materials for a period of one year from date of purchase.
B&K Precision Corp. will, without charge, repair or replace, at its option, defective product or component parts.
Returned product must be accompanied by proof of the purchase date in the form of a sales receipt.
To help us better serve you, please complete the warranty registration for your new instrument via our website
www.bkprecision.com
Exclusions: This warranty does not apply in the event of misuse or abuse of the product or as a result of
unauthorized alterations or repairs. The warranty is void if the serial number is altered, defaced or
removed.
B&K Precision Corp. shall not be liable for any consequential damages, including without limitation damages
resulting from loss of use. Some states do not allow limitations of incidental or consequential damages. So the
above limitation or exclusion may not apply to you.
This warranty gives you specific rights and you may have other rights, which vary from state-to-state.
B&K Precision Corp.
22820 Savi Ranch Parkway
Yorba Linda, CA 92887
www.bkprecision.com
714-921-9095
8