1
Instructor User Guide
Table Of Contents
Getting Started......................................................................... 1
Using MyNursingLab™ ...................................................................................1
Getting Started in MyNursingLab™ ..................................................................................... 1
Contacting MyNursingLab Faculty Support ........................................................................ 1
Register ............................................................................................................1
Logging In ........................................................................................................1
My Courses page.................................................................................................................... 2
Logging Out......................................................................................................2
Logging In as a Student ..................................................................................3
Creating a New Course....................................................................................3
Selecting a Course from the Catalog ................................................................................... 3
Allowing Students to Enroll in Your Course ....................................................................... 4
Allowing Other Instructors to Enroll in Your Course ......................................................... 4
MyNursingLab Tools.............................................................................................................. 5
Using the Content Editor in MyNursingLab......................................................................... 6
Using Options Menus in MyNursingLab .............................................................................. 6
MyNursingLab Icons .............................................................................................................. 6
System Requirements .....................................................................................7
Supported Operating Systems ............................................................................................. 7
Supported Web Browsers ..................................................................................................... 7
Screen Resolution.................................................................................................................. 7
Hardware ................................................................................................................................. 7
Internet Connection ............................................................................................................... 7
Plug ins.................................................................................................................................... 7
Supported File Types / Formats ........................................................................................... 7
Content Editor ..................................................................................................8
Using the Content Editor ....................................................................................................... 8
Toolbar Buttons...................................................................................................................... 8
MyNursingLab Icons......................................................................................11
Navigation Toolbar Icons .................................................................................................... 11
Today's View Icons .............................................................................................................. 11
Course Content Icons .......................................................................................................... 12
Question Library Icons ........................................................................................................ 12
Gradebook Icons .................................................................................................................. 12
Communicate Icons ............................................................................................................. 13
Preferences Icons ................................................................................................................ 13
Today's View .......................................................................... 13
Using Today's View Overview ......................................................................13
-i-
MyNursingLab Instructor Guide Fall 2008
Notifications ...................................................................................................13
Welcome Message........................................................................................................... 13
Announcements ............................................................................................................... 14
To Do ..................................................................................................................................... 14
Alerts ..................................................................................................................................... 15
Performance ......................................................................................................................... 17
Customizing Notifications.............................................................................19
Welcome Message ............................................................................................................... 19
Default View .......................................................................................................................... 19
To Do ..................................................................................................................................... 19
Alerts ..................................................................................................................................... 20
Performance ......................................................................................................................... 20
Manage Calendar.................................................................................................................. 22
Calendar .........................................................................................................22
Course Content....................................................................... 23
Using Course Content ...................................................................................23
Overview ............................................................................................................................... 23
Student View ......................................................................................................................... 23
Content Library (left side) .............................................................................24
Content Library Items .......................................................................................................... 24
Content Library Taskbar...................................................................................................... 24
Content Library Column Headers....................................................................................... 24
Options: Content Library ..............................................................................24
Options: Folder..................................................................................................................... 25
Options: Activity................................................................................................................... 25
Options: Link ........................................................................................................................ 26
Options: File ......................................................................................................................... 26
Options: Page ....................................................................................................................... 27
Student Content (right side) .........................................................................28
Using Student Content ........................................................................................................ 28
Student Content Column Headers...................................................................................... 29
Options: Student Content .............................................................................29
Options: Folder..................................................................................................................... 29
Options: Activity................................................................................................................... 30
Options: Links ...................................................................................................................... 32
Options: File ......................................................................................................................... 33
Course Content: Sub Navigation Tabs ........................................................34
Add Content from Library.................................................................................................... 34
Content Library Advanced Options.................................................................................... 35
Deleting Questions or Folders ............................................................................................ 35
Copying and Pasting Questions or Folders ...................................................................... 35
Cutting and Pasting Questions or Folders ........................................................................ 36
Organize Content ...........................................................................................36
Student Content ................................................................................................................... 36
Student Content Taskbar..................................................................................................... 37
Notes...................................................................................................................................... 38
Student View ......................................................................................................................... 38
Assign Content ..............................................................................................38
Assign Course Content ....................................................................................................... 38
Filter the Student Content View .......................................................................................... 39
Organize Calendar .........................................................................................39
Using Organize Calendar..................................................................................................... 40
Moving Items to a New Date in the Calendar .................................................................... 42
- ii -
MyNursingLab Instructor Guide Fall 2008
Manage Question Library..............................................................................42
Overview ............................................................................................................................... 42
Using the Question Library Window .................................................................................. 42
Previewing Questions.......................................................................................................... 43
Adding Questions or Folders.............................................................................................. 43
Deleting Questions or Folders ............................................................................................ 43
Copying and Pasting Questions or Folders ...................................................................... 44
Cutting and Pasting Questions or Folders ........................................................................ 44
Creating a Fill in the Blank Question ...........................................................45
Editing a Fill in the Blank Question.................................................................................... 47
Trying Out a Fill in the Blank Question.............................................................................. 48
Deleting a Fill in the Blank Question.................................................................................. 48
Creating a File Upload Question...................................................................48
Editing a File Upload Question ........................................................................................... 49
Trying Out a File Upload Question ..................................................................................... 49
Deleting a File Upload Question ......................................................................................... 50
Creating a Flash™ Question .........................................................................50
Editing a Flash Question ..................................................................................................... 51
Previewing a Flash Question .............................................................................................. 52
Deleting a Flash Question ................................................................................................... 52
Creating a Matching Question ......................................................................52
Editing a Matching Question............................................................................................... 54
Previewing a Matching Question ........................................................................................ 54
Deleting a Matching Question............................................................................................. 54
Creating a Multiple Choice Question ...........................................................54
Editing a Multiple Choice Question.................................................................................... 57
Previewing a Multiple Choice Question ............................................................................. 57
Deleting a Multiple Choice Question.................................................................................. 57
Creating a Multiple Response Question ......................................................57
Editing a Multiple Response Question............................................................................... 60
Previewing a Multiple Response Question........................................................................ 61
Deleting a Multiple Response Question............................................................................. 61
Creating a Ranking Question........................................................................61
Editing a Ranking Question ................................................................................................ 63
Previewing a Ranking Question ......................................................................................... 63
Deleting a Ranking Question .............................................................................................. 63
Creating a True/False Question ....................................................................63
Editing a True/False Question ............................................................................................ 65
Previewing a True/False Question...................................................................................... 65
Deleting a True/False Question .......................................................................................... 65
Options: Question Library ............................................................................65
Folder..................................................................................................................................... 66
Objective-Based Questions................................................................................................. 66
Adding Content to Course....................................................... 67
Overview ............................................................................................................................... 67
Add a Folder ...................................................................................................67
Folder Properties ...........................................................................................68
Overview ............................................................................................................................... 68
General .................................................................................................................................. 68
Availability ............................................................................................................................ 68
Select Students .................................................................................................................... 69
Add an Activity or Assignment (such as a quiz, homework, or test) ........69
Activity Details Tab .............................................................................................................. 69
- iii -
MyNursingLab Instructor Guide Fall 2008
Questions Tab ...................................................................................................................... 69
Messages Tab....................................................................................................................... 70
Grades Tab............................................................................................................................ 70
Scheduling Options ............................................................................................................. 71
Set Scheduling Options for Activities..........................................................71
Overview ............................................................................................................................... 71
General .................................................................................................................................. 71
Availability ............................................................................................................................ 71
Select Students .................................................................................................................... 72
Select Locations................................................................................................................... 72
Add a Link ......................................................................................................73
Link Properties...............................................................................................73
Overview ............................................................................................................................... 73
General .................................................................................................................................. 73
Availability ............................................................................................................................ 73
Select Students .................................................................................................................... 74
Adding Files ...................................................................................................75
Adding Multiple Files ........................................................................................................... 75
Supported File Types / Formats ......................................................................................... 76
File Properties ................................................................................................76
Overview ............................................................................................................................... 76
General .................................................................................................................................. 76
Availability ............................................................................................................................ 76
Select Students .................................................................................................................... 77
Add a Page .....................................................................................................78
Page Properties..............................................................................................78
Overview ............................................................................................................................... 78
General .................................................................................................................................. 78
Availability ............................................................................................................................ 79
Select Students .................................................................................................................... 79
Add a Study Plan .................................................................... 80
Using Study Plans in Your Course...............................................................80
Create a Study Plan.............................................................................................................. 81
Add a Study Plan Pretest..................................................................................................... 81
Add Study Material Content ................................................................................................ 81
Set Pass Criteria................................................................................................................... 81
Study Material Taskbar..................................................................................82
Show ...................................................................................................................................... 82
Remove.................................................................................................................................. 82
Cut.......................................................................................................................................... 82
Paste ...................................................................................................................................... 82
Add a Study Plan Posttest .................................................................................................. 83
Resetting a Study Plan Pretest ........................................................................................... 83
Properties: MyNursingLab Study Plan.........................................................84
Overview ............................................................................................................................... 84
General .................................................................................................................................. 84
Availability ............................................................................................................................ 84
Select Students .................................................................................................................... 85
Select Locations................................................................................................................... 86
Best Practices for Developing Study Plans ............................................86
Course Structure .................................................................................................................. 86
Best Practice: Folder Structure .......................................................................................... 86
Study Plan Elements............................................................................................................ 87
- iv -
MyNursingLab Instructor Guide Fall 2008
Study Material Pass Criteria................................................................................................ 87
Best Practices for Creating Study Plan Assessments ...........................88
Writing Good Study Plan Questions .................................................................................. 88
Pre- and Posttests................................................................................................................ 88
Add a Discussion Topic....................................................................................................... 89
Managing Discussions ..................................................................................89
Discussion Window Header ................................................................................................ 89
Discussion Topic and Response Window ......................................................................... 89
Discussion Taskbar ............................................................................................................. 90
Options: Discussion Topic ...........................................................................91
Content Library..................................................................................................................... 91
Student Content ................................................................................................................... 92
Properties: Discussion Topic .......................................................................93
Overview ............................................................................................................................... 93
General .................................................................................................................................. 93
Availability ............................................................................................................................ 93
Select Students .................................................................................................................... 94
Gradebook.............................................................................. 95
Using the Gradebook.....................................................................................95
Overview ............................................................................................................................... 95
Grades ................................................................................................................................... 95
Custom View ......................................................................................................................... 95
Manage Roster...................................................................................................................... 95
Reports .................................................................................................................................. 95
Changing the Default Grading Schema .......................................................95
Grades ............................................................................................................96
Course Content Navigator................................................................................................... 96
Advanced Filters .................................................................................................................. 96
Grades Area .......................................................................................................................... 97
Grades Area Toolbar.......................................................................................................... 100
Download Grades............................................................................................................... 103
Custom View ................................................................................................104
Working with Custom View ............................................................................................... 104
Custom View Grades Area ................................................................................................ 105
Download Grades............................................................................................................... 106
Manage Roster .............................................................................................106
Roster Area ......................................................................................................................... 106
Roster Area Toolbar........................................................................................................... 107
Download Roster................................................................................................................ 109
Options: Gradebook ....................................................................................109
Options: Grades ................................................................................................................. 109
Options: Custom View ....................................................................................................... 111
Options: Manage Roster.................................................................................................... 112
Reports .........................................................................................................113
Overview ............................................................................................................................. 113
My Reports .......................................................................................................................... 113
Performance Reports......................................................................................................... 114
Student Results by Activity Results (Multiple Students and Activities) ...................... 114
Activity Results by Student (Multiple Students) ............................................................. 116
Study Plan Results............................................................................................................. 118
Question Analysis Reports ............................................................................................... 119
Communicate ....................................................................... 121
Using Communicate ....................................................................................121
-v-
MyNursingLab Instructor Guide Fall 2008
Using the Mail Tool ......................................................................................121
Overview ............................................................................................................................. 121
Composing a New Message .............................................................................................. 121
Reading Messages in the Inbox........................................................................................ 122
Replying to a Mail Message............................................................................................... 122
Forwarding a Mail Message............................................................................................... 123
Saving Messages as Drafts............................................................................................... 123
Viewing Sent Messages..................................................................................................... 123
Using Announcements................................................................................123
Managing Announcements ............................................................................................... 124
Preferences .......................................................................... 125
Using Preferences .......................................................................................125
Preferences: General ......................................................................................................... 125
Preferences: Grading......................................................................................................... 127
Preferences: Roster ........................................................................................................... 130
Preferences: Permissions ................................................................................................. 131
Preferences: Activities.......................................................... 133
Using Activities Preferences ......................................................................134
Customize Study Plan........................................................................................................ 134
Customize Activity Types.................................................................................................. 139
Setting Preferences .....................................................................................141
Setting Behavioral Mode .............................................................................145
Preferences: Manage Locations ............................................ 146
Computers .................................................................................................146
Adding a Computer ............................................................................................................ 146
Removing a Computer.................................................................................................... 148
Change the Name of an Existing Computer................................................................. 149
View Locations Assigned to an Existing Computer.................................................... 149
Locations......................................................................................................149
Adding a New Location .................................................................................................. 149
Removing a Location...................................................................................................... 149
Change the Name of an Existing Location ................................................................... 149
View Computers Assigned to an Existing Location.................................................... 149
Assigning and Unassigning Computers to/from a Location....................150
Search .................................................................................. 150
Using Search ................................................................................................150
Search for Activity.............................................................................................................. 150
Search Questions............................................................................................................... 151
Search Resources .............................................................................................................. 152
Options: Search Results for Activity..........................................................152
Previewing an Activity ....................................................................................................... 152
Printing an Activity............................................................................................................. 152
Viewing an Activity in Course Content ............................................................................ 152
Options: Simple Search Results for Question ..........................................152
Previewing a Question....................................................................................................... 153
Viewing a Question in Question Library .......................................................................... 153
Options: Advanced Search Results for Question .....................................153
Previewing a Question....................................................................................................... 153
Viewing an Question in Question Library........................................................................ 153
Options: Search Results for Resource ......................................................153
- vi -
MyNursingLab Instructor Guide Fall 2008
Previewing a Resource ...................................................................................................... 153
Viewing a Resource in Course Content ........................................................................... 154
Technical Support................................................................. 154
- vii -
Getting Started
Using MyNursingLab™
Getting Started in MyNursingLab™
MyNursingLab™ is a centrally hosted application that allows you to deliver online
assessment and review material, use study plans, and access detailed reporting across
students and activities. MyNursingLab also provides basic course management
capabilities in the area of course organization, grades, communication, and
personalization.
Contacting MyNursingLab Faculty Support
MyNursingLab Faculty Support Specialists are available to assist you, as an instructor,
on the phone, via email, or online. If you need technical assistance, or if you would like to
ask a question or submit feedback about MyNursingLab, please visit
http://www.MyNursingLab.com and then click Support, then Instructor Support.
Call 877-MNL-Prof or 877-665-7763 for direct technical support.
Register
Before you register, take a minute to be sure you have the following items:
1. Valid email address: You must have an email address to register. After you
register, you will receive an email message at the address you provide,
confirming your personal login name and password.
2. Access code: An access code looks similar to this:
PSPMIL-CHILI-KENJI-EDDIE-AKIRA-WAHOO
Instructors need an instructor access code; TAs need a student access code.
If you are an instructor and do not have an access code, contact your Pearson
Education representative for help in obtaining a valid access code.
To register for your course go to www.mynursinglab.com
1. Click the New User, Instructor link, located on the left side of the screen.
2. Click on Register if you have an access code, or Request Access to get a code
3. You must read, review, and accept the licensing and privacy agreements.
4. Click to Accept the licensing and privacy agreements. If you choose to Decline,
you will be given alternate instructions on how to proceed.
The Access Information screen opens.
5. Follow the on-screen instructions to continue with the registration process. When
registering for the first time, you must create a login name and password.
After you complete the registration process, you will receive a confirmation email
that contains details on your account.
Logging In
-1-
MyNursingLab Instructor Guide Fall 2008
When you log in, the application validates your login name and password, and opens
your home page.
Note: Before you can log in, you must first register. See above. If you have forgotten your login
name or password, you can click the link on the login screen to request to have this information
emailed to you.
To log in to MyNursingLab:
1. Go to www.mynursinglab.com and click on Existing User, Instructor
2. On the login screen, enter your Login Name and Password. Note that passwords
are case-sensitive.
3. Click Login. The My Courses page opens. You’re my Courses page will be
blank at first.
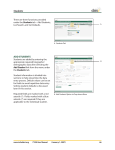
My Courses page
•
Welcome Banner (not viewable in the picture above) - displays at top of page, with a
welcome message and links to Help, Support, and more. The available links are common
to all pages in the application.
•
My Courses - displays the enrolled courses you can open and a button that lets you
enroll in new courses. The area is blank until you are enrolled in a course or have created
a course.
•
Search Catalog and Create Course - enables instructors to create new courses (this is
not viewable to students when they log in)
•
Announcements - displays new announcements posted by Pearson Education. To view
the announcement details, click the Subject or the Received date link. After the
announcement is open, click the back arrow or the announcement subject to return to the
Student Contents page. To view the announcement history, clicking the Archive link.
Logging Out
To log out of MyNursingLab:
-2-
MyNursingLab Instructor Guide Fall 2008
•
Click Logout in the upper-right corner.
−
Your session ends and you see the login screen.
Note: If your session is inactive for an extended period of time, an alert message displays. If
you do not respond to the alert within two minutes, the session automatically ends and you are
redirected to the login screen.
Logging In as a Student
Every instructor course has a “pseudo” default student account (_Student, _Student) who
is the first student user enrolled in the course. This student user enables you to view and
work through the course as a student would.
1. To access student view, log in as you normally would, as Existing User,
Instructor, open a course, and click the Student View button
located on the far right of the toolbar. The display changes to a fully-functional
student view. You can work through the course as a student would.
Note: While you can see any grades accrued as _Student, _Student, these grades are not
tracked and recorded in any of the course reports.
2. To switch back to instructor mode, click Return to Instructor View.
Creating a New Course
You create a new course by selecting it from the course catalog. Only instructors have
access to the course catalog
Selecting a Course from the Catalog
1. On the Student Contents page, in the Search Catalog and Create Course area,
choose your search criteria:
−
−
−
Search By Textbook: Enter the textbook author, title, or ISBN.
Search By Discipline: Select Nursing.
Browse: View all available courses.
2. Click Search to display the results on the Select Course page
3. Select the appropriate course.
Entering Course Information
After you select a course from the catalog, on the Enter Course Information page, you
enter the course name and description and select the course start and end date, which
controls when the course is available to users.
1. Enter the name of your course in the Name field.
The name you enter will appear on the Student Contents page for any students
or co-instructors that are enrolled in your course.
2. To select the Start date, click the calendar icon and choose the date on which
you want users to be able to enroll in your course.
3. To select the End date, click the calendar icon
which you want users to access your course.
and choose the last date on
You may want to set the date after the last day of class in order to allow students
to complete any makeup work.
4. (Optional) Enter a description for your course in the Description field.
-3-
MyNursingLab Instructor Guide Fall 2008
Descriptions can help you distinguish one online course from another, similar
course.
5. To create your course, click Create Course.
You will receive email notification after the course has been created.
Note: To edit the course information after the course has been created, from the Student
Contents page, scroll your cursor over the name of the course, and select Edit Course Info from
the options menu for the course.
After you create a course, the program automatically creates a unique Course ID that
identifies your course. The Course ID# is right under the name of the course. You will
distribute this Course ID to any students, teaching assistants, or instructors that you want
to enroll in your course.
Allowing Students to Enroll in Your Course
After you create the course, note the Course ID# listed under the name of the course. A
course ID looks like this – note that it case sensitive and usually includes a hyphen:
The student enrollment process is as follows:
1. Go to www.mynursinglab.com
2. Click the First Time User, Student link, located on the left side of the screen.
3. Click on I Already Have an Access Code (if they bought a new book in the
bookstore the code was likely packaged with the book) or I Need to Buy
Access.
4. They must read, review, and accept the licensing and privacy agreements.
5. Click to Accept the licensing and privacy agreements. If they choose to Decline,
they will be given alternate instructions on how to proceed.
i. The Access Information screen opens.
6. Follow the on-screen instructions to continue with the registration process. When
registering for the first time, they must create a login name and password.
ii. After you complete the registration process, you will receive a
confirmation email that contains details on your account.
7. After registering, students return to www.mynursinglab.com
8. Click on Existing User, Student and log in. NOTE: The first time students log in
as existing users, they will see a Self Study course in their account. They
SHOULD NOT open and work in the Self Study course – they should continue
the enrollment process to enroll in the instructor’s course with a course ID#. The
Self Study version of the course will become active for the student after the
instructor led course ends (as determined by the instructor when setting up the
course dates.)
9. On the Student Contents page, click Enroll.
10. Enter the Course ID# from the instructor course, Submit, and then Confirm.
Allowing Other Instructors to Enroll in Your Course
Commonly in nursing, several instructors teach the same group of students, and may
want to use the same MyNursingLab “master” course. Here are the steps to enroll other
instructors as co-instructors in your course after you have created the master course:
1. Each co-instructor registers following the directions under Register above
-4-
MyNursingLab Instructor Guide Fall 2008
2. The co-instructor logs in and selects Enroll on the My Courses page.
3. Enter the Course ID# of the “master” course, Submit, and Confirm.
4. Next, the instructor who set up the master course logs in.
5. Open the master course in which the co-instructors will be teaching, and select
the Gradebook tab in the grey bar across the top of the screen.
6. Under the Gradebook tab, select Manage Roster, then View Instructors:
7. Check the box in front of the name of the new instructor, then click Grant Access
on the right side of the screen. The co-instructor now has full instructor privileges
in the master course.
MyNursingLab Tools
After you have created a course or enrolled as a co-instructor in a course, you can begin
exploring the contents of the course. To navigate through your course, use the tabs in the
horizontal toolbar across the top of the course. By default, MyNursingLab has six main
tools (or tabs) for instructors:
1. The Today's View tool helps you organize and manage your course
information. It contains a Notifications list that displays new messages and
announcements, as well as alerts for overdue work, late submissions, idle
students, and more. .
2. The Course Content tool provides access to four key subtools related to
managing course content, your content library, and more. The four subtools
include:
• Add Content from Library allows you to view content available in the
Content Library, create folders to organize your course, assign content to
students in your course. This is the default view.
• Organize Content allows you to view your course just as your students
will; from this view you also can create folders to organize your course,
assign content to students in your course
• Assign Content allows you to schedule activities on the Course
Calendar.
• Organize Calendar allows you to view assignments on the Course
Calendar, set the order of assignments, and change due dates.
• Manage Question Library allows you to view and manage the questions
used in your course. With the Question Library tool, you can add, delete,
copy and paste, edit, preview, or try out course questions.
Gradebook tool provides access to four key subtools that allow you to
3. The
view student grades and submission, manage the student roster, and run reports.
The three subtools include:
• Grades allows you to view the grades for the assignments students have
submitted. From the Grades tool, you can view student submissions,
generate reports, or send a message to one or more students.
-5-
MyNursingLab Instructor Guide Fall 2008
•
•
•
Custom View allows you to view the pre and post test scores for all
students. You can also add your own custom grade columns.
Manage Roster allows you to view a list of users in a course, download
rosters, and more.
Reports allows you to generate a number of different reports for activities
and study plans, so you can track and review student performance.
If you click the Gradebook tool button, it defaults to the Grades view.
4. The Communicate tool provides access to two key subtools that allow you
send, receive, and manage mail messages to and from students and instructors,
as well as to create announcements to be viewed by students in your course.
The two subtools include:
• Mail allows you to create and send messages to instructors and
students, receive and read mail and announcements, and draft
messages to send at a later date or time.
• Announcements allows you to manage course announcements.
If you click the Communicate tool button, it defaults to the Mail view.
5. The
Preferences tool to customize MyNursingLab features to best match
your course needs.
6. The
Search tool allows you to search for course content like questions,
activities, and resources within the current course.
If one of these MyNursingLab tools has a submenu (or subnavigation), a drop-down
menu will display when you point to the main button in the horizontal toolbar across the
top of the course. For example, pointing to the Course Content tab also provides access
to the Content Library, Course Content, and Manage Question Library via a submenu.
Pointing to the Gradebook tool provides access to Grades, Custom View, Manage
Roster, and Reports via a submenu.
Using the Content Editor in MyNursingLab
The Content Editor provides basic formatting and editing tools, so that you can
customize the look of items you create in MyNursingLab. The Content Editor is available
when creating and editing objective-based questions in the Question Library, adding
HTML pages to the Course Content, adding start and end messages for activities,
composing mail and announcements, and more. For information on the Content Editor,
see later sections of this manual.
Using Options Menus in MyNursingLab
Throughout MyNursingLab, you will note contextual option menus that display when you
move the mouse pointer over items such as assignments, folders, grades, and so on.
Clicking an options menu icon will display a small menu, with options specific to the item.
Clicking the desired option will perform the associated function. To learn more about the
options available on options menus throughout MyNursingLab, see later sections of this
manual.
MyNursingLab Icons
Throughout MyNursingLab, icons are used to communicate information visually. To learn
more about the icons used in the MyNursingLab system, see later sections of this
manual.
-6-
MyNursingLab Instructor Guide Fall 2008
System Requirements
Supported Operating Systems
MyNursingLab™ supports the following Operating Systems
• Windows XP
• Windows Vista
• Macintosh® OS 10.5
Supported Web Browsers
MyNursingLab supports the following Web browsers:
• Internet Explorer 6.0
• Internet Explorer 7.0
• Safari 3.1.2+
Note: MyNursingLab does not run on Firefox.
Screen Resolution
MyNursingLab is best viewed with a screen resolution of 1024x768 pixels.
Hardware
Memory [RAM]: 512MB or higher recommended; 256MB minimum requirement
• Windows XP: 512MB or higher recommended; 256MB minimum
requirement
• Windows Vista: 1GB RAM*
Processor*
•
•
Windows XP: 1.4Ghz processor
Windows Vista: 2.0Ghz processor*
Sound Card
• Any MCI compliant sound card
Note: The increase in the requirements for Vista are due to the additional memory and CPU
overheads imposed by the operating system itself.
Internet Connection
MyNursingLab is best used with a broadband connection (cable or DSL) or higher.
Plug ins
MyNursingLab uses the following plug ins:
•
Flash
•
QuickTime
•
Adobe Reader
•
PowerPoint or PowerPoint reader
Supported File Types / Formats
In MyNursingLab, you can upload a wide range of Web-compatible file types, including
HTML, Microsoft Office Documents, Flash™, and more. MyNursingLab supports the
following file types / formats for file uploads:
-7-
MyNursingLab Instructor Guide Fall 2008
•
•
•
•
•
Image formats: JPEG, JPG, GIF, BMP, TIFF, PNG, EMF, ICO, WMF.
Audio formats: MID, MIDI, WAV, RAM, MP3, WMA.
Video formats: WMV, MPEG, MPG, MPE, WM, AVI, ASF, MOV.
Application formats: DOC, XLS, PPT, PPS, PDF, RM, SWF, CLASS, EXE,
RTF, and CAB.
Text formats: TXT, HTML, and HTM. [Note: If an uploaded HTML files
include relatives or absolute path based links or references, those links will
not work after the file is uploaded.]
Note: You cannot upload any files larger than 10MB to MyNursingLab. If you need to include
larger files in your course, consider posting them to a Web site and adding links in your course to
point to those files.
Content Editor
The Content Editor provides basic formatting and editing tools, so that you can
customize the look of items you create in MyNursingLab. The Content Editor is available
when creating and editing objective-based questions in the Question Library, adding
HTML pages to the Course Content, adding start and end messages for activities,
composing mail and announcements, editing Study Plans, and more. To open up the
Content Editor window, scroll your cursor over the name of the item you wish to edit and
select Edit from the drop down menu.
Using the Content Editor
1. Enter text in the Content Editor.
2. As appropriate, select the toolbar buttons to format the text and insert images,
hyperlinks, and more.
Toolbar Buttons
The buttons available on the Content Editor toolbar are listed below, in order from left to
right, top to bottom. Note that, depending on the specific area of MyNursingLab in which
you are working, some of the buttons may be grayed out or not appear on the Content
Editor toolbar.
Not sure which button is which? Position the mouse pointer over the Content Editor
toolbar to view a tool tip for each toolbar button.
•
•
•
•
•
•
•
•
•
Find: To search characters in the Content Editor, select the Find toolbar button.
Print: To print the content in the Content Editor, select the Print toolbar button. A
Print dialog box will display.
Preview: To preview the content in the Content Editor, select the Preview button.
A browser window with a preview of the content will appear.
Check Spelling: Select the Check Spelling toolbar button to check the spelling of
the content in the currently selected content editor input field.
Help: To view the help content on using the Content editor, select the Help
toolbar button.
Cut: To remove selected content from the Content Editor and place it on the
Clipboard, select the Cut toolbar button.
Copy: To copy selected content from the Content Editor and place it on the
clipboard, select the Copy toolbar button.
Paste: To paste content from the Clipboard to the Content Editor, select the
Paste toolbar button.
Select All: To select all content in the Content Editor, select the Select All toolbar
button.
-8-
MyNursingLab Instructor Guide Fall 2008
•
•
•
•
•
•
•
•
•
•
•
•
•
•
•
•
•
•
•
•
•
Undo: To reverse the last command or delete the last entry you typed, select the
Undo toolbar button.
Redo: To reverse an action of the Undo command, select the Redo toolbar.
Delete: To delete content from the Content Editor select the content to be deleted
and then click the Delete toolbar button.
Clean HTML Code: Content pasted from other applications may contain
unwanted HTML code. Select the Clean HTML Code toolbar button to clean
unwanted HTML codes. For example, when copying and pasting from Word
documents, you must also use the Clean HTML Code button to clean up
Microsoft Word related tags.
Show WYSIWYG/Plain: Select the Show WYSIWYG/Plain toolbar button to
toggle between displaying content in WYSIWYG (What You See Is What You
Get) and Plain modes.
Show HTML: Select the Show HTML toolbar button to see and edit the content
as HTML code in the Content Editor.
Insert Special Character Code: To insert special characters and codes into the
Content Editor, select Insert Special Characters and Code toolbar button.
Insert Media (Image/ Flash/Java Applet): To insert an image (or Flash
animation or Java applet), select Insert Media toolbar button. Note that Flash and
Java applets will not display in any Skill-Based or Project-Based Exams or
Trainings run via the MyNursingLab simulation player.
Insert Media from Content Library: To select an image or other file uploaded
into the Content Library, select Insert Media from Content Library toolbar button.
Insert Link: Select the Insert Link toolbar button to insert a link to an external
URL or a link to an item in the Content Editor. When the Insert Hyperlink window
opens, the External URL tab displays by default. Select the appropriate protocol
(default is http://) and then type the rest of the URL. To add link to an item in the
Content Library, click the Content Library tab, click the Choose button, navigate
through the Content Library to locate the desired item, click the Add and Close
button and then click OK.
Insert URL: To insert a a link to an item in the Content Editor, select the Insert
URL toolbar button. When the Select Content window opens, click the Content
Library tab,navigate through the Content Library to locate the desired item, click
the Add and Close button and then click OK.
Unlink: To remove a link (without deleting the content), select the Unlink toolbar
button.
Insert Horizontal Rule: To insert horizontal rule in the Content Editor, select the
Insert Horizontal Rule toolbar button.
Font Name: To change the font, select the text to change and then select a font
name from the Font Name list. By default, the Font Name is Arial.
Font Size: To change font size, select the text to change and then select a font
size from the Font Size list in the toolbar. By default, the Font Size is 10.
Bold: To apply bold formatting to text, select the text you want to change and
then select the Bold toolbar button
Italic: To apply italic formatting to text, select the text you want to change and
then select the Italic toolbar button
Underline: To apply underline formatting to text, select the text you want to
change and then select the Underline toolbar button.
Justify Left: To left align text, select the text you want to align left and then click
on Justify Left toolbar button.
Justify Center: To center text, select the text you want to center and then click
on Justify Center toolbar button.
Justify Right: To right align text, select the text you want to align right and then
click on Justify Right toolbar button.
-9-
MyNursingLab Instructor Guide Fall 2008
•
•
•
•
•
•
•
•
•
•
•
•
Justify Full: To fully justify the text, select the text you want to align and then
click on Justify Full toolbar button.
Numbered List: To create a numbered list, select the items that will be listed,
and then select the Numbered List toolbar button.
Bulleted List: To create a bulleted list, select the items that will be listed and then
select the Bulleted List toolbar button.
Outdent: To decrease the indent of the paragraph or text, select the text you
want to change and then select the Outdent toolbar button.
Indent: To increase the indent of the paragraph or text, select the text you want
to change and then select the Indent toolbar button.
Text Color: To apply text color formatting to text, select a color from the Standard
color palette or click More Colors to display the Color Selector palette. Select the
color and click OK. You also can type the Hex Code of a particular color in the
text box . To view a complete range of colors with their respective Hex Code, click
here.
Background Color: To apply background color formatting to text, select a color
from the Standard color palette or click More Colors to display the Color Selector
palette. Select the color and click OK. You also can type the Hex Code of a
particular color in the text box. To view a complete range of colors with their
respective Hex Code, click here.
Superscript: To apply Superscript formatting to text, select the text you want to
change and then select the Superscript toolbar button.
Subscript: To apply Subscript formatting to text, select the text you want to
change and then select the Subscript toolbar button.
Strikethrough: To apply Strikethrough formatting to text, select the text you want
to change and then select the Strikethrough toolbar button.
Remove Formatting: To remove text formatting, select the text you want to
change and then select the Remove Formatting toolbar button.
Insert Table: Select the Insert Table toolbar to insert a table in the Content
Editor. When the Insert Table window opens, set the Width, Height, Rows,
Columns, Padding, and Spacing information in the Size area. In the Border area,
click the
•
•
•
•
•
•
•
•
color picker and then select a color from the color palette for the
table border. Enter a Width in pixels. In the Background area, click the
color
picker and then select a color from the color palette. Click the OK button to set
the background color. Click the OK button to save the table properties.
Table Properties: Select or position the cursor inside a table and select the
Table Properties toolbar button to edit the table’s properties.
Insert Caption: Select or position the cursor inside a table and select the Insert
Caption toolbar button to insert a caption for the table.
Insert Header Row: Select or position the cursor inside a table and select the
Insert Header Row toolbar button to insert a new table header row at the top of
the table.
Insert Footer Row: Select or position the cursor inside a table and select the
Insert Footer Row toolbar button to insert a new table footer row at the bottom of
the table.
Insert Row Above: Select or position the cursor inside a table row and select the
Insert Row Above toolbar button to insert a new row above the selected row.
Insert Row Below: Select or position the cursor inside a table row and select the
Insert Row Below toolbar button to insert a new row below the selected row.
Row Properties: Select or position the cursor inside a table row and select the
Row Properties toolbar button to edit the row properties.
Split Cell Rows: Position the cursor inside a merged table cell and select the
Split Cell Row toolbar button to split the cell back into the rows again.
- 10 -
MyNursingLab Instructor Guide Fall 2008
•
•
•
•
•
•
•
•
•
•
•
•
Delete Row: Select or position the cursor inside a table row and select the Delete
Row toolbar button to delete the selected row.
Insert Column Left: Position the cursor inside a table cell and select the Insert
Column Left toolbar button to insert a new column to the left of the selected
column.
Insert Column Right: Position the cursor inside a table cell and select the Insert
Column Right toolbar button to insert a new column to the right of the selected
column.
Column Properties: Position the cursor inside a table cell and select the Column
Properties toolbar button to edit the column’s properties.
Split Cell Columns: Position the cursor inside a merged table cell and select the
Split Cell Columns toolbar button to split the cell back into columns again.
Delete Column: Position the cursor inside a table cell and select the Delete
Column toolbar button to delete the selected column.
Insert Cell Left: Position the cursor inside a table cell and select the Insert Cell
Left toolbar button to insert a new cell to the left of the selected cell.
Insert Cell Right: Position the cursor inside a table cell and select the Insert Cell
Right toolbar button to insert a new cell to the right of the selected cell.
Split Cell: Position the cursor inside a merged table cell and select the Split Cell
toolbar button to split the cell back into rows and columns again.
Merge Cells: Select a number of table cells across rows and/or columns and
select the Merge Cells toolbar button to merge the cells into a single cell.
Cell Properties: Position the cursor inside a table cell and select the Cell
Properties toolbar button to edit the cell’s properties.
Delete Cell: Position the cursor inside a table cell and select the Delete Cell
toolbar button to delete the selected cell.
MyNursingLab Icons
Navigation Toolbar Icons
•
•
•
•
Today's View
Course Content
Question Library
Gradebook
•
•
•
•
•
Reports
Communicate
Preferences
Search
Expand Folder
•
Previous Folder
Today's View Icons
•
•
•
•
•
•
Welcome Message
Notifications
Announcements
Instructor Grading
Unread Discussion
Unread Messages
•
•
Late Submissions
New Grades
- 11 -
MyNursingLab Instructor Guide Fall 2008
•
Idle Students
•
Overdue Work
Course Content Icons
•
•
•
•
•
Add Content
Folder
Link
File
Page
•
•
•
•
•
•
•
Assign/ Unassign
Show/Hide
Remove
Delete
Copy
Cut
Paste
Add
•
Add to selected date
•
•
Scheduled activity or item added to calendar
•
Scheduled activity or item is past due
Question Library Icons
Add Content
Folder
Remove
Delete
Copy
Cut
Paste
•
•
•
•
•
•
•
Gradebook Icons
•
•
•
•
•
•
•
•
•
•
•
•
•
•
•
Create Column
Search Students
Reports
Send Message
Grant Access
Deny Access
Sort by ascending order
Sort by descending order
Numeric Column
Calculated Column
Selection List Column
Free Test Column
Failed
Feedback
Late submission
- 12 -
MyNursingLab Instructor Guide Fall 2008
•
•
•
•
New grade
Hide
Show
Download grades
Print
•
Communicate Icons
•
•
Compose new
Recipient
•
Inbox
•
Drafts
•
•
Sent
Unread message
•
Reply
•
Reply all
•
Forward
•
Create Announcement
•
•
Pin Announcement
Delete Announcement
Preferences Icons
•
Help
•
Available
•
•
Unavailable
Download
Today's View
Using Today's View Overview
Today's View provides a single page where you can track, organize, and manage the
students’ activities in MyNursingLab. Today's View includes two main areas:
1. Notifications: The Notifications area on the left includes five sections –
Welcome Message, Announcements, To Do, Alerts, and Performance -- which
are described below.
2. Calendar: The Calendar area on the right allows provides a quick snapshot of
assignments, by date.
Notifications
The Notifications area at the left displays five sections -- Welcome Message,
Announcements, To Do, Alerts, and Performance.
Welcome Message
The Welcome Message allows the course author or instructor to create a Welcome
message that displays to students when the first log in. You can customize whether or
- 13 -
MyNursingLab Instructor Guide Fall 2008
not the Welcome message displays in Today's View -- and edit or create your own
Welcome message.
To enable (or disable) the Welcome Message:
1. Click Customize on the top right of the Notifications section.
2. In the Customize Notifications window, select (or clear) Enable Welcome
Message.
3. Scroll to the bottom of the Customize Notifications window and then click
.
To customize the Welcome Message:
1. Click Customize on the top right of the Notifications section.
2. In the Customize Notifications window, select Edit Welcome Message.
3. Using the content editor, edit the existing content or enter new content.
4. Scroll to the bottom of the Customize Notifications window and then click
.
If you want to set the Welcome Message to display as the default view on the Today's
View page, select Welcome Message in the Default View list (by default, it is set to
Announcements).
Announcements
The Announcements section is used to display any announcements you create. The
number of announcements currently posted appears in parentheses next to the
Announcements link in the left navigation bar of the Notifications area.
To create a new announcement or make edits to existing announcements, click the
Manage link to display the Announcements tool.
To Do
The To Do section is used to display notifications of any Instructor Grading, Unread
Discussions or Unread Messages posted.
Instructor Grading
This section displays activity submissions that require manual grading by instructors.
Case Studies and Critical Thinking activities in MyNursingLab require manual grading.
Unread Discussions
The Unread Discussions section displays a list of Discussion topics with unread posts.
The number of Discussion topics with new posts appears in parentheses next to the
Unread Discussions link in the left navigation bar of the Notifications area.
To view more details for each unread post, click the Unread Discussions link in the left
navigation bar of the Notifications area.
>The discussion topic name and the number of unread posted messages is
displayed.
>Each discussion topic is listed with an options menu that has two options: Open
and Send Message. For more information on these options, click here.
>On the options menus, click Open to open the Discussion Topic window.
Unread Messages
- 14 -
MyNursingLab Instructor Guide Fall 2008
The Unread Messages section displays a list of unread mail messages. The first 10
unread mails in your Inbox will be displayed here. The total number of unread mails in the
Inbox appears in parentheses next to the Unread Discussions link in the left navigation
bar of the Notifications area.
To view more details for each unread mail message, click the Unread Messages link in
the left navigation bar of the Notifications area. Unread Messages are displayed with
three items:
>Name: Indicates the name of the sender.
>Subject: Displays the subject of the mail.
>Name: Indicates the date on which you have received the mail.
Clicking the message will open the Read Message window. You can also go to the Mail
Inbox by clicking the Go to Mail link. For more information, see Mail.
Alerts
The Alerts section is used to display notifications of new grades and other student
submissions.
Not Passed
The Not Passed section displays a list of activities for which students did not receive
passing grades.
>For each activity in the list, the Activity name is displayed, along with the
number of students who have not met the pass criteria for that criteria (for
example, the text "Not passed by 1 of 3 students who took activity" indicates that
1 of 3 students who took the activity did not pass it). Late Submissions are also
displayed if the student has not obtained passing marks for an activity.
>Click the Activity name to view the activity in the Gradebook window. For
details, see Gradebook.
Several options are available on the options menu for each Activity:
1. View All Submissions: Click View All Submissions on the options menu for
the corresponding activity name. The View Submission window opens.
2. View in Course Content: Click View in Course Content on the options menu for
the corresponding activity name. An expanded Course Content window opens,
highlighting the selected activity.
3. Send Message: Click Send Message on the options menu for the corresponding
activity name. The New Message window opens.
New Grades
The New Grades section displays the newly posted grades for the activities. The number
of activities for which new grades have been posted is displayed in parentheses next to
the New Grades link in the left navigation bar of the Notifications area.
>The activity name along with the number of new grades posted for each activity
is displayed.
>Clicking an activity name will open the Gradebook and display that activity in
the Grades window.
>You can also go the Grades window by clicking the Go to Grades link. For
details on using the Gradebook, see Grades.
Idle Students
- 15 -
MyNursingLab Instructor Guide Fall 2008
The Idle Students section allows you to view the students who have not logged in to the
course for a defined amount of time. The number of students who have not entered the
course in the specified time is displayed in brackets next to the Idle Students link.
Note: you can set an alert to be displayed based on student’s inactivity in a course for the
specified number of days, weeks or months; see Customization information below.
>The name of each Idle Student appears in the list.
>To send a message to all students in the list, click the
button.
Several options are available on the options menu for each student:
1. Deny Access: Click Deny Access on the options menu for the corresponding
student name to deny the student access to the course. When prompted, click
OK to confirm the action (or Cancel to cancel the Action). The student will be
removed from the list.
2. Send Message: Click Send Message on the options menu for the corresponding
activity name. The New Message window opens.
3. View Roster: Click View Roster on the options menu for the corresponding
student to open the view to the Gradebook Manage Roster tab.
Past Due: Submitted
The Past Due: Submitted section displays a list of any activities submitted after the
scheduled due date. The total number of late submissions is displayed in brackets next to
the Past Due: Submitted link.
To view more details or to accept activities submitted after the scheduled due date:
1. Click Past Due: Submitted - Here you see past due submissions listed by
student name.
2. Click the student name to view the details of each past due submission.
3. The alarm icon
and the Total number of late submissions for the activities are
displayed. Each of the activities has an options menu with options specific to that
activity.
4. To accept late submissions, complete the following steps:
• To accept an individual student submission, select Accept Late
Submissions on the options menu. All of the submissions by that
student (or for that activity) are accepted.
• To accept all late submissions, click Accept All, and on the confirmation
dialog, click OK to confirm you want to accept the submissions.
After the submissions have been accepted, the student (or activity) name is removed
from the list and the grades flow to your gradebook.
Past Due: Not Submitted
The Past Due: Not Submitted section displays the number of students who have not
submitted the activities within the specified due date.
>The names of students who have not submitted the activities within the
specified due date are displayed.
>To send a message to all students in the list, click the
button.
Several options are available on the options menu for each student:
1. View Roster: Click View Roster on the options menu for the corresponding
student to open the view to the Gradebook Manage Roster tab.
2. Send Message: Click Send Message on the options menu for the corresponding
activity name. The New Message window opens.
- 16 -
MyNursingLab Instructor Guide Fall 2008
Performance
Performance is a graphical interface that provides performance statistics for both the
course and individual students; it is an at-a-glance view of how students are performing in
your course. Performance is summarized and calculated for activities and study plans
(pre- and post-tests) that you specify in the Grading section of the Preferences tool or in
the Edit Calculated Settings window, which is linked from the Customize Notifications
window.
If you enable the Performance option, the Course Performance and Student Performance
notifications view appear in Today's view. Enabling this option gives you the options to:
• Add folder level calculated columns in Gradebook.
• Allows you to edit the folder level calculations (settings are updated to the
Gradebook and Today's view every two hours).
• Set a folder level threshold score for students.
When enabled in a course, Performance displays the following types of notifications:
• Course Performance: Summarizes course performance at the folder (chapter)
level and individual activity level. You can view overall course performance and
determine where the class is under-performing.
• Student Performance: Displays performance report for individual (enrolled and
active) students in the course.
Course Performance:
The Course Performance section allows you to view overall course performance and
determine where the class is under-performing. Course Performance summarizes course
performance at the folder level and at the individual activities and study plan level.
The calculations for the report are specified in the Customize window available in Today's
View. For example, the Course Performance report displays Study Plans only if the
Enable Study plan results check box is selected when settings are customized. You can
also specify if you would like the report results on Assigned material, All material, or
Unassigned Material.
To view the Course Performance report, click the Course Performance link in the left
navigation bar of the Notifications area.
The top row, Overall, displays the overall course performance for all students. The
Overall section includes three columns:
• The Grade column displays the grade-to-date average for all students based
on the calculation criteria specified in Customize settings.
• The Content Completed column displays the average of percentage of
activities completed for all students based on the calculation criteria
specified in the Customize settings.
• The Time on Task column displays the average time on task for all students
for all content within a particular fold
For each assignment, the following columns of information are displayed:
>Course Content: Depending on the folder calculation level specified in the
Customize settings, displays the name of the first-level folders and
activities/study plans. Select a folder to display the folder contents. Study plan
names conclude with either Pre-test or Post-test. Note: The Course Performance
report displays Study Plans only if the Enable Study plan results check box is
selected in the Customize settings of Today's View.
- 17 -
MyNursingLab Instructor Guide Fall 2008
>Grade: Displays the average cumulative grade-to-date for the particular folder
or content within the folder. The average of all assigned activities is calculated
unless another calculation is specified in Customize settings.
>Content Completed: Displays the percentage of content completed at the firstlevel folder or content within the folder. The percentage of assigned completed
within each folder is calculated unless another calculation is specified in
Customize settings.
>Time on Task (hh:mm:ss): Displays the total time taken for completion of the
activities or study plans.
Each of the folders and activities/study plans has an options menu; you can click the
menu arrow to display the options specific to the item and then click an option to
complete that action.
Additionally, in the top-right of the Course Performance window, you can view the
following details:
>Last updated (MM/DD/YYYY HH:MM): Displays the date and time the
calculations were last updated.
>What's being calculated?: Click to display the calculation criteria used to
obtain the Performance report. To change this criteria, click the
Customize
link and then click the Edit Calculation Setting link in the Performance area.
Student Performance:
The Student Performance section allows you to view performance for individual (enrolled
and active) students in the course.
To view the Student Performance report, click the Student Performance link in the left
navigation bar of the Notifications area.
The top row, Overall, displays the overall student performance for the particular course.
The Overall section includes three columns:
• The Grade column displays the grade-to-date average for all students based
on the calculation criteria specified in Customize settings.
• The Content Completed column displays the average of percentage of
activities completed for all students based on the calculation criteria
specified in the Customize settings.
• The Time on Task column displays the average time on task for all students
for all content within a particular folder.
For each student, the following columns of information are displayed:
>Student Name: Displays the name (Last name, First name) of the students in
the course. Depending on the folder calculation level specified in the Customize
settings, when you click a student name it displays the name of the first-level
folders and activities/study plans. Select a folder to display the folder contents.
Study plan names conclude with either Pre-test or Post-test. Note: The Student
Performance report displays Study Plans only if the Enable Study plan results
check box is selected in the Customize settings of Today's View.
>Grade: Displays the average cumulative grade-to-date of an individual student
for the particular folder or content within the folder. The average of all assigned
activities is calculated, unless another calculation is specified in Customize
settings.
>Content Completed: Displays the percentage of content completed at the firstlevel folder or content within the folder, by student. The percentage of assigned
completed within each folder is calculated unless another calculation is specified
in Customize settings.
- 18 -
MyNursingLab Instructor Guide Fall 2008
>Time on Task (hh:mm:ss): Displays the total time taken for completion of the
activities or study plans by an individual student.
Each of the folders and activities/study plans has an options menu; you can click the
menu arrow to display the options specific to the item and then click an option to
complete that action.
Additionally, in the top-right of the Course Performance window, you can view the
following details:
>Last updated (MM/DD/YYYY HH:MM): Displays the date and time the
calculations were last updated.
>What's being calculated?: Click to display the calculation criteria used to
obtain the Performance report. To change this criteria, click the
Customize
link and then click the Edit Calculation Setting link in the Performance area.
Customizing Notifications
You can customize your Notifications to set the default view and determine when
notifications are displayed. At the top of the Notifications window, click the Customize
link. The Customize Notifications window displays. Select from the following options to
set your notifications and then click
to save the changes.
Welcome Message
Edit Welcome Message: Select this check box to edit the any existing welcome
message. The Content Editor will display; you can type the welcome message in
the editor.
Enable Welcome Message: Select this checkbox to enable the Welcome
Message to be displayed in Today’s View. If the checkbox is de-selected, the
welcome message is disabled and the welcome message is hidden.
•
•
Default View
•
In the Default View list, select the notification you want to appear as the default
view when you open Today’s View.
•
Notify me when new submissions are available for manual grading:
Select this check box to receive notifications when submissions are posted for
manual grading.
Notify me when new Discussion Board posts are available to read:
Select this check box to receive notifications when Discussions are posted.
To Do
•
- 19 -
MyNursingLab Instructor Guide Fall 2008
•
Notify me when new Mail messages are available to read: Select this
check box to receive notifications when new mail messages are posted.
•
Notify me of all students not passing an activity within the time frame
selected below: Select this check box to receive notifications when students
do not obtain passing marks for activities. You can select Show all (default) to
view the alert for all students who have not passed an activity. If you specify a
time frame (such as 1 week), alerts will display for any students who do not
pass an activity within the time frame specified (1 week from the current date).
Notify me when new activity submissions are ready for grading: Select
this check box to receive notifications when new grades are posted.
Notify me if a student has not entered the course in: Select this check
box to receive notifications when students assigned to the course do not enter
the course in the specified time (in days/weeks/months). If you select Show all
(default) all students who are inactive in the course are displayed. If you select
a time frame (such as 1 month), any student that has not entered the course
within that time frame (1 month) are displayed.
Notify me if a student submits an activity past the due date: Select this
check box to receive notifications when students submit the activities after the
specified due date or for late submissions. Select this check box to receive
notifications when students submit the activities after the specified due date.
You can select your choice of display to list the past due submissions by
student or by activity.
Notify me if a student has not submitted any activity by the due date:
Select this check box to receive notifications when students do not submit the
activities by the specified due date. You can select Show all (default) to view
the alert for all students who have not submitted the activity. If you specify a
time frame (such as 1 week), alerts will display for any students who do not
submit the activity within the time frame specified (1 week from the current
date)
Alerts
•
•
•
•
Note: Notify me if a student submits an activity past the due date and Notify me if a student has
not submitted an activity by the due date display only if Enable Calendar is selected in the
General preferences of the Preferences tool.
Performance
•
•
•
Edit Calculation Settings: Click the Edit Calculation Settings link to open the
Edit Calculation settings window.
Enable Course Performance View: Select this check box to display Course
Performance notifications in Today's View.
o Show "Time on Task" column: select this check box to display the
Time on Task column for all levels in the Course Performance view (this
shows the total time spent per activity and is displayed as hh:mm:ss.)
Enable Student Performance View: Select this check box to display Student
Performance notifications in Today's View.
o Show "Time on Task" column: select this check box to display the
Time on Task column for all levels in the Student Performance view (this
shows the total time spent by the student per activity and is displayed as
hh:mm:ss).
Editing Calculation Settings
You can use the Edit Calculation Settings window to set the criteria used to calculate
grades and display folder-level statistics in the Gradebook and in the Performance
- 20 -
MyNursingLab Instructor Guide Fall 2008
notifications of Today's View. The settings you select here will calculate and display
folder-level statistics in the Gradebook and on the Today's View > Course Performance
page. To ensure system stability, this calculation will be updated at 2 hour intervals.
Therefore, the data may not be updated immediately in the Gradebook or Course
Performance page in Today's View.
In the Edit Calculation Settings window, you can set the following criteria:
Student Performance and Gradebook Calculation
In this section, you specify the type of calculation to perform and the activities that are
included.
1. From Calculate the, select the operation. Options are: Average or Sum.
The Average is calculated by averaging all of the assignment grades in
each subfolder and then averaging all of the subfolder averages to
determine the folder, or overall, average. The Sum is calculated by
summing the raw scores the student received on every activity and
dividing by the total possible points for those activities.
Activities are not included in the calculations if at least one of the
following is true
• The activity is marked for anonymous submittal.
• The activity is not submitted and is not due.
Note: activities that are not submitted (or are submitted) after the due date are counted as zero
(unless the instructor accepts the grade for the past due, submitted activity). If the activity is
assigned without a due date it is considered to be due on the course end date and the previous
rules apply.
2. Select the activity filter you want to apply. Options are: All, Assigned, and
Unassigned
3. Choose an Activity type option:
o All Activity types to include all activities in the calculation
o Select activity types to include only selected activity types in
the calculation. After selecting this option, click the check box for
each of the desired activity types to add them to the calculation.
Only the activity types selected are included in the calculation.
Note: The Activity types available for selection in the Edit Calculations section are Homework
(content added by instructor and named “Homework”), Quiz (the Application Activity from Study
Material in the Study Plan)Practice Test (Pre Test from the Study Plan), Test (Post Test from the
Study Plan) and Test Your Terminology in each chapter in the Chapter Activities and Resources
folder.
Levels to which the calculation will be shown and applied
In this section, you can specify the levels to which the above calculations are to be shown
and applied.
1.
Folder Calculation Level:
•
Overall (Shown at first level): When selected, the calculation is
applied to the whole course (it is selected by default). The column
appears as the first column when you navigate to the top-level of the
Gradebook.
•
Folder level (Shown inside folders): When selected, the calculation
is applied at the folder level. All of the activities/study plans in the
- 21 -
MyNursingLab Instructor Guide Fall 2008
2.
folder and any subfolders are included in the calculation. The column
appears as the first column when you navigate to a content folder in
the Gradebook.
Gradebook column prefix: Enter text that will be used as the column
prefix in Gradebook. For the first level, this name precedes the course
name. For the second and third level, this name precedes the folder
name. Click Set to default to revert back to the default name for each
level (Course Average or Folder Average).
Course Performance Settings.
In this section, you can specific the settings to define how study plans are handled in
calculated columns.
•
Enable Study Plan results: When selected, Study Plan results are
included in the calculation and displayed in the Course Performance view
of Today's View.
o Display Pre-test results: Select this check box to display Pre-test
results in Course Performance View. To include the pre-test results
in the calculation, select the Include in calculation check box.
o Display Post-test results: Select this check box to display the Posttest results in Course Performance view. To include the post-test
results in the calculation, select the Include in calculation check
box.
Enable Course Performance View
In this section, click to display Course Performance notifications in Today's View. When
enabled you can also view the Time on Task, which is the total time spent per activity in
hours, minutes, and seconds (hh:mm:ss).
Enable Student Performance View
In this section, click to display Student Performance notifications in Today's View. When
enabled you can also view the Time on Task, which is the total time spent by the student
per activity in hours, minutes, and seconds (hh:mm:ss).
When you have made all desired changes, click Save and Close to save your changes.
Note: To remove Performance statistics from Today's View, clear the respective option for
Course and/or Student Performance.
Manage Calendar
•
Display calendar on Today's View for you and your students: Select this
check box to display calendar in Today's View for both Instructors and students.
Note: The Manage Calendar option is available only if you select the Enable Calendar check box
in General preferences in the Preferences tab.
Calendar
The Course Calendar allows you to easily locate the activities or items that have been
assigned by you, with a due date. The due dates for the each activity or item to be
submitted is highlighted on the calendar. By default current month and current day are
displayed in the calendar. You can navigate forward and backward in the calendar by
clicking
button or
button.
- 22 -
MyNursingLab Instructor Guide Fall 2008
You can assign Course Content for the student by clicking the Assign Content link in the
top-right hand corner of the calendar. This link will navigate to Course Content Calendar
view. For more information on assigning contents to the course, click here.
If you click a date in the calendar, the Course Content window opens to the Course
Calendar, which lists any assignments for that day.
To go directly to Course Content, click the Course Content link. The Course Content tab
will open to the View All Contents tab.
The calendar displays the following icons:
• Completed: The date on which a student completes an assignment and
submit the activity are indicated with a checkmark
icon.
• Items Due: When a due date is set for an activity, that date will be marked
•
with
icon. (This means that students have to submit the activity on or
before the date specified for submitting a particular assignment.)
Items Past Due: If students have not submitted an activity on or before the
due date, that date will be marked with icon. If you choose accepts the
submission of the activity that you have submitted after the due date, the
icon is replaced with
•
•
.
Note: Any note or information added for a date will be marked with icon.
Submitted: The date on which a student submits a completed activity will be
indicated with
icon.
Course Content
Using Course Content
Overview
In Course Content you can manage assets for your course. You can toggle between the
Instructor view and the Student view. You can exactly see how the Course Content is
displayed for the students by clicking on the
button.
Course Content consists of the following sub-navigation tabs:
1. Add Content from Library: This tab displays the split view consisting of both the
Content Library and Student Content screens. From this view you can add
selected content from the Content Library to Student Content. The Student
Content window displays a snapshot of what students see in their Course
Content window.
2. Organize Content: This tab displays an advanced view of Student Content, from
which you can create notes and further customize the Course Content view for
students.
3. Assign Content: This tab displays a split view of Student Content and Calendar.
From this tab, you can assign content items to a specific date in the Calendar.
4. Organize Calendar: This tab displays a split view of Calendar and Student
Content. From this tab, you can view assignments that have due dates, set the
order of the assignments, and move assignments from one date to another.
5. Manage Question Library: This tab displays a view of the Question Library. From
this view, you can manage the questions used in your course.
Student View
- 23 -
MyNursingLab Instructor Guide Fall 2008
To view how changes you make on the Course Content tab display to students in the
Course Content view, click the
button on the top-right corner of the
toolbar. In Student View, you can see the entire course just as a student would. To return
button on the toolbar.
to Instructor view click the
Content Library (left side)
Content Library is the “warehouse” of course assets you can use to customize the
student course. Course assets include Folders, Activity/Assignments, Study Plans, Links,
or Files. Also stored in the Content Library are all the Instructor Resources.
Content Library Items
The Content Library contains all of the available assets for your courses. When you first
start using MyNursingLab, the Content Library includes all of the content provided by
Pearson. You also can add your own content to the Content Library, which then can be
made available in your student course. Items available in (or to be added to) the Content
Library include the following:
• Student Study Plans
• Chapter Activities and Resources
• Book Resources
• Test Item File
• Instructor’s Resource Manual and Resources
• Instructor Power Point
• Videos and Animations
• Real Nursing Skills videos (in some courses)
• Folder
• Link
• File
• Page
Content Library Taskbar
You can perform the following activities in the Content Library Taskbar:
•
•
Add Content: You can add content to Content Library from the available
resources in the Add Content menu of Content Library Taskbar. For
information on adding content to the Content Library, see below.
Advanced Options: You can view the advanced features of Content
Library by selecting Advanced Options from the Content Library Taskbar.
Content Library Column Headers
•
•
Name: Displays the name of the course contents. It can be that of a File,
Activity/Assignment, Study Plan, Discussion topic, Link or Page.
Order: This column allows you to change the order of the course content
appearing in the list. Click the Order icon corresponding to the course name
that will be moved to the desired location in the list. To move an item, drag
the corresponding
icon and drop the selected content to the desired
location. The
icons indicate the locations where you can drop the
content item. The re-ordered content is displayed with a highlighted
background.
Options: Content Library
- 24 -
MyNursingLab Instructor Guide Fall 2008
After you have added an item to the Content Library, you can edit, preview, and perform
other actions on the item, using the options menu available in the Content Library
window. The options available on the options menu vary, according to the item.
Options: Folder
In Content Library, several options are available on the Folder options menu, as listed
below.
Editing a Folder
To edit an existing folder, complete the following steps:
1. Click the Course Content button on the toolbar.
2. In the Content Library window, click the option menu for the appropriate folder
and then click Edit.
3. Edit the folder name and description and select or deselect the Question Folder
check box. For more information on adding a Folder, click here. Click Save to
save the changes (or Cancel to cancel the changes).
Deleting a Folder
To delete a folder, complete the following steps:
1. Click the Course Content button on the toolbar.
2. In the Content Library window, click the option menu for the appropriate folder
and then click Delete (or click the check box next to the appropriate folder and
click the Delete link on the toolbar).
3. When the message box displays, asking you to confirm the deletion, click OK to
delete or Cancel to cancel the deletion.
Options: Activity
Activities in MyNursingLab are within folders. Examples of activities are Activities
(quizzes) within Study Plans and Test Your Terminology quizzes. For more detailed
information on working with Activities, see beginning on page 69 of this manual.
Previewing an Activity
To preview an existing activity, complete the following steps:
1. Click the Course Content button on the toolbar.
2. In the Content Library window, click the option menu for the appropriate activity
and then click Preview.
Editing an Activity
To edit an existing activity, complete the following steps:
1. Click the Course Content button on the toolbar.
2. In the Student Content window, click the option menu for the appropriate activity
and then click Edit.
3. Edit the activity, entering desired changes in the edit screen under the Activity
Details, Questions, Messages, Grades and Preferences sections. Click Save to
save the changes (or Cancel to cancel the changes).
Printing an Activity
To print an existing activity, complete the following steps:
1. Click the Course Content button on the toolbar.
- 25 -
MyNursingLab Instructor Guide Fall 2008
2. In the Content Library window, click the option menu for the appropriate activity
and then click Print.
3. The Print Settings window displays. Select the appropriate options and then click
OK. To learn more about Print Settings, click here.
Deleting an Activity
To delete an activity, complete the following steps:
1. Click the Course Content button on the toolbar.
2. In the Content Library window, click the option menu for the appropriate activity
and then click Delete (or click the check box next to the appropriate activity and
click the Delete link on the toolbar).
3. When the message box displays, asking you to confirm the deletion, click OK to
delete or Cancel to cancel the deletion.
Options: Link
In Content Library, several options are available on the Link options menu, as listed
below.
Opening a Link
To open an existing link, complete the following steps:
1. Click the Course Content button on the toolbar.
2. In the Content Library window, click the option menu for the appropriate link and
then click Open.
3. The link opens in a new browser window. Click the [x] button in the top right of
the window to close the window and return to Content Library.
Editing a Link
To edit an existing link, complete the following steps:
1. Click the Course Content button on the toolbar.
2. In the Content Library window, click the option menu for the appropriate link and
then click Edit.
3. Edit the Link name and description, time to complete, and the URL. For more
information on adding a Link, click here. Click Save to save the changes (or
Cancel to cancel the changes).
Deleting a Link
To delete a link, complete the following steps:
1. Click the Course Content button on the toolbar.
2. In the Content Library window, click the option menu for the appropriate link and
then click Delete (or click the check box next to the appropriate link and click the
Delete link on the toolbar).
3. When the message box displays, asking you to confirm the deletion, click OK to
delete or Cancel to cancel the deletion.
Options: File
In Content Library, several options are available on the File options menu, as listed
below.
Previewing a File
To preview an existing file, complete the following steps:
- 26 -
MyNursingLab Instructor Guide Fall 2008
1. Click the Course Content button on the toolbar.
2. In the Content Library window, click the option menu for the appropriate file and
then click Preview.
3. The File Download dialog box displays. Click Open or Save to view or save the
file. The link opens in a new browser window. Click the [x] button in the top right
of the window to close the window and return to Content Library.
Editing a File
To edit an existing file, complete the following steps:
1. Click the Course Content button on the toolbar.
2. In the Content Library window, click the option menu for the appropriate file and
then click Edit.
3. Edit the file title and description, time to complete, and other information. For
more information on adding a file, click here. Click Save to save the changes (or
Cancel to cancel the changes).
Deleting a File
To delete a file, complete the following steps:
1. Click the Course Content button on the toolbar.
2. In the Content Library window, click the option menu for the appropriate file and
then click Delete (or click the check box next to the appropriate file and click the
Delete link on the toolbar).
3. When the message box displays, asking you to confirm the deletion, click OK to
delete or Cancel to cancel the deletion.
Options: Page
In Content Library, several options are available on the Page options menu, as listed
below.
Previewing a Page
To preview an existing page, complete the following steps:
1. Click the Course Content button on the toolbar.
2. In the Content Library window, click the option menu for the appropriate file and
then click Preview.
3. The page opens in a new browser window. Click the [x] button in the top right of
the window to close the window and return to Content Library.
Editing a Page
To edit an existing page, complete the following steps:
1. Click the Course Content button on the toolbar.
2. In the Content Library window, click the option menu for the appropriate page
and then click Edit.
3. Edit the file title and description, time to complete, and other information. Click
Save to save the changes (or Cancel to cancel the changes).
Deleting a Page
To delete a page, complete the following steps:
1. Click the Course Content button on the toolbar.
- 27 -
MyNursingLab Instructor Guide Fall 2008
2. In the Content Library window, click the option menu for the appropriate page
and then click Delete (or click the check box next to the appropriate page and
click the Delete link on the toolbar).
When the message box displays, asking you to confirm the deletion, click OK to delete or Cancel
to cancel the deletion
Student Content (right side)
The Student Content window, on the right hand side of the screen, displays a snapshot of
what students see in their Course Content window. In addition, the Student Content
window also provides you with advanced options for managing and organizing the course
content resources.
Using Student Content
The Student Content window contains all of the assets for your course shown to students
taking your course. You also can add content to the Student Content from the Content
Library or you can add your own content directly. Note: it is recommended that you add
all content first to the Instructor Resources Content Library side, then add a copy to the
Student Content side.
The Student Content taskbar contains the following elements
•
•
•
•
•
•
Add Content: You can add content to Content Library from the available
resources in the Add Content menu of Content Library Taskbar.
Assign/Unassign: Select an item or activity in the Student Content
window to activate the Assign/Unassign link. Click the
Assign/Unassign link to assign/unassign course content to the student.
[Note: Assigning an item or activity is the equivalent of making it required.
Only assigned items are calculated in the Grade to Date column.]
Show/Hide: Select an item or activity in the Student Content window to
activate the Show/Hide link. If the item or activity is Shown, a blue
checkmark appears in the Show column and the green text Shown is
displayed below the item or activity name. If the item or activity is hidden
from students, the study plan name appears in gray italics and the red text
Hidden is displayed below the item or activity name.
Remove: Remove selected course content.
Copy: Copy the selected content to the clipboard.
Cut: Cut the selected content and move to clipboard.
Note: Until you paste them, items you copy or cut to the clipboard appear dimmed, in red
italicized text.
•
Paste: Paste the content on the Clipboard to the desired location. You
must cut or copy content to make this option active. To paste copied
content, click Paste or the Paste icon. When the Paste menu displays, click
to select the desired paste location from the menu:
o Paste At Top: Choose this option if you want to paste the
clipboard item before the first item in the Student Content window.
o Paste Before Selected: Choose this option if you want to paste
the clipboard item before the selected content item in the Student
Content window.
o Paste After Selected: Choose this option if you want to paste the
clipboard item after the selected content item in the Student
Content window.
- 28 -
MyNursingLab Instructor Guide Fall 2008
o
Paste At Bottom: Choose this option if you want to paste the
clipboard item after the last item in the Student Content window.
Note: Paste Before Selected and Paste After Selected are enabled only if you select another
content item after you cut or copy items to the Clipboard. If multiple items are selected, the Paste
occurs before (or after) the last item. Recently pasted content items are displayed with a
highlighted background.
•
Clipboard items: This displays the number of copied or cut items. Content
items placed on the Clipboard appear dimmed, in red italicized text. Copied
items remain on the clipboard even after they are pasted; cut items do not.
Student Content Column Headers
In the Student Content window on the right, the following information is displayed:
•
•
•
Name: Displays the name of the item or activity. If the item or activity is
set as optional, a small blue dot appears to the right of the item or activity
name.
Shown: Indicates if an activity is shown to or hidden from students. If the
blue checkmark appears in the Show column
item or activity is Shown, a
and the green text Shown is displayed below the item or activity name. If
the item or activity is Shown and scheduled with a start and end date, a
blue checkmark with a circle appears in the Show column and the
green text Shown is displayed below the item or activity name.If the item or
activity is hidden from students, the study plan name appears in gray italics
and the red text Hidden is displayed below the item or activity name.
Assigned: Displays the assigned status of Course Contents. The status
may be in any of the following states:
: Indicates that the item is assigned but not scheduled or added to the
calendar.
: Indicates that the item is assigned and scheduled (meaning it has a
start date and end date and is added to the calendar).
•
: If the item or activity is past the due date, then the due date and time
are displayed next to the status.
Order: This column allows you to change the order of the course content
appearing in the list. Click the Order icon corresponding to the course
name that will be moved to the desired location in the list. To move an item,
drag the corresponding
icon and drop the selected content to the
desired location. The
icons indicate the locations where you can drop
the content item. The re-ordered content is displayed with a highlighted
background.
Options: Student Content
After you have added an item to Student Content, you can edit, preview, and perform
other actions on the item, using the options menu available in the Student Content
window. The options available on the options menu vary, according to the item.
Options: Folder
In MyNursingLab, folders contain material such as Student Study Plans, Chapter
Activities and Resources, and Book Resources. Several options are available on the
Folder options menu, as listed below.
- 29 -
MyNursingLab Instructor Guide Fall 2008
Editing a Folder
To edit an existing folder, complete the following steps:
1. Click the Course Content button on the toolbar.
2. In the Student Content window, click the option menu for the appropriate folder
and then click Edit.
3. Edit the folder name and description and select or deselect the Question Folder
check box. Click Save to save the changes (or Cancel to cancel the changes).
Setting Folder Properties
To edit an existing folder, complete the following steps:
1. Click the Course Content button on the toolbar.
2. In the Student Content window, click the option menu for the appropriate folder
and then click Properties.
3. Follow the steps outlined in the Properties: Folder page to set the folder
properties.
Show/Hide a Folder in Student Content
To determine whether or not students see a folder in their Course Content, you can show
or hide the folder. To show or hide a folder, complete the following steps:
1. Click the Course Content button on the toolbar.
2. In the Student Content window, click the option menu for the appropriate folder
and then click Show/Hide (or click the check box next to the appropriate folder
and click the
Show/Hide folder on the toolbar).
3. If the folder is Shown, the green text Shown is displayed below the folder name.
If the folder is hidden from students, the folder name appears in gray italics and
the red text Hidden is displayed below the folder name.
Removing a Folder
To remove a folder from Student Content, complete the following steps:
1. Click the Course Content button on the toolbar.
2. In the Student Content window, click the option menu for the appropriate folder
and then click Remove (or click the check box next to the appropriate folder and
Remove link on the toolbar).
click the
3. When the message box displays, asking you to confirm the deletion, click OK to
delete or Cancel to cancel the deletion.
Note: Remove appears as Unassign when you view the options from the Items Due section of
the Calendar.
Options: Activity
Activities in MyNursingLab are within folders. Examples of activities are Activities within
Study Material in Study Plans and Test Your Terminology quizzes. Several options are
available on the Activity menu, as listed below.
Previewing an Activity
To preview an existing activity, complete the following steps:
1. Click the Course Content button on the toolbar.
2. In the Student Content window, click the option menu for the appropriate activity
and then click Preview.
- 30 -
MyNursingLab Instructor Guide Fall 2008
3. A Preview window opens, displaying a text preview of the questions in the
activity.
Editing an Activity
To edit an existing activity, complete the following steps:
1. Click the Course Content button on the toolbar.
2. In the Student Content window, click the option menu for the appropriate activity
and then click Edit.
3. Edit the activity, entering desired changes in the edit screen under the Activity
Details, Questions, Messages, Grades and Preferences sections.. Click Save to
save the changes (or Cancel to cancel the changes).
Set the Scheduling Options (Properties) for an Activity
To edit the scheduling options for an activity, complete the following steps:
1. Click the Course Content button on the toolbar.
2. In the Student Content window, click the option menu for the appropriate activity
and then click Set Scheduling Options.
3. The Set Scheduling Options tab displays, providing scheduling options.
4. Click Save and Close to save the changes.
Printing an Activity
To print an existing activity, complete the following steps:
1. Click the Course Content button on the toolbar.
2. In the Student Content window, click the option menu for the appropriate activity
and then click Print.
3. The Print Settings window displays. Select the appropriate options and then click
OK. To learn more about Print Settings, click here.
Viewing Grades for an Activity
To view the grades for an activity, complete the following steps:
1. Click the Course Content button on the toolbar.
2. In the Student Content window, click the option menu for the appropriate activity
and then click View Grades.
3. The Gradebook window opens directly to the folder where the activity is
scheduled. For more information on using the Gradebook, click here.
Viewing Submissions for an Activity
To view the submission for an activity, complete the following steps:
1. Click the Course Content button on the toolbar.
2. In the Student Content window, click the option menu for the appropriate activity
and then click View Submissions.
3. The View All Submissions window opens. For more information on the View All
Submissions window, click here.
Show/Hide an Activity in Student Content
To determine whether or not students see an activity in their Course Content, you can
show or hide the activity. To show or hide an activity, complete the following steps:
1. Click the Course Content button on the toolbar.
- 31 -
MyNursingLab Instructor Guide Fall 2008
2. In the Student Content window, click the option menu for the appropriate activity
and then click Show/Hide (or click the check box next to the appropriate activity
Show/Hide link on the toolbar).
and click the
3. If the activity is Shown, a blue checkmark appears in the Show column and the
green text Shown is displayed below the activity name. If the activity is hidden
from students, the activity name appears in gray italics and the red text Hidden is
displayed below the activity name.
Remove an Activity from Student Content
To remove an activity from Student Content, complete the following steps:
1. Click the Course Content button on the toolbar.
2. In the Student Content window, click the option menu for the appropriate activity
and then click Remove (or click the check box next to the appropriate activity
and click the
Remove link on the toolbar).
3. When the message box displays, asking you to confirm the deletion, click OK to
delete or Cancel to cancel the deletion.
Note: Remove appears as Unassign when you view the options from the Items Due section of
the Calendar.
Options: Links
Examples of links are Vango Notes and Research Navigator. Several options are
available on the Links options menu, as listed below.
Opening a Link
To open an existing link, complete the following steps:
1. Click the Course Content button on the toolbar.
2. In the Student Content window, click the option menu for the appropriate link and
then click Open.
3. The link opens in a new browser window. Click the [x] button in the top right of
the window to close the window and return to Student Content.
Editing a Link
To edit an existing link, complete the following steps:
1. Click the Course Content button on the toolbar.
2. In the Student Content window, click the option menu for the appropriate link and
then click Edit.
3. Edit the Link name and description, time to complete, and the URL. For more
information on adding a Link, click here. Click Save to save the changes (or
Cancel to cancel the changes).
Setting Link Properties
To edit an existing link, complete the following steps:
1. Click the Course Content button on the toolbar.
2. In the Student Content window, click the option menu for the appropriate link and
then click Properties.
3. Follow the steps outlined in the Properties: Link page to set the link properties.
Show/Hide a Link in Student Content
- 32 -
MyNursingLab Instructor Guide Fall 2008
To determine whether or not students see a Link in their Course Content, you can show
or hide the link. To show or hide a link, complete the following steps:
1. Click the Course Content button on the toolbar.
2. In the Student Content window, click the option menu for the appropriate link and
then click Show/Hide (or click the check box next to the appropriate link and click
the
Show/Hide link on the toolbar).
3. If the link is Shown, the green text Shown is displayed below the link name. If the
link is hidden from students, the link name appears in gray italics and the red text
Hidden is displayed below the link name.
Removing a Link
To remove a link from Student Content, complete the following steps:
1. Click the Course Content button on the toolbar.
2. In the Student Content window, click the option menu for the appropriate link and
then click Remove (or click the check box next to the appropriate link and click
the
Remove link on the toolbar).
3. When the message box displays, asking you to confirm the deletion, click OK to
delete or Cancel to cancel the deletion.
Note: Remove appears as Unassign when you view the options from the Items Due section of
the Calendar.
Options: File
In Student Content, several options are available on the File options menu, as listed
below.
Previewing a File
To preview an existing file, complete the following steps:
1. Click the Course Content button on the toolbar.
2. In the Student Content window, click the option menu for the appropriate file and
then click Preview.
3. The File Download dialog box displays. Click Open or Save to view or save the
file. The file opens in a new browser window. Click the [x] button in the top right
of the window to close the window and return to Student Content.
Editing a File
To edit an existing file, complete the following steps:
1. Click the Course Content button on the toolbar.
2. In the Student Content window, click the option menu for the appropriate file and
then click Edit.
3. Edit the file title and description, time to complete, and other information. For
more information on adding a file, click here. Click Save to save the changes (or
Cancel to cancel the changes).
Note: Selecting a new file will replace your current file. The new file will be used in all items using
the current file.
Setting File Properties
To edit an existing file, complete the following steps:
1. Click the Course Content button on the toolbar.
- 33 -
MyNursingLab Instructor Guide Fall 2008
2. In the Student Content window, click the option menu for the appropriate file and
then click Properties.
3. Follow the steps outlined in the Properties: File page to set the file properties.
Show/Hide a File in Student Content
To determine whether or not students see a Link in their Course Content, you can show
or hide the file. To show or hide a file, complete the following steps:
1. Click the Course Content button on the toolbar.
2. In the Student Content window, click the option menu for the appropriate file and
then click Show/Hide (or click the check box next to the appropriate file and click
Show/Hide file on the toolbar).
the
3. If the file is Shown, the green text Shown is displayed below the file name. If the
file is hidden from students, the file name appears in gray italics and the red text
Hidden is displayed below the file name.
Removing a File
To remove a file from Student Content, complete the following steps:
1. Click the Course Content button on the toolbar.
2. In the Student Content window, click the option menu for the appropriate file and
then click Remove (or click the check box next to the appropriate file and click
Remove file on the toolbar).
the
3. When the message box displays, asking you to confirm the deletion, click OK to
delete or Cancel to cancel the deletion.
Note: Remove appears as Unassign when you view the options from the Items Due section of
the Calendar.
Course Content: Sub Navigation Tabs
The sub-navigation tabs in the Content Library section are Add Content from Library, Organize
Content, Assign Content, Organize Calendar, and Manage Question Library.
Add Content from Library
The split view of Content Library and Student Content is displayed when you click the
Add from Content Library tab of Course Content. Content Library is displayed in the left
pane while the Student Content is displayed in the right pane. The Student Content
window displays a snapshot of what students see in their Course Content window. You
can add course contents to Content Library and Student Content or add content from
Content Library to Student Content.
Add Content from Library displays the following sections:
1. Instructor Content Library (left side)
2. Student Content (right side)
Add Content from Instructor Content Library to Student Content
To add content from the Content Library to Student Content, complete the following
steps:
1. Click the Course Content tab.
2. If necessary, click the Add from Content Library tab to display the split view of
Content Library and Student Content.
3. Click the check box next to the content you wish to add from the Content Library.
You may add or remove entire folders, one item, or multiple items.
- 34 -
MyNursingLab Instructor Guide Fall 2008
4. In the Student Content window navigate to the folder where you want to add the
content. .
5. Click the
button. The selected contents will be added to Student Content.
6. If you add multiple items or a single folder, file, link, or page, the items will appear
in the Student Content window with a status of Hidden. Setting items to Hidden
gives you an opportunity to make any necessary modifications, before students
see the item in their Course Content. Use the Show/Hide options to change the
status to Shown, when are you ready to make this available to students.
Content Library Advanced Options
Content Library advanced options allow you to access features for advanced content
management and organization. To view the Content Library Advanced Options, click the
Course Content tab and view the default Add Content from Library tab, which displays
the split view consisting of both the Content Library and Student Content screens. Click
the Advanced Options link.
Note: You can return to the split screen view of Content Library and Student Content by clicking
Close Advanced options.
When you view the Content Library Advanced Options, you have access to options to
cut, copy, paste, and remove content, as outlined below.
Deleting Questions or Folders
To delete an existing item in the Content Library, complete the following steps:
1. Click the Course Content button on the toolbar. Click the Advanced Options
link.
2. Click the check box next to the appropriate item or folder and then click the
Delete link on the toolbar (or click the option menu for the appropriate question
and then click Delete).
Copying and Pasting Questions or Folders
To copy and then paste an existing item in the Content Library, complete the following
steps:
1. Click the Course Content button on the toolbar. Click the Advanced Options
link.
2. Click the check box next to the appropriate item or folder and then click the
Copy link on the toolbar. The Clipboard items area displays the number of
items copied.
3. Navigate to the appropriate folder and then click the
Paste link on the toolbar.
When the Paste menu displays, click to select the desired paste location from the
menu:
4. Paste At Top: Choose this option if you want to paste the clipboard item before
the first item in the Student Content window.
5. Paste Before Selected: Choose this option if you want to paste the clipboard item
before the selected content item in the Student Content window.
6. Paste After Selected: Choose this option if you want to paste the clipboard item
after the selected content item in the Student Content window.
7. Paste At Bottom: Choose this option if you want to paste the clipboard item after
the last item in the Student Content window.
Note: Paste Before Selected and Paste After Selected are enabled only if you select another
content item after you cut or copy items to the Clipboard. If multiple items are selected, the Paste
- 35 -
MyNursingLab Instructor Guide Fall 2008
occurs before (or after) the last item. Recently pasted content items are displayed with a
highlighted background.
Note: You can copy and then paste an item into its original folder or a new folder.
Cutting and Pasting Questions or Folders
To cut and then paste an existing item in the Content Library, complete the following
steps:
1. Click the Course Content button on the toolbar. Click the Advanced Options
link.
2. Click the check box next to the appropriate question or folder and then click the
Cut link on the toolbar. The Clipboard items area displays the number of
items copied.
Paste link on the toolbar.
3. Navigate to the appropriate folder and then click the
When the Paste menu displays, click to select the desired paste location from the
menu:
4. Paste At Top: Choose this option if you want to paste the clipboard item before
the first item in the Student Content window.
5. Paste Before Selected: Choose this option if you want to paste the clipboard item
before the selected content item in the Student Content window.
6. Paste After Selected: Choose this option if you want to paste the clipboard item
after the selected content item in the Student Content window.
7. Paste At Bottom: Choose this option if you want to paste the clipboard item after
the last item in the Student Content window.
Note: Paste Before Selected and Paste After Selected are enabled only if you select another
content item after you cut or copy items to the Clipboard. If multiple items are selected, the Paste
occurs before (or after) the last item. Recently pasted content items are displayed with a
highlighted background.
Note: You cannot cut and then paste an item into its original folder. You must paste the cut item
into a new folder location.
Organize Content
When you click the Organize Content tab of Course Content, you see a detailed view of
Student Content, from which you can create notes and further customize the Course
Content view for students.
Student Content
In the Student Content window on the right, the following information is displayed:
•
•
Name: Displays the name of the item or activity.
Status: Displays the status of the item or activity. The status may be in any
of the following states:
o Not Started: This indicates that the item has not been opened
even once by any students.
o Not Passed: This indicates at least one student has not passed.
o In Remediation: This indicates at least one student has not
passed, for a Study Plan only.
o Started: This indicates at least one student has accessed the
course and submitted an item.
- 36 -
MyNursingLab Instructor Guide Fall 2008
Not Viewed: Indicates that no students have opened a course
page, file, or link.
o Viewed: Indicates that at least one student has opened a course
page, file, or link.
Assigned: If the item or activity is assigned, Assigned is displayed next to
the status.
Scheduled: If item or activity is scheduled, then Scheduled (Start date and
End date) is displayed next to the status.
o
•
•
•
Due: If the item or activity has a due date, then the due date and time are
displayed next to the status.
•
Due: If the item or activity is past the due date, then the due date and
time are displayed next to the status.
If the item or activity is set as optional, a small blue dot appears to the right
of the item or activity name.
•
Student Content Taskbar
The Student Content Taskbar contains the following elements:
•
Add Content: This helps you add content to the course from the
available resources.
•
Assign/Unassign: Select an item or activity in the Student Content
window to activate the Assign/Unassign link. Click the
Assign/Unassign link to assign/unassign course content to the student.
[Note: Assigning an item or activity is the equivalent of making it required.
Only assigned items are calculated in the Grade to Date column.]
•
Show/Hide: Select an item or activity in the Student Content window to
activate the Show/Hide link. If the item or activity is hidden from
students, the name of the item appears in gray italics. If the item or activity
is shown, the item appears normally.
•
Remove: Remove selected course content.
•
Copy: Copy the selected content to the clipboard.
•
Cut: Cut the selected content and move to clipboard.
Note: Until you paste them, items you copy or cut to the clipboard appear dimmed, in red
italicized text.
•
Paste: Paste the content on the Clipboard to the desired location. You
must cut or copy content to make this option active. To paste copied
content, click Paste or the Paste icon. When the Paste menu displays, click
to select the desired paste location from the menu:
o Paste At Top: Choose this option if you want to paste the clipboard
item before the first item in the Student Content window.
o Paste Before Selected: Choose this option if you want to paste the
clipboard item before the selected content item in the Student
Content window.
o Paste After Selected: Choose this option if you want to paste the
clipboard item after the selected content item in the Student
Content window.
o Paste At Bottom: Choose this option if you want to paste the
clipboard item after the last item in the Student Content window.
Note: Paste Before Selected and Paste After Selected are enabled only if you select another
content item after you cut or copy items to the Clipboard. If multiple items are selected, the Paste
occurs before (or after) the last item. Recently pasted content items are displayed with a
highlighted background.
- 37 -
MyNursingLab Instructor Guide Fall 2008
•
Clipboard items: This displays the number of copied or cut items. Content
items placed on the Clipboard appear dimmed, in red italicized text. Copied
items remain on the clipboard even after they are pasted; cut items do not.
Order
If you want to reorder items in Student Content, click the Order icon corresponding to the
item or activity -- and then drag and drop the item to the new location in the list.
Notes
The Notes feature allows you to add a note that displays within each folder to students, in
their Course Content. If notes are not provided for the students, then the Notes window is
not displayed in folders. To add or edit a note, complete the following steps:
1. Click the Edit link on the Notes box. The Notes window opens.
2. Enter the Notes information in the Content Editor.
3. Click Save to save the Notes information.
Student View
To view how changes you make on the Course Content tab display to to students in the
Course Content view, click the
button on the top-right corner of the
toolbar. In Student View, you can see the entire course just as a student would. To return
to Instructor view click the
button on the toolbar.
Assign Content
The split view of Student Content and Calendar is displayed when you select Assign
Content in Course Content. Student Content is displayed in the left pane while the
Calendar is displayed in the right pane. Assign Content helps you manage and assign
course content for the students. The Calendar helps you assign content items to specific
dates and keep track of the students’ schedule.
The Assign Content window includes the following sections:
1. Student Content
2. Calendar
Assign Course Content
You can add Course Content items to specific dates in the calendar to assign the items.
When assigning a folder, all the course items within the folder get assigned to the
calendar for the selected date. To assign only some items in the folder, open the folder to
locate the exact material you wish to assign. The dates with assigned due course items
are represented with
icon in the calendar which helps you track the scheduled due
dates for the students.
To assign course content items, use the following steps:
1. Click the desired date in the calendar. [Note: You cannot add content to a date
prior to the current date.]
2. In the Student Content window, select the check box(es) next to the course
item(s) you want to schedule.
3. Click the
the calendar.
button to add the course items to the selected date in
- 38 -
MyNursingLab Instructor Guide Fall 2008
4. The item is added to the calendar, as indicated by a
icon on the date in the
Calendar. A list of items due displays below the Calendar, along with options to
Add a Note or Unassign All items. For more details on the Calendar, click
here.
Note: If students do not submit material by the assigned due dates, grades from that assigned
material do no automatically flow to the instructor gradebook. To accept grades from late
submissions and have the grades post to the gradebook, follow the directions on page 24 in the
Past Due Submission section.
Filter the Student Content View
The Display menu below the Student Content window contains the following filters for
Student Content:
• All Course Material: Displays all the items of the Course Content.
• Assigned Only: Displays all the assigned items of the Course Content and
also all assigned items with due dates.
• Unassigned Only: Displays all unassigned items of the Course Content.
Organize Calendar
The Calendar allows you to view the tasks scheduled for the students and helps you
keep track of the due dates of the assigned content. By default current month and current
day are displayed in the calendar. You can navigate forward and backward in the
calendar by clicking button , or
button.
You can switch calendar views directly from the text links in the upper-right corner of the
calendar. For example, if you are viewing the Assign Content tab, you can switch to the
Organize Calendar link to switch to the Organize Calendar view. If you are viewing
Organize Calendar tab, click the Assign Content link to switch to the Assign Content
view.
The following details can be viewed in the Calendar:
• Current date: The current date will be highlighted.
• Items Due: The scheduled activities with due dates set for submitting the
activities are marked with the icon.
•
Note: The
date.
icon representing a note carries information for the selected
On selecting a date on the calendar, the section below the calendar displays the following
details:
•
•
•
Selected Date: The Date, Month and Year details of the selected date.
Items Due: The total number of course items due for the current date or the
selected date. [Note: Assigned folders are not displayed in the Items due
section; only the course content items within the folders are seen.]
Add a Note: The Notes feature allows you to add a note that displays
within each folder to students, in their Course Content. If notes are not
provided for the students, then the Notes window is not displayed in folders.
You can provide only one Note per date. To add or edit a note, complete the
following steps:
1. Click the Add a Note link. The Notes window opens.
2. Enter the Notes information in the Content Editor.
3. Click Save to save the Notes information.
- 39 -
MyNursingLab Instructor Guide Fall 2008
•
4. A
icon appears on the Calendar, indicating a note is added to
the selected date in the Calendar.
5. Click the Edit link to edit an existing note; click Delete to delete an
existing note.
Unassign All: Unassign All allows you to clear all the due items for the
selected date. On selecting Unassign All, the course items due for a date will
be unassigned. The unassigned status reflected in the Assigned column of
Student Content.
Note: You also can unassign a single item or activity in the Due items list. Click Unassign under
the Options menu of the corresponding item or activity name. The activity is removed from the
due items list.
Note: If the Calendar is not enabled for your course, you can enable it from the course toolbar by
selecting Preferences and then clicking the General tab. On the General tab, select the Enable
Calendar check to display the Calendar in Today’s view. The Organize Calendar link appears
only if the Enable Organize Calendar check box is selected in the General preference of the
Preference tool.
Using Organize Calendar
When you select a date from the calendar, the assignment details for that date display on
the right. Activity due dates are highlighted in the calendar for students.
By default, the current month and current day display in the calendar. Use the forward
and back
buttons to navigate to a different month.
Calendar Area
In the Calendar area, you can view the following details:
• Current date: The current date is highlighted.
• Items Due: The scheduled activities with due dates set for submitting the
activities are marked with the icon.
•
Note: Activities with corresponding notes appear with a
icon.
Student Content Area
Header Area
When you select a date in the calendar, the right Student Content header area displays
the following information:
•
•
Selected Date: Displays the month, day, and year for the selected date.
Note: If any note is added for the selected date, the note text displays in the Note
pane above the list of Due Items.
•
button: Allows you to add a note that displays on a specific date;
this note displays to students. To add a Note:
1. Click the date in the calendar for which you want to add a note.
2. Click
. The Add Note window opens.
3. Enter the desired text in the note box.
4. Click Save and Close to save the note.
5. The
icon appears in the selected date in the Calendar, indicaiting a
note has been added; the note text displays in the Note pane above the
list of Due Items.
- 40 -
MyNursingLab Instructor Guide Fall 2008
•
button: Allows you to clear all due items for the selected date.
When you click the Unassign All button, all course items due for that date are
unassigned and the status "Unassigned" is reflected in the Assigned column of
Student Content.
Due Items List
When you select a date in the calendar, the right Student Content Due Items list
displays a list of items due for the selected date. For each item, the following details
display:
• Name: Displays the name of the item or activity. If the item or activity is set as
optional, a small blue dot appears to the right of the item or activity name.
• Order: This column allows you to change the order of the course content
appearing in the list. Click the Order icon corresponding to the course name
that will be moved to the desired location in the list. To move an item, drag the
corresponding
icon and drop the selected content to the desired location.
icons indicate the locations where you can drop the content item. The
The
re-ordered content is displayed with a highlighted background.
Taskbar
When you select a date in the calendar, the right Student Content taskbar displays the
following options:
•
•
•
Unassign: Allows you to unassign the items currently listed in the Due Items
list. Select the check box to the left of the item(s) you wish to unassign and then
click Unassign on the taskbar. The selected content items are removed from the
Due Items list (and all other Calendar views)
Remove Due Date: Allows you to remove a due date from an assigned
content item, but retain all other scheduling options. Select the check box to the
left of the item(s) you wish to unassign and then click Remove Due Date on the
taskbar. The due date set for the selected items are removed; all other
scheduling options remain.
Cut: Cut the selected content and move to clipboard.
Note: Until you paste them, items you copy or cut to the clipboard appear dimmed, in red
italicized text.
•
Paste: Paste the content on the Clipboard to the desired location. You must cut
or copy content to make this option active. To paste copied content, click Paste or
the Paste icon. When the Paste menu displays, click to select the desired paste
location from the menu:
o Paste At Top: Choose this option if you want to paste the clipboard
item before the first item in the Student Content window.
o Paste Before Selected: Choose this option if you want to paste the
clipboard item before the selected content item in the Student
Content window.
o Paste After Selected: Choose this option if you want to paste the
clipboard item after the selected content item in the Student
Content window.
o Paste At Bottom: Choose this option if you want to paste the
clipboard item after the last item in the Student Content window.
- 41 -
MyNursingLab Instructor Guide Fall 2008
Note: Paste Before Selected and Paste After Selected are enabled only if you select another
content item after you cut or copy items to the Clipboard. If multiple items are selected, the Paste
occurs before (or after) the last item. Recently pasted content items are displayed with a
highlighted background.
•
Clipboard items: This displays the number of copied or cut items. Content items
placed on the Clipboard appear dimmed, in red italicized text. Copied items
remain on the clipboard even after they are pasted; cut items do not.
Note: If the Calendar is not enabled for your course, you can enable it from the course toolbar by
selecting Preferences and then clicking the General tab. On the General tab, select the Enable
Calendar check to display the Calendar in Today’s view. The Organize Calendar link appears
only if the Enable Organize Calendar check box is selected in the General preference of the
Preference tool.
Moving Items to a New Date in the Calendar
To change the scheduled date of an item in the Calendar to another day, use the
following steps:
1. Select one or more items in the check boxes of the Due Items list.
2. Click Cut on the taskbar. The selected content items are placed on the
Clipboard.
3. Select the new day in the calendar on which you wish to assign the items.
4. Click Paste icon on the taskbar. When the Paste menu displays, click to select
the desired paste location from the menu.
The selected content items are moved and re-assigned to the selected date. Note that
the due time set for the items (and all other scheduling options) remain the same after an
item is moved to a new date in the calendar.
Manage Question Library
Overview
Use the Manage Question Library tool to manage the questions used in your course.
With the Question Library tool you can add, delete, copy and paste, edit, preview, or try
out course questions. You can use the Question Library tool to manage a database of
questions to design activities, homework, and other course elements as needed for
optimal course design. When you want to create your own question, you will create and
store them in Question Library.
When you first click to open the Manage Question Library tab a screen opens with folders
containing questions you can choose from to create assignments. You must navigate to
the correct bank of test questions that you are interested in using.
The Manage Question Library tool includes three main elements:
1. The Question Library window
2. The Preview window
3. The Question Library toolbar (Add Content, Cut, Copy, Paste, Delete)
Using the Question Library Window
The Question Library window contains the following elements:
• Name: Displays the folder name.
• Type: In MyNursingLab, all the assets here are folders.
- 42 -
MyNursingLab Instructor Guide Fall 2008
Previewing Questions
The Preview window allows you to view a quick preview of each question in the Question
Library.
1. Navigate through the questions to location the desired question.
2. Click the question name to select it. A preview of the question displays in the
Preview box.
Adding Questions or Folders
To add a question or folder to the Question Library, complete the following steps:
1. Click the Manage Question Library button on the toolbar.
2. Click the
Add Content button. On the Add Content menu, click to select
from a list of available questions types to add to the Question Library.
Folder
Import Questions (this option is not fully functional at this time)
Connect the Points
Drag and Drop
Drop-down List
Entry List
Entry List (Dynamic)
Essay
File Upload
Fill in the Blank
Fill in the Blank (Dynamic)
Flash™
Hot Spot — Multiple Choice
Hot Spot — Multiple Response
Java Applet
Likert Scale
Matching
Matrix
Multiple Choice
Multiple Choice (Dynamic)
Multiple Response
Multiple Response (Dynamic)
Numeric
Ranking
Select a Blank
Slider
Text Match
True/False
Note: You can organize your questions into folders by creating a folder in the Question Library
and then adding the questions into that folder. Folders created in the Question Library are
automatically added to the Content Library. When viewed in the Content Library you do not see
the questions; instead, you only see the images used in the questions. However, questions within
the folder can always be viewed from within the Question Library.
Deleting Questions or Folders
To delete an existing item in the question library, complete the following steps:
1. Click the Question Library button on the toolbar.
- 43 -
MyNursingLab Instructor Guide Fall 2008
2. Click the check box next to the appropriate question or folder and then click the
Delete link on the toolbar (or click the option menu next to the appropriate
question and then click Delete).
Copying and Pasting Questions or Folders
To copy and then paste an existing item in the question library, complete the following
steps:
1. Click the Manage Question Library button on the toolbar.
2. Click the check box next to the appropriate question or folder and then click the
Copy link on the toolbar. The Clipboard items area displays the number of
items copied.
Paste link on the toolbar.
3. Navigate to the appropriate folder and then click the
When the Paste menu displays, click to select the desired paste location from the
menu:
• Paste At Top: Choose this option if you want to paste the clipboard item
before the first item in the Student Content window.
• Paste Before Selected: Choose this option if you want to paste the clipboard
item before the selected content item in the Student Content window.
• Paste After Selected: Choose this option if you want to paste the clipboard
item after the selected content item in the Student Content window.
• Paste At Bottom: Choose this option if you want to paste the clipboard item
after the last item in the Student Content window.
Note: Paste Before Selected and Paste After Selected are enabled only if you select another
content item after you cut or copy items to the Clipboard. If multiple items are selected, the Paste
occurs before (or after) the last item. Recently pasted content items are displayed with a
highlighted background.
Note: you can copy and paste into the original folder location or a new folder.
Cutting and Pasting Questions or Folders
To cut and then paste an existing item in the question library, complete the following
steps:
1. Click the Question Library button on the toolbar.
2. Click the check box next to the appropriate question or folder and then click the
Cut link on the toolbar. The Clipboard items area displays the number of
items copied.
3. Navigate to the appropriate folder and then click the
Paste link on the toolbar.
When the Paste menu displays, click to select the desired paste location from the
menu:
• Paste At Top: Choose this option if you want to paste the clipboard item
before the first item in the Student Content window.
• Paste Before Selected: Choose this option if you want to paste the clipboard
item before the selected content item in the Student Content window.
• Paste After Selected: Choose this option if you want to paste the clipboard
item after the selected content item in the Student Content window.
• Paste At Bottom: Choose this option if you want to paste the clipboard item
after the last item in the Student Content window.
Note: Paste Before Selected and Paste After Selected are enabled only if you select another
content item after you cut or copy items to the Clipboard. If multiple items are selected, the Paste
occurs before (or after) the last item. Recently pasted content items are displayed with a
highlighted background.
- 44 -
MyNursingLab Instructor Guide Fall 2008
Note: you can copy and paste into the original folder location or a new folder.
Creating a Fill in the Blank Question
To create a fill in the blank question, complete the following steps:
1. Point to the Course Content button on the toolbar and then click Manage
Question Library.
2. Click the
Add Content button. On the Add Content menu, click Fill in the
Blank.
3. The Create Fill in the Blank window opens. The screen displays two main
areas: Question & Answers and Hints. You can expand or collapse these areas
by clicking on the bar or the
(expand) and
(collapse) buttons.
Note: These instructions take you through a linear progression of creating a Fill in the Blank
question. However, after the information is entered in one area, you can switch to another area;
your inputs will be saved. You also can click the Save and Close button to save the question and
return to Question Library at any time.
Note: While working on a question, you can see how the question will be displayed for the
students by clicking the Preview button. To view a sample question, click the
Question icon.
Sample
Question & Answers: Add/Edit Question
The Question & Answers section allows you to enter the question title, question text and
blank. The Question & Answers section has two subsections: Add/Edit Question and
Add/Edit Score and Feedback. To enter a question, use the following steps:
1. In the Edit Question area, in the Question title text box, enter the question
name. Be sure to use a descriptive name, as this is the way you will identify the
question in the Question Library.
2. Enter the question text and a blank in the Content Editor to define a fill in the
blank question. To add text, click Add Text on the Answer taskbar. The drop
down list displays the following options to choose a desired location to insert the
textbox:
o Add at top: Adds the text box at the top.
o Add before selected: Adds the text box before the selected Text
or Blank.
o Add after selected: Adds the text box after selected Text or
Blank.
o Add at bottom: Adds the text box at the bottom.
3. On selecting a desired location, a new blank text box appears. Type the question
text in the textbox. When typing the question, you will type the beginning text,
then add a blank, and then add the following text. For example, you might type:
"This is a fill in the" in the first text box, add a blank and enter the answer "blank",
and then type "question." to complete the question: "This is a fill in the blank
question." If you want to use additional formatting, click the Edit HTML link to
open the Content Editor.
- 45 -
MyNursingLab Instructor Guide Fall 2008
4. To add a blank, click Add Blank on the Answer taskbar. The drop down list
displays the following options to choose a desired location to insert the text box:
•
Add at top: Adds the text box at the top.
•
Add before selected: Adds the text box before the selected Text or Blank.
•
Add after selected: Adds the text box after selected Text or Blank.
•
Add at bottom: Adds the text box at the bottom.
5. On selecting a desired location, a new blank text box appears. Type the question
text in the text box. This text will appear as a blank when the student views the
question.
6. Next, choose a blank length for the blank text box. Each blank size is a set
number of pixels that can accommodate a certain number of characters in the
visible blank area. The user can enter any number of characters in the blank,
regardless of the size you choose.
Blank length
Pixel length of
blank field
Approx. # of visible
characters
xx-small
x-small
small
medium
large
x-large
xx-large
25 px
50 px
100px
150px
200 px
325px
450px
1-3
3-6
7-18
11-30
15-45
24-52
34-72
Note: To delete the Text or Blank, select in the checkboxes and click
taskbar.
Delete in the Answer
7. Continue adding Text and Blanks to complete the question creation. If you want
to reorder text or blanks, click the
Order icon and then drag and drop the text
or blank to the desired location.
8. Click the Add Score and Feedback subsection bar.
Question & Answers: Add/Edit Score and Feedback
All the text of the Blank answers defined in Edit Question will be displayed under the
Answer column. Here, you can edit the answer text for the Blanks or provide alternate
answers, set score, and feedback for correct and wrong answers.
1. Click the
button under the Alternative answers column to edit any of the
defined text and to give alternative answers for the choices. Adding alternative
- 46 -
MyNursingLab Instructor Guide Fall 2008
2.
3.
4.
5.
6.
7.
8.
9.
10.
answers allows you to account for spelling or other variations that may occur
when entering the answers for this question.
Type a score and feedback for each answer.
For each answer blank, enter a feedback and a score for both correct and
incorrect answers.
In the Options area, select the Case sensitive check box to require case
sensitivity in student responses, when grading fill-in-the-blank questions. If this
check box is not selected, questions will be graded ignoring case sensitivity.
Select the Allow similar sounding words check box to allow similar sounding
words to be accepted when grading (for example, gray and grey).
To allow similar sounding words, select the Allow similar sounding words
checkbox.
Select the Ignore Punctuation check box to allow incorrect punctuation in a
student response, when grading objective-based questions.
Select the Ignore Double Space check box to ignore double spacing in student
response. (This generally is not needed with Fill in the Blank questions).
The Accents options are not used in MyNursingLab and can be ignored.
Click the Hints subsection bar.
Hints
The Hints section displays, showing three areas where you can enter optional question
hints. Hints only display to students in Skill-Based Training, Project-Based Training, or
Objective-Based Question Only activities. At the time of scheduling these three types of
activities, you can turn hints on or off.
1. In the Hint 1 text box, type the desired hint text. If you want to format the
feedback using fonts, colors, and more, click the Edit button to open the Content
Editor and format your text appropriately.
2. Complete the same process to enter Hint 2 and Hint 3.
3. Click the Preferences subsection bar.
Preferences
The Preferences section for the question displays, allowing you to further customize the
question.
•
Time to answer: Choose either Unlimited or Restricted. If Restricted, type the
time in the boxes in minutes and seconds.
•
Hide question: Hides the question
•
High-Stakes question: Makes the question available only for testing purposes.
High stakes questions are those you want hidden from selection lists when
creating non-testing assignments or activities (such as homework).
•
Copyright: Type the Copyright information in the box, which is optional.
•
Metadata: Three other metadata items can be displayed. For each metadata
item, choose an option from the list.
Click the Save and Close button to save the question. The question will now appear in
your Question Library.
At any point while creating a question, click the
button to view the question
content and layout. Note that, when these questions are played through the
MyNursingLab simulation player, your students will not see exactly what you see in the
Preview. Click Close to close the Preview window.
Editing a Fill in the Blank Question
To edit an existing fill in the blank question, complete the following steps:
- 47 -
MyNursingLab Instructor Guide Fall 2008
1. Click the Question Library button on the toolbar.
2. Click the option menu next to the appropriate question and then click Edit.
3. Edit the question, following the steps outlined for creating a question, saving the
changes when your edits are complete.
Trying Out a Fill in the Blank Question
To preview an existing fill in the blank question, complete the following steps:
1. Click the Question Library button on the toolbar.
2. Click the option menu next to the appropriate question and then click Tryout.
3. The question will display in a Preview window. You can test the question, view
hints, and click Submit for Grading to view feedback. Note that, when these
questions are played through the MyNursingLab simulation player, your students
will not see exactly what you see in the Preview. Click the red [x] button or the
Return to Course Content button to close the window
Deleting a Fill in the Blank Question
To delete an existing fill in the blank question, complete the following steps:
1. Click the Question Library button on the toolbar.
2. Click the option menu next to the appropriate question and then click Delete (or
click the check box next to the appropriate question and click the Delete link
on the toolbar).
3. When the message box displays, asking you to confirm the deletion, click OK to
delete or Cancel to cancel the deletion.
Creating a File Upload Question
To create a file upload question, complete the following steps:
1. Point to the Course Content button on the toolbar and then click Manage
Question Library.
Add Content button. On the Add Content menu, click Fill in the
2. Click the
Blank.
3. The Create File Upload window opens. The screen displays two main areas:
Question & Answers and Hints. You can expand or collapse these areas by
clicking on the bar or the
(expand) and
(collapse) buttons.
Note: These instructions take you through a linear progression of creating a File Upload question.
However, after the information is entered in one area, you can switch to another area; your inputs
will be saved. You also can click the Save and Close button to save the question and return to
Question Library at any time.
Note: While working on a question, you can see how the question will be displayed for the
students by clicking the Preview button. To view a sample question, click the
Question icon.
Sample
Question & Answers: Add/Edit Question
The Question & Answers section allows you to enter the question title, question text and
blank. The Question & Answers section has two subsections: Add/Edit Question and
Add/Edit Answer. To enter a question, use the following steps:
1. In the Edit Question area, in the Question title text box, enter the question
name. Be sure to use a descriptive name, as this is the way you will identify the
question in the Question Library.
- 48 -
MyNursingLab Instructor Guide Fall 2008
2. Enter the question text in the Content Editor to define the text that displays to
students. Be sure to be specific about what files or files you expect students to
upload. For more information, read the Content Editor topic.
3. Click the Add Answer subsection bar.
Question & Answers: Add/Edit Answer
In the Add Answer section, enter the following information:
1. Type the maximum score and feedback message in the respective textboxes.
The Edit button opens the Content Editor, which enables you to format text,
insert images, hyperlinks, HTML code and the audio player. For more information
on using the Content Editor, click here.
2. Click the Hints subsection bar.
Hints
The Hints section displays, showing three areas where you can enter optional question
hints. Hints only display to students in Skill-Based Training, Project-Based Training, or
Objective-Based Question Only activities. At the time of scheduling these three types of
activities, you can turn hints on or off.
1. In the Hint 1 text box, type the desired hint text. If you want to format the
feedback using fonts, colors, and more, click the Edit button to open the Content
Editor and format your text appropriately.
2. Complete the same process to enter Hint 2 and Hint 3.
3. Click the Preferences subsection bar.
Preferences
The Preferences section for the question displays, allowing you to further customize the
question.
• Time to answer: Choose either Unlimited or Restricted. If Restricted, type the
time in the boxes in minutes and seconds.
• Hide question: Hides the question
• High-Stakes question: Makes the question available only for testing purposes.
High stakes questions are those you want hidden from selection lists when
creating non-testing assignments or activities (such as homework).
• Copyright: Type the Copyright information in the box, which is optional.
• Metadata: Three other metadata items can be displayed. For each metadata
item, choose an option from the list.
Click the Save and Close button to save the question. The question will now appear in
your Question Library.
At any point while creating a question, click the
button to view the question
content and layout. Click Close to close the Preview window.
Editing a File Upload Question
To edit an existing file upload question, complete the following steps:
1. Click the Question Library button on the toolbar.
2. Click the option menu next to the appropriate question and then click Edit.
3. Edit the question, following the steps outlined for creating a question, saving the
changes when your edits are complete.
Trying Out a File Upload Question
To preview an existing file upload question, complete the following steps:
- 49 -
MyNursingLab Instructor Guide Fall 2008
1. Click the Question Library button on the toolbar.
2. Click the option menu next to the appropriate question and then click Tryout.
3. The question will display in a Preview window. You can test the question, view
hints, and click Submit for Grading to view feedback. Note that, when these
questions are played through the MyNursingLab simulation player, your students
will not see exactly what you see in the Preview. Click the red [x] button or the
Return to Course Content button to close the window
Deleting a File Upload Question
To delete an existing file upload question, complete the following steps:
1. Click the Question Library button on the toolbar.
2. Click the option menu next to the appropriate question and then click Delete (or
click the check box next to the appropriate question and click the Delete link
on the toolbar).
3. When the message box displays, asking you to confirm the deletion, click OK to
delete or Cancel to cancel the deletion.
Creating a Flash™ Question
To create a Flash question, complete the following steps:
1. Point to the Course Content button on the toolbar and then click Manage
Question Library.
Add Content button. On the Add Content menu, click Flash.
2. Click the
3. The Create Flash window opens. The screen displays two main areas:
Question & Answers and Hints. You can expand or collapse these areas by
clicking on the bar or the
(expand) and
(collapse) buttons.
Note: These instructions take you through a linear progression of creating a Flash question.
However, after the information is entered in one area, you can switch to another area; your inputs
will be saved. You also can click the Save and Close button to save the question and return to
Question Library at any time.
Note: While working on a question, you can see how the question will be displayed for the
students by clicking the Preview button. To view a sample question, click the
Question icon.
Sample
Question & Answers: Add/Edit Question
The Question & Answers section allows you to enter the question title, question text and
blank. The Question & Answers section has two subsections: Add/Edit Question and
Add/Edit Answer. To enter a question, use the following steps:
1. In the Edit Question area, in the Question title text box, enter the question
name. Be sure to use a descriptive name, as this is the way you will identify the
question in the Question Library.
2. Enter the question text in the Content Editor to define the text that displays with
the Flash file. For more information, read the Content Editor topic.
3. Click the Add Answer subsection bar.
Question & Answers: Add/Edit Answer
In the Add Answer section, you can add the Flash question file for the question.
1. Click the Choose button to select the Flash question file. The Select Content
window opens. Note: The Flash file must be a .swf file and already uploaded to
- 50 -
MyNursingLab Instructor Guide Fall 2008
the Content Library. For information on adding Flash question files to the Content
Library, click here.
2. Type the Flash size settings for the height and width of the Flash file, if different
from the default settings (640x480).
3. Type the maximum score and feedback message in the respective textboxes.
The Edit button opens the Content Editor, which enables you to format text,
insert images, hyperlinks, HTML code and the audio player. For more information
on using the Content Editor, click here.
4. Click the Hints subsection bar.
Hints
The Hints section displays, showing three areas where you can enter optional question
hints. Hints only display to students in Skill-Based Training, Project-Based Training, or
Objective-Based Question Only activities. At the time of scheduling these three types of
activities, you can turn hints on or off.
1. In the Hint 1 text box, type the desired hint text. If you want to format the
feedback using fonts, colors, and more, click the Edit button to open the Content
Editor and format your text appropriately.
2. Complete the same process to enter Hint 2 and Hint 3.
3. Click the Preferences subsection bar.
Preferences
The Preferences section for the question displays, allowing you to further customize the
question.
• Locale: Choose a language/locale from the list.
• Asset path: Type the asset URL in the text box. This path points to the
content folder that is stored in the media server or repository. You can
also copy and paste the URL. The path can hold a maximum of 1024
characters.
• XML path: Type the XML URL in the text box. This path points contains
the XML file for the specific activity. You can also copy and paste the
URL. The path can hold a maximum of 1024 characters. Note: The upper
character limit for Asset Path and XML is up to 1024 characters.
• Time to answer: Choose either Unlimited or Restricted. If Restricted, type
the time in the boxes in minutes and seconds.
• Hide question: Hides the question
• High-Stakes question: Makes the question available only for testing
purposes.: High stakes questions are those you want hidden from
selection lists when creating non-testing assignments or activities (such
as homework).
• Copyright: Type the Copyright information in the box, which is optional.
• Metadata: Three other metadata items can be displayed. For each
metadata item, choose an option from the list.
Click the Save and Close button to save the question. The question will now appear in
your Question Library.
At any point while creating a question, click the
button to view the question
content and layout. Click Close to close the Preview window.
Editing a Flash Question
To edit an existing Flash question, complete the following steps:
1. Click the Question Library button on the toolbar.
- 51 -
MyNursingLab Instructor Guide Fall 2008
2. Click the option menu next to the appropriate question and then click Edit.
3. Edit the question, following the steps outlined for creating a question, saving the
changes when your edits are complete.
Previewing a Flash Question
To preview an existing Flash question, complete the following steps:
1. Click the Question Library button on the toolbar.
2. Click the option menu next to the appropriate question and then click Tryout.
3. The question will display in a Preview window. You can test the question, view
hints, and click Submit for Grading to view feedback. Note that, when these
questions are played through the MyNursingLab simulation player, your students
will not see exactly what you see in the Preview. Click the red [x] button or the
Return to Course Content button to close the window
Deleting a Flash Question
To delete an existing Flash question, complete the following steps:
1. Click the Question Library button on the toolbar.
2. Click the option menu next to the appropriate question and then click Delete (or
click the check box next to the appropriate question and click the Delete link
on the toolbar).
3. When the message box displays, asking you to confirm the deletion, click OK to
delete or Cancel to cancel the deletion.
Creating a Matching Question
To create a matching question, complete the following steps:
1. Point to the Course Content button on the toolbar and then click Manage
Question Library.
2. Click the
Add Content button. On the Add Content menu, click Matching.
3. The Create Matching window opens to the Question tab. The screen displays
two main areas: Question & Answers and Hints. You can expand or collapse
these areas by clicking on the bar or the
buttons.
(expand) and
(collapse)
Note: These instructions take you through a linear progression of creating a Flash question.
However, after the information is entered in one area, you can switch to another area; your inputs
will be saved. You also can click the Save and Close button to save the question and return to
Question Library at any time.
Note: While working on a question, you can see how the question will be displayed for the
students by clicking the Preview button. To view a sample question, click the
Question icon.
Sample
Question & Answers: Add/Edit Question
The Question & Answers section allows you to enter the question title, question text and
blank. The Question & Answers section has two subsections: Add/Edit Question and
Add/Edit Answer. To enter a question, use the following steps:
1. In the Add/Edit Question area, in the Question title text box, enter the question
name. Be sure to use a descriptive name, as this is the way you will identify the
question in the Question Library.
- 52 -
MyNursingLab Instructor Guide Fall 2008
2. Enter the question text in the Content Editor. For more information, read the
Content Editor topic.
3. Click the Add/Edit Answer subsection bar.
Question & Answers: Add/Edit Answer
The Add/Edit Answer section allows you to enter matching options.
1. In the Answers window, in the first row, type the Text in the text box for the first
matching option. If you want to format your answer using fonts, colors, and more,
click the Edit/Choose button to open the Content Editor and format your text
appropriately.
2. Next, type the Match text in the second text box.
Note: When displayed to a student, the Text entered in the first text box appears on the left side
of the matching question as text and the Match text entered in the second text box appears in a
drop-down list on the right side of the matching question. Be aware that, when creating a
question, if one set of text is much longer than the other, put the longer items in the first text box.
(For example, if you have a series or definitions and terms in a matching question, type the
definition text in the first text box and the terms in the second match text box.) This prevents the
drop-down list from being too long and making matching options hard to read.
3. Enter the Score for correct and incorrect answers, being sure to put an
appropriate score for the correct answer (default is 1).
4. Enter the Feedback for correct and incorrect answers (for example, Correct or
Incorrect). If you want to format your answer using fonts, colors, and more, click
the Edit/Choose button to open the Content Editor and format your text
appropriately.
5. If you want to have more than four matching choices, click the Add link. An
Answer choice is added to the question. Repeat the steps above to add
additional matching items. If you want your question to have fewer than four
answer choices, click the
Delete link and then click OK to confirm the deletion.
Note: you must delete any blank choices before proceeding to the Hints section.
6. Under Options, select the Shuffle choices check box, if you want to shuffle
(randomize) the answer choices when they are displayed to the student.
7. Click the Hints subsection bar.
Hints
The Hints section displays, showing three areas where you can enter optional question
hints. Hints only display to students in Skill-Based Training, Project-Based Training, or
Objective-Based Question Only activities. At the time of scheduling these three types of
activities, you can turn hints on or off.
1. In the Hint 1 text box, type the desired hint text. If you want to format the
feedback using fonts, colors, and more, click the Edit button to open the Content
Editor and format your text appropriately.
2. Complete the same process to enter Hint 2 and Hint 3.
3. Click the Preferences subsection bar.
Preferences
The Preferences section for the question displays, allowing you to further customize the
question.
•
Time to answer: Choose either Unlimited or Restricted. If Restricted, type the
time in the boxes in minutes and seconds.
•
Hide question: Hides the question
•
High-Stakes question: Makes the question available only for testing purposes.:
High stakes questions are those you want hidden from selection lists when
creating non-testing assignments or activities (such as homework).
- 53 -
MyNursingLab Instructor Guide Fall 2008
•
•
Copyright: Type the Copyright information in the box, which is optional.
Metadata: Three other metadata items can be displayed. For each metadata
item, choose an option from the list.
Click the Save and Close button to save the question. The question will now appear in
your Question Library.
At any point while creating a question, click the
button to view the question
content and layout. Note that, when these questions are played through the
MyNursingLab simulation player, your students will not see exactly what you see in the
Preview. Click Close to close the Preview window.
Editing a Matching Question
1. Click the Question Library button on the toolbar.
2. Click the option menu next to the appropriate question and then click Edit.
3. Edit the question, following the steps outlined for creating a question, saving the
changes when your edits are complete.
Previewing a Matching Question
To preview an existing matching question, complete the following steps:
1. Click the Question Library button on the toolbar.
2. Click the option menu next to the appropriate question and then click Tryout.
3. The question will display in a Preview window. You can test the question, view
hints, and click Submit for Grading to view feedback. Note that, when these
questions are played through the MyNursingLab simulation player, your students
will not see exactly what you see in the Preview. Click the red [x] button or the
Return to Course Content button to close the window
Deleting a Matching Question
To delete an existing matching question, complete the following steps:
1. Click the Question Library button on the toolbar.
2. Click the option menu next to the appropriate question and then click Delete (or
click the check box next to the appropriate question and click the Delete link
on the toolbar).
3. When the message box displays, asking you to confirm the deletion, click OK to
delete or Cancel to cancel the deletion.
Creating a Multiple Choice Question
To create a multiple choice question, complete the following steps:
1. Point to the Course Content button on the toolbar and then click Manage
Question Library.
2. Click the
Add Content button. On the Add Content menu, click Multiple
Choice.
3. The Create Multiple Choice window opens. The screen displays three main
areas: Question Layout, Question & Answers and Hints. You can expand or
collapse these areas by clicking on the bar or the
(collapse) buttons.
- 54 -
(expand) and
MyNursingLab Instructor Guide Fall 2008
Note: These instructions take you through a linear progression of creating a Flash question.
However, after the information is entered in one area, you can switch to another area; your inputs
will be saved. You also can click the Save and Close button to save the question and return to
Question Library at any time.
Note: While working on a question, you can see how the question will be displayed for the
students by clicking the Preview button. To view a sample question, click the
Question icon.
Sample
Question Layout
The Question Layout displays multiple page layout options. These layouts determine how
the question and answer appear to students during a test. The layout either contains one
or two text fields and a answer location. Question, or supplemental question text, display
in the text fields (either field A or field B). By default, the layout with the questions at the
top and the answers at the bottom is selected.
1. Choose the desired layout for your Multiple Choice question:
•
A and Answer Location: Choose one of these layouts to display one
Question text field "A" and an Answer location.
•
A, B and Answer Location: Choose one of these layouts to display two
Question text fields "A" and "B", and an Answer location. This type of
layout might be appropriate if you want to use a text description along
with an image below or to the right of the text.
2. The selected layout is displayed with the appropriate number of text fields.
Question & Answers: Add/Edit Question
The Question & Answers section allows you to enter the question title, question text and
blank. The Question & Answers section has two subsections: Add/Edit Question and
Add/Edit Answer. To enter a question, use the following steps:
1. In the Question title text box, enter the question name. Be sure to use a
descriptive name, as this is the way you will identify the question in the Question
Library.
2. Enter the question text for section A and B (if selected) in the Question Section:
A and Question Section: B areas. For more information, read the Content Editor
topic.
3. Click the Add/Edit Answer subsection bar.
Note: You can change the question layout at any time. However, if you attempt to switch from a
layout with two question text fields to a layout with only one question field, you are asked to
confirm you want to make the switch as the text you entered in section B will not be used in the
new layout.
Question & Answers: Add/Edit Answer
The Answer tab displays, showing the Question text at the top of the window. Next, you
will enter multiple choice options.
1. In the Answer window, in the first row, select the type of answer from the dropdown list. Note that only Text and Image are supported in MyNursingLab at this
time; Audio and Movie are not.
2. If you have selected Text, type the answer in the text box for that answer choice.
If you want to format your answer using fonts, colors, and more, click the
Edit/Choose button to open the Content Editor and format your text
appropriately. Click OK to save your changes.
3. If you have selected Image and want to use an image as an answer option, click
the Edit/Choose button. The Select Content window opens, showing a view of
the Content Library. Navigate through the Content Library to find the appropriate
- 55 -
MyNursingLab Instructor Guide Fall 2008
image. Select the option button next to the image and then click the Add and
Close button. The name of the image appears in the text box.
Note: If you want to use an image or graphic in a question or HTML page you are creating, you
first must upload that graphic into the Content Library, as a file. See Add a File for more
information on uploading graphics (and other file types). Images can be any valid image file
format supported by a browser.
4. Under Options, select the Shuffle choices check box, if you want to shuffle
(randomize) the answer choices when they are displayed to the student. If you do
not select Shuffle choices, the answers will appear in the same order to all
students.
5. If you choose Shuffle choices, you also can one or more answers in place, so
that these answer choices will not be shuffled, while the other answers are. To
pin an answer choice, select the check box(es) next to the corresponding
choice(s) and then click Pin/Unpin Answer link. A small
pin icon appears
to indicate an answer choice is pinned.
6. Enter the Score for each answer, being sure to put an appropriate score for the
correct answer (default is 1).
7. Enter the Feedback for each answer (for example, Correct or Incorrect). If you
want to format the feedback using fonts, colors, and more, click the Edit/Choose
button to open the Content Editor and format your text appropriately.
8. If you want to have more than four answer choices, click the Add link. An
Answer choice is added to the question. Follow the steps outlined to add the
appropriate information. If you want to delete one of the answer choices, click the
Delete link and then click OK to confirm the deletion.
9. Under Options, select Horizontal or Vertical as a presentation layout.
Horizontal displays all of the answer choices in a single row, below the question
text. Vertical displays all of the answer choices in a single column, below the
question text.
10. At any point while creating a question, click the
button to view the
question content and layout. Note that, when these questions are played through
the MyNursingLab simulation player, your students will not see exactly what you
see in the Preview. Click Close to close the Preview window.
11. Click the Hints subsection bar.
Hints
The Hints section displays, showing three areas where you can enter optional question
hints. Hints only display to students in Skill-Based Training, Project-Based Training, or
Objective-Based Question Only activities. At the time of scheduling these three types of
activities, you can turn hints on or off.
1. In the Hint 1 text box, type the desired hint text. If you want to format the
feedback using fonts, colors, and more, click the Edit button to open the Content
Editor and format your text appropriately.
2. Complete the same process to enter Hint 2 and Hint 3.
3. Click the Preferences subsection bar.
Preferences
The Preferences section for the question displays, allowing you to further customize the
question.
•
Time to answer: Choose either Unlimited or Restricted. If Restricted, type
the time in the boxes in minutes and seconds.
•
Hide question: Hides the question
•
High-Stakes question: Makes the question available only for testing
purposes. High stakes questions are those you want hidden from
- 56 -
MyNursingLab Instructor Guide Fall 2008
•
•
selection lists when creating non-testing assignments or activities (such
as homework).
Copyright: Type the Copyright information in the box, which is optional.
Metadata: Three other metadata items can be displayed. For each
metadata item, choose an option from the list.
Click the Save and Close button to save the question. The question will now appear in
your Question Library.
button to view the question
At any point while creating a question, click the
content and layout. Note that, when these questions are played through the
MyNursingLab simulation player, your students will not see exactly what you see in the
Preview. Click Close to close the Preview window.
Editing a Multiple Choice Question
To edit an existing multiple choice question, complete the following steps:
1. Click the Question Library button on the toolbar.
2. Click the option menu next to the appropriate question and then click Edit.
3. Edit the question, following the steps outlined for creating a question, saving the
changes when your edits are complete.
Previewing a Multiple Choice Question
To preview an existing multiple choice question, complete the following steps:
1. Click the Question Library button on the toolbar.
2. Click the option menu next to the appropriate question and then click Tryout.
3. The question will display in a Preview window. You can test the question, view
hints, and click Submit for Grading to view feedback. Note that, when these
questions are played through the MyNursingLab simulation player, your students
will not see exactly what you see in the Preview. Click the red [x] button or the
Return to Course Content button to close the window
Deleting a Multiple Choice Question
To delete an existing multiple choice question, complete the following steps:
1. Click the Question Library button on the toolbar.
2. Click the option menu next to the appropriate question and then click Delete (or
click the check box next to the appropriate question and click the Delete link
on the toolbar).
3. When the message box displays, asking you to confirm the deletion, click OK to
delete or Cancel to cancel the deletion.
Creating a Multiple Response Question
A multiple response question is a variation of a multiple choice question, in which the
student is allowed to choose more than one choice. To create a multiple response
question, complete the following steps:
1. Point to the Course Content button on the toolbar and then click Manage
Question Library.
2. Click the
Add Content button. On the Add Content menu, click Multiple
Response.
3. The Create Multiple Choice window opens. The screen displays three main
areas: Question Layout, Question & Answers and Hints. You can expand or
- 57 -
MyNursingLab Instructor Guide Fall 2008
collapse these areas by clicking on the bar or the
(collapse) buttons.
(expand) and
Note: These instructions take you through a linear progression of creating a Flash question.
However, after the information is entered in one area, you can switch to another area; your inputs
will be saved. You also can click the Save and Close button to save the question and return to
Question Library at any time.
Note: While working on a question, you can see how the question will be displayed for the
students by clicking the Preview button. To view a sample question, click the
Question icon.
Sample
Question Layout
The Question Layout displays multiple page layout options. These layouts determine how
the question and answer appear to students during a test. The layout either contain one
or two text fields and a answer location. Question, or supplemental question text, display
in the text fields (either field A or field B). By default, the layout with the questions at the
top and the answers at the bottom is selected.
1. Choose the desired layout for your Multiple Choice question:
• A and Answer Location: Choose one of these layouts to display one
Question text field "A" and an Answer location.
• A, B and Answer Location: Choose one of these layouts to display
two Question text fields "A" and "B", and an Answer location. This
type of layout might be appropriate if you want to use a text
description along with an image below or to the right of the text.
2. The selected layout is displayed with the appropriate number of text fields.
Question & Answers: Add/Edit Question
The Question & Answers section allows you to enter the question title, question text and
blank. The Question & Answers section has two subsections: Add/Edit Question,
Add/Edit Choice, and Add/Edit Answer. To enter a question, use the following steps:
1. In the Question title text box, enter the question name. Be sure to use a
descriptive name, as this is the way you will identify the question in the Question
Library.
2. Choose a scoring criteria
3. Group scoring: Select this option to give students credit only when all of the
correct answer choices are selected. If you select this option, in the Answer
subsection, you need to select the correct answer choices to be included in the
group scoring.
4. Each option scored separately: Select this option to give students partial credit
for correct answer choices, even if the student has not selected all of the correct
choices.
5. Type the question text in the Content Editor. You only need to type the beginning
of the question, such as "Which of the following is true?". The multiple response
answer options will be entered on the next tab.
6. Click the Add/Edit Choice subsection bar.
Note: You can change the question layout at any time. However, if you attempt to switch from a
layout with two question text fields to a layout with only one question field, you are asked to
confirm you want to make the switch as the text you entered in section B will not be used in the
new layout.
Question & Answers: Add/Edit Choice
- 58 -
MyNursingLab Instructor Guide Fall 2008
The Add/Edit Choice section displays, showing the Question text at the top of the
window. Next, you will enter multiple response answer choices.
1. In the Enter choices window, in the first row, select the type of answer from the
drop-down list. Note that only Text and Image are supported in MyNursingLab at
this time; Audio and Movie are not.
2. If you have selected Text, type the answer in the Choice box for that answer
choice. If you want to format your answer using fonts, colors, and more, click the
Edit/Choose button to open the Content Editor and format your text
appropriately. Click OK to save your changes.
3. If you have selected Image and want to use an image as an answer option, click
the Edit/Choose button. The Select Content window opens, showing a view of
the Content Library. Navigate through the Content Library to find the appropriate
image. Select the option button next to the image and then click the Add and
Close button. The name of the image appears in the text box.
Note: If you want to use an image or graphic in a question or HTML page you are creating, you
first must upload that graphic into the Content Library, as a file. See Add a File for more
information on uploading graphics (and other file types). Images can be any valid image file
format supported by a browser.
4. Enter a Score for each choice, using 0 for incorrect choices and a value of 1 or
more for correct choices.
5. Under Options, enter the Minimum number of choices to be selected and the
Maximum number of choices to be selected. Be sure that the Minimum number
of choices accurately reflects the number of correct possible answers to the
question: if there are 2 possible correct answers, this should be set to 2. The
Maximum number of choices cannot be greater than the total number of choices.
6. Under Options, select the Shuffle choices check box, if you want to shuffle
(randomize) the answer choices when they are displayed to the student. If you do
not select Shuffle choices, the answers will appear in the same order to all
students.
7. If you choose Shuffle choices, you also can one or more answers in place, so
that these answer choices will not be shuffled, while the other answers are. To
pin an answer choice, select the check box(es) next to the corresponding
pin icon appears
choice(s) and then click Pin/Unpin Answer link. A small
to indicate an answer choice is pinned.
8. If you want to have more than four answer choices, click the Add link. An
Answer choice is added to the question. Follow the steps outlined to add the
appropriate information. If you want to delete one of the answer choices, click the
Delete link and then click OK to confirm the deletion.
9. Under Options, select Horizontal or Vertical as a presentation layout.
Horizontal displays all of the answer choices in a single row, below the question
text. Vertical displays all of the answer choices in a single column, below the
question text.
10. Click the Add/Edit Answer subsection bar.
Question & Answers: Add/Edit Answer
The Answer subsection displays, allowing you to select choice(s) for the answer and
give or change score and feedback.
1. If you chose Each option scored separately in the Add/Edit Question section,
confirm the Score for each answer and enter the Feedback for each answer (for
example, Correct or Incorrect). If you want to format the feedback using fonts,
colors, and more, click the Edit/Choose button to open the Content Editor and
format your text appropriately.
2. If you chose Group scoring in the Add/Edit Question section:
- 59 -
MyNursingLab Instructor Guide Fall 2008
a. Select the answer choices to be included in the group score (ex:
Choice_1, Choice_3) and click the Add button. The choice can be
combination of any number of answer choices; by default, the score will
be set to the sum of the selected choices.
b. In the lower pane, enter the overall Score for the question and enter the
Feedback for the question (for example, Correct or Incorrect). Enter a
score and feedback for any other choices selected by the student. If you
want to format the feedback using fonts, colors, and more, click the
Edit/Choose button to open the Content Editor and format your text
appropriately.
c. Enter the score and feedback for other choice selection in the Score and
Feedback textboxes. This score will be credited to the students if they
group any other choices while answering to the question. Any other
grouped answer choices other than the ones specified will be allotted
with this score and feedback.
3. Click the Hints subsection bar.
Hints
The Hints section displays, showing three areas where you can enter optional question
hints. Hints only display to students in Skill-Based Training, Project-Based Training, or
Objective-Based Question Only activities. At the time of scheduling these three types of
activities, you can turn hints on or off.
1. In the Hint 1 text box, type the desired hint text. If you want to format the
feedback using fonts, colors, and more, click the Edit button to open the Content
Editor and format your text appropriately.
2. Complete the same process to enter Hint 2 and Hint 3.
3. Click the Preferences subsection bar.
Preferences
The Preferences section for the question displays, allowing you to further customize the
question.
•
Time to answer: Choose either Unlimited or Restricted. If Restricted, type
the time in the boxes in minutes and seconds.
•
Hide question: Hides the question
•
High-Stakes question: Makes the question available only for testing
purposes.: High stakes questions are those you want hidden from
selection lists when creating non-testing assignments or activities (such as
homework).
•
Copyright: Type the Copyright information in the box, which is optional.
•
Metadata: Three other metadata items can be displayed. For each
metadata item, choose an option from the list.
Click the Save and Close button to save the question. The question will now appear in
your Question Library.
At any point while creating a question, click the
button to view the question
content and layout. Note that, when these questions are played through the
MyNursingLab simulation player, your students will not see exactly what you see in the
Preview. Click Close to close the Preview window.
Editing a Multiple Response Question
To edit an existing multiple response question, complete the following steps:
1. Click the Question Library button on the toolbar.
- 60 -
MyNursingLab Instructor Guide Fall 2008
2. Click the option menu next to the appropriate question and then click Edit.
3. Edit the question, following the steps outlined for creating a question, saving the
changes when your edits are complete.
Previewing a Multiple Response Question
To preview an existing multiple response question, complete the following steps:
1. Click the Question Library button on the toolbar.
2. Click the option menu next to the appropriate question and then click Tryout.
3. The question will display in a Preview window. You can test the question, view
hints, and click Submit for Grading to view feedback. Note that, when these
questions are played through the MyNursingLab simulation player, your students
will not see exactly what you see in the Preview. Click the red [x] button or the
Return to Course Content button to close the window
Deleting a Multiple Response Question
To delete an existing multiple response question, complete the following steps:
1. Click the Question Library button on the toolbar.
2. Click the option menu next to the appropriate question and then click Delete (or
click the check box next to the appropriate question and click the Delete link
on the toolbar).
3. When the message box displays, asking you to confirm the deletion, click OK to
delete or Cancel to cancel the deletion.
Creating a Ranking Question
A ranking question is asks the student to rank a number of series of items, in order from 1
to x. A student must get all of the items in the correct ranked order to get the question
correct. To create a ranking question, complete the following steps:
1. Point to the Course Content button on the toolbar and then click Manage
Question Library.
2. Click the
Add Content button. On the Add Content menu, click Ranking.
3. The Create Ranking window opens. The screen displays two main areas:
Question & Answers and Hints. You can expand or collapse these areas by
clicking on the bar or the
(expand) and
(collapse) buttons.
Note: These instructions take you through a linear progression of creating a Flash question.
However, after the information is entered in one area, you can switch to another area; your inputs
will be saved. You also can click the Save and Close button to save the question and return to
Question Library at any time.
Note: While working on a question, you can see how the question will be displayed for the
students by clicking the Preview button. To view a sample question, click the
Question icon.
Sample
Question & Answers: Add/Edit Question
The Question & Answers section allows you to enter the question title, question text and
blank. The Question & Answers section has two subsections: Add/Edit Question and
Add/Edit Answer. To enter a question, use the following steps:
1. In the Add/Edit Question area, in the Question title text box, enter the question
name. Be sure to use a descriptive name, as this is the way you will identify the
question in the Question Library.
- 61 -
MyNursingLab Instructor Guide Fall 2008
2. Enter the question text in the Content Editor. For more information, read the
Content Editor topic.
3. Click the Add/Edit Answer subsection bar.
Note: These instructions take you through a linear progression of creating a Ranking question.
However, after the Question tab information is entered, you can switch between all tabs simply by
clicking the tab. You also can click the Save and Return button to save the question and return
to Question Library at any time.
Question & Answers: Add/Edit Answer
The Add/Edit Answer section allows you to enter ranking options.
1. In the Choice and Rank section, type an item to be ranked in the Text box. If you
want to format your answer using fonts, colors, and more, click the Edit/Choose
button to open the Content Editor and format your text appropriately. Click OK to
save your changes.
2. To the right of the text box, in the Rank box, indicate the Rank of this item
relative to the other items. Ranking options must be in a series or integers from 1
to x.
3. If you want to have more than four ranking items, click the Add link. An item is
added to the question. Follow the steps outlined to add the appropriate
information. If you want to delete one of the items, click the Delete link and
then click OK to confirm the deletion.
4. Under Options, click the Shuffle choices check box, if you want to shuffle the
choices.
5. Enter a Score for a correct answer and an incorrect answer. Note: a student
must get all of the items in the correct ranked order to get the question correct. .
6. Enter the Feedback for each answer (for example, Correct or Incorrect). If you
want to format the feedback using fonts, colors, and more, click the Edit/Choose
button to open the Content Editor and format your text appropriately.
7. Click the Hints subsection bar.
Hints
The Hints section displays, showing three areas where you can enter optional question
hints. Hints only display to students in Skill-Based Training, Project-Based Training, or
Objective-Based Question Only activities. At the time of scheduling these three types of
activities, you can turn hints on or off.
1. In the Hint 1 text box, type the desired hint text. If you want to format the
feedback using fonts, colors, and more, click the Edit button to open the Content
Editor and format your text appropriately.
2. Complete the same process to enter Hint 2 and Hint 3.
3. Click the Preferences subsection bar.
Preferences
The Preferences section for the question displays, allowing you to further customize the
question.
•
Time to answer: Choose either Unlimited or Restricted. If Restricted, type
the time in the boxes in minutes and seconds.
•
Hide question: Hides the question
•
High-Stakes question: Makes the question available only for testing
purposes. High stakes questions are those you want hidden from
selection lists when creating non-testing assignments or activities (such
as homework).
•
Copyright: Type the Copyright information in the box, which is optional.
•
Metadata: Three other metadata items can be displayed. For each
metadata item, choose an option from the list.
- 62 -
MyNursingLab Instructor Guide Fall 2008
Click the Save and Close button to save the question. The question will now appear in
your Question Library.
At any point while creating a question, click the
button to view the question
content and layout. Note that, when these questions are played through the
MyNursingLab simulation player, your students will not see exactly what you see in the
Preview. Click Close to close the Preview window.
Editing a Ranking Question
To edit an existing ranking question, complete the following steps:
1. Click the Question Library button on the toolbar.
2. Click the option menu next to the appropriate question and then click Edit.
3. Edit the question, following the steps outlined for creating a question, saving the
changes when your edits are complete.
Previewing a Ranking Question
To preview an existing ranking question, complete the following steps:
1. Click the Question Library button on the toolbar.
2. Click the option menu next to the appropriate question and then click Tryout.
3. The question will display in a Preview window. You can test the question, view
hints, and click Submit for Grading to view feedback. Note that, when these
questions are played through the MyNursingLab simulation player, your students
will not see exactly what you see in the Preview. Click the red [x] button or the
Return to Course Content button to close the window
Deleting a Ranking Question
To delete an existing ranking question, complete the following steps:
1. Click the Question Library button on the toolbar.
2. Click the option menu next to the appropriate question and then click Delete (or
click the check box next to the appropriate question and click the Delete link
on the toolbar).
3. When the message box displays, asking you to confirm the deletion, click OK to
delete or Cancel to cancel the deletion.
Creating a True/False Question
To create a true/false question, complete the following steps:
1. Point to the Course Content button on the toolbar and then click Manage
Question Library.
2. Click the
Add Content button. On the Add Content menu, click True/False.
3. The Create True/False window opens. The screen displays two main areas:
Question & Answers and Hints. You can expand or collapse these areas by
clicking on the bar or the
(expand) and
(collapse) buttons.
Note: These instructions take you through a linear progression of creating a Flash question.
However, after the information is entered in one area, you can switch to another area; your inputs
will be saved. You also can click the Save and Close button to save the question and return to
Question Library at any time.
- 63 -
MyNursingLab Instructor Guide Fall 2008
Note: While working on a question, you can see how the question will be displayed for the
students by clicking the Preview button. To view a sample question, click the
Question icon.
Sample
Question & Answers: Add/Edit Question
The Question & Answers section allows you to enter the question title, question text and
blank. The Question & Answers section has two subsections: Add/Edit Question and
Add/Edit Answer. To enter a question, use the following steps:
1. In the Add/Edit Question area, in the Question title text box, enter the question
name. Be sure to use a descriptive name, as this is the way you will identify the
question in the Question Library.
2. Enter the question text in the Content Editor. For more information, read the
Content Editor topic.
3. Click the Add/Edit Answer subsection bar.
Note: These instructions take you through a linear progression of creating a True/False question.
However, after the Question tab information is entered, you can switch between all tabs simply by
clicking the tab. You also can click the Save and Return button to save the question and return
to Question Library at any time.
Question & Answers: Add/Edit Answer
The Add/Edit Answer section allows you to enter ranking options.
1. By default, the answer options provided are True and False. Edit these as
needed to include any two responses (for example, you can use this question
type to create a Yes/No question).
2. If you want to format the answer options using fonts, colors, and more, click the
Edit button to open the Content Editor and format your text appropriately. Click
OK to save your changes.
3. Enter the Score for each answer, being sure to put an appropriate score for the
correct answer (default is 1).
4. Enter the Feedback for each answer (for example, Correct or Incorrect). If you
want to format the feedback using fonts, colors, and more, click the Edit/Choose
button to open the Content Editor and format your text appropriately.
5. Under Options, select Horizontal or Vertical as a presentation layout.
Horizontal displays all of the answer choices in a single row, below the question
text. Vertical displays all of the answer choices in a single column, below the
question text.
6. Click the Hints subsection bar.
Hints
The Hints section displays, showing three areas where you can enter optional question
hints. Hints only display to students in Skill-Based Training, Project-Based Training, or
Objective-Based Question Only activities. At the time of scheduling these three types of
activities, you can turn hints on or off.
1. In the Hint 1 text box, type the desired hint text. If you want to format the
feedback using fonts, colors, and more, click the Edit button to open the Content
Editor and format your text appropriately.
2. Complete the same process to enter Hint 2 and Hint 3.
3. Click the Preferences subsection bar.
Preferences
The Preferences section for the question displays, allowing you to further customize the
question.
- 64 -
MyNursingLab Instructor Guide Fall 2008
•
•
•
•
•
Time to answer: Choose either Unlimited or Restricted. If Restricted, type
the time in the boxes in minutes and seconds.
Hide question: Hides the question
High-Stakes question: Makes the question available only for testing
purposes. High stakes questions are those you want hidden from
selection lists when creating non-testing assignments or activities (such
as homework).
Copyright: Type the Copyright information in the box, which is optional.
Metadata: Three other metadata items can be displayed. For each
metadata item, choose an option from the list.
Click the Save and Close button to save the question. The question will now appear in
your Question Library.
At any point while creating a question, click the
button to view the question
content and layout. Note that, when these questions are played through the
MyNursingLab simulation player, your students will not see exactly what you see in the
Preview. Click Close to close the Preview window.
Editing a True/False Question
To edit an existing true/false question, complete the following steps:
1. Click the Question Library button on the toolbar.
2. Click the option menu next to the appropriate question and then click Edit.
3. Edit the question, following the steps outlined for creating a question, saving the
changes when your edits are complete.
Previewing a True/False Question
To preview an existing true/false question, complete the following steps:
1. Click the Question Library button on the toolbar.
2. Click the option menu next to the appropriate question and then click Tryout.
3. The question will display in a Preview window. You can test the question, view
hints, and click Submit for Grading to view feedback. Note that, when these
questions are played through the MyNursingLab simulation player, your students
will not see exactly what you see in the Preview. Click the red [x] button or the
Return to Course Content button to close the window
Deleting a True/False Question
To delete an existing true/false question, complete the following steps:
1. Click the Question Library button on the toolbar.
2. Click the option menu next to the appropriate question and then click Delete (or
click the check box next to the appropriate question and click the Delete link
on the toolbar).
3. When the message box displays, asking you to confirm the deletion, click OK to
delete or Cancel to cancel the deletion.
Options: Question Library
- 65 -
MyNursingLab Instructor Guide Fall 2008
After you have added an item to the Question Library, you can edit, preview, and perform
other actions on the item, using the options menu available in the Question Library
window. The options available on the options menu vary, according to the item.
Folder
In Question Library, several options are available on the Folder options menu, as listed
below.
Opening a Folder
To open an existing folder, complete the following steps:
1. Click the Question Library button on the toolbar.
2. In the Question Library window, click the folder name click the option menu next
to the appropriate folder and then click Open.
3. The folder opens.
Editing a Folder
To edit an existing folder, complete the following steps:
1. Click the Question Library button on the toolbar.
2. In the Question Library window, click the option menu next to the appropriate
folder and then click Edit.
3. Edit the folder name and description and select or deselect the Question Folder
check box. For more information on adding a Folder, click here. Click Save to
save the changes (or Cancel to cancel the changes).
Deleting a Folder
To delete a folder, complete the following steps:
1. Click the Course Content button on the toolbar.
2. In the Content Library window, click the option menu next to the appropriate
folder and then click Delete (or click the check box next to the appropriate folder
and click the Delete link on the toolbar).
3. When the message box displays, asking you to confirm the deletion, click OK to
delete or Cancel to cancel the deletion.
Objective-Based Questions
In Question Library, several options are available on the options menu for various
objective-based question types, as listed below.
Editing a Question
1. Click the Question Library button on the toolbar.
2. Click the option menu next to the appropriate question and then click Edit.
3. Edit the question, following the steps outlined for creating a question, saving the
changes when your edits are complete.
Deleting a Question
To delete a question, complete the following steps:
1. Click the Question Library button on the toolbar.
2. Click the option menu next to the appropriate question and then click Delete (or
click the check box next to the appropriate question and click the Delete link
on the toolbar).
3. When the message box displays, asking you to confirm the deletion, click OK to
delete or Cancel to cancel the deletion.
- 66 -
MyNursingLab Instructor Guide Fall 2008
Trying Out a Question
To preview an existing fill in the blank question, complete the following steps:
1. Click the Question Library button on the toolbar.
2. Click the option menu next to the appropriate question and then click Tryout.
3. The question will display in a Preview window. You can test the question, view
hints, and click Submit for Grading to view feedback. Note that, when these
questions are played through the MyNursingLab simulation player, your students
will not see exactly what you see in the Preview. Click the red [x] button or the
Return to Course Content button to close the window
Adding Content to Course
Overview
To add content to the Content Library or Course Content, complete the following steps:
1. Navigate to the location where you want to add the content.
2. Click the Add Content button. On the Add Content menu, click the desired
content type. .
3. Follow the steps for the appropriate content type to add the item to Content
Library or Course Content.
• Adding a Folder
• Adding Homework (a type of activity or assignment)
• Adding a Quiz (a type of activity or assignment)
• Adding a Practice Test (a type of activity or assignment)
• Adding a Test (a type of activity or assignment)
• Adding a Test Your Terminology (a type of activity or assignment)
• Adding a Study Plan (a type of activity or assignment)
• Adding a Discussion Topic
• Adding a Link
• Adding a File
• Adding Multiple Files
• Adding a Page
Add a Folder
MyNursingLab allows you to add folders into Content Library, Student Content, and
Question Library, so that you can better organize the items in your course.
To add a folder to the Content Library or Student Content, complete the following steps:
1. Navigate to the location where you want to create the folder. To create a
subfolder within another folder, for example, you first must navigate into the main
folder before adding the subfolder.
2. Click the Add Content button. On the Add Content menu, click Add Folder.
3. The Create New Folder window opens.
4. Type the Folder Name and Description in the appropriate text boxes.
5. If you also want this folder to appear in the Question Library, select the Question
folder checkbox. Typically, you would do this if a question will contain questions.
By default, this option is unchecked, [Note: If you are adding a folder to the
Question Library, this checkbox option is not available. All folders created
automatically appears in both Question Library and Content Library.]
6. Click the Create button. A new folder is created.
- 67 -
MyNursingLab Instructor Guide Fall 2008
Note: Folder name displays a maximum of 54 characters.
Folder Properties
Overview
Setting the Properties for a Folder allows you to set various scheduling options, such as
locations and dates. When you set scheduling options for a folder, all of the items in that
folder are subject to those properties (for example, you can place all of the activities for a
week in your course in a series of weekly folders -- and then make those folders available
to students one per week.) To view the Properties for a Folder, complete the following
steps:
1. Click the Course Content button on the toolbar.
2. In the Student Content window, click the option menu next to the appropriate
folder and then click Properties.
3. The Properties window displays, providing scheduling options.
The Properties window for a Folder includes four tabs in the left navigation bar:
• General
• Availability
• Select Students
General
The General tab displays by default. On the General tab, you can set the general
properties for the Folder
•
•
•
Name: The Folder name displays in the Name text box. You can edit the
name here, if desired.
Description: The Folder description displays in the Description text box.
You can edit the name here, if desired. [Note: this description appears to
students on the Course Content page.]
Require proctor password: If this check box is selected and a password is
entered, students will be required to enter a password to view the contents
of the folder.
Availability
Click the Availability link to display the Availability tab. On this tab, you can make the
Folder available or hidden in the Course Content, or make it available only on particular
dates. To set the availability properties, you can select an option from the following;
• Show in Course Content (Available): Click this option to make the Folder
always available for the students in the course content. By default this is
selected.
• Hide in Course Content (Hidden): Click this option to hide the Folder so
that it does not display in the student Course Content page.
• Make available in Course Content only on these dates: Click this option
to make the Folder available only on the particular dates specified. If you
select this option, set the start date/times and end date/times as follows:
1. Click the calendar icon corresponding to Start date, and then
choose a date.
2. Type the time for Start date in the Time boxes.
3. Click the calendar icon corresponding to End date, and then
choose a date.
4. Type the time for End date in the Time boxes.
- 68 -
MyNursingLab Instructor Guide Fall 2008
5. Select the Always show item in Course Content but prevent
students from opening it before or after these dates check
box to always show the Folder in student Course Content, but
to limit students from attempting it before or after the specified
dates. If you do not select this check box, the Folder will be
shown only on the specified dates.
Select Students
Click the Select Students link to display the Select Students tab. On this tab, you can
assign the Folder to all students or selected students. You can choose an option from the
following.
• Assign this item to all students: Click this option to assign the Folder to
all students. By default this option is selected
• Select specific students who should be assigned this item: Click this
option to assign the Folder to only selected students (for example, a
student or students who missed an exam). To select the students to whom
this activity should be assigned:
1. In the All Students window on the left, select the check box(es)
next to the corresponding student name(s).
button to move the student name(s) to the
2. Click the
Selected Students window on the right.
3. To remove any students from the Selected Students window,
select the check box(es) next to the corresponding student
name(s) and then click the
Remove link.
Click
Content window.
to save the Properties settings and return to the Student
Add an Activity or Assignment (such as a quiz, homework, or test)
An activity/assignment is used to evaluate student performance. To add an activity or
assignment to the Content Library or Student Content, complete the following steps:
1. Navigate to the location where you want to create the activity. To create an
activity within another folder, for example, you first must navigate into the main
folder before adding the activity.
2. Click the Add Content button. On the Add Content menu, click the type of
activity or assignment you want to add
Activity Details Tab
1. Type a name in the Activity name text box.
2. Type a description in the Description text box.
3. Type the estimated time to complete the page in the Time to complete text
boxes in hh:mm format. Note: this time is an estimate only and does not impact
time available to students; actual completion times for students are set when the
item is schedule.
4. Click the
button.
Questions Tab
On the Questions tab, you can add questions by selecting the existing questions or by
creating new questions.
1. Click the Add Questions link. Two options are available:
•
Select from Question Library: Select this option if the question
you want to use is already available in the Question Library. Click the
- 69 -
MyNursingLab Instructor Guide Fall 2008
Select from Question Library link. The Select question window
opens, showing a view of the Question Library. Navigate through the
Content Library to find the desired questions to add to the exam or
training. Select the check box next to the questions to add and then
click the Add button. Continue navigating through the Question
Library to find all of the desired questions. When you are finished,
click the Add and Close button.
•
Create New Question: Select this option if you want to create a
new question in the Question Library, for use in this activity. Click the
Create New Question link. Select the Question Type from the list
and then follow the steps to create the question.
2. The selected questions display on the Questions tab. Each section can be
deleted (click the check box next to the Section and then click Delete on the
options menu) or reordered (click the Order icon in the section header and drag
and drop to move to the desired location in the activity).
3. For each question, the following information displays:
• Question title: Displays the question name
• Type: Displays the question type for objective-based questions
(e.g. Matching, Multiple Choice, Fill in the Blank).
• Points: Displays the point value for each question.
• Options: Each question includes an options menu.
>Edit: Click Edit to open the Edit question window. the
question
>Delete: Click Delete to delete the question (or select the
check box next to the question and then click Delete on
the taskbar.
>Try Out: Click Try Out. The objective-based question will
display in a Preview window. You can test the question,
view hints, and click Submit for Grading to view feedback.
• Order: Allows you to change the order of the
objective-based
questions appearing in the list. Click the Order icon corresponding
to the name and then drag and drop to move to the desired location
in the list.
4. Click
to continue to the Messages tab.
Note: To open the preview box, click Show Question preview. You can view a question preview
by clicking the question. To hide the preview box, click Hide preview
Messages Tab
The Messages tab allows you to create messages to display before and after students
start an activity. You can use Content Editor for creating the messages by clicking the
appropriate Edit HTML links. Messages are optional.
1. In the Beginning of activity text box, type the message to be displayed to
student before the activity starts.
2. In the End of activity text box, type the message to be displayed to student at
the end of the activity.
3. Click
to continue to the Grades tab.
Grades Tab
The Grades tab allows you to apply a grade schema for the activity. Entering information
on the Grades tab is optional; if you make no selections, the defaults will apply.
1. Select grade schema: The list contains the default grade schema and other
available grade schemas.
- 70 -
MyNursingLab Instructor Guide Fall 2008
2. Add new schema. You can also add a new grade schema to apply to the activity.
3. Click
to continue to the Scheduling Options tab or click
to save the changes.
Scheduling Options
The Scheduling Options tab only displays when you are creating or editing an activity in
the Student Content window (not in the Content Library window). For detailed information
on the options available on the Scheduling Options tab, click here.
Click
to save the changes. The new activity appears in the Content
Library or Course Content.
Set Scheduling Options for Activities
Overview
After you have added content to the Content Library and moved the content over to the
Student Content side, you can set scheduling options. You can also set scheduling
options for content provided by the publisher. Setting the Scheduling Options for an
activity allows you to define availability dates and times, students who can access the
activity, specific locations for the activity, and more. To view and set scheduling options
for an activity, complete the following steps:
1. Click the Course Content button on the toolbar.
2. In the Student Content window, click the
option menu next to the appropriate
activity and then click Properties
3. The Edit window displays, providing scheduling options.
The Properties window for an Activity includes four tabs in the left navigation bar:
• General
• Availability
• Select Students
• Select Location
General
Click the General link to display the General tab. On this tab, you can name the activity
and or require a proctor password. Type the password in the Require Proctor
Password text box. Students must enter this password to take the activity. By default, no
password is set.
Availability
Click the Availability link to display the Availability tab. On this tab, you can make the
Activity available or hidden in the Course Content, or make it available only on particular
dates. To set the availability properties, you can select an option from the following;
• Show in Course Content (Available): Click this option to make the Activity
always available for the students in the course content. By default this is
selected.
• Hide in Course Content (Hidden): Click this option to hide the Activity so
that it does not display in the student Course Content page.
- 71 -
MyNursingLab Instructor Guide Fall 2008
•
Make available in Course Content only on these dates: Click this option
to make the Activity available only on the particular dates specified. If you
select this option, set the start date/times and end date/times as follows:
1. Click the calendar icon corresponding to Start date, and then
choose a date.
2. Type the time for Start date in the Time boxes.
3. Click the calendar icon corresponding to End date, and then
choose a date.
4. Type the time for End date in the Time boxes.
5. Select the Always show item in Course Content but prevent
students from opening it before or after these dates check
box to always show the Activity in student Course Content, but
to limit students from attempting it before or after the specified
dates. If you do not select this check box, the Activity will be
shown only on the specified dates.
Select Students
Click the Select Students link to display the Select Students tab. On this tab, you can
assign the Activity to all students or selected students. You can choose an option from
the following.
• Assign this item to all students: Click this option to assign the Activity to
all students. By default this option is selected
• Select specific students who should be assigned this item: Click this
option to assign the Activity to only selected students (for example, a
student or students who missed an exam). To select the students to whom
this activity should be assigned:
1. In the All Students window on the left, select the check box(es)
next to the corresponding student name(s).
2. Click the
button to move the student name(s) to the
Selected Students window on the right.
3. To remove any students from the Selected Students window,
select the check box(es) next to the corresponding student
name(s) and then click the
Remove link.
Select Locations
Click the Select Locations link to display the Select Locations tab. On this tab, you can
allow students to take the Activity from all locations or from selected locations. You can
choose an option from the following;
• Do not restrict access. Click this option allow students take the Activity
from any location:
• Restrict access to this item to the following locations: Click this option
to allow the students to take the Activity only from the selected locations.
To select the locations to which this activity should be assigned:
1. In the All Locations window on the left, select the check box(es)
next to the corresponding location(s). [Note: Only Locations
with computers are displayed on the All Locations list.]
2. Click the
button to move the location(s) to the Selected
Locations window on the right.
3. To remove any students from the Selected Locations window,
select the check box(es) next to the corresponding location(s)
and then click the
Remove link.
- 72 -
MyNursingLab Instructor Guide Fall 2008
Add a Link
MyNursingLab allows you to add links to outside Web content into Content Library or
Student Content. For example, you might want to add a link to your course's home page
or your school or department's Web site directly within your course.
To add a link to the Content Library or Student Content, complete the following steps:
1. Navigate to the location where you want to create the link. To create a link within
a folder, you first must navigate into the folder before adding the link.
2. Click the Add Content button. On the Add Content menu, click Add Link.
3. The Add Link window opens.
4. Enter the Title, Description, and URL for the link in the appropriate text boxes.
5. Type the optimal time to complete the file in the Time to complete text boxes in
hh:mm format. Note: this time is an estimate only and does not impact time
available to students; actual completion times for students are set when the item
is schedule.
6. Click Add. A new link is created.
Link Properties
Overview
Setting the Properties for a Link allows you to set various scheduling options, such as
locations and dates. To view the Properties for a Link, complete the following steps:
1. Click the Course Content button on the toolbar.
2. In the Student Content window, click the
option menu next to the appropriate
link and then click Properties.
3. The Properties window displays, providing scheduling options.
The Properties window for a Link includes four tabs in the left navigation bar:
• General
• Availability
• Select Students
General
The General tab displays by default. On the General tab, you can set the general
properties for the Link
•
•
•
Name: The File name displays in the Name text box. You can edit the name
here, if desired.
Description: The File description displays in the Description text box. You
can edit the name here, if desired. [Note: this description appears to
students on the Course Content page.]
Open in pop-up window: If this checkbox is selected, the file will open in a
pop-up window for students, rather than under the student navigation
toolbar.
Availability
Click the Availability link to display the Availability tab. On this tab, you can make the
Link available or hidden in the Course Content, or make it available only on particular
dates. To set the availability properties, you can select an option from the following;
• Show in Course Content (Available): Click this option to make the Link
always available for the students in the course content. By default this is
selected.
- 73 -
MyNursingLab Instructor Guide Fall 2008
•
•
•
Hide in Course Content (Hidden): Click this option to hide the Link so that
it does not display in the student Course Content page.
Make available in Course Content only on these dates: Click this option
to make the Link available only on the particular dates specified. If you
select this option, set the start date/times and end date/times as follows:
1. Click the calendar icon corresponding to Start date, and then
choose a date.
2. Type the time for Start date in the Time boxes.
3. Click the calendar icon corresponding to End date, and then
choose a date.
4. Type the time for End date in the Time boxes.
5. Select the Always show item in Course Content but prevent
students from opening it before or after these dates check
box to always show the Link in student Course Content, but to
limit students from attempting it before or after the specified
dates. If you do not select this check box, the Link will be shown
only on the specified dates.
Specify Due Date: In addition to a start and end date, you also can specify
a due date for submission of the activities. You can either set the end date
as the due date for submission or set a due date.
1. Assign: To specify a due date, you first must click the Assign
check box to assign the activity.
2. Set End date as Due date: Select this checkbox to set the end
date specified as the due date for submission of the activity.
Note: Set End date as Due date is active only when "Assign" and "Make available in Course
Content only on these dates" option is selected with the start date and end date specified for the
activity.
•
Due Date: Select this checkbox to set the due date other than the end date.
Choose a due date for the submission of the activity by clicking the calendar
icon. Type the time for due date in the Time boxes. The due date checkbox
is enabled only if the "Assign" and "Show in Course Content (Available)" or
"Make available in Course Content only on these dates" are selected.
Select Students
Click the Select Students link to display the Select Students tab. On this tab, you can
assign the Link to all students or selected students. You can choose an option from the
following.
• Assign this item to all students: Click this option to assign the Link to all
students. By default this option is selected
• Select specific students who should be assigned this item: Click this
option to assign the Link to only selected students (for example, a student or
students who missed an exam). To select the students to whom this activity
should be assigned:
1. In the All Students window on the left, select the check box(es)
next to the corresponding student name(s).
2. Click the
button to move the student name(s) to the
Selected Students window on the right.
3. To remove any students from the Selected Students window,
select the check box(es) next to the corresponding student
name(s) and then click the
Remove link.
- 74 -
MyNursingLab Instructor Guide Fall 2008
Click
Content window.
to save the Properties settings and return to the Student
Adding Files
MyNursingLab allows you to upload files into Content Library or Student Content. After a
file has been uploaded, it can be added to a course as an assignment (for example, with
a PowerPoint presentation) or used as part of a question or other item (for example, a
graphic might be uploaded for use in a multiple choice question or HTML page).
To add a file to the Content Library or Student Content, complete the following steps:
1. Navigate to the location where you want to upload the file. To upload a file to a
specific folder, for example, you first must navigate into that folder before
uploading the file.
2. Click the Add Content button. On the Add Content menu, click Add File. The
Add File window opens.
3. Click Browse and then choose the file to upload.
4. Type the Title and Description in the appropriate text boxes.
5. Type the optimal time to complete the file in the Time to complete text boxes in
hh:mm format.
Note: this time is an estimate only and does not impact time available to students; actual
completion times for students are set when the item is scheduled
6. From the drop-down list, select a Character set. If you aren't sure if you need to
change the character set, leave it as the default 7-bit ISO 2022.
7. Click Add. The file will be added and will appear in Content Library or Course
Content.
Note: the maximum file size you can upload is 10MB.
Adding Multiple Files
To add multiple files to the Content Library or Student Content, complete the following
steps:
1. Navigate to the location where you want to upload the file. To upload a file to a
specific folder, for example, you first must navigate into that folder before
uploading the file.
2. Click the Add Content button. On the Add Content menu, click Add Multiple
Files. The Add Multiple Files window opens.
3. Click Browse files and then choose the file(s) to upload. You can add a
maximum of 50 non-image files at a time; each file must not exceed 10 MB. You
can add up to 300 image files to a folder at one time. If you want to remove a file,
select that file and then click the Remove button; click the Clear List button to
clear all files from the list.
4. Type the optimal time to complete the file in the Time to complete text boxes in
hh:mm format. Note: this time is an estimate only and does not impact time
available to students; actual completion times for students are set when the item
is scheduled
5. From the drop-down list, select a Character set. If you aren't sure if you need to
change the character set, leave it as the default 7-bit ISO 2022.
6. Click Add. The file will be added and will appear in Content Library or Course
Content.
- 75 -
MyNursingLab Instructor Guide Fall 2008
Supported File Types / Formats
In MyNursingLab, you can upload a wide range of Web-compatible file types, including
HTML, Microsoft Office Documents, Flash™, and more. MyNursingLab supports the
following file types / formats for file uploads:
• Image formats: JPEG, JPG, GIF, BMP, TIFF, PNG, EMF, ICO, WMF.
• Audio formats: MID, MIDI, WAV, RAM, MP3, WMA.
• Video formats: WMV, MPEG, MPG, MPE, WM, AVI, ASF, MOV.
• Application formats: DOC, XLS, PPT, PPS, PDF, RM, SWF, CLASS, EXE,
RTF, and CAB.
• Text formats: TXT, HTML, and HTM. [Note: If an uploaded HTML files
include relatives or absolute path based links or references, those links will
not work after the file is uploaded.]
Note: You cannot upload any files larger than 4MB to MyNursingLab. If you need to include larger
files in your course, consider posting them to a Web site and adding links in your course to point
to those files.
Note: You cannot upload images that exceed a maximum width of 500 pixels and a maximum
height of 325 pixels.
File Properties
Overview
Setting the Properties for a File allows you to set various scheduling options, such as
locations and dates. To view the Properties for a File, complete the following steps:
1. Click the Course Content button on the toolbar.
2. In the Student Content window, click the option menu next to the appropriate file
and then click Properties.
3. The Properties window displays, providing scheduling options.
The Properties window for a File includes four tabs in the left navigation bar:
• General
• Availability
• Select Students
General
The General tab displays by default. On the General tab, you can set the general
properties for the File
•
•
•
Name: The File name displays in the Name text box. You can edit the name
here, if desired.
Description: The File description displays in the Description text box. You
can edit the name here, if desired. [Note: this description appears to
students on the Course Content page.]
Open in pop-up window: If this checkbox is selected, the file will open in a
pop-up window for students, rather than under the student navigation
toolbar.
Availability
Click the Availability link to display the Availability tab. On this tab, you can make the
File available or hidden in the Course Content, or make it available only on particular
dates. To set the availability properties, you can select an option from the following;
- 76 -
MyNursingLab Instructor Guide Fall 2008
•
•
•
•
Show in Course Content (Available): Click this option to make the File
always available for the students in the course content. By default this is
selected.
Hide in Course Content (Hidden): Click this option to hide the File so that
it does not display in the student Course Content page.
Make available in Course Content only on these dates: Click this option
to make the File available only on the particular dates specified. If you
select this option, set the start date/times and end date/times as follows:
1. Click the calendar icon corresponding to Start date, and then
choose a date.
2. Type the time for Start date in the Time boxes.
3. Click the calendar icon corresponding to End date, and then
choose a date.
4. Type the time for End date in the Time boxes.
5. Select the Always show item in Course Content but prevent
students from opening it before or after these dates check
box to always show the File in student Course Content, but to
limit students from attempting it before or after the specified
dates. If you do not select this check box, the File will be shown
only on the specified dates.
Specify Due Date: In addition to a start and end date, you also can specify
a due date for submission of the activities. You can either set the end date
as the due date for submission or set a due date.
1. Assign: To specify a due date, you first must click the Assign
check box to assign the activity.
2. Set End date as Due date: Select this checkbox to set the end
date specified as the due date for submission of the activity.
Note: Set End date as Due date is active only when "Assign" and "Make available in Course
Content only on these dates" option is selected with the start date and end date specified for the
activity.
•
Due Date: Select this checkbox to set the due date other than the end date.
Choose a due date for the submission of the activity by clicking the calendar
icon. Type the time for due date in the Time boxes. The due date checkbox
is enabled only if the "Assign" and "Show in Course Content (Available)" or
"Make available in Course Content only on these dates" are selected.
Select Students
Click the Select Students link to display the Select Students tab. On this tab, you can
assign the File to all students or selected students. You can choose an option from the
following.
• Assign this item to all students: Click this option to assign the File to all
students. By default this option is selected
• Select specific students who should be assigned this item: Click this
option to assign the File to only selected students (for example, a student or
students who missed an exam). To select the students to whom this activity
should be assigned:
1. In the All Students window on the left, select the check box(es)
next to the corresponding student name(s).
2. Click the
button to move the student name(s) to the
Selected Students window on the right.
- 77 -
MyNursingLab Instructor Guide Fall 2008
3. To remove any students from the Selected Students window,
select the check box(es) next to the corresponding student
name(s) and then click the
Remove link.
Click
Content window.
to save the Properties settings and return to the Student
Add a Page
MyNursingLab allows you to create pages in Content Library or Student Content, using
the Content Editor. A page created in MyNursingLab may include links to or reference
any content inside MyNursingLab or links to outside Web pages.
To add a Page to the Content Library or Student Content, complete the following steps:
1. Navigate to the location where you want to create the page. To create a page in
a specific folder, for example, you first must navigate into that folder before
creating the page.
2. Click the Add Content button. On the Add Content menu, click Add Page.
The Create Page window opens.
3. Type the Title and Description in the appropriate text boxes.
4. Type the estimated time to complete the page in the Time to complete text
boxes in hh:mm format. Note: this time is an estimate only and does not impact
time available to students; actual completion times for students are set when the
item is schedule.
5. From the drop-down list, select a character set. In most cases, you can use the
default 7-bit ISO 2002..
6. Using the Content Editor create a page, adding content and formatting the page
using the Content Editor tools.
7. Click Save and Return to save the new page or Cancel to cancel the page
creation.
8. A new page is created.
Page Properties
Overview
Setting the Properties for a Page allows you to set various scheduling options, such as
locations and dates. To view the Properties for a Page, complete the following steps:
1. Click the Course Content button on the toolbar.
option menu next to the appropriate
2. In the Student Content window, click the
page and then click Properties.
3. The Properties window displays, providing scheduling options.
The Properties window for a Page includes four tabs in the left navigation bar:
• General
• Availability
• Select Students
General
The General tab displays by default. On the General tab, you can set the general
properties for the Page
- 78 -
MyNursingLab Instructor Guide Fall 2008
•
•
•
Name: The File name displays in the Name text box. You can edit the name
here, if desired.
Description: The File description displays in the Description text box. You
can edit the name here, if desired. [Note: this description appears to
students on the Course Content page.]
Open in pop-up window: If this checkbox is selected, the file will open in a
pop-up window for students, rather than under the student navigation
toolbar.
Availability
Click the Availability link to display the Availability tab. On this tab, you can make the
Page available or hidden in the Course Content, or make it available only on particular
dates. To set the availability properties, you can select an option from the following;
• Show in Course Content (Available): Click this option to make the Page
always available for the students in the course content. By default this is
selected.
• Hide in Course Content (Hidden): Click this option to hide the Page so
that it does not display in the student Course Content page.
• Make available in Course Content only on these dates: Click this option
to make the Page available only on the particular dates specified. If you
select this option, set the start date/times and end date/times as follows:
1. Click the calendar icon corresponding to Start date, and then
choose a date.
2. Type the time for Start date in the Time boxes.
3. Click the calendar icon corresponding to End date, and then
choose a date.
4. Type the time for End date in the Time boxes.
5. Select the Always show item in Course Content but prevent
students from opening it before or after these dates check
box to always show the Page in student Course Content, but to
limit students from attempting it before or after the specified
dates. If you do not select this check box, the Page will be
shown only on the specified dates.
• Specify Due Date: In addition to a start and end date, you also can specify
a due date for submission of the activities. You can either set the end date
as the due date for submission or set a due date.
1. Assign: To specify a due date, you first must click the Assign
check box to assign the activity.
2. Set End date as Due date: Select this checkbox to set the end
date specified as the due date for submission of the activity.
Note: Set End date as Due date is active only when "Assign" and "Make available in Course
Content only on these dates" option is selected with the start date and end date specified for the
activity.
•
Due Date: Select this checkbox to set the due date other than the end date.
Choose a due date for the submission of the activity by clicking the calendar
icon. Type the time for due date in the Time boxes. The due date checkbox
is enabled only if the "Assign" and "Show in Course Content (Available)" or
"Make available in Course Content only on these dates" are selected.
Select Students
Click the Select Students link to display the Select Students tab. On this tab, you can
assign the Page to all students or selected students. You can choose an option from the
following.
- 79 -
MyNursingLab Instructor Guide Fall 2008
•
•
Assign this item to all students: Click this option to assign the Page to all
students. By default this option is selected
Select specific students who should be assigned this item: Click this
option to assign the Page to only selected students (for example, a student
or students who missed an exam). To select the students to whom this
activity should be assigned:
1. In the All Students window on the left, select the check box(es)
next to the corresponding student name(s).
2. Click the
button to move the student name(s) to the
Selected Students window on the right.
3. To remove any students from the Selected Students window,
select the check box(es) next to the corresponding student
name(s) and then click the
Remove link.
Click
Content window.
to save the Properties settings and return to the Student
Add a Study Plan
A Study Plan is a collection of two activities (Pretest and Posttest) supported by study
material. The Study Plan is a powerful tool for helping students consolidate their
understanding of course content. A well-designed Study Plan offers students
opportunities to fully master required course content:
•
Students can assess their mastery of the content through the Pretest.
•
Students can advance their understanding and content mastery through the
delivery of personalized Study Material that reflects their Pretest performance
results.
•
Students can use the Posttest to assess their content mastery following the use
of Study Materials.
Similarly, instructors can use Study Plans to identify knowledge and learning gaps in the
student population, which can be addressed with further instructional attention as
needed.
Note: You can rename the Pretest and Posttest if desired by using Activities settings in the
Preferences tool.
Using Study Plans in Your Course
When your course has Study Plans, you can track your students’ progress in mastering
subject material in your MyNursingLab course. You can follow their progress from their
Pretest scores in the Study Plan on to their posttest scores until they demonstrate full
mastery of the material. You can use student outcomes on pretests and posttests in the
Study Plan to determine if and when you may want to intervene to provide students with
additional help, in the event they appear to be struggling with mastery of the content.
Additionally, you may wish to create new Study Plans for your course. You can create
study plans from the Add Content menu of Content Library and My Course in the
secondary navigation in Course Content.
- 80 -
MyNursingLab Instructor Guide Fall 2008
Note: If you have organized your study plan content into folders with the study plan questions, it
will make creating Study Plans much easier. When the content and question assets are together
in one folder, you can easily select Study Material content from the Course Content Folder from
which the questions were selected for creating the Study Plan tests.
Create a Study Plan
1. On the Add Content menu, click Add Study Plan. The Create Study Plan page
opens.
2. Enter the name of the Study Plan in the Name textbox.
3. Click Edit on the Instructions to student box if you want to customize
instructions to students.
4. First, create the Pretest. Then select Study Material, and then create the
Posttest.
5. Click Save and Return.
Add a Study Plan Pretest
1. Click Create Test under Pretest. The Save Copy to Content Library window
opens.
2. Save Copy to Content Library (This window appears when you add new content
to the My Course. You are asked to save the copy of the content to the Content
Library.)
a. Select the folder in the Content Library to save the copy of the new
content.
b. Click Add and Close.
3. The Create Pretest window opens.
4. Enter the Activity Details.
5. Add questions based on the learning objectives you want to cover.
6. Add helplinks to link to websites or e-books, if enabled.
7. Enter the messages to be displayed at the beginning and end of activity, or leave
blank if you want no messages to appear.
8. Select a grade schema, or create a new grade schema, to apply to this activity.
9. Set preferences for the activity.
Note: The HelpLinks tab appears only if the Enable Need Help resource for students when taking
activity check box is enabled in the General preferences under Preferences tool.
Add Study Material Content
1. In the Study Material box, click Add Study Material. The Select Content
window opens.
2. Select the content you wish to add by checking the appropriate Content that may
be included as study materials are activities, links, files and pages.
Note: Click the Show Preview link on the top right hand corner to display a preview of the
selected contents.
3. Click Add and Close. The selected content is added to the Study Plan.
Note: You can view, edit, or delete the content by selecting an appropriate option from the
Options menu. Content can also be deleted by selecting a content asset and clicking Remove.
Set Pass Criteria
To set a Pass Criterion for the Study Plan assessments:
1. Click the underlined numeral link in the Pass Criteria option. A text box opens.
2. Type the pass percentage number.
- 81 -
MyNursingLab Instructor Guide Fall 2008
Note: It is a good practice is to set the same pass-criteria number in the pretest and the posttest
preferences as that set in the Study Material.
3. Click Save.
Study Material Taskbar
The Study Material Taskbar has the following options:
•
Show
•
Remove
•
Cut
•
Paste
Show
The Show drop-down list contains the following:
•
Learning Objectives and Study Material: On selecting this, all the learning
objectives along with the study materials are displayed. You can reorder the
content items in Learning Objectives and Study Material.
•
Learning Objectives Only: Displays only the learning objectives. You can
reorder the content items in Learning Objectives.
•
Study Material Only: Displays only the study material associated with the
learning objectives. You cannot reorder the study materials but can sort the
content items by Name and Type.
Note: You can preview, edit, or remove the content by selecting an appropriate option from the
Options menu of the corresponding study material.
Remove
Allows you to remove Study Material content. To do so, use the following steps:
1. Select in the check boxes of the Study Material content to be removed.
2. Click Remove. A window confirming deletion pops up.
3. Click OK to remove.
Cut
This enables you to cut the content item and move the content to the clipboard.
1. Select the check box of the desired content items and click Cut. The selected
contents are placed on the clipboard. The cut items are highlighted in red,
italicized text with a dimmed check box.
Paste
This allows you to paste the content in the clipboard to the desired location. It is enabled
only if there are cut items placed in the clipboard. To paste the content item, click the
Paste icon. Choose a location from the Paste menu:
•
Paste At Top: Select this option if you want to paste the clipboard item
before the first item in the viewing area. In case of multiple Learning
Objectives, it will paste as the first item in the first Learning Objective.
•
Paste Before Selected: Select this option if you want to paste the clipboard
item before the content item selected in the viewing area. In case you select
multiple content items across multiple learning objectives, it will paste a copy
of the cut items before the first selected items of each Learning Objective.
- 82 -
MyNursingLab Instructor Guide Fall 2008
•
Paste After Selected: Select this option if you want to paste the clipboard
item after the content item selected in the viewing area. In case you select
multiple content items across multiple learning objectives, it will paste a copy
of the cut items after the last selected items of each Learning Objective.
Paste At Bottom: Select this option if you want to paste the clipboard item
after the last item in the viewing area. In case of multiple Learning
Objectives, it will paste as the last item in the last Learning Objective.
The recently pasted content items are displayed with highlighted background.
•
Add a Study Plan Posttest
To add a Study Plan Posttest:
1. Click Create Test under Posttest. The Create Posttest window opens.
2. Enter the activity details.
3. Add questions based on the learning objectives you want to cover.
4. Add helplinks to link to websites or e-books, if enabled.
5. Type the messages to be displayed at the beginning and end of activity, or leave
blank if you want no messages displayed.
6. Select a grade schema, or create a new grade schema to apply to this activity.
7. Set preferences for the activity.
Note: The HelpLinks tab appears only if you have selected the Enable Need Help resource for
students when taking activity check box in the General preferences
Resetting a Study Plan Pretest
Once you have placed a Study Plan in your course, the Pretest for that Study Plan
follows specific rules to ensure the integrity of its use as a valid diagnostic tool for
measuring student mastery of Pretest content:
•
The Study Plan pretest by design allows students only one opportunity to take
the pretest as a diagnostic.
Note: The student may elect to save the pretest and come back to it later. However, if they do not
save it for later, they will not be able to go back to it once they exit the pretest.
•
Once any student in your course has accessed the Study Plan, you can not
make changes to the Pretest (the "Edit" menu option is no longer available).
Nonetheless, occasionally Instructors will need to make changes to the Study Plan
Pretest, or students will have a valid reason for requiring a second opportunity to start the
Study Plan Pretest.
For instance, students might begin the Pretest, and then leave the course without
completing or saving the Pretest for later. When they return to the course, they will be
locked out of access to that Pretest, because the study plan has been attempted once,
and they did not save it for later. Pegasus assumes they have completed their Pretest
work after their first access. To make changes to the Pretest, or to allow any given
student more than one access to the Pretest, you need to reset the Pretest. Once reset
for any given student, that student will have access to the Pretest once more.
To make changes to the Pretest in the course, Instructors need to reset the Pretest for all
students who have already accessed that test.
- 83 -
MyNursingLab Instructor Guide Fall 2008
To Reset the Study Plan Pretest:
1. From My Course (as differentiated from the Content Library) select the Study
Plan you wish to reset in your course.
2. Select Edit from Contextual Menu of the study plan; this opens the Edit Study
Plan page.
3. Select View Submissions from Contextual Menu of Pretest, this will open up the
View Assessment Submission page.
4. Select one student at a time and click Delete All Submissions
5. Repeat step 4 for every student as needed.
Properties: MyNursingLab Study Plan
Overview
Setting the Properties for a MyNursingLab Study Plan allows you to set various
scheduling options, such as locations and dates. To view the Properties for a
MyNursingLab Study Plan, complete the following steps:
1. Click the Course Content button on the toolbar.
2. In the Student Content window, click the
option menu next to the appropriate
study plan and then click Properties.
3. The Properties window displays, providing scheduling options.
The Properties window for a MyNursingLab Study Plan includes four tabs in the left
navigation bar:
• General
• Availability
• Select Students
• Select Locations
General
The General tab displays by default. On the General tab, you can set the general
properties for the Study Plan
•
•
•
Name: The MyNursingLab Study Plan name displays in the Name text box.
You can edit the name here, if desired.
Description: The MyNursingLab Study Plan description displays in the
Description text box. You can edit the name here, if desired. [Note: this
description appears to students on the Course Content page.]
Recommended (optional): If this check box is selected, the MyNursingLab
Study Plan is considered Recommended (Optional), as opposed to
required. The study plan will appear in the student Course Content view
with an
flag.
Availability
Click the Availability link to display the Availability tab. On this tab, you can make the
Study Plan available or hidden in the Course Content, or make it available only on
particular dates. To set the availability properties, you can select an option from the
following;
• Show in Course Content (Available): Click this option to make the Study
Plan always available for the students in the course content. By default this
is selected.
• Hide in Course Content (Hidden): Click this option to hide the Study Plan
so that it does not display in the student Course Content page.
- 84 -
MyNursingLab Instructor Guide Fall 2008
•
Make available in Course Content only on these dates: Click this option
to make the Study Plan available only on the particular dates specified. If
you select this option, set the start date/times and end date/times as
follows:
1. Click the calendar icon corresponding to Start date, and then
choose a date.
2. Type the time for Start date in the Time boxes.
3. Click the calendar icon corresponding to End date, and then
choose a date.
4. Type the time for End date in the Time boxes.
5. Select the Always show item in Course Content but prevent
students from opening it before or after these dates check
box to always show the Study Plan in student Course Content,
but to limit students from attempting it before or after the
specified dates. If you do not select this check box, the Study
Plan will be shown only on the specified dates.
Note: If you have selected Recommended (optional) under General, then Specify Due Date
options below are not available.
•
Specify Due Date: In addition to a start and end date, you also can specify
a due date for submission of the activities. You can either set the end date
as the due date for submission or set a due date.
1. Assign: To specify a due date, you first must click the Assign
check box to assign the activity.
2. Set End date as Due date: Select this checkbox to set the end
date specified as the due date for submission of the activity.
Note: Set End date as Due date is active only when "Assign" and "Make available in Course
Content only on these dates" option is selected with the start date and end date specified for the
activity.
•
Due Date: Select this checkbox to set the due date other than the end date.
Choose a due date for the submission of the activity by clicking the calendar
icon. Type the time for due date in the Time boxes. The due date checkbox
is enabled only if the "Assign" and "Show in Course Content (Available)" or
"Make available in Course Content only on these dates" are selected.
Select Students
Click the Select Students link to display the Select Students tab. On this tab, you
can assign the Study Plan to all students or selected students. You can choose an
option from the following.
• Assign this item to all students: Click this option to assign the Study Plan
to all students. By default this option is selected
• Select specific students who should be assigned this item: Click this
option to assign the Study Plan to only selected students (for example, a
student or students who missed an exam). To select the students to whom
this activity should be assigned:
1. In the All Students window on the left, select the check box(es)
next to the corresponding student name(s).
2. Click the
button to move the student name(s) to the
Selected Students window on the right.
3. To remove any students from the Selected Students window,
select the check box(es) next to the corresponding student
name(s) and then click the
Remove link.
- 85 -
MyNursingLab Instructor Guide Fall 2008
Select Locations
Click the Select Locations link to display the Select Locations tab. On this tab, you can
allow students to take the Study Plan from all locations or from selected locations. You
can choose an option from the following;
• Do not restrict access. Click this option allow students take the Study Plan
any location:
• Restrict access to this item to the following locations: Click this option
to allow the students to take the Study Plan only from the selected
locations. To select the locations to which this activity should be assigned:
1. In the All Locations window on the left, select the check box(es)
next to the corresponding location(s). [Note: Only Locations
with computers are displayed on the All Locations list.]
button to move the location(s) to the Selected
2. Click the
Locations window on the right.
3. To remove any students from the Selected Locations window,
select the check box(es) next to the corresponding location(s)
and then click the
Remove link.
Click
Content window.
to save the Properties settings and return to the Student
Best Practices for Developing Study Plans
Course Structure
The structure of your course is vital content development and production. It is important
to know how you want to structure your course before your author starts writing content,
because the course structure directly correlates to the design of your Study Plans.
The very first course planning and design document that should be created, and which
will be the basis for this, is your Table of Contents (TOC.) For example you may decide
that your Study Plan and all supporting supplements for student and instructors’ will be
mapped to one Study Plan at the chapter level. Therefore your TOC for the site would
consist of two levels: Chapter > Chapter learning objectives. You will map your entire
Content Library with this structure.
Note: “Learning Objectives” as referenced in the program’s Study Plans are differentiated from
the “Learning Objectives” mapping feature. In Study Plans, the term “Learning Objectives” refers
to the actual Content Library/Question Library Folder in which the questions and content for the
Study Plan reside.
Best Practice: Folder Structure
You will add all of your content during production to the content library. Note that Folders
are shared between the Question Library and the Content Library, so when you create a
Folder and Folder structure in either of those it is carried over to the second. This is not
the case with My Course.
The Content and Question Libraries are repositories for course assets, whereas My
Course is the specific and unique course that you are setting up for Instructors and
Students. As such, you need to create your desired Folder structure as a separate task in
My Course. So once you have your TOC set up in the Content Library, it’s a good
practice to then create your desired Course structure the My Course area as well. This
- 86 -
MyNursingLab Instructor Guide Fall 2008
may well be the same TOC structure you have designed in the Content and Question
Libraries.
Once your Folder/Course organization is established in My Course, you can move
content from the Content Library into the appropriate Folders in My Course.
Study Plan Elements
The Study Plan uses two Assessments: the Pretest and the Posttest. It also includes
remediation materials, or Study Materials, which correlate to the Pre- and Posttest. In
other words, if a student fails particular questions within the Pretest, they will be
presented with relevant Study Materials to help them brush up on the content before
taking the Posttest.
To preserve the pedagogical integrity of the Study Plan, students are only allowed one
chance in taking the Pretest, but may take the Posttest as many times as needed to
pass. When building these questions in the Question Library, create them directly into the
appropriate folders, so that they are organized according to the folder structures from
which you will be building your Study Plans.
For example, if Study Plans at the Chapter level are designed to assess proficiency in
that Chapter’s learning objectives, you will organize your Folders within the Content
Library to reflect this design as shown in the following hierarchy:
Top Level Folder: Chapter One
1. Second Level Folder: Chapter learning objective 1
2. Second Level Folder: Chapter learning objective 2
Top Level Folder: Chapter Two
1. Second Level Folder: Chapter learning objective 1
2. Second Level Folder: Chapter learning objective 2
Using this Content Library Folder structure, the questions for each learning objective
need to be placed in their corresponding Chapter and Chapter learning objectives folders
so that the Study Material in the Study Plan will reveal the appropriate content required
for study for students to master any given Chapter learning objectives.
Example: Folder Structure
The Content Library Folder Structure below displays the following course structure. This
structure is automatically mirrored exactly in the Question Library Folder structure, as
seen in the second image below.
Top Level Folder: Leadership and Teams Course
1. Second Level Folder: Chapter One learning objective: “Characteristics of Teams”
This structure should be carried through in the presentation of the Study Materials within
the Study Plan that has been created for this Chapter/learning objective.
Study Material Pass Criteria
As noted above, Study Material is course content that is provided to students to assist
them in learning what is required in order to successfully pass the Study Plan Posttest.
- 87 -
MyNursingLab Instructor Guide Fall 2008
For each section of Study Material, you must input the desired Pass criteria threshold to
indicate that students have mastered the content as reflected by their correctly answering
this percent threshold of questions in either the Pre- or Posttests. Note that the default
setting for Study Material Pass criteria is set to “0”, so if you neglect to input and save the
threshold, students who successfully answer 0% of the Pre- or Posttest will be assumed
to have mastered the test content and will not be presented with Study Material.
Note: When creating Pre- and Posttests, you must enter your preference for another “set
threshold score to pass” area in the Grades tab. This is an entirely different data point and should
not be mistaken for setting threshold on proficiency as it relates to content mastery in the Study
Plan. The threshold that is set within the Pre- and Posttests is tracked and reported in the
Gradebook as showing the student to either have passed or failed the test itself. On the other
hand, the Pass criteria threshold in the Study Materials serves as a guide for students, since if
they do not meet this pass criteria for either test, they are presented with Study Materials for
remediation.
Best Practices for Creating Study Plan Assessments
Study Plans are an important feature in MyLabs courses. Study Plan pre- and posttests
associate each question with a particular learning objective, major heading, or topic area
in a textbook chapter. The Study Plan highlights the material Students have mastered,
and which material needs further study. Where the Study Plan identifies that further study
is recommended, students are provided with a link to the relevant page (or pages) in an
ebook, and or to other study material as needed.
Writing Good Study Plan Questions
A good Study Plan question is, in many ways, simply a good question; it is written
according to your internal guidelines on writing multiple choice questions. There are,
however, some considerations relating to the balance of question types and content
coverage that are unique to questions written for study plans.
Best Practice for Study Plan Questions
1. Make sure that there is an even balance of questions across the major headings
or learning objectives of the chapter. Although some sections will be relatively
more important than others, you want to ensure that students are being tested on
the whole chapter and not just portions of it.
2. Make sure that there are enough questions relating to each major heading to
make the results of the diagnostic test meaningful. A student who answers one
question correctly out of an available two on a particular topic will not really know
whether or not they understand the content. A minimum of five questions is a
good rule of thumb.
3. Make sure that the difficulty of the questions, as well as the mix of factual and
applied questions (60% applied, as a rule of thumb), matches that of an in-class
test a student could expect to take. If the questions online are significantly easier
than those they will see in-class, students will feel a false sense of confidence in
their understanding of the topic.
Pre- and Posttests
Study Plans include two separate and distinct Assessments, a pretest and a post- (or
exit) test. A student takes the pretest and their areas of mastery are identified, as are the
areas where they need further study. Students can only take a pretest once. They then
re-read the relevant Study Materials as presented in the Study Plan before taking the
posttest. Students can take the Posttests as many times as they would like until they are
satisfied that they have mastered all of the topics in the assessment.
- 88 -
MyNursingLab Instructor Guide Fall 2008
Because the Posttest should illustrate or measure the improvement in a student’s
understanding of any particular topic area, it is important that it is identical to the pretest
in terms of the number of questions per learning objective/major heading, and in terms of
the difficulty level and balance of question types.
Add a Discussion Topic
The Discussion Topic helps instructors to communicate interactively with students about
a particular topic. Instructors and students can post responses and attach supporting files
along with these discussions.
To add a Discussion Topic, complete the following steps:
1. Click the Add Content link in Content Library or Course Content.
2. Click Add Discussion Topic on the menu.
3. Enter a Title and Description in the text boxes. The Title and Description appear
to the student in the course, before they have started the Discussion Topic.
4. Type the optimal time to complete the discussion in the text boxes in hh:mm
format.
5. Click Browse to select the supporting files, and then click
. You can
attach a maximum of three files with a maximum file size of 2.5MB each.
6. Type the body of the Discussion Topic in the Content Editor window. [For more
information on using the Content Editor, see Content Editor.]
7. Select the appropriate Student Posting Rules options. The available options
are:
• Students can post messages: Select this checkbox to allow students to
post messages (responses) to the Discussion Topic.
• Students can reply to the messages posted: Select this checkbox to
allow the students to reply to the messages (responses) posted by the
instructor.
8. Select the Anonymity Preferences option.
• Student posts are anonymous: Select this checkbox to prevent the
student from viewing the author and other student details.
9. Click Save and Close to save the Discussion Topic. Click Cancel to cancel the
action.
Managing Discussions
The Discussion Window helps you to view the discussion topic with posted messages
and responses. From there, you can edit the discussion topic, post responses to the
discussion, and delete messages or responses.
To view the discussion, click the Course Content button on the toolbar. In the Content
Library or Student Content window, navigate to the discussion topic. Click Open from the
options drop-down menu.
The Discussion window has several areas: the header area, the Discussion Topic and
Response window, and the taskbar.
Discussion Window Header
1. The Discussion window opens. The Discussion window header displays the
name of the Discussion topic, options menu, and the total number of messages
and unread messages.
2. To edit the discussion topic, click the options menu and then click Edit. For more
information on Adding a Discussion topic, click here.
Discussion Topic and Response Window
- 89 -
MyNursingLab Instructor Guide Fall 2008
1. The Discussion Response Window displays the discussion topic posted for the
students. To view the complete message, click Expand; to close, click Collapse.
2. Below this is the list of messages and responses posted by the students. Each
message/response has an options menu with the following links:
• Open: Click Open to open the details lf the posted response. The Message
window displays the author who posted the message, the date the
message was posted, any attachments posted with the message [click the
file name with the link to open or save the attachment], and the detailed
message text.
>To reply to the message, click the
•
•
Post Response link.
>To close the window, click the
button.
Post Response: Click Post Response to open the Reply window and post
response to the message. The Reply window opens, with the original
message at the bottom of the window and an area to enter a reply at the
top. The Reply window displays the Subject of the message.
>To attach files in your response, click the Browse to select the file(s) and
then click the Attach button.You can attach a maximum of three files with a
maximum file size of 2.5MB each.
>Type the message in the Content Editor.
>Click
to send the response to the discussion.
Delete: Click Delete to delete the message. When prompted, select
whether to delete only the message but keep responses or to delete this
message and all responses. Click OK to confirm the deletion (or Cancel to
cancel the deletion).
Discussion Taskbar
The Discussion Taskbar includes tools to allow you to filter the view, post responses, and
more.
Filter Discussion Views
The Display list contains the following filters for discussions:
• All Messages: Displays all the Read and Unread messages posted in the
discussion. You can view All Messages as:
>Threaded: Threaded view shows messages organized by thread, so
responses are visually connected to the original post. Expand All and
Collapse All links are shown when you choose the view as Threaded.
Click on the appropriate links to expand or collapse the posted messages
and responses.
>Unthreaded: Unthreaded view shows messages and responses in
order by date posted.
• Unread Messages Only: Sorts the discussion messages and displays only
the Unread messages.
>Threaded: Threaded view shows messages organized by thread, so
responses are visually connected to the original post. Expand All and
Collapse All links are shown when you choose the view as Threaded.
Click on the appropriate links to expand or collapse the posted messages
and responses.
>Unthreaded: Unthreaded view shows messages and responses in
order by date posted.
Post a Response
To post a response, complete the following steps:
1. Click Post Response in the Discussion taskbar.
- 90 -
MyNursingLab Instructor Guide Fall 2008
2. The Reply window opens, with the original message at the bottom of the window
and an area to enter a reply at the top. The Reply window displays the Subject of
the message.
3. To attach files in your response, click the Browse to select the file(s) and then
click the Attach button. You can attach a maximum of three files with a maximum
file size of 2.5MB each.
4. Type the message in the Content Editor.
5. Click
to send the response to the discussion.
Mark Read
To mark a response as read, complete the following steps:
1. Select the check boxes next to the messages you want to mark as read.
2. Click the Mark Read link in the Discussion taskbar.
3. The responses will be marked as Read.
Mark Unread
To mark a response as unread, complete the following steps:
1. Select the check boxes next to the messages you want to mark as unread.
2. Click the Mark Unread link in the Discussion taskbar.
3. The responses will be marked as Unread.
Delete
To delete a response, complete the following steps:
1. Select the check boxes next to the messages you want to delete.
2. Click the Delete link in the Discussion taskbar (or click Delete on the options
menu of the corresponding responses).
3. Delete Confirmation window opens. Choose an option from the following:
• Delete this message but keep responses: Choose this option if you want
to delete only the message and not the responses posted for the message.
• Delete this message and all responses: Choose this option if you want to
delete the message and the responses posted for the messages.
4. Click OK to confirm the deletion (or Cancel to cancel the deletion).
Options: Discussion Topic
After you have created a Discussion Topic, you can edit, preview, and perform other
actions on the study plan, using the options menu available in the Content Library or
Student Content window.
Content Library
In the Content Library, the following options are available on the options menu for a
Discussion Topic:
Editing a Discussion Topic
To edit an existing Discussion Topic, complete the following steps:
1. Click the Course Content button on the toolbar.
2. In the Content Library window, click the option menu next to the appropriate
study plan and then click Edit.
3. The Edit discussion topic window opens. Modify the discussion topic as
desired.
4. Click Save and Close to save the changes and return to Content Library.
- 91 -
MyNursingLab Instructor Guide Fall 2008
Opening a Discussion Topic
To edit an existing Discussion Topic, complete the following steps:
1. Click the Course Content button on the toolbar.
2. In the Content Library window, click the option menu next to the appropriate
study plan and then click Open.
3. The Discussion window opens. For details, click here.
Delete a Discussion Topic
To delete an existing Discussion Topic, complete the following steps:
1. Click the Course Content button on the toolbar.
2. In the Content Library window, click the option menu next to the appropriate
study plan and then click Delete (or click the check box next to the appropriate
study plan and click the Delete link on the toolbar).
3. When the message box displays, asking you to confirm the deletion, click OK to
delete or Cancel to cancel the deletion.
Student Content
In Student Content, all of the options available in Course Content are available on the
options menu for a Discussion Topic (see above). Several additional options are
available, as outlined below.
Edit the Scheduling Options (Properties) for a Discussion Topic
To edit the scheduling options for an existing Discussion Topic, complete the following
steps:
1. Click the Course Content button on the toolbar.
2. In the Student Content window, click the option menu next to the appropriate
study plan and then click Properties.
3. The Properties window displays, providing scheduling options. For more
information on the scheduling options available for Discussion Topics, click here.
4. Click Save and Close to save the changes.
Show/Hide a Discussion Topic in Student Content
To determine whether or not students see a study plan in their Course Content, you can
show or hide the study plan. To show or hide a Discussion Topic, complete the following
steps:
1. Click the Course Content button on the toolbar.
2. In the Student Content window, click the option menu next to the appropriate
study plan and then click Show/Hide (or click the check box next to the
appropriate study plan and click the
Show/Hide link on the toolbar).
3. If the study plan is Shown, a blue checkmark appears in the Show column and
the green text Shown is displayed below the study plan name. If the study plan is
hidden from students, the study plan name appears in gray italics and the red
text Hidden is displayed below the study plan name. This helps you hide a shown
content and show a hidden content to the students. If you show a content, the
text Shown is displayed in green color just below the content.
Remove a Discussion Topic in Student Content
To remove a Discussion Topic from Student Content, complete the following steps:
1. Click the Course Content button on the toolbar.
- 92 -
MyNursingLab Instructor Guide Fall 2008
2. In the Student Content window, click the option menu next to the appropriate
study plan and then click Remove (or click the check box next to the appropriate
Remove link on the toolbar).
study plan and click the
3. When the message box displays, asking you to confirm the deletion, click OK to
delete or Cancel to cancel the deletion.
Note: Remove appears as Unassign when you view the options from the Items Due section of
the Calendar.
Properties: Discussion Topic
Overview
Setting the Properties for a Discussion Topic allows you to set various scheduling
options, such as locations and dates. To view the Properties for a Discussion Topic,
complete the following steps:
1. Click the Course Content button on the toolbar.
2. In the Student Content window, click the option menu next to the appropriate
discussion topic and then click Properties.
3. The Properties window displays, providing scheduling options.
The Properties window for a Discussion Topic includes four tabs in the left navigation bar:
• General
• Availability
• Select Students
General
The General tab displays by default. On the General tab, you can set the general
properties for the Discussion Topic
•
•
•
Name: The Discussion Topic name displays in the Name text box. You can
edit the name here, if desired.
Description: The Discussion Topic description displays in the Description
text box. You can edit the name here, if desired. [Note: this description
appears to students on the Course Content page.]
Recommended (optional): If this check box is selected, the Discussion
Topic is considered Recommended (Optional), as opposed to required. The
discussion topic will appear in the student Course Content view with an
flag.
Availability
Click the Availability link to display the Availability tab. On this tab, you can make the
Discussion Topic available or hidden in the Course Content, or make it available only on
particular dates. To set the availability properties, you can select an option from the
following;
• Show in Course Content (Available): Click this option to make the
Discussion Topic always available for the students in the course content.
By default this is selected.
• Hide in Course Content (Hidden): Click this option to hide the Discussion
Topic so that it does not display in the student Course Content page.
• Make available in Course Content only on these dates: Click this option
to make the Discussion Topic available only on the particular dates
specified. If you select this option, set the start date/times and end
date/times as follows:
- 93 -
MyNursingLab Instructor Guide Fall 2008
1. Click the calendar icon corresponding to Start date, and then
choose a date.
2. Type the time for Start date in the Time boxes.
3. Click the calendar icon corresponding to End date, and then
choose a date.
4. Type the time for End date in the Time boxes.
5. Select the Always show item in Course Content but prevent
students from opening it before or after these dates check
box to always show the Discussion Topic in student Course
Content, but to limit students from attempting it before or after
the specified dates. If you do not select this check box, the
Discussion Topic will be shown only on the specified dates.
Note: If you have selected Recommended (optional) under General, then Specify Due Date
options below are not available.
•
Specify Due Date: In addition to a start and end date, you also can specify
a due date for submission of the activities. You can either set the end date
as the due date for submission or set a due date.
1. Assign: To specify a due date, you first must click the Assign
check box to assign the activity.
2. Set End date as Due date: Select this checkbox to set the end
date specified as the due date for submission of the activity.
Note: Set End date as Due date is active only when "Assign" and "Make available in Course
Content only on these dates" option is selected with the start date and end date specified for the
activity.
•
Due Date: Select this checkbox to set the due date other than the end date.
Choose a due date for the submission of the activity by clicking the calendar
icon. Type the time for due date in the Time boxes. The due date checkbox
is enabled only if the "Assign" and "Show in Course Content (Available)" or
"Make available in Course Content only on these dates" are selected.
Select Students
Click the Select Students link to display the Select Students tab. On this tab, you
can assign the Discussion Topic to all students or selected students. You can
choose an option from the following.
• Assign this item to all students: Click this option to assign the Discussion
Topic to all students. By default this option is selected
• Select specific students who should be assigned this item: Click this
option to assign the Discussion Topic to only selected students (for
example, a student or students who missed an exam). To select the
students to whom this activity should be assigned:
1. In the All Students window on the left, select the check box(es)
next to the corresponding student name(s).
2. Click the
button to move the student name(s) to the
Selected Students window on the right.
3. To remove any students from the Selected Students window,
select the check box(es) next to the corresponding student
name(s) and then click the
Remove link.
Click
Content window.
to save the Properties settings and return to the Student
- 94 -
MyNursingLab Instructor Guide Fall 2008
Gradebook
Using the Gradebook
Overview
The Gradebook tool allows you to manage grades for activities and completed by
students. From the Gradebook, you also can generate reports, add columns, send
messages, and search the list of students. You also can generate reports to understand
student performance.
You can access the Gradebook in two ways:
•
On the Today's View page, click the Go to Gradebook link on the top-right
hand of the New Grades under Alerts in the Notifications.
•
Click the Gradebook button in the toolbar.
The Gradebook has four sub-tabs:
• Grades
• Custom View
• Manage Roster
• Reports
Grades
The Grades tab allows you to manage grades for assignments completed by the
students. The Course Content navigator displays the Course Content/Student Content
folders and activities for the course. You can view the available student grades for the
assignments and activities.
Custom View
The default Custom View in MyNursingLab shows the Study Plan Pre and Post Test
grades for all students. You can also add additional custom views with only those grade
columns you specify. The same Custom View is available to your students.
Manage Roster
The Manage Roster tab allows you to create users and then invite them to register in the
course via email. The created users are listed in Gradebook and are considered as
unregistered users. After registration these users can access the course activities.
Reports
The Grades tab allows you to generate a number of different reports for activities and
study plans, so you can track and review student performance.
Changing the Default Grading Schema
The default grading schema in MyNursingLab is letter grades. Typically, instructors prefer
to see student scores as percentages or raw score. To change the schema to a
percentage or raw score, do the following:
•
•
First, click on the Preferences tab in the main navigation bar.
Select Grading on the left, uncheck the first box (Enable Letter Scoring)
- 95 -
MyNursingLab Instructor Guide Fall 2008
•
•
•
•
•
•
•
•
•
•
•
•
Next check the box (Enable percentage or raw score at the course level),
then select your grading preference of raw score or percentage circle
Next, you have to override the default letter grade option in each graded
Activity that you’d like to monitor. Typically, instructors want to see grades for
Study Plans, so the directions here are for changing Study Plans grades.
Click on the Course Content tab, in the main course navigation bar.
Working in the left hand side (Instructor side) click the Student Study Plans
folder to open the folder and view the chapter Study Plans.
Begin with Chapter 1 Study Plan – scroll your cursor over the chapter title to
see the Option down arrow on the right.
Choose Edit.
When the next screen opens, choose Edit again beside the Pre Test.
Go to the Grades tab in Edit view
Click the drop-down box and change the “Select grade schema” option to <Select->
Click Save and Return
This overrides the individually set Study Plan letter-grade default, and allows
the general grading preferences you set to come through.
Repeat for every Pre and Post Test in every chapter
Grades
The Grades tab allows you to manage grades for assignments completed by the
students. You can view the available student grades for the assignments and activities.
The Grades tab has a few main areas: the Course Content Navigator, Advanced
Filters, the Grades Area with the list of graded activities, and the Download Grades
tools.
When using the Gradebook, please note, the following rules apply:
• You cannot use commas in column names or column data as this will cause
problems in downloading or exporting grades.
• You cannot create more than 256 columns in the Gradebook.
Course Content Navigator
The Course Content navigator box on the left side of the Gradebook screen displays the
folders and study plans available in your course, mirroring the folder structure and
organization in the Student Content window. To view the contents of a folder, click the
folder name to open it.
Show/Hide Course Navigation
If you want to close the Course Content Navigator to make more room for the Grades
Area, click the Hide text icon below the Date and Grades list, at the left side of the
window. To redisplay the Course Content Navigator, click the Show text icon at the
bottom left of the window.
Note: To set the course content navigator default view in Gradebook, go to the Grading section of
the Preferences tool. To hide the navigator when the gradebook is opened, select Hide
Gradebook Course Content Navigator by Default.
Advanced Filters
Advanced Filters allow you to choose which gradebook items/columns that display, so
you can obtain a filtered view of the Grades. To use Advanced Filters to filter the Grades
view, complete the following steps:
1. Click the Advanced Filters button.
- 96 -
MyNursingLab Instructor Guide Fall 2008
2. In the filter area, select the desired the filter options from the drop-down menus.
3. Click the
button to obtain the Grades view of your choice.
The filter options are:
• Search Students: By default, the Grades view lists all students. To filter the
Grades view to results for one or more students:
1. Click the Search Students button in advanced filter options. The Find
Users page opens.
2. Enter the search criteria for a student based on User Name, First Name,
or Last Name.
3. Select the search criteria. Options are:
o Equals – the exact text entered.
o Contains – the name contains a specific character(s).
o Begins with – the name begins with a specific character(s).
o Ends with – the name ends with a specific character(s).
4. Enter the search criterion in the text box.
5. Click Search to display the search results. The Grades view
automatically refreshes to show the Grades view filtered for the
student(s). The total number of students found is displayed next to the
Search Students button. To again view all students, click Show All.
• Show Status of all items: Displays the status of all items in Gradebook. When
selected, all other filters are disabled. The status icons include:
o
Not Submitted: Indicates activity has not been submitted.
o
Submitted. Indicates that the content item is completed and submitted.
This icon displays for unassigned items.
o
Passed: Indicates the student has passed the activity.
o
Not Passed: Indicates the student has failed.
o
Not Started: Indicates the student has not yet opened the activity.
o
Submitted: Indicates that student has completed the activity and
submitted it for grading. This icon appears for submitted activities that
have at least one instructor graded question and the question has not yet
been graded.
• Select Activity types: Allows you to select from the available activity types and
sort the display for particular activity types. By default, all activity types display in
the Grades view. Click Select Activity types to display the activity types available
in your course and then click the checkbox for those activities you wish to include
in the filter Grades view.
• Item Status: Displays the following filter options.
o All Items: (default) When selected, it displays all the items/columns in
gradebook.
o Completed only: Displays only items/columns that have at least one
submission.
o Assigned only: Displays all the items/columns that have an item
assigned.
o Assigned and Completed: Displays all the items/columns that have
completed, assigned activities.
• Column Sort: Allows you to sort the display of gradebook columns by:
o Course Order: Displays the items/ columns in the order as seen in
Course Content.
o Alphabetical: Displays the items/columns in an Alphabetical order (A to
Z).
o By Due Date: Displays all the items/columns with due dates.
Grades Area
- 97 -
MyNursingLab Instructor Guide Fall 2008
The Grades Area includes a number of navigation and filtering options. The Grades Area
displays a series of columns -- one for student information, a Course Average column,
and one column per activity assigned to students in your course. For each activity, a
column includes a column header and various icons to indicate the status of the activity.
Additional columns can be added using the Create Column tool (see below).
Grades Columns
The Gradebook column headers include:
1. Student Name/Student ID: Displays the names of students enrolled in the
course. If you want to view the gradebook by Student ID, click Show ID link. To
view by Student Name, click the Show Name link next to Student ID column.
[Note: you can use the Student ID view in conjunction with the Current Display
download to generate a .csv file that can be imported into another grading or
learning management system.] An option menu is available for each student, with
option to Edit Grades, Send a Message, or Deny Access. For more details, click
here.
The Student Name/Student ID column can be sorted ascending or descending by
clicking the up or down arrow.
2. Course Average and/or Folder Average: If enabled for the course, these
columns include folder-level calculations, as defined by the instructor. The
Course Average appears in the top level the gradebook; the Folder Average
appears when you click into a folder.
Note: For the columns to appear, Enable Folder level calculations for Gradebook and Today's
View must be selected on the Grading section of the Preferences tool. From the Grading page, to
specify the calculation criteria, select which content items are included, or to rename the default
column headings, click Edit calculation settings.
The Course Average and Folder Average columns are updated every 24 hours to
reflect student scores for all assigned items. The row also displays the last time the
grade was updated (for example, last updated at 12:00 AM GST).
Note: If you want to confirm the last time the score was updated, click the last updated at 12:00
AM GST link. The Grade to Date Column window opens, listing the last date and time on which
the Course Average or Folder Average was updated. Click Close to close the window.
The Grade to Date row has the following limitations:
• Items that have not been submitted but are not yet due will not be counted
• Items that have not been submitted but are past due will be counted as a
zero
• Items that were submitted past the due date will be counted as a zero unless
the instructor accepts the grade
• Items that are assigned without a due date will be considered as due on the
last day of the course, and all the above apply.
3. Activities: The Gradebook includes one column per activity assigned to students
in your course. For each activity, a column includes a column header and various
icons to indicate the status of the activity.
• Each gradebook column has an options menu, with various options available.
For more information on options, click here.
•
Drag the icon to the left or right to change the order of columns in a
gradebook.
- 98 -
MyNursingLab Instructor Guide Fall 2008
•
Displays if an activity or study plan is assigned.
Displays if due date is specified for an activity or study plan. Point to the
icon to display a tool tip showing the due date and time.
If you have indicated that unassigned items should display a checkmark in
•
the Grading Preferences, a checkmark displays for unassigned items. If you
select this option, the score and grades will be displayed for the students on
the view submission page, but the score will not be available for the
instructor. The instructor can only view the
icon in the Gradebook for this
item and cannot view the submission.
4. Created Columns: If you have created custom columns (see below), these
columns also display in the gradebook.
5. Class Average Row: If you have used Class Average columns, these columns
also display in the gradebook.
•
When scheduling an Objective-Based Question Only Exam or Dropbox activity,
you have an option to provide a Class Average, either having students identified
or anonymous. If you have selected this option, a Class Average row appears in
the Grades view to show the average score of a class for those activities.
Average score is calculated for all student submissions and is only calculated for
numeric scoring. Average totals are updated continuously as each student
completes or starts the activities.
Note: Class average cannot be used in conjunction with Skill-Based or Project-Based Exams or
Trainings or Study Plans.
The averages are displayed according to the Grade options specified in the
activity preferences. These might include:
o For Class Average, Students Anonymous – Displays class
average only for each activity. Score results are displayed as:
o Not Attempted: Indicates none of the students have
started the activity.
o In Progress: Indicates some of the students have started
but have not yet completed the activity, or some of the
students have completed the activity, but others have
not.
o Complete: Indicates all of the students have completed
the activity.
o For Class Average, Students Not Anonymous – Displays class
average score and all student records for the class. Score results
are displayed as Not Attempted, In Progress or Complete, as
noted above. Additionally, score results for students are
displayed on individual student rows. The score results for each
student are displayed as:
o Not Attempted: Indicates student has not yet started the
activity.
o In Progress: Indicates student has begun but not
completed the activity.
o Complete: Indicates student has completed the activity.
Submitted Grade Icons
For each activity in the Gradebook, scores are represented with the following icons:
•
: Displays if the grades are edited after the submission.
- 99 -
MyNursingLab Instructor Guide Fall 2008
•
•
•
•
•
•
: Displays if a student has a late submission (submissions after due date)
and the scores are grayed. The scores will not be counted for any averages
and will not be displayed in Reports. This icon will disappear only if you
accept the submission. On accepting, the scores will be displayed normally.
: Displays if the student has failed to obtain passing grades.
: Displays to indicate a new grade. This icon displays when view the page
for the first time after the grade is posted.
Not Attempted: Displays if a student has not yet started the activity.
In Progress:Displays if a student has started but not completed the activity.
Complete: Displays if a student has completed the activity. Click the
Complete link to open View Submissions screen.
Grades Area Toolbar
At the top of the Grades area, a toolbar includes a number of options for managing
grades and student access. .
1.
Create Column
2.
Send Message
3.
Grant Access
4.
Deny Access
Create Column
This option helps you to create customized grade columns based on certain criteria. To
create a new column in the Gradebook, complete the steps as outlined below.
Numeric
1. Using Course Content Navigator, navigate to the folder where you want to create
the column.
2. Click
Create Column in the Gradebook toolbar and then click Numeric.
3. The Create Numeric Column window opens.
4. Type the column name in the Column name text box, up to 25 alphanumeric
characters.
5. Select the location where the column is to be inserted from the Insert as dropdown list. Last will display the column as the last column this folder; 1 will display
it as the first, 2 as the second, and so on.
6. Click Save to save the changes.
Calculated
A Calculated column allows you to aggregate grades for selected activities, and to also
assign a weight to the final calculated grade, if desired. You can choose the operation
that you want to use for the calculated grade, and then define the weighted grade for the
calculated grade of specified content.
1. Using Course Content Navigator, navigate to the folder where you want to create
the column.
2. Click Create Column in the Gradebook toolbar and then click Calculated.
3. The Create Calculated Column window opens.
4. Type the column name in the Column name text box, up to 25 alphanumeric
characters.
5. Select the operation to be performed on the columns from the Select the
Operation list: Sum to add the grades, Avg to average the grades, Min to display
the lowest grade, and Max to display the highest grade.
6. Enter a Grade Weight(%), up to 99%.
- 100 -
MyNursingLab Instructor Guide Fall 2008
7. From the Insert as list, select the location where the column is to be inserted
from the Insert as drop-down list. Last will display the column as the last column
this folder; 1 will display it as the first, 2 as the second, and so on.
8. In the Select the columns for operation area, all assigned activities display. Click
the check box next to the appropriate items to include them in the calculation. To
delete an activity, select the activity and click Remove from the Selected
Activities taskbar.
9. Click Save to save the changes.
Selection List
A Selection List column includes a series of text options from which you can select. For
example, if you wanted to add a Selection List column to store class participation column,
you could create a Selection List column with options of Excellent, Very Good, Fair, Poor.
To create a Selection List column:
1. Using Course Content Navigator, navigate to the folder where you want to create
the column.
2. Click Create Column in the Gradebook toolbar and then click Selection List.
3. The Create Selection List Column window opens.
4. Type the column name in the Column name text box, up to 25 alphanumeric
characters.
5. In the Enter list item text box, enter the first text option to appear in the list and
click Add. The corresponding list item is added in the Existing List Item grid.
Repeat this process until all list items are added. [To delete an added item or
items, select the check box next to the item(s) to delete and then click the
Delete selected items link.]
6. Select the location where the column is to be inserted from the Insert as dropdown list. Last will display the column as the last column this folder; 1 will display
it as the first, 2 as the second, and so on.
7. Click Save to save the changes.
Free Text
A Free Text column allows you to add a note to you or your student, directly in the
gradebook. A maximum of 1000 alphanumeric characters can be entered in a Free Text
column. To create a Free Text column:
1. Using Course Content Navigator, navigate to the folder where you want to create
the column.
2. Click Create Column in the Gradebook toolbar and then click Free Text.
3. The Create Free Text Column window opens.
4. Type the column name in the Column name text box, up to 25 alphanumeric
characters.
5. Select the location where the column is to be inserted from the Insert as dropdown list. Last will display the column as the last column this folder; 1 will display
it as the first, 2 as the second, and so on.
6. Click Save to save the changes.
Import Grades
The Import Grades option allows you to import grades from a .csv file into your
gradebook. When you import grades, they are added into a new column. To import
grades:
1. First, generate a correctly formatted grade import .csv (comma separated value)
file. At the bottom of the Gradebook page, in the Download area, select Student
- 101 -
MyNursingLab Instructor Guide Fall 2008
2.
3.
4.
5.
6.
7.
8.
9.
10.
Roster from the drop-down list and set csv as the format. Click the Download
link and then click the Save button to save the file to a location on your computer
(for example, the Desktop).
Open the .csv file. Note that it includes five columns (no header) with student
data in columns in the following order:
• UserID: A system generated User ID for the student.
• LastName: The last name of the student.
• First Name: The first name of the student.
• Userscore: The score the student obtained on the assignment.
This column is blank; enter the student grade in this column.
• Maxscore: Contains the maximum possible score for the
assignment. This column is blank; enter the maximum possible
grade in this column.
Save the .csv file in a location that you will remember.
Now, you can add the column to the Gradebook. Using Course Content
Navigator, navigate to the folder where you want to create the column.
Click Create Column in the Gradebook toolbar and then click Import
Grades,
The Create Imported Grades Column window opens.
Type the column name in the Column name text box, up to 25 alphanumeric
characters.
Select the location where the column is to be inserted from the Insert as dropdown list. Last will display the column as the last column this folder; 1 will display
it as the first, 2 as the second, and so on.
Click Browse to select the .csv (comma separated value) file with the grades.
Click OK to import the grades.
Total Column
A Total Column column allows you to create a column that calculates the total grade
received by a student, based on one or more assessments, which can be weighted
appropriately. To create a Total Column column:
1. Using Course Content Navigator, navigate to the folder where you want to create
the column.
2. Click Create Column in the Gradebook toolbar and then click Total Column.
3. The Create Total Grades Column window opens.
4. Type the column name in the Column name text box, up to 25 alphanumeric
characters.
5. Select the location where the column is to be inserted from the Insert as dropdown list. Last will display the column as the last column this folder; 1 will display
it as the first, 2 as the second, and so on.
6. On the left side of the window, navigate through the Student Content view to
locate the activities you want to include in the calculation. Select the check box
next to the appropriate activities and then click the Add button. The selected item
will be added to the Selected Columns section.
7. Continue adding activities until all items are added. [Note: to add activities from a
Study Plan, you must click the Study Plan name and then select from the
activities included in the Study Plan.] To remove an activity from the list, select
the checkbox for the appropriate activity and then click Remove in the
Selected Columns taskbar.
8. Assign a weight for each column or activity in the Weight text box.
9. The total weight for the selected columns is added up and displayed in the Total
Weight text box. The total weight of the columns should ideally be 100.
10. Click Save to save the Total Column.
- 102 -
MyNursingLab Instructor Guide Fall 2008
Send Message
This Send Message tool allows you to send messages to students.
1. Select the check box next to the appropriate student name(s) in the Name
column.
2. Click the Send Message link on the toolbar.
3. The New message window opens, so you can compose the mail. For more
details, click here.
Grant Access
The Grant Access link allows you to define what students have the rights to access a
course.
1. To grant access to a student, select the check box next to the appropriate
student name(s) in the Name column.
2. Click the Grant Access link on the Gradebook toolbar.
3. The strikethrough no longer appears over the student name, indicating that the
student has been granted access to the course.
Deny Access
The Deny Access link allows you to define what students have the rights to access a
course.
1. To deny access to a student, select the check box next to the appropriate student
name(s) in the Name column.
2. Click the Deny Access link on the Gradebook toolbar.
3. A strikethrough appears over the student name, indicating that the student has
been denied access to this course.
Download Grades
At the bottom of the Gradebook, a Download Grades area displays. From here, you can
download views of the gradebook and student roster in various formats. The Download
drop-down list has three options: All Grades, Current Display, and Student Roster. The
file format options include csv (comma-separated value), tab delimited, or pdf files.
All Grades: Downloads all the grades in all of the folders.
1. Select All Grades from the Download drop-down list.
2. Choose a file format from the drop-down list.
3. Click the
button. A File Download dialog box displays, with options
to Open or Save the file to a desired location.
Current Display: Downloads the grades shown in the current display.
1. Select Current Display from the Download drop-down list.
2. Choose a file format from the drop-down list.
3. Click the
button. A File Download dialog box displays, with options
to Open or Save the file to a desired location.
Student Roster: Downloads student information such as user ID, last name, first name.
Use the .csv format to create a file that then can be used to import grades (see above).
1. Select Student Roster from the Download drop-down list.
2. Choose a file format from the drop-down list.
3. Click the
button. A File Download dialog box displays, with options
to Open or Save the file to a desired location.
Note: The download displays the Student Name or Student ID, depending on the view you have
set at the time of download. If you download the grades when viewing by Student name, the
- 103 -
MyNursingLab Instructor Guide Fall 2008
download displays Student name. If you download the grades when viewing by Student ID, the
download displays Student ID. [Note: you can use the Student ID view in conjunction with the
Current Display download to generate a .csv file that can be imported into another grading or
learning management system.]
Custom View
Custom View allows you to view a unique, or custom, Gradebook view with only those
grade columns you specify.
One Custom View has already been set up in MyNursingLab, which displays the Pre and
Post Test scores for every student. The default grade schema for the Custom View is
letter grades. You can change letter grade to percentage or raw scores in the following
way:
•
•
First, go into Preferences, Grading, uncheck the first box (Enable Letter Scoring)
check the second box (Enable percentage or raw score at the course level), then
select the "Use Raw Score" circle
Next, you have to override the default letter grade option in each Study Plans –
for every Pre Test and every Post Test.
o Open the Study Plan folder in the Course Content section.
o Under the drop down options menu for the Study Plan, choose Edit.
o When the next screen opens, choose Edit again beside the Pre Test.
o Go to the Grades tab in Edit view
o Click the drop-down box and change the “Select grade schema” option to
<-Select->
o Click Save and Return
o This overrides the individually set Study Plan letter-grade default, and
allows the general grading preferences you set to come through.
o Repeat for every Pre and Post Test.
Working with Custom View
To add a column from the Grades view to the Custom View:
1. Click the Gradebook toolbar button or click the Grades tab.
2. Using the Course Content navigator, navigate to the folder with the column you
wish to add to custom view.
3. Click the options menu next to the appropriate activity name and then click Save
to Custom View.
You can copy up to 115 columns into Custom View.
By default, students will see all of the columns you have added to Custom View in their
own student version of the Custom View. To hide a column in the student's Custom View,
you must revoke the column from the Custom View tab.
To hide a Custom View column from students:
1. Click the Gradebook toolbar button and then click Custom View or click the
Custom View tab.
2. Using the Course Content navigator, navigate to the folder with the column you
wish to add to custom view.
3. Click the options menu next to the appropriate activity name and then click
Revoke Column.
Two important notes:
- 104 -
MyNursingLab Instructor Guide Fall 2008
•
•
Revoking a column in Custom View does not revoke (hide) it from students in the
main Grades view. If you wish to hide it in both locations, you must revoke (hide)
the column in both Grades an Custom View.
If a column was revoked (hidden) in Grades view when it is added to Custom
View, it will be released (unhidden) upon being added to Custom View; you must
revoke the column from the Custom View tab to again hide it from students.
Custom View Grades Area
The Grades Area includes two areas of columns: Student Name/Student ID and the
Grades columns:
1. Student Name/Student ID: Displays the names of students enrolled in the
course. If you want to view the gradebook by Student ID, click Show ID link. To
view by Student Name, click the Show Name link next to Student ID column.
[Note: you can use the Student ID view in conjunction with the Current Display
download to generate a .csv file that can be imported into another grading or
learning management system.] An option menu is available for each student, with
option to Send a Message. For more details, click here.
2. Grades Columns: The gradebook columns saved to Custom View display the
same information as seen in the Grades tab. Note that:
• Any changes made to grades in the Grades tab are reflected in
Custom View and all other views that display grades.
• Any changes made in Custom View are reflected in the Grades tab
and all other views that display grades.
3. Activities: The Custom View includes one column per activity assigned to
students in your course. For each activity, a column includes a column header
and various icons to indicate the status of the activity.
• Each gradebook column has an options menu, with various options
available.
Drag the icon to the left or right to change the order of columns in a
•
gradebook.
•
Displays if an activity or study plan is assigned.
•
•
•
•
•
•
•
•
•
Displays if due date is specified for an activity or study plan. Point
to the icon to display a tool tip showing the due date and time.
If you have indicated that unassigned items should display a
checkmark in the Grading Preferences, a checkmark displays for
unassigned items. If you select this option, the score and grades will
be displayed for the students on the view submission page, but the
score will not be available for the instructor. The instructor can only
view the
icon in the Gradebook for this item and cannot view the
submission.
Indicates the column is a Numeric column.
Indicates the column is a Calculated Column.
Indicates the column is a List Column
Indicates the column is a Free Text Column
Indicates the column is an Import Grades column
:
Indicates the column is a Total Column
Indicates the activity in the column required manual grading
(displays for Dropbox assignments with File Upload questions).
Submitted Grade Icons
For each activity in the Custom View, scores are represented with the following icons:
•
: Displays if the grades are edited after the submission.
- 105 -
MyNursingLab Instructor Guide Fall 2008
•
•
•
•
•
•
: Displays if a student has a late submission (submissions after due date)
and the scores are grayed. The scores will not be counted for any averages
and will not be displayed in Reports. This icon will disappear only if you
accept the submission. On accepting, the scores will be displayed normally.
: Displays if the student has failed to obtain passing grades.
: Displays to indicate a new grade. This icon displays when view the page
for the first time after the grade is posted.
Not Attempted: Displays if a student has not yet started the activity.
In Progress:Displays if a student has started but not completed the activity.
Complete: Displays if a student has completed the activity. Click the
Complete link to open View Submissions screen.
Download Grades
At the bottom of the Custom View, a Download Grades area displays. From here, you
can download views of the gradebook in various formats. The file format options include
csv (comma-separated value), tab delimited, or pdf files. To download the grades in
Custom View:
1. Choose a file format from the drop-down list.
2. Click the
button. A File Download dialog box displays, with options
to Open or Save the file to a desired location.
Note: The download displays the Student Name or Student ID, depending on the view you have
set at the time of download. If you download the grades when viewing by Student name, the
download displays Student name. If you download the grades when viewing by Student ID, the
download displays Student ID. [Note: you can use the Student ID view in conjunction with the
Current Display download to generate a .csv file that can be imported into another grading or
learning management system.]
Manage Roster
The Manage Roster tab allows you to create users and then invite them to register in the
course via email. The created users are listed in Gradebook and are considered as
unregistered users. After registration, users can access the course and complete
activities. The Manage Roster tab has three main areas: the Roster Area the Roster
Area Toolbar with various options, and the Download Roster tools.
Roster Area
The Roster area lists all users currently created or active in your course. For each user,
the following information is listed:
• Name: Name of the user, listed by last name, first name.
• Student ID: Student ID for each user. You can use Student ID to be any
unique identifier used at your school -- for example, a student ID in the
registration system, WebCT, Blackboard, or others. To edit a Student ID,
click the options menu next to Student ID and then click Edit Student IDs.
1. The Edit Student IDs window opens, displaying a list of students,
showing Student Name and Student ID.
2. Edit or type the Student ID in the text box next to the corresponding
student name.
3. Click the Save button to save the changes (or Cancel to cancel the
updates).
• Role: Indicates the type of user -- Student, Instructor, Teaching Assistant.
• Status: Lists the status of the user: Active users are registered and
enrolled in a course. Invited users have been invited to enroll in a course.
- 106 -
MyNursingLab Instructor Guide Fall 2008
•
•
Unregistered users are new and have not yet been invited or enrolled in a
course.
User Name: Displays the MyNursingLab username of the user.
Last Login: Lists the date on which the user last logged in.
Note: You can sort the columns ascending or descending by clicking the column header.
Roster Area Toolbar
The Roster Area toolbar includes options to allow you to create and invite users, send
messages, and more.
Filtering the Roster View
The View list is used to filter the Roster to show only specific types of users. The View list
contains the following options:
• All Users: Displays all users in the Roster Area.
• Students: Displays only users with Student role in the Roster Area.
• Teaching Assistants: Displays only users with Teaching Assistant role in
the Roster Area.
• Instructors: Displays only users with Instructor role in the Roster Area.
• Unregistered Students: Displays only Enrolled Student users in the Roster
Area (this includes Unregistered and Invited Student users).
• Registered Students: Displays only Unenrolled Student users in the Roster
Area (this includes Active Student users).
• Enrolled Students Only: Displays only Enrolled Student users in the
Roster Area.
• Unenrolled Students: Displays only Unenrolled Student users in the
Roster Area.
Creating a New User (Student, Teaching Assistant and Instructor)
You can create new users as Student, Teaching Assistant and Instructor. You can also
Import Students from other courses to into this course. To create a user, complete the
following steps:
1. Click Create User on the Roster Area Toolbar.
2. Choose the appropriate user type (Student, Teaching Assistant, Instructor)
from the list.
3. When the Create User window opens, enter the user profile information in the
text boxes (red asterisks indicate required fields):
• *First name: Type the first name of the user.
• *Last name: Type the last name of the user.
• *Email Address: Type the e-mail address of the user.
• Access Code: If available, enter a valid access code for the user. Entering
the access code here means that, when the user is invited, the access code
will appear in the invitation email. [Note: the access code must match the
user -- Instructors and Teaching Assistants must have valid instructor
codes; Students must have valid student access codes.]
• Student ID: Type the Student ID (appears for Teaching Assistants and
Students only).
• LMS ID: Type the LMS ID. LMS ID might be the users Blackboard ID,
WebCT ID, CourseCompass ID, or any other unique identifier that will allow
you to generate reports to import into another system. (appears for
Teaching Assistants and Students only).
• Alias: Type an Alias. An alias can be a name that you can use to post
printed grades anonymously or any other unique identifier used at your
school (appears for Teaching Assistants and Students only).
- 107 -
MyNursingLab Instructor Guide Fall 2008
Other: Type any other unique identifier used at your school (appears for
Teaching Assistants and Students only).
4. Click Save to create the user profile.
•
Importing Student Users
You can create also import Student users from a .csv (comma separated value) file. To
import users, complete the following steps:
1. First, generate a correctly formatted grade import .csv (comma separated value)
file. The csv (comma separated value) file must include at least three columns,
with additional optional columns, as outlined below:
• *First name: Type the first name of the user.
• *Last name: Type the last name of the user.
• *Email Address: Type the e-mail address of the user.
•
Access Code: If available, enter a valid access code for the user. Entering
the access code here means that, when the user is invited, the access
code will appear in the invitation email. [Note: the access code must match
the user -- Instructors and Teaching Assistants must have valid instructor
codes; Students must have valid student access codes.]
•
Student ID: Type the Student ID.
•
LMS ID: Type the LMS ID. LMS ID might be the users Blackboard ID,
WebCT ID, CourseCompass ID, or any other unique identifier that will
allow you to generate reports to import into another system. .
•
Alias: Type an Alias. An alias can be a name that you can use to post
printed grades anonymously or any other unique identifier used at your
school (appears for Teaching Assistants and Students only).
•
Other: Type any other unique identifier used at your school.
2. Save the .csv file in a location that you will remember.
3. Click Create User on the Roster Area Toolbar.
4. Click Import Students.
5. When the Create User window opens, click Browse to locate the .csv file
containing the student information.
6. Click the OK button to import the file. If there are formatting issues with the file,
an error message, "There are no valid record(s) to import." will display.
Inviting Users
After you have added a user, you can invite them to enroll in a course.
1. Select the check boxes next to the names of the users you want to invite. [Note
that you can only invite Unregistered or Invited users].
2. Click the Invite Users link. The Invite students window opens.
3. By default, a subject and email body are filled in. You can edit them, as needed.
Edit the subject of the mail in the Email Subject text box.
4. If desired, edit the content for e-mail invitation in the Email Body.
5. If desired, type the course name in the Course Name text box.
6. If desired, type the textbook name in the Textbook Name text box.
7. The links at the bottom of the email cannot be edited: these are links to point
students to the Pearson registration system.
8. Click Send to send the email invitation.
9. The Invited users will receive an email at the email address in his or her profile,
which provides links to register and access to the course. The links at the bottom
between the links and follow the steps mentioned. Two links appear on the
bottom of the page:
a. Register here: This link directs to the Pearson registration system for the
users to register and get access to the course. An access code will also be
provided by the system, which is mandatory for registration purposes. On
- 108 -
MyNursingLab Instructor Guide Fall 2008
completing the registration process, a username and password is provided
using which the users can login and gain access to the course.
b. Login here: After the registration process, the user becomes a registered
user. The user then should click on this second link to log in to the
MyNursingLab (Pegasus) login page. Type the username and password set
up during the registration process to access the course to which the user was
invited.
Send Message
This Send Message tool allows you to send messages to students.
1. Select the check box next to the appropriate student name(s) in the Name
column.
2. Click the Send Message link on the toolbar.
3. The New message window opens, so you can compose the mail. For more
details, click here.
Grant Access
The Grant Access link allows you to define what students have the rights to access a
course.
1. To grant access to a student, select the check box next to the appropriate
student name(s) in the Name column.
2. Click the Grant Access link on the Gradebook toolbar.
3. The strikethrough no longer appears over the student name, indicating that the
student has been granted access to the course.
Deny Access
The Deny Access link allows you to define what students have the rights to access a
course.
1. To deny access to a student, select the check box next to the appropriate student
name(s) in the Name column.
2. Click the Deny Access link on the Gradebook toolbar.
3. A strikethrough appears over the student name, indicating that the student has
been denied access to this course.
Download Roster
At the bottom of the Roster, a Download Roster as .CSV file area displays. From here,
you can download the student roster as a ,csv (comma-separated value) file.
1. Click the Download Roster as .CSV file link.
2. A File Download dialog box displays, with options to Open or Save the file to a
desired location.
Options: Gradebook
The Gradebook has many options available on the options menus on the Grades,
Custom View, and Manage Roster tabs.
Options: Grades
The Grades tab options are outlined below.
Student Name/Student ID Column
The following options are available on the options menus for the Student Name/Student
ID column:
1. Edit Grades: Navigate to the folder where you want to edit student grades. Click
the options menu next to the appropriate Student Name or Student ID -- and then
- 109 -
MyNursingLab Instructor Guide Fall 2008
click Edit Grades. The Edit Grades window opens, listing current grades for all
activities in the selected folder. Edit the grades, as desired, adding comments
where appropriate. Click the Save button to save your changes (or Cancel to
cancel the edits).
2. Send Message: Click the options menu next to the appropriate Student Name or
Student ID -- and then click Send Message. The New Message window opens.
3. Deny Access/Grant Access: To deny a student access to a course, click the
options menu next to the appropriate Student Name or Student ID -- and then
click Deny Access. A strikethrough appears over the student name, indicating
that the student has been denied access to this course, click the options menu
next to the appropriate Student Name or Student ID -- and and then click Grant
Access. The strikethrough no longer appears over the student name, indicating
that the student has been granted access to the course.
Gradebook Columns
The Gradebook displays a series of columns, including one column per activity assigned
to students in your course. The following options are available on the options menus for
the various Gradebook columns:
1. Edit Grades: Click the options menu next to the appropriate activity name and
then click Edit Grades. The Edit Grades window opens, listing current grades for
the activity. You can assign the same grade to all students (global) or edit grades
for each student individually.
• To assign the same grade to all students, select the Assign global
grade/comment for all students check box. The Grade and
Comment text boxes are enabled. Enter the Grade and Comment in
the respective text boxes. For all the assigned students, the same
grade and comments will be displayed.
• To assign individual grades to each student, be sure the Assign
global grade/comment for all students check box is deselected.
Enter the Grades and Comments information in the corresponding
text boxes. For the Grades, enter the student score in the left box
and the maximum possible score in the right box.
• Click Save to save the changes (or Cancel to cancel the changes).
Note: When you edit grades for late submissions, the submissions are accepted. The grayed
scores are displayed normally and the
icon disappears.
2. View in Gradebook. To view the activity in the Grades view, click the options
menu next to the appropriate activity name and then click View in Gradebook.
3. Apply Grade Schema: Click the options menu next to the appropriate activity
name and then click Apply Grade Schema. The Apply Schema window opens.
Select a grade schema from the existing drop down list. Click Apply to apply the
Add New Schema in the Apply Schema
schema. [To add new schema, click
taskbar. To update the existing schema, click the Update Schema link. For more
information on adding and updating schemas, see Grading.]
• After you apply changes to the schema, the Modify Grade Schema
and Remove Grade Schema options appear for the activity.
• Click Modify Grade Schema to open Apply Schema window. From
this window, you can add a new schema or make updates to the
existing grade schema . [For more information on adding and
updating schemas, see Grading.]
• Click Remove Grade Schema to remove the grade schema and
return to the raw grade display.
3. Show Raw Score/Show Percentage Score: Click the options menu next to the
appropriate activity name and then click Show Raw Score or Show Percentage
- 110 -
MyNursingLab Instructor Guide Fall 2008
4.
5.
6.
7.
8.
9.
10.
Score. When you show a raw score, the score displays as an x /y value. When
you show a percentage score, the grade appears as a percentage.
Send Message: Click the options menu next to the appropriate activity name and
then click Send Message. The New Message window opens.
View Statistics: To view the mean, median, and standard deviation of the
grades for an activity, click the options menu next to the appropriate activity
name and then click View Statistics. The Statistics report window opens. Click
Cancel to close the window.
View All Submissions: To view the all submissions (and details) for an activity,
click the options menu next to the appropriate activity name and then click View
All Submissions. For details on View Submissions, click here.
View in Course Content: To view the activity in the Course Content, click the
options menu next to the appropriate activity name and then click View in
Course Content. The Course Content tool displays, open to the folder where the
activity is located.
Move Column: Click Move Column on the options menu of the corresponding
activity name. The Move Gradebook Column window opens. Select the location
from the drop-down list and then click Apply.
Revoke Column/Release Column: To hide a column from the Student
Gradebook, click the options menu of the corresponding activity name and then
click Revoke Column. A strikethrough appears over the column header, to
indicate it is hidden. To undo this and show a hidden column in the Student
Gradebook, click the options menu of the corresponding activity name and then
click Release Column.
Show/Hide Submissions. By default, all students are allowed to view
submissions for activities. To hide the Student Study Guide/Submissions report
from students, click the options menu of the corresponding activity column name
and then click Hide Submissions from Students. If a student tries to view
submissions for this activity, the message "Your instructor has hidden
submissions for this assignment. Please see your instructor for more
information." displays in the View submissions page. To undo this and show a
hidden column in the Student Gradebook, click the options menu of the
corresponding activity name and then click Show Submissions to Students.
Note: Not all of these options apply to Custom Gradebook columns: Apply Grade Schema and
Show Percentage Score/Show Raw Score are displayed only for Import Grades column. View
Statistics is displayed only for Calculated column. All custom columns also have a Delete
Column option: To delete a custom column, click the options menu of the corresponding activity
name and then click Delete Column. Click OK or Cancel, when prompted.
Options: Custom View
The Custom View tab options are outlined below.
Student Name/Student ID Column
The following options are available on the options menus for the Student Name/Student
ID column:
1. Send Message: Click the options menu next to the appropriate Student Name or
Student ID -- and then click Send Message. The New Message window opens.
Gradebook Columns
The Gradebook displays a series of columns, including one column per activity assigned
to students in your course. The following options are available on the options menus for
the various Gradebook columns:
- 111 -
MyNursingLab Instructor Guide Fall 2008
1. Edit Grades: Click the options menu next to the appropriate activity name and
then click Edit Grades. The Edit Grades window opens, listing current grades for
the activity. You can assign the same grade to all students (global) or edit grades
for each student individually.
• To assign the same grade to all students, select the Assign global
grade/comment for all students check box. The Grade and
Comment text boxes are enabled. Enter the Grade and Comment in
the respective text boxes. For all the assigned students, the same
grade and comments will be displayed.
• To assign individual grades to each student, be sure the Assign
global grade/comment for all students check box is deselected.
Enter the Grades and Comments information in the corresponding
text boxes. For the Grades, enter the student score in the left box
and the maximum possible score in the right box.
• Click Save to save the changes (or Cancel to cancel the changes).
Note: When you edit grades for late submissions, the submissions
are accepted. The grayed scores are displayed normally and the
icon disappears.
2. View All Submissions: To view the all submissions (and details) for an activity,
click the options menu next to the appropriate activity name and then click View
All Submissions. For details on View Submissions, click here.
3. View in Course Content: To view the activity in the Course Content, click the
options menu next to the appropriate activity name and then click View in Course
Content. The Course Content tool displays, open to the folder where the activity
is located.
4. Move Column: Click Move Column on the options menu of the corresponding
activity name. The Move Gradebook Column window opens. Select the location
from the drop-down list and then click Apply.
5. Revoke Column/Release Column: To hide a column from the Student
Gradebook, click the options menu of the corresponding activity name and then
click Revoke Column. A strikethrough appears over the column header, to
indicate it is hidden. To undo this and show a hidden column in the Student
Gradebook, click the options menu of the corresponding activity name and then
click Release Column.
6. Remove from Custom View: If you wish to remove a gradebook column from
Custom View, click the options menu of the corresponding activity name and
then click Remove from Custom View. The column is removed from the Custom
View, but unchanged in the gradebook.
Options: Manage Roster
The Manage Roster tab options are outlined below.
Name Column (Active User)
The following options are available on the options menus in the Name column for an
Active User:
1. Send Message: Click the options menu next to the appropriate Name -- and then
click Send Message. The New Message window opens.
2. Deny Access/Grant Access: To deny a student access to a course, click the
options menu next to the appropriate Name -- and and then click Deny Access.
A strikethrough appears over the student name, indicating that the student has
been denied access to this course, click the options menu next to the
appropriate Name -- and and then click Grant Access. The strikethrough no
longer appears over the student name, indicating that the student has been
granted access to the course.
- 112 -
MyNursingLab Instructor Guide Fall 2008
3. View Grades: Click the options menu next to the appropriate Name -- and then
click View Grades. The Gradebook opens to the View by Course tab, showing
grades for that student.
Name Column (Unregistered or Invited User)
The following options are available on the options menus in the Name column for an
Unregistered or Invited User:
1. View Profile: Click the options menu next to the appropriate Name -- and then
click View Profile. The View Profile window opens, listing enrollment, login, and
other information for that student.
2. Edit Profile: Click the options menu next to the appropriate Name -- and then
click Edit Profile. The Edit Profile window opens, listing profile information for
that student. You can edit this information following the same steps used to
create a new user.
3. Delete from Program: Click the options menu next to the appropriate Name -and then click Delete from Program. Click OK to confirm the deletion (or Cancel
to cancel the deletion).
Reports
Overview
The
Reports tool provides a list of reports available to you in MyNursingLab. By
selecting appropriate filter options before running each report, you can fully customize
each report to suit both your needs and those of your students.
The reports available in the Reports tool are organized by type into the following areas:
• My Reports: Lists reports that you have saved to for future use.
• Performance Reports: List reports that provide detailed student results on
MyNursingLab.
My Reports
Overview
My Reports section displays the generated reports. This acts as a storage place for
saved reports.
Note: My Reports section displays the message “There are currently no reports saved to this
section” when there are no reports.
Saving the Settings to My Report
Each time you run a report, a Save Settings to My Report check box appears at the
bottom of the Report Options window. To save a report to the My Reports area:
1. Click the Save Settings to My Reports check box.
2.
3.
4.
5.
button.
Click the
Type the name for the report in the text box.
Click the Create New Report option to create a new report.
Click the Replace Existing Report option to replace an existing report. Choose
an existing report from the selection list to be replaced with the new report
settings.
6. To save and view the report, click the
Options
- 113 -
button.
MyNursingLab Instructor Guide Fall 2008
The options menu of the My Reports has the following:
• Run Report: This helps you run the report
• Edit Settings: This helps you edit the settings options for the report
• Delete: This helps you delete the report
Performance Reports
Performance Reports are detailed reports that provide data on student performance, with
regard to course activities. Four types of Activity reports are available in MyNursingLab:
•
•
•
•
Student Results by Activity (Multiple Students): Shows the performance
of one or more students for a single activity.
Activity Results by Student (Single Student): Shows the performance of a
single student for one or more activities.
Study Plan Results: Shows detailed results for one or more students on a
single study plan.
Question Analysis Shows overall student performance on questions in one
or more activities.
Student Results by Activity Results (Multiple Students and Activities)
The Activity Results (Multiple Students and Activities) shows the performance of one or
more students for the activities (quizzes) within the study material from the Study Plans.
Choose Student Results by Activity under the Performance Reports.
The Options for Activity Results (Multiple Students and Activities) window opens.
Selecting Activity Options
1.
2.
3.
4.
5.
In the Student Options, choose the students whose activity reports you want.
In the Activity Options, choose All Activities
Choose a Date Option
Choose a Paging Option
Choose an option from Attempts, which contains the following:
• Recorded in Gradebook: This will display only those results that are saved
in the Gradebook. By default, this is selected.
• Last: This will display only the most recent attempt for the activity.
• All Attempts: This will display the results of all the attempts.
• First: This will display only the first attempt for the activity.
• Highest: This will display only the attempt with the highest score.
• Lowest: This will display only the attempt with the lowest score.
• Average: This will display only the average of the attempts.
Selecting Student Options
1. In the Student Options, click on Select Student(s) button. The Select Students
window opens which displays the list of all students. Select the students in the
check boxes and click Add. The textbox displays "Multiple Selected(n)", where
(n) denotes the number of students selected.
2. From Use this student identifier in report selection list, select the ID to use for
identifying the student, for example (first/last name, username)
- 114 -
MyNursingLab Instructor Guide Fall 2008
Note: You can view the selected students by clicking the Show All link present next to the
textbox. Here, you can remove a selected student by clicking on the corresponding Remove link.
To close the selected students list, click the Collapse link next to the textbox.
Selecting Date Options
1. From the Date options, select any of the following:
• All Dates: Select this option to display the attempts, grading and score for
all the dates. By default, this is selected.
• From and To dates: Select this option to display the attempts, grading and
scoring for the dates specified. Click the calendar icons to select the dates.
2. To save the settings in the My Reports section, select the Save Settings to My
Report check box.
3. Click the
button to view the report generated for Activity Results
(Multiple Students and Activities).
Paging Options
1. From the Paging Options, select one of the following:
• Show X results per page: Select this option to display specified number
of results on a single page. Choose the desired number from the list.
• Show all results: Select this option to display all results on a single
page.
If you select Show X results per page and specify number of results for a single page, the
resulting report will display First Page, Previous, Next and Last Page navigation links
display below the Report Data. The links are displayed only if you have selected more
activities than the number specified in Show X results per page.
Reading the Activity Results (Multiple Students and Activities) Report
The Activity Results (Multiple Students and Activities) Report displays the following
information:
• Header: You can view the Name, Print and Download the reports.
- Print: Click this button to open the Print Settings window. For details, see
Print.
- Download: Click this button to download the report as .csv file or .pdf file
or .txt file.
• Summary: Displays the summary information
• Report Data: Displays the detail assessment results.
Summary
The report displays the following summary information:
• Activity name
• Section name
• Instructor name
• Report run date
• Attempts
• Activity Type
• Date range
- 115 -
MyNursingLab Instructor Guide Fall 2008
Report Data
The following columns are displayed for each student:
• Student: Displays the following:
- Name of the student
- Attempt posted to Gradebook: Highest, Lowest, First, Last, Average
• Attempt #: Number of attempts
• Submitted: Date and time of submission
• Grade: Grades scored
• Score: Score as percentage
• Time in Activity: Time taken by student to complete the task.
• Submissions/Study Guide: View button linking to view submissions of the
students for the activities.
For each of the selected activity you can view the following:
• Activity type: Word, Excel, PowerPoint, Access
• Average Score: Average score of all the students for the activities
• Average Time in Activity: Average time spent to complete the task.
Note: The Grade column will display a value only if a grade schema is applied for the activity.
You can sort the all the columns except Submissions/Study Guide. Sorting is available only
when you click on the column header.
Activity Results by Student (Multiple Students)
The Activity Results (Multiple Students) shows the performance of one or more students
for a single activity.
1. Choose Activity Results (Multiple Students) under the Activity Reports.
2. The Options for Activity Results (Multiple Students) window opens.
Selecting Activity Options
1. In Activity Options, click Select Activity button. The Select Activity window
opens displaying the list of activities. Select an Activity name and click Add. The
text box displays the selected activity.
2. Choose an option from Attempts, which contains the following:
• Recorded in Gradebook: This will display only those results that are saved
in the Gradebook. By default, this is selected.
• Last: This will display only the most recent attempt for the activity.
• All Attempts: This will display the results of all the attempts.
• First: This will display only the first attempt for the activity.
• Highest: This will display only the attempt with the highest score.
• Lowest: This will display only the attempt with the lowest score.
• Average: This will display only the average of the attempts.
Selecting Student Options
1. In the Student Options, click on Select Student(s) button. The Select Students
window opens which displays the list of all students. Select the students in the
check boxes and click Add. The text box displays "Multiple Selected(n)", where
(n) denotes the number of students selected.
- 116 -
MyNursingLab Instructor Guide Fall 2008
2. From Use this student identifier in report selection list, select the ID to use for
identifying the student, for example (first/last name, username)
Note: You can view the selected students by clicking the Show All link present next to the text
box. Here, you can remove a selected student by clicking on the corresponding Remove link. To
close the selected students list, click the Collapse link next to the text box.
Selecting Date Options
1. From the Date options, select any of the following:
• All Dates: Select this option to display the attempts, grading and score for
all the dates. By default, this is selected.
• From and To dates: Select this option to display the attempts, grading and
scoring for the dates specified. Click the calendar icons to select the dates.
8. To save the settings in the My Reports section, select the Save Settings to My
Report check box.
9. Click the
button to view the report generated for Activity
Results (Multiple Students).
Paging Options
1. From the Paging Options, select one of the following:
• Show X results per page: Select this option to display specified number
of results on a single page. Choose the desired number from the list.
• Show all results: Select this option to display all results on a single
page.
If you select Show X results per page and specify number of results for a single page,
the resulting report will display First Page, Previous, Next and Last Page navigation links
display below the Report Data. The links are displayed only if you have selected more
activities than the number specified in Show X results per page.
Reading the Activity Results (Multiple Students) Report
The Activity Results (Multiple Students) displays the following information
• Header: You can view the Name, Print and Download the reports.
- Print: Click this button to open the Print Settings window. For details, see
Print.
- Download: Click this button to download the report as .csv file or .pdf file
or .txt file.
• Summary: Displays the summary information
• Report Data: Displays the detailed activity report.
Summary
The report displays the following summary information:
• Activity name
• Section name
• Instructor name
• Average score
• Average Time in Activity
• Report run date
• Attempts
- 117 -
MyNursingLab Instructor Guide Fall 2008
•
•
Activity type
Date range
Report Data
The following columns are displayed for each student:
• Student: Displays the following:
- Name of the student
- Attempt posted to Gradebook: Highest, Lowest, First, Last, Average
• Attempt #: Number of attempts
• Submitted: Date and time of submission
• Grade: Grades scored
• Score: Score as percentage
• Time in Activity: Time taken by student to complete the task.
• Submissions/Study Guide: View button linking to view submissions of the
students for the activities.
Note: The Grade column will display a value only if a grade schema is applied for the activity.
You can sort the all the columns except Submissions/Study Guide. Sorting is available only
when you click on the column header.
Study Plan Results
The Study Plan results shows the performance of a single student for one or more Study
Plans
1. Choose Study Plan Results under the Activity Reports.
2. The Options for Study Plan Results window displays.
Selecting Student Options
1. In the Student Options area, click on Select Student button. The Select Students
window opens which displays the list of all students. Select a student name and
click Add. The text box displays the selected student.
2. From Use this student identifier in report selection list, select the identifier to
use for identifying the student.
Study Plan Options
1. In the Study Plan Options, choose the desired Study Plan/Plans
2. Select the Attempts you wish to view – Recorded in Gradebook, Most Recent, All
Attempts
Selecting Date Options
1. From the Date options, select any of the following:
• All Dates: Select this option to display the attempts, grading and score for
all the dates. By default, this is selected.
• From and To dates: Select this option to display the attempts, grading and
scoring for the dates specified. Click the calendar icons to select the dates.
- 118 -
MyNursingLab Instructor Guide Fall 2008
Paging Options
1. From the Paging Options, select one of the following:
2. Show X results per page: Select this option to display specified number of
results on a single page. Choose the desired number from the list.
3. Show all results: Select this option to display all results on a single page.
4. To save the settings in the My Reports section, select the Save Settings to My
Report check box.
5. Click the
button to view the report
If you select Show X results per page and specify number of results for a single page, the
resulting report will display First Page, Previous, Next and Last Page navigation links
display below the Report Data. The links are displayed only if you have selected more
activities than the number specified in Show X results per page.
Reading the Study Plan Results Report
The Study Plan Results Report displays the following information
• Header: You can view the Name, Print and Download the reports.
- Print: Click this button to open the Print Settings window. For details, see
Print.
- Download: Click this button to download the report as .csv file or .pdf file
or .txt file.
• Summary: Displays the summary information
• Report Data: Displays the detailed activity report.
Summary
The report displays the following summary information:
• Student name
• Study Plan name
• Pre and Post Test score
• % Change
• Averaged Score
Question Analysis Reports
In the Question Analysis Report you can generate reports based on the statistics of all
questions used in the Pre and Post Tests, and the graded activities from within the Study
Material.
Generating a Report
1. Choose the Questions Analysis Report.
2. The Options for Question Analysis Report window opens.
Selecting Activity Options
1. Fro Activity Type, choose All Activities
2. Select the Activity you want the report data run on
- 119 -
MyNursingLab Instructor Guide Fall 2008
Selecting Date Options
1. From the Date option, select any of the following:
• All Dates: Select this option to display the attempts, grading and score for
all the dates. By default, this is selected.
• From and To dates: Select this option to display the attempts, grading and
scoring for the dates specified. Click the calendar icon to select the dates.
2. To save the settings in the My Reports section, select the Save Settings to My
Report check box.
3. Click the
to view the report generated for Question Analysis.
Paging Options
1. From the Paging Options, select one of the following:
• Show X results per page: Select this option to display specified number
of results on a single page. Choose the desired number from the list.
• Show all results: Select this option to display all results on a single
page.
If you select Show X results per page and specify number of results for a single page, the
resulting report will display First Page, Previous, Next and Last Page navigation links
display below the Report Data. The links are displayed only if you have selected more
activities than the number specified in Show X results per page.
Viewing the Question Analysis Report
The Exam Frequency Analysis Report displays the following information
• Header: You can view the Name, Print and Download the reports.
- Print: Click this button to open the Print Settings window. For details, see
Print.
- Download: Click this button to download the report as .csv file or .pdf file
or .txt file.
• Summary: Displays the summary information
• Report Data: Displays the analysis report in detail.
Summary
The report displays the following summary information:
• Activity name(s) of the Exam
• Section name
• Instructor name(s)
• Total number of students
• Average Score for activities
• Report run date
• Attempts
• Date range
Report Data
The following columns are displayed for each of the simulation (performance-based)
questions and objective-based questions in the Exams:
- 120 -
MyNursingLab Instructor Guide Fall 2008
•
•
•
•
•
•
•
•
•
Question: Displays the following details
- Question Title: Title of the Question
- Question Text: The text for the Question
Type: The question type name.
Application: Word, Excel, PowerPoint, Access for simulation (performancebased) questions.
Total # of times questions presented: Total number of times the question was
presented to the students.
Average time: Average time taken by the student to complete the task.
% Correct: Percentage of students who answered the questions correctly.
Correct: Number of times the question was completed correctly by the
students.
Incorrect: Number of times the question was completed incorrectly by the
students.
Skipped: Number of times the question was skipped and not presented by
the students
Communicate
Using Communicate
The Communicate tool allows you to manage course Mails and Announcements.
Instructors can send messages to students, using Mail or Announcements. Communicate
tool consists of the following sub sections:
1. Mail
2. Announcements
Using the Mail Tool
Overview
The Communicate tool is where you manage correspondence in your course. Using the
Communicate tool, you can create and send messages to instructors and students,
receive and read mail and announcements, and draft messages to send at a later date or
time.
The Communicate tool includes an Inbox Area on the right, where new messages
display, and a left navigation bar with four items:
Compose new
Inbox
Draft
Sent
Composing a New Message
You can write a new mail message to the intended recipients.
1. Click
Compose new. The New Message screen opens.
2. Click the To button to select recipient names from a list in the Address Book to
whom the message is to be sent. If you are logged into your Shared Library
course, you also can choose to send the message to all instructors who have
- 121 -
MyNursingLab Instructor Guide Fall 2008
that Shared Library linked to their enrolled course. The message will be sent to
the instructors' external email address.
3. Click the Cc button to select recipient names from a list in the Address Book to
whom a carbon copy of your message is to be sent.
Note: Carbon copies are usually sent to people other than the one (s) being written to directly but
are important recipients of the email as well, usually someone indirectly concerned about the
subject of the email. All 'To:' recipients and 'Cc:' recipients can see the entire list of both kinds of
recipients.
4. Click the Bcc button to select recipient names from a list in the Address Book to
whom a blind carbon copy of your message is to be sent.
Note: Blind carbon copies are usually sent to people other than direct and indirect recipients
("To:" and "Cc:" recipients) who need to read what is being written as well, without the other
recipients knowing that they are receiving the email. Thus 'blind' means that the identity of these
recipients is hidden from all other recipients of the email, and only you and they know they got a
copy.
Click Show All to show the entire list of recipient names.
In the Subject box, type the subject of the message.
In the message body, type the message.
Select the Copy message to recipient's external email account checkbox if
you want to send the mail to the recipient’s external email address.
9. Click Send to send the message. Click Save as Draft to save the message as a
draft.
5.
6.
7.
8.
10. To view a list of messages you have sent, click the
Folders.
Sent link under Mail
Reading Messages in the Inbox
You can read the messages sent to your Inbox.
1. Click
Inbox under Mail Folders. The list of messages in your Inbox is
displayed.
2. Any new mail will automatically be placed in your Inbox. Any unread messages
will be highlighted on the top, just above the display box.
3. Announcements which are sent as mail will also be displayed in the Inbox.
4. To read a mail, click the sender name, subject, or the date received links.
Note: From denotes the name of the sender, Subject denotes the subject of your mail, and
Received denotes the date when the mail was sent.
5. The Message – Subject screen opens.
6. Read the message.
Note: The top half of the display contains information about the sender of the mail, the intended
recipient/s, date when the mail was sent, and the subject of the mail.
7. Click Back to go back to the previous screen. Click Delete to permanently delete
the mail.
Replying to a Mail Message
1. To reply to a message, first follow the steps to read the message.
2. Click Reply on the top strip of the display box to reply only to the sender. Click
Reply All to reply to all the recipients, including the carbon copy (cc) recipients
3. The Re: Subject screen opens.
4. In the message body, type the message.
- 122 -
MyNursingLab Instructor Guide Fall 2008
Note: Select the Copy message to recipient's external email account checkbox if you want to
send the mail to the recipient’s external email address.
5. Click Send to send the composed message. Click Save as Draft to save the
composed message as a draft.
Forwarding a Mail Message
1. To reply to a message, first follow the steps to read the message.
2. Click Forward on the top strip of the display box.
3. The Fw: Subject screen opens.
4. If you want to add any additional information, type the message in the message
body.
Note: Select the Copy message to recipient's external email account checkbox if you want to
send the mail to the recipient’s external email address.
5. Click Send to send the composed message. Click Save as Draft to save the
composed message as a draft.
Saving Messages as Drafts
Save as Draft places an unfinished message in the
Drafts folder under Mail Folders.
1. Compose a new mail.
2. Click Save as Draft on the top-right corner of the display box or click the Save
as Draft button.
3. To rework the draft, click the sender name, subject, or the saved links.
Note: To denotes the name of the recipient, Subject denotes the subject of your mail, and Saved
denotes the date when the mail was saved.
4. The Edit Message screen opens.
5. Make the necessary changes, and then click Send to send the mail to the
recipient(s). Click Save as Draft to update the changes to the Drafts folder.
Viewing Sent Messages
You can read the messages sent to various recipients.
Sent under Mail Folders.
1. Click
2. The Sent Messages screen opens. The list of sent messages is displayed.
3. To read a sent mail, click the sender name, subject, or the date received links.
Note: To denotes the name of the recipient, Subject denotes the subject of your mail, and Sent
denotes the date when the mail was sent.
4. Read the message.
Note: The top half of the display contains information about the sender of the mail, the intended
recipient/s, date when the mail was sent, and the subject of the mail.
5. Click Back to go back to the previous screen, Click Delete to permanently delete
the mail.
6. You can also Reply to the mail or Forward the mail to the intended recipient.
Using Announcements
With the Announcements tool, you can manage course announcements. Instructors can
create, edit and delete announcements. Both students and instructors can view
announcements in the Today's View tool. Announcements also can be sent as mail
- 123 -
MyNursingLab Instructor Guide Fall 2008
messages to students and instructors. Finally, you also can view the announcements
listed in the Announcements of the Communicate tool.
Managing Announcements
Viewing an Announcement
When the Announcements page displays, the following information views for any existing
announcements:
• From: Displays the name of the sender.
• Subject: Displays the subject of the announcement. You can sort the
announcements date-wise.
• Created Date: Date the announcement was created.
Creating an Announcement
To create an Announcement, complete the following steps:
1. Click Create Announcement in the taskbar. The Create Announcement
window opens.
2. Enter the subject of the announcement in the Subject text box.
3. In Manage Announcement, choose an option from the following:
• Make available now: Select this option to make the announcement available
in Today's View once it is created.
• Choose date restrictions: Select this option to make the announcement
available in Today's View only on the dates specified. To specify the dates,
1. Click the calendar icon corresponding to Display After, and then
choose a date.
2. Type the time for Display After in the Time boxes.
3. Click the calendar icon corresponding to Display Until, and then
choose a date.
4. Type the time for Display Until in the Time boxes.
• Remove Announcement: Select this option to remove the announcement
from Today's View and not from the Announcements List.
4. In Options, select the following:
• Also Send as Mail: Select this check box to send this announcement as a
mail message in addition to it being displayed in Today's View.
1. Click the To button. The Select recipients window opens.
2. Select the names of the recipients in the check boxes and click
Add recipients. [Note: you can view the selected recipients by
clicking the Show All link present next to the text box. To close
the selected recipients list, click the Collapse link next to the text
box.]
3. The To field displays the selected recipients to whom the
announcements will be posted.
• Pin Announcement: Select this check box to display this announcement as
the first message in Today's View - Notifications. The pinned
announcement is represented by
icon. If you and a program
administrator both have pinned an announcement to display at top of
Notifications channel, your announcements appears first, followed by the
program administrator announcement.
Note: You can 'pin' only two announcements to display at the top of Notifications. When you try to
pin a third announcement, an alert message pops up which reads as "You already have selected
two (2) pinned announcements to appear at the top of Today's View Notifications. Please unpin
an announcement and try again". Click OK to continue. You have to unpin the any one of the two
messages before pinning the new message. To unpin an announcement, use the following steps:
- 124 -
MyNursingLab Instructor Guide Fall 2008
Editing an Announcement
To edit an Announcement, complete the following steps:
announcement by clicking the From or Subject column
1. Open any existing
names.
2. When the Edit Announcement window opens, edit the contents in the
respective text boxes, following the steps to create an announcement. To unpin
an announcement, deselect the Pin Announcement check box.
3. Click Save to save the changes.
Deleting an Announcement
To delete an Announcement use the following steps:
1. Select in the check boxes of the Announcements.
2. Click Delete in the Announcements taskbar.
3. In the pop up confirmation window, click OK to confirm the deletion of the
Announcements.
Note: Select the Select all check box to select all the announcements displayed in the page.
Preferences
Using Preferences
The Preferences tool allows you to customize MyNursingLab by defining and managing
the feature preferences within a MyNursingLab course. This provides you with maximum
flexibility to design the end user experience for both instructors and students using the
course.
Preferences are set at the Master Course level, and any associated course, such as
Instructor Courses, inherit the value of the preferences from the Master Course. As the
instructor, you then can change these settings to reflect the approach for your course.
Categories of Preferences settings available for personalization in instructor courses are
listed below. Click the name of each Preference in the left navigation bar to view the
settings available under each category.
• General: Enable or disable various product features, such as the Course
Calendar; define settings for default font size, and more.
• Grading: Create or edit grade schemas, to set display options for the
Gradebook, and more.
• Roster: Customize the e-mail invitations used to invite Students, Instructors
and Teaching Assistants to your course.
• Permissions: Grant or deny permission to Instructors and Teaching
Assistants to perform different tasks in the application.
• Activities: Define the activity type, name, description and default style for
each activity type.
• Manage Locations: Create locations and associate individual computers to
a specific location, which you can use to limit exams.
• Shared Libraries: This is currently not functional in MyNursingLab.
Preferences: General
General Preferences allow you to enable or disable various product features, such as the
Course Calendar; define settings for default font size, and more. The General
Preferences to enable/disable Product features in your course.
- 125 -
MyNursingLab Instructor Guide Fall 2008
The options available in General Preferences are listed below. Note: If a preference
setting appears grayed out with a locked icon, this preference setting is unavailable
cannot be change for your course or product. Preference settings that appear with an
unlocked icon are available and can be changed.
Features
•
•
Enable Calendar: Select this check box to display Course Calendar view
for Students and make the Assign Content tab and Organize Content tab of
Course Content available for Instructors. Selecting this check box also
displays the calendar in Today's View for Instructors and Students.
Make all assignments due time at (HH:MM): Enter a default time for due
dates in the HH:MM boxes. When you schedule activities, if the due date is
set without a specific due (end) time, the time entered here will be used as
the default due time for activities. By default the time is set at 11:59PM. Click
the
button to set the specified time as the due time for all
activities already scheduled in Course Content.
Note: the Make all assignments due time at (HH:MM) option is available only if you select the
Enable Calendar checkbox.
Note: be sure to select your own time zone under the My Profile button (top right of the screen,
viewable in most screens of the program) in both the Instructor and Student View of the course.
Unmatched time zones in Instructor and Student Views could affect due date times.
•
Enable Organize Calendar: Select this check box to display Organize
Calendar feature for your course. When selected, the Organize Calendar tab
is displayed as a sub-navigation in the Course Content tool. Note: The
Enable Organize Calendar option is available only if the Enable Calendar
option is enabled for the course.
•
Enable default font face and font size: Select this check box to set the
default font face and font size for the HTML editor; selecting this check box
enables the Font size and Font face lists.
o
Font face: Choose an option from the list to define default font
face. The default font is Arial.
o
Font size: Choose an option from the list to define default font
size. The default size is 10.
•
Enable font size controls in the toolbar: Select this check box to display
the Font size buttons on the toolbar.
Set default size: Select the default font size by clicking any one of the
options (small [10px], medium [13px], large [16px]). Changing the font size
will increase the size of the text on each page, but not the size of the text on
various buttons throughout the product.
HTML Editor
Fonts
•
- 126 -
MyNursingLab Instructor Guide Fall 2008
After you have made your selections, click the
bottom of the page to save your preferences
button at the top of
Not sure what a preference setting means? You can view contextual help for each
Preference setting by pointing to or clicking the corresponding
icon.
Preferences: Grading
Grading Preferences allow you to enable, disable, and set various grading aspects of
your MyNursingLab course.
The options available in Grading Preferences are listed below. Note: If a preference
setting appears grayed out with a locked icon, this preference setting is unavailable
cannot be change for your course or product. Preference settings that appear with an
unlocked icon are available and can be changed.
Main
•
•
Enable letter grade schema for Instructor Course and Class Test
Course: Using a Grade Schema allows you to apply a letter grading schema
to a graded activity in the Gradebook (for example, 90% or above = A, 8089% = B, and so on.). Select this check box to make grade schema options
available in the Gradebook (Apply Grade Schema, Remove Grade Schema,
Edit Grade Schema). Note that, if this check box is not selected, instructors
will not be able to add or edit grade schemas, as described below.
Enable % or raw score: Select this check box to enable the Use
percentage grade for this course and Use raw score grade for this course
options in the Gradebook. By default, all grades appear in the gradebook as
a letter grade.
o Click Use percentage grade for this course to change the
reporting of grades from raw score to percentage across the
entire course, for both students and instructors.
o Click Use raw score grade for this course to change the
reporting of grades from percentage to raw score across the
entire course. In the Gradebook, each column will display all
grades as a fraction (x/y) where x = number correct and y =
total possible correct.
Note: To change the default letter grades in the gradebook to either % or raw score, change the
preferences as noted above. Then you must also edit every activity (pre and post test, Test Your
Terminology, etc.) to “allow” the new grading system. Follow these directions:
o
o
o
o
o
o
o
Click on the Course Content tab.
Open the folder containing the activity where you want to
change the grades, either the Study Plan folder to change
pre and post test grades or the Chapter Activities and
Resources folder to change Test Your Terminology grades.
Under the drop down options menu for the activity, choose
Edit.
When the next screen opens, choose Edit again beside the
activity
Go to the Grades tab in Edit view
Click the drop-down box and change the “Select grade
schema” option to <-Select->
Click Save and Return
- 127 -
MyNursingLab Instructor Guide Fall 2008
o
o
This overrides the individually set activity letter-grade
default, and allows the general grading preferences you set
to come through.
Repeat for every activity.
.
•
•
•
•
•
•
•
•
Enable "Filter by Content type" filter: Select this checkbox to display the
filter in Gradebook tool. When enabled, the Filter by Content type drop-down
list is seen in the Grades tool for Students.
Enable folder level calculations for Gradebook and Today's View:
Select this check box to allow folder level calculations. When enabled, the
Course Average and Folder Average options appear in the Gradebook and
the Course Performance and Student Performance notifications view appear
in Today's View. When this option is selected, the Edit Calculation Settings
links displays.
o Edit Calculation Settings: Allows you to edit the folder level
calculations. For more information on editing calculation
settings, click here.
o Folder Level Threshold Score: Enter the folder level
threshold score in the text box to define the passing
threshold for each folder.
Enable Rubric Grading: Contact tech support for help
Hide Gradebook Course Content Navigator by Default: Select this
check box to hide the Course Content Navigator in Gradebook. When
enabled, the Course Content is unavailable for all the users by default.
Hide Show ID in Student Name column: Select this checkbox to hide the
Show ID link in Student Name column of Gradebook. When enabled, the
(Show ID) link is not displayed in the Student Name column of Gradebook.
Provide a class average: Select this check box to track class average for
the activities. When selected, instructors have the option to select a class
average option for the activities/assignments, which is reported in the
Reports and View Submissions page of the Gradebook.
For unassigned items display: Activities that are assigned will display
grades in the Gradebook by default. For unassigned activities, you can select
whether to display a grade or a checkmark in the instructor and student
Gradebook. Options include:
o Grade: Select this option to display a percentage grade for
the unassigned items. The scores obtained for unassigned
items are not used in calculating the average scores. The
grades are displayed in the Gradebook for instructors and in
Grades tool for the students.
o Checkmark: Select this option to display a checkmark for the
unassigned items. Grades will be displayed to the students
but will not be calculated in any calculated grades (when
using a calculated column in the gradebook). The score and
grades will be displayed for the students on the view
submission page, but the score will not be available for the
instructor. The instructor can only view the
icon in the
Gradebook for this item and cannot view the submission.
Default display in Gradebook: The Gradebook allows you to filter the
view to show all, completed, or only assigned items. Using this setting, you
can define what activities (or items) appear in the instructor and student
Gradebook by default. Options include:
o All Items: Select this option to display All Items as default
view in the Gradebook (default).
- 128 -
MyNursingLab Instructor Guide Fall 2008
Completed Items: Select this option to display Completed
Items as default view in the Gradebook.
o Assigned Items: Select this option to display Assigned Items
as default view in the Gradebook.
Default student list in Gradebook: The Gradebook allows you to filter the
•
view to show all students or enrolled students. Using this setting, you can
define which students appear in the Gradebook by default. Options include:
Enrolled Students Only: Select this option to display only
the enrolled students as a default view in the Gradebook.
All Students: Select this option to display All Students
irrespective of their status, as a default view in the Gradebook.
o
o
o
Fill in the Blank questions
•
•
•
Enable Fill in the Blank Case Sensitive: Select this check box to require
case sensitivity in student responses, when grading fill-in-the-blank
questions. If this check box is not selected, questions will be graded ignoring
case sensitivity. Click the Apply to all link to apply the preferences settings
to existing and new fill-in-the-blank questions as a default.
Ignore Extra Spacing: Select this check box to ignore extra spacing in
student response, when grading objective-based questions. If this check box
is not selected, questions will be graded based on the spacing. Click the
Apply to all link to apply the preferences settings to existing and new
objective-based questions as a default.
Ignore punctuation: Select this check box to allow incorrect punctuation
in a student response, when grading objective-based questions. Click the
Apply to all link to apply the preferences settings to existing and new
objective-based questions as a default.
Grade Schemas
Using a Grade Schema allows you to apply a letter grading schema to a graded activity in
the Gradebook (for example, 90% or above = A, 80-89% = B, and so on.). The Grade
Schemas area of the Preferences page allow you to create new schemas and modify
existing schemas.
MyNursingLab comes with one default grade schema, which you can edit to reflect your
course grading scheme. You also can create new grade schemas for other types of
grading. For a Pass/Fail grading schema, for example, you might have only two grades
for Pass and Fail. Alternatively, you could create a grade schema that reflects
competency levels. In this case, you could create a grade schema such as beginner,
intermediate, or advanced. The Grade Schema window displays the existing grade
schemas.
Adding a New Grade Schema
Add New Schema in the toolbar at the top of the Grade Schemas
1. Click
window. The Add New Schema window opens.
2. Type the Grade Schema Name and the Description in the corresponding text
boxes.
3. For the first grade in the schema, type the Grade, % Score from, % Score to and
Feedback in the respective text boxes. Note: The grade scores
can not overlap. For instance, you can not enter a grade of F with a score from
0% to 50% and then a grade of A with a score from 50% to 100%. You must
enter 51% to 100% as the scores for the A grade (or 0% to 49% for the F grade).
- 129 -
MyNursingLab Instructor Guide Fall 2008
4. To add more grades to the schema, click the Add Grade link. Again, enter
Grade, % Score from, % Score to and Feedback in the respective text boxes.
Continue until all grades are added. If you need to delete a grade, select the
check box next to the grade(s) to delete and then click the Delete Grade link.
5. Click the
button. A new grade schema will be created.
Deleting Existing Grade Schema(s)
1. In the Grade Schemas window, select the check box next to the Grade
Schema(s) you want to delete and then click the Delete selected grade
schemas link. Note: you also can delete a grade schema by clicking the options
menu next to the Grade Schema and then clicking Delete.
2. A message 'Are you sure you want to delete the selected grade schema(s)? This
action cannot be undone'. is displayed. After a grade schema is deleted, it cannot
be retrieved.
3. Click OK to delete the grade schema or click Cancel to cancel the delete.
Edit an Existing Grade Schema
1. In the Grade Schemas window, click the options menu next to the Grade
Schema you want to edit and then click Edit.
2. The Update Schema window opens. Modify, delete, or add Grades, Scores, and
Feedback, as appropriate.
3. Click Save and Close to save the changes or click Cancel to cancel the edits.
Copy an Existing Grade Schema
1. In the Grade Schemas window, click the options menu next to the Grade
Schema you want to edit and then click Copy.
2. A copy of the grade schema appears in the Grade Schema window. After
creating a copy of a grade schema, you should edit it and assign a new name, so
that each grade schema is uniquely identifiable.
After you have made your selections, click the
bottom of the page to save your preferences
button at the top of
Not sure what a preference setting means? You can view contextual help for each
Preference setting by pointing to or clicking the corresponding
icon.
Preferences: Roster
The Roster tab in the Preferences tool allows you to toggle on/off the Manage Roster tab
in the Gradebook -- and to customize the e-mail invitations used to invite Students,
Instructors and Teaching Assistants to your course.
By default, all Roster Manager options for MyNursingLab are pre-set. The options
available in Roster Preferences are listed below. Note: If a preference setting appears
grayed out with a locked icon, this preference setting is unavailable cannot be change
for your course or product. Preference settings that appear with an unlocked icon are
available and can be changed.
- 130 -
MyNursingLab Instructor Guide Fall 2008
•
Enable Roster Manager: Select this check box to display the Manage
Roster tab in Gradebook. If you select this check box, the following
additional options are enabled:
o Registration URL: Type the URL required for the registration in
this text box.
Note: do not change this URL or students will not be able to register correctly. The URL in the text
box must be to https://register.pearsoncmg.com/reg/register/reg1.jsp.
o
o
Email Subject: Type the Subject of the mail in this text box.
Note that template text has been provided, but you can edit it
here.
Email Body: Type the message you want users to receive in
the email body. This text should provide detailed instructions on
how to complete the registration process for MyNursingLab.
Note that template text has been provided, but you can edit it
here.
After you have made your selections and edited the email subject and body, as
appropriate, click the
your preferences.
button at the top of bottom of the page to save
Not sure what a preference setting means? You can view contextual help for each
Preference setting by pointing to or clicking the corresponding
icon.
Preferences: Permissions
Permissions Preferences allow you to grant or deny permission to Teaching Assistants,
to define what tasks Teaching Assistants can perform in MyNursingLab.
For each option, a check box appears in the Teaching Assistant column. Selecting
(checking) a checkbox gives a Teaching Assistant permission to complete a function or
task; deselecting (unchecking) a check box denies Teaching Assistants permission to
perform that task.
The options available in Permissions Preferences are listed below. Note: If a preference
setting appears grayed out with a locked icon, this preference setting is unavailable
cannot be change for your course or product. Preference settings that appear with an
unlocked icon are available and can be changed.
Question Library
•
•
•
•
Create items in Question Library: allows user to create, add, or import
questions to the Question Library.
Cut/Copy/Paste items in Question Library: allows user to cut, copy, and/or
paste questions in the Question Library.
Edit items in Question Library: allows user to edit questions in the
Question Library.
Delete items in Question Library: allows user to delete questions in the
Question Library.
Content Library
- 131 -
MyNursingLab Instructor Guide Fall 2008
•
•
•
•
Create items in Content Library: allows user to create items in the Content
Library.
Cut/Copy/Paste items in Content Library: allows user to cut, copy, and/or
paste items in the Content Library.
Edit items in Content Library: allows user to edit items in the Content
Library.
Delete items in Content Library: allows user to delete items in the Content
Library.
Student Content
•
•
•
•
Create items in Student Content: allows user to create items in Student
Content.
Cut/Copy/Paste items in Student Content: allows user to cut, copy, and/or
paste items in Student Content.
Edit items in Student Content: allows user to edit items in Student Content.
Delete items in Student Content: allows user to delete items in Student
Content.
Activity
•
•
Schedule assessments: allows user to schedule items in Student Content.
Show/Hide content in Student Content: allows show or hide items in
Student Content.
•
•
•
View Gradebook: allows user to view the Gradebook tool.
Create Column: allows user to create a column in the Gradebook. .
Revoke/Release Column: allows user to revoke or release a column in the
Gradebook.
Grant or deny student access to course: allows user to grant or deny a
student's access to the course via the Gradebook.
Gradebook
•
Gradebook Activity
•
•
•
•
•
Delete Submission(s): allows user to delete student submission(s) via the
Gradebook.
Edit Grades: allows user to edit student grades in the Gradebook.
Change/Modify grade schema in grade column: allows user to change or
modify the grade schema for a Gradebook column.
Import Grades: allows user to import student grades into the Gradebook.
Print and/or Download gradebook: allows user to print and/or export the
Gradebook.
Reporting
•
•
•
•
•
View Activity Reports: allows user to view Activity reports via the Reports
tool.
Download & Print Activity Reports: allows user to download and print
Activity reports via the Reports tool.
View Study Plan Reports: allows user to view Study Plan reports via the
Reports tool.
Download & Print Study Plan Reports: allows user to download and print
Study Plan reports via the Reports tool.
View Certificate of Completion Reports: allows user to view Certificate of
Completion reports via the Reports tool.
- 132 -
MyNursingLab Instructor Guide Fall 2008
•
•
•
Download & Print Certificate of Completion Reports: allows user to
download and print Certificate of Completion reports via the Reports tool.
View Frequency Analysis Reports: allows user to view Frequency Analysis
reports via the Reports tool.
Download & Print Frequency Analysis Reports: allows user to download
and print Frequency Analysis reports via the Reports tool.
Submissions
•
•
View Student Submissions: allows user to view student submissions in
MyNursingLab.
Download & Print Student Submissions: allows user to download and
print student submissions.
Manage User/User Roles
•
•
•
•
Create New Student Profile: allows user to create a new student profile.
View Student Profiles: allows user to view a student profile.
Update Student Profiles: allows user to update a student profile.
Enroll Student in course section: allows user to enroll a student in a
course section.
•
•
•
•
•
Add Locations: allows user to add locations to the Locations list.
Delete Locations: allows user to delete computers from the Locations list.
Add Computers: allows user to add computers to the Computers list.
Delete Computers: allows user to delete computers from the Computers list.
Add Computer to Location: allows user to add computers to an existing
location.
Remove Computer from Location: allows user to remove computers from
an existing location.
Locations
•
Learning Objectives
Learning Objectives permissions cannot be edited in MyNursingLab; all settings are
unavailable (locked).
After you have made your selections, click the
bottom of the page to save your preferences
button at the top of
Not sure what a preference setting means? You can view contextual help for each
Preference setting by pointing to or clicking the corresponding
icon.
Preferences: Activities
Use the Activities Preferences to define the activity type name, description, and default style for
each activity type. You can add activity types and edit preferences for each activity type, and set
global preferences for each activity type.
Use this feature to personalize the look and feel of your course activities to suit your tastes and
needs. By customizing preferences for each activity type you can control activity behaviors such
as the number of times you allow each student to take the activity, whether or not students can
bookmark the activity, and more.
- 133 -
MyNursingLab Instructor Guide Fall 2008
Your course brand may include specific colors that you would like to incorporate into the
presentation of Pegasus assignments. Activities preferences enable you to produce a seamless
integration between the course textbook and the course content in Pegasus. You can define
these colors in a stylesheet and have that carry through all activity content in all courses
associated with your courses. If, for any reason, your students are required to take an activity
only once, then you can set that behavior by editing the preferences for that particular activity
type. You can set your activities to provide as much or as little latitude as required for your
particular situation.
You can also predefine specific activity types and their behavioral modes. You might, for
example, want all homework assignments to be adaptive according to the Bloom's Taxonomy
level of the associated questions. In this case, you will label this type of activity as "Homework,"
then set and lock the "Bloom's Taxonomy-based" Behavioral Mode for that activity type.
You can customize Study Plan activity types, edit and set labels for the Pretest and Posttest,
enable Direction Lines for the Activity and Activity Sections, and create new feedback schema or
modify existing feedback schemas, which is useful for adding feedback schemas suitable for a
particular content type.
You can generate a report and download the listed settings as .csv file by clicking
the icon. You can either download reports of All pages or Current page of the
Preferences tool.
You can edit the Section specific instructional text by clicking the Edit link which launches a pop
up to edit the text.
You can lock the set preferences by clicking the corresponding Lock icons. Locking prevents
other users from changing the set preferences. You can launch contextual help for each
Preference setting by clicking the corresponding
icons
.
Using Activities Preferences
Customize Study Plan
Study Plan contains two activities Pretest and Posttest. You can define rename, change
the description, and edit Preferences for these two types of Study Plan activities.
•
Name: You can rename the activity type names of Study Plan using
alphanumeric characters and can accommodate a maximum of 50
characters.
o Pre-Test label: Type the label for Pretest in the text box. By default,
it is Pretest. The name specified in this text box is reflected in all
places where the default Pretest label appears in the application.
For example, you can view the label changes while creating a Study
Plan, or in the student view when students attempt the Study Plan.
o Post-Test label: Type the label for Posttest in the text box. By
default, it is Posttest. The name specified in this text box is reflected
in all places where the default Posttest label appears in the
application. For example, you can view the label changes while
creating a Study Plan, or in the student view when students attempt
the Study Plan.
o Description: Type in descriptions for Pretest and Posttest activity
types in the Description text box.
- 134 -
MyNursingLab Instructor Guide Fall 2008
•
Preferences: Displays the Edit links for each Study Plan activity type. You
can Set preferences for each activity type by clicking the appropriate Edit
links. The following preferences are available for Pretest and Posttest
activities:
o General
Display X question(s) per page: Click this option to enter
the number of questions that you want to display in a single
page for the students. When the students attempt the activity.
The number of questions specified in the text box will be
displayed for them on each page of the Test Presentation
window. By default, it is 1.
Allow students to skip questions: Select this check box
to allow students to skip questions in an activity. If
cleared, all questions in an activity become mandatory.
By default it is selected
Allow student to flag questions: Select this check box to
allow students to set a flag or bookmark to an
unanswered or question in doubt. The students can
revisit the flagged questions after the test. By default it
is cleared.
Note: “Allow student to skip questions” and “Allow student to flag question” is available only when
Display X question(s) per page is selected and the number of questions per page is at least 1.
Display one section per page: Click this option to display
one section per page. When students attempt the activity, a
single section is displayed on each page.
Allow students to skip pages: Select this check box to
allow students to skip pages in an activity. This check
box is enabled only when the Display one section per
page option is selected.
Show Immediate Feedback: Select this check box to
display feedback for each question before proceeding to the
next question. When this is selected, students have to submit
each question before proceeding to the next question in the
Test presentation window. This option will be available only if
Feedback is enabled.
Note: “Display X questions (s) per page” and “Display one section per page” options are not
available when you select “Show Immediate Feedback” check box.
Display Direction Lines On Each Page: Select this check
box to display the Direction Lines on each page of the
activity. This check box will be displayed only if you enable
this feature in the Activities section of the Preferences tool.
Requires students to answer all questions: Select this
check box to require students to attempt all the questions By
default, it's selected.
Display point score in feedback: Select this checkbox to
display point score for individual question feedback in an
activity. When not selected, the point score per question is
not displayed for the students in the View submissions
screen or Gradebook.
- 135 -
MyNursingLab Instructor Guide Fall 2008
Display Score for Question: Select this check box to show
students the score for the question.
Remove Correct/Incorrect indicators in Students Results
view: Select this checkbox if you do not want students to be
able to see if the answer they selected was correct or
incorrect on the activity results summary. Note that if you
do not want the students to be able to view the correct
answer after they submit the activity, you must also go to the
Feedback preferences section and clear the Display correct
answers after student submits the activity option (or
specify to Never display the correct answer for the option).
Include in course plan scoring: Select this check box to
include the activity in the course plan scoring.
Default Activity Style: Choose a style for the activity from
the list. You can preview the style by clicking Preview
Note: Activity styles will be displayed in the list only when they are created in the Activity Styles
preferences.
Display questions in columns: Select this check box to
display the questions in columns in the Test Presentation
window for the students.
Save response at the end of each page: Select this check
box to save the response at the end of each page. By
default, it's cleared. When selected, students can save their
responses at the end of each page of the Test presentation
window.
Allow student to save for later: Select this check box to
allow the students to save the current attempt of the activity
and submit it later. By default, it's cleared. When selected,
Save for Later is displayed in the Test Presentation window.
Students can click this option to save their answers and
revisit them without them having to submit the activity.
Note: You can allow students to save the activity and submit it later only if you allow them to
attempt the activity more than once. Allow student to save for later and Number of saves allowed
is not available for Posttest activities.
Number of saves allowed: You can allow students to save
the activities more than once. Enter the number of saves
allowed in the box. Only if the Allow student to save for
later check box is enabled, you can specify the number of
saves to be allowed.
Enable Help Links for this activity: Select this check box to
show the Need help link to the students while attempting the
activity. To make this option available, you must select
Enable Need Help resource for students when taking
activity in the General section of the Preferences tool.
Show hints: Select this check box to show the hints for the
students while attempting the activity. By default it's selected.
When selected, hints provided for the questions contained in
the activity can be seen by students by clicking Hints in the
Test Presentation window.
Note: Click Save to save the preferences and click Apply to all to apply the set preferences to all
existing and new activities.
- 136 -
MyNursingLab Instructor Guide Fall 2008
o
Messages: You can display a Default message and Instructor
message for each of the activity type at the Beginning and End of
the activity. Use the Content Editor for creating the messages by
clicking the appropriate Edit HTML links.
Beginning of Activity: You can specify messages for the following:
Default Message: Enter the message in the text box. This is
a required message entered by a master course admin and
is not editable by the instructor. The default message will be
displayed at the beginning of the activity.
Instructor Message: Enter the message in the text box. This
is editable by the instructor and will be displayed below the
Default Message at the beginning of the activity
Note: You can lock the preferences for Default Messages by clicking the corresponding Lock
icons. By locking your not allowing anyone to change the Preferences.
o
o
End of Activity: You can specify messages for the following:
Default Message: Enter the message in the text box. This is
a required message entered by the master course admin and
is not editable by the instructor. The default message will
displayed be at the end of the activity.
Instructor Message: Enter the message in the text box. This
is editable by the instructor and will be displayed below the
Default Message at the end of the activity.
Timing: You can enforce the timings to complete the activity at the
following levels:
Activity level: Click this option to define a time for the
completion of the activity. Students have to finish the activity
within the allotted time. You also specify:
Time required to complete the activity (HH:MM): Enter
the time required to complete an activity in the boxes.
Enable buzzer before time in (min): Select this check
box to set an alert bell to notify the participant of the
time limit. Enter the minutes before the ending time of
the activity, at which point a buzzer alert will be
sounded, in the box.
Question Level: Click this option to enforce the timing at the
question level. Students have to finish the activity within the
allotted time.
None: Click this option to allow students complete the activity
without any time restriction.
Feedback
Allow participant to view summary: Select this check box
to allow students to view summary report at the end of the
assessment.
Display correct answers after student submits activity:
Select this check box to show the students the correct
answers for the question at the end of the assessment.
Show Correct Answer: Choose an option to show correct
answer from the following;
Always: Click this to always show the correct answer
Never: Click this option to never show the correct
answer
After the Due Date: Click this option to show the correct
answer after the due date.
- 137 -
MyNursingLab Instructor Guide Fall 2008
Note: You can choose options to show correct answers only if the "Display correct answers after
students submits activity" check box is selected. This option is not available for Posttest activities.
Show Need Help: Choose an option to show Need Help
from the following;
Always: Click this option to always show the Need Help
Never: Click this option to never show the Need Help
At Attempt: Click this option to show the Need Help for
the specified number of attempts. Type the number of
attempts in the box
Note: "Show Need Help" will be displayed only if the "Enable HelpLinks for this activity" check box
is selected in General settings under Preferences tab. Only Posttest activities will have the "At
Attempt".
Show Feedback: Choose an option to show Feedback for
the students from the following;
Always: Click this option to show feedback for all the
attempts
Never: Click this option to never show feedback.
Note: "At X Attempts" is available only if the activity can be attempted more than once and X
cannot exceed the number of allowed attempts.
Display Feedback and Correct Answers: Choose a place
to display the feedback and correct answer from the
following;
Next to responses
Below responses
Next to and below responses
Display Activity level Feedback and Remediation at X
attempt: Select this check box to enable activity level
feedback and remediation tool for the activities. Enter the
attempt number for which you want to display the
information. The students view the feedback and remediation
content in the "Recommended Study Materials" box in the
results page. Feedback and further study is also available to
students and instructors at the bottom of the View
Submissions page.
Show Activity level Feedback and Remediation at
Top/Below: Select Top or Below from the drop-down
list to specify the display position of the feedback and
remediation content in the results page.
Note: "Display Activity level Feedback and Remediation at X attempt" and "Show Activity level
Feedback and Remediation at Top/Below"is displayed only if Enable Activity Level
Performance-based Feedback and Further Study Tools check box is enabled.
o
Resource Toolbar
Display Resource Toolbar: Select this check box to show
the Resource Toolbar to the students while attempting the
activity. To make this option available, you must select
Enable Resource Toolbar for Course in the General
section of the Preferences tool.
When checked, the Resource Toolbar is displayed on the
- 138 -
MyNursingLab Instructor Guide Fall 2008
o
Student navigation toolbar and in the Test Presentation
activity.
Grading
Set the threshold score to pass (%): Select to enable
threshold score to pass, and enter the score required to
pass. By default the threshold score required to pass is
35%.If this option is cleared, the pass/fail icons are not
displayed in Gradebook or Activity Summary results page.
The grade is still displayed (except for rubric activities).
Provide a Class Average: Select this check box to track
class average for the activity. This enables the following
options:
Students will be identified (default): Select this option to
identify the students and their submittal
Students will be anonymous: Select this option to make
the student submittal anonymous. When selected, the
grade column displays "Anon" to indicate the activity is
marked for anonymous submittal.
When selected, the class average for the activities/
assignments are tracked and reported in the Reports and
View Submissions page of the Gradebook.
Note: You cannot change the anonymity preference after the activity has been accessed by
students, but you can edit or change the "Class Average" preference even after the activity has
been accessed by students. After you make a change, it will affect activities already submitted by
students, activities students have begun but saved for later, and all activities not yet started.
o
Shuffling
Shuffle order of section to each student: Select this check
box to shuffle the order of sections randomly for each
student. When selected, the sections appear differently each
time a student attempts the activity. By default, it is cleared.
Customize Activity Types
•
Icon: This column displays the icons associated with the activity types. You can
change the default icons. To display the available icons, click the down arrow for
the corresponding activity type and choose an icon from the list. The icon you
select will display for any instance of that particular activity type.
•
Activity type name: This column displays Activity type names. By default these
include:
- Homework
- Quiz
- Practice Test
- Test
The activity type names entered in the text boxes are displayed in the Add
Content menu of Content Library and My Course in the Course Content tool.
•
Activity type description: Displays the current description for each activity
type. You can edit the descriptions or add new descriptions for each activity
type.
•
Preferences: Displays the Edit link for each Activity type. You can Set
preferences for each activity type by clicking the appropriate Edit links
- 139 -
MyNursingLab Instructor Guide Fall 2008
•
Behavioral Mode: This column displays the Edit link for each Activity type. You
can Set the Behavioral Mode for each activity type by clicking the appropriate
Edit links.
You can rename or delete the activity type names and add more activity types to the
default list of the activities. The added activity types are displayed under the Add
Content menu of the Course Content tool.
To Add Activity Type:
1. Click
Add Activity Name in the taskbar.
2. Text boxes are added for Activity type name, Activity type description,
Preferences and Behavioral Mode columns.
3. Enter the name of the activity in Activity type name column.
4. Enter the description in the Activity type description column.
5. Set preferences for the activity type by clicking the appropriate Edit link in the
Preferences column.
6. Set the Behavioral Mode for the activity by clicking the appropriate Edit link in the
Behavioral Mode column.
Note: If Enable peerScholar Review check box is enabled for the course in the peerScholar
preference, the new activity type you create displays "Enable peerScholar" check box in the
General preferences tab when you edit the preferences for the activity type. This check box can
only be selected for one activity type at any given time.
To Delete Activity Type:
1. Select the Activity type(s), and click
2. Selected activity is deleted.
Delete in the taskbar.
•
Enable Activity Level Direction Lines: Select the check box to enable
Activity Level Direction Lines for your course.
When selected, the Direction Lines box appears in the Messages tab while
creating an Activity. The directions message entered in the box is displayed
for the students throughout the Test Presentation window when the student
attempts the Activity.
•
Enable Direction Lines in Activity Sections: Select the check box to
enable Direction lines in Activity Sections for your course.
When selected, the Direction (Add) link is displayed in the Questions tab
while creating an Activity. Click Add link which opens an editor. Type in the
directions message which will be displayed for the students only for the
particular section or question of an activity in the Test Presentation window.
•
Allow INS to preview activity without answering the questions: Select
this check box to allow the instructors to preview the activity without having to
answer the questions.
When selected, the Preview of the activity in Course Content displays all the
activity questions in page format (up to 30 questions per page). Instructors
are able to preview activities to review how they appear to students without
having to go through and respond to each individual question.
•
Enable activity level performance-based feedback and further study
tools: Select this check box to enable activity level feedback and remediation
tool for the activities. You can add feedback to an activity and links for further
study that will be delivered based on student performance.
When selected, the Feedback Schemas box is displayed below this setting
- 140 -
MyNursingLab Instructor Guide Fall 2008
where you can add, edit and delete feedback schemas. Also, the Feedback
tab is displayed while creating activities. It also displays the Display Activity
level Feedback and Remediation at X attempt check box for all activity
types in the Feedback tab when you Edit preferences to Customize Activity
types and Study plan. For the students, the feedback and further study are
displayed under "Recommended Study Materials" box in the results page
after the students has submitted an activity. The Instructors and Students are
also made available with the feedback and further study at the bottom of the
View Submissions page.
Setting Preferences
You can set preferences for each of the activity types. Preferences change will affect any
activity created of this type. If you click Apply to all button, preferences changes will be
applied to all the existing activities. You can lock each preference. When you click on the
lock icon, that particular preference is hidden in the Instructor Course both at Preferences
tab of activity creation and at individual activity preferences. The following preferences
are available for each of the activity types:
o General
Display X question(s) per page: Click this option to enter
the number of questions that you want to display in a single
page for the students. When the students attempt the activity.
The number of questions specified in the text box will be
displayed for them on each page of the Test Presentation
window. By default, it is 1.
Allow students to skip questions: Select this check box
to allow students to skip questions in an activity. If
cleared, all questions in an activity become mandatory.
By default it is selected
Allow student to flag questions: Select this check box to
allow students to set a flag or bookmark to an
unanswered or question in doubt. The students can
revisit the flagged questions after the test. By default it
is cleared.
Note: “Allow student to skip questions” and “Allow student to flag question” is available only when
Display X question(s) per page is selected and the number of questions per page is at least 1.
Display one section per page: Click this option to display
one section per page. When students attempt the activity, a
single section is displayed on each page.
Allow students to skip pages: Select this check box to
allow students to skip pages in an activity. This check
box is enabled only when the Display one section per
page option is selected.
Show Immediate Feedback: Select this check box to
display feedback for each question before proceeding to the
next question. When this is selected, students have to submit
each question before proceeding to the next question in the
Test presentation window. This option will be available only if
Feedback is enabled.
Note: “Display X questions (s) per page” and “Display one section per page” options are not
available when you select “Show Immediate Feedback” check box.
- 141 -
MyNursingLab Instructor Guide Fall 2008
Display Direction Lines On Each Page: Select this check
box to display the Direction Lines on each page of the
activity. This check box will be displayed only if you enable
this feature in the Activities section of the Preferences tool.
Requires students to answer all questions: Select this
check box to require students to attempt all the questions By
default, it's selected.
Display point score in feedback: Select this checkbox to
display point score for individual question feedback in an
activity. When not selected, the point score per question is
not displayed for the students in the View submissions
screen or Gradebook.
Display Score for Question: Select this check box to show
students the score for the question.
Remove Correct/Incorrect indicators in Students Results
view: Select this checkbox if you do not want students to be
able to see if the answer they selected was correct or
incorrect on the activity results summary. Note that if you
do not want the students to be able to view the correct
answer after they submit the activity, you must also go to the
Feedback preferences section and clear the Display correct
answers after student submits the activity option (or
specify to Never display the correct answer for the option).
Include in course plan scoring: Select this check box to
include the activity in the course plan scoring.
Default Activity Style: Choose a style for the activity from
the list. You can preview the style by clicking Preview
Note: Activity styles will be displayed in the list only when they are created in the Activity Styles
preferences.
Display questions in columns: Select this check box to
display the questions in columns in the Test Presentation
window for the students.
Save response at the end of each page: Select this check
box to save the response at the end of each page. By
default, it's cleared. When selected, students can save their
responses at the end of each page of the Test presentation
window.
Allow student to save for later: Select this check box to
allow the students to save the current attempt of the activity
and submit it later. By default, it's cleared. When selected,
Save for Later is displayed in the Test Presentation window.
Students can click this option to save their answers and
revisit them without them having to submit the activity.
Note: You can allow students to save the activity and submit it later only if you allow them to
attempt the activity more than once. Allow student to save for later and Number of saves allowed
is not available for Posttest activities.
Number of saves allowed: You can allow students to save
the activities more than once. Enter the number of saves
allowed in the box. Only if the Allow student to save for
later check box is enabled, you can specify the number of
saves to be allowed.
- 142 -
MyNursingLab Instructor Guide Fall 2008
Enable Help Links for this activity: Select this check box to
show the Need help link to the students while attempting the
activity. To make this option available, you must select
Enable Need Help resource for students when taking
activity in the General section of the Preferences tool.
Show hints: Select this check box to show the hints for the
students while attempting the activity. By default it's selected.
When selected, hints provided for the questions contained in
the activity can be seen by students by clicking Hints in the
Test Presentation window.
Note: Click Save to save the preferences and click Apply to all to apply the set preferences to all
existing and new activities.
o
Messages: You can display a Default message and Instructor
message for each of the activity type at the Beginning and End of
the activity. Use the Content Editor for creating the messages by
clicking the appropriate Edit HTML links.
Beginning of Activity: You can specify messages for the following:
Default Message: Enter the message in the text box. This is
a required message entered by a master course admin and
is not editable by the instructor. The default message will be
displayed at the beginning of the activity.
Instructor Message: Enter the message in the text box. This
is editable by the instructor and will be displayed below the
Default Message at the beginning of the activity
Note: You can lock the preferences for Default Messages by clicking the corresponding Lock
icons. By locking your not allowing anyone to change the Preferences.
o
o
End of Activity: You can specify messages for the following:
Default Message: Enter the message in the text box. This is
a required message entered by the master course admin and
is not editable by the instructor. The default message will
displayed be at the end of the activity.
Instructor Message: Enter the message in the text box. This
is editable by the instructor and will be displayed below the
Default Message at the end of the activity.
Timing: You can enforce the timings to complete the activity at the
following levels:
Activity level: Click this option to define a time for the
completion of the activity. Students have to finish the activity
within the allotted time. You also specify:
Time required to complete the activity (HH:MM): Enter
the time required to complete an activity in the boxes.
Enable buzzer before time in (min): Select this check
box to set an alert bell to notify the participant of the
time limit. Enter the minutes before the ending time of
the activity, at which point a buzzer alert will be
sounded, in the box.
Question Level: Click this option to enforce the timing at the
question level. Students have to finish the activity within the
allotted time.
None: Click this option to allow students complete the activity
without any time restriction.
Feedback
- 143 -
MyNursingLab Instructor Guide Fall 2008
Allow participant to view summary: Select this check box
to allow students to view summary report at the end of the
assessment.
Display correct answers after student submits activity:
Select this check box to show the students the correct
answers for the question at the end of the assessment.
Show Correct Answer: Choose an option to show correct
answer from the following;
Always: Click this to always show the correct answer
Never: Click this option to never show the correct
answer
After the Due Date: Click this option to show the correct
answer after the due date.
Note: You can choose options to show correct answers only if the "Display correct answers after
students submits activity" check box is selected. This option is not available for Posttest activities.
Show Need Help: Choose an option to show Need Help
from the following;
Always: Click this option to always show the Need Help
Never: Click this option to never show the Need Help
At Attempt: Click this option to show the Need Help for
the specified number of attempts. Type the number of
attempts in the box
Note: "Show Need Help" will be displayed only if the "Enable HelpLinks for this activity" check box
is selected in General settings under Preferences tab. Only Posttest activities will have the "At
Attempt".
Show Feedback: Choose an option to show Feedback for
the students from the following;
Always: Click this option to show feedback for all the
attempts
Never: Click this option to never show feedback.
Note: "At X Attempts" is available only if the activity can be attempted more than once and X
cannot exceed the number of allowed attempts.
Display Feedback and Correct Answers: Choose a place
to display the feedback and correct answer from the
following;
Next to responses
Below responses
Next to and below responses
Display Activity level Feedback and Remediation at X
attempt: Select this check box to enable activity level
feedback and remediation tool for the activities. Enter the
attempt number for which you want to display the
information. The students view the feedback and remediation
content in the "Recommended Study Materials" box in the
results page. Feedback and further study is also available to
students and instructors at the bottom of the View
Submissions page.
Show Activity level Feedback and Remediation at
Top/Below: Select Top or Below from the drop-down
- 144 -
MyNursingLab Instructor Guide Fall 2008
list to specify the display position of the feedback and
remediation content in the results page.
Note: "Display Activity level Feedback and Remediation at X attempt" and "Show Activity level
Feedback and Remediation at Top/Below"is displayed only if Enable Activity Level
Performance-based Feedback and Further Study Tools check box is enabled.
o
o
Resource Toolbar
Display Resource Toolbar: Select this check box to show
the Resource Toolbar to the students while attempting the
activity. To make this option available, you must select
Enable Resource Toolbar for Course in the General
section of the Preferences tool.
When checked, the Resource Toolbar is displayed on the
Student navigation toolbar and in the Test Presentation
activity.
Grading
Set the threshold score to pass (%): Select to enable
threshold score to pass, and enter the score required to
pass. By default the threshold score required to pass is
35%.If this option is cleared, the pass/fail icons are not
displayed in Gradebook or Activity Summary results page.
The grade is still displayed (except for rubric activities).
Provide a Class Average: Select this check box to track
class average for the activity. This enables the following
options:
Students will be identified (default): Select this option to
identify the students and their submittal
Students will be anonymous: Select this option to make
the student submittal anonymous. When selected, the
grade column displays "Anon" to indicate the activity is
marked for anonymous submittal.
When selected, the class average for the activities/
assignments are tracked and reported in the Reports and
View Submissions page of the Gradebook.
Note: You cannot change the anonymity preference after the activity has been accessed by
students, but you can edit or change the "Class Average" preference even after the activity has
been accessed by students. After you make a change, it will affect activities already submitted by
students, activities students have begun but saved for later, and all activities not yet started.
o
Shuffling
Shuffle order of section to each student: Select this check
box to shuffle the order of sections randomly for each
student. When selected, the sections appear differently each
time a student attempts the activity. By default, it is cleared.
Setting Behavioral Mode
For any given activity type that you are defining, you can enable which behavioral modes are
available by clicking the Edit link. The Enable Behavioral Modes window opens. Clear the
Behavioral modes you want to exclude from the activity type. By default all Behavioral modes are
selected.
- 145 -
MyNursingLab Instructor Guide Fall 2008
The enabled Behavioral modes will be available for the associated activity type while creating
activities in Course Content.
Behavioral modes
•
Adaptive: This activity uses branching to determine the order in which
questions appear based on student response to the preceding question.
•
Assignment: This activity requires students to upload their assignment for
evaluation by the instructor.
Note: peerScholar Review enabled activity type displays only Assignment activity as the default
Behavioral mode. All other behavioral modes are disabled.
•
Bloom's Taxonomy-based: This activity displays questions based on their
assigned level in Bloom’s Taxonomy. Questions are presented as prespecified or based on a system analysis of student records and needs.
•
Difficulty-based: This activity displays questions based on their assigned
level of difficulty. Questions are presented as pre-specified or based on a
system analysis of student records and needs.
•
Basic/ Random: This activity uses a series of questions, which are
presented to the student as pre-specified or in a system-selected randomized
fashion.
Note: Click Save Preferences to save the preferences.
Preferences: Manage Locations
Locations are a mechanism for restricting student access to individual scheduled
assignments to specific locations, such as a classroom or computer lab. The Manage
Locations preferences allow you to create locations and associate individual
machines/computers to the location. The machines are identified with their MAC address
and assigned a more human-friendly name. After computers are created in
MyNursingLab, they can be assigned to one or more locations.
Note: MAC address is the short form for Media Access Control address. The MAC address is a
unique value associated with a network adapter and can be used to uniquely identify a computer.
MAC addresses are also known as hardware addresses or physical addresses. MAC addresses
are 12-digit hexadecimal numbers (48 bits in length).
After a location is created and one or more computers are associated with it, instructors
can restrict access to an assignment by selecting one or more locations while scheduling
the assignment When this is done, the scheduled assignment will only be made available
on client machines that are members of the selected location(s).
The Manage Locations contains two sections:
1. Computers
2. Locations
Computers
The Computers window displays on the left side of the Manage Locations page. From
here, you can add, edit, and delete computers.
Adding a Computer
To add a computer, complete the following steps:
- 146 -
MyNursingLab Instructor Guide Fall 2008
1. Click the Add Computer link. The Add Computer window opens. The system
auto detects the MAC address of the machine/computer.
2. If the computer on which you are currently working has not yet been added, the
window will appear as below, with an ActiveX installation bar at the top of the
window. Right-click the yellow bar at the top of the window and then click Install
ActiveX Control.
3. When the Internet Explorer - Security Warning displays, click the Install button to
install the MAC Address Detector ActiveX Control.
4. The Add Computer window will display a MAC address (or MAC addresses, if a
computer has multiple network cards, as shown here). If you see a Warning box
- 147 -
MyNursingLab Instructor Guide Fall 2008
at the top of the window, click the [x] in the yellow bar to close it (it does not
impact the functionality).
5. Type a name for the computer in the Computer Name text box. Be sure the
name is something easily recognizable and unique to that machine (for example,
if a workstation already has a name in a computer lab, such as Tyler Hall
Workstation S004, you may want to use that name here).
6. Click
to save the computer name along with the MAC address or
to cancel the action.
7. If added, the computer will display in the Computer list.
Note: Installing a location on a client machine causes a key to be added to the computer's
registry.
Removing a Computer
To remove a computer, complete the following steps:
1. Click the check box next to the name of the computer(s) to be deleted.
2. Click the Remove link on the taskbar or click the options menu and then click
Remove.
3. A message window displays, asking "Are you sure you want to delete the
selected Computer(s)? This action cannot be undone."
4. Click OK to confirm the deletion or Cancel to cancel the deletion.
5. If added, the location will display in the Computer list.
- 148 -
MyNursingLab Instructor Guide Fall 2008
Change the Name of an Existing Computer
To edit the name of an existing computer, complete the following steps:
1. Click the options menu next to the corresponding computer name.
2. Click Edit on the options menu.
3. Type the new computer name.
4. Click Save and Close to save the computer with the new name or click Cancel
to cancel the changes.
View Locations Assigned to an Existing Computer
To view a list of the locations to which a computer is assigned, complete the following
steps:
1. Click the options menu next to the corresponding computer name.
2. Click View Locations on the options menu.
3. A window displays, listing all of the locations to which this computer is assigned.
4. Click Close to close the window.
Locations
The Locations window displays on the right side of the Manage Locations page. From
here, create new locations or edit and delete existing locations.
Adding a New Location
To add a location, complete the following steps:
1. Click Add Computer link. The Add Location window opens.
2. Type the Location Name in the text box. Be sure the name is something easily
recognizable and unique to that location (for example, you might name it Tyler
Hall Room 202 Computer Lab). You cannot create locations with identical
names.
3. Click
to save the location or
to cancel the action.
Removing a Location
To remove a location, complete the following steps:
1. Click the check box next to the name of the location(s) to be deleted.
2. Click the Remove link on the taskbar or click the options menu and then click
Remove.
3. A message window displays, asking "Are you sure you want to delete the
selected Location(s)? This action cannot be undone."
4. Click OK to confirm the deletion or Cancel to cancel the deletion.
Change the Name of an Existing Location
To edit the name of an existing location, complete the following steps:
1. Click the options menu next to the corresponding location name.
2. Click Edit on the options menu.
3. Type the new location name.
4. Click Save and Close to save the location with the new name or click Cancel to
cancel the changes.
View Computers Assigned to an Existing Location
To view a list of the locations to which a computer is assigned, complete the following
steps:
1. Click the options menu next to the corresponding computer name.
- 149 -
MyNursingLab Instructor Guide Fall 2008
2. Click Open on the options menu (or click the name of the location).
3. All of the computers assigned to this location display in list.
4. Click Close to close the window.
Assigning and Unassigning Computers to/from a Location
To assign a computer to a location, complete the following steps:
1. In the Computers window, select one or more computers from the list.
2. In the Locations window, click the name of the location to which you want to add
the computer(s) or click the options menu and then click Open. The location
name appears above the Locations window, indicating this is the active location,
and the Add button is enabled.
3. Click the
Assign Computers button. The selected computers are
associated with the active location.
To unassign a computer from a location, complete the following steps:
1. In the Locations window, click the name of the location to view the computers
assigned to that location.
2. Select one or more computers from the list.
3. Click the Remove link on the taskbar or click the options menu and then click
Remove.
4. A message window displays, asking "Are you sure you want to delete the
selected Computer(s)? This action cannot be undone."
5. Click OK to confirm the removal or Cancel to cancel the removal. The selected
computer is unassigned from its location.
Note: You cannot remove a location, if there are computers assigned to it. A message will appear
at the top of the page, indicating this. Remove all computers from the location before attempting
to remove the location.
After you have set up locations and computers, as appropriate, click the
button at the top of bottom of the page to save your preferences
Not sure what a preference setting means? You can view contextual help for each
icon.
Preference setting by pointing to or clicking the corresponding
Search
Using Search
The Search tool allows you to search for course content like questions, activities and
resources within the current course. Search results are displayed in the Search Results
page. The Search function includes three main features:
1. Search Activity
2. Search Questions
3. Search Resources
Search for Activity
You can search for the activities depending upon the required search criteria. To search
for an activity:
1. Click the Search Activity options button. Select or enter information in the
following boxes to narrow the search:
- 150 -
MyNursingLab Instructor Guide Fall 2008
2.
3.
4.
5.
From the drop-down list, select the activity name.
Click the calendar icon and select the from and to dates.
Enter the exact number of questions in the text box.
Enter the duration in the text box, in the hh :mm format.
5. Click
to start the search or to
your selections.
The Search Results for Activity window opens and displays the activity name, the date
on which the activity was last modified, the number of questions the activity has, the
category of the activity and the options menu for the activity.
Search Questions
The Search Questions feature has two options:
1. Simple Search
2. Advanced Search
Simple Search
1. Click the Search Question options button.
2. Click Choose. The Select Question Types window opens. Note: The ability to
search for simulation questions is not yet implemented.
3. Select the appropriate question type by checking the desired question type, or
check Select All to select all question types.
4. Click Add Question Type.
5. Enter the question text in the text box.
6. Click the calendar icon and select the last modified from and to dates.
7. Click
to start the search or to
your selections.
The Search Results for Questions window opens which displays the question label, the
question type, the author of the question, the last date on which the question was
modified and the options menu for the question.
You can use New Search to obtain new search results or use Refine Search to specify
more filters to obtain precise search results.
Advanced Search
1. Click the Search Question options button.
2. Click the Advanced Search link.
3. Enter the learning objective in the text box.
4. Enter the question text in the text box.
5. Click Choose. The Select Question Types window opens. Note: The ability to
search for simulation questions is not yet implemented.
6. Select the appropriate question type by checking the desired question type, or
check Select All to select all question types.
7. Click Add Question Type.
8. From the drop-down list, select the author.
9. Enter the question answering from and to time in the text box, in the mm:ss
format.
10. Click the calendar icon and select the questions modified from and to dates.
11. Enter the filename in the text box.
12. From the drop-down list, select the file type.
13. From the drop-down list, select the file format.
14. Click
15. Click Search.
to start the search or to
- 151 -
your selections.
MyNursingLab Instructor Guide Fall 2008
The Search Results for Questions window opens which displays the question label, the
question type, the status of the question, the author of the question, the last date on
which the question was modified and the options menu for the question.
You can use New Search to obtain new search results or use Refine Search to specify
more filters to obtain precise search results.
Search Resources
1. Click the Search Resources options button.
2. Enter the filename in the text box.
3. From the drop-down list, select the file type.
4. From the drop-down list, select the file format.
5. Click
to start the search or to
your selections.
The Search Results for Resources window opens which displays the resource name,
the resource description, the resource type, the author of the resource and the options
menu for the resource.
You can use New Search to obtain new search results or use Refine Search to specify
more filters to obtain precise search results.
Options: Search Results for Activity
Previewing an Activity
To preview an activity, complete the following steps:
1. When viewing the Search Activities Results page, click the
option menu next
to the appropriate activity and then click Preview.
2. A Preview window opens, displaying a text preview of the questions in the
activity. To preview a single question, click the
button next to the
corresponding question. To preview all of the question, click the
Launch All
link on the right side of the toolbar. To print a list of all of the questions in the
activity, click the
Print link on the right side of the toolbar. Click the Close
button to return to the Student Content window.
Printing an Activity
To print an activity, complete the following steps:
1. When viewing the Search Activities Results page, click the option menu next to
the appropriate activity and then click Print.
2. The Print Settings window displays. Select the appropriate options and then click
OK. To learn more about Print Settings, click here.
Viewing an Activity in Course Content
To view an activity in Course Content, complete the following steps:
1. When viewing the Search Activities Results page, click the option menu next to
the appropriate activity and then click Go to Course Content.
2. The Course Content tool displays, open to the folder where the activity is located.
Options: Simple Search Results for Question
- 152 -
MyNursingLab Instructor Guide Fall 2008
Previewing a Question
To preview a question, complete the following steps:
1. When viewing the Search Results for Questions page, click the option menu next
to the appropriate question and then click Preview.
2. A Preview window opens, displaying a text preview of the questions in the
question. To preview a single question, click the
button next to the
corresponding question. To preview all of the question, click the
Launch All
link on the right side of the toolbar. To print a list of all of the questions in the
question, click the
Print link on the right side of the toolbar. Click the Close
button to return to the Student Content window.
Viewing a Question in Question Library
To view a question in Question Library, complete the following steps:
1. When viewing the Search Questions Results page, click the option menu next to
the appropriate question and then click Go to Question Library.
2. The Question Library tool displays, open to the folder where the question is
located.
Options: Advanced Search Results for Question
Previewing a Question
To preview a question, complete the following steps:
1. When viewing the Search Results for Questions page, click the option menu next
to the appropriate question and then click Preview.
2. A Preview window opens, displaying a text preview of the questions in the
question. To preview a single question, click the
button next to the
corresponding question. To preview all of the question, click the
Launch All
link on the right side of the toolbar. To print a list of all of the questions in the
question, click the
Print link on the right side of the toolbar. Click the Close
button to return to the Student Content window.
Viewing an Question in Question Library
To view a question in Question Library, complete the following steps:
1. When viewing the Search Questions Results page, click the option menu next to
the appropriate question and then click Go to Question Library.
2. The Question Library tool displays, open to the folder where the question is
located.
Options: Search Results for Resource
Previewing a Resource
To preview a resource, complete the following steps:
1. When viewing the Search Resources Results page, click the option menu next to
the appropriate resource and then click Preview.
- 153 -
MyNursingLab Instructor Guide Fall 2008
2. A Preview window opens, displaying a text preview of the questions in the
resource. To preview a single question, click the
button next to the
Launch All
corresponding question. To preview all of the question, click the
link on the right side of the toolbar. To print a list of all of the questions in the
resource, click the
Print link on the right side of the toolbar. Click the Close
button to return to the Student Content window.
Viewing a Resource in Course Content
To view a resource in Course Content, complete the following steps:
1. When viewing the Search Resources Results page, click the option menu next to
the appropriate resource and then click Go to Course Content.
2. The Course Content tool displays, open to the folder where the resource is
located.
Technical Support
877-MNL-Prof or 877-665-7763 to be connected
with a MyNursingLab tech specialist
- 154 -