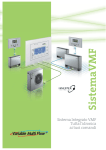
1
Sequence of operations to be performed to install the various components:
(1) Install the Omnia HL fan coil: this unit is the MASTER fan coil of the zone; the unit must be appropriately
installed electrically and hydraulically following the instructions provided in the fan coil documentation.
(2) Install the VMF-E1 thermostat: to be able to manage the fan coil via a VMF network, a VMF-E1 thermostat
must be installed on the fan coil (for detailed information on installation and connection of the thermostat, refer to
the specific documentation). The following is a summary of the operations required for installation of the proposed
example:
(a) remove the service terminal board from the side of the fan coil;
(b) mount the box of the VMF-E1 thermostat in place of the service terminal board;
(c) using the connection cables previously detached from the terminal board, connect the thermostat with the
electric motor controls (we recommend referring to the wiring diagrams of the unit to perform this connection);
(d) connect the power supply to the VMF-E1 thermostat;
(e) connect the air probe to the VMF-E1 thermostat (the air probe is indicated as SA in the wiring diagrams);
(f) connect the water probe to the VMF-E1 thermostat (the water probe is indicated as SW in the wiring diagrams);
(g) connect the VMF-E2H control interface (this connection can be made even if the box of the VMF-E1 thermostat
is closed);
(h) connect the VMF-E1 thermostat to the VMF network (these connections will be specified more in detail in the
chapter VMF NETWORKS SERIAL CONNECTIONS).
ATTENTION: the VMF-E18 thermostat boards have dip switches which MUST be set correctly based on the
features of the fan coil to which the thermostat is connected. Refer to the thermostat documentation to set
these dip switches correctly.
(3) Install the VMF-E2H control interface: to manage the Omnia HL fan coil directly from the unit, the VMF-E2H
control interface must be fitted (refer to the specific documentation to install the control).
(4) Install the Omnia HL fan coil: this unit is the SLAVE fan coil of the zone; the unit must be appropriately installed
electrically and hydraulically following the instructions provided in the fan coil documentation.
(5) Install the VMF-E0 thermostat: to be able to manage the SLAVE fan coil (controlled by the MASTER terminal
via serial controls on a TTL network), a VMF-E0 thermostat must be installed on the fan coil (for detailed information
on installation and connection of the VMF-E0 thermostat, refer to the specific documentation). The following is a
summary of the operations required for installation of the proposed example:
(a) remove the service terminal board from the side of the fan coil;
(b) mount the box of the VMF-E0 thermostat in place of the service terminal board;
(c) using the connection cables previously detached from the terminal board, connect the thermostat with the
electric motor controls (we recommend referring to the wiring diagrams of the unit to perform this connection);
(d) connect the power supply to the VMF-E0 thermostat;
(e) connect the air probe to the VMF-E0 thermostat (the air probe is indicated as SA in the wiring diagrams);
(f) connect the water probe to the VMF-E0 thermostat (the water probe is indicated as SW in the wiring diagrams);
(g) connect the VMF-E0 thermostat to the VMF-E1 thermostat of the master unit (via TTL zone network).
ATTENTION: the VMF-E0 thermostat boards have a dip switch which MUST be set correctly based on the
features of the system to which the thermostat is connected; refer to the thermostat documentation to set
this dip switch correctly.
6795773_00
GB
19