1
HD All-in-one DVR User Manual
it exits; single-clicking the ・Cancel・ button, it will exit without saving the setting information.
3.8.2.9 Network Setup
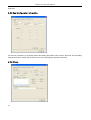
Choose “Network” on the system setting interface to enter its setting interface. There are "Ethernet
Configuration, PPPOE Configuration, DDNS configuration".
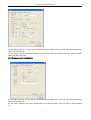
1) Ethernet Configuration: Choose “Ethernet Configuration” on the network configuration interface to enter its
setting interface.
Physical Address: Indicate the physical address number of the device.
Port Number・The default port number is 6650.
IP address・The IP address must be exclusive, which can not be conflict with any other host or
workstation during the same network segment.
Subnet Mask: It is used to divide subnet segment.
Default Gateway: Realizes the communications between different network segments. Gateway
address needs to be set.
DNS Address: When the device is connected to the network using PPPoE protocol, it will gain a
dynamic IP address.
DHCP: Choose whether to enable DHCP to obtain IP automatically.
Http Port: The port number which the IE browser visit. The default port is 80.
When the page setting is complete, single-clicking the ・OK・ button, the setting information will be saved and
it exits; single-clicking the ・Cancel・ button, it will exit without saving the setting information.
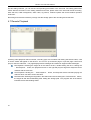
2) PPPOE Configuration: Choose “PPPOE Configuration" on the network configuration interface to enter its
setting interface.
Enable: "√" means enable PPPOE protocol and dial-up internet access; " □ " means do not enable
this function.
User Name and Password: Input the user name and password provided by ISP in the edit box. For the
edit methods, please refer to 3.3.2・4・edit box.
When the page setting is complete, single-clicking the ・OK・ button, the setting information will be saved and
it exits; single-clicking the ・Cancel・ button, it will exit without saving the setting information.
3) DDNS Configuration: Choose “"DDNS Configuration" on the network configuration interface to enter its
setting interface.
Enable: "√" means enabling DDNS dynamic domain name service; " □ " means do not enable this
function.
Servicer: Choose the corresponding servicer.
User Name, Password and Domain Name: Input the user name, password and domain name applied
from the internet. For the edit methods, please refer to 3.3.2・4・edit box.
When the page setting is complete, single-clicking the ・OK・ button, the setting information will be saved and
it exits; single-clicking the ・Cancel・ button, it will exit without saving the setting information.
3.9 Log Information
Choose “Log Search” on the main menu page to enter its operation interface.
Type: Select the target log type in the select box.
Time Setting: Input the time bucket of viewing in the edit box. Single-click ・Log Search・, the
corresponding log information will appear in the log list at the bottom. You can turn page by inputting
target page number in the page number box or by single-clicking ・OK・ button.
18