1
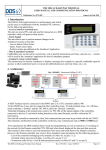
THE DDS LCD-KEYPAD TERMINAL
USER MANUAL AND COMMUNICATION PROTOCOL
Publication No. 07UE102
October, the 12th 2010
1. Introduction
The DDS LCD-Keypad terminal is a multi-purpose unit which
can be used as a remote station of the Amadeus PC software.
Once the user has identified himself through his PIN code or his
card, he may perform one of the following applications:
- Access Control to restricted area:
According to a pre-defined code, the unit may grant access to a
corresponding secured area.
- Alarm keypad
The unit allows user to perform manual changes in the Amadeus
security system like:
- Arm or disarm Alarm Zones
- Query Alarm zones status
- Perform actions pre-defined at the Amadeus Application.
- Time & attendance terminal
Cardholders may use the unit to record entry, exit or specific transactions (exit busy, start job, etc…) which
will be used by the Amadeus application for time & attendance purpose
- Amadeus remote control station
The terminal may be used by Amadeus to display a message (for example to a specific cardholder upon his
access), to allow authorized users to execute pre-defined processes (activate relays, etc.), etc.
2. Architecture
RS232
Bus 1 (RS485) : Transactions Polling (To PC)
RS232/RS485
Interface
Port 1
C00/I1
Domain
Controller
(TPL
#00)
Port 2
Port 1
Port 1
DS216
#01
C02/I1
C02/I2
DS216
#03
TPL
#02
Port 2
Bus 2
C03/I1
TPL
#04
DS216
#05
Port 2
Port 2
Domain
A DDS Terminal must be connected to the RS485 port 2 of a TPL controller address #00.
To this RS485 bus 2 may also be connected other controllers (max. 32) and terminals (max. 16). All these
items constitute a ‘Domain’ and the TPL #00 is called the ‘Domain’ controller.
Terminals belonging to the domain may control, via TPL #00, all the inputs/outputs of the controllers
belonging to the same Domain, and this without the PC intervention.
Note that all controllers connected by their 2nd communication port must be provided with the kit COM 2.
The terminals, and therefore all the controllers on the bus, may communicate only at 9600 or 19200 baud.
To be operational, the DDS terminal doesn’t need any programming: as soon as turned-on, it is looking on
the network for the Domain controller (TPL #00) and when found, displayed the time and date received.
The terminal is then ready to received transactions from users and sends them to the Domain controller.
Notes:
1- At the Amadeus application, Cardholders or supervisors supposed to use the DDS Terminal must have in their Access group
definition, the Reader no.1 of the Domain Controller (#00).
2- The Domain controller may receive from Amadeus some parameters for the following purposes:
- Terminal parameters (Alarm zone, exit delay, etc. via Mess 45, see par 5.1.1)
- List of the controllers belonging to the domain (via Mess 45, see par 5.1.2).
- Transactions name (via Mess 51, see par. 5.2).
The DDS LCD-Keypad Terminal User Manual
Doc. 07UE102 – Issue: 12/10/10
Page 1/6
DDS Terminal Connection
Keypad:
Controller:
AUX (RED) 12Vdc
COM (BLK) 0v
BUS (YEL)
Hi (RS485 bus 2)
BUS (GRN) Lo (RS485 bus 2)
3. Installing the terminal
Connect the terminal to a bus 2 via its RS485 port.
This bus must be connected to port 2 of TPL #00.
All the controllers of the domain (i.e. connected to
the same Bus 2) must get a firmware dated from
1/12/2010 or later.)
Because up to 15 terminals may be connected to the same bus, each if them needs a different address set by
its internal dip switches (inside the housing, on the PCB near the LCD display) as follows:
1
2
3
4
on
1
2
3
4
Address
Dip
Sw.
off
off
off
off
00
on
off
off
off
01
off
on
off
off
02
on
on
off
off
03
off
off
on
off
04
on
off
on
off
05
off
on
on
off
06
on
on
on
off
07
off
off
off
on
08
on
off
off
on
09
off
on
off
on
10
on
on
off
on
11
off
off
on
on
12
on
off
on
on
13
off
on
on
on
14
on
on
on
on
15
Note that each terminal adds 191 to this physical address to communicate with the Domain controller so that
addresses 00 to 15 may be used by the controllers.
4. Using the terminal
4.1- Transaction entry:
To perform a transaction, the user has first to identify himself either by presenting his card front of the
terminal or by keying-in his PIN code at the keypad. He then can enter the transaction requested as shown in
Table 1.
An Audible Tone (Buzzer) is sounded when a card is correctly read or when a key pressed.
The authorized amount of time is 8 seconds between key entries. If the time expires, all keys entered and
possible card code read are cleared and the user must start the sequence from the beginning.
Pressing the [*] (Clear) key at any moment will cancel the transaction. Keeping this Clear key pressed during
4 seconds will reset the terminal while keeping the [D] key pressed will display the firmware version.
4.2- Terminal built-in Card reader:
The terminal contains a proximity card reader (RFID) which may read the 32 data bits of any proximity EM
card (125 Khz).
The format read (i.e. hexadecimal, decimal or other) is the same as the one defined for Reader 1 of the
Domain controller (Controller address #00).
Note that the DDS Terminals read the 32 bits of a DDS EM Card while the DDS readers read only 26 Bits of
these cards. To get the same hexadecimal code from the DDS terminal and the DDS reader, the Wiegand
format 09 must be defined at all the readers of the Domain controller. Alternatively, to read the card in one
of the decimal format recognized by the controller (formats ‘Decimal’, ‘Decimal 24 bits’ or ‘Decimal 6
digits’), this format must be defined at all the readers of the Domain controller (via the PC Amadeus
application, screen ‘Controller/Reader/Miscellaneous-Badge format’).
The reader antenna is located around the terminal keypad and therefore, to be read, a card must be presented
few centimeters in front of the keypad.
4.3- Transaction Display:
On stand-by, the terminal displays the stand-by text (‘Wait for ID.’) and the actual time and date.
When a transaction is performed, the unit sends it to the host and when acknowledged, displays the
corresponding text. To each type of transaction (defined by its code, see next note 1), a specific text may be
user defined from Amadeus like ‘Exit busy’, ‘Maintenance’, etc…(via Mess 51, see par 5.2).
The following table shows the transactions format recognized by the terminal.
The DDS LCD-Keypad Terminal User Manual
Doc. 07UE102 – Issue: 12/10/10
Page 2/6
Table 1: Transactions recognized by the DDS Terminal
Operation
User action
Comments
TRN.
Code/data1
aa = alarm zone No.
aa = alarm zone No.
aa = alarm zone No.
26/aa
27/aa
29/aa
No transaction recorded
No transaction recorded
No transaction recorded
-/-/-/00/00
01/00
nn/00
Alarm transactions 2
ID3
ID
ID
Arm Alarm Zone No.‘aa’
Disarm Alarm Zone No.‘aa’
Query status of Alarm zone No.‘aa’
Time & Atendance transactions
Display the key [A] transaction name4
4
Display the key [B] transaction name
Display transaction ‘nn’ name
Record a transaction with key [A] default code4,5
Record a transaction with key [B] default code4,5
Record a transaction with code nn5
ID
aa
aa #
aa
?
[A]
[B]
nn [C]
ID [A]
ID [B]
nn [C]
Remote control
Transaction with code ‘nn’5
ID
nn [C]
ID [A] or ID [B]
ID
rr [D]
nn/00
00/00
22/rr
Press [*]
Press [*] during 4 sec.
Press [D] during 4 sec.
-/-/-/-
5
Perform an action (ex: open a door) using A or B
Activate Reflex No.RR2
Local action
Cancel / Clear
Reset the terminal
Get the terminal firmware version
Notes:
1- Transaction code and data.
Within the Amadeus system, each cardholder transaction is recorded with a code, which describes the type of
transaction and therefore the type of process Amadeus has to perform upon reception of the transaction.
According to the user keypad entries, transactions performed at the DDS Terminal get their own code to perform
specific operations like ‘entrance or exit busy’ (for time attendance application), arm or disarm alarm zones (for alarm
monitoring), activate pre-define reflexes, etc. Note that some transactions require also a parameter (the ‘transaction
data’) like the alarm zone number to be armed or disarmed, etc.
Table 1 shows how to perform transactions from the DDS terminal and which transaction code and data are generated
and sent to the host.
2- These transactions may be performed only by authorized users (defined as ‘Supervisor’ from Amadeus)
3- ‘ID’ stands for user identification: either the user’s card or his PIN (recorded from Amadeus).
It is also possible to force the user using his card or his PIN or both. (Via Mess 45, byte ‘P’, see par 5.1.1)
Note that if only the card is requested, the ‘Bypass’ key is not needed after.
4- The default terminal transaction for key [A] is 00 (‘Entrance’) and for Key [B] is 01 (‘Exit) but may be changed
from Amadeus via Mess 45 (see par 5.1.1).
5- A transaction with a specific transaction code will trigger a possible action pre-defined for this code at the Amadeus
application. Any code may be used for transaction, from 00 to 99, excepted codes 20 to 29 which are reserved for predefined applications. (20,21,23,24,25,28: reserved for future used; 22: Reflex activation, 26/27: Alarm zone
armed/disarmed; 29: Query Alarm Zone status).
If a door must be opened, a network reflex may be defined to activate the required door relay upon a specific
transaction code (To do so, Reader No.1 of controller #00 must be selected at the field ‘Reader’ of the Amadeus
‘Network reflex’ screen). Then, if key [A] is for example redefined with this transaction code (using Mess 45, See
5.1), opening the door will be performed by the ‘ID [A]’ key entry.
6- On some terminals, the symbols are replaced by the following text:
=
Bypass
=
Arm
#
=
#
Disarm
Examples of transactions:
Transaction with code 18 using a card or the PIN 1234 : [Card] 18 [C]
or 1234
Arm Alarm zone No.01 using a card:
[Card] 01 [Arm]
Arm Alarm zone No.01 using a card and the PIN 1235 : [Card] 1235
01 [Arm]
?
=
Status
18 [C]
Arming/Disarming ALL the Alarm zones: use the Alarm zone No. ‘00’.
The DDS LCD-Keypad Terminal User Manual
Doc. 07UE102 – Issue: 12/10/10
Page 3/6
4.4 Alarm Zone Management:
An Alarm Zone (or Input group) is a group of alarm inputs grouped together (through the Amadeus
application). The inputs of an Alarm Zone may belong to different controllers. A Weekly Program WPZ may
be attributed to an Alarm Zone: the zone will be automatically armed during the ‘green’ periods of this
program and disarmed during the ‘red’ periods.
The DDS terminal allows the user (who must be defined as ‘Supervisor’) to manually change the status of
such a zone:
- If a Weekly Program is attributed to the zone, the change will take effect until the next time period of the
program.
- If no Weekly Program is attributed, or a Weekly Program without time periods (The default ‘Always’ and
‘Never’ Programs), the change will take effect till the next manual change.
Notes:
1- Only inputs which belong to the same domain (i.e. managed by all the controllers connected together via their bus2)
may be updated via the DDS terminal connected to the domain.
2- To be able to manage Alarm zones, the two following lines have to be inserted in the ‘.ini’ file of the application:
AlarmZones = 1
ControllerInputGroup = 1
Terminal Alarm Zone and led ‘ARM’:
According to its physical location, a terminal may belong to an Alarm Zone (defined from Amadeus via
Mess 45, see par. 5.1.1). When this zone is armed, the led ‘ARM’ of the terminal is ‘on’ and when the zone
is disarmed, the led is ‘off’.
When the zone is manually armed (by a user from the terminal), the ARM led blinks for the period of the
defined 'Exit delay' (in Mess 45), during which the zone is still disarmed to give the user time to leave the
zone. After this delay, the zone is armed and the led turns ‘on’. It is possible to program the terminal to
sound a ‘bip bip’ indication during this exit delay. (via Mess 45, byte ‘P’, see par. 5.1.1)
If the domain has been defined (see par. 5.1.2), when arming an Alarm zone from the terminal, the Domain
controller first checks that all the inputs belonging to that zone (even if managed by another controllers of
the domain) are not in their alarm state:
→ If no, the Alarm Zone, i.e. all the inputs belonging to this zone, will be armed.
→ If one or several of these inputs are under alarm, (for example input 2 of controller #02, ‘C02/I2’, see
diagram in par. 2), the keypad LCD will prompt the user with a warning message saying:
LCD Line 1 (16 characters): ‘CnnIn on alarm !’ (For example: 'C02I2 on alarm !')
LCD Line 2 (16 characters): ‘ Continue ?’
The user will then have the following choices:
- [Status] : Display the next input under alarm (if exist).
- [Arm] : Arm the zone anyway (even with inputs under alarm)
: Cancel the Arming operation.
- [*]
If the user doesn’t press any key during 10 sec., the arming operation will be cancelled.
Notes:
1- If the user decides to arm the zone while an alarm input is in its alarm state (and have already sent an ‘start alarm’
message) , no alarm will be raised, because the system sends alarm ONLY after a change on a input, i.e. only when an
input goes from its normal state to its alarm state. Therefore, for example, if the zone is armed while input C02/I2 in
its alarm state, it will not raise any alarm, until it goes back to its normal state and then to its alarm state.
2- It is possible however to prevent users to arm a zone in the case that at least one input is under alarm (Via Mess 45,
byte ‘P’, see par. 5.1.1). When this option is set, if the Domain controller detects such an input, it will automatically
cancel the arming request.
Accessing an armed zone via a reader
When a zone is armed, access to a reader which belongs to the zone is denied excepted for cardholders
defined as ‘Supervisors’. For them, access is granted, the zone is disarmed during the ‘Entrance delay’, the
led ‘ARM’ blinks and a ‘bip bip’ can be sound at the terminal (see par 5.1.1). Such supervisors may then
access the zone and reach the terminal to disarm it. A zone is attributed to a reader from Amadeus, screen
‘Controller/Reader/Miscellaneous-Badge format’, where the entrance delay may also be defined.
The DDS LCD-Keypad Terminal User Manual
Doc. 07UE102 – Issue: 12/10/10
Page 4/6
Request to Exit (RTX) button
Any controller input may be used for a RTX button. When a Weekly program is attributed to such an input,
the RTX button operates only during the ‘green’ period of this program. If no Weekly program is attributed,
the RTX button is always operational.
Note:
It is possible to group all the RTX inputs in a specific alarm zone and then, arming or disarming the zone from
Amadeus will make the buttons operational or not. However, if performed from a terminal, this operation will not have
any effect on the RTX buttons.
5. Programming the Terminal through the Amadeus 5 Script Menu.
The terminal doesn’t need any programming to be operational. As soon as connected to the Domain
controller and powered-up, it searches on the network for the Domain controller (TPL #00) and when found,
displayed the time and date received. The terminal is then ready to received transactions from users and
sends them to the Domain controller.
However, the Domain controller may receive from Amadeus some parameters via Mess 45 and 51 of
protocol 4 as described hereunder. They may be automatically sent by Amadeus5 if they are recorded in the
‘Script’ screen which appears when clicking on Shift + F12 at the ‘Controller’ screen of the Domain
Controller. All the data must be written in hexadecimal.
5.1 Terminals Parameters and Domain Definition: Message 45
5.1.1 Terminals Parameters:
Command 45 allows to define the terminal parameters as follows:
45, 1t, AZ, dd, P, A, B
Where:
t= Terminal number (0-F),
AZ = Terminal Alarm zone (in hexa, from 01 to h7F). When armed, the ‘arm’ led is lit on.
dd = Terminal exit delay in hexa, i.e. the delay the zone stays disarmed after that the user has armed it:
01- BFh : 1-191 minutes. The terminal Arm led blinks slowly during this delay
C1h- FCh: 1-60 seconds. The terminal Arm led blinks quickly during this delay
P=Terminal parameters, see table 5.1.1
A and B = Transaction codes in hexa for Keys [A] and [B] (by default or if null, key A transaction = 00 and
key B transaction = 01)
P
80
81
82
83
84
85
86
87
90
91
92
93
94
95
96
97
Table 5.1.1: Terminal parameters: byte ‘P’
Arming a zone not performed
Sound a ‘bip bip’
when input(s) on alarm
during entry/exit delay
No
No
No
No
No
No
No
No
No
Yes
No
Yes
No
Yes
No
Yes
Yes
No
Yes
No
Yes
No
Yes
No
Yes
Yes
Yes
Yes
Yes
Yes
Yes
Yes
ID Request
For transactions
Card or PIN
Card only
PIN only
Card and PIN
Card or PIN
Card only
PIN only
Card and PIN
Card or PIN
Card only
PIN only
Card and PIN
Card or PIN
Card only
PIN only
Card and PIN
Example: To define that the terminal 00 belongs to Alarm Zone 01 with an exit delay of 45 sec.,
transactions code for keys A and B are 18 and 19, card or PIN are requested from the user and a ‘bip bip’ is
sound during the entrance or exit delay, the script to write is: 45 10 01 ED 84 12 13
The DDS LCD-Keypad Terminal User Manual
Doc. 07UE102 – Issue: 12/10/10
Page 5/6
Note on an Alarm Zone dispatched in several controllers.
When the user arms the terminal alarm zone, the inputs (of this zone) managed by the Domain controller will
be armed after the alarm exit delay ‘dd’ programmed (see Par. 5.1.1). But if other inputs of this zone are
managed by other controllers, they will be armed immediately. To allocate also a delay to these inputs,
message 45 must also be sent to all the controllers which manage these inputs, as follows: 45 1t AZ dd 00 00
00 (1t, AZ and dd as explained in Par.5.1.1). The command will be inserted in the script menu of the
corresponding controller.
5.1.2 Domain Definition
When the user requests to arm an alarm zone, the Domain controller may query the other controllers of the
domain if their inputs which belong to this zone are ‘on alarm’. If yes, the Domain controller will prompt the
user, via the terminal LCD, if he wants to continue the arming operation. Therefore the Domain controller
must know the list of the controllers in the domain. This is done via Mess 45 as follows:
45, 00, 00, tt0, tt1, tt2, tt3
Where: tt3, … tt0 is the list of the controllers belonging to the domain, in a ‘bit map’ form: tt0 bit 0
represents controller #00, tt0 bit 7 controller #07, tt1 bit 0 controller #08, until tt3 bit 7 for controller #31. A
controller belongs to the domain if its corresponding bit is set.
Example: if the domain contains controllers #01, #02, #03, and #09, the command to insert in the script
screen will be: 45 00 00 0F 02 00 00.
Contr.addr. 070605 0403 020100 151413 1211100908 2322212019181716 3130 2928 2726 2524
bits 0 0 0 0 1 1 1 1 0 0 0 0 0 0 1 0 0 0 0 0 0 0 0 0 0 0 0 0 0 0 0 0
bytes
tt0 = 0F
tt1 = 02
tt2 = 00
tt3 = 00
Note that bit 0 of tt0 stands for the Domain controller #00 and therefore may also be set.
5.2 Transaction Name: Message 51
When a transaction is acknowledged by the domain controller, it displays via the terminal LCD screen the
cardholder number in the first line and in the second line the transaction code used. It is possible to predefined transaction names which will be displayed instead of the transaction code as follows:
51, ss, cc, dd1, …. dd16
Where: ss is the string number (from 01 to 31, therefore up to 31 codes may be pre-defined), cc the
transaction code (from 00 to 19 or 30 to 99 with Bit 7 set to 1, i.e. cc=h80 to h93 or h9E to hE3) and dd1 to
dd16 the transaction name, in ASCII. If the name has less than 16 characters, ‘00’ must be added.
5.3 Script example
Hereunder an example of a script which can be ‘copied’ and ‘pasted’ to the script screen of Amadeus5,
controller #00 :
51 01 8A 20
51 02 8B 20
51 03 8C 45
Maintenance
51 04 8D 20
45 00 00 05
45 10 01 c8
45 12 02 02
20 20 53 74 61 72 74 20 4D 65 61 6C 20 20 20 /string 01: TRN code 10: start meal
20 20 20 45 6E 64 20 4D 65 61 6C 20 20 20 20 /string 02: TRN code 11: end meal
78 69 74 20 4D 61 69 6E 74 65 6E 61 6E 63 65 /string 03: TRN code 12: Exit
45
00
80
80
78
00
0A
0C
69
00
0B
0D
74 20 54 72 61 69 6E 69 6E
/Domain def.: Cnt. #00 and
/Trm.00:AZ=01,Exit delay 8
/Trm.02:AZ=02,Exit delay 2
67 20 20 /string 04: TRN code 13: Exit Training
#02
sec., Key [A]: Trn code 10, Key [B]: Trn code 11
min., Key [A]: Trn code 12, Key [B]: Trn code 13
Note that a comment may be written after each command, if it is preceded by the ‘/’ character.
The DDS LCD-Keypad Terminal User Manual
Doc. 07UE102 – Issue: 12/10/10
Page 6/6