1
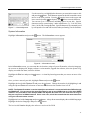
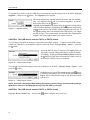
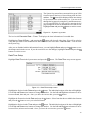
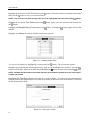
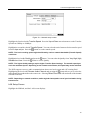
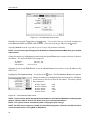
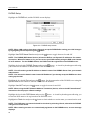
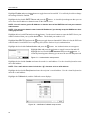
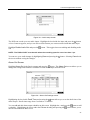
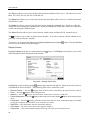
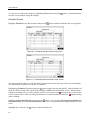
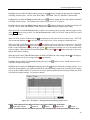
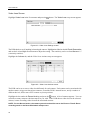
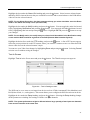
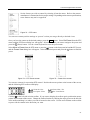
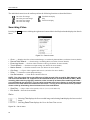
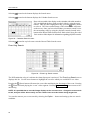
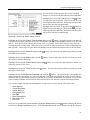
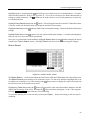
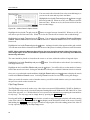
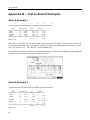
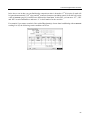
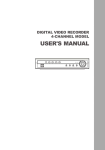
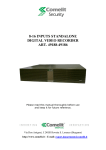
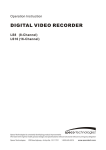
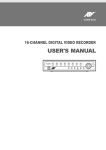
User’s Manual
You can save your Record settings by highlighting Save and pressing the
exits the screen without saving the changes.
button. Selecting Cancel
Schedule Screen
Highlight Schedule in the Record menu and press the
button, and the Schedule setup screen appears.
Figure 46 ─ Schedule (Simple Mode) setup screen.
Figure 47 ─ Schedule (Advanced Mode) setup screen.
You can program the DVR to record only during certain times based on time, day of the week, and holidays.
The smallest time segment you can use is 15 minutes.
Highlighting Schedule On and pressing the button toggles between On and Off. In the Schedule On
mode, the DVR records video based on the schedule established in the Schedule screen. When turning
Schedule recording Off, you will be asked to confirm your decision, and displays at the top-left corner
of each camera screen. Panic recording will function even when Schedule is turned off.
displays during
panic recording.
Highlight the Schedule Mode box and press the button. You can select between Simple Mode and
Advanced Mode. Selecting Advanced Mode allows you to set up individual recording schedule for each
event.
Highlight the + and press the
32
button to add a schedule item.