Download User`s manual
Transcript
English FCC STATEMENT This device complies with Part 15 of the FCC Rules. Operation is subject to the following two conditions: (1). This device may not cause harmful interference, and (2). This device must accept any interference received, including interference that may cause undesired operation. Note: This equipment has been tested and found to comply with the limits for Class B digital devices, pursuant to Part 15 of the FCC rules. These limits are designed to provide reasonable protection against harmful interference in a residential installation. This equipment generates uses and can radiate radio frequency energy and, if not installed and used in accordance with the instructions, may cause harmful interference to radio communications. However, there is no guarantee that interference will not occur in a particular installation. If this equipment does cause harmful interference to radio or television reception, which can be determined by turning the equipment off and on, the user is encouraged to try to correct the interference by one or more of the following measures: Reorient or relocate the receiving antenna Increase the separation between the equipment and receiver Connect the equipment into an outlet on a circuit different from that to which the receiver is connected Use of shielded cable is required to comply with Class B limits in Subpart B of Part 15 of the FCC rules. Do not make any changes or modifications to the equipment unless otherwise specified in the manual. If such changes or modifications should be made, you could be required to stop operation of the equipment. Product Information 1. Product design and specifications are subject to change without notice. This includes primary product specifications, software, software drivers, and user’s manual. This User Manual is a general reference guide for the product. -1- English 2. The product and accessories that come with your camera may be different from those described in this manual. This is due to the fact that different retailers often specify slightly different product inclusions and accessories to suit their market requirements, customer demographics, and geographical preferences. Products very often vary between retailers especially with accessories such as batteries, chargers, AC adapters, memory cards, cables, carrying cases/pouches, and language support. Occasionally a retailer will specify a unique product color, appearance, and internal memory capacity. Contact your dealer for precise product definition and included accessories. 3. The illustrations in this manual are for the purpose of explanation and may differ from the actual design of your camera. 4. The manufacturer assumes no liability for any errors or discrepancies in this user manual. 5. For driver updates, you can check the “Download” section of our website, www.geniusnet.com.tw. SAFETY INSTRUCTIONS Read and understand all Warnings and Cautions before using this product. Warnings If foreign objects or water have entered the camera, turn the power OFF and remove the batteries and the AC power adapter. Continued use in this state might cause fire or electric shock. Check with your retailer. If the camera has fallen or its case has been damaged, turn the power OFF and remove the batteries and the AC power adapter. Continued use in this state might cause fire or electric shock. Check with your retailer. Do not disassemble, change or repair the camera. This might cause fire or electric shock. For repair or internal inspection, ask your retailer. Use the supplied AC adapter only with the indicated power supply voltage. Use with any other power supply voltage might cause fire or electric -2- English shock. Do not use the camera in areas near water. This might cause fire or electric shock. Take special care during rain, snow, on the beach, or near the shore. Do not place the camera on inclined or unstable surfaces. This might cause the camera to fall or tilt over, causing injury. Keep the batteries out of the reach of children. Swallowing batteries might cause poisoning. If the battery is accidentally swallowed, immediately consult a physician. Do not use the camera while you are walking, driving or riding a motorcycle. This might cause you to fall over or result in a traffic accident. Cautions Insert the batteries paying careful attention to the polarity (+ or –) of the terminals. Inserting the batteries with its polarities inverted might cause fire and injury, or damage to the surrounding areas due to the battery rupturing or leaking. Do not fire the flash close to anyone’s eyes. This might cause damage to the person’s eyesight. Do not subject the LCD monitor to impact. This might damage the glass on the screen or cause the internal fluid to leak. If the internal fluid enters your eyes or comes into contact with your body or clothes, rinse with fresh water. If the internal fluid has entered your eyes, consult a physician to receive treatment. A camera is a precision instrument. Do not drop it, strike it or use excessive force when handling the camera. This might cause damage to the camera. Do not use the camera in humid, steamy, smoky, or dusty places. This might cause fire or electric shock. -3- English Do not remove the battery immediately after long periods of continuous use. The battery becomes hot during use. Touching a hot battery might cause burns. Do not wrap the camera or place it in cloth or blankets. This might cause heat to build up and deform the case, resulting in fire. Use the camera in a well-ventilated place. Do not leave the camera in places where the temperature may rise significantly, such as inside a car. This might adversely affect the case or the parts inside, resulting in fire. Before you move the camera, disconnect cords and cables. Failure to do this might damage cords and cables, resulting in fire and electric shock. Notes on Battery Usage When you use the battery, carefully read and strictly observe the Safety Instructions and the notes described below: Different battery types and surrounding temperatures may affect the battery performance. Avoid using batteries in extremely cold environments as low temperatures can shorten the battery life and reduce camera performance. If you are using the new rechargeable battery or rechargeable battery that has not been used for an extended period of time (batteries that pass the expiry date are exceptions) might affect the number of pictures that can be taken. Therefore, to maximize their performance and lifetime, we recommend that you fully charge the batteries and discharge them for at least one complete cycle before use. The battery may feel warm when using the camera for an extended period of time or using the flash continuously. This is normal and not a malfunction. The camera may feel warm when being used continuously or for an extended period of time. This is normal and not a malfunction. If you will not be using the batteries for an extended period of time, remove them from the camera to prevent leakage or corrosion. Always keep the terminals in a clean state. -4- English CONTENTS INTRODUCTION 7-8 CAMERA MODE Overview Package contents GETTING TO KNOW THE CAMERA 9-13 Front view Rear view Control Buttons Top View of Docking Cradle LCD monitor information ADVANCED SHOOTING 14-17 Inserting the Battery Docking Cradle Charging the Battery Using the AC Power Adapter Attaching the Camera Strap Inserting and Removing an SD Memory Card GETTING STARTED 28-31 Continuous Shooting Auto Exposure Bracketing (AEB) Adjust White Balance Manually PREPARING THE CAMERA 21-28 Shooting Images Useful Scene Mode Reviewing the Last Image Using the Zoom Function Using the Macro (Close-UP) Mode Using the Flash Using the Self-Timer Adjusting the Exposure Setting White Balance PLAY MODETHE BASICS 31-35 Viewing Images Magnifying Images Thumbnail Display (Index Playback) Slideshow Display Resizing an Image 18-21 MOVIE MODE Turning the Power On/Off Entering the Main Menu Setting the Date and Time Choosing the Screen Language Formatting an SD Memory Card or Internal Memory Setting Image Resolution and Quality Using the LCD Monitor 35-36 Recording Video Clips Playing Back Video Clips PLAY MODE-ADVANCED FUNCTIONS 36-48 Playing Back Images/Video Clips on TV Rotating Images in the Display Deleting Images/Video Clips -5- English Protecting Images/Video Clips Setting the DPOF Connecting to a PictBridge Compliant Printer Changing the Camera Startup Logo AUDIO MODE PC CAMERA 48-50 Recording Voice Clips Playing Back a Voice Recording File Deleting a Voice Recording File MENU OPTIONS YOUR DIGITAL STILL CAMERA 51-53 Step 1: Installing the USB Driver (Windows 98/98SE users only) Step 2: Connecting the digital still Camera to your computer Step 3: Downloading Images, video clips or voice recording files CONNECTING YOUR CAMERA TO OTHER INSTALLNG THE EDIT SOFTWARE 57-65 Camera Menu Movie Menu Play Menu Setup Menu TRANSFERRING FILES FROM TO A COMPUTER 55-57 Step 1: Installing the PC camera Driver (same as USB driver) Step 2: Connecting the digital still Camera to your computer Step 3: Run your application software (i.e. Windows NetMeeting) DEVICES 66 SPECIFICATIONS 67 APPENDIX 68-70 Troubleshooting Guide Possible Number of Recordable Image Approximate Duration of Recording Time 53-54 Installing Photo Explorer Installing Photo Express USING THE DIGITAL STILL CAMERA AS A -6- English INTRODUCTION Overview Thank you for purchasing this new digital still camera! Equipped with a 5.0 Mega pixels CCD sensor, your camera delivers good quality, 2560 x 1920 resolution images. Other features provided by the camera include the following: 5.0 Mega pixels A high-resolution CCD sensor provides 5.0 mega pixels for good quality of images. USB connection (USB 2.0 compliant) Still images, video clips, or voice recording files that you have recorded can be downloaded to your computer using the USB cable (A USB driver is required for Win 98 and Win98SE). Auto flash An auto flash sensor automatically detects the shooting (lighting) conditions and determines whether the flash should be used. 2.0” LTPS color image LCD monitor DPOF functionality DPOF can be used to print your images on a DPOF compatible printer by simply inserting the memory card. Optical zoom: 3x Digital zoom Preview mode: 4x / Playback mode: 8x 10MB internal (built-in) memory Images can be captured without using a memory card. PictBridge support You can connect the camera directly to a printer that supports PictBridge and perform image selection and printing using the camera monitor screen and controls. -7- English Support for SD memory card for memory expansion You may wish to expand the memory capacity (up to 512MB capacity) by using an external memory card. Camcorder, PC Camera and voice recorder support provided editing software: Photo Explorer / Photo Express You can enhance and retouch your images on your computer by using the provided editing software. Package contents Carefully unpack your package and make sure that you have the following items. In the event that any item is missing or if you find any mismatch or damage, promptly contact your dealer. Digital still camera USB cable AV cable Software CD-ROM User’s manual Camera strap Quick guide Camera pouch Docking Cradle AC Power Adapter AC Plug Adaptor for EU to US One Rechargeable Lithium Ion Battery NOTE Accessory and components may vary by different retailer. -8- English GETTING TO KNOW THE CAMERA Front view 1. Self-timer LED 2. Shutter button 3. Power button 4. Strap eyelet 5. Battery/SD memory card cover 6. Lens 7. Auto-Focus auxiliary LED 8. Flash 9. Microphone Rear view 1. LED indicator 2. W/ Zoom out (Wide-angle) button Thumbnail button 3. T/ Zoom in (Telephoto) button 4. 5. 6. 7. 8. Menu button MODE button Control buttons Delete button Display (LCD on/off) button 9. Tripod socket 10. Docking station terminal 11. LCD monitor (DC IN 5V port/USB port) 12. Speaker -9- English Control Buttons 1. ( 2. ( ) Quick View button 3. 4. 5. ) Flash button SCN ( ) Scene Mode button ( ) Self-Timer button OK button Top View of Docking Cradle 1. Cradle 2. USB port 3. AV-OUT port 4. DC IN 5V port 5. Cradle plug -10- English LCD Monitor Icons Camera mode 1. 2. Camera mode Image quality [ ] Super Fine [ ] Fine [ ] Normal 3. 4. 5. 6. 7. 8. Image size [ ] 2560 x 1920 [ ] 2048 x 1536 [ ] 1280 x 960 [ ] 640 x 480 [ ] TIFF IMAGE Possible number of shots Memory card indicator Remaining battery status [ ] Full battery power ] Medium battery power [ [ ] Low battery power [ ] No battery power Scene mode 9. [ ] Forced flash Self-timer mode [ ] 3 sec. delay [ ] 10 sec. Delay Off 10. White balance [AUTO] Auto [ ] Daylight [ ] Auto Mode [ ] Cloudy [ ] Backlight Mode [ ] Sunset [ ] Landscape Mode [ ] Tungsten [ ] Macro Mode [ ] Night Scene Mode [ ] Portrait Mode ] Fluorescent [ 11. Capture mode [ [ [ ] Sports Mode Flash mode [ [ ] ] Red eye No flash [ ] Auto flash 12. 13. 14. 15. -11- ] Single ] Continuous [ ] AEB Time Date Focus area Zoom state English Movie mode 1. Movie mode 2. Recordable movie time available 3. SD memory card indicator (if present) 4. Battery power indicator 5. Time 6. Date 7. Zoom state Audio mode 1. Audio mode 2. Current file/ total number of audio files 3. SD memory card indicator (if present) 4. Battery power indicator 5. Sound level (speaker volume) 6. Audio file name Image Playback 1. Play mode 2. Playback frame number 3. SD memory card indicator (if present) 4. Battery power indicator 5. Image size 6. Camera mode -12- English Video Playback 1. Play mode 2. Playback frame number 3. SD memory card indicator (if present) 4. Battery power indicator 5. Fast reverse playback indicator 6. Fast forward playback indicator 7. Movie mode Audio Playback 1. Audio mode 2. Current file/ total number of audio files 3. SD memory card indicator (if present) 4. Battery power indicator 5. Sound level (speaker volume) 6. Audio file name LED Indicators Indicator State Description/Activity LED indicator Solid red 1. The digital still camera is powering up. 2. The battery is being charged. LED indicator Self-timer indicator Solid green Blinking green USB communication is in progress. Blinking blue The self-timer function is activated. USB transfer is in progress. -13- English PREPARING THE CAMERA Installing the Battery We highly recommend you to use the specified rechargeable lithium-ion battery to realize the full capability of your digital still camera before initial use. Make sure that the power of the digital still camera is off before inserting or removing the battery. 1. Slide the battery cover in the direction of the [OPEN] arrow. 2. Insert the battery in the correct orientation as shown in the illustration. 3. Close the battery cover. To remove the batteries Hold the camera with the battery cover facing upward, then open the battery cover and remove the batteries. NOTE Be careful not to drop the batteries when opening or closing the battery cover. Docking Cradle With the docking cradle, you can position your digital still camera and connect it to other media devices to play back your images, video clips, or voice recording files (output to a TV monitor or another recorder recording device, for example) on your desktop. The cradle will facilitate the battery charge of the camera in conjunction with an AC power adapter. 1. Position the camera on the cradle. 2. Match the docking connectors and carefully insert the camera until it fits in place. -14- English Charging the Battery The status of the battery will affect the performance of the digital still camera. To maximize battery performance and lifetime, it is recommended that you fully charge the battery using the optional AC power adapter and then fully discharge it (through normal use) at least one time. Please note that the digital still camera must be powered off before charging the battery. Otherwise, the power will be provided only to the digital still camera. 1. Place the camera on the cradle. Connect the AC power adapter to the jack on the cradle labeled "DC IN 5V". 2. Connect the other end of the AC power adapter to a wall outlet. Charging time differs depending on the ambient temperature and the status of battery. NOTE The digital still camera must be used with the specified AC power adapter. Damage caused by the use of an incorrect adapter is not covered under the warranty. Always make sure that the digital still camera is off before removing the battery. The battery may feel warm after it has been charged or immediately after being used. This is normal and not a malfunction. When using the digital still camera in cold environments, keep the digital still camera and its battery warm by holding it inside your jacket or other warm protective environment. The battery is not fully charged at shipment and must be fully charged before being used. -15- English Using the AC Power Adapter 1. Make sure the camera is turned off. 2. Connect one end of the AC power adapter to the jack on the cradle labeled “DC IN 5V”. 3. Connect the other end to an electrical outlet. NOTE Make sure to use the specified AC power adapter or the camera. Damage caused by the use of an incorrect adapter is not covered under the warranty. To prevent unexpected auto power off resulting from no battery power left during the process of transferring your images to the computer, use the AC power adapter as a power supply. Attaching the Camera Strap Attach the strap as shown in the illustration. Inserting and Removing an SD Memory Card (Optional Accessory) The digital still camera comes with 10MB of internal memory, allowing you to store video clips, captured images, or voice recording files in the digital still camera. However, you can also expand the memory capacity by using an optional SD (Secure Digital) memory card so that you can store more files. 1. Always make sure the digital still camera is turned off before inserting or removing a memory card. -16- English 2. Insert an SD memory card in the correct orientation as shown in the illustration. 3. Close the battery/SD memory card cover. To remove the SD memory card, make sure the camera is turned off. Press lightly on the edge of the memory card and it will eject. Removing the SD card Open the battery/SD card cover, press lightly on the edge of the SD card and it will eject. NOTE Be sure to format an SD memory card with this digital still camera before using it. Refer to section in the manual titled “Formatting an SD Memory Card or Internal Memory” for further details. To prevent valuable data from being accidentally erased from an SD card, you can slide the write protect tab (on the side of the SD memory card) to “LOCK”. To save, edit, or erase data on an SD memory card, you must unlock the card. GETTING STARTED Turning the Power On/Off 1. Press the button until the digital still camera turns on. 2. To turn the power off, press and hold the button again. Entering the Main Menu After turning on the digital still camera, the Main Menu screen appears. Follow the steps below to select the desired mode: 1. Press the button to turn on the power. 2. Press the MODE button to access in Main Menu screen -17- English 3. Use , , or to choose the desired mode, then press the OK button. 4. For returning to Main Menu from each mode, press the MODE button again. Setting the Date and Time The date/time setting screen will automatically appear: When first turning the camera on. When turning the power on after leaving the camera without battery for an extended period of time. 1. Press the button to turn on the camera. 2. Press the MODE button to access in [ (SETUP)] mode with , , or then press the OK button. 3. Press 4. Use to select the [CUSTOM] menu. , , or to select [DATE SETUP], then press the OK button. 5. Press or to select the Year, Month, Day and Time fields. To increase a value, press the To decrease a value, press the button. button. The time is displayed in 24-hours format. 6. Press the OK button after all fields are set. Choosing the Language Follow the steps below to specify in which language menus and messages are to be displayed on the LCD monitor from the following: , ENGLISH, , FRANÇAIS, DEUTSCH, ITALIANO and ESPAÑOL. 1. Press the button to turn on the camera. -18- , , English 2. Press the MODE button to access [ mode with , , or (SETUP)] , then press the OK button. to select the [CUSTOM] menu. 3. Press 4. Use , , or to select [LANGUAGE], then press the OK button. 5. Use or to select the language you want. 6. Press the OK button to confirm. Formatting an SD Memory Card or Internal Memory The term “Formatting” means preparing an “SD Memory Card” to record images; this process is also called “initialization”. This utility formats the internal memory (or memory card) and erases all stored images and data. button to turn on the camera. 1. Press the 2. Press the MODE button to access [ mode with , , or (SETUP)] , then press the OK button. The [BASIC] menu is displayed. 3. Use , , or to select [FORMAT], then press the OK button. 4. Use or to select [YES], then press the OK button to confirm. NOTE When you format an SD memory card, be aware that all data will be permanently erased. Protected images are also erased. -19- English To format the internal memory, do not insert a memory card into the camera. Otherwise, you will format the memory card. Formatting is an irreversible action and data cannot be recovered at a later time. An SD memory card having any problem cannot be properly formatted. Setting Image Resolution and Quality As you get to know the digital still camera, you can set the image resolution (number of vertical and horizontal pixels) and image quality (compression ratio) based on the types of images you want to shoot. These settings affect the number of images that can be stored in memory, or on a memory card. Higher resolution and higher quality images provide finer detail but cause the images file size to be larger. To change image resolution or image quality, perform these steps below: 1. Press the button to turn on the camera. 2. Press the MODE button to access in [ (CAMERA)] mode with , , or , then press the OK button. 3. Press the button. The [PICTURE] menu is displayed. 4. Use , , or to select [SIZE], then press the OK button. 5. Use or to select the desired setting, then press the OK button. 6. Follow steps 4 and 5 above to set the [QUALITY]. NOTE The possible number of shots and recording time depend on the storage size, resolution and quality settings and the subject of the image to be captured. Check the Appendix. You can resize the images later. (Please refer to section in this manual titled "Resizing an Image" for further detail. -20- English Using the LCD Monitor Your camera is equipped with a 2.0" full color TFT LCD monitor to help you compose images, replay recorded images/video clips or adjust menu settings. The mode icons, text and numbers displayed on the monitor may vary according to the current settings. 1. Press the button to turn on the camera. 2. Compose your scene on the LCD monitor. 3. Press the shutter button. NOTE The LCD monitor darkens in strong sunlight or bright light. This is not a malfunction. To prevent your images from being blurred while pressing the shutter button, always hold it carefully. This is especially important when you are shooting under low lighting conditions, which your camera may decelerate the shutter speed to ensure your images are properly exposed. CAMERA MODE Shooting Images 1. Press the button to turn on the power. 2. Press the MODE button to access [ mode with , , or (CAMERA)] , then press the OK button. 3. Compose the image on the monitor screen so that the main subject is within the focus frame. 4. Press the shutter button down half way to focus the image. When you press the shutter button down half way, the camera’s Auto Focus feature automatically focuses the image and exposure. 5. Press the shutter button the rest of the way down to capture the image. -21- English NOTE The captured image appears to be larger than the one on the LCD after image captured. Pressing the button switches the LCD monitor display mode. Each time you press the button, the display changes in the following order: Standard Display → Simplified Display. Useful Scene Mode Your digital still camera offers you seven types of scene modes to capture images easily in a situation that is programmed to handle all adjustments for you by selecting the following shooting conditions. MACRO SPORT Use this mode to shoot fast moving objects. Use this mode to shoot close-up objects. AUTO Select this when not using SCENE mode. NIGHT BACK- SCENE LIGHT Select this option to take photographs of people against a dusk or nighttime background Select this option to take photographs with background is particularly bright; the subject will be dark (under exposure) POR- LAND- TRAIT SCAPE Use this mode to take photographs of distant scenery or landscapes. Select this to make people stand out with the background out-of-focus. -22- English To use the SCENE mode, follow the steps below: 1. Press the 2. Press 3. Use button to turn on the camera. / SCN to access [SCENE] mode. , , or to select the desired scene mode, then press the OK button to confirm. 4. Compose the image and then press the shutter button. Note for the following functions according to the desired scene from a menu: The camera will automatically adjust the focus and exposure depending on the settings of ISO sensitivity and White AUTO Balance. In this mode, Flash mode will be set to BACKLIGHT LANDSCAPE SPORT MACRO (Forced Flash) automatically. The Flash mode will be set to (Flash Off). In this mode, the low limit of shutter speed is 1/125. The Flash mode will be set to -23- (Flash Off). English Reviewing the Last Image The camera is equipped with the displayed on the LCD monitor in the button, allowing the most recent image to be / mode. Use the following procedure to preview the last image captured. 1. Press to display the last image captured. The last image displays on the LCD monitor. Press again to return to the normal shooting mode. You can only view the last image with this function. To view all your recorded images, press the MODE button to access in PLAY mode to playback the still images. Refer to the section in this manual titled “PLAYBACK MODE—THE BASICS” for further details. Using the Zoom Function This camera is equipped with 3x optical zoom. The lens moves during the optical zoom photography, allowing you to capture telephoto and wide-angle shots. By using the optical zoom function; images appear closer by pressing the T button, or smaller away by pressing the W button. Moreover, you can further enlarge the subjects with 4x digital zoom by pressing continuously the T button. It is activated after your camera reaches its maximum optical zoom factor (3x). A useful feature as it is, however, the more the image is magnified, the grainer the image may become. To capture a zoomed image, perform the following steps: 1. Adjust the magnification ratio by using the T/W button. To access the optical zoom function, press the T button as far as it can go. Press it again to activate the digital zoom. 2. Compose your scene and press the shutter button. To exit the zoom photography, press continuously the W button. -24- English NOTE The digital magnification ranges from 1.5x to 4x (within 6 stages: 1.5x, 2x, 2.5x, 3x, 3.5x, 4x). While recording video clips, the zoom function cannot be activated. Using the Macro (Close-Up) Mode With this mode, the camera’s lens switches the auto focus system to focus on subjects that are much closer to the lens. This feature allows you to shoot close-up objects, such as small insects or flowers to get the smallest detail. button to turn on the camera. 1. Press the 2. Press 3. Use / SCN to access [SCENE] mode. , , or to choose [ (MACRO)], then press the OK button. The icon appears on the LCD monitor. 4. Compose your scene and press the shutter button. When not using MACRO mode at any time, press with , , or / SCN again to choose and then press the OK button. NOTE After a macro shot is taken DO NOT FORGET to reset the lens to the normal position. Using the Flash The flash is designed to function automatically when lighting conditions warrant the use of flash. You can take an image using a desired flash mode to suit your circumstances. 1. Press the button to turn on the camera. -25- English 2. Press the 3. Use , / button to access [FLASH] mode. , or to select the desired flash mode, then press the OK button. The flash mode you set will be displayed on the LCD monitor. 4. Compose your scene and press the shutter button. The camera has four flash modes: Red Eye, No Flash (default), Auto Flash and Forced Flash. The table below will help you to choose the appropriate flash mode: Flash mode Description Use this mode to reduce the red-eye phenomenon when you want to take natural-looking photographs of people and animals in low-light conditions. When taking photographs, the red-eye RED EYE phenomenon can be reduced by asking the subject (person) to look at the digital still camera or get as close to the digital still camera as possible. Use this mode in an environment that the flash use is prohibited or under the situation that the distance to the subject is too far away NO FLASH AUTO FLASH for the flash to have any effect. The flash fires automatically according to suit the photographic conditions. The flash will always fire regardless of the surrounding brightness. FORCED FLASH Select this mode for recording images with high contrast (backlighting) and deep shadows. Using the Self-Timer The self-timer can be set in [ (CAMERA)] mode. This feature is used in situations such as group shots. 1. Secure the camera to a tripod or place it on a stable surface. 2. Press the button to turn on the power. -26- 
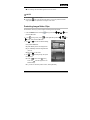
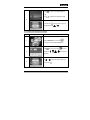
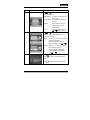
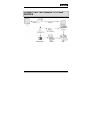
English 3. Toggle / to select the desired self-timer mode. [NO INDICATION] 4. Compose your scene and press the shutter button. The self-timer function is activated and the status of countdown will be displayed on the LCD monitor. The photography is then taken after the preset time. To cancel the self-timer at any time, press to disrupt the sequence. NOTE After one shot is taken, the self-timer mode is turned off. If you wish to take another image using the self-timer, repeat these steps. Adjusting the Exposure You can manually adjust the exposure determined by the digital still camera. Use this mode when the proper exposure cannot be obtained, for example, when the contrast (difference between light and dark) between the subject and the background is extremely large. The EV compensation value can be set in the range from –2.0EV to +2.0EV. 1. Press the MODE button to access [ mode with , , or (CAMERA)] , then press the OK button. -27- English 2. Press 3. Use , then use , , 4. You can use or or to select the [FUNCTION] menu. to select [EXPOSURE], then press the OK button. to set the range of EV compensation values from –2.0EV to +2.0EV, then press the OK button. To reactive auto exposure, select [0EV] in step 4. 5. To exit from the menu, press the button. Setting White Balance This feature lets you make adjustments to compensate for different lighting types according to your shooting conditions. 1. Press the MODE button to access [ (CAMERA)] mode with , , or then press the OK button. 2. Press , then toggle to select the [AE/AWB] menu. 3. Use to select [WHITE BALANCE], then press the OK button. 4. Use or to select the desired setting. 5. To exit from the menu, press the button. ADVANCED SHOOTING Continuous Shooting This mode is used for continuous shooting. Pictures are taken continuously while the shutter release button is pressed. -28- , English 1. Press the MODE button to access [ (CAMERA)] mode with , , or , then press the OK button. , then use 2. Press to select the [FUNCTION] menu. 3. Use to select [CAPTURE MODE], then press the OK button. 4. Use or to select [CONTINUOUS 5. To exit from the menu, press the The ], then press the OK button. button. indicator is displayed on the monitor screen. 6. Press the shutter button halfway to lock the focus. 7. Press the shutter button all the way to shoot. Shooting will stop when the shutter button is released. NOTE Maximum number of continuous shots: 10. In Continuous mode, the flash mode will be set to OFF automatically. Auto Exposure Bracketing (AEB) In this mode, the camera automatically changes the exposure within a set range to take three shots after you press the shutter button once. AEB settings can be combined with exposure compensation settings to extend the adjustment range. 1. Press the MODE button to access [ (CAMERA)] mode with then press the OK button. 2. Press , then use to select the [FUNCTION] menu. -29- , , or , English 3. Use to select [CAPTURE MODE], then press the OK button. 4. Use or to select [ AEB 5. To exit from the menu, press the The ], then press the OK button. button. indicator is displayed on the monitor screen. 6. Press the shutter button to shoot. NOTE In AEB mode, the flash mode will be set to OFF automatically. Adjust White Balance Manually Manual white balance lets you configure the digital still camera for a particular light source and other conditions. Note that you must perform manual white balance under the same conditions you will be shooting under. You must also have a white piece of paper or other similar object on hand in order to perform this function. 1. Press the MODE button to access [ mode with , , or (CAMERA)] , then press the OK button. 2. Press , then toggle to select the [AE/AWB] menu. 3. Use and to select [MANUAL WB], then press the OK button. -30- English 4. Point the camera at an enclosed gray card for which you can set the white balance. This starts the white balance adjustment procedure. 5. Use or to select [EXECUTE], then press the OK button to confirm. The procedure of manual white balance is complete. If you with to cancel [MANUAL WB] setting, press or to select [CANCEL]. 6. To exit from the menu, press the button. 7. Press the shutter button to shoot. PLAY MODE - THE BASICS In the [ (PLAY) ] mode, you can view, magnify, delete images or play video clips back. This mode also provides thumbnail images display and slide show, allowing you to quickly search for the desired image. Viewing Images 1. Press the button to turn on the power. 2. Press the MODE button to access [ (PLAY)] mode with , , or , then press the OK button. 3. In the [ (PLAY) ] mode, use or to select the desired images. To view the previous image, press the button. To view the next image, press the button. -31- English NOTE If there is no image stored in the internal memory or on the memory card. [NO PICTURE] message will appear on the monitor. switches the LCD monitor display mode. Each time you press , the display Pressing changes in the following order: Standard display → Detailed display → No information. Magnifying Images While reviewing your images, you may enlarge a selected portion of an image. This magnification allows you to view the details. The zoom factor is displayed on the screen, showing the current magnification ratio. Images that are being played back can be enlarged in 14 levels of 8 times enlargement. 1. Press the MODE button to access [ (PLAY) ] mode with , , or , then press the OK button. 2. In the [ (PLAY) ] mode, use or to select the desired images. To view the previous image, press the button. To view the next image, press the button. 3. Adjust the zoom ration by using the T/W button. To enlarge the selected image, press the T button. To return to the normal image, press the W button. The magnification factor is displayed on the LCD monitor. 4. To view different portion of the images, press , , or to adjust the display area. The displayed image is enlarged; you will see a white frame with a pink box inside. -32- English The white frame indicates the entire image, while the pink box shows the location of the currently enlarged area. NOTE The magnification factors range from 1.5x to 8x within 14 stages: 1.5x, 2.0x, 2.5x, 3.0x, 3.5x, 4.0x, 4.5x, 5.0x, 5.5x, 6.0x, 6.5x, 7.0x, 7.5x and 8.0x. Thumbnail Display (Index Playback) This function allows you to view four or nine thumbnail images on the LCD monitor simultaneously so you may search for a particular image. 1. Press the MODE button to access [ (PLAY)] mode with , , (PLAY)] mode, press to select [THUMBNAIL] with the , or , then press the OK button. 2. In the [ , or button, then press the OK button. 3. Use or to choose the desired number of thumbnail images to be displayed, then press the OK button. Press the 4. In the [ button to exit from the menu. (PLAY)] mode, press the W / button. Four or nine thumbnail images are displayed simultaneously. 5. Use , , or to select the image to be displayed at regular size, then press the OK button to display the selected image on full screen. -33- English NOTE A[ ] or [ ] icon will be displayed in a thumbnail display Slideshow Display The slide show function enables you to play your images back automatically in sequential order. This is very useful and entertaining feature for reviewing recorded images and for presentations. 1. Press the MODE button to access in [ mode with , , or (PLAY)] , then press the OK button. 2. In the [ (PLAY)] mode, press to select [SLIDE SHOW] with , , or , then press the OK button. 3. Use or to set the slideshow interval, then press the OK button. The slide show starts. The video clips are displayed in the first frame image, and not played back. To stop slide show, press the OK button. Resizing an Image You can follow the steps below to set an image to one of the four sizes. You can change the image size of a captured image to one of the following sizes: 2560x1920 pixel, 2048x1536 pixel, 1280x960 pixel and 640x480 pixel. The original image is retained even after resizing. 1. Press the MODE button to access [ mode with , , or (PLAY)] , then press the OK button. -34- English 2. In the [ (PLAY)] mode, use or to select the desired image you want to resize. to select [RESIZE] with the 3. Press , , or button, then press the OK button. 4. Use or to select the desired setting, then press the OK button to confirm. MOVIE MODE Recording Video Clips 1. Press the button to turn on the power. 2. Press the MODE button to access [ mode with , , or (MOVIE)] , then press the OK button. 3. Press the shutter button to start recording. 4. Press the shutter button again to stop recording. NOTE The function of optical zoom (3x) can be activated before you start to record video clips. Pressing the button switches the LCD monitor display mode. Each time you press the button, the display changes in the following order: Standard Display → Simplified Display. -35- English Playing Back Video Clips 1. Press the MODE button to access [ (PLAY)] mode with , , or , then press the OK button. 2. In the [ (PLAY)] mode, use or to go through the images until the video clip you want to play back is displayed. To view the previous image, press the button. To view the next image, press the 3. button. Press the shutter button to start playing back the video clips. To pause or resume video playback, press the shutter button. To stop playback, press the OK button. Use to start fast reverse playback. Use SCN to start fast forward playback. NOTE The zoom function cannot be activated while playing the video clips back. To playback the video clips on the computer, we recommend you to use Windows Media Player 9.0 (WMP 9.0). You can download WMP version from the website at www.microsoft.com. PLAY MODE - ADVANCED FUNCTIONS Playing Back Images/Video Clips on TV You can also playback your images on a TV screen. Before connecting to any device, make sure to select NTSC/PAL system to match the video output system of the video equipment you are going to connect to the digital still camera, then turn all connected devices off. -36- English 1. Position the camera on the cradle. 2. Match the docking connectors and carefully insert the camera until it fits in place. 3. Connect one end of the A/V cable to the A/V terminal of the cradle. 4. Connect the other end to the A/V input socket of the TV set. 5. Turn the TV and digital still camera on. 6. Playback the still images/video clips. The method of operation is the same as playing back still images and video clips on the digital still camera. Rotating Images in the Display This function lets you rotate images so that the images are played back with the correct orientation. You can rotate image 90 degrees clockwise or counterclockwise. 1. Press the MODE button to access [ (PLAY)] mode with , , or , then press the OK button. 2. In the [ (PLAY)] mode, use 3. Press or or to display the image you want to rotate. to rotate the selected image +90° or -90°. 90° Counterclockwise 0° (Original) NOTE You cannot rotate video clips. Rotated images can be magnified. -37- 90° Clockwise English Deleting Images/Video Clips Use this function to delete one or all images/video clips stored in the internal memory or memory card. Please note that the deleted images or video clips cannot be recovered. Exercise caution before deleting a file. To delete a single image/video clip 1. Press the MODE button to access [ (PLAY)] mode with , , or , then , , or , then press the OK button. 2. Use or to select the image you want to delete. 3. Press to delete the file. 4. When the delete message appears, use or to select [YES], then press the OK button. If you wish to cancel the deletion, select [NO]. To delete all images/video clips at once 1. Press the MODE button to access [ (PLAY)] mode with press the OK button. 2. In the [ (PLAY)] mode, press [DELETE ALL] with , , to select or , then press the OK button. 3. To confirm the deletion of all images, use or to select [YES], then press the OK button. -38- English The message “NO PICTURE” appears on the LCD screen. NOTE You cannot delete protected images. Pressing the button in the playback mode allows you to quickly delete the selected image, sparing you the requisites of accessing the menu mode. Protecting Images/Video Clips Set the data to read-only to prevent images from being erased by mistake. 1. Press the MODE button to access [ (PLAY)] mode with , , or , then press the OK button. 2. In the [ (PLAY)] mode, press to select [PROTECT] with the button, then press the OK button. 3. Use or to choose the desired setting, then press the OK button. [ONE IMAGE]: Protect one image/movie. [ALL IMAGES]: Protect all images/movies (at once). [EXIT]: Exit from this menu. 4. Use or to select [LOCK], then press the OK button. Press to return to the [ mode. The PLAY] indicator appears on the selected image. If you wish to cancel the protect function, select [UNLOCK]. -39- , , or English Setting the DPOF DPOF (Digital Print Order Format) allows you to embed printing information on your memory card. By using DPOF, you can select an image to be printed and then specify how many prints or which image you would like. Take your memory card to a DPOF enabled printer that accepts memory cards. The DPOF/card-compatible printer will read the embedded information on the memory card and print your images as specified. To configure print settings for a single image. Step 1 Figure Procedure Press the MODE button to access [ (PLAY)] mode, then press the OK button. In the [ 2 (PLAY)] mode, press [DPOF] with , , or to select , then press the OK button. 3 Use or want to mark -40- to select the desired image you . English Step Figure Procedure Use 4 5 or to select [ONE IMAGE], then press the OK button. [ONE IMAGE]: To configure print settings for a single image. [ALL IMAGES]: To configure print settings for all images. [RESET]: Returns all basic settings to the digital still camera’s default settings. [EXIT]: To exit the mark function, use or to select [EXIT]. Use or to select [QUANTITY], [DATE] and [ENABLE], then press the OK button to configure the settings. [QUANTITY]: Allows you to select image or quantity (0~99). Use to set the image quantity and press the OK button. [DATE]: The date of recording can be printed directly on the images. Press the OK button to choose [SET] or [CANCEL] with or . [ENABLE]: Allows you to confirm your setting which will be saved in the SD card. Press the OK button to choose [ENABLE] or [DISABLE] with or . -41- English Press to return to the image playback mode. * The is marked on the displayed image. 6 To unmark the mark, go back to step 4 to select [RESET] with or . To configure print settings for all images. Step 1 Figure Procedure Press the MODE button to access [ (PLAY)] mode, then press the OK button. In the [ 2 (PLAY)] mode, press [DPOF] with , , or to select , then press the OK button. 3 Use or want to mark -42- to select the desired image you . English Step Figure Procedure Use or to select [ALL IMAGES], then press the OK button. [ONE IMAGE]: To configure print settings for a [ALL IMAGES]: To configure print settings for [RESET]: Returns all basic settings to single image. 4 all images. the digital still camera’s default settings. [EXIT]: To exit the mark function, use or Use or to select [EXIT]. to select [DATE] and [ENABLE], then press the OK button to configure the settings. [DATE]: The date of recording can be printed directly on the images. Press the OK button to choose 5 [SET] or [CANCEL] with or [ENABLE]: Allows you to confirm your setting which will be saved in the SD card. Press the OK button to choose [ENABLE] or [DISABLE] with Press 6 or . to return to the image playback mode. * The -43- is marked on the displayed image. . English To unmark the mark, go back to step 4 to select [RESET] with or . NOTE Before you perform the DPOF settings on your camera, always remember to copy your images from the internal memory to an SD memory card first. The [ ] print icon will appear on the monitor indicating images selected for printing. You cannot print movies. Connecting to a PictBridge Compliant Printer Even if you do not have a computer, you can connect the camera directly to a printer that supports PictBridge to perform image selection and printing using the camera monitor screen and controls. DPOF support also lets you specify which images you want to print and how many copies of each should be printed. Connecting the camera to the printer 1. Connect the USB port on the cradle and the USB jack on the printer with the supplied USB cable, then turn on your camera and the printer. The camera turns on automatically and the screen for selecting the USB mode is displayed. 2. Use or to select [PRINTER], then press the OK button. Printing images When the camera is properly connected to a PictBridge compliant printer, the [PRINT MODE SELECT] screen is displayed on the monitor. Use mode. -44- or to select the print English In [PRINT] Mode: Lets you print the specified image with PictBridge. Step Figure Procedure Use 1 or to select the [PRINT] mode, then press the OK button. * The [PRINT PAPER] screen is displayed. Use to access in the selection of paper setting, then press the OK button to confirm. [SIZE]: You may select the desired item depending on the type 2 of printer being used. [BORDERLESS]: You may select the desired item depending on the type of printer being used. Use 3 or to select the image you want to to set MORE print print, then press reservations. * The [PRINT INFO] screen is displayed. Use or to select the desired item, then press the OK button. * Use or to change the setting, then press the OK button to confirm. 4 [ ]: Specifies the number of prints. You can select the number up to 10. [DATE]: If you select WITH, images are printed with the date. -45- English [FILE NAME]: If you select WITH, images are printed with the file name. [EXIT]: To cancel the print settings, use or to select [EXIT]. After step 4 is finished, you can still use 5 or to change the image to print by your preference. Then, press the OK button to print. Use 6 or to select [PRINT], then press the OK button to confirm. * The TRANSFERRING screen is displayed. This starts printing and displays the message “TRANSFERRING” on the monitor screen. The message will disappear after the printing is finished. 7 * To cancel printing: Pressing the OK button during print data transfer displays the screen for selecting whether to [CONTINUE] or [CANCEL] printing. -46- English In [PRINT ORDER] Mode: This function only lets you print the specified image based on the previous Step Figure Procedure Use 1 or to select the [PRINT ORDER] mode, then press the OK button. * The [PRINT PAPER] screen is displayed. Use to access in the selection of paper setting, then press the OK button to print. [SIZE]: You may select the desired item depending on the type 2 of printer being used. [BORDERLESS]: You may select the desired item depending on the type of printer being used. Use 3 or to select [PRINT], then press the OK button to confirm. * The TRANSFERRING screen is displayed. This starts printing and displays the message 4 “TRANSFERRING” on the monitor screen. The message will disappear after the printing finished. -47- English * To cancel printing: Pressing the OK button during print data transfer displays the screen for selecting whether to [CONTINUE] or [CANCEL] printing. Changing the Camera Startup Logo This feature lets you specify one of your recorded images as your setup screen image, which will be displayed on the monitor whenever you press the button to turn on the camera. 1. Press the MODE button to access [ (PLAY)] mode with , , or , then press the OK button. 2. In the [ 3. Use 4. Use (PLAY)] mode, press , , or or to access the [PLAY] menu. to select [CHANGE LOGO], then press the OK button. to select [EXECUTE], then press the OK button to confirm. The new logo will be activated the next time you turn on the camera. AUDIO MODE The digital still camera enables you to record and playback voice files anytime and anywhere. -48- English Recording Voice Files 1. Press the button to turn on the camera. 2. Press the MODE button to access [ mode with , , or (AUDIO)] , then press the OK button. 3. In the [ (AUDIO)] mode, use the shutter button to start voice recording. A indicator is displayed on the screen. Recording stops when you press the shutter button again. Playing Back a Voice Recording File 1. Press the MODE button to access [ (AUDIO)] mode with , , or , , , or , then press the OK button. 2. Voice playlist appears on the screen. 3. In the [ (AUDIO)] mode, use or to select the voice-recording file you want to play. 4. Press the OK button to start playback of the voice-recording file through the camera’s speaker. To pause playback, press the button. To resume playback, press the OK button. To stop playback, press the OK button again. Deleting a Voice Recording File 1. Press the MODE button to access [ (AUDIO)] mode with then press the OK button. -49- English 2. In the [ (AUDIO)] mode, use or to select the voice file you want to delete. 3. Press to delete the selected voice file. 4. When the delete message appears, use or to select [YES], and then press the OK button. If you wish to cancel the deletion, select [NO]. Button operations To Functional Description Press Press the Power on/off button to turn on/off the camera. Start/stop voice Shutter Press the shutter button to start or stop voice recording Button recording. Choose previous/next voice recording file Start/stop playback of a voice recording file Adjust audio volume Use / or to choose previous or next voice-recording file and then press the OK button to play. OK T/W Press the OK button to start or stop playback of a voice-recording file. Press T or W to increase or decrease audio volume. Pause playback of a Press voice-recording file recording file. to pause playback of a voice- Delete a voice Press the recording file files. button to delete voice-recording Press the MODE button to return to one of the Enter the Main Menu MODE following modes: [SETUP], [CAMERA], [MOVIE], [AUDIO], or [PLAY]. NOTE Audio volume can be adjusted only when playback is being performed or is paused. -50- English TRANSFERRING RECORDED IMAGES TO YOUR COMPUTER You need to use the USB cable to establish a USB connection between the camera and your computer, then you can use your computer to share recorded images/video clips/voice-recording files with your family or friends via e-mail or post them on the Web. In order to do this, you must install the USB driver onto your computer first. Note that before you begin to install the software, you need to check your system according to the table as shown below. CPU System requirements (Windows) Pentium 166 MHz processor or higher System requirements (Macintosh) PowerPC G3/G4 OS Windows 98/98SE/Me/2000/XP OS 9.0 or later Memory 64MB RAM 64MB RAM Free Space on Hard Disk 128MB hard disk space 128MB hard disk space Required Devices A CD-ROM drive, An available USB port Display Color monitor (800x600, 24-bit or higher recommended) A CD-ROM drive, An available USB port Color monitor (800x600, 24-bit or higher recommended) Step 1: Installing the USB driver on Windows computers The USB driver on the supplied CD-ROM is exclusively for Windows 98 and 98SE. Windows 2000/ME/XP users need not install the USB driver. 1. Insert the enclosed CD-ROM into your CD-ROM drive. 2. When the welcome screen appears, click “Install USB/PC-Cam driver “. Follow the on-screen instructions to complete the installation. 3. After the USB driver has been installed, restart your computer. Installing the USB driver on Macintosh computers Mac OS 8.6 users must install a USB driver. For Mac OS 9.0 or higher, the computer will automatically recognize the camera and load its own USB drivers. 1. Insert the CD-ROM packaged with the camera into the CD-ROM drive. -51- English 2. Select and double-click “Digital Camera Driver Installer”. 3. Select “Install Location” and click “Install”. 4. Follow the on-screen instructions to complete the installation and restart your computer. Step 2: Connecting the digital still camera to your computer 1. Position the camera on the cradle. 2. Connect one end of the USB cable to the USB connector on the cradle. 3. Connect the other end of the USB cable to an available USB port on your computer. 4. Turn the camera on. [USB Mode] screen is displayed. 5. Use or to select [PC], then press the OK button. 6. There will be a new “Removable Disk” icon detected in “My Computer”, in which contains your recorded images/video clips/audio files. Mac users: Double-click the “untitled” or “unlabeled” disk drive icon on our desktop. iPhoto may automatically launch. NOTE When connecting to the computer, it is necessary to install the battery into the digital still camera. While transferring images to your computer, the other buttons on your digital still camera will not perform the functions. Step 3: Downloading images/video clips When the camera is turned on and connected to your computer, it is considered as a disk drive, just like a floppy disk or CD. You can download (transfer) images/video clips by copying them from the “removable disk” (“untitled” disk on a Macintosh) to your computer hard drive or to another kind of disk. -52- English For computers running Windows Open the “removable disk” by double-clicking on it. Double-click on the folder that contains your recorded images/video clips. Select the images/video clips that you prefer and choose “Copy” from the “Edit” menu. After that, open the destination location and choose “Paste” from the “Edit” menu. For computers running Mac OS Open the “untitled” disk window and the hard disk or the destination location. Drag and drop from the camera disk to the desired destination. NOTE Memory card users may prefer to use a memory card reader (highly recommended). Video playback application is not included with the package. Make sure that video playback application has been installed in your computer. INSTALLING THE EDIT SOFTWARE Installing Photo Explorer ® Ulead Photo Explorer provides a simple and efficient way to transfer, browse, modify and distribute digital media. Acquire photos, video or sound clips from various digital device types and easily browse or add personal descriptions; make timely modifications; or distribute the media through the medium of your choice: E-mail, Print, Slideshow Presentations. It is an indispensable all-in-one tool for owners of digital cameras, WebCams, DV camcorders, scanners, or anyone who strives to effectively organize a large collection of digital media. 1. Insert the enclosed CD-ROM into your CD-ROM drive. ® 2. When the welcome screen appears, click “Install Ulead Photo Explorer”. Follow the on-screen instructions to complete the installation. -53- English NOTE For more information about the operation of Photo Explorer application software, refer to its respective help documentation. For Windows 2000/XP users, please make sure to install and use the Photo Explorer in “Administrator” mode. Photo Explorer is not supported on the Mac. iPhoto or iPhoto2is recommended. Installing Photo Express ® Ulead Photo Express is complete photo project software for digital images. The step-by-step workflow, visual program interface, and in-program help assist users in creating exciting photo projects. Acquire digital photos effortlessly from digital cameras or scanners. Organize them conveniently with the Visual Browse mode. Use hundreds of ready-to-use templates such as albums, cards, posters, slideshows, and more. Edit and enhance images with photo editing tools, photographic filters, and special effects. Embellish projects by adding creative design elements such as frames, callouts, and stamp objects. Share results with family and friends via e-mail and multiple print options. 1. Insert the enclosed CD-ROM into your CD-ROM drive. ® 2. When the welcome screen appears, click “Install Ulead Photo Express”. Follow the on-screen instructions to complete the installation. NOTE For information on how to use Photo Express to edit and retouch your recorded images, please refer to its online help. For Windows 2000/XP users, make sure to install and use the Photo Express while logged in as a user with an Administrator account. Photo Express is not supported on the Mac. -54- English USING THE DIGITAL STILL CAMERA AS A PC CAMERA Your digital still camera can act as a PC camera, which allows you to videoconference with business associates, or have a real-time conversation with friends or family. To use the digital still camera for videoconferencing, your computer system must include the items as below: Microphone Sound card Speakers or headphones Network or Internet connection NOTE Video conferencing (or video editing) software is not included with the digital still camera. This mode is not supported for Mac. Step 1: Install the PC camera driver (same as USB driver) The PC-camera driver included in the CD-ROM is exclusively for Windows. The PC camera function is not supported in Mac platforms. 1. Insert the enclosed CD-ROM into your CD-ROM drive. 2. When the welcome screen appears, click “ Install USB/PC-Cam driver “. Follow the on-screen instructions to complete the installation. 3. After the driver installation is completed, restart your computer. NOTE The USB driver that is bundled inside the CD-ROM is designed in a form 2 in 1 (USB & PC camera driver). a) In Windows 98, the Windows OS will install both USB & PC camera drivers. b) In Windows 2000/ME/XP, it will only install the PC camera driver. -55- English Step 2: Connect the digital still camera to your computer. 1. Position the camera on the cradle. 2. Connect one end of the USB cable to the USB port on the cradle. 3. Connect the other end of the USB cable to an available USB port on your computer. 4. Turn on the power. [USB Mode] screen is displayed. 5. Use or to select [PC CAM], then press the OK button. 6. Position the digital still camera steadily on top of your computer monitor or use a tripod. NOTE When using this digital still camera as a PC camera, it is necessary to install the battery into the digital still camera. Step 3: Run your application software (i.e. Windows NetMeeting) To use Windows NetMeeting for videoconferencing: 1. Go to Start → Programs → Accessories → Communications → NetMeeting to launch the NetMeeting program. 2. Click the Start Video button to view live video. 3. Click the Place Call button. 4. Type the e-mail address or the network address of the computer that you are calling. 5. Click Call. The person that you are calling must also have Windows NetMeeting running and be willing accept your call to start the videoconference. -56- English NOTE The video resolution for videoconferencing applications is generally 320 x 240. For more information about the operation of videoconference application software, refer to its respective help documentation. MENU OPTIONS Camera Menu This menu is for the basic settings to be used when capturing still images in camera mode. 1. Press the MODE button to access [ (CAMERA)] mode with , , or , then press the OK button. 2. Press to access in [CAMERA] menu, then use or to select [PICTURE] / [FUNCTION] / [AE / AWB] menu. 3. Use , , or to select the desired option item in [PICTURE] / [FUNCTION] / [AE / AWB] menu, then press the OK button. 4. To exit from the menu, press the button. -57- English PICTURE Settings Option SIZE QUALITY Functional Description Sets the size of the image that will be captured. [ [ ] 2560 x 1920 ] 2048 x 1536 [ ] 1280 x 960 [ ] 640 x 480 [ ] TIFF IMAGE Sets the quality (compression rate) at which the image is captured. [ ] [ ] [ ] SHARPNESS Super Fine Fine Normal Sets the quality (compression rate) at which the image is captured. HIGH NORMAL LOW COLOR Sets the color of the image that will be captured. * NORMAL * B&W * SEPIA -58- English FUNCTION Settings Item Functional Description CAPTURE MODE Sets the recording method at the time of taking pictures. SINGLE CONTINUOUS AEB LCD BRIGHT Sets whether or not to use digital zoom at the time of photography. The adjustment range is from –5 to +5. DIGITAL ZOOM Sets whether or not to use digital zoom at the time of photography. * ON/OFF QUICK VIEW Sets to display a captured image on LCD monitor immediately after you have taken the shot. * ON/OFF EXPOSURE Sets to obtain the correct exposure when the subject is much brighter or darker than the background. The EV compensation value can be set in the range from –2.0EV to +2.0EV. -59- English AE/AWB Settings Item Functional Description WHITE BALANCE Sets the white balance photographing under a variety of lighting conditions and permits photographs to be taken that approach the conditions that are seen by the human eye. [AUTO] Auto [ [ ] Daylight ] Cloudy [ ] Sunset [ ] Tungsten [ ] Fluorescent Sets the sensitivity for taking pictures. When the sensitivity is ISO raised (and the ISO figure is increased), photography will become possible even in dark locations, but the more pixilated (grainer) the image will appear. *AUTO/100/200 Manually sets the white balance and stores it. Use of this is MANUAL WB convenient when the white balance does not offer a good match. Before you select [EXECUTE], determine the subject (such as a white paper) that will be used to set the white balance. *EXECUTE/CANCEL Movie Menu This menu is for the basic settings to be used when recording video clips. 1. Press the MODE button to access [ mode with , , or (MOVIE)] , then press the OK button. -60- English 2. Press 3. Use to access [MOVIE] menu. , , or to select the desired setting, then press the OK button. 4. To exit from the menu, press the button. Item Functional Description SIZE Sets the size of the image that will be recorded. * 640X480 * 320X240 COLOR Refer to “Camera Menu - PICTURE Settings” in LIST OF MENU OPTION. LCD BRIGHT Refer to “Camera Menu - FUNCTION settings” in LIST OF MENU OPTIONS. EXPOSURE Refer to “Camera Menu - FUNCTION settings” in LIST OF MENU OPTIONS. Play Menu In the [PLAY] menu, set which settings are to be used for playback. 1. Press the MODE button to access [ (PLAY)] mode with press the OK button. 2. Press to access in [PLAY] menu. -61- , , or , then English 3. Use , , or to select the desired setting, then press the OK button. 4. To exit from the playback menu, press the button. Item Functional Description SLIDE SHOW You can play back recorded images in order with a selected interval time. This function is useful for checking your images or for presentations, etc. Refer to section in this manual titled “Slideshow Display” for further details. * 3SEC/5SEC/7SEC/9SEC PROTECT Set the data to read-only to prevent images from being erased by mistake. Refer to the section in this manual titled “Protecting Images/Video Clips” for further details. DELETE ALL Delete all files. * YES/NO COPY TO CARD Allows you to copy your files from the digital still camera’s internal memory to a memory card. Of course, you can only do this if you have a memory card installed and some files in internal memory. * YES/NO THUMBNAIL Allows you to view 4 or 9 thumbnail images on the LCD monitor at the same time, where you can quickly search for the image that you want. * 4/9 RESIZE Changes the size of a recorded image. * 2560 x 1920 * 2048 x 1536 * 1280 x 960 * 640 x 480 * EXIT -62- English Item Functional Description CHANGE LOGO Allows you to specify one of your recorded images as your setup screen image, which will be displayed on the monitor whenever you press the button to turn on the camera. * EXECUTE/CANCEL Allows you to select the desired pictures to be printed and set DPOF the number of prints and date displayed in DPOF format. You can print images easily just by inserting the memory card to a DPOF-compatible printer or a print shop. Refer to section in this manual titled "Setting the DPOF” for further details. Setup Menu You can select your preferences on the camera settings in the mode. 1. Press the MODE button to access [ (SETUP)] mode with , , or , then press the OK button. 1. The [SETUP] menu is displayed. or 2. Press 3. Use , to select the [BASIC] / [CUSTOM] menu. , or to select the desired option item, then press the OK button. 4. Press the MODE button to return to Main Menu and select the desired mode. -63- English BASIC Settings Item Functional Description SPEAKER Sets whether or not to mute the startup sound, and the camera sound each time you press the camera button. * ON/OFF FORMAT Erases all images and reformats the SD card loaded in your camera. Protected images are also erased. SD card cannot be formatted if it is write-protected. Refer to section in this manual titled "Formatting an SD Memory Card or Internal Memory" for further details. * YES/NO SLEEP Allows you to adjust the time delay for power savings. If no operation is performed for a specific period of time, the status of LCD monitor will turn into idle mode (also known as power save mode) and the LCD monitor will turn off. You can press any button to resume the operation. * OFF / 30SEC / 1MIN. / 2MIN. RESET Returns all basic settings to the digital still camera’s default settings. The time setting will not be reset. * YES/NO POWER OFF If no operation is performed for a specific period of time, the power to the camera is automatically turned off. This feature is useful to reduce battery wear. * OFF / 3MIN. / 5MIN. / 10MIN. DATE PRINT The date of recording can be printed directly on the still images. This function must be activated before the image is captured. * ON/OFF -64- English CUSTOM Settings Item Functional Description DATE TYPE Sets the displayed type of date and time on the screen. * [Y/M/D]: Year/Month/Day * [D/M/Y]: Day/Month/Year * [M/D/Y]: Month/Day/Year DATE SETUP Sets the date and the time. Refer to section in this manual titled “Setting the Date and Time” for further details. LANGUAGE Sets the language that is displayed on the LCD monitor. Refer to section in this manual titled “Choosing the Screen Language” for further details. * / ENGLISH / / / FRANÇAIS / DEUTSCH / ITALIANO / ESPAÑOL VIDEO OUT Sets video output system of the video equipment that you are going to connect to the camera. *PAL / NTSC VERSION Displays the firmware version of the camera. -65- English CONNECTING THE CAMERA TO OTHER DEVICES -66- English CAMERA SPECIFICATIONS Item Description Image Sensor CCD Effective pixels 5.0 Mega pixels Image size Still image: 2560 x 1920, 2048 x 1536, 1280 x 960, 640 x 480 Video clip: 640 x 480, 320 x 240 Image quality Still image: Super fine, Fine, Normal Recording media 10MB internal memory SD memory card (optional, up to 512MB) Compression format MPEG 4 SP (Video), IMA-ADPCM (Audio) File format JPEG, TIFF, ASF (Video) Lens F-no.: Wide: 2.8 / Tele: 4.9 Focal length: 5.4mm-16.2mm Focus range Normal: 0.5m-infinity Wide: 0.06m-0.4m Tele: 0.35m-0.5m LCD monitor 2.0” LTPS color LCD Self-timer 3 sec delay, 10sec delay Exposure compensation -2.0EV- +2.0EV (in 0.5EV increments) White balance Auto, Daylight, Cloudy, Sunset, Tungsten, Fluorescent ISO Auto, 100, 200 Interface DC-IN jack, USB connector, A/V terminal Power Lithium-ion rechargeable battery (650mAh) One AC-DC Adapter Dimension Approx. 91 x 58 x 27 mm (* Max. 30mm / excluding protruding parts) Weight Approx. 120g (without batteries and the SD memory card) * Design and specifications are subject to change without notice. -67- English APPENDIX Troubleshooting Guide Symptom Possible causes Solutions / Corrective Actions Power does not The battery has run out. Load new or fully charged battery. turn on. The battery is not Load the battery in the correct oriented correctly. direction. The battery cover is not Close the battery cover correctly. closed properly. Properly connect the AC power The AC power adapter adapter. (optional) is disconnected. Camera suddenly [SLEEP] in BASIC menu Turn the power back on. powers down. of SETUP mode Charge the battery. activated. The battery has run out. Image is not The camera is in PLAY Select the CAMERA mode in main captured when mode. menu screen. the shutter button Memory is full. Transfer the desired files to your is pressed. computer and then delete unnecessary files, or use a different memory card. Cannot use the NO FLASH is selected in Select a different flash mode. flash to capture flash mode. Select [SINGLE] in the capture mode images. The camera is in of CAMERA menu. Continuous/AEB/ Movie mode. Continuous The capacity of the shooting is not built-in memory or SD possible. memory card is full. Insert a new SD memory card. -68- English Cannot transfer USB cable is not Check all connections. files over a USB connected securely. Install the USB driver on your connection. USB driver is not computer. installed. Turn on the camera. Camera is turned off. Possible Number of Recordable Images The frame counter indicates the approximate number of images that can be stored on the SD memory card. The number of recordable images may vary depending on the recorded subject, the capacity of the memory card, there are files other than images or when the recording is made while switching the picture quality or resolution. Quality Resolution 8MB 16MB 32MB 64MB 128MB 256MB 512MB Super Fine 1 4 9 19 40 79 161 Fine 3 8 19 39 79 158 320 Normal 5 13 28 59 120 239 483 Super Fine 3 7 14 30 62 124 251 Fine 6 13 29 61 123 247 498 Normal 9 20 44 91 185 370 747 Super Fine 7 17 38 78 159 317 641 Fine 15 35 74 153 312 623 1256 Normal 23 51 109 226 459 916 1847 Super Fine 30 67 143 295 600 1198 2416 Fine 58 125 266 549 1114 2225 4487 Normal 84 175 373 769 1560 3115 6282 Ratio) [ ] 2560 x 1920 [ ] 2048 x 1536 [ ] 1280 x 960 [ ] 640 x 480 SD Memory Card (Compression -69- English [ ] 0 0 2 4 8 17 TIFF IMAGE * The data shows the standard testing results. The actual capacity varies according to the shooting conditions and settings. 34 Approximate Duration of Recording Time The table below indicates the approximate duration of recording time depending on the capacity of the SD memory card. Image size SD memory card 8MB 16MB 32MB 64MB 128MB 256MB 512MB 640 x 480 0:18 0:47 1:46 3:42 7:36 15:14 30:48 320 x 240 1:13 3:08 6:58 14:38 29:58 1:00:05 2:01:25 * The data shows the standard testing results. The actual capacity varies according to the shooting conditions and settings. -70-