Download DIO32 Manual - Light-O-Rama
Transcript
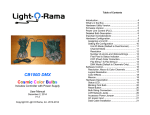
DIO32 DMX
32 Channel Digital I/O Controller
Daughter Boards: DIO16AC – 16 Channel Dimmer
DIO8RLY – 8 Channel Relay
DIO8ACF – 8 Channel Dimmer
DIO16IOS – 16 Channel Connector
User Manual
September 23, 2009
V1.0
Copyright © Light O Rama, Inc. 2008, 2009
Powering with 12 vdc ......................................... 27
Powering with 15 to 36 vdc ................................ 27
Servo Control Connectors (24 Pin) .................... 28
Sequence Editor Channel to Servo Port ............ 29
Servo Power Connection ................................... 30
Status LED1....................................................... 30
Status LED2....................................................... 30
Unit ID Switches................................................. 30
Zero-Cross Selection ......................................... 31
How to Connect Input Switches............................. 33
Stand Alone Operation .......................................... 34
Daughter Boards ................................................... 35
DIO8ACF 120/240 vac, High Current, Filtered 8Channel Triac Dimming ..................................... 36
DIO8ACF Specifications................................. 36
Connecting the DIO8ACF to the DIO32 ......... 36
DIO8ACF Power Connections........................ 37
DIO16AC 12/24/120/240 vac, 16-Channel Triac
Dimming............................................................. 37
DIO16AC Specifications ................................. 38
Connecting the DIO16AC to the DIO32.......... 38
DIO16AC Power Connections ........................ 38
DIO8RLY 8-Channel Relay ................................ 39
DIO8RLY Specifications ................................. 39
Connecting the DIO8RLY to the DIO32.......... 40
DIO8RLY Power Connections ........................ 40
DIO16IOD 16-Channel Connection Board ......... 40
DIO16IOs Specifications ................................ 40
Connecting the DIO16IOS to the DIO32 ........ 41
DIO16IOS Input/Output Connections ............. 41
Updating the DIO32 Firmware ............................... 41
Appendix A Hexadecimal to Decimal..................... 44
Appendix B LOR Unit ID to DMX Address ............. 46
Specifications ........................................................ 47
Table of Contents
Introduction.............................................................. 5
What’s in the Box..................................................... 6
Important Considerations ........................................ 6
Hardware Utility Version .......................................... 6
Port Capabilities ...................................................... 7
Software Control...................................................... 7
Digital Input Ports................................................. 8
Digital Output Ports.............................................. 8
Dimming Output Ports.......................................... 8
Servo Output Ports .............................................. 8
Hardware Utility Configuration of Ports ................ 9
Setting Input NO/NC Selection ....................... 10
Setting Servo Pulse width ranges................... 11
DMX Mode............................................................. 13
Hardware Description ............................................ 14
Hardware Configuration Checklist...................... 14
Fuses ................................................................. 15
JP6 Header ........................................................ 15
JP7 Header ........................................................ 16
Legacy Mode Jumper ........................................ 16
Network Connections ......................................... 17
Connecting to a PC ........................................ 17
Connecting to a Show Director....................... 18
Connecting to another Controller.................... 19
Port DC Power Jumpers .................................... 20
Port 16-Pin Connectors...................................... 21
Unit ID to Sequence Editor Channel .................. 22
Port IO Select DIP Switches .............................. 24
Powering with 120 vac ....................................... 25
Powering with 240 vac ....................................... 25
Powering with 12 vac ......................................... 26
Powering with 24 vac ......................................... 26
97H
30H
98H
31H
9H
10H
3H
10H
34H
102H
35H
103H
36H
104H
37H
105H
38H
106H
39H
107H
40H
108H
41H
109H
42H
10H
43H
1H
4H
12H
45H
13H
46H
14H
47H
15H
48H
16H
49H
17H
50H
18H
51H
19H
52H
120H
53H
12H
54H
12H
5H
123H
56H
124H
57H
125H
58H
126H
59H
127H
60H
128H
61H
129H
62H
130H
63H
13H
96H
29H
32H
DIO32
DIO32
Introduction
What’s in the Box
The Light-O-Rama (LOR) DIO32 is a 32 channel
digital controller that can be used in a LOR Network
or in a DMX512 universe to perform digital output,
dimming control and servo control. Digital input is
also possible in a LOR network. It has four eight-bit
ports. Each eight-bit port can be configured
independently.
The box contains a DIO32 Digital I/O Controller and
this user manual. The latest manual is also
available at www.lightorama.com ► Support ►
DIO32 User’s Manual.
There are four optional daughter boards that can be
mixed and matched to create the controller required
by your application. The daughter boards are:
***** WARNING *****
•
•
•
•
DIO8RLY – Eight channel relay board, each
channel can handle 16 amps at 250 vac
DIO8ACF – Eight channel, high power,
120/240 vac, 60 amp total, filtered triac
dimming board
DIO16AC – Sixteen channel, 12/24/120/240
vac, 60 amp total, triac dimming board
DIO16IOS – Sixteen channel, screw terminal
connection board
The 32 I/O channels are fully buffered and each
channel is capable of sourcing or sinking 24 ma at
5 vdc. The DIO32 may be used without any of the
daughter boards depending upon your application.
The Windows Showtime software is used to design
and build Sequences (controller commands that
may be choreographed to audio/music.) These user
created sequences and/or pre-programmed musical
sequences available from LOR are then arranged
into Shows. These shows are played by your PC or
one of the LOR Show Directors which command
the controller(s).
Page 5
Important Considerations
In order to provide maximum flexibility, the DIO32
can use a variety of power sources. Be sure to
consult the Hardware Description Checklist
section before connecting power to the board. If all
the power related jumpers are not properly
configured, the board may be irreparably damaged.
Hardware Utility Version
The version of the Hardware Utility appears in the
title bar to the right of “Light-O-Rama Hardware.” If
the version number is less than 2.4.7, then you
need a new Hardware Utility. The latest version is
available for download at www.lightorama.com ►
Support ► Software Downloads. Click the
Download button to the left of the Hardware Utility
and run the installer.
Page 6
DIO32
Port Capabilities
The four ports (A, B, C & D) are configured
independently. An individual port (8 bits) can be all
Digital Input, all Digital Output, all Dimming or all
Servo Control.
Note that only ports C & D have 3-pin servo
connectors but all ports can be used for servo
control.
Software Control
The DIO32 appears in a LOR Network at the
address set by its Unit ID switches. Each 8-bit port
appears as a set of 8 channels in the Sequence
Editor. Port A is channels 1-8, Port B is 9-16, Port C
is 17-24 and Port D is 25-32.
The board also supports a “Legacy Mode” that
causes the board to appear as two consecutive Unit
IDs. The first ID is set by the Unit ID switches and
represents Ports A & B. The second ID is at the
Unit ID switches + 1 and represents Ports C & D.
This allows the board to be used in environments
where the maximum number of channels supported
per controller is limited to 16. See the Legacy Mode
Jumper section for more information.
Since the individual ports can be configured to do
different functions (digital input, digital output,
dimming or servo control) the behavior in the
Sequence Editor depends upon how a particular
port is configured.
Reading a port not configured for input returns a
random result. An output command (intensity,
Page 7
DIO32
shimmer, fade, etc.) to a port configured for input
will be ignored.
Digital Input Ports
Digital input ports are used to sense user inputs,
normally to provide for interaction in shows. See the
How to Connect Input Switches section for
information on connecting push-buttons or
switches.
Port A can also be used to start one internal stand
alone animation sequence. See the Stand Alone
Operation section for more information.
Digital Output Ports
A digital output port is ON for any intensity greater
than zero, otherwise it is off. Shimmer will rapidly
turn ON and OFF a digital output port. Twinkle will
randomly turn ON and OFF a digital output port.
Digital output ports are normally used to control
relays.
Dimming Output Ports
These ports respond to Sequence Editor
commands in the same way as a normal lighting
controller. All effects are supported.
Servo Output Ports
These ports respond to Sequence Editor
commands in the same was as a normal lighting
controller. 0% intensity is fully left or
counterclockwise (minimum pulse width), 50%
intensity is centered and 100% intensity is fully right
or clockwise (maximum pulse width.)
Page 8
DIO32
DIO32
Servo pulses on a port do not start until the first
command is received for that channel. If your
sequence has all off at its start, then when the
sequence starts the servo ports will start pulsing
and go to the minimum pulse width (0% intensity.)
Servo mechanical structures should be able to
withstand servo position at minimum pulse width.
Config Screen button on the lower left of the Servo
Configuration screen.
Servo pulses will stop when communication is lost
to the controller and will restart when the first
command is received for the channel corresponding
to the servo port.
Setting Input NO/NC Selection
Note that shimmer and twinkle are not supported on
servo ports.
Hardware Utility Configuration of Ports
Currently the DIO32 supports only Legacy mode
which means that it appears as two consecutive
unit IDs starting with the unit ID set by the on-board
switches.
The following screen capture shows the Digital IO
Boards tab configuration screen for the first unit ID,
ports A & B. If the Port Select DIP switches are set
to off-on-on-on for one or both ports, then you can
set the NO/NC parameter for the inputs using this
screen.
The Hardware Utility is used to configure the servo
pulse width ranges. If the port’s selection switches
are set to allow Hardware Utility configuration of
inputs (refer to the Port IO Select DIP Switches
section) then NO/NC can be set for each input bit
individually.
The Hardware Utility will read the setting of the Port
Select DIP switches to determine how the ports are
being used.
To configure the DIO32, start the Hardware Utility
and click the Digital IO Boards tab. You will see the
Configuration screen. This screen allows you to
configure the NO/NC option for input ports. To
switch to the DIO32 – Servo Configuration screen,
click the DIO32-Servo Screen button on the lower
left of the window. You can return to the
Configuration screen by clicking the Return to
After setting the NO/NC parameter for the input
ports, be sure to click the Send Info To Unit button
so that the DIO32 will save these settings in its nonvolatile memory.
Page 9
Page 10
DIO32
DIO32
The next screen capture shows the Digital IO
Boards tab for the second unit ID:
Setting Servo Pulse width ranges
The following pulse width ranges can be selected:
•
•
•
•
•
•
•
•
1.25ms - 1.75ms
1.20ms - 1.80ms
1.10ms - 1.90ms
1.00ms - 2.00ms
0.90ms - 2.10ms
0.80ms - 2.14ms
0.70ms - 2.18ms
0.60ms - 2.20ms
After setting the pulse widths for the servo ports
using the drop down menus, be sure to click the
Send Info To Unit button so that the DIO32 will
save these settings in its non-volatile memory.
The second unit ID, shown below, sets the pulse
widths for servo ports C &D:
The following screen capture shows the Hardware
Utility’s Digital IO Boards tab after the DIO32-Servo
Screen button has been clicked. Since the board is
in Legacy mode, it shows up as two unit IDs. The
first unit ID, shown below, sets the pulse widths for
servo ports A & B:
Page 11
Page 12
DIO32
DIO32
DMX Mode
Hardware Description
The DIO32 automatically recognizes DMX512
protocol if the unit ID switches are set according to
Appendix B, LOR Unit ID to DMX Address. The
controller occupies 32 DMX addresses.
Refer to the following picture for the hardware
description. The upright orientation is shown below.
Note that the Light O Rama, Inc. silk-screening is
upright, the network connection jacks are on the
upper right and the 16-pin port connection headers
are on the bottom.
The DIO32 controller has RJ45 network
connectors. You will need the LOR RJ-45 to XLR 3pin Male connector to connect the controller to a
DMX universe. It is available from the Web Store on
the accessories page:
http://store.lightorama.com/accessories.html
After the first LOR controller, you can use Cat5e
LAN cables to daisy chain additional DMX capable
LOR controllers.
Input is not possible in DMX mode so ports
configured for input will not be useable.
For digital output ports, a DMX intensity of 0 turns
the port off (0 vdc) any non-zero DMX intensity will
turn the output port on (+5 vdc.) If the Port Select
DIP Switches select inverted output, the output
voltages are reversed.
For dimmer ports, the triac/SSR duty cycle will be
linearly set by the DMX intensity.
For servo ports, DMX intensity 0 is minimum pulse
width (fully counterclockwise,) intensity 128 is
median pulse width (centered) and 255 is maximum
pulse width (fully clockwise.)
For more detailed information on DMX use of LOR
controllers see:
http://lightorama.com/Documents/DMX-DOC.pdf
Page 13
Hardware Configuration Checklist
***** WARNING *****
Each of the following steps must be completed
before powering up the DIO32. If all the power
related jumpers are not properly configured, the
board may be irreparably damaged.
1. The board must be powered down when
making any changes to switches or jumpers.
2. See the Legacy Mode section for information
on making this board appear as two
consecutive 16 channel controllers.
Page 14
DIO32
3. Choose one of the Powering with xxx
sections below and set the jumpers for your
power source.
4. Refer to the Port IO Select DIP Switches
section to set the desired function for Ports
A, B, C & D.
5. Refer to the Port DC Power Jumpers section
to connect the on-board DC power supplies
to the 16 pin port connectors.
6. If you are using any ports for servo control,
refer to the Servo Power Connection and
Servo Control 24 Pin Connectors sections.
7. If you are using any ports for triac dimming
control, refer to the Zero-Cross Selection
section.
Fuses
DIO32
JP7 Header
This header is reserved for future expansion. No
connections should be made to this header.
Legacy Mode Jumper
Note: Only legacy mode is supposed at this time
and the jumper described below is not used.
In Legacy Mode, the DIO32 appears as two 16
channel controllers. The Unit ID switches set the
address of the first controller. The second controller
is at the address of the Unit ID switches + 1. If this
jumper is not present, then the controller operates
in normal mode, meaning it has one Unit ID with 32
channels.
In Legacy Mode, ports A & B appear on the first
controller ID with Port A being channels 1 to 8 and
Port B being channels 9 to 16. Ports C & D appear
on the second controller ID with Port C being
channels 1 to 8 and Port D being channels 9 to 16.
To activate Legacy Mode, place a plastic jumper
block on the 2nd vertical set or pins from the right on
jumper header JP8. See picture below:
F1 – This is a 1 amp 250 vac fuse used in the line
voltage power supply. This fuse is required when
running the DIO32 from 120 or 240 vac.
F2 – This is a 2 amp 32 vac fuse used in the low
voltage power supply section of the DIO32. This
fuse is always required for operation.
JP6 Header
No connections should be made to this header.
Page 15
Page 16
DIO32
Network Connections
In order to use your DIO32, you must connect it to a
Windows PC, a LOR Show Director or run it in
stand alone mode (see the Stand Alone Operation
section for more information.) The following picture
labels the LOR network connectors:
Connecting to a PC
You will need the following to connect your DIO32
controller to a PC:
• Showtime Windows Software
• RS485 Adapter
• CAT5e LAN cable or phone cable
• Your DIO32 controller
• Windows PC running 98 SE, 2000, ME, XP
or Vista
The first three items are available in the LOR SPKST Generic Starter Package. www.lightorama.com
► Web Store ► Showtime Products. You will have
to choose an RS485 adapter type. It’s best to go
Page 17
DIO32
with the USB485 if you have no intention of going
wireless from your PC to the controller. If wireless is
desired, get the USB485B.
The following diagram shows how the pieces fit
together:
1. Your PC running the Showtime Windows
Software
2. Your PC speakers to play the music
3. RS485 Adapter to convert short distance
USB to long distance RS485
4. Phone or CAT5e LAN cable
5. DIO32 controller in your enclosure
If your USB adapter has more than one jack, you
can use either.
If you are using phone cable to connect the RS485
adapter to your controller, make sure you use the
smaller “Phone In” jack on the DIO32. If you are
using CAT5e LAN cable, you can use either of the
larger jacks on the controller.
Connecting to a Show Director
You will need the following to connect your DIO32
controller to a Show Director:
Page 18
DIO32
•
•
•
LOR1602MP3 Show-in-a-Box controller (has
an internal DC-MP3 Show Director), mDMMP3 Show Director or DC-MP3 Show
Director
Phone or CAT5e LAN cable
Your DIO32 controller
If you are using phone cable to connect a show
director to the DIO32, you can use either jack on
the show director. Make sure you use the smaller
“Phone Cable In” jack on the DIO32.
If you are using CAT5e LAN cable, you can use
either jack on the show director and either of the
large jacks on the DIO32.
The cable connecting a show director to the
controller should be 50’ or less in length. Longer
cables may result in a voltage drop causing erratic
operation of the show director. This 50’ limitation
does not apply to the Show Director internal to the
LOR1602MP3. It gets its power for the co-housed
controller.
Connecting to another Controller
If you are using phone cable to connect two
controllers together, always go from either of the
large jacks on one controller to the smaller “Phone
In” jack on other controller.
DIO32
Port DC Power Jumpers
These jumpers allow the on-board 5 and 12 vdc
power supplies to be connected through to the 16pin port headers. These connections are required
by some of the LOR daughter boards available for
use for this controller.
The total draw on the 5 vdc power must be kept
under 1 amp. Likewise, the total draw on the 12 vdc
power supply must be kept under 1 amp. Both the 5
and 12 volt supplies may draw their 1 amp
simultaneously.
For example, if you place a vertical jumper on the
right two pins of JP3, then the 5 vdc supply will
appear on pin 9 of the port A 16-pin header. See
the Port 16-Pin Connectors section for more
information.
If you are using CAT5e LAN cable, you can go from
either large jack on one controller to either large
jack on the other controller.
Page 19
Page 20
DIO32
Port 16-Pin Connectors
The next diagram shows one of the four 16-pin port
headers.
DIO32
Unit ID to Sequence Editor Channel
The Following table shows the mapping of I/O
channels described above to Sequence Editor
channels:
Port, I/O
channel
1.
2.
3.
4.
5.
6.
7.
8.
9.
10.
11.
12.
13.
14.
15.
16.
I/O channel 5
I/O channel 1
I/O channel 6
I/O channel 2
I/O channel 7
I/O channel 3
I/O channel 8
I/O channel 4
5 vdc (optional, see the Port DC Power
Jumpers section)
Ground
Zero-Cross input (optional, see the ZeroCross Selection section)
12 vdc (optional, see the Port DC Power
Jumpers section)
Reserved, do not use
Reserved, do not use
Reserved, do not use
Reserved, do not use
Page 21
Normal Mode
Legacy Mode
A, 1
Unit ID, Chan 1
Unit ID, Chan 1
A, 2
Unit ID, Chan 2
Unit ID, Chan 2
A, 3
Unit ID, Chan 3
Unit ID, Chan 3
A, 4
Unit ID, Chan 4
Unit ID, Chan 4
A, 5
Unit ID, Chan 5
Unit ID, Chan 5
A, 6
Unit ID, Chan 6
Unit ID, Chan 6
A, 7
Unit ID, Chan 7
Unit ID, Chan 7
A, 8
Unit ID, Chan 8
Unit ID, Chan 8
B, 1
Unit ID, Chan 9
Unit ID, Chan 9
B, 2
Unit ID, Chan 10
Unit ID, Chan 10
B, 3
Unit ID, Chan 11
Unit ID, Chan 11
B, 4
Unit ID, Chan 12
Unit ID, Chan 12
B, 5
Unit ID, Chan 13
Unit ID, Chan 13
B, 6
Unit ID, Chan 14
Unit ID, Chan 14
B, 7
Unit ID, Chan 15
Unit ID, Chan 15
B, 8
Unit ID, Chan 16
Unit ID, Chan 16
C, 1
Unit ID, Chan 17
Unit ID+1, Chan 1
C, 2
Unit ID, Chan 18
Unit ID+1, Chan 2
C, 3
Unit ID, Chan 19
Unit ID+1, Chan 3
C, 4
Unit ID, Chan 20
Unit ID+1, Chan 4
Page 22
DIO32
DIO32
C, 5
Unit ID, Chan 21
Unit ID+1, Chan 5
Port IO Select DIP Switches
C, 6
Unit ID, Chan 22
Unit ID+1, Chan 6
C, 7
Unit ID, Chan 23
Unit ID+1, Chan 7
C, 8
Unit ID, Chan 24
Unit ID+1, Chan 8
The following table shows the affect of setting a
Port’s Select DIP Switch to various values. There is
one DIP switch for each 8-bit port. The ports are
configured independently.
D, 1
Unit ID, Chan 25
Unit ID+1, Chan 9
D, 2
Unit ID, Chan 26
Unit ID+1, Chan 10
DIP Switch
Function
D, 3
Unit ID, Chan 27
Unit ID+1, Chan 11
off-off-off-off
Digital Input – NO switch
D, 4
Unit ID, Chan 28
Unit ID+1, Chan 12
off-off-off-on
Digital Input – NC switch
D, 5
Unit ID, Chan 29
Unit ID+1, Chan 13
D, 6
Unit ID, Chan 30
Unit ID+1, Chan 14
off-off-on-off
Digital Output
D, 7
Unit ID, Chan 31
Unit ID+1, Chan 15
off-off-on-on
Digital Output (inverted)
D, 8
Unit ID, Chan 32
Unit ID+1, Chan 16
off-on-off-off
Dimming, use port A zero
cross
off-on-off-on
Dimming, use zero cross
from individual port
off-on-on-off
Servo control
off-on-on-on
Digital Input – Hardware
Utility sets NO/NC
NO means Normally Open – meaning that the
channel will read as ON if there is +5 vdc present at
the header pin.
NC means Normally Closed so the channel reads
as ON when 0 vdc is present at the header pin.
Page 23
Page 24
DIO32
Powering with 120 vac
Referring to the following picture:
DIO32
•
•
•
•
•
JP10 – jumper on bottom two pins
JP11 – no jumpers
JP14 – jumper on top two pins
JP15 – Jumper on top two pins
240 vac power to terminals AC1 & AC2
Powering with 12 vac
Referring to the following picture:
•
•
•
•
•
•
JP1 – two jumpers, side by side
JP10 – jumper on top two pins
JP11 – no jumpers
JP14 – jumper on top two pins
JP15 – Jumper on top two pins
120 vac power to terminals AC1 & AC2
Powering with 240 vac
Referring to the following picture:
•
•
•
•
•
•
JP1 – no jumpers
JP10 – no jumpers
JP11 – jumper on bottom two pins
JP14 – jumper on bottom two pins
JP15 – Jumper on bottom two pins
12 vac power to screw terminals X1
Powering with 24 vac
Referring to the following picture:
•
JP1 – one jumper on center two pins
Page 25
Page 26
DIO32
•
•
•
•
•
•
DIO32
JP1 – no jumpers
JP10 – no jumpers
JP11 – jumper on top two pins
JP14 – jumper on bottom two pins
JP15 – Jumper on bottom two pins
24 vac power to screw terminals X1
Powering with 12 vdc
Referring to the following picture:
•
•
•
•
•
•
JP1 – no jumpers
JP10 – no jumpers
JP11 – no jumpers
JP14 – no jumpers
JP15 – no jumpers
15 to 36 vdc power to screw terminals X1,
right screw terminal is positive
Note: on board zero-cross detector is disabled
when using DC power
•
•
•
•
•
•
JP1 – no jumpers
JP10 – no jumpers
JP11 – no jumpers
JP14 – no jumpers
JP15 – no jumpers
12 vdc (± 0.5 volts) power to barrel jack JK1,
center pin positive
Servo Control Connectors (24 Pin)
Ports C & D may be used to control servos. DC
Servo power must be supplied to the screw
terminals to the right of the servo connection
headers. See the next section for more info on
servo power.
Note: on board zero-cross detector is disabled
when using DC power.
Powering with 15 to 36 vdc
Servo Connectors
Port C Port D
Referring to the following picture:
Page 27
Page 28
Servo Power Input
+ on bottom
DIO32
On the servo connection headers, the top row of
pins is the servo control pulse outputs. The middle
row is positive power and the bottom row is ground.
Sequence Editor Channel to Servo Port
The following table shows the Sequence Editor
Channel number to servo port connection:
DIO32
Servo Power Connection
Due to the voltage and current requirements of
servos, the on-board power supplies cannot be
used to power servo actuators. DC servo power
must be brought into the board using screw
terminals X2 located on the lower right edge of the
board.
Status LED1
Port and
Servo #
Normal Mode
Legacy Mode
C, 1
Unit ID, Chan 17
Unit ID+1, Chan 1
C, 2
Unit ID, Chan 18
Unit ID+1, Chan 2
C, 3
Unit ID, Chan 19
Unit ID+1, Chan 3
C, 4
Unit ID, Chan 20
Unit ID+1, Chan 4
C, 5
Unit ID, Chan 21
Unit ID+1, Chan 5
C, 6
Unit ID, Chan 22
Unit ID+1, Chan 6
C, 7
Unit ID, Chan 23
Unit ID+1, Chan 7
C, 8
Unit ID, Chan 24
Unit ID+1, Chan 8
Status LED2
D, 1
Unit ID, Chan 25
Unit ID+1, Chan 9
Reserved for future use.
D, 2
Unit ID, Chan 26
Unit ID+1, Chan 10
D, 3
Unit ID, Chan 27
Unit ID+1, Chan 11
D, 4
Unit ID, Chan 28
Unit ID+1, Chan 12
D, 5
Unit ID, Chan 29
Unit ID+1, Chan 13
D, 6
Unit ID, Chan 30
Unit ID+1, Chan 14
D, 7
Unit ID, Chan 31
Unit ID+1, Chan 15
D, 8
Unit ID, Chan 32
Unit ID+1, Chan 16
Page 29
•
Blinks twice per second if the DIO32 has
booted correctly
•
Solid on if the DIO32 sees a network director
– either a PC or Show Director
•
Blinks one long on and a short off repeatedly
if in the bootloader. This means that the
firmware is not loaded or corrupted. See the
Updating the DIO32 Firmware section to
load firmware
Unit ID Switches
Each LOR controller used in a network must have a
Unit ID assigned. [If two controllers are given the
same unit ID, then they will both perform the same
effects.] Every channel that you control in a
sequence (a sequence is a set of controller
commands constructed using the Showtime
Windows software) has to identify a particular
output circuit (or channel) on a particular controller
(Unit.)
Page 30
DIO32
For example, in a sequence that you construct, a
channel you call “Front door” may be assigned to
Unit ID 03 circuit 10. Because the controllers are
daisy chained together, every controller sees every
command sent but only Unit 03 will react to
commands that are marked “for Unit 03.”
The two hexadecimal rotary dip switches (shown in
the next picture) are used to set a controller’s Unit
ID. Valid Unit ID values are 01 to F0 hex(1 to 240
decimal.) 00 is not a valid Unit ID.
DIO32
selections (jumper JP10 and jumper JP11) for the
zero-cross detectors are set when the AC power
source is set. See the appropriate Power From xxx
section.
It is also possible to have the DIO32 determine the
zero-cross from a signal received on the 16-pin port
headers. This allows the DIO32 to perform dimming
where the zero-crosses are different due to 3-phase
power. The zero-cross signal is a 5 vdc signal that
pulses positive at the zero-cross point.
The setting of the Port IO Select DIP Switches
determines the zero-cross source for a port. See
the Port IO Select DIP Switches section for more
information.
To set the Unit ID to ’01,’ the left rotary switch
would be set to ‘0’ and the right rotary switch would
be set to ‘1.’
See Appendix A for a conversion of Hexadecimal
controller unit IDs set with the switches and their
decimal equivalents.
Port A zero-cross is a special case. Jumper JP9 is
used to select the zero-cross source for port A. The
options are:
• Get zero-cross from the 16-pin port A header
“PORT A”
• Get the zero-cross from the low voltage AC
detector (12 or 24 vac) “LVAC”
• Get the zero-cross from the high voltage AC
detector (120 or 240 vac) “HVAC”
This jumper, shown in the next picture, is located
just below the large transformer. Place a vertical
jumper on a column of two pins on the jumper
shown below to make the selection.
Zero-Cross Selection
Zero-cross detection is required for dimming control
using triacs or random-cross SSRs (Solid State
Relays.) The DIO32 has the ability to detect zerocross on any of its AC input voltages. The jumper
Page 31
Page 32
DIO32
DIO32
SW3 is a normally closed (NC) switch that breaks
the circuit when pressed. When a port is used as
digital inputs to control a show, all switches on that
port must be either NC or NO.
If the DIO32 port used is port A, then SW1 would
be channel 1, SW2 would be channel 2 and SW3
would be channel 3.
Note that the firmware in the controller is coded to
work with the zero-cross detectors designed by
Light O Rama. A foreign zero-cross detector may
not present the zero-cross signal at exactly the
same time as a LOR detector. If the foreign
detector is not different by much you may notice
incorrect dimming near the very dim and very bright
settings. If it is significantly different, behavior may
appear erratic, even with full on/off commands.
How to Connect Input Switches
The following diagram shows how to connect a few
push button (momentary contact) switches to a
digital input port 16-pin header.
Since the ports can be input or output, they are
floating and the 4.7K Ω resistor is required to set
the port state.
Stand Alone Operation
A stand alone animation sequence (sequence with
no accompanying audio) can be downloaded into
the flash memory of the DIO32 controller.
This sequence can contain approximately 5,000
commands. These commands can also be for
controllers other than this controller, so this
controller can direct a network of controllers. There
are no restrictions on the types of LOR controllers
in this network.
The sequence is designed and tested using the
Showtime Software Sequence Editor. When you
are happy with the sequence, save it and stop the
Sequence Editor.
Start the Hardware Utility and click the Refresh
button to find the DIO32. Use the drop down menu
next to the Refresh button to select the controller.
SW1 and SW2 are normally open (NO) switches,
meaning they complete the circuit when pressed.
Page 33
Click the Standalone button at the bottom of the
window. Note that the trigger conditions set by the
Hardware Utility in the stand-alone window are
ignored.
Page 34
DIO32
If you are using a switch to activate a sequence,
then Port A on the controller must be configured for
input. If port A is not configured for input, the
sequence runs all the time. Port A, channel one
starts the internal sequence according to the
NO/NC rules set for this channel. See the Port IO
Select DIP Switches section for more information.
DIO32
DIO8ACF 120/240 vac, High Current,
Filtered 8-Channel Triac Dimming
Use the Open button to browse to your sequence
and click the Download button.
You also use this screen to remove downloaded
standalone sequences. Note that all downloaded
sequences are removed. You can also remove
standalone sequences by turning the controller off,
setting the Unit ID switches to ‘00’ and turning it on
for 10 seconds. Then turn it off and reset the Unit
ID switches to the original value.
Daughter Boards
This section describes the daughter boards that are
available to extend the functionality of the DIO32.
Daughter boards can be mixed and matched as
needed using the 32 channels available.
Available daughter boards:
DIO8ACF – 8 channel filtered triac dimmer,
120/240 vac, up to 60 amps total
DIO16AC – 16 channel triac dimmer, 12/24 or
120/240 vac, up to 60 amps total
DIO8RLY – 8 channel SPDT relay, 16 amps @
250 vac per relay
DIO16IOS – 16 Channel Connector
DIO8ACF Specifications
•
•
•
•
•
•
•
•
Connecting the DIO8ACF to the DIO32
•
Page 35
8½”w x 5¼”h x 2”d
Eight 10 amp triac dimming channels
Two banks of four channels
30 amps @ 120/240 vac per bank, 60 amps
per board
Both input power and output channels fully
filtered with common mode chokes and
capacitors
Each bank and each channel separately
fused
Power limited to 20 amps per bank with
supplied standard heat sinks
Both power feeds must be on the same
phase in three phase systems
This device uses one 8-bit port on the DIO32
and appears as 8 channels.
Page 36
DIO32
•
•
•
Connect the DIO8ACF board to the DIO32
main board using one 16-line ribbon cable.
Jumper through the 5 vdc power on the main
board, see Port DC Power Jumpers section
for more information
Set the Port IO Select DIP Switch for
dimming. See the Port IO Select DIP
Switches for more information
DIO32
DIO16AC Specifications
•
•
•
•
•
•
DIO8ACF Power Connections
The DIO8ACF has two 30 amp input screw terminal
sets toward the bottom of the board. This board has
only one zero-cross detector, therefore when it is
used in a 3-phase environment, both power input
terminal sets must be on the same phase.
Power to the connected lighting is via ¼” blade
terminals that run along the left and right edges of
the board.
DIO16AC 12/24/120/240 vac, 16-Channel
Triac Dimming
•
8½”w x 5¼”h x 1½”d
Sixteen 8 amp triac dimming channels
Two banks of eight channels
30 amps @ 12/24/120/240 vac per bank, 60
amps per board
Each bank and each channel separately
fused
Power limited to 20 amps per bank with
supplied standard heat sinks
Each bank can be on a different phase in
three phase systems
Connecting the DIO16AC to the DIO32
•
•
•
•
This device can use one or two 8-bit ports on
the DIO32 and appears as 8 or 16 channels.
Connect the DIO16AC board to the DIO32
main board using one or two16-line ribbon
cables.
Jumper through the 5 vdc power on the main
board for the DIO32 ports used, see the Port
DC Power Jumpers section for more
information
Set the Port IO Select DIP Switches for
dimming. See the Port IO Select DIP
Switches section for more information
DIO16AC Power Connections
The DIO16AC has two 30 amp input screw terminal
sets toward the bottom of the board. The left screw
terminal set powers the left 8 channels and the right
screw terminal set powers the right 8 channels.
Page 37
Page 38
DIO32
This board contains two zero cross detectors so
that the two input power terminal sets may be on
different phases in 3-phase systems.
Power to the connected lighting is via ¼” blade
terminals that run along the left and right edges of
the board.
DIO8RLY 8-Channel Relay
DIO32
Connecting the DIO8RLY to the DIO32
•
This device uses on 8-bit port on the DIO32
and appears as 8 channels.
•
Connect the DIO8RLY board to the DIO32
main board using one 16-line ribbon cable.
•
Jumper through the 5 vdc and the 12 vdc
power on the main board, see the Port DC
Power Jumpers section for more information
DIO8RLY Power Connections
There are three ¼” blade connectors for each relay.
One is a common connection and the others are
the NO (normally open) and the NC (normally
closed) contacts. Use ¼” female quick connects on
your connection wires.
DIO16IOD 16-Channel Connection Board
DIO8RLY Specifications
•
•
•
•
•
•
8½”w x 5¼”h x 1½”d
Eight Single Pole Double Throw (SPDT)
relays
Relay inputs and outputs are completely
independent of one another, there is no
common wiring
Each relay is rated to handle 16 amps at 250
vac
¼” blade terminals for connection
Each relay is separately fused
DIO16IOs Specifications
•
Page 39
8½”w x 5¼”h x 1½”d
Page 40
DIO32
•
•
16 sets of screw terminals to facilitate
connection of custom devices to the DIO32
main board
Provided to eliminate the need to make a
custom 16-pin ribbon cable to your device
cable
Connecting the DIO16IOS to the DIO32
•
•
Connect the DIO16IOS board to the DIO32
main board using one or two 16-line ribbon
cables. Only connect one cable if you will
only be using 8 of the 16 ports.
Jumper through the 5 vdc power on the main
board, see Port DC Power Jumpers section
for more information.
DIO16IOS Input/Output Connections
•
The ‘-‘ connections on the IOS board are a
common ground.
•
The ‘+’ connections on the IOS board are the
0/5 vdc inputs/outputs depending upon the
DIP configuration switch. See the Port IO
Select DIP Switches section for more
information.
DIO32
Get the latest firmware. www.lightorama.com ►
Support ► Using the Hardware – Documentation
and Firmware section. Click the Firmware button in
the DIO32 line and run the firmware installer
program which will install the firmware file on your
PC. Note the name of the firmware .lhx file. The
normal location of firmware files is C:\Program
Files\Light-O-Rama\Firmware.
Start the LightORama Control Panel if it is not
running by clicking start ► All Programs ►
LightORama ► Light-O-Rama Control Panel.
The Light-O-Rama light bulb icon will appear in the
system tray on the lower right of your screen.
Start the Hardware Utility by right-clicking the
Light-O-Rama Control Panel light bulb and
selecting Hardware Utility from the menu.
Click the Firmware button in the LOR Control tab
and you will see this window:
Updating the DIO32 Firmware
You must have:
•
•
Hardware Utility version 2.0.16 or later, see
the section Hardware Utility Version
The DIO32 powered (see the Power …
sections) and connected to the PC via one of
the RS485 adapters – Do not use wireless
Page 41
Page 42
DIO32
In Step 1 – Select Unit, choose the DIO32 radio
button.
In Step 2 – Select firmware file, click the Open
button. Use the Open file box to select the firmware
file. This is the .lhx file you saved in the Firmware
folder. Click the Open button. The window will look
like this:
In Step 3 – Press Download Button, click the
Download button – the firmware download will start
automatically.
The Update progress bar will fill from left to right.
When the new firmware is loaded, the Status will
change to “Successful” and the DIO32 will reboot.
Page 43
DIO32
Appendix A Hexadecimal to Decimal
Hex
Hex
Dec
Hex
Dec
01
01
Dec
Hex
3D
Dec
61
79
121
B5
181
02
02
3E
62
7A
122
B6
182
03
03
3F
63
7B
123
B7
183
04
04
40
64
7C
124
B8
184
05
05
41
65
7D
125
B9
185
06
06
42
66
7E
126
BA
186
07
07
43
67
7F
127
BB
187
08
08
44
68
80
128
BC
188
09
09
45
69
81
129
BD
189
0A
10
46
70
82
130
BE
190
0B
11
47
72
83
131
BF
191
0C
12
48
72
84
132
C0
192
0D
13
49
73
85
133
C1
193
0E
14
4A
74
86
134
C2
194
0F
15
4B
75
87
135
C3
195
10
16
4C
76
88
136
C4
196
11
17
4D
77
89
137
C5
197
12
18
4E
78
8A
138
C6
198
13
19
4F
79
8B
139
C7
199
14
20
50
80
8C
140
C8
200
15
21
51
81
8D
141
C9
201
16
22
52
82
8E
142
CA
202
17
23
53
83
9F
143
CB
203
18
24
54
84
90
144
CC
204
19
25
55
85
91
145
CD
205
1A
26
56
86
92
146
CE
206
1B
27
57
87
93
147
CF
207
1C
28
58
88
94
147
D0
208
1D
29
59
89
95
147
D1
209
Page 44
DIO32
1E
30
5A
90
96
150
D2
210
1F
31
5B
91
97
151
D3
211
20
32
5C
92
98
152
D4
212
21
33
5D
93
99
153
D5
213
22
34
5E
94
9A
154
D6
214
23
35
5F
95
9B
155
D7
215
24
36
60
96
9C
156
D8
216
25
37
61
97
9D
157
D9
217
26
38
62
98
9E
158
DA
218
27
39
63
99
9F
159
DB
219
28
40
64
100
A0
160
DC
220
29
41
65
101
A1
161
DD
221
2A
42
66
102
A2
162
DE
222
2B
43
67
103
A3
163
DF
2C
44
68
104
A4
164
2D
45
69
105
A5
2E
46
6A
106
2F
47
6B
30
48
6C
31
49
6D
109
A9
168
32
50
6E
110
AA
170
33
51
6F
111
AB
171
E7
231
34
52
70
112
AC
172
E8
35
53
71
113
AD
173
DIO32
Appendix B LOR Unit ID to DMX
Address
See the section Unit ID Switches for instructions on
setting the controller’s unit ID. The controller must
be set to one of the LOR Unit IDs listed in the
following table to recognize DMX protocol. E.g.
setting the LOR Unit ID to “06” will result in the first
DMX address (base address) for the controller
being 81.
LOR DMX
Unit ID Address
LOR DMX
Unit ID Address
“01” 1
“11” 257
223
“02” 17
“12” 273
E0
224
“03” 33
“13” 289
165
E1
225
“04” 49
“14” 305
A6
166
E2
226
107
A7
167
E3
227
“05” 54
“15” 321
108
A8
168
E4
228
“06” 81
“16” 337
E5
229
“07” 97
“17” 353
E6
230
“08” 113
“18” 369
232
“09” 129
“19” 385
E9
233
“0A” 145
“1A” 401
36
54
72
114
AE
174
EA
234
“0B” 161
“1B” 417
37
55
73
115
AF
175
EB
235
38
56
74
116
B0
176
EC
236
“0C” 177
“1C” 433
39
57
75
117
B1
177
ED
237
“0D” 193
“1D” 449
3A
58
76
118
B2
178
EE
238
“0E” 209
“1E” 465
3B
59
77
119
B3
179
EF
239
3C
60
78
120
B4
180
F0
240
“0F” 225
“10” 241
“1F” 481
“20” 497
Page 45
Page 46
Specifications
Dimensions
8½”w x 5¼”h x 2"d
Channels
32 broken into four groups of 8
Source/Sink
current for
outputs
24 ma maximum
Channel
Input/Output Approximately 0 and 5 vdc
voltages
Maximum
draw from
on-board
power
supplies
1 amp total for all 4 ports from
the 5 vdc and 1 amp total for all 4
ports from the 12 vdc. Both
power supplies may be used
simultaneously.
Light-O-Rama, Inc.
Tel: (518) 539-9000
Fax: (518) 538-0067
[email protected]


