Download Manual (english)
Transcript
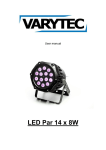
User’s manual
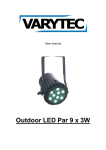
LED Par 26x3W RGB IP65
Table of content
1.
Safety instructions ........................................................................................................................... 3
1.1.
2.
Operating Manual ............................................................................................................................ 4
2.1.
3.
4.
FOR SAFE AND EFFICIENT OPERATION ............................................................................ 3
Description and advantages .................................................................................................... 4
Installation........................................................................................................................................ 4
3.1.
DMX cable ............................................................................................................................... 4
3.2.
Connect a DMX line ................................................................................................................. 5
Functions ......................................................................................................................................... 5
4.1.
Automatic mode ....................................................................................................................... 5
4.2.
Stand-alone mode ................................................................................................................... 6
4.3.
Master/Slave mode .................................................................................................................. 6
5.
DMX mode ....................................................................................................................................... 7
6.
DMX channels ................................................................................................................................. 7
7.
Technical data ................................................................................................................................. 7
2/9
1. Safety instructions
•
This device is suitable for indoor use only.
•
All modifications to the device will void the warranty.
•
Repairs are to carry out by skilled personnel only.
•
Use only fuses of the same type and original parts as spare parts.
•
Protect the unit from rain and humidity to avoid fire and electric shocks.
•
Make sure to unplug the power supply before opening the housing.
1.1. FOR SAFE AND EFFICIENT OPERATION
Be careful with heat and extreme temperature
Avoid exposing it to direct rays of the sun or near a heating appliance.
Not put it in a temperature bellow 32°F / 0°C, or exceeding 131°F / 55°C.
Keep away from humidity, water and dust
Do not place the set in a location with high humidity or lots of dust.
Containers with water should not be placed on the set.
Keep away from sources of hum and noise
Such as transformer motor, tuner, TV set and amplifier.
To avoid placing on un-stable location
Select a level and stable location to avoid vibration.
Do not use chemicals or volatile liquids for cleaning
Use a clean dry cloth to wipe off the dust, or a wet soft cloth for stubborn dirt.
If out of work, contact sales agency immediately
Any troubles arose, remove the power plug soon, and contact with an engineer for repairing,
do not open the cabinet by yourself, it might result a danger of electric shock.
Take care with the power cable
3/9
Never pull the power cable to remove the plug from the receptacle, be sure to hold the plug.
When not using the device for an extended period of time, be sure to disconnect the plug
from the receptacle.
Important:
Damages caused by the disregard of this user manual are not subject to
warranty. The dealer will not accept liability for any resulting defects or problems. Make sure
the electrical connection is carried out by qualified personnel. All electrical and mechanical
connections have to be carried out according to the European safety standards.
2. Operating Manual
2.1. Description and advantages
-
36 LEDs 3W 15° (12 red, 12 green and 12 blue)
-
DMX 512 with 8 DMX channels
-
Master dimmer
-
RGB color changing
-
Strobe effect
-
Auto play with internal programs
-
Master/Slave function
-
Stand alone mode
3. Installation
Connect the device with the power supply system.
Know your device is ready to receive control signals like DMX 512 or automatic signals.
Disconnect the device from the power supply system when you don´t want to use it for a longer time.
3.1. DMX cable
For DMX control please use a commercial DMX XLR 3-Pin cable.
The pin assignment is as follows:
4/9
In the graphic you can see how you can ´make adapters from 3 to 5 pins.
3.2. Connect a DMX line
If you want to control several devices you have to connect them with a DMX cable. You are not
allowed to use more than 32 devices in one line and distance has to be below 500m. In practice it is
useful to use not more than 12 devices in one line and to use a pull-up resistor.
Connect the male end of the cable to the DMX controller and the female end to the device. Like this
you have to connect all devices.
4. Functions
The device can be controlled by different possibilities: DMX 512, automatic mode, stand-alone mode
or master/slave mode.
Push the MENU button.
With the UP/DOWN buttons you can go through the menu.
4.1. Automatic mode
RGB Flash
-
Press the UP/DOWN buttons until you can read FLAS on the display. Press ENTER.
-
Now you can read FLXX
-
Press UP to raise the value and DOWN to lower it.
-
You have 16 possible speeds, the higher the value is, the faster.
Fade Function
-
Press the UP/DOWN buttons until you can read FAdE on the display. Press ENTER.
-
Now you can read FAXX
-
Press UP to raise the value and DOWN to lower it.
-
You have 16 possible speeds, the higher the value is, the faster.
7 color run
-
Press the UP/DOWN buttons until you can read ASC- on the display. Press ENTER.
-
Now you can read ASXX
-
Press UP to raise the value and DOWN to lower it.
5/9
-
You have 16 possible speeds, the higher the value is, the faster.
Chaser 1
-
Press the UP/DOWN buttons until you can read CE-- on the display. Press ENTER.
-
Now you can read CEXX
-
Press UP to raise the value and DOWN to lower it.
-
You have 16 possible speeds, the higher the value is, the faster.
Chaser 2
-
Press the UP/DOWN buttons until you can read CS-- on the display. Press ENTER.
-
Now you can read CSXX
-
Press UP to raise the value and DOWN to lower it.
-
You have 16 possible speeds, the higher the value is, the faster.
4.2. Stand-alone mode
You can set you color mixing in 16 steps, to mix your required color.
Red
-
Press the UP/DOWN buttons until you can read rL-- on the display. Press ENTER.
-
Now you can read rLXX
-
Press UP to raise the value and DOWN to lower it.
-
You have 16 possible dimming steps, the higher the value is, the brighter the color.
Green
-
Press the UP/DOWN buttons until you can read gL-- on the display. Press ENTER.
-
Now you can read gLXX
-
Press UP to raise the value and DOWN to lower it.
-
You have 16 possible dimming steps, the higher the value is, the brighter the color.
Blue
-
Press the UP/DOWN buttons until you can read bL-- on the display. Press ENTER.
-
Now you can read bLXX
-
Press UP to raise the value and DOWN to lower it.
-
You have 16 possible dimming steps, the higher the value is, the brighter the color.
4.3. Master/Slave mode
If you want to use the Master/Slave mode you have to set the master device to the required automatic
program, the Slave devices you have to set to DMX address 1.
6/9
5. DMX mode
You can control the device with a commercial DMX controller. It uses 8 channels.
-
Press the UP/DOWN buttons until you can read Addr on the display. Press ENTER.
-
Now you can read AXXX
-
Press UP to raise the value and DOWN to lower it.
-
You can set the value from A001 to A512
6. DMX channels
CH1
0-255
Main dimmer
CH2
0-255
Red dimmer
CH3
0-255
Green dimmer
CH4
0-255
Blue dimmer
CH5
15-255
colour preset
CH6
15-239
sections combination
240-255
all off
0-255
strobe peed from slow to fast
CH7
gradual change speed from slow to
6-140
CH8
fast;
141-154
seven color run
155-161
run way 1
162-168
run way 2
169-175
run way 3
176-182
run way 4
183-189
run way 5
190-196
run way 6
197-203
run way 7
204-210
run way 8
211-217
run way 9
218-224
run way10
225-231
run way 11
232-238
run way 12
239-245
run way 13
246-255
off
7. Technical data
-
Power supply
220V 50Hz (up to 30 devices)
110V 60HZ (up to 15 devices)
-
Power consumption
115W
-
IP class
IP65
7/9
-
Weight
3kg
-
Measures
245x245x350mm
-
Radiation
15°
-
LED
38x3W
-
Work temperature
-20°C to +45°
-
Ambient humidity
0% to 90%
8/9
Importeur:
B & K Braun GmbH
Industriestraße 1
D-76307 Karlsbad
www.bkbraun.com
[email protected]
9/9


