1
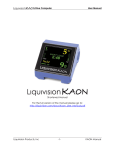
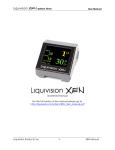
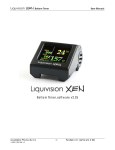
Liquivision X1 Hardware User Manual © Liquivision Products, Inc. 2007. v 4.1 TABLE OF CONTENTS IMPORTANT NOTICES .................................................................................................................................................2 PARTS LIST......................................................................................................................................................................4 X1 HARDWARE SPECS..................................................................................................................................................5 ANATOMY OF THE X1 ..................................................................................................................................................5 X1 ACCESSORIES ...........................................................................................................................................................9 CHARGING THE X1 ......................................................................................................................................................10 X1 USB COMMUNICATION WITH YOUR PC..........................................................................................................13 © Liquivision Products, 2007 -1- User Manual v.4.1 IMPORTANT NOTICES User Agreement and Warranty Use of your Liquivision X1 is subject to the User Agreement and Warranty (“Agreement”) included in the X1 package, and available at the Liquivision website: www.liquivision.ca. You must read the entire Agreement before using your X1. If you do not agree with any term of the Agreement, you must not use the X1, and you may return the X1 to Liquivision or the authorized Liquivision dealer from which you purchased the X1 for a full refund within 30 days after your date of purchase. If you use the X1, you are deemed to have agreed to the User Agreement and Warranty. User Manual The User Manual is delivered to you on the CD included in the X1 package, and is available at the Liquivision website: www.liquivision.ca. You must read this entire X1 User Manual before using your X1. Incorrect use of the X1 or its accessories will invalidate your Warranty and can cause permanent damage to the X1 or its accessories. Important Rules Here are some important rules you must follow while using the X1. Not abiding by these rules will void your Warranty. Please consult the Agreement for details (section 4.3 “Warranty Limitations and Exclusions”). - The X1 may only be submerged when worn by a human being. Any un-manned submersions including, but not limited to, submersions in an un-manned vehicle or on a rope, will void the Warranty. - The X1 may only be submerged to a maximum depth of 330m (1,082 ft). Any submersions or pressurizations beyond this depth will void the Warranty. - Only the X1 wrist unit and strap have been designed for underwater use. Never dive with any of the attachments, accessories, or cables connected to the X1. Doing so will damage the accessories and/or the X1, and will void the Warranty. - Do not recharge the X1 in direct sunlight, or allow the temperature of the X1 to exceed 45°C (113°F) during recharging. - Do not expose the X1 to chemical products including, but not limited to, mosquito repellents. - Do not attempt to open, modify or repair your X1 yourself. Contact your dealer for assistance. Important Notice on Charging When you want to charge your X1, FIRST you must connect the X1 to the Multifunction Attachment, THEN you can connect the attachment to the AC Adapter and into a power supply. When you want to stop charging your X1, FIRST disconnect the unit from power, THEN disconnect the Multifunction attachment from the X1. If you do not follow these rules, your X1 can be damaged and your warranty will be void. © Liquivision Products, 2007 -2- User Manual v.4.1 Liquivision Limitation of Liability The Agreement includes exclusions and limitations of Liquivision’s liability to you. These exclusions and limitations include, but are not limited to, the following: YOU AGREE THAT YOU UNDERSTAND AND ACCEPT ALL RISKS ASSOCIATED WITH DIVING, AND THAT LIQUIVISION IS NOT LIABLE TO YOU OR ANY OTHER PERSON, INCLUDING YOUR HEIRS, EXECUTORS OR PERSONAL REPRESENTATIVES, FOR ANY LOSS, DAMAGE, COST, EXPENSE OR CLAIM ARISING OUT OF, CAUSED BY OR RELATING TO YOUR PERSONAL INJURY OR DEATH WHILE DIVING, EVEN IF YOUR PERSONAL INJURY OR DEATH IS RD CAUSED, IN WHOLE OR IN PART AND DIRECTLY OR INDIRECTLY, BY THE X1, ANY 3 PARTY SOFTWARE (AS DEFINED BELOW) OR THE DRIVER SOFTWARE PROVIDED WITH THE X1 (THE “DRIVER”) OR YOUR USE OF THE X1, RD RD ANY 3 PARTY SOFTWARE OR THE DRIVER, AND REGARDLESS OF WHETHER OR NOT THE X1, ANY 3 PARTY SOFTWARE OR THE DRIVER FUNCTIONED PROPERLY OR WAS DEFECTIVE IN ANY WAY. YOU HEREBY IRREVOCABLY WAIVE AND RELEASE LIQUIVISION FROM ANY LIABILITY OR OBLIGATION TO YOU OR YOUR HEIRS, EXECUTORS OR PERSONAL REPRESENTATIVES FOR ANY LOSS, DAMAGE, COST, EXPENSE OR CLAIM ARISING OUT OF, CAUSED BY OR RELATING TO YOUR PERSONAL INJURY OR DEATH WHILE DIVING, EVEN IF YOUR PERSONAL INJURY OR DEATH IS CAUSED, IN WHOLE OR IN PART AND DIRECTLY OR INDIRECTLY, BY THE X1, ANY 3RD PARTY SOFTWARE OR THE DRIVER OR YOUR USE OF THE X1, ANY 3RD PARTY SOFTWARE OR THE DRIVER, AND REGARDLESS OF WHETHER OR NOT THE X1, ANY 3RD PARTY SOFTWARE OR THE DRIVER FUNCTIONED PROPERLY OR WAS DEFECTIVE IN ANY WAY. You must read the Agreement for all limitations and exclusions of Liquivision’s liability to you. 3rd Party Software The X1 as purchased by you is computer hardware only, and it will not operate or perform any function until you obtain and install third party decompression software (“3rd Party Software”). Here is a list of X1-compatible 3rd Party Software available at time of printing: V-Planner Live [VPM-B/E] http://www.hhssoftware.com/v-planner-live/ GAP X1 [Buhlmann-GF] www.gap-software.com You can find a current list of 3rd Party Software on the Liquivision website: www.liquivision.ca. Liquivision does not recommend or endorse any 3rd Party Software, and you are responsible to select, purchase, install and properly use the 3rd Party Software of your choosing. Liquivision is not responsible for any problems you may experience as a result of use of the 3rd Party Software or the Driver, including death, personal injury or loss or damage to your computer, software, data or other personal property. Contact your preferred software company for software user manual, download and installation instructions, and technical support. © Liquivision Products, 2007 -3- User Manual v.4.1 PARTS LIST In your X1 package, you will find the following items: 1. X1 Computer 2. Heavy duty wrist strap 3. Multifunction Attachment 4. USB Cable 5. AC Adapter 6. International Plug Adapters 7. X1 business card CD USB Driver for Windows Hardware User Manual 8. Liability Waiver Form 9. Warranty Card Clockwise from top left: © Liquivision Products, 2007 -4- AC Adapter Strap Plug Adapters Multifunction Attachment Business Card CD USB Cable User Manual v.4.1 X1 HARDWARE SPECS Depth rating: 330m / 1082ft Casing: Hard anodized aluminum Display glass: Borosilicate Battery: Lithium polymer rechargeable Strap: Nylon, with laser welded holes and non-magnetic stainless steel buckle. Temperature measurement range: -10 to 50C Flash memory: 2048KB ANATOMY OF THE X1 Internal Components Gel Filling The X1 components and circuitry are encased in a gel that allows for the elimination of O-rings. Once encased, the X1 cannot be opened up, nor can it leak. You may see gel around certain parts of the unit. Exposed gel does not compromise the function of the X1. Pressure Sensor The X1 contains a custom pressure sensor which can measure extreme depths. The X1 is warrantied to a depth of 330m, although it is tested beyond that depth. Lithium Polymer Battery The X1 features a rechargeable battery that has a spec lifespan of over ten years. Depending on software energy consumption by 3rd party software, the X1 can operate for over 30 hours of continual use in dive mode and last several months in sleep mode. The battery life of the rechargeable battery may decline gradually with use, but the X1 is designed to maintain functional battery power for over 10 years. 3-axis accelerometer, Magnetic Field Sensor and Water Sensor These sensors allow for a variety of advanced software features. See your 3rd party software manual for more information. Software Various decompression software packages can be loaded into the X1. Currently there are two packages available, but more are being developed. Only one software package can be loaded into the X1 at a time. You can switch between software packages yourself with a Windows PC with USB port. Bottom timer software is also available for those users who do not wish to install dedicated decompression software. Where are the buttons? You control the function of the X1 at all times by tapping the side of the casing with your fingers. Where and how many times you tap the casing is determined by the 3rd party software you have chosen to install on the X1. This revolutionary technology eliminates the difficulty of pressing small buttons with thick gloves and the risk of button malfunction at depth. Navigation through settings & menus is intuitive. You can access menus during dive mode by tapping the casing as specified by your 3rd party software user manual. © Liquivision Products, 2007 -5- User Manual v.4.1 OLED Display and Mineral Glass The X1 features an Organic LED graphic display, which allows for a wide variety of font sizes and graphics. The resolution of the display is 128 x 64 and features a 180 degree viewing angle. The display is bright yellow on a black background. The OLED display is like a computer display. The OLED display is rated to retain more than half its initial brightness after 40,000 hours of use. The display is protected against scratching, pressure and impact damage by borosilicate mineral glass. Anodized Aluminum Casing The X1 casing is built from hard anodized aluminum and is 67mm long x 44mm wide x 24mm thick. Both the display and the casing are extremely scratch resistant. While most knives and sharp tools won't scratch the X1, certain barnacles, certain types of sharp rocks and other marine invertebrates can cause minor scratches if the X1 is forcefully struck or scraped against them. Steel Contact Pins The X1 features seven contact pins that perform a variety of roles: - Detecting the presence the water © Liquivision Products, 2007 -6- User Manual v.4.1 - Connecting to the multifunction attachment for charging, software upgrades, resetting or downloading dive data to your PC. The contact pins must be clean and dry before connecting the multifunction attachment. Screw Holes for Multifunction Attachment The screw holes are for the purpose of attaching the Multifunction Attachment, as well as other hardware expansion modules. Infrared transmitter/receiver window The infrared window is reinforced mineral glass that provides a medium for the transmission and reception of digital infrared signals. The infrared window allows for a wide range of expansion hardware interaction such as communication with a PDA, PC, or CCR sensor link. Serial Number The X1 unit serial number is located on the upper edge of the unit, and should also be written on the retail box. The serial number is required for your warranty, 3rd party software downloads and to track compatibility with future software upgrades. We recommend that you write down your serial number and keep it in a secure place in case of theft. Liquivision and the 3rd party software companies all maintain data to prevent any software updates for stolen units. Back plate The X1 back plate protects the X1 internal circuitry from damage from high impacts. The back plate cannot be removed as it is bonded to the rigid gel that fills the unit, nor can the screws be removed. The back plate also has four open holes to ensure the inside of the X1 remains at ambient pressure. These holes do not jeopardize the function of the X1. © Liquivision Products, 2007 -7- User Manual v.4.1 Pressure Sensor Aperture The pressure sensor aperture allows the pressure sensor to come in direct contact with the surrounding water and measure the hydrostatic pressure. This hole must not be blocked or covered in any way. Strap The X1 strap can easily be attached to the unit by slipping the straps through each of the open slots on the X1 back plate. The open slots also may allow custom strap insertion. Secure the strap by taking advantage of the safe-locking mechanism as shown. © Liquivision Products, 2007 -8- User Manual v.4.1 X1 ACCESSORIES Multifunction Attachment The Multifunction Attachment (called the “Attachment” below for simplicity’s sake) allows for a variety of functions, including: Charging of the X1 battery via the AC Adapter Connection of the X1 via USB cable to a PC, to upload software to the X1 Download of the X1 dive data to a PC Resetting of the X1 with the reset button © Liquivision Products, 2007 -9- User Manual v.4.1 AC Adapter The AC Adapter allows you to connect the X1 to a wall outlet. The AC adapter autoswitches between different international voltages (90-260V AC). Plug Adapters Four plug adapters are included with the X1 that allow compatibility of the AC Adapter with wall sockets in most countries. USB Cable The USB cable allows you to connect your PC to the X1 via the Multifunction Attachment. CHARGING THE X1 We recommend charging your X1 fully once you have received it. Your X1 may already have a partial charge or be completely discharged. ***WARNING: It is very important that you follow these steps for charging your X1. If you connect or disconnect your X1 in a different sequence, it could put the X1 in an illegal state which requires it to be reset before you can use it.*** Connecting the Attachment and AC Adapter for charging 1. Make sure the AC Adapter is NOT connected to the Attachment: Not connected! © Liquivision Products, 2007 -10- User Manual v.4.1 2. Connect the Attachment to the X1 by using thumb screws: FIRST connect Multifunction Attachment to X1… 3. Screw each thumb screw a little at a time evenly to maintain proper alignment. 4. Once the Attachment and X1 are connected, you can connect the AC Adapter to the Attachment and the wall power source. Use the correct plug adapter if needed. …THEN connect the power. 5. Your X1 should automatically start charging once the Attachment and AC Adapter are connected. 6. The display will show a “charging status” – how it appears will depend on the 3rd party software you have installed on the X1. 7. Charging should take approximately 4 hours. © Liquivision Products, 2007 -11- User Manual v.4.1 Disconnecting AC Adapter after charging 8. When you disconnect your X1, FIRST remove the power supply from the Attachment, THEN remove the Attachment from the X1. X1 is finished charging… FIRST disconnect the power… THEN remove the Attachment. Battery Life Battery life for the X1 will vary depending on 3rd party software. Battery power conservation can be achieved in a variety of ways, including OLED display brightness, sampling rate and variable demands on X1 hardware. Consult your 3rd party software user manual for more information. In general, the X1 lasts up to 30 hours in dive mode and anywhere from several weeks to several months in sleep mode on a single charge. Troubleshooting 1. Bad connection: Sometimes a bad connection between the Attachment and the X1 will prevent charging from taking place. Unplug the AC Adapter from the Attachment and then unscrew the Attachment. Try again, this time turning each thumbscrew a little at a time to maintain an even alignment with the side of the X1. This will ensure that the pins in the Attachment make full contact with the steel pins on the X1. 2. Salt: If the X1 pins become encrusted with salt, this can disrupt the Attachment’s connection. Unplug the AC Adapter and remove the attachment. Wash the X1 in fresh water and scrub the metal pins with a stiff brush to remove any salt deposits. Dry the X1 thoroughly and then reattach the Attachment. 3. Blank X1: If your X1 shows a black display, and doesn't seem to recharge or do anything at all, you may have accidentally connected or disconnected the Attachment with power applied from the wall outlet. To fix the problem, connect the Attachment, then connect AC power to the Attachment. Disconnect the USB cable from the Attachment. Then, reset the X1 by pressing the reset button on the Attachment (use a long thin object). © Liquivision Products, 2007 -12- User Manual v.4.1 X1 USB COMMUNICATION WITH YOUR PC ***WARNING: You must FIRST install the USB Drivers on your computer, before you connect the X1 to the computer using the USB cable*** Overview To connect your X1 with your computer, you must first install the USB X1 Driver from the Liquivision Quick Start CD. Once this process has been successfully completed, you can easily connect your PC to the X1 through the Multifunction Attachment and download your preferred software. For instructions on how to download and/or install V-Planner Live [VPM-B] or GAP X1 (Buhlmann-GF) software on your X1, please refer to the software user manual of each respective 3rd party company. Websites V-Planner Live: http://www.hhssoftware.com/v-planner-live/ GAP Software: www.gap-software.com Step 1: Make sure the USB cable is NOT CONNECTED to your PC nor the X1 Multifunction Attachment. Step 2: Install “Liquivision X1 Multifunction Attachment Driver” from CD 1. Insert the Liquivision Quick Start CD into your computer’s CD Drive. 2. Double click on X1Driver.exe file or right click and select “Open.” 3. Confirm desired installation location. Default location is C:\Program Files\Liquivision. Click “Install.” 4. Driver installation will be confirmed. The X1 USB driver files will now be installed on your computer. Step 3: Connect your X1 to your computer using the USB cable 1. Prepare all the cables… 2. FIRST connect the attachment to 3. THEN connect to the AC adapter the X1 using the thumbscrews… and to the power supply… (continued on next page) © Liquivision Products, 2007 -13- User Manual v.4.1 4. The X1 is now ready to connect to your PC. You can connect the attachment to your PC with the included USB cable as shown: Step 4: Upload software to X1 Now you can download software to your PC from the internet, and upload it to your X1. 1. Download software from your preferred software vendor V-Planner Live: http://www.hhssoftware.com/v-planner-live/ Gap Software: www.gap-software.com 2. Refer to the 3rd party software user manual for specific software upload instructions Step 5: Disconnect X1 from Multifunction Attachment 1. To disconnect the attachment, follow the above procedure in reverse: a. Disconnect the USB cable b. Then unplug the AC Adapter cable c. Then unscrew the attachment from the X1 2. Never attempt to remove the attachment with the AC Adapter still connected to the wall power source. © Liquivision Products, 2007 -14- User Manual v.4.1