1
11
Installation and Configuration Guide
The Define a New Server wizard opens. This wizard lets you define a new server that contains information
required to point to a specific runtime environment for local or remote testing, or for publishing to an application
server.
Note: If you installed Eclipse using Oracle Enterprise Pack for Eclipse Galileo Edition, Oracle WebLogic
Server (11gR1) is listed in the New Server wizard under Oracle server type. If you downloaded Eclipse 3.6.2
directly from Apache Web site, you need to click Download Additional Server Adapters and download Oracle
WebLogic Server adapter from the Internet yourself.
4
Select Oracle WebLogic Sever 11gR1, click Next, and then perform the following steps:
Note: These steps also apply for Oracle WebLogic Server on Linux.
a. First you need to input WebLogic Home, for example, C:\bea\wlserver_11.1 on Windows and /home/my/bea/
wlserver_11.1on Linux, at the Define WebLogic Runtime dialog and then provide the domain directory at
Define a WebLogic Server dialog.
b. If you do not have the WebLogic domain available yet or you want to create a different one, click Click Here
to launch Configuration Wizard to create a new domain. Write down the Domain Location for your
created domain, for example, C:\bea\user_projects\domains\base_domain.
c. Now suppose you already have a domain directory available. You can input or browse to get it on your
machine and click Next.
5
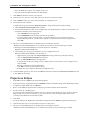
Select the projects from the available projects list in the Add and Remove dialog and then click Add to add them
to the configured projects list. Click Finish.
Then Oracle WebLogic Server 11gR1 appears in the Servers view. You can start and stop the Server from this
view.
6
Open the Server view to verify that the server has been created. You can click Servers
from the menu bar, then Show View and Servers to display the Server view.
or click on Window
Creating Projects on IDE
This section describes how to create a project on JDeveloper and Eclipse IDEs.
Projects on JDeveloper
1
Create an application if you do not have one yet. You can create an application by clicking on File from the
menu, then select New.
The New Gallery dialog appears.
2
Select Applications under the General category from the left panel and then select Custom Application from
the right panel.
3
Click OK.
The Create Application dialog appears.
4
Complete the Create Application dialog to create an application with the Application Package Prefix field left
empty. Click Finish to the create the project.
5
Click File and then Import.
The Import dialog appears.
6
Select WAR File and then click OK.
The Create Project from WAR File dialog appears.
7
Browse to the ISDK component folder or sample projects folder and then select a WAR file.
8
In the following Create Project from WAR file dialogs perform the following:
• Enter your project name.
• Choose a directory to put your project.