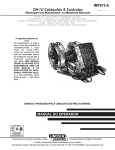
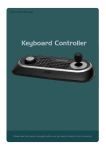
Download User Manual
Transcript
Simicon Ltd. Radar Gun With Integrated Video “BINAR” Operation Manual IP-VAB-2.1-ENG.DOC Saint Petersburg, Russia 2014 BINAR Radar Gun With Integrated Video Table of Contents 1 Introduction ..........................................................................................................5 2 Application ...........................................................................................................6 3 Technical Parameters and Features ..................................................................7 3.1 Technical Specifications ..................................................................................7 3.2 Radar Gun Functions and Features ................................................................ 8 4 Delivery Set ........................................................................................................ 10 5 Radar Gun Design ............................................................................................. 12 5.1 Measuring unit ............................................................................................... 12 5.2 Battery handle ............................................................................................... 14 5.3 Protective cover ............................................................................................ 15 6 General Operating Guidelines .......................................................................... 15 7 Safety Precautions ............................................................................................ 16 8 Interface and Controls ....................................................................................... 17 8.1 Radar Gun Interface ...................................................................................... 17 8.2 Radar Gun Controls ...................................................................................... 18 8.2.1 Using the touch screen and Remote Control .......................................... 18 8.2.2 Control panel buttons .............................................................................. 21 9 Basic Operations and Setup ............................................................................. 21 9.1 Preparation before Work ............................................................................... 21 9.2 Battery Charging ........................................................................................... 22 9.2.1 Battery level indicators ............................................................................ 22 9.2.2 Battery charging...................................................................................... 22 9.3 SD Card Installation ...................................................................................... 23 9.4 Switching On the Radar Gun ......................................................................... 24 9.4.1 Automatic self-testing ............................................................................. 24 9.4.2 SD card authorization ............................................................................. 25 9.4.3 Energy saving ......................................................................................... 26 9.5 Setup before Operation ................................................................................. 26 9.5.1 Operation modes .................................................................................... 26 9.5.2 Quick adjustment .................................................................................... 27 9.5.3 Main menu .............................................................................................. 28 9.5.4 Clear archive on SD card ........................................................................ 30 9.5.5 Entering location ..................................................................................... 30 9.5.6 Orientation control feature ...................................................................... 31 2 Simicon Ltd. Chapter 1. Introduction 9.6 Reset ............................................................................................................. 32 9.7 Switching Off the Radar Gun ......................................................................... 32 10 Data Recording ................................................................................................ 33 10.1 Observing the Traffic Situation .................................................................... 33 10.1.1 “ТV” mode ............................................................................................. 33 10.2 Speed Measurements ................................................................................. 34 10.2.1 Wide-angle and telephoto camera images ........................................... 34 10.2.2 Automatic capture mode (optional feature) ........................................... 35 10.2.3 “WORK” mode ...................................................................................... 36 10.2.4 Using the radar gun in Moving mode .................................................... 37 10.2.5 Limit by law feature ............................................................................... 39 10.3 Photo Mode ................................................................................................. 40 10.4 Video Mode ................................................................................................. 41 10.4.1 Video recording..................................................................................... 41 10.4.2 Playing and saving the video clips ........................................................ 43 11 Recorded Data Review .................................................................................... 44 11.1 Viewing the Images in Volatile Memory....................................................... 44 11.1.1 Basic operation principle ....................................................................... 44 11.1.2 Analysis of image sequence and its presentation to violator ................ 46 11.1.3 Thumbnail image view .......................................................................... 47 11.1.4 Full-screen slide show view .................................................................. 48 11.1.5 Full-screen still image view ................................................................... 50 11.1.6 Viewing the magnified telephoto camera image ................................... 52 11.1.7 Image adjustment ................................................................................. 53 11.2 Clip Archiving .............................................................................................. 54 11.2.1 Saving the images to archive ................................................................ 54 11.2.2 Thumbnail image view in archive .......................................................... 55 11.2.3 Viewing the archived clip in full-screen slide show ............................... 56 11.2.4 Full-screen still image view in archive ................................................... 57 11.2.5 Viewing the magnified telephoto camera image in archive ................... 59 11.2.6 Deleting the data from archive .............................................................. 59 11.2.7 Archive size .......................................................................................... 60 12 Identification and sealing ................................................................................ 60 13 Technical maintenance and repair ................................................................. 60 14 Periodic verification......................................................................................... 60 15 Shipping and storage ...................................................................................... 61 16 Manufacturer contacts .................................................................................... 61 17 Appendix. External Battery Pack .................................................................... 62 17.1 Design and application ................................................................................ 62 Operation Manual 3 BINAR Radar Gun With Integrated Video 17.2 Charging the battery pack ........................................................................... 62 17.3 Tripod setup ................................................................................................ 63 4 Simicon Ltd. Chapter 1. Introduction 1 Introduction The Operation Manual contains technical specifications, operating principles and installation instructions for “BINAR” Radar Gun with Integrated Video (hereinafter referred to as the Radar Gun). Carefully read this manual to become familiar with all the features of the Radar Gun before starting the operation. Before start check the device and related hardware for physical damage and ensure that the delivery package is complete. If any items are damaged or the delivery package is incomplete, please, contact the Supplier. This manual contains the following signal symbols: WARNING! This information is important for normal operation of software and hardware. NOTE. This is the additional information about system properties and features. This Manual contains the following abbreviations and special terms: Control zone — a limited part of road where the speed measurement and image capturing are taking place. Target — the vehicle that was captured by the radar gun within the control zone. Patrol vehicle — vehicle equipped with the radar gun. Stationary mode — speed measurements without moving the radar gun (from stationary patrol vehicle, in handheld mode or using the tripod). Moving mode — speed measurements from moving patrol vehicle. Clip — a sequence of images recorded during the single recording operation. Stylus — a tool intended for working with touch-screen. FPS — frames per second. The figures and diagrams presented in this manual are intended for demonstration purpose and may slightly differ from actual ones. As the Manufacturer continuously improves and extends the product range, products manufactured at various times may differ slightly. These differences will not affect the metrological parameters or system performance. The Manufacturer reserves the right to make modifications and/or improve the product design, delivery package and software without notification. Operation Manual 5 BINAR Radar Gun With Integrated Video 2 Application “BINAR” Radar Gun with Integrated Video is designed for measuring the speed of motor vehicles and recording the road traffic violations by traffic police officers. “BINAR” is designed as self-contained radar gun with removable handle. The radar gun can measure speeds of oncoming and outgoing targets in stationary and moving modes. The radar gun can be mounted on the patrol vehicle’s front panel using the provided mounting bracket and be powered using the cigarette lighter adapter. The radar gun also has two built-in Li-Ion rechargeable batteries which ensures up to 4 hours of operation. One battery is located in measuring unit and the second battery is located in battery handle. Fig. 1. "BINAR" Radar Gun appearance The radar gun comprises of a speed meter and two video cameras, first camera is fitted with wide-angle lens and the second one — with telephoto lens. The touch-sensitive display (touch screen) and control buttons are located on the front panel. 6 Simicon Ltd. Chapter 3. Technical Parameters and Features During the operation the radar gun displays on the screen the measured speed value, video image of captured vehicle, operation mode and other data. “BINAR” provides video surveillance capabilities and on-the-fly storage of obtained data, as well as ability to archive the data in non-volatile memory (SD memory card) on user’s command. This advanced radar gun benefits from two integrated video cameras which can record the road traffic events simultaneously: the first camera takes wide-angle picture which is useful for event analysis, the second camera takes zoomed picture of the license number of the vehicle. The vehicle speed measured by the radar in combination with two simultaneously captured video streams greatly simplifies the analysis of any road traffic event and adds significant validity to revealed traffic violations. 3 Technical Parameters and Features 3.1 Technical Specifications Parameter Radiation frequency 1 Maximum speed measurement distance Speed measurement range 2 Speed measurement accuracy : — in stationary mode — in moving mode Speed threshold selection step Capabilities of detection the fastest target from 3 the group of targets Maximum distance for license plate visual 4 recognition Video frame rate: — “Work” and “Photo” operating modes — “Video” operating mode Volatile memory capacity for “Work” and “Photo” modes Value 24.15 ± 0.10 GHz 300 m from 20 to 300 km/h ± 1 km/h ± 2 km/h 1 km/h at least 10 km/h speed difference, at least 1:10 radar cross-section ratio up to 150 m 2, 4, 8 FPS 12 FPS 32 seconds (not less than 64/128/256 frames, depending on the frame rate) 1 The radar gun can be effectively used to measure speed of targets located at distances closer or farther than 300 m. 2 Measurement distance doesn’t affect the measurement error. 3 The radar gun can effectively detect the fastest target with 4 km/h speed difference and radar cross-section ratio of 1:100. 4 The special version of “Binar” with improved detection range (up to 200 meters) may be supplied on request. Operation Manual 7 BINAR Radar Gun With Integrated Video Parameter Volatile memory capacity for “Video” mode (typical) 1 Maximum total image archive capacity Battery life time with battery handle External supply voltage Power consumption from external power supply Operating conditions: — ambient air temperature — relative humidity — atmospheric pressure Value at least 55 seconds up to 64,000 images up to 4 hours 11–16 V up to 12 W 0 to +50 С 90 % at 25 С 84.0 to 106.7 kPa. at least 10,000 hours at least 5 years Mean Time Between Failure Average service life Weight: — measuring unit 1.15 kg — removable handle 0.21 kg Overall dimensions: — measuring unit 170 х 135 х 120 mm — removable handle 110 х 100 х 35 mm The radar gun retains its performance after 48 hours storage in the following extreme environmental conditions: temperature between −25 °С and +60 °С, relative humidity of 95 %. The radar gun withstands the influence of radio-frequency electromagnetic 2 fields with frequency range between 80 and 1400 МHz, field intensity of 20 V/m. The radar gun retains performance and withstands electrostatic discharge according to Russian national standard GOST R 50607-93 (class 2) and electromagnetic interference in power circuits according to Russian national standard GOST 28751-90 (1, 2, 3a/3b types of action, class 3). 3.2 Radar Gun Functions and Features Speed measurement and video recording of traffic violations. Fastest target selection. Oncoming and outgoing targets selection. Moving mode and stationary mode, including handheld operation. “Auto” mode – unattended start of image recording in case of overspeeding in radar gun control zone, and automatic saving the recorded clip to SD card. Simultaneous video recording by two wide-angle and telephoto cameras. 1 2 This number includes images captured both by wide-angle and telephoto cameras. Refer to Russian national standard GOST R 41.10-99. 8 Simicon Ltd. Chapter 3. Technical Parameters and Features Reliable detection of violator among other vehicles and approval of violation event using two simultaneously captured video clips. High sensitivity of the cameras makes low-light surveillance (in the twilight) possible. On-line switching between images from two video cameras in recording and view modes. Displaying of target image along with measured speed, date, time, GPS coordinates and current measurement mode. Clear recognition of license plate number at distances of up to 150 meters. Magnification capability for recorded images in view mode. License plate image recovery function. Recording and saving the video clips (e.g. scene of road traffic accident). Automatic self-testing of main operation units at start-up. Storing video clips and relevant data in non-volatile memory (SD card) in encoded format. SD cards of up to 32 GB capacity are supported. PC software for data transfer and data integrity verification (included into delivery set). This software also allows printing the document with set of images for violation event validation. Logging of all operations with data obtained by radar gun. Bluetooth 2.0 wireless connection to external devices. Easy-to-use touch-screen display and IR remote control. Efficient energy saving system (automatically switches to “standby” mode when not in use). Ability to power and recharge the radar gun from the vehicle power supply. Lightweight and ergonomic design. Ability to use the radar gun on tripod using the stock mounting pad. Optional external battery pack (with standard photo tripod screw) provides more than 10 hours of operation. Operation Manual 9 BINAR Radar Gun With Integrated Video 4 Delivery Set The standard radar gun delivery set includes the following items: 1. Measuring unit with rechargeable battery 2. Stylus 3. Removable handle with rechargeable battery 4. Car Power cable 5. SD memory card 6. 220 V power 7. Remote control adapter unit 8. SD card reader 9. Protective cover with shoulder strap 10. Transportation and storage case 11. Mounting bracket with mounting pad for 1 installation in vehicle Optional equipment: o External battery pack — ensures at least 10 hours of battery life time and installation on the tripod. See Appendix for details. o Photo tripod for using the radar gun in stationary state. 1 The mounting pad apart the bracket is used for installation the measuring unit on the photo tripod. 10 Simicon Ltd. Chapter 4. Delivery Set The components listed above, as well as their appearance may vary from the actual delivery set. The most actual list of supplied accessories is located in the log-book. The radar gun can be mounted in most car models and some vans equipped with standard 12 V cigarette lighter socket. It is recommended to use the radar gun in cars fitted with onboard electronic voltage regulator. WARNING! Never operate the radar gun in the car with faulty power supply. Operation Manual 11 BINAR Radar Gun With Integrated Video 5 Radar Gun Design The radar gun consists of two main units: measuring unit (Fig. 2) and battery handle (Fig. 3). 5.1 Measuring unit The radar gun body is made of shockproof plastic material. Bottom view Top view 5 2 3 4 8 1 6 7 Front control panel 9 Faceplate 12 16 17 11 10 13 15 14 1 2 3 4 5 6 7 8 9 – – – – – – – – – external power supply connector USB connector latch slideways speaker stylus service socket (PC interface) “START” button status indicator 10 11 12 13 14 15 16 17 – – – – – – – – “RESET” SD card slot RC infrared sensor touch-screen LCD control panel dielectric lens of speed meter wide-angle color lens telephoto BW lens Fig. 2. Measuring unit design The lower part of the measuring unit (Fig. 2) contains the following items: 12 Simicon Ltd. Chapter 5. Radar Gun Design Power socket (1) for connection to external power supply and recharging of the battery in the measuring unit. Stylus (6) for working with the radar gun with touch-screen display (13). Handle latch (3) PC connection service socket (7). It is used by manufacturer for testing purposes. WARNING! Do not use this service socket to connect the radar gun to any equipment! This may lead to the radar gun failure. “START” button (8) in the upper part of the measuring unit is used to switch the radar gun on and off. Also this button is used to start and stop the speed measurement. The following items are located on the front control panel (Fig. 2): Status indicator (9): o Steady green — the radar gun is on. o Blinks red — battery charging in progress (only if radar gun is off). o Blinks green — battery charging is complete (only if the radar gun is off). “RESET” button (10) — force reset of radar gun. SD card slot (11) — accepts the SD/SDHC card (up to 32 GB) for saving the images and video to archive. Remote Control IR sensor (12) — receives signals from remote control. Touch-screen display (13) — displays the images and other data, allows to control the radar gun with stylus (6). Control panel with hardware buttons (14) — gives access to main menu and settings. The faceplate of the measuring unit contains the dielectric lens of the radar speed meter (15, Fig. 2), the wide-angle lens (16) of color camera, and the telephoto lens (17) of black-and-white camera. Operation Manual 13 BINAR Radar Gun With Integrated Video 5.2 Battery handle 1 6 6 2 3 4 1 – USB connector 2 – trigger 3 – LED flashlight 4 – external power supply connector 5 5 – flashlight on/off switch 6 – latch spring Fig. 3. Handle design The standard delivery set of the radar gun includes the battery handle with internal charger (Fig. 3). The handle is connected to the radar gun using the USB connector (6 on Fig. 2 and 1 on Fig. 3). The handle slides into the measuring unit by the guides (4 on Fig. 2), and is secured with spring-loaded latch. To remove the handle from the radar gun, press the latch (3 on Fig. 2) and slide the handle back by the guides. The trigger button (2) on the handle is used to turn on the radar gun and to start the speed measurement. The power socket (4) on the handle side is used to connect the external power supply for recharging the battery inside the handle. The LED flashlight (3) may be used, for example, to illuminate the documents in night time. Flashlight on/off button (5) is located to the left of the trigger. 14 Simicon Ltd. Chapter 6. General Operating Guidelines 5.3 Protective cover Fig. 4. Protective cover The standard delivery set of the radar gun includes the protective cover with shoulder strap and the following features: The flip cover ensures protection of cameras and speed meter against mechanical damage. Red button on the top transfers the pressure to the START button. The adjustable visor may be installed in 3 possible positions: o protecting the display against mechanical damage when the radar gun is not used (Fig. 4, A); o folded position (B); o covering the display from the sun (C). Storage of 2 spare SD cards in special pockets. Stylus storage (the stylus holder on the measuring unit is not available when the cover is used). 6 General Operating Guidelines Unpack the radar gun and visually examine it to check for damage and seal integrity. During the acceptance procedure check that the delivery set is complete. Before switching on the radar gun, carefully read the operating manual. If the radar gun was exposed to a temperature below 0 °С, leave it in place with normal working conditions for at least 1 hour. Operation Manual 15 BINAR Radar Gun With Integrated Video Avoid damage to the radar gun, display and video camera lenses. Both camera lenses must be always clean. Do not clean the camera lens with coarse cloth or material containing solid particles. Keep the radar gun away from water and atmospheric precipitations. 7 Safety Precautions WARNING! To ensure safe operation, carefully observe all precautions. Do not use the radar gun if this may distract the vehicle driver and impair safe driving. Do not disassemble the electronic components of the radar gun. Do not use the radar gun in areas with high humidity and avoid touching it with wet hands. If the water enters into the radar gun, immediately disconnect it from the power supply and stop using it. Contact the authorized service center. Do not use the damaged equipment, including broken cables. Do not use any solvents or flammable fluids to clean radar gun. This may cause the radar gun body breakdown. Always disconnect the radar gun from power supply when it is not in use. When disconnecting the power cable, pull by the cable plug, not by the cable itself. Do not damage, twist or modify the cables. Avoid bending the cables at narrow angles or squeezing them. Protect the touch-screen display from mechanical damage. The radar gun generates UHF electromagnetic radiation. Therefore, never point the speed meter to a person at short distance. The safe distance is at least 2 meters. 16 Simicon Ltd. Chapter 8. Interface and Controls 8 Interface and Controls 8.1 Radar Gun Interface Battery levels Free archive space Radar mode indicator Current camera Speed metering distance “DAY/DARK” camera mode On-screen buttons Aiming frame Time and date Current operation mode Current direction Fig. 5. Radar Gun Interface The touch-screen display is the main control unit of the radar gun. It displays the images from cameras, all necessary information and recorded data. For example of display appearance, see Fig. 5. The current operating mode of radar gun is always displayed in the upper left corner of the screen (see chapter 9.5.1). The radar speed meter can work in two modes. Each mode is indicated on the screen as follows: — stationary mode. Use it for all kinds of speed measurement with still radar gun: for handheld or tripod operation and inside the parked patrol vehicle. — moving mode. Use it for speed measurements from the moving patrol vehicle. To change the speed meter operation mode (stationary/moving), use the stylus to touch the mode symbol (also you may use the Main menu or Remote Control). To change the target direction, touch the direction name on the screen. During the speed measurement the special color dots appear on the bar in upper part of the screen. These dots indicate the number of images stored in volatile memory. Operation Manual 17 BINAR Radar Gun With Integrated Video In all operation modes (except “PHОТО” and “VIDEO” modes) the current speed limit displayed in lower right corner of the screen. The speed limit is set in main menu (see chapter 9.5.3). In “WORK” and “VIEW” modes the speed indicator appears in lower left corner of the screen. It shows the measured target speed with specific background color. The background color of speed indicator and color of the dots allow the user to quickly determine the measured speed: o Red — measured speed equals or exceeds the speed limit. o Yellow — measured speed is below the speed limit (by 0—10 km/h). o Green — measured speed is well below the speed limit (by more than 10 km/h). o Blue — no target available or the speed is not measured. The free archive space indicator, which is located in the upper right corner of the screen, shows the remaining number of images that can be recorded on SD card. It depends on free space available on SD card and size of single image. If SD card is not identified (cannot save images to archive), the free space indicator shows SD in red. If SD card is not installed, the free archive space indicator is disabled. The upper right corner of the screen shows the camera name which is currently used to stream the image: CAM1 refers to wide-angle color camera and CAM2 refers to telephoto black-and-white camera. The aiming frame in center of the screen shows the field of view for telephoto camera (i.e. the actual “CAM2” image size). The toolbar on the right side of the screen contains several on-screen buttons. The available buttons and functions depend on current operating mode of radar gun (see chapter 8.2.1). 8.2 Radar Gun Controls 8.2.1 Using the touch screen and Remote Control The radar gun can be operated using the touch-screen buttons or remote control (Fig. 6). To ensure good IR signal strength, direct the remote control at the IR sensor (4 on Fig. 7) located on the control panel. The Remote Control is powered by two AA batteries. Before using the remote control, insert the batteries into the battery compartment of the remote control. The table below contains description of radar gun and remote control buttons. 18 Simicon Ltd. Fig. 6 Chapter 8. Interface and Controls On-screen button Remote control button START START MODE (2) Description Start the speed measurement and image capturing (in “WORK” and “AUTO” modes) Start image capturing (in “PHOTO” and “VIDEO” modes) Stop the speed measurement and image capturing (in “WORK” and “AUTO” modes) Stop image capturing (in “PHOTO” and “VIDEO” modes) Select the radar speed meter operation mode: — Stationary mode — Moving mode Select camera preset: — “day”, — “dark” DIR. (3) PHOTO (9) Go to “PHOTO” mode to capture snapshots 1 Go to “TV” mode TV 1 VIEW Go to thumbnail mode “VIEW” ARCH Go to thumbnail mode “ARCH” PLACE (7) Go to location input page. Available in “TV” mode only. ■ OK Confirm data input or select the item - Cancel data input and leave the page VIDEO (8) SAVE DEL 1 Select target movement direction Go to “VIDEO” mode View image clip in “VIEW” and “ARCH” modes Play recorded video in “VIDEO” mode Save full clip or clip fragment to archive Save video to archive Delete the entire clip associated with selected image from archive Delete (completely) a location name in the location input page, or the protocol number Delete the selected video clip Not available in automatic capture mode Operation Manual 19 BINAR Radar Gun With Integrated Video On-screen button Remote control button DEL Description Confirm deleting from archive. This button appears after touching button. Page scrolling in “VIEW” and “ARCH” modes START ARCH - - - - ■ OK - ■ OK - RESET START button on the top ON/OFF 20 Scroll to previous or next image in “VIEW” and “ARCH” modes (within the current clip) Record a video clip. This button is available only in “VIDEO” mode. Open list of video clips. This button is available only in “VIDEO” mode. Go to next frame in «VIEW» and «ARCH» modes Move selection left Select menu sub-item Go to previous frame in «VIEW» and «ARCH» modes Move selection right Select menu sub-item Move selection up Increase the measurement range Move selection down Decrease the measurement range Switch between wide-angle and telephoto cameras View full-screen image in thumbnail view mode. Change the magnification of selected area Confirm action Adjust the contrast and color of the selected image area Restart the radar gun (hold the button for at least 2 seconds) Switch off the radar gun (hold the button for at least 2 seconds) Simicon Ltd. Chapter 9. Basic Operations and Setup 8.2.2 Control panel buttons 2 1 3 4 (c) SIMICON (c) MasterVideo 1 — Status indicator 2 — RESET pinhole button 3 — SD card slot 4 — Remote Control IR sensor RC_MOB v0.50.6, HW v1.4, JP (c)0.9, MV ИСКРА ДА v3.27 OK Fig. 7. Control panel The hardware buttons are located on the control panel of the radar gun (Fig. 7). These buttons have the following functions: Button Any button except ОК Function Open main menu Decrease parameter value or move cursor to the left Move cursor downwards Exit menu, confirm the selected parameter, disable all on-screen buttons in "TV" mode Move cursor upwards Increase parameter value or move cursor to the right OK 9 Basic Operations and Setup 9.1 Preparation before Work Before using the radar gun check that the batteries are completely charged. If necessary, charge the batteries in measuring unit and handle (see chapter 9.2). Ensure that the SD card is installed in the slot (3 on Fig. 7) on the front panel. If not, insert the SD card as specified in chapter 9.3. WARNING! Format the SD card using the “Clear archive” operation in main menu (see chapter 9.5.4) before using it for the first time after purchase. For using the radar gun in patrol vehicle, install the mounting bracket on the front panel inside the car and install the measuring unit (without handle) on the bracket. Connect the radar gun to the cigarette lighter outlet using the power cable. For using the radar gun in hand-held mode, mount the handle on the measuring unit. 21 Operation Manual BINAR Radar Gun With Integrated Video 9.2 Battery Charging The radar gun receives the power supply from two embedded lithium-ion rechargeable batteries (1.8 A-h each). One battery is embedded in the radar gun’s measuring unit, the other is in the handle. To check the battery charge level, switch on the radar gun as specified in chapter 9.4. 9.2.1 Battery level indicators Handle battery level H Main battery level B Charging indicator H B H B Fig. 8. Battery level indicators The battery level status is shown by two indicators in the upper area of the screen marked by “H” and “B” letters which corresponds to handle and main (measuring unit) batteries respectively. The number of segments in each indicator shows the charge level of this battery. While discharging, the indicators change their color from green to yellow, and then to red, which means that the battery is almost empty. If battery level is not enough for normal operation, the radar gun may be still switched on, but the speed cannot be measured. When both batteries are completely discharged, LOW BATTERY message appears, and measuring unit automatically switches off. The battery level will be shown only after the first speed measurement if the radar gun was just switched on. The battery life time is approximately 4 hours (in dependence on operating conditions). Also the battery life time may be reduced if ambient temperature is low. If the battery is exhausted with you may connect the spare handle with fresh battery to continue operation. In this case, the main battery may remain completely discharged. When the battery handle is disconnected from the measuring unit, the “H” indicator will be crossed and colored in grey. 9.2.2 Battery charging The charging voltage applied to the radar gun must be between 11 and 16 V. You may use either the 220 V power adapter or the power cable with cigarette lighter adapter for charging from the car power supply. During the battery charging the air temperature should be between 0 °С and 40 °С. 22 Simicon Ltd. Chapter 9. Basic Operations and Setup To charge both batteries simultaneously, connect the power cable to the socket on the handle (4 on Fig. 3) and then connect it to the car cigarette lighter power outlet or 220 V power outlet (depending on which adapter was used). A green diamond indicates that the external power supply is connected. It takes 3 to 5 hours to charge the batteries completely. During the charging the LED on the handle (3 on Fig. 3) is blinking white and the measuring unit status indicator (1 on Fig. 7) is blinking red. When charging is complete, the LED on the handle goes off, and the measuring unit status indicator becomes green. You can control the charging process on the display if the radar gun is switched on. The batteries in handle and measuring unit can be charged separately. To charge the battery in measuring unit, connect the power cable to the socket in the bottom of the measuring unit (1 on Fig. 2). In this case the battery in handle will not be charged. The batteries can be recharged during the radar gun operation using the car onboard power supply. 9.3 SD Card Installation Fig. 9. SD card installation Before using the radar gun check that the SD card (included to delivery set or purchased separately, up to 32 GB) is installed in the appropriate slot (3 on Fig. 7) located on the control panel of the radar gun. WARNING! If using the SD card for the first time after purchase, make sure to authorize it (see chapter 9.4.2) and format it with “Clear archive” operation (see chapter 9.5.4). It is recommended to install or remove the SD card with the radar gun being turned off. When installing the SD card, check that the label faces upwards. Insert the SD card into the slot and slightly press it until it clicks (Fig. 9). To remove the SD card, slightly press it until it clicks and then pull it from the slot. Operation Manual 23 BINAR Radar Gun With Integrated Video 9.4 Switching On the Radar Gun Before switching on the radar gun with battery handle, ensure that it is securely connected to the measuring unit. To switch on the radar gun, press and hold the trigger on the handle for at least 2 seconds or alternatively shortly press the START button on the top of the measuring unit. Release the trigger after you hear a short audio signal. When using the radar gun with connected handle, it is advised to switch on the radar gun by pressing the trigger. The START button switches on only the measuring unit and you will also need to switch on the handle by pressing the trigger. When the radar gun is switched on, the status indicator turns green and the splash screen displays the firmware version number and its release date (Fig. 7). After that the radar gun automatically performs the self-testing procedure. After switching on and completion of the self-testing procedure the radar gun goes to “TV” mode. 9.4.1 Automatic self-testing If no hardware errors were detected during the self-testing procedure, the following message will be shown: Self-testing completed. If any errors were detected, the error report will be shown: HARDWARE error Color camera : OK B&W camera : OK Radar : OK SD card : NOT AUTH Fig. 10. Error report This report shows the status of SD card and major units of the radar gun. The major unit that didn’t pass the self-test will be highlighted with red color and marked FAILED. In case of any error switch off the radar gun by pressing the START button on the top. Also the radar gun will switch off automatically if it remains in idle for longer than 5 minutes. WARNING! Do not use the radar gun if any major units have failed the self-test. Contact the authorized service center. The SD card test may display the following problems: ABSENT — the memory card wasn’t installed into the slot (see Fig. 9). Install the card according to chapter 9.3. 24 Simicon Ltd. Chapter 9. Basic Operations and Setup NOT AUTH — the memory card is broken or it wasn’t authorized for using in this radar gun. Replace it with working SD card or authorize the card in this radar gun. 9.4.2 SD card authorization This process allows the radar gun to be used only with limited number (up to 8 pcs.) of memory cards, and any unauthorized card will be rejected. To authorize the SD card for using in this radar gun complete the following steps: 1. Install the SD card into the slot (see Fig. 9). 2. Switch on the radar gun and during the splash screen demonstration (Fig. 7) quickly press in sequence Remote Control buttons “2” and “8”. 1 The list of authorized SD cards will be displayed : Fig. 11. Card authorization menu 3. To authorize the current SD card press SAVE button on Remote Control. Then the current SD card will be added to the list (Fig. 12). This list is sorted by authorization date and it contains the serial numbers of authorized SD cards. Fig. 12. List of authorized cards It is possible to add the cards to the list, but their removal is not available to the user — only the administrator with special SD card can remove the cards from the list. 1 WARNING! The SD card shall be formatted prior to the first use after purchasing (see chapter 9.5.4). Where XXXXXXXX — the serial number of currently installed SD card. Operation Manual 25 BINAR Radar Gun With Integrated Video 9.4.3 Energy saving The radar gun supports the energy saving function — if the radar gun remains in idle for longer than 5 minutes, it goes to “standby” mode and switches off the display. To activate the radar gun again, press the handle trigger, the START button on the top or touch the screen with stylus. The radar gun automatically switches off if there weren’t any user actions over a period of 25 minutes (including 20 minutes in “standby” mode). 9.5 Setup before Operation Before starting the operation, select the operation mode, then specify the speed limit and target direction of travel. 9.5.1 Operation modes Mode indicator Description “TV” mode TV Live video from wide-angle camera is on the screen. Use this mode to aim on the target or during the radar gun setup. 1 AUTO WORK PHOTO “Auto” mode Live video from wide-angle camera is on the screen, the speed of the fastest target is being measured. If any target in the controlled area exceeds the speed threshold, the clip is automatically saved to archive on SD-card along with date and time. 2 “Work” mode The speed meter is performing continuous speed measurement. The screen displays the video image, date and time of speed measurement. The clips received from both cameras and all service data are stored in volatile memory. 2 “Photo” mode The screen displays the video image, date and time. The speed meter is disabled. The images are recorded to volatile memory. “View” mode 2 This mode is used to view the images in volatile memory. This mode supports thumbnail view and full-screen view. You can save the selected clip images to archive on SD card, and specify the protocol number or other comments. VIEW VIEW 1 2 Thumbnail image view Full-screen slide show view Optional feature. Not available in automatic capture mode 26 Simicon Ltd. Chapter 9. Basic Operations and Setup Mode indicator VIEW VIEW+ Description Full-screen image view Full-screen magnified image view “Arch” mode This mode is used to view the image clips in archive on SD card ARCH ARCH ARCH ARCH+ Thumbnail image view Full-screen slide show view Single image view Full-screen magnified image view “Video” mode In this mode the screen displays video image with date and time. The speed meter is disabled. The radar gun records the video to volatile memory as a continuous movie clip. Then you can save it to the memory card. In this mode you can also view the saved video clip. VIDEO 9.5.2 Quick adjustment In “TV” mode you can quickly change the basic radar gun settings using the screen buttons or Remote Control buttons: 1. Set the radar gun operation mode Touch on-screen button or MODE remote control button: — stationary mode is enabled. — moving mode is enabled. 2. Select the camera preset The camera has two presets which shall be used depending on the lighting conditions to achieve the optimum picture quality. Touch on-screen button if you are working in daylight. Touch if you are working in twilight. icon on screen means that the camera is prepared for twilight operation (and vice versa). You may also cycle between camera presets by clicking “6” button on Remote Control. WARNING! The radar gun is not designed for operation in night hours. 3. Change the target direction of travel Touch on-screen button or DIR button on Remote Control. The selected direction is displayed in the lower part of the screen. 4. Select the measurement distance You can choose from 3 distances, each corresponding to the radar sensitivity preset: Operation Manual 27 BINAR Radar Gun With Integrated Video o > — ”minimum” — approximately up to 300 m. o >> — “average” — approximately up to 400 m. o >>> — “maximum” — approximately up to 500 m. Also you may set the distance using buttons on Remote Control or by touching the distance indicator on the top of the screen (the parameter will change cyclically). The distance parameter improves the radar performance and it doesn’t limit the possible working distance, i.e. you can also make measurements at longer or shorter distances. The specified distance values are valid for good weather conditions with direct visibility. Actual distance depends on numerous factors such as target size (radar cross-section), precipitation, interference level, aiming accuracy etc. The speed measurement accuracy does not depend on distance to target. Distance selection tips: o Select the minimum distance value when using the radar gun in moving mode at outgoing targets. o Select average or minimum distance value when using the radar gun in stationary mode to monitor the average or intensive traffic. o Select the maximum distance only when using the radar gun to measure single oncoming targets. 9.5.3 Main menu Fig. 13. Main menu The speed limit and other parameters can be set in main menu. To open the main menu switch radar gun to “TV” mode and press any hardware button on control panel or MENU Remote Control button. The main menu interface is shown in Fig. 13. 28 Simicon Ltd. Chapter 9. Basic Operations and Setup Use the control panel, Remote Control or screen buttons to navigate the menu and make adjustments: Control panel Remote Control Function button or screen button Move the cursor in desired direction Accept the changes to the selected OK OK 1 parameter — << Decrease the parameter value — >> Increase the parameter value — TV Exit from menu to "TV" mode The active parameter and its value are indicated on the screen with bright and bold font. Here are the parameters available for adjustment: Measurement limit — select the speed limit for measurements. Radar Mode — select the speed meter working mode: stationary or moving. Radar direction — select the radar gun heading (in moving mode only): o FRONT — targets in front of police vehicle, o REAR — targets behind the police vehicle. Target direction — select the target direction of travel: o ONCOMING — only oncoming targets, o OUTGOING — only outgoing targets, o ALL — service mode, for manufacturer use only. Capture speed — select image recording speed: o 2, 4, 8 — 2, 4 and 8 frames per second respectively. The higher the recording rate, the more complex traffic situation may be captured at the expense of higher memory usage. o Recommendations on recording rate selection: 2 frames per second — for monitoring the road traffic with maximum speed limit of 60 km/h. This recording rate is sufficient for detecting most traffic violations in the city. 4 frames per second — for monitoring the road traffic with maximum speed limit speed of 90 km/h. It is recommended as basic recording mode. 8 frames per second — for monitoring the road traffic with maximum speed limit of 110 km/h. Clear archive — delete all data from the SD card (refer to chapter 9.5.4). In this line the approximate number of remaining frames that can be stored on SD card is also displayed. Rot. sensor — select the rotation sensor mode (see chapter 9.5.6 for details): 1 If there weren’t any changes, pressing OK will return you to "TV" mode. Operation Manual 29 BINAR Radar Gun With Integrated Video o NO — rotation sensor is off, o YES — rotation sensor is on, o SLEEP — the radar gun goes to standby mode when hanged upside down. Rotate screen —select YES to rotate the screen image and user interface by 180 degrees. After switching off the radar gun the screen returns to normal position. Disable sound — disable or enable the beeping sound during the speed measurement (see chapter 10.2.3 for details). Overspeed alarm and Remote Control confirmation sounds cannot be muted. Enter offence # — select YES if you need to enter the violation document number each time after the speed measurement. Autowrite (optional feature) — set the automatic capture mode: o NO — automatic capture mode is off. o 2, 5, 10, 20 — automatic capture mode is on, the recorded clips will contain the fact of overspeeding and the specified amount of seconds after that. Date — set the current date (DD/MM/YYYY). Time — set the current time. To close the main menu, press OK hardware button on front panel or OK Remote Control button. Then all changes will be saved automatically. Most settings can be changed with Remote Control or screen buttons without using the main menu (see chapter 9.5.2). 9.5.4 Clear archive on SD card WARNING! This operation deletes all data from SD card. You can use this function if the radar gun cannot recognize the freshly purchased SD card or for quick deletion of all data from the archive (only if all data on the SD card is already processed). Do not clear archive if it contains necessary unprocessed data. Instead of that, manually delete the unnecessary data as specified in chapter 11.2.7. Make sure that the SD card is installed in its slot (3 on Fig. 7). Open main menu (see chapter 9.5.3), choose the CLEAR ARCHIVE item, select YES and then confirm selection by pressing the handle trigger, START button on the top or START Remote Control button. SD card will be formatted, all data will be deleted. This procedure does not affect the parameters and settings of the radar gun. 9.5.5 Entering location When using the radar gun in stationary mode you may specify the location address name for each recorded image. 30 Simicon Ltd. Chapter 9. Basic Operations and Setup This function is disabled by default. If necessary, enable it before starting the image recording. Go to “TV” mode and touch screen button or press PLACE Remote Control button to open the location input window. This window contains the text field, virtual keyboard and the toolbar (Fig. 14). The virtual keyboard has the following specific buttons: o — delete previous character. o — space. o — change between lower and upper letter case. Fig. 14. Entering the location On-screen buttons have the following functions: (or OK Remote Control button) — confirm the entered location and go to "TV" mode. The entered location will be assigned to all images recorded after that. The entered location is saved to the radar gun’s memory and remains there after power-off or touching button. — cancel assigning location to images and go to "TV" mode. The location name will not be assigned to all images recorded after that. (or DEL Remote Control button) — delete all characters in location field. — open Bluetooth configuration menu to set up the connection to external GPS receiver. In that case user doesn’t have to input the location manually — the radar gun gets the GPS coordinates for recorded images automatically. 9.5.6 Orientation control feature The radar gun has several specific positions which are treated by rotation sensor. To use the orientation control feature select ON value in Rot. sensor main menu item (see chapter 9.5.3). This feature works in Stationary mode only. 31 Operation Manual BINAR Radar Gun With Integrated Video 1. Standby mode Putting the radar gun into any of these positions will automatically switch the device into “standby” mode, where the screen, cameras and radar are switched off to save the battery power. After putting the radar gun into the normal working position it will turn on the screen and switch to “TV” mode automatically. 2. Switch to VIEW mode During the handheld operation in “WORK” or “PHOTO” modes you can tilt the radar gun by approx. 50° angle and it will switch to “VIEW” mode automatically. This feature doesn’t work in “AUTO” mode. 3. Screen rotation Putting the gun in this position will turn the screen image and user interface through 180 degrees (similar to Rotate screen function in main menu). If Rot. sensor item in main menu is set to SLEEP, then in this position the radar gun will go to “standby” mode. 9.6 Reset In cases of unforeseen failure you may reset the radar gun. To do this press RESET Remote Control button for 2 seconds. If it does not work, press RESET pinhole button on the control panel (2 on Fig. 7) using the sharp object. After reset all data in volatile memory will be lost. Reset does not affect the archived data on SD card. After that it is recommended to check the parameter values in main menu (see chapter 9.5.3). In case of repeated radar gun failures, please contact the authorized service center. 9.7 Switching Off the Radar Gun To switch off the radar gun, press and hold the START button on the top of the gun or ON/OFF Remote Control button for 2–3 seconds. 32 Simicon Ltd. Chapter 10. Data Recording 10 Data Recording 10.1 Observing the Traffic Situation 10.1.1 “ТV” mode Fig. 15. "TV" mode interface “TV” mode is used to setup the radar gun, to aim it at the desired road section or to observe the road traffic situation. In this mode the speed meter is disabled. The radar gun switches on in “TV” mode. Also the radar gun can be switched to “TV” mode from other modes by touching the screen button or pressing TV Remote Control button. When this mode is active, TV symbol appears in the upper left corner of the screen. In this mode the screen shows live video image. The images are not recorded to the memory, so they cannot be viewed later. Current date and time as well as the target direction are displayed in lower part of the screen. The green aiming frame in the center of the screen indicates the actual image limits that will be recorded by telephoto camera. To switch between cameras, touch in the center of the screen with stylus or press OK Remote Control button. If working in stationary mode aim the radar gun at the desired road section, the targets at 100–200 meters shall be located within the aiming frame. To start the speed measuring and image recording to volatile memory press either the trigger, screen button, START Remote Control button or START button on the top of the radar gun. Operation Manual 33 BINAR Radar Gun With Integrated Video 10.2 Speed Measurements WARNING! In “WORK”, “PHOTO” and “VIEW” modes the images are stored only in volatile memory. Therefore, after switching off, reset (by RESET button) or power failure these images will be lost. Save the necessary clips to archive (see chapter ) to prevent that. The volatile memory can store up to 32 seconds of images. All subsequent images will continuously overwrite the oldest recorded images. 10.2.1 Wide-angle and telephoto camera images In all recording modes the images from both cameras are recorded simultaneously. Thus you can obtain the general view of road traffic situation with wide-angle camera and determine the violator and identify its license number with telephoto camera. “CAM1” wide-angle camera image “CAM2” telephoto camera image Fig. 16. Wide-angle and telephoto camera images 34 If the distance to target is less than 30 meters, the telephoto camera will produce a blurry image. Simicon Ltd. Chapter 10. Data Recording 10.2.2 Automatic capture mode (optional feature) Fig. 17. “TV” screen when the automatic capture is enabled WARNING! The following modes are not available when the automatic capture is enabled: “Work”, “Photo”, “View”. When the radar gun is in automatic mode, it’s impossible to process the speeding violations immediately on the field. All processing is performed later on PC. Deleting the data from archive is disabled. When the automatic capture is enabled, the “Start” button on “TV” screen (see Fig. 17) changes to “Auto”, also the “Photo” and “View” buttons become inactive. In this mode the speed of the fastest visible target is being continuously measured. If any target in the controlled area exceeds the speed threshold (see chapter 9.5.3), the clip that shows the fact of overspeeding is automatically saved to archive on SD-card along with date and time. The clip is being recorded while the target exceeds the speed limit, and also within 1 second before that and within the specified amount of seconds after that. To start the automatic capturing point the radar gun on the traffic and touch button on “TV” screen. Also you may start the measurements using the handle trigger, “Start” button on Remote Control, or on the top of the gun body. The further radar gun operation doesn’t require the user intervention. It’s recommended to install the radar gun on the car bracket or tripod as close as possible to the road border. Point it on the traffic in the way that ensures passing the license plates through the aiming frame at distances of 100-150 meters. Touch the aiming frame to ensure that the license plates are visible and recognizable on telephoto camera image. Operation Manual 35 BINAR Radar Gun With Integrated Video To stop the automatic capturing press either the handle trigger, or Start button on Remote Control or top of radar gun, or touch Stop button on the screen. 10.2.3 “WORK” mode Fig. 18. “WORK” mode interface To start the speed measuring and image recording to volatile memory, press trigger button, START button on the top of the gun, screen button or START Remote Control button. Then the radar gun immediately begins to measure the speeds of oncoming or outgoing targets (depending on selected settings). Along with image from camera (Fig. 18) the display shows the target direction and measured speed in lower left corner. In moving mode the display also shows the patrol vehicle speed. Every time the image is saved, the colored dot appears on the top of the screen. The number of these dots corresponds to number of images recorded to volatile memory. The speed indicator displays the recorded speed in the bottom of the screen. The colors of the speed indicator and the dots in the top of the screen correspond to the measured speed range as specified below: o Red — the speed equals or exceeds the specified speed limit. o Yellow — the speed is below the limit by less than 10 km/h. o Green — the speed is well below the limit by more than 10 km/h. o Blue — no target available or the speed is not measured. During the speed measurements the radar gun beeps (one beep per second). You can disable this in main menu (see chapter 9.5.3). When the target exceeding the speed limit is detected, the radar gun begins beeping more quickly (3 beeps per second). If the radar gun also detects the second violator moving with speed exceeding the first one by more than 10 km/h, the radar gun produces 2 momentary beeps. 36 Simicon Ltd. Chapter 10. Data Recording The overspeed audio alarm is always enabled, even if the speed measuring sound is disabled in main menu. Once the radar gun has detected the violator (audio alarm sounds and the display shows the red speed indicator), do not stop speed measuring and keep holding the violator within the aiming frame until you have recorded enough images to validate the fact of traffic violation. During the speed measurement the images are recorded simultaneously from the wide-angle camera and the telephoto camera, which simplifies the analysis of the road traffic situation. The aiming frame indicates the actual size of image captured by telephoto camera. During the speed measurements try to keep the license number in the center of the aiming frame. To switch between cameras, touch the display center with stylus or press OK Remote Control button. To perform image recording without speed measuring (“PHOTO” mode) touch screen button or press PHOTO Remote Control button. During the speed measurements you can change the target movement direction by touching screen button or pressing DIR Remote Control button. The volatile memory contains the latest 32 seconds of recorded images in cycled buffer. In dependence on recording speed (as specified in main menu, see chapter 9.5.3) that equals to 64, 128 or 256 frames. To stop the speed measurement, press either the trigger button, or START button on the top of the gun (hold it depressed for a while), or START Remote Control button, or touch screen button. Then the radar gun automatically goes to thumbnail view mode and VIEW icon appears in the upper left corner of the screen. 10.2.4 Using the radar gun in Moving mode V2 Vp V1 V p – patrol vehicle speed V 1 – oncoming target speed V 2 – outgoing target speed Fig. 19. Speed measurement in moving mode In moving mode the radar gun measures both target speed and patrol vehicle speed based on the signal reflection from the road. Operation Manual 37 BINAR Radar Gun With Integrated Video WARNING! When using the radar gun in moving mode observe the following requirements (see Fig. 19): o Keep the patrol vehicle speed at least 30 km/h (Vp ≥ 30 km/h) for correct radar operation. o The speed difference between patrol vehicle and target shall be at least 4 km/h: ( V2 VP ≥ 4 km/h). o The patrol vehicle shall move smoothly without rapid accelerations or decelerations (the speed changes shall not exceed ± 6 km/h per second). In “WORK” mode the radar gun continuously measures the patrol vehicle speed and checks for rapid accelerations/decelerations. If the radar gun fails to measure the patrol vehicle speed from the first attempt for any reason, it automatically makes more attempts. As soon as the patrol speed is defined, the radar gun begins measurements of the target speed. WARNING! The radar gun can measure the target speed only after the patrol vehicle speed has been determined. If the radar fails to determine the patrol vehicle speed after 10 attempts, the further attempts are cancelled. If the radar gun fails to determine the patrol speed, three zeros (000) on blue background appear in the lower left corner of the display. The difficulties may arise in the following situations: o patrol speed is below 30 km/h, o rapid accelerations or decelerations, o sharp turning, o movement in heavy traffic or when large cars are close to the patrol vehicle. In this case the radar gun continues making attempts to measure the patrol speed until the road traffic situation improves. 38 Simicon Ltd. Chapter 10. Data Recording 10.2.5 Limit by law feature Fig. 20. TV screen with enabled “Limit by law” feature The radar gun may have the optional “Limit by law” feature, which improves the look of printed violation documents. In this case the printed documents will contain the actual speed limit assigned by law, instead of the speed recording threshold that was set by Police officer. Fig. 21. Speed limit adjustment The TV screen with enabled “Limit by law” feature is presented on Fig. 20. In the upper left corner the additional button appears. The numeric value varies and represents the current law-defined speed limit, as it will be recorded to the data stream. If you wish to change the speed limits, click on the adjustment menu will appear (see Fig. 21). Operation Manual button. The speed limit 39 BINAR Radar Gun With Integrated Video This menu includes the following items: o Measurement limit — the speed threshold that was defined by Police officer. See chapter 10.2.3 for details on this value. It also may be adjusted via Main menu (see chapter 9.5.3). o Limit by law — the value represents the actual speed limit that is in effect on this road. This value will be presented in printed violation documents. Use the buttons on the radar gun’s control panel or Remote Control buttons to change the values. Click OK to apply the changes. 10.3 Photo Mode Fig. 22. “PHOTO” mode interface The “PHОТО” mode is similar to “WORK” mode, but the radar gun doesn’t measure speed, it only records images to volatile memory with current date and time. The speed indicator in the lower left corner is absent in this mode (Fig. 22). The radar gun can be switched to “PHОТО” from “ТV” mode by touching the screen button or pressing PHОТО Remote Control button. Then the radar gun begins recording the images to volatile memory. The dots corresponding to recorded images are in blue color. In “PHOTO” mode the image recording process is accompanied by audio alarm (1 beep per second). You can disable this feature in main menu (see chapter 9.5.3). To stop the work in “PHOTO” mode, press either the trigger button, or START button on the top of the gun, or PHOTO or START Remote Control buttons, or touch screen button. Then the radar gun switches to “VIEW” mode. 40 Simicon Ltd. Chapter 10. Data Recording 10.4 Video Mode 10.4.1 Video recording Recording rate Aiming frame Time and date Fig. 23. “VIDEO” mode interface The Video mode is intended for recording the road events and the violations which can be proofed by video clip, such as driving on the wrong side of the road, solid line crossing, red light running etc. You can also play the video clips from the volatile memory or save them to SD card. Touch screen button or press Video Remote Control button to go to “VIDEO” mode from “ТV” mode. Then VIDEO icon appears in the upper left corner of the screen. In this mode the screen displays image from wide-angle camera, date and time (Fig. 23) and recording rate. The speed meter is disabled. To start the video clip recording touch button or press the handle trigger. During the recording the RECORD icon appears in the upper left corner of the screen (see Fig. 24). The current length of recorded video clip is displayed on the top of the screen, and current date and time are displayed in the bottom. The video streams are captured by both cameras simultaneously at 12 FPS and stored to volatile memory as a single video file. Operation Manual 41 BINAR Radar Gun With Integrated Video Recording time, sec Aim frame Time and date Fig. 24. Video recording If necessary, you can touch to save the recorded video clip to the memory card. To open the list of available video files, touch below). Recording duration, sec Current frame number within the clip Aiming frame Time and date Fig. 25. Paused recording 42 button (see Simicon Ltd. Chapter 10. Data Recording To return to “ТV” mode touch Control button. screen button or press ТV Remote To stop the recording, touch button or the handle trigger. Once the recording is stopped, PAUSE icon appears in the upper left corner of the screen (Fig. 25). The current date and time are displayed in the bottom, and the duration of recorded video clip (in seconds), as well as recording rate and sequence number of the current frame in the clip are displayed in the top. 10.4.2 Playing and saving the video clips To play the recorded video clip, touch button. To view the clip imageby-image, use two-segment screen button or Remote Control buttons. To jump by 10 images forward or backward, use screen buttons (or Remote Control buttons). The video clip playback is provided only for wide-angle camera image. The telephoto image is available only in paused state. Fig. 26. Telephoto image in pause To examine the selected image recorded by the telephoto camera, touch inside the aiming frame with stylus when viewing the clip image-by-image (Fig. 26). To save the recorded video clip, touch screen button or SAVE Remote Control button. The saving process is indicated in the upper left corner of the screen. Operation Manual 43 BINAR Radar Gun With Integrated Video Fig. 27. List of video clips Touch to view the list of video clips on SD card (Fig. 27). For each video file its duration (in seconds), creation time and date are specified. To play the video file, select it using either the stylus, or screen buttons, or Remote Control buttons and touch screen button. The video file will be loaded, then the radar gun will switch to pause mode (Fig. 25, see description above). To return to “VIDEO” mode, touch screen button. To delete the video file from SD card, select it and touch screen button or DEL Remote Control button. Then you will be requested to confirm this action. If you touch screen button or press DEL Remote Control button again, this video file will be deleted. 11 Recorded Data Review 11.1 Viewing the Images in Volatile Memory 11.1.1 Basic operation principle You can view, zoom-in, adjust and archive the images stored in volatile memory. When you stop the speed measurement in “WORK” mode or image recording in “PHOTO” mode, the radar gun automatically switches to “VIEW” mode. To go to the image view mode from “TV” or “ARCH” modes touch screen button or press VIEW Remote Control button. The View mode employs the following possible picture representations: o Thumbnail view — 9 image thumbnails. o Full-screen slide show view. 44 Simicon Ltd. Chapter 11. Recorded Data Review o Full-screen still image view (for wide-angle or telephoto camera images). o Full-screen magnified image view (for telephoto camera images). When the radar gun switches to View mode, the thumbnail view “VIEW” is activated. The neighboring clips are separated by red vertical lines. or on the selected image VIEW Thumbnail view CAM 1 Slide show VIEW CAM 1 VIEW CAM 2 VIEW + CAM 2 Still image (red aiming frame appears) Switching to telephoto camera Selecting the image area for detailed analysis Detailed analysis of selected image area — touch the center of the screen with stylus Fig. 28. Image view modes Operation Manual 45 BINAR Radar Gun With Integrated Video In thumbnail view “VIEW” you may select specific image of clip and touch button. The radar gun goes to full-screen slide show mode “VIEW ” and runs the respective clip in slow motion in forward and backward directions. You can pause this process for 5 seconds by touching the screen with stylus. The wide-angle camera image at which the clip was stopped is displayed. If you touch the center of the screen with stylus again, the respective image from telephoto camera appears, and the red frame allows magnifying the specific image area. Use the red arrows to move this frame to required image area. Then touch the screen inside the frame with stylus (or press ОК Remote Control button). The selected image area will be magnified by 200%. Now you can scroll through the magnified image using the red arrows. If you touch the screen with stylus, or press ОК Remote Control button, the thumbnail image view will resume. For sequence of actions, refer to Fig. 28. Additionally, in any full-screen view mode you can scroll through images within the selected clip using screen button or and Remote Control buttons. To return to thumbnail view mode touch screen button. During the still image view after the inactive period of 5 seconds the slide show with wide-angle images resumes. WARNING! All images in volatile memory (not saved to SD card) will be lost on switching off the radar gun or reset. The single images cannot be deleted from volatile memory. 11.1.2 Analysis of image sequence and its presentation to violator The speed meter detects the fastest moving target in the traffic, and the images are saved to the volatile memory. If there are two or more vehicles traveling in the same direction, one image is not enough to determine which of them is moving faster. In such case you have to analyze the road traffic situation recorded in the clip to determine the violator. Fig. 29. Analysis of image sequence For instance, a single image (see Fig. 29) is insufficient to determine the speed of which vehicle was measured. After playing the clip you can easily determine that the jeep was performing the overtaking and thus it was moving 46 Simicon Ltd. Chapter 11. Recorded Data Review faster. And in this case the speeding violation detected by the radar gun refers to the jeep. When you have detected the speeding event, continue holding the violator’s vehicle within the aiming frame until you have recorded enough images to claim the violation event. The following evidence of violation shall be presented to the violator: o The clip (full-screen slide show) that demonstrates the fact of overtaking other vehicles and exceeding the speed limit. o Wide-angle image with the highest recorded speed value. o Telephoto camera image which clearly shows the violator’s license number. 11.1.3 Thumbnail image view Archive free space (remaining images) Clip start Active image Target data Fig. 30. Thumbnail “VIEW” mode After stopping the speed measurement the radar gun switches to “VIEW” mode automatically. In other cases touch screen button to switch to this mode. In this mode the thumbnails of nine recently recorded images are displayed (Fig. 30), and VIEW icon appears in the upper left corner of the screen. The selected image (by default, the recent recorded image) is highlighted by color frame where the color indicates the measured speed value in relation to the speed limit (for more details about the meaning of such colors, see chapter 8.1). Different clips are divided by red vertical lines. The measured speed, date and time of recording for the selected image are displayed in the bottom of the screen. The blinking color mark in the top of the screen indicates the position of this image within the clip and approximate speed values of other images. Operation Manual 47 BINAR Radar Gun With Integrated Video To select the desired image touch it with stylus or use Remote Control buttons. You may scroll between pages by touching screen buttons or pressing remote control buttons. Touch the selected image one more time or press ОK Remote Control button to view the slide show of the short clip in full screen or touch button to view the slide show of entire clip (see chapter 11.1.4). To save the entire clip including the selected image to archive, use screen button or SAVE Remote Control button. 11.1.4 Full-screen slide show view There are several ways to view the clip in full-screen slide show. Full-screen view of full clip Sequential number of image in clip Fig. 31. Full-screen clip view The full clip is a sequence of images recorded from the beginning of capturing until the moment when the capturing was stopped. In thumbnail view mode the clips are divided by red vertical line displayed to the left of the first image of each clip (Fig. 30). To view the full clip in full-screen slide show, select the desired image in thumbnail view mode (“VIEW”) and touch button. The respective clip is displayed in slow motion in forward and backward directions (Fig. 31). The sequential numbers of each clip image are shown in the upper left corner of the screen. You can view only the wide-angle images as a slide show. To save the entire clip to archive, use Remote Control button. 48 Simicon Ltd. screen button or SAVE Chapter 11. Recorded Data Review Touch button to return to thumbnail view mode. To pause the slide show, touch the screen with stylus or press OK Remote Control button. Then the radar gun goes to “VIEW” mode and displays the fullscreen view of still image (see chapter 11.1.5) for 5 seconds, then the slide show resumes. Full-screen view of short clip Fig. 32. Full-screen short clip view In this mode, instead of watching the full clip, you can view only its fragment, including the desired image in the middle. To view the short clip with the selected image, in thumbnail mode “VIEW” (see chapter 11.1.3) touch the selected image with stylus one more time or press ОK Remote Control button. The radar gun will begin the slide show of the short clip containing 7, 15 or 29 images (depending on the selected recording rate, see chapter 9.5.3), with the selected image in the middle. The clip is played automatically in forward and backward directions, the radar gun beeps on changing the playback direction. Image numbers are shown in the screen’s upper left corner. The length of the short clip in real time is approximately 3-4 seconds. Touch button to return to thumbnail view mode. To save this short clip to archive, use screen button or SAVE Remote Control button. To pause the slide show, touch the screen with stylus or press OK Remote Control button. Then the radar gun goes to “VIEW” mode and displays the fullscreen view of still image (see chapter 11.1.5) for 5 seconds, then the slide show resumes. Operation Manual 49 BINAR Radar Gun With Integrated Video 11.1.5 Full-screen still image view Wide-angle camera image Sequential number of image in clip Fig. 33. Wide-angle camera image The radar gun switches to this mode when the slide show is paused. The selected image is displayed on the screen for 5 seconds, and VIEW icon appears in the upper left corner of the screen (Fig. 33) along with the sequence number of this image within the clip. Use two-segment screen button or Remote Control buttons to scroll between the still images (within this clip only). The blinking color mark on the top indicates the position of the current image within the clip and approximate speed values of each image (see chapter 8.1 for meaning of the color marks). The recording date and time, location, direction of travel, measured speed and patrol vehicle speed (for moving mode) for current image are displayed in the bottom. The images captured in “Photo” mode don’t contain the speed data. To save the short clip (with current image in the middle) to archive, touch screen button or SAVE Remote Control button. When viewing a single image in any View mode the radar gun resumes the slide show of wide-angle images after inactive period of 5 seconds. Touch the image with stylus or press ОК Remote Control button to view the corresponding image from telephoto camera, with digital magnification option. 50 Simicon Ltd. Chapter 11. Recorded Data Review Telephoto camera image Sequence number of image in clip Move the frame using these buttons Magnification frame Fig. 34. Telephoto camera image When viewing the telephoto camera image (Fig. 34) the interface is similar to that of wide-angle image (see above). Also the rectangular frame with arrow buttons appears. This frame allows selection of the desired area of this image for further magnification. To move this frame over the image, touch buttons on the frame with stylus or use the Remote Control buttons . When the magnification frame is on the desired image area, touch inside the frame with stylus or press ОК Remote Control button to magnify the selected area by 200%. Operation Manual 51 BINAR Radar Gun With Integrated Video 11.1.6 Viewing the magnified telephoto camera image Scrolling buttons Fig. 35. Magnified telephoto camera image This mode is available by touching the image by stylus while viewing the telephoto camera image. It enables you to view the magnified image from telephoto camera, VIEW+ icon appears in the upper left corner of the screen (see Fig. 35). Use this mode for detailed analysis of selected image area (for example, to recognize the vehicle license number). Touch screen buttons with stylus or use the Remote Control buttons to scroll through the magnified image if you want to examine the another fragment. When viewing a single image in any mode the radar gun resumes the slide show of wide-angle images after inactive period of 5 seconds. To save the short clip (with current image in the middle) to archive, touch screen button or use SAVE Remote Control button. To return to thumbnail view (see chapter 11.1.3) touch the magnified image with stylus or press ОК Remote Control button. 52 Simicon Ltd. Chapter 11. Recorded Data Review 11.1.7 Image adjustment Magnified image after correction Before correction Fig. 36. Image correction In certain cases you may need to adjust the image to recover blurry or soft license numbers. Fig. 36 shows the example of image look before and after the adjustment. Such corrections can be used in the following modes only: “VIEW”, “VIEW+”, “ARCH”, and “ARCH+”. Before adjustment of telephoto camera images you can touch inside the red frame with stylus to magnify the image by 200% (see Fig. 36 on the right). This adjustment process includes three steps: 1. Magnify the image Press button on Remote Control, IMPRM icon will appear in the upper left corner of the screen and the green frame will appear in the center. To select the desired fragment, move the frame using Remote Control buttons. Pressing ОК button will change the size of the frame cyclically. Select the appropriate size of the frame. 2. Desaturate the image Press Remote Control button again, the selected fragment within the frame will become black-and-white to filter the color noise (if present). The IMPRВ icon will appear in the upper left corner of the screen. 3. Improve the image contrast Press Remote Control button again, the brightness and contrast will increase within the selected fragment. The IMPRG icon will appear in the upper left corner of the screen. You can go back by pressing button again if you are not satisfied with correction results. To return to image thumbnail mode touch Remote Control button with numbers between 4 and 9. screen button or any WARNING: You cannot save the modified image to archive. Operation Manual 53 BINAR Radar Gun With Integrated Video 11.2 Clip Archiving 11.2.1 Saving the images to archive The recorded images can be saved to archive only as full or short clips. To save the full clip, in thumbnail view mode “VIEW” touch any image of desired clip with stylus and touch button. The full clip containing the selected image will be saved to archive. To save the short clip which contains 7, 15 or 29 successive images (depending on the specified recording rate, see chapter 9.5.3), proceed as follows: 1. In thumbnail view mode twice touch the image which shall be in the middle of the desired clip. Then the full-screen slide show of the short clip (with selected image in the middle) will begin. 2. Touch screen button (or press SAVE Remote Control button). You can save the same clip to archive again, but only with different protocol number. The request to enter the protocol number will appear (Fig. 37) prior to the saving the clip. Fig. 37. Entering protocol number If you want to enter the number, select YES and press ОК button. The additional window will appear where you need to enter the protocol number using the screen buttons or Remote Control buttons. Press ОК button to confirm. If you do not need to enter protocol number, select NO and press ОК button. Clip with recording rate and time will be saved to archive (to SD card). The protocol request form may be disabled on customer’s request. During the saving process SAVE icon appear on the screen and thumbnail image view mode resumes. The already archived images are marked by red dot: . During the clip archiving the images in volatile memory and their quantity are not changed. In Archive (“ARCH”) mode you can view, enlarge or delete the saved image clips. The navigation between clips and image views is similar to that of “VIEW” mode (see chapter 11.1 and Fig. 28). The “ARCH” mode can be accessed from “TV” or “VIEW” modes using screen button or ARCH Remote Control button. This mode employs the following possible picture representations: o Thumbnail view — 9 image thumbnails. o Full-screen slide show view. 54 Simicon Ltd. Chapter 11. Recorded Data Review o Full-screen still image view (for wide-angle or telephoto camera images). o Full-screen magnified image view (for telephoto camera images). When the radar gun switches to Archive mode, the thumbnail view “ARCH” is activated. To return to previous modes (“VIEW” or “ТV”), use the corresponding screen or remote control buttons. You can quickly begin the speed measurement (“WORK” mode) from Archive. To do this, press either the trigger button, START Remote Control button or touch screen button. 11.2.2 Thumbnail image view in archive Clip start Sequential number of image in clip Active frame Fig. 38. Thumbnail view mode in archive In this mode the thumbnails of nine recently archived images are displayed, and ARCH icon appears in the upper left corner of the screen. As in “VIEW” mode (see chapter 11.1.3), the clips are visually divided by red vertical line on the left of the first image of each clip. The sequence number of the selected image is shown in the upper right corner of the screen (see Fig. 38). The images are numbered in the order as they were archived. The selected image (by default, the recent archived image) is highlighted by the frame of the same color that the color mark corresponding to the image (for more details on the meaning of the color mark and the color frame, see chapter 8.1). The measured speed, date and time of recording for the selected image are displayed in the bottom of the screen. The blinking color mark in the top of the Operation Manual 55 BINAR Radar Gun With Integrated Video screen indicates the position of this image within the clip and approximate speed values of other images. To select the desired image touch it with stylus or use Remote Control buttons. You may scroll between pages by touching screen buttons or using remote control buttons. To view the slide show of the desired clip in full screen you can either touch the selected image one more time, press ОK Remote Control button or touch screen button. 11.2.3 Viewing the archived clip in full-screen slide show Sequential number of image in clip Fig. 39. Full-screen slide show view in archive In this mode the selected clip is displayed in slow motion in forward and backward directions (Fig. 39). The sequence numbers of the images are indicated in the upper left corner of the screen. You can view only the wide-angle images as a slide show. To return to thumbnail view mode (“ARCH”), touch screen button. To pause the slide show, touch the screen with stylus or press OK Remote Control button. Then the radar gun goes to “ARCH” mode and displays the fullscreen view of still image for 10 seconds, then the slide show resumes. 56 Simicon Ltd. Chapter 11. Recorded Data Review 11.2.4 Full-screen still image view in archive Wide-angle camera image Fig. 40. Wide-angle camera image The radar gun switches to this mode when the slide show is paused (see chapter 11.2.3). The selected image is displayed on the screen for 10 seconds, and ARCH icon appears in the upper left corner of the screen (Fig. 40) along with the sequence number of this image within the clip. Use two-segment screen button or Remote Control buttons to scroll between the still images (within this clip only). The blinking color mark on the top indicates the position of the current image within the clip and approximate speed values of each image (see chapter 8.1 for meaning of the color marks). The recording date and time, location, direction of travel, measured speed and patrol vehicle speed (for moving mode) for current image are displayed in the bottom. The images captured in “Photo” mode don’t contain the speed data. When viewing a single image in any Archive mode the radar gun resumes the slide show of wide-angle images after inactive period of 10 seconds. Touch the image with stylus or press ОК Remote Control button to view the corresponding image from telephoto camera, with digital magnification option. Operation Manual 57 BINAR Radar Gun With Integrated Video Telephoto camera image Move the frame using these buttons Magnification frame Fig. 41. Telephoto camera image When viewing the telephoto camera image the interface is similar to that of wide-angle image (see above). Also the rectangular frame with arrow buttons appears. This frame allows selection of the desired area of this image for further magnification. To move this frame over the image, touch buttons on the frame with stylus or use the Remote Control buttons . When the magnification frame is on the desired image area, touch inside the frame with stylus or press ОК Remote Control button to magnify the selected area by 200%. 58 Simicon Ltd. Chapter 11. Recorded Data Review 11.2.5 Viewing the magnified telephoto camera image in archive Scrolling buttons Fig. 42. Full-screen magnified image This mode is available by touching the image by stylus while viewing the telephoto camera image. It enables you to view the magnified image from telephoto camera, ARCH+ icon appears in the upper left corner of the screen (see Fig. 42). Use this mode for detailed analysis of selected image area (for example, to recognize the vehicle license number). Touch screen buttons with stylus or use the Remote Control buttons to scroll through the magnified image if you want to examine the another fragment. When viewing a single image in any Archive mode the radar gun resumes the slide show of wide-angle images after inactive period of 10 seconds. To return to thumbnail view (see chapter 11.2.2) touch the magnified image with stylus or press ОК Remote Control button. 11.2.6 Deleting the data from archive This feature is disabled in “AUTO” mode. You can delete only a whole clip from archive and only in thumbnail archive view mode (see chapter 11.2.2). You cannot delete the selected images from the clip. To delete the clip select any image from that clip and touch screen button or press DEL Remote Control button. Then the confirmation request appears, where you need to touch screen button or press DEL Remote Control button Operation Manual 59 BINAR Radar Gun With Integrated Video to confirm the deletion. The DELETED message appears on the screen, and then the thumbnail archive view mode is resumed. 11.2.7 Archive size The images are archived to SD card (non-volatile memory). The images are captured simultaneously by two cameras (see chapter 10.2.1), so Archive contains pairs of images from both cameras. You can check the free space on SD card (possible number of image pairs) in “ТV” mode in the upper right corner of the screen or in main menu (see chapter 9.5.3). If your SD card is full, on attempt to record the images the message appears: Recording disabled. Archive is full. In this case, delete the unnecessary data from archive or replace the SD card. The approximate numbers of images that can be recorded to SD card: SD card capacity 2 GB 4 GB 8 GB 32 GB Number of image 8,000 15,000 25,000 32,000 pairs The maximum number of image pairs that can be saved to archive is 32,000 (64,000 images in total). All remaining free space on SD card can be used for video recording (see chapter 10.4). The possible number of image pairs that can be recorded may be affected by other data present on SD card, such as video clips. 12 Identification and sealing The Measuring unit body has the Manufacturer's serial number, brand name and Manufacturer's contacts. The Measuring unit has the seal made of mastic on its screw as a sign of acceptance by QC Department and preparation for delivery. 13 Technical maintenance and repair Technical maintenance and repair of the Radar gun components must be performed by Manufacturer or authorized service centers with all the necessary equipment, documents and components. The repair shall be performed only by personnel who have received special training at Manufacturer facility. 14 Periodic verification Periodic performance verification shall be carried out once every 2 years or earlier as well as each time after repair. 60 Simicon Ltd. Chapter 15. Shipping and storage The verification shall be performed according to the instructions specified in ГДЯК 468162.014 МП regulation. The verification results shall be added to the logbook. 15 Shipping and storage The Radar gun components shall be shipped in Manufacturer package by railway (in closed compartment), air or water transport (in sealed compartments) as well as by motor transport without any speed or distance limitation under ambient conditions specified in technical specifications. The system shall be stored in Manufacturer package at ambient temperature between +5 and +40 С and maximum 80 % RH. 16 Manufacturer contacts SIMICON Ltd. Mendeleevskaya str., 8, Saint Petersburg, Russia, 194044 Phone: +7(931)295-4040, +7(812)295-0009 Fax: +7(812)324-6151 E-mail: [email protected] WWW.SIMICON.COM Operation Manual 61 BINAR Radar Gun With Integrated Video 17 Appendix. External Battery Pack 17.1 Design and application The external battery pack is designed for battery life time extension of the radar gun (at least 10 hours) and its installation on the photo tripod. The battery pack and photo tripod are optional equipment. 1 2 3 5 (below) 4 1 2 3 4 5 – – – – – USB connector guides and latch spring battery status LEDs photo tripod socket battery charging socket Fig. 43. External battery pack The external battery pack is a self-contained stabilized power supply unit with 4 rechargeable batteries (total capacity 8000 mAh). The upper part of the body contains the mounting pad which slides into the measuring unit like the battery handle. On the bottom there is a tripod socket with standard 1/4-20 UNC thread. The total weight of the radar gun with connected battery pack is 1.75 kg. 17.2 Charging the battery pack The battery pack shall be charged from external power supply with voltages 11—16 V and current up to 3 A. Use the supplied 220 V power adapter or car power cable. While charging the battery pack the temperature shall be between 0 and 40 °C. To charge the battery insert the power cable into the socket (5 on Fig. 43) and then connect it to the cigarette lighter socket or 220 V power supply. Full charging takes up to 5 hours. The charging process of each battery is shown by status LED (3 on Fig. 43): o Red — charging in progress. o Green — charging complete. The charging level of the battery pack is shown by “H” indicator on the screen of the measuring unit (in place of the battery handle indicator, refer to chapter 9.2.1) when it is connected to the battery pack and turned on. 62 Simicon Ltd. Chapter 17. Appendix. External Battery Pack 17.3 Tripod setup WARNING: The tripod shall be designed to bear the load of 1.8 kg. Use of the tripod with less maximum load may lead to dropping the radar gun on the ground. Slide the measuring unit onto the battery pack pad until the click. Install the measuring unit and the battery pack on the tripod (refer to the manual of the tripod). Place the tripod with the radar gun on the road side and point it at the control zone. It’s recommended to install the radar gun on the tripod as close as possible to the road border. Point it on the traffic in the way that ensures passing the license plates through the aiming frame at distances of 100-150 meters. Touch the aiming frame to ensure that the license plates are visible and recognizable on telephoto camera image. Fig. 44. Installation on the tripod Operation Manual 63


